

Page 1
BumperKit
G018208
1
2
3
4
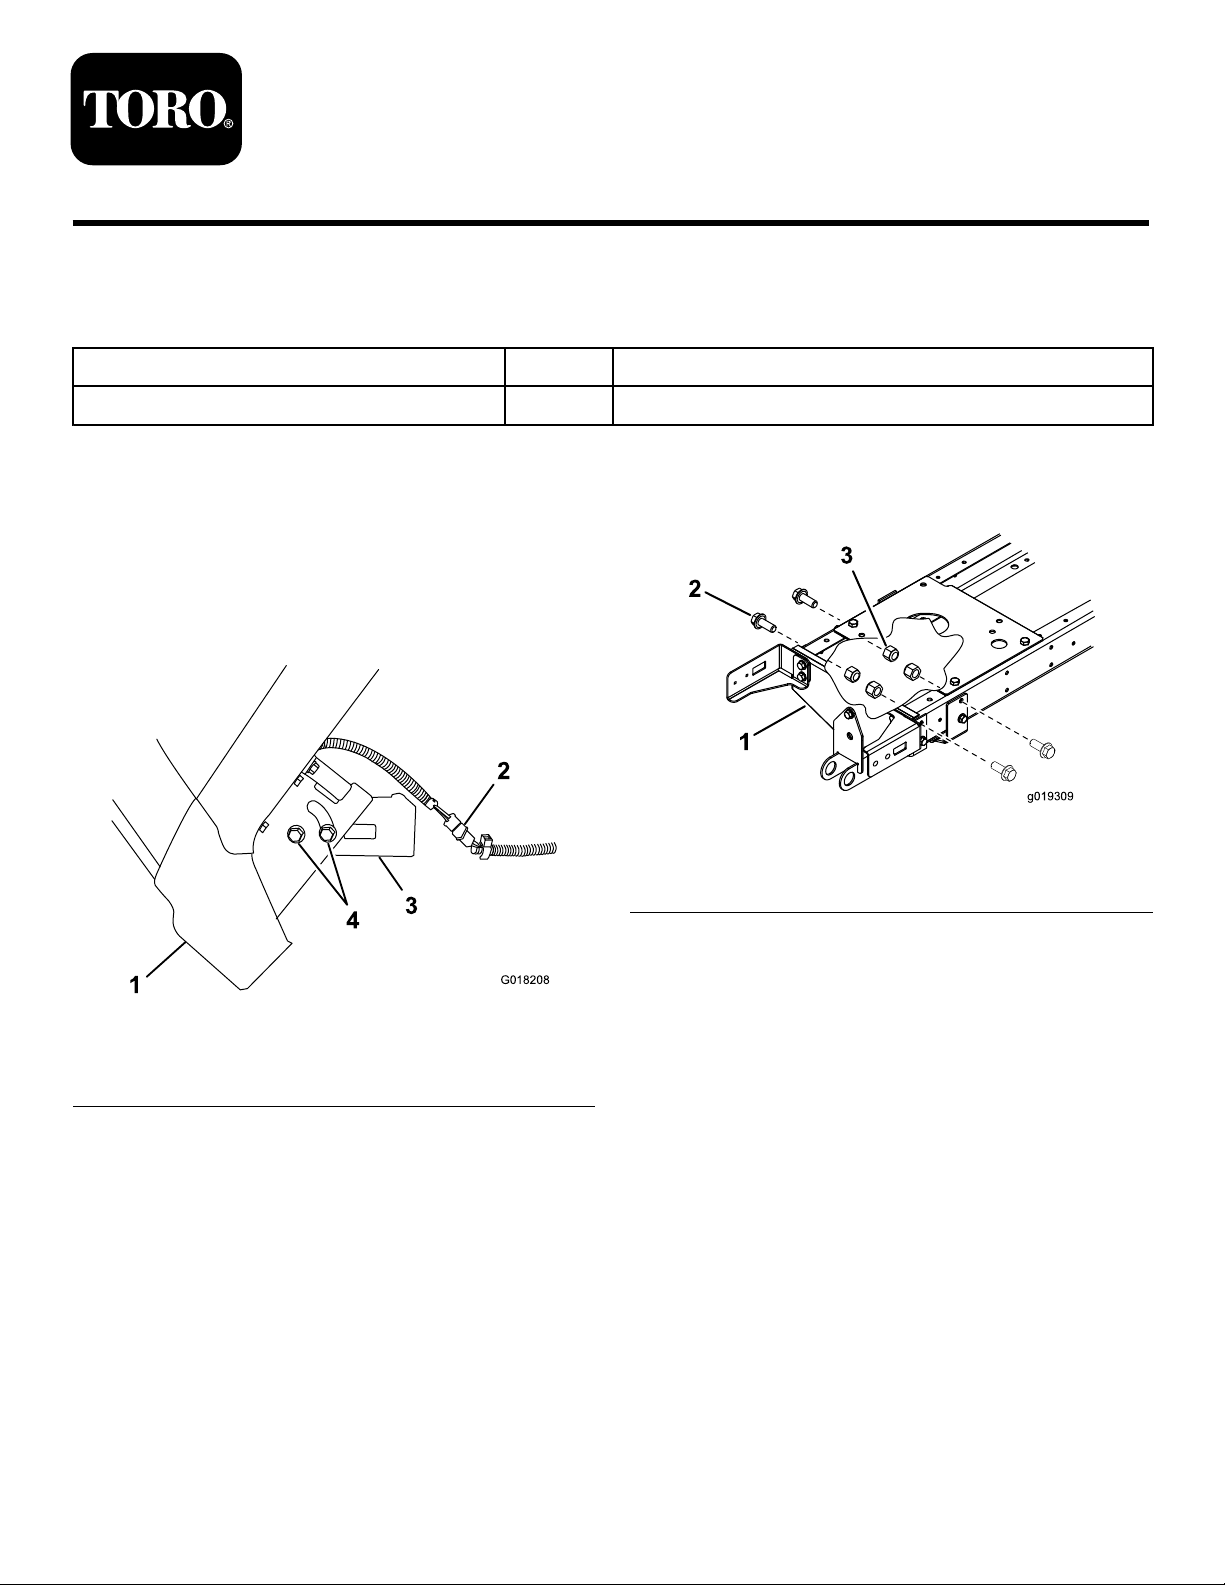
g019309
2
1
3
XLSLawnTractor
ModelNo.791 14
LooseParts
Usethechartbelowtoverifythatallpartshavebeenshipped.
FormNo.3373-591RevA
InstallationInstructions
Description
Bumper1Installthebumper.
InstallingtheBumper
1.Stoptheengine,waitforallmovingpartstostop,and
Qty.
6.Removeandsavethe4boltsandnutsfromtheframe
asshowninFigure2.
removetheignitionkey.
2.Raisethehood.
3.Disconnectthewiringharnessontheleftsideofthe
machineframeFigure1.
1.Frame3.Nut
2.Bolt
Use
Figure2
Figure1
1.Raisedhood3.Frame
2.Wiringharness4.Bolt
4.Removeandsavethe4boltsthatsecurethehoodto
theframe.
5.Removethehood(Figure1).
Registeratwww.T oro.com.
OriginalInstructions(EN)
PrintedintheUSA
AllRightsReserved
*3373-591*A
©2012—TheToro®Company
8111LyndaleAvenueSouth
Bloomington,MN55420
Page 2
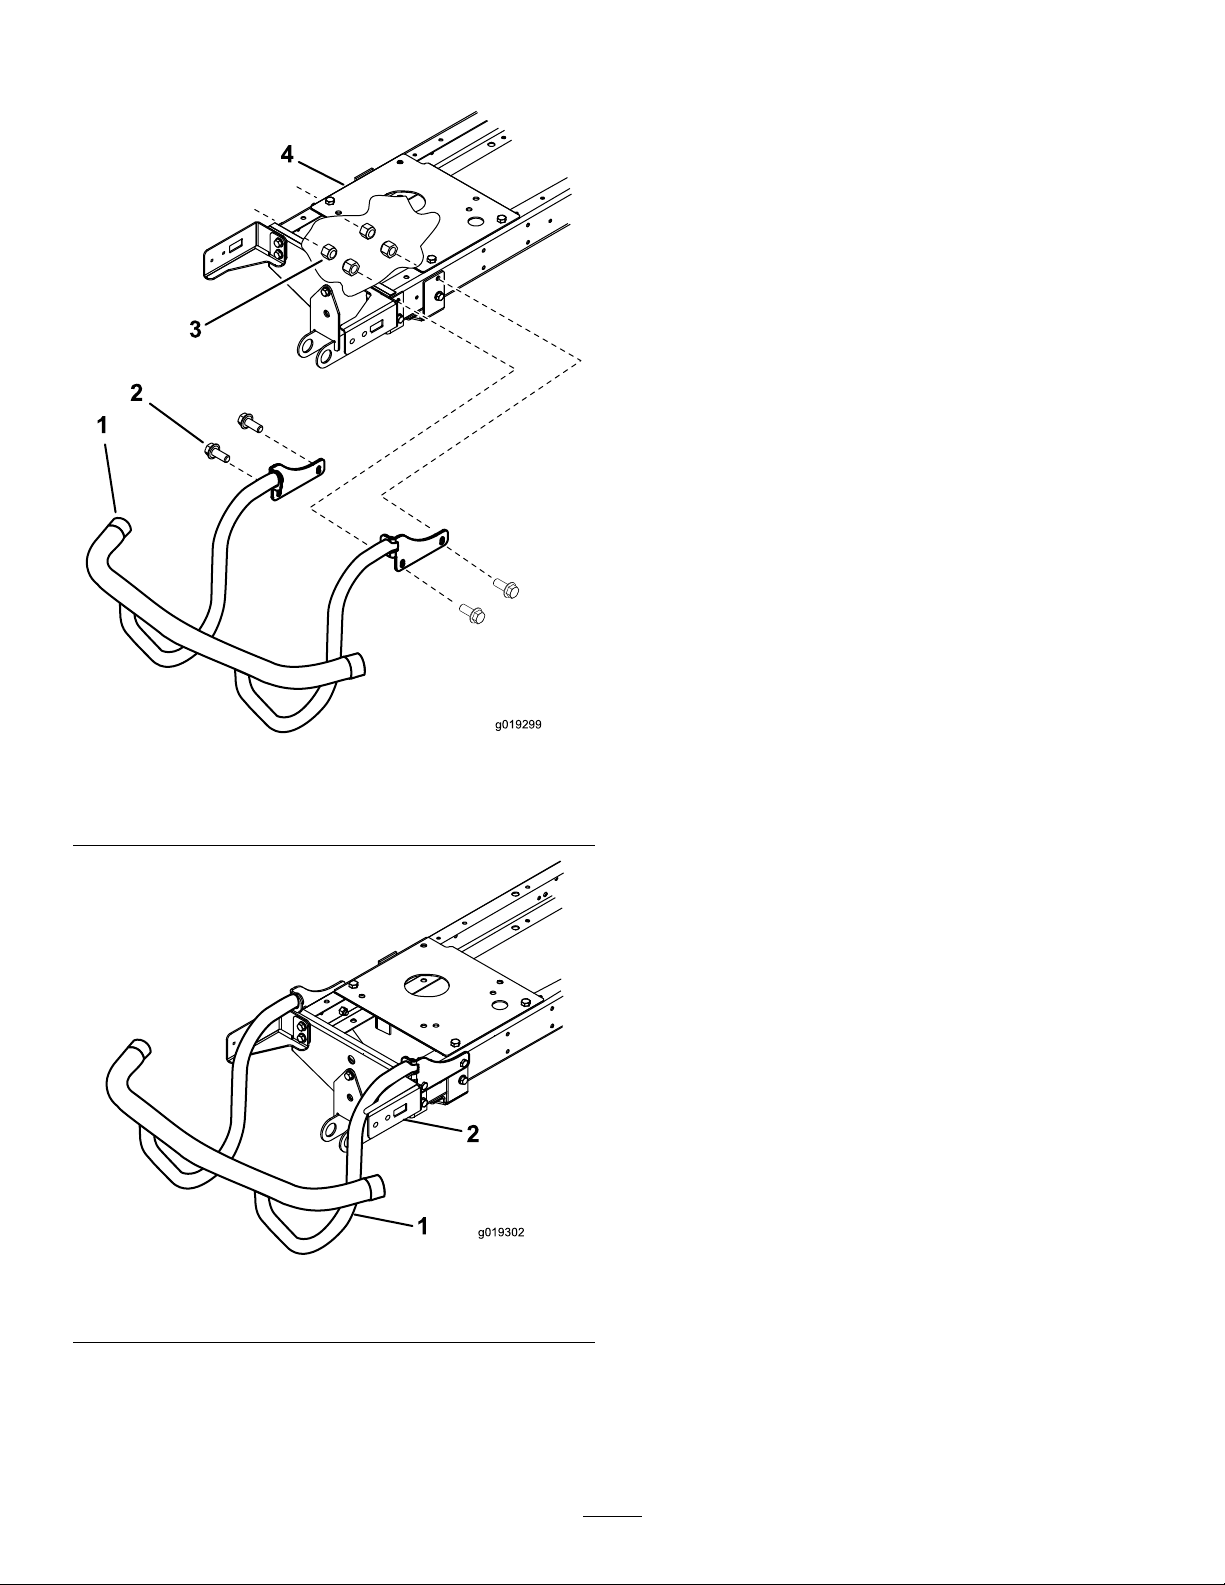
7.Installthebumpertotheframeusingthefastenersthat
1
2
3
4
g019299
g019302
1
2
youremovedinstep5(Figure3andFigure4).
Figure3
1.Bumper3.Nut
2.Bolt4.Frame
1.Bumper2.Frame
Figure4
8.Installthehoodtotheframeusingthefastenersthat
youremovedinstep4(Figure1).
9.Connectthewiringharness(Figure1).
10.Closethehood.
2
 Loading...