

Page 1
ReplacementBladeKit
G015201
1
2
3
4
5
6
2007andAfterTimeCutter
ModelNo.79016
LooseParts
Usethechartbelowtoverifythatallpartshavebeenshipped.
®
RidingMowerswith50inMowers
FormNo.3367-350RevA
InstallationInstructions
Description
Nopartsrequired
Blades3Installtheblades.
Qty.
–
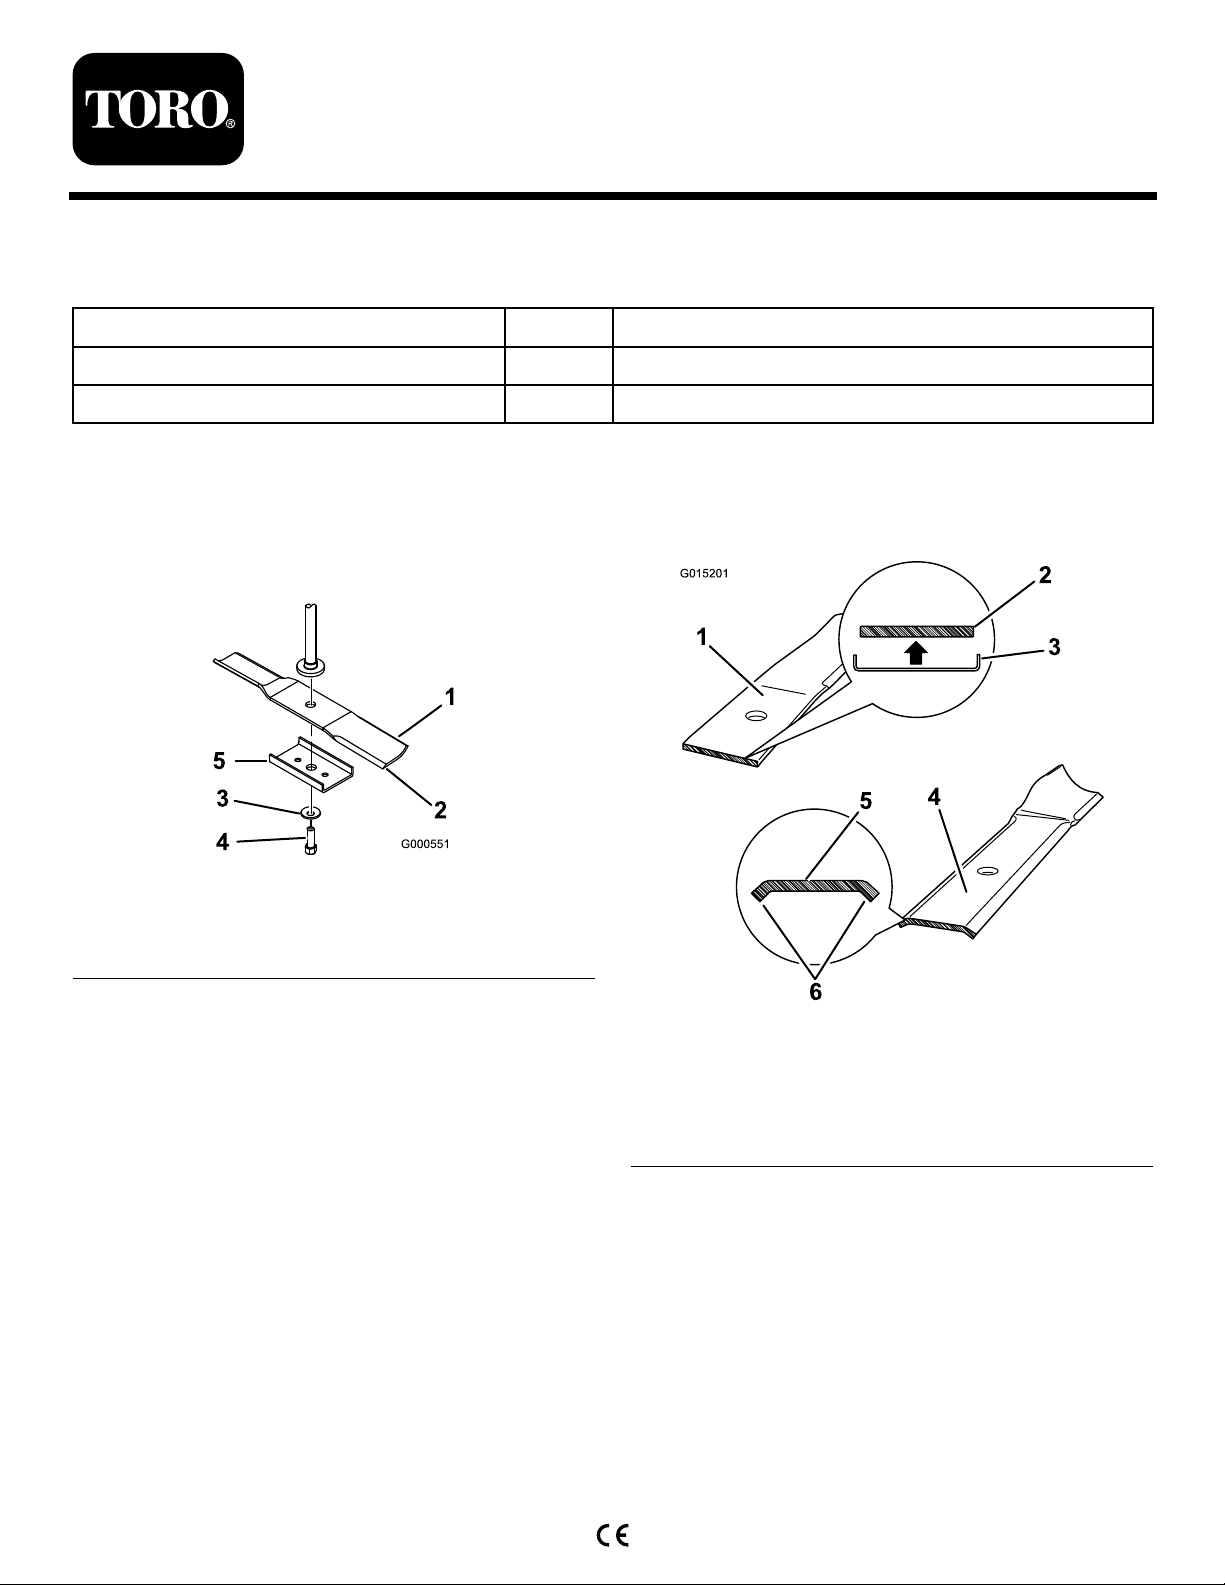
RemovingtheBlades
Holdthebladeendusingaragorthickly-paddedglove.
Removethebladebolt,curvedwasher,bladestiffener
andbladefromthespindleshaft(
Figure1
1.Sailareaofblade
2.Blade
3.Curvedwasher
Figure1).
4.Bladebolt
5.BladeStiffener
Use
Removetheblades.
Retainthebladestiffenerforusewithbladesthatrequire
it.Thereplacementbladeswithinthiskithaveadifferent
designwhichdoesnotrequirethestiffener.(
Figure2)
©2010—TheT oro®Company
8111LyndaleAvenueSouth
Bloomington,MN55420
Figure2
1.Standardblade
2.Crosssectionofstandard
blade
3.Stiffenerrequired
4.Newblade
5.Crosssectionofnew
blade
6.Bendsincrosssection
providesinternalrigidity.
InstallingtheBlades
1.Installthebladeontothespindleshaft(Figure3).
Registeratwww.Toro.com.
OriginalInstructions(EN)
PrintedintheUSA.
AllRightsReserved
Page 2
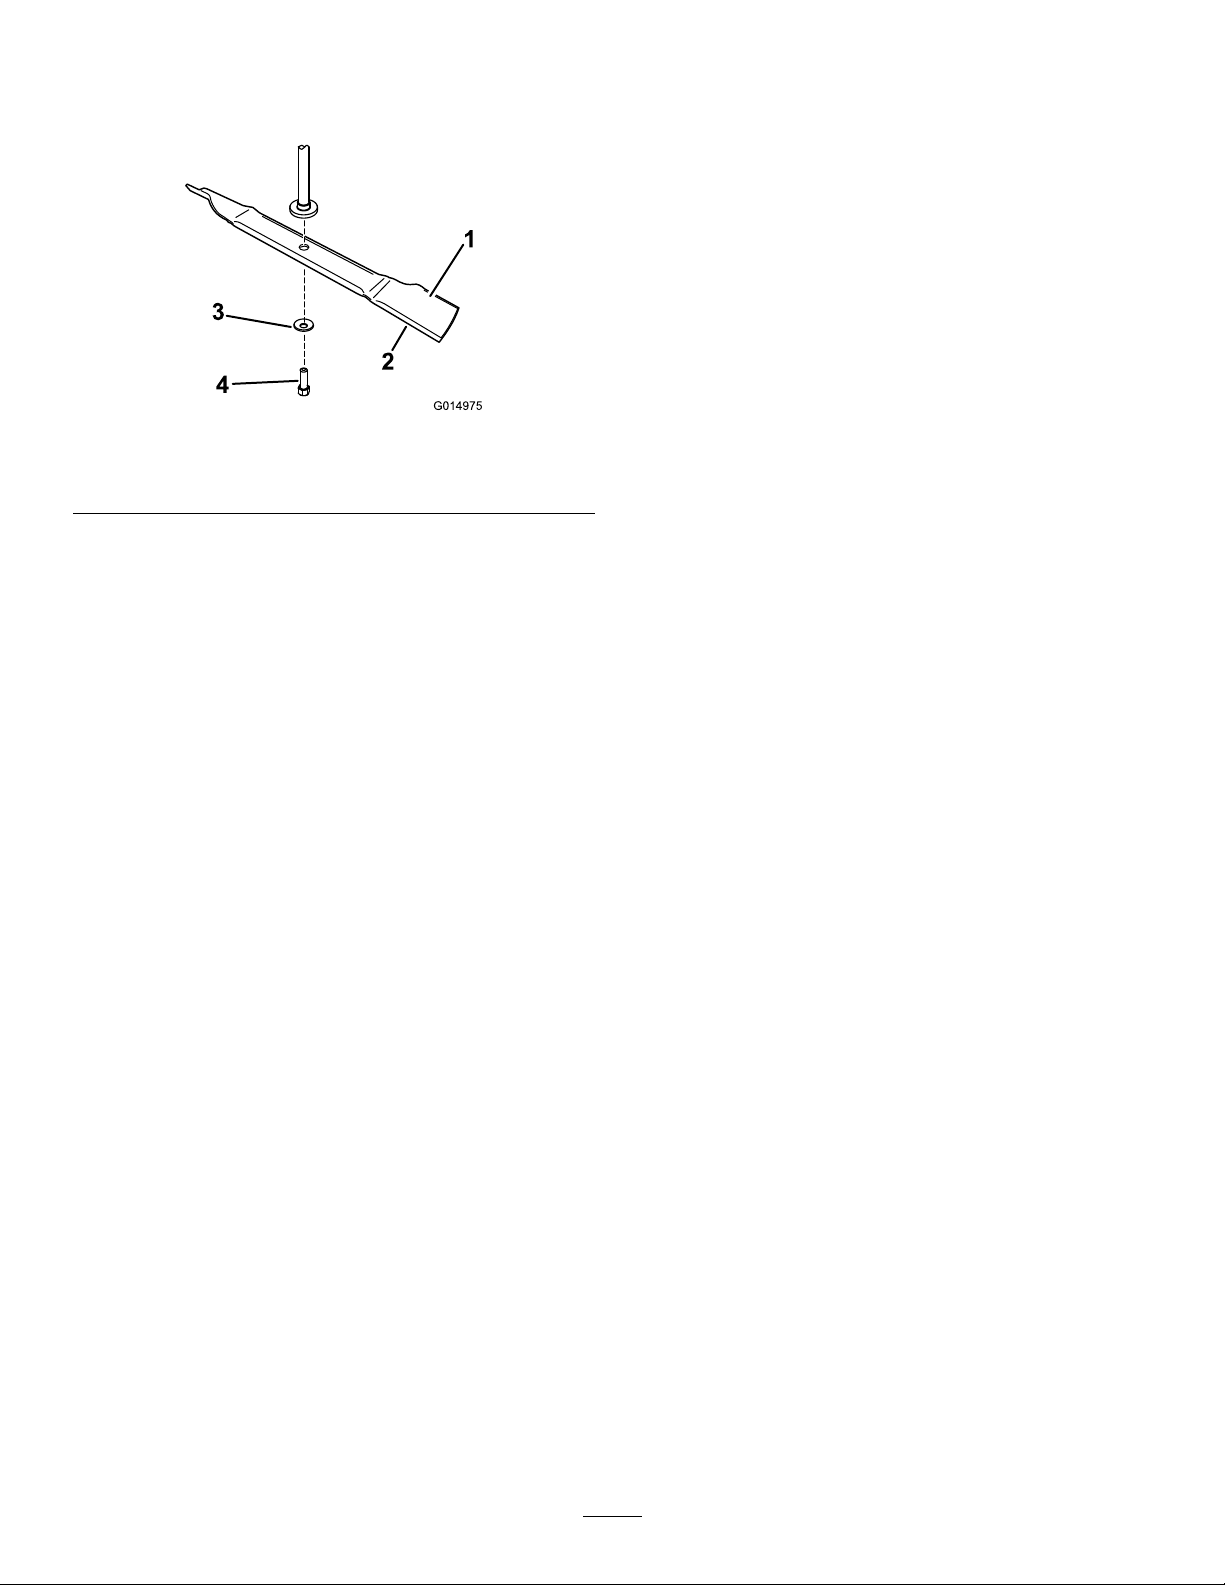
Important:Thecurvedpartoftheblademust
G014975
1
2
3
4
bepointingupwardtowardtheinsideofthe
mowertoensurepropercutting.
Figure3
1.Sailareaofblade3.Curvedwasher
2.Blade4.Bladebolt
2.Installthecurvedwasher(cuppedsidetowardthe
blade)andthebladebolt(Figure3).Donotinstall
abladestiffener.
Thesebladesdonotrequirethebladestiffener
bracket(Figure2).
3.Torquethebladeboltto35-65ft-lb(47-88N-m).
2
 Loading...