

Page 1
FormNo.3378-862RevA
g021660
CM-250E-PCandCM-250E-PWB
ConcreteMixer
ModelNo.68001—SerialNo.313000001andUp
ModelNo.68003—SerialNo.313000001andUp
Registeratwww.T oro.com.
OriginalInstructions(EN)
*3378-862*A
Page 2
WARNING
g021796
1
CALIFORNIA
Proposition65Warning
Thisproductcontainsachemicalorchemicals
knowntotheStateofCaliforniatocausecancer,
birthdefects,orreproductiveharm.
Useofthisproductmaycauseexposureto
chemicalsknowntotheStateofCalifornia
tocausecancer,birthdefects,orother
reproductiveharm.
Introduction
Thismachineisdesignedtomixconcreteproducts.
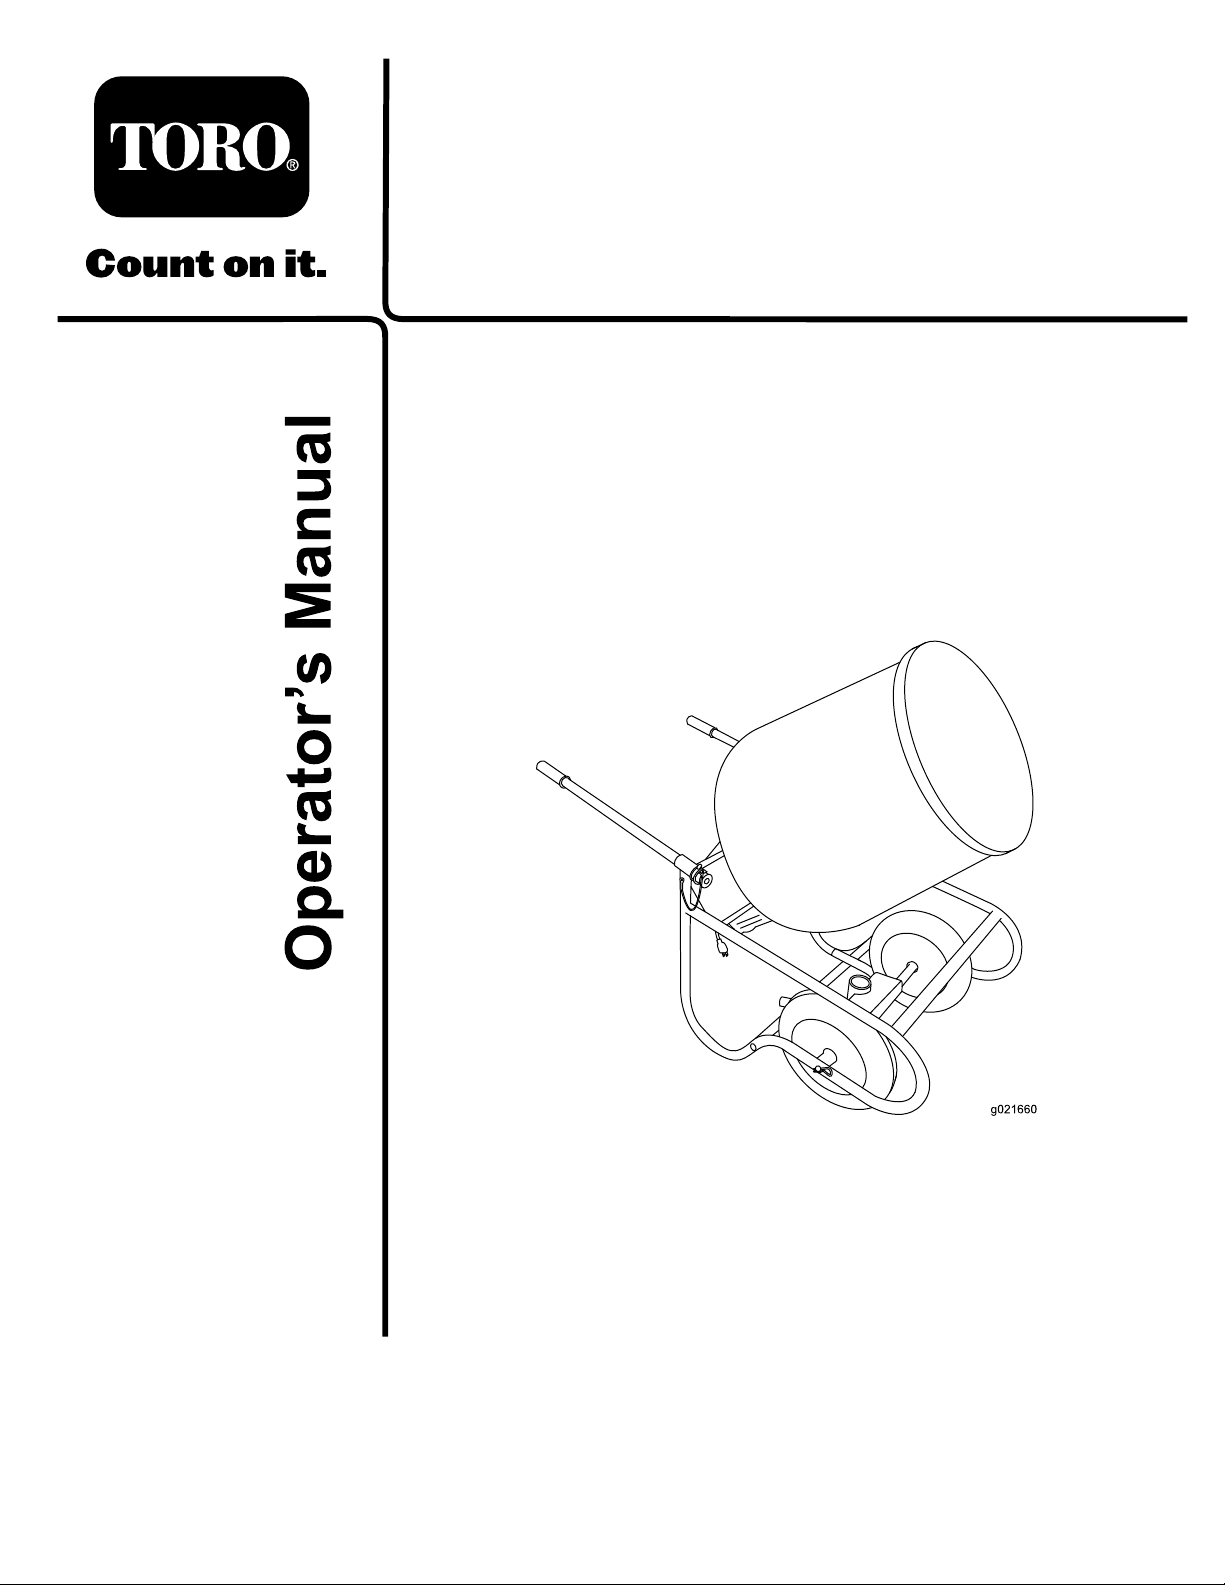
Figure1
1.Modelandserialnumberplate
Readthisinformationcarefullytolearnhowtooperateand
maintainyourproductproperlyandtoavoidinjuryand
productdamage.Youareresponsibleforoperatingthe
productproperlyandsafely .
YoumaycontactTorodirectlyatwww .Toro.comforproduct
andaccessoryinformation,helpndingadealer,ortoregister
yourproduct.
Wheneveryouneedservice,genuineToroparts,oradditional
information,contactanAuthorizedServiceDealerorToro
CustomerServiceandhavethemodelandserialnumbersof
yourproductready .
Figure1illustratesthelocationofthe
modelandserialnumbersontheproduct.Writethenumbers
inthespaceprovided.
ModelNo.
SerialNo.
Thismanualidentiespotentialhazardsandhassafety
messagesidentiedbythesafetyalertsymbol(Figure2)
Whichsignalsahazardthatmaycauseseriousinjuryordeath
ifyoudonotfollowtherecommendedprecautions.
Figure2
1.Safetyalertsymbol
Thismanualuses2wordstohighlightinformation.
Importantcallsattentiontospecialmechanicalinformation
andNoteemphasizesgeneralinformationworthyofspecial
attention.
©2013—TheToro®Company
8111LyndaleAvenueSouth
Bloomington,MN55420
Contactusatwww.T oro.com.
2
PrintedintheUSA.
AllRightsReserved
Page 3

Contents
Safety
Introduction..................................................................2
Safety...........................................................................3
SafeOperatingPractices...........................................3
SafetyandInstructionalDecals.................................5
Setup............................................................................6
1InstallingtheWheelsandAxle................................6
2InstallingtheFrameStop.......................................6
3InstallingtheMotor...............................................6
4InstallingtheDrum...............................................7
5InstallingtheMotorCover.....................................8
6InstallingtheHandlebars.......................................8
ProductOverview..........................................................9
Controls................................................................9
Specications.........................................................9
Operation....................................................................10
OperatingtheMachine............................................10
ElectricalPower.....................................................10
StartingandStoppingtheMotor...............................11
UsingthePedestal..................................................11
MixingtheMaterial.................................................13
Maintenance.................................................................14
RecommendedMaintenanceSchedule(s)......................14
Lubrication...............................................................14
OiltheGearbox.....................................................14
Cleaning...................................................................14
............................................................................14
Storage........................................................................15
............................................................................15
Troubleshooting...........................................................16
Improperuseormaintenanceofthemachinecanresult
ininjury.Toreducethepotentialforinjury,complywith
thesesafetyinstructionsandalwayspayattentiontothe
safetyalertsymbol,whichmeans:
or
Danger
complywiththeinstructionmayresultinpersonalinjury
ordeath.
—personalsafetyinstruction.Failureto
Caution
,
W ar ning
WARNING
Machiningorhandlingstone,masonry,concrete,
metal,andothermaterialscangeneratedust,mists,
andfumescontainingchemicals,suchassilica,
knowntocauseseriousorfatalinjuryorillness,
suchasrespiratorydisease,silicosis,cancer,birth
defects,orotherreproductiveharm.
•Controldust,mist,andfumesatthesource
wherepossible.Usewaterfordustsuppression
whenfeasible.
•Usegoodworkpracticesandfollowthe
recommendationsofthemanufactureror
suppliers,OSHA,andotheroccupationaland
tradeassociations.
•Alwaysfollowrespiratoryprecautions.
•Whenthehazardsfrominhalationcannotbe
eliminated,theoperatorandanybystanders
shouldweararespiratorapprovedbyOSHAfor
thematerialbeinghandled.
,
SafeOperatingPractices
Thisproductiscapableofamputatinghandsandfeet.Always
followallsafetyinstructionstoavoidseriousinjuryordeath.
Training
•ReadtheOperator'sManualandothertrainingmaterial.If
theoperator(s)ormechanic(s)cannotreadEnglish,itis
theowner'sresponsibilitytoexplainthismaterialtothem.
•Becomefamiliarwiththesafeoperationoftheequipment,
operatorcontrols,andsafetysigns.
•Alloperatorsandmechanicsshouldbetrained.The
ownerisresponsiblefortrainingtheusers.
•Neverletchildrenoruntrainedpeopleoperateorservice
theequipment.Localregulationsmayrestricttheageof
theoperator.
•Theowner/usercanpreventandisresponsiblefor
accidentsorinjuriestopeople,ordamagetoproperty.
Preparation
•W earappropriateclothingincludinghardhat,faceshield,
safetyglasses,longpants,safetyshoes,andhearing
3
Page 4

protection.Longhair,looseclothing,orjewelrymayget
tangledinmovingparts.
•Connectthemachineonlytoa3-polereceptaclewithlive,
neutral,andgroundcircuits.
•Wheneverpossible,usecircuitsorreceptaclesprotected
withaGroundFaultCircuitInterrupter(GFCI)device.
•Inspecttheelectricalcordsfordamage.Replacethe
damagedcordbeforeoperatingthemachine.
•Inspecttheelectricalplugandsocketsfordamage.
Replacethedamagedelectricalconnector(s)before
operatingthemachine.
•Keepelectricalconnectorsoffthegroundanddry.
Operation
•Onlyoperateingoodlight,keepingawayfromholesand
hiddenhazards.
•Ensurethatyouoperatethemachineinareaswhere
therearenoobstaclesincloseproximitytotheoperator.
Failuretomaintainadequatedistancefromtrees,walls,
andotherbarriersmayresultininjuryduringoperationif
theoperatorisnotattentivetothesurroundings.Operate
themachineinareaswherethereissufcientclearance
fortheoperatortosafelymaneuverthemachine.
•Keephandsandfeetawayfromthemovingparts.
•Usecarewhenloadingorunloadingthemachineintoa
trailerortruck.
•Neverleavearunningmachineunattended.
•Beforeworkingonthemixer,stopthemotorandunplug
themachine.
•Donottouchpartswhichmaybehotfromoperation.
Allowthemtocoolbeforeattemptingtomaintain,adjust,
orservice.
•Locatethepinchpointareasonthemachineandkeep
handsandfeetawayfromtheseareas.
•Donotoperatethemachineatavoltageotherthanthe
voltagespeciedonthedataplateofthemotor.
•Donotoperatethemachineinstandingwater.
•Donotoperatethemachineintherain.
•Donotusewithdamagedcordorplug.Ifmachineisnot
workingasitshould,hasbeendropped,damaged,left
outdoors,ordroppedintowater,returnittoaservice
dealer.
•Donotpullorcarrybycord,usecordashandle,closea
dooroncord,orpullcordaroundsharpedgeorcorners.
Keepcordawayfromheatedsurfaces.
•Donotunplugbypullingoncord.T ounplug,graspthe
plug,notthecord.
•Whenusinganextensioncordandanin-lineGround
FaultCircuitInterrupter(GFCI)device,installtheGFCI
deviceasclosetotheelectricalsourceaspossible.
•EnsurethattheOn/OffswitchisrotatedtotheOff
positionbeforeconnectingthemachinetotheelectrical
source.
•Themotorandmotorshroudmaybehot.Allowtocool
beforepreforminganyservicework.
•Lightningcancausesevereinjuryordeath.Iflightning
isseenorthunderisheardinthearea,donotoperate
themachine;seekshelter.
MaintenanceandStorage
•Stopthemotor.Waitforallmovementtostopbefore
adjusting,cleaning,orrepairing.
•Unplugthemachinebeforemakinganyrepairs.
•Cleandebrisfromthegears,drives,drum,andmotor.
•Letthemotorcoolbeforestoring.
•Neverserviceoradjustmachinewhileitismoving.
•Alwayssetthemachineonlevelground.
•Neverallowuntrainedpersonneltoservicethemachine.
•Donotmodifytheelectricalconnectorsorwiring.
•Donotconnectthegroundcircuitofthemachinetothe
energizedcircuitoftheelectricalsource.
•Keephandsandfeetawayfrommovingparts.
•Keepallpartsingoodworkingconditionandallhardware
tightened.Replaceallwornordamageddecals.
•Securelysupportanymachineelementsthatmustbe
raisedforservicework.
•Keepnutsandboltstight.Keepequipmentingood
condition.
•Nevertamperwithsafetydevices.
•Stopandinspecttheequipmentifthemachine
unexpectedlystops.Makenecessaryrepairsbefore
restarting.
•Disposeofwasteproperly .Improperlydisposedwaste
canthreatentheenvironment.
•Storethemachineindoors.
•UseonlygenuineTororeplacementpartstoensurethat
originalstandardsaremaintained.
•Donothandleplugorappliancewithwethands.
•Turnoffallcontrolsbeforeunplugging.
•Useonlya3-wireextensioncordswithterminalsand
socketsforthelive,neutral,andgroundcircuits.
4
Page 5
SafetyandInstructionalDecals
Safetydecalsandinstructionsareeasilyvisibletotheoperatorandarelocatednearanyareaofpotential
danger.Replaceanydecalthatisdamagedorlost.
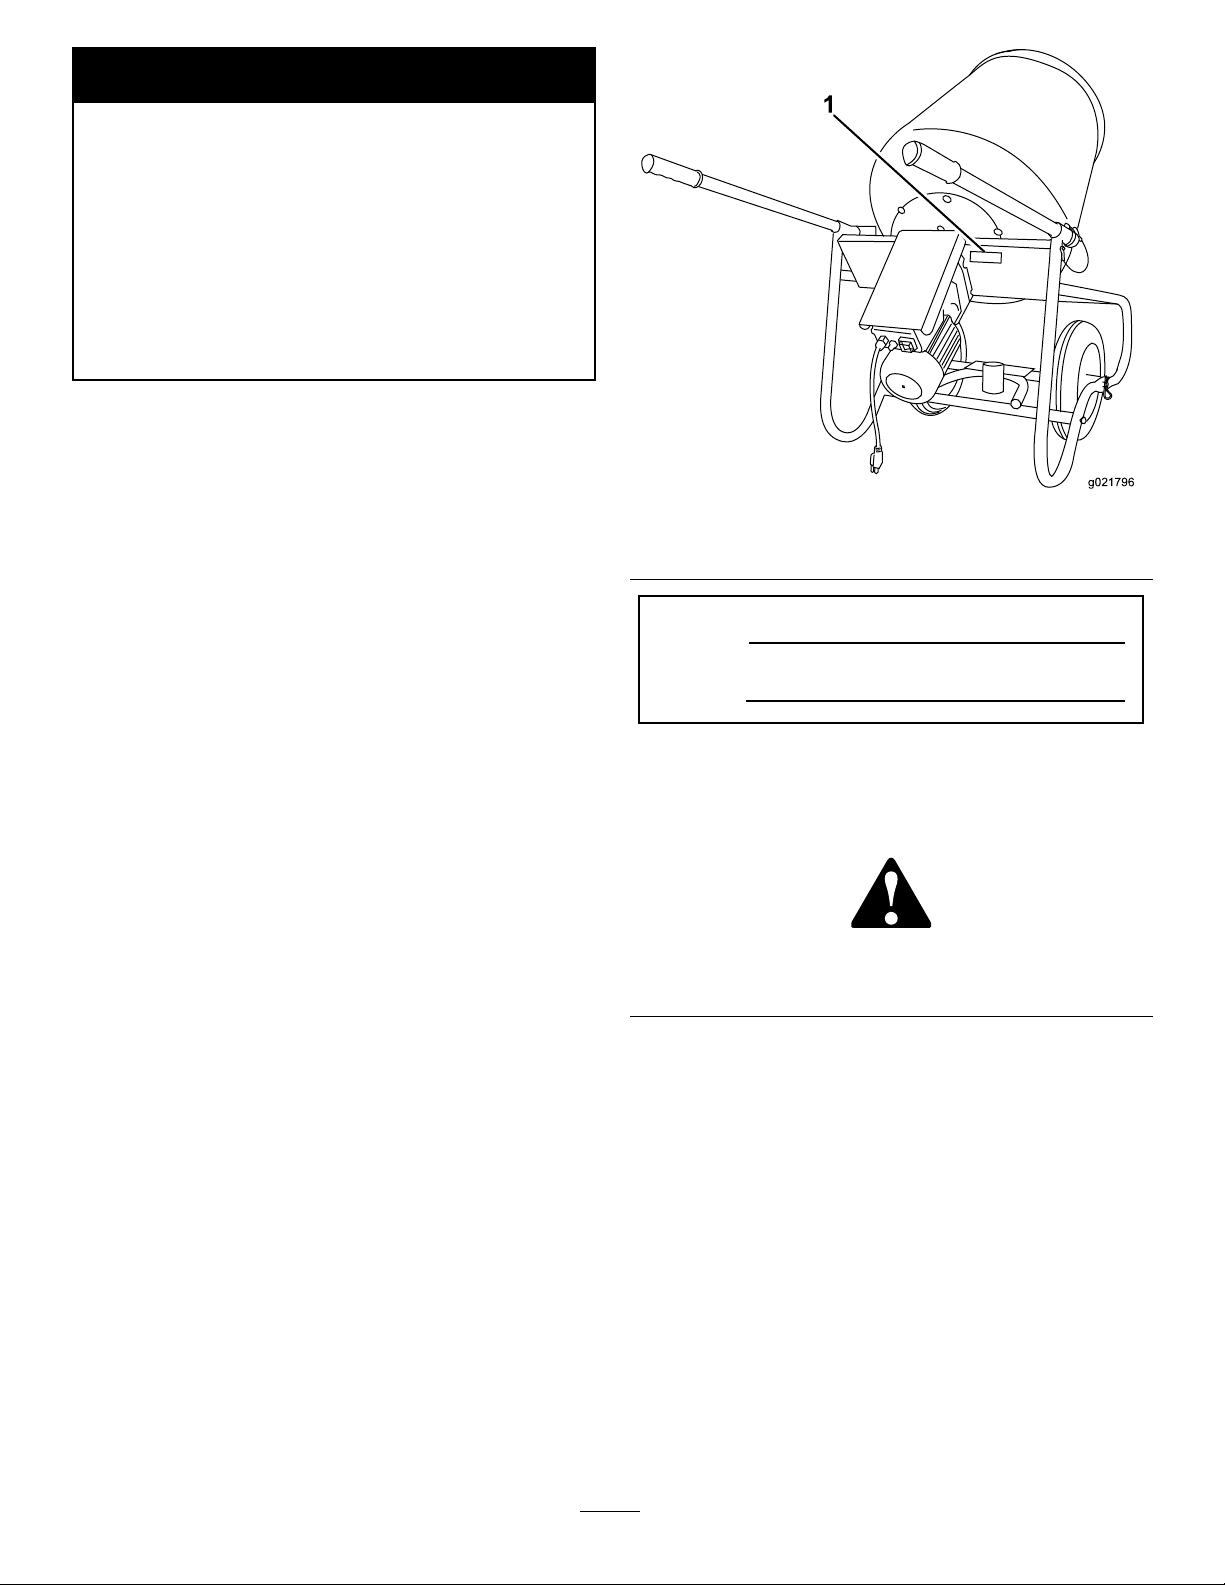
121–6161
1.Entanglementhazard,belt—keephandsawayfrommoving
parts;keepallguardsandsafetiesinplace.
125–8176
125–4971
1.ReadtheOperator’sManual.
1.Warning—readthe
Operator’sManual.
2.Electricshock
hazard—properlyground
equipmentbeforeuse.
3.Entanglement,severing
hazard—stoptheengine
andwaitforallmoving
partstostopbefore
performingmaintenance
onthemachine.
5
Page 6
Setup
g022168
1
2
3
4
5
g022165
1
2
1
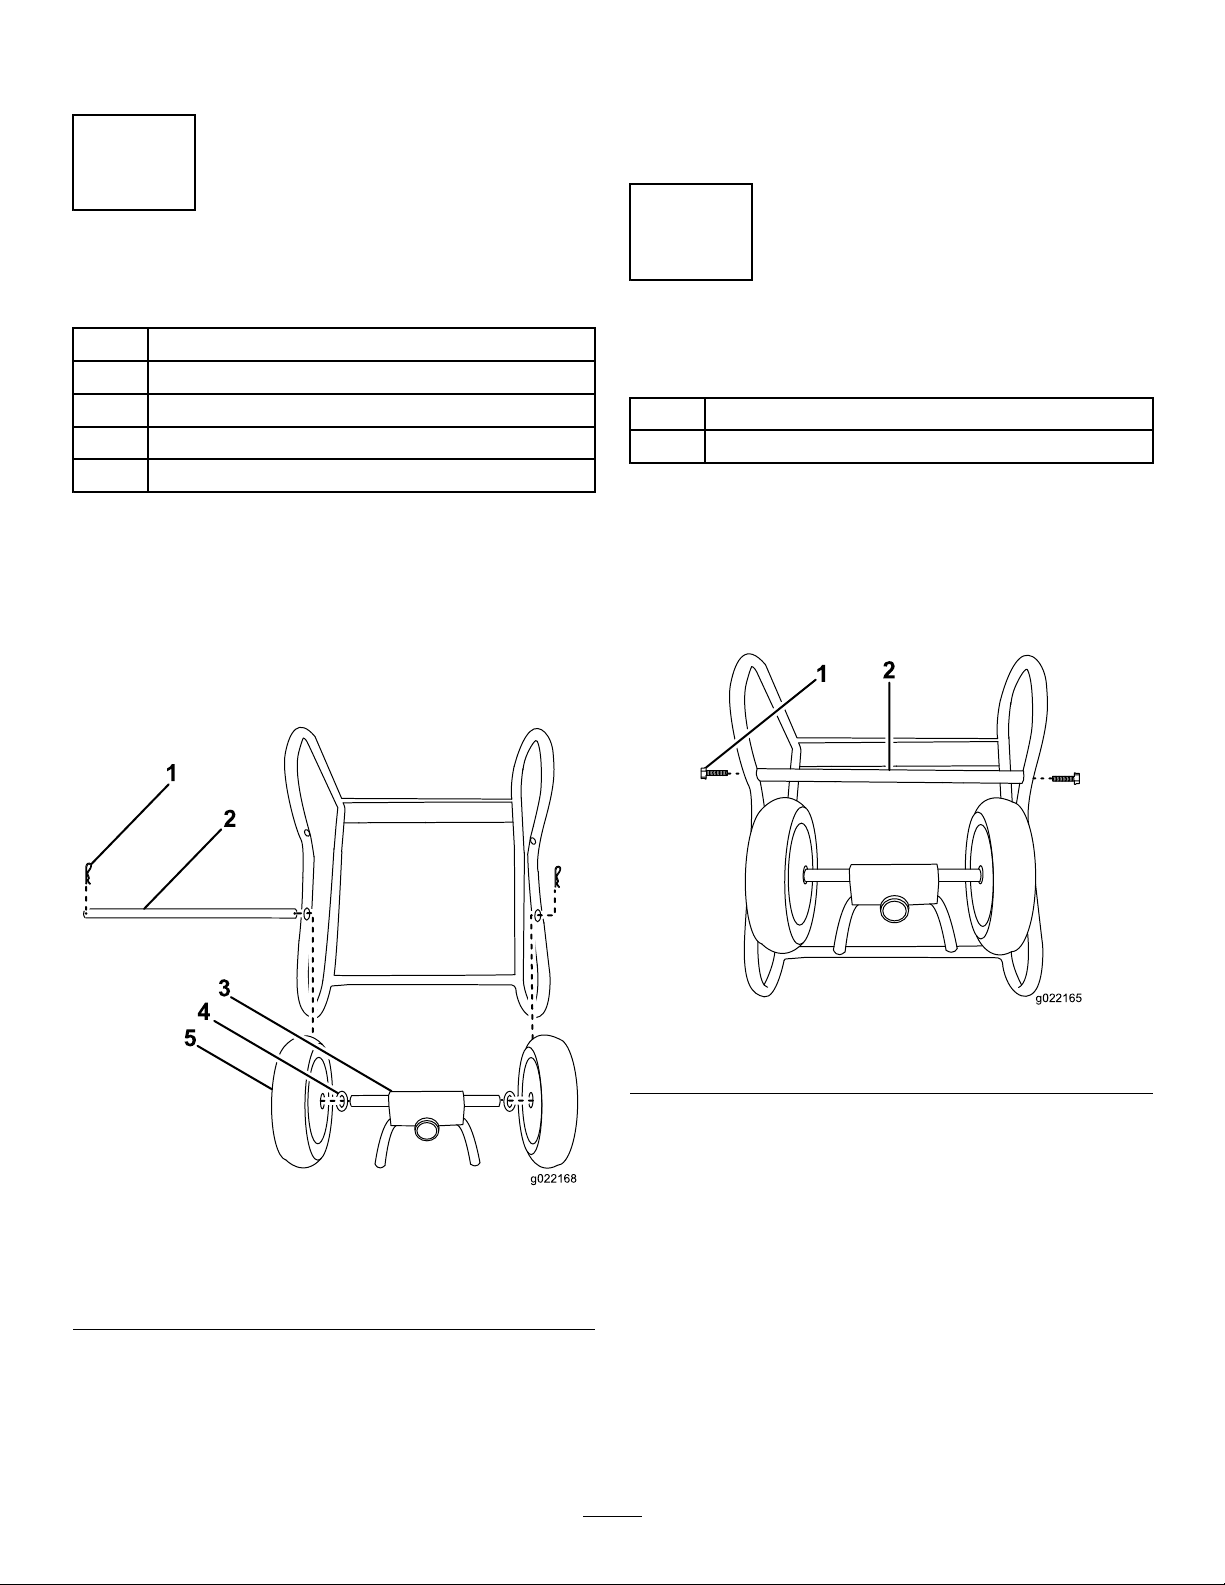
InstallingtheWheelsandAxle
Note:Ifyouarenotusingthepedestal,youmayusea
spaceraxlepieceinsteadofthepivotmountplate.
3.Securethewheelsandaxlerodinplacewithcotter
pins;refertoFigure3.
2
Partsneededforthisprocedure:
2
Cotterpin
1Axlerod
1Pivotmountplate
2Washer
2Wheel
Procedure
Note:Thepivotmountplateisincludedwithpedestal
model(68001).Aspaceraxleisusedonthewheelbarrow
onlymodel(68003).
1.Slidetheaxlerodintotheframeofthemachine;refer
toFigure3.
InstallingtheFrameStop
Partsneededforthisprocedure:
2Bolts
1Framestop
Procedure
Note:Theframestopisincludedonlywiththepedestal
(model68001).
Installtheframestop;refertoFigure4.
1.Cotterpin
2.Axlerod5.Wheel
3.Pivotmountplate
2.Slidetheaxlerod,wheels,washers,andpivotmount
plateintoplace;referto
Note:Thewheelsshouldhavethesidewiththegrease
ttingsfacingoutward.
Figure3
4.Washer
Figure3.
Figure4
1.Bolt2.Framestop
6
Page 7

3
1
2
3
4
g022156
1
2
g022157
4
InstallingtheMotor
Partsneededforthisprocedure:
1ElectricMotor
4Nut
4Washer
4LockWasher
Procedure
1.Movethemotorintopositionontheframeofthe
machine;refertoFigure5.
InstallingtheDrum
Partsneededforthisprocedure:
1Drum
1Bolt
1Nut
Procedure
1.Movethedrumintoplace;refertoFigure6.
Figure5
1.Nut3.Washer
2.Lockwasher4.Motor
2.Securethemotorontothemachinewithnuts,washers,
andlockwashers;refertoFigure5.
Figure6
1.Drum2.Motor
2.Connectthedrumtothemotorwiththeboltandnut.
RefertoFigure7.
7
Page 8

1
2
3
4
g022158
Figure7
g022175
1
2
3
g021661
1
2
1.Bolt3.Drum
2.Nut4.Motor
Figure8
1.Motorcover3.Nuts
2.Bolts
5
InstallingtheMotorCover
Partsneededforthisprocedure:
1Motorcover
2Bolt
2Nut
Procedure
Fastenmotorcovertotheframeofthemachine;referto
Figure8.
6
InstallingtheHandlebars
Partsneededforthisprocedure:
2Handlebar
2
HandlebarGrips
Procedure
1.Slidehandlebarsintoplace,andsecurethemusingthe
lockingpin(Figure9).
Figure9
1.Lockingpin2.Handlebar
2.Slidetherubberhandgripsintoplace.
8
Page 9

ProductOverview
g021662
1
2
3
4
2
3
1
g021663
Figure10
1.Dumphandles3.Drum
2.Powercord4.Electricmotor
Figure11
Controls
MotorControls
Becomefamiliarwithallthecontrolsbeforeyoustartthe
motorandoperatethemachine.
1.Powercord
2.Resetbutton
3.On/Offswitch
Specications
Note:Specicationsanddesignaresubjecttochange
withoutnotice.
Capacity:ConcreteVolume
Total(wet)
Length
Width
Height
Weight
Motor0.5HP;110–120volt;5.3
61.6cm(24.25inches)
56.6L(2cuft)
127cm(50inches)
101.6cm(40inches)
55.79Kg(123lbs)
amperes;60Hz
9
Page 10

Operation
g021664
damagedcord.Donotrunthecordthroughstanding
waterorwetgrass.
Important:Beforeoperating,removedebrisfromthe
machine.Also,ensurethattheareaisclearofpeople
anddebris.
OperatingtheMachine
•Reviewallofthesafetydecals.
•Useahard-hat,andeyeprotection.Ameshvisoralone
doesnotprovidesufcienteyeprotection;supplementit
withprotectiveglasses.
•Ensurethatyouarefamiliarwiththesafetyregulations
andshutdownproceduresdescribedinthismanual.
•Ensurethateveryone,includingchildrenandanimals,
maintainadistanceofatleast15m(50feet)fromthe
machine.
ElectricalPower
ConnectingtoaPowerSource
DANGER
Contactwithwaterwhileoperatingtheproduct
couldcauseelectricshock,causinginjuryordeath.
•Don'thandletheplugorthemachinewithwet
handsorwhilestandinginwater.
•Useonlyanextensioncordrecommendedfor
outdooruse.
Important:Useonly3-wireextensioncordswith
terminalsandsocketsforthelive,neutral,andground
circuits.
Important:Onlyconnectthemachinetoa3-pole
receptaclewithlive,neutral,andgroundcircuits.
Important:Theconnectingwiresorextensioncord
shouldbeasshortaspossibleandinonepiece.
Important:Onlyplugthemachineinto115single
phase,60–cycle,fusedoutlets.
Important:Donotuseanextensioncordover30.4m
(100ft)long.
Important:Onlyusepowercordsthatareratedfor
outdooruse.
Important:Onlyusepowercordsthatareratedforthe
motorloadofthemachine.
Toreducetheriskofelectricshock,thismachinehas
polarizedplugs(i.e.,uniquebladeshapesandwidths).Use
onlyapolarizedplugandsocketthatiscompliantwith
NEMAspecicationsandextensioncordsthatareUL-listed
(CSAcertiedinCanada)andrecommendedforoutdooruse.
Apolarizedplugwilltinapolarizedcordonlyoneway.If
theplugdoesnottfullyinthecord,reversethecord.Ifit
stilldoesnott,purchaseapolarizedextensioncord.Ifyou
haveapolarizedextensioncordandtheextensioncordplug
doesnottfullyintothewallreceptacle,reversetheplug.
Ifitstilldoesnott,contactaqualiedelectriciantoinstall
theproperoutlet.Donotchangethemachineorextension
cordpluginanyway.
Note:Connectthepowercordtotheextensioncordas
showninFigure12.
Figure12
Important:Checktheextensioncordfrequentlyduring
useforholesorcracksintheinsulation.Donotusea
10
Page 11

StartingandStoppingthe
UsingthePedestal
Motor
StartingtheElectricMotor
Important:Checkanyextensioncordcarefullyfor
brokenconnectors,barewires,ordamagedinsulation.
Donotuseanycordfoundtobeinpoorcondition.
Makesurethattheextensioncordisnotroutedthrough
standingwaterandthatallconnectionsaretight.Use
theshortestextensioncordpossible.
1.Plugthepowercordintoany115singlephase,60-cycle,
fusedoutlet.
2.TurnthemotoronbyippingtheOn/Offswitchto
theOnposition;referto
Note:Theswitchismarkedl(On)andO(Off).
StoppingtheElectricMotor
1.TurnthemotoroffbyippingtheOn/Offswitchto
theOffposition;refertoFigure11.
2.Disconnectthepowercord.
Figure11.
Note:ForModel68001only
AssemblingthePedestal
1.Place2halvesofthesupportlegstogether,andinsert
pivottubethroughthecenterofthelegs(Figure13).
2.Insertthelockingpinthroughthebottomofthepivot
tube(Figure13).
ResettingtheElectricMotor
Ifthemotordrawstoomuchcurrent,itwillautomatically
shutoff.Inthatevent,followthesesteps:
1.MovetheOn/OffswitchtotheOffposition;referto
Figure11.
2.Unplugthemachinefromthepowersource.
3.Allowtheelectricmotortocoolfor3to5minutes.
4.Intheeventofamotorshutoff:
•Checktomakesurethemotorfancoverisnot
blocked.
•Checktoseeifthedrumisoverlledorobstructed.
Important:Whenremovinganythingfrom
thedrumbyhand,alwaysmakesurethatthe
machineisunplugged.
•Checktomakesurethatthemachineisplugged
intoacorrectoutlet;refertoConnectingtoa
PowerSource(page10).
5.Presstheresetbutton;refertoFigure11.
6.Plugthemachineintothepowersource.
Figure13
7.MovetheOn/OffswitchtotheOnposition;referto
Figure11.
Note:Ifthemotorcontinuestooverheatafterthese
measureshavebeentaken,takethemachinetoanAuthorized
ServiceDealer.
11
Page 12

AttachingPedestalStandtothe
g019656
1
2
Machine
1.Tipthemixer,asifdumpingcontents,andplaceit
squarelyonthedrumopening.
CAUTION
Thepivotmountwillrotatefreelyaboutthe
axlewhentippingthemixerontothedrum
opening.Therotatingpivotmountcancause
painandinjurytolegs.
Standclearofwheelaxle.
2.Rotatethepivotmountplateawayfromthedrumand
ontothefrontstop(Figure14).
Figure14
1.Pivotmount2.Framestop
3.Insertthepedestalstandassemblythroughthepivot
mount(Figure15).
CAUTION
Use2peopletotiltthemixeruprightontothe
stand.
Figure15
4.Movetothefrontofthemachineandbegintiltingit
uprightontothestand(Figure15).
Note:Alwaysbendyourkneesandusecorrectposture
forlifting.
12
Page 13

WARNING
Donottiltmixeruprightontostandonawet,
uneven,orslipperysurface.Failuretofollow
thisinstructioncouldresultinpersonalinjury
anddamagetotheequipment.
Setupthepedestalonatgroundwith
plentyoftractionbeforeattemptingtotiltthe
machineuprightontothestand.
5.Tiltthemachinetotheuprightmixingposition.
MixingPre-MixConcrete
1.Turnthemachineon.
2.Pourwaterintothedrum.
3.Addtherequiredamountofdrypre-mixconcrete.
4.Allowthedrumtoturnwhilethemixreachesthe
appropriateconsistency.
5.Pourtheproperlymixedconcretequickly .
6.Startnextbatchrightawayorcleanoutthedrum
immediately.
MixingtheMaterial
DANGER
Eyeandskincontactwithconcretematerialsand
breathingthedustinvolvedishazardoustoyour
health.
•Wearadustmasktopreventinhalationofdust
whileusingthemachine;referto
•Avoiddirectcontactofcementandconcrete
materialswithskinandeyes.
Important:Donotaddmorematerialthanthebatch
capacityforyourspecicmachinemodel;referto
Specications(page9).
Note:Followthemanufacturer’sinstructionsthatareprinted
onthepackagingoftheproduct.
Thereare4basicingredientsinconcrete:
•Sand
•Gravel
(page).
MixingSand,Gravel,andCement
Thetypicalratioformixingconcreteis1partPortland
cement,2partssand,and3partsgravel.
1.Turnthemachineon.
2.Pourwaterintothedrum.
3.Addtherequiredamountofgravel.
4.AddtherequiredamountofPortlandcement.
5.Addtherequiredamountofsand.
6.Allowthedrumtoturnwhilethemixreachesthe
appropriateconsistency.
7.Pourtheproperlymixedconcretequickly .
8.Addthewaterandgraveltothedrumtobeginnext
batchandloosenupmixleftbythepreviousbatch.
Note:Addingwaterandgravelbeforecementandsand
allowsthemixleftinthedrumfromthepreviousbatchto
tumbleoffthedrumandpaddlesandintothenextbatch.
•Portlandcement
•Water
Dependingontheapplicationyoucanusedifferentratios
ofthese4ingredients.
Therearemanyvariationsofconcretemixrecipes,depending
ontheapplication.Itisimportanttousetheappropriate
quantityofwater.Usingtoolittlewaterwillresultindryareas
inthemix,butusingtoomuchwaterwillresultinweaker
concrete.Theamountofwaterneededwillvarydepending
onmoisturecontentofthesandandgravel.Themixshould
haveathicknesssimilartopeanutbutter.
Keepthepouredconcretedampforseveraldaystoobtain
propercuring.Evaporationresultsinweakerconcrete.
Concretecuresthroughhydration,areactionbetweenwater
andcement.
13
Page 14

Maintenance
g021812
1
2
4
3
RecommendedMaintenanceSchedule(s)
MaintenanceService
Interval
Aftereachuse
Every200hours
Important:RefertoyourMotorOperator'sManualforadditionalmaintenanceprocedures.
Lubrication
OiltheGearbox
ServiceInterval:Every200hours
1.Removethemotorcover(Figure16).
MaintenanceProcedure
•Removedebrisfromthemachine.
•Cleanthemachine.
•Drainandreplacetheoilinthegearbox.
Cleaning
Coatthedrumandframewithaconcretepreventative.This
willmakecleaningthemachineeasier.
Regularcleaningandwashingwillincreasethelifespanof
themachine.Cleanthemachinedirectlyafteruse,beforethe
cementhardens.
Usecarewhenusingahigh-pressuresprayer,becauseitcan
damagewarningdecals,instructionsigns,andthemotor.
Washthemachinewithmilddetergentandwater.Donot
getthemotorwet.
Figure16
1.Motorcover3.Nuts
2.Bolts
2.Removetheoilplug(Figure16).
3.Draintheoil.
Note:Carefullyipthemachineupsidedowntoa
waitingoilpanfortheoiltodrain.Whennished,ip
themachineright-sideup.
4.Pour0.2L(8.0oz)ofoilintothegearbox.
Note:UseMobil1LS75W–90GearLubricantor
equivalent.
5.Installtheoilplugandmotorcover.
4.Oilplug
14
Page 15

Storage
Forstorageover30days,preparethemachineasfollows:
1.Removedirtandgrimefromtheexternalpartsofthe
entiremachine,especiallythemotor.Cleandirtand
concretefromtheinsideandoutsideofthedrum;refer
toCleaning(page14).
2.Checkandtightenallbolts,nuts,andscrews.Repairor
replaceanypartthatisdamaged.
3.Paintallscratchedorbaremetalsurfaces.Paintis
availablefromyourAuthorizedServiceDealer.
4.Inspecttheelectricalcordandelectricalconnectorsfor
damage.
5.Storethemachineinaclean,drygarageorstoragearea.
6.Coverthemachinetoprotectitandkeepitclean.
15
Page 16

Troubleshooting
Problem
Theelectricmotorwillnotstart.
Themotorrunsbutthemixerrotationis
underpowered.
PossibleCauseCorrectiveAction
1.Theconnectorforthemachineisnot
pluggedintoapowersource.
2.Thecurrentprotectorfortheelectrical
sourceisopen.
1.Thedrumisoverlled.
2.Extensioncordistoolongortoohigh
ofagauge.
1.Plugtheconnectorintoasocketor
andextensioncordfromanelectrical
source.
2.Resetthecircuitprotector .
1.Dumpoutconcreteuntilthemotorruns
atfullpower.
2.Pluginmixerusingshorterextension
cordorcordofalowergauge.
16
Page 17

Notes:
17
Page 18

Notes:
18
Page 19

Notes:
19
Page 20

ToroCompactUtilityEquipmentWarranty
AOne-YearLimitedWarranty
CUEProducts
ConditionsandProductsCovered
TheT oro®Companyanditsafliate,T oroWarrantyCompany ,pursuant
toanagreementbetweenthem,jointlywarrantyourT oroCompactUtility
Equipment(“Product”)tobefreefromdefectsinmaterialsorworkmanship.
Thefollowingtimeperiodsapplyfromthedateofpurchase:
ProductsWarrantyPeriod
Loaders,Trenchers,StumpGrinders,
Chippers,LogSplittersandAttachments
KohlerEngines3years
AllotherEngines2years
Whereawarrantableconditionexists,wewillrepairtheProductatnocost
toyouincludingdiagnosis,labor,andparts.
1yearor1000operating
hours,whicheveroccursrst
InstructionsforObtainingWarrantyService
IfyouthinkthatyourT oroProductcontainsadefectinmaterialsor
workmanship,followthisprocedure:
1.ContactanyAuthorizedT oroCompactUtilityEquipment(CUE)
ServiceDealertoarrangeserviceattheirdealership.Tolocatea
dealerconvenienttoyou,accessourwebsiteatwww.Toro.com.
YoumayalsocallourToroCustomerCareDepartmenttollfree
at888-865-5676(U.S.customers)or888-865-5691(Canadian
customers).
2.Bringtheproductandyourproofofpurchase(salesreceipt)tothe
ServiceDealer.
3.IfforanyreasonyouaredissatisedwiththeServiceDealer’s
analysisorwiththeassistanceprovided,contactusat:
LCBCustomerCareDepartment
ToroWarrantyCompany
811 1LyndaleAvenueSouth
Bloomington,MN55420-1 196
TollFree:888-865-5676(U.S.customers)
TollFree:888-865-5691(Canadacustomers)
OwnerResponsibilities
YoumustmaintainyourT oroProductbyfollowingthemaintenance
proceduresdescribedintheOperator’sManual.Suchroutine
maintenance,whetherperformedbyadealerorbyyou,isatyourexpense.
Partsscheduledforreplacementasrequiredmaintenance(“Maintenance
Parts”),arewarrantedfortheperiodoftimeuptothescheduled
replacementtimeforthatpart.Failuretoperformrequiredmaintenance
andadjustmentscanbegroundsfordisallowingawarrantyclaim.
ItemsandConditionsNotCovered
Notallproductfailuresormalfunctionsthatoccurduringthewarranty
periodaredefectsinmaterialsorworkmanship.Thisexpresswarranty
doesnotcoverthefollowing:
•Productfailureswhichresultfromtheuseofnon-T ororeplacement
parts,orfrominstallationanduseofadd-on,modied,orunapproved
accessories
•Productfailureswhichresultfromfailuretoperformrequired
maintenanceand/oradjustments
•ProductfailureswhichresultfromoperatingtheProductinan
abusive,negligentorrecklessmanner
•Partssubjecttoconsumptionthroughuseunlessfoundtobe
defective.Examplesofpartswhichareconsumed,orusedup,during
normalProductoperationinclude,butarenotlimitedto,teeth,tines,
blades,sparkplugs,tires,tracks,lters,chains,etc.
•Failurescausedbyoutsideinuence.Itemsconsideredtobeoutside
inuenceinclude,butarenotlimitedto,weather,storagepractices,
contamination,useofunapprovedcoolants,lubricants,additives,or
chemicals,etc.
•Normal“wearandtear”items.Normal“wearandtear”includes,butis
notlimitedto,wornpaintedsurfaces,scratcheddecalsorwindows,
etc.
•Anycomponentcoveredbyaseparatemanufacturer’swarranty
•Pickupanddeliverycharges
GeneralConditions
RepairbyanAuthorizedT oroCompactUtilityEquipment(CUE)Service
Dealerisyoursoleremedyunderthiswarranty .
NeitherTheToro®CompanynorToroWarrantyCompanyisliable
forindirect,incidentalorconsequentialdamagesinconnectionwith
theuseoftheToroProductscoveredbythiswarranty ,including
anycostorexpenseofprovidingsubstituteequipmentorservice
duringreasonableperiodsofmalfunctionornon-usepending
completionofrepairsunderthiswarranty.Allimpliedwarranties
ofmerchantabilityandtnessforusearelimitedtotheduration
ofthisexpresswarranty.Somestatesdonotallowexclusionsof
incidentalorconsequentialdamages,orlimitationsonhowlong
animpliedwarrantylasts,sotheaboveexclusionsandlimitations
maynotapplytoyou.
Thiswarrantygivesyouspeciclegalrights,andyoumayalsohaveother
rightswhichvaryfromstatetostate.
ExceptfortheenginewarrantycoverageandtheEmissionswarranty
referencedbelow,ifapplicable,thereisnootherexpresswarranty .The
EmissionsControlSystemonyourProductmaybecoveredbyaseparate
warrantymeetingrequirementsestablishedbytheU.S.Environmental
ProtectionAgency(EPA)ortheCaliforniaAirResourcesBoard(CARB).
ThehourlimitationssetforthabovedonotapplytotheEmissions
ControlSystemWarranty.RefertotheCaliforniaEmissionControl
WarrantyStatementsuppliedwithyourProductorcontainedintheengine
manufacturer’sdocumentationfordetails.
CountriesOtherthantheUnitedStatesorCanada
CustomerswhohavepurchasedT oroproductsexportedfromtheUnitedStatesorCanadashouldcontacttheirT oroDistributor(Dealer)toobtain
guaranteepoliciesforyourcountry ,province,orstate.IfforanyreasonyouaredissatisedwithyourDistributor’sserviceorhavedifcultyobtaining
guaranteeinformation,contacttheT oroimporter.Ifallotherremediesfail,youmaycontactusatT oroWarrantyCompany .
374-0261RevB
 Loading...