

Toro 51467 - Cordless Electric Trimmer Operator's Manual

Form No. 3356-425 Rev A
8-inch Cordless Trimmer
Model No. 51467 —Serial No. 270000001 and Up
Operator's Manual
If you have questions or problems, call toll free
1-866-336-5208 (US) or 1-800-544-5364 (Canada) before
returning this product.
I MPORTANT S AFETY
I NSTRUCTIONS
W hen using an electrical appliance, basic pr ecautions
should al w ays be f ollo w ed, including the f ollo wing:
R EAD A LL I NSTRUCTIONS B EFORE U SING
T HIS A PPLIANCE
WARNING —T or r educe the risk of fir e, electric
shock, or injur y , f ollo w these safety instr uctions.
It is essential that y ou or an y other operator of the appliance
read and understand the contents of this man ual before operating
the appliance . P a y par ticular attention to the safety aler t symbol
whic h means CA UTION , W ARNING or D ANGER—personal
safety instr uction. R ead and understand the instr uction because it
has to do with safety . F ailur e to compl y with these instr uctions
may r esult in per sonal injur y , risk of fir e, or electrical shock.
A v oid danger ous en vir onments —Do not use or c harg e the
trimmer in damp or w et locations .
Do not use or c harg e the trimmer in the rain.
K eep childr en and bystander s a w ay —All visitors should be
k e pt at a distance from the w ork area.
Dr ess pr oper l y —Do not w ear loose clothing or jew elr y; they can
be caught in mo ving par ts . Use of r ubber glo v es and substantial
footw ear is recommended when w orking outdoors . W ear
protecti v e hair co v ering to contain long hair .
Use safety g lasses —Safety glasses are a v ailable at most retail
stores . Use a face or dust mask if operation is dusty .
Use the right appliance —Do not use the trimmer for any job
ex ce pt that for whic h it w as intended. Do not use it as an edger .
A v oid unintentional star ting —Do not car r y the trimmer with
y our fing er on the switc h.
K ee p g rass shield in place and in w orking order .
K ee p hands and feet a w a y from the cutting area. Do not g rasp
the exposed blade under the g rass shield.
Stop the motor whenev er y ou lea v e the trimmer , before cleaning
the housing, and when making any re pairs or inspections .
Do not f orce the trimmer —It will do the job better and with less
lik elihood of a risk of injur y at the rate for whic h it w as designed.
Do not o v er r each —K ee p proper footing and balance at all times .
Stay aler t —W atc h what y ou are doing . Use common sense . Do
not operate the trimmer when y ou are tired.
Stor e the trimmer indoor s —W hen not in use , store the trimmer
indoors in a dr y , high or loc k ed up place , out of reac h of c hildren.
Maintain the trimmer —F ollo w instr uctions for c hanging
accessories . Inspect the trimmer periodically , and if damag ed,
ha v e it re paired b y an A uthorized T oro Ser vice Dealer . K ee p the
handles dr y , clean, and free from oil and g rease . T he trimmer
requires no lubrication.
Chec k damag ed par ts—If any par ts of the trimmer are damag ed,
stop the trimmer and ha v e it re paired before operating the
trimmer ag ain. A damag ed trimmer should only be re paired b y
an A uthorized T oro Ser vice Dealer . W hen ser vicing, use only
identical T or o re placement par ts .
T o reduce the risk of electrical shoc k, re place the c harg er
immediately if the c harg er case or cord is damag ed.
SAVE THESE INSTRUCTIONS
© 2006—The Toro® Company
8111 Lyndale Avenue South
Bloomington, MN 55420
Register at www.Toro.com. Original Instructions (EN)
Printed in the USA.
All Rights Reserved

Safety and Instructional Decals
Important: Safety and instr uction decals ar e located near ar eas of potential danger . R eplace dama ged or lost decals.
112-1565
112-1577
Hang tag
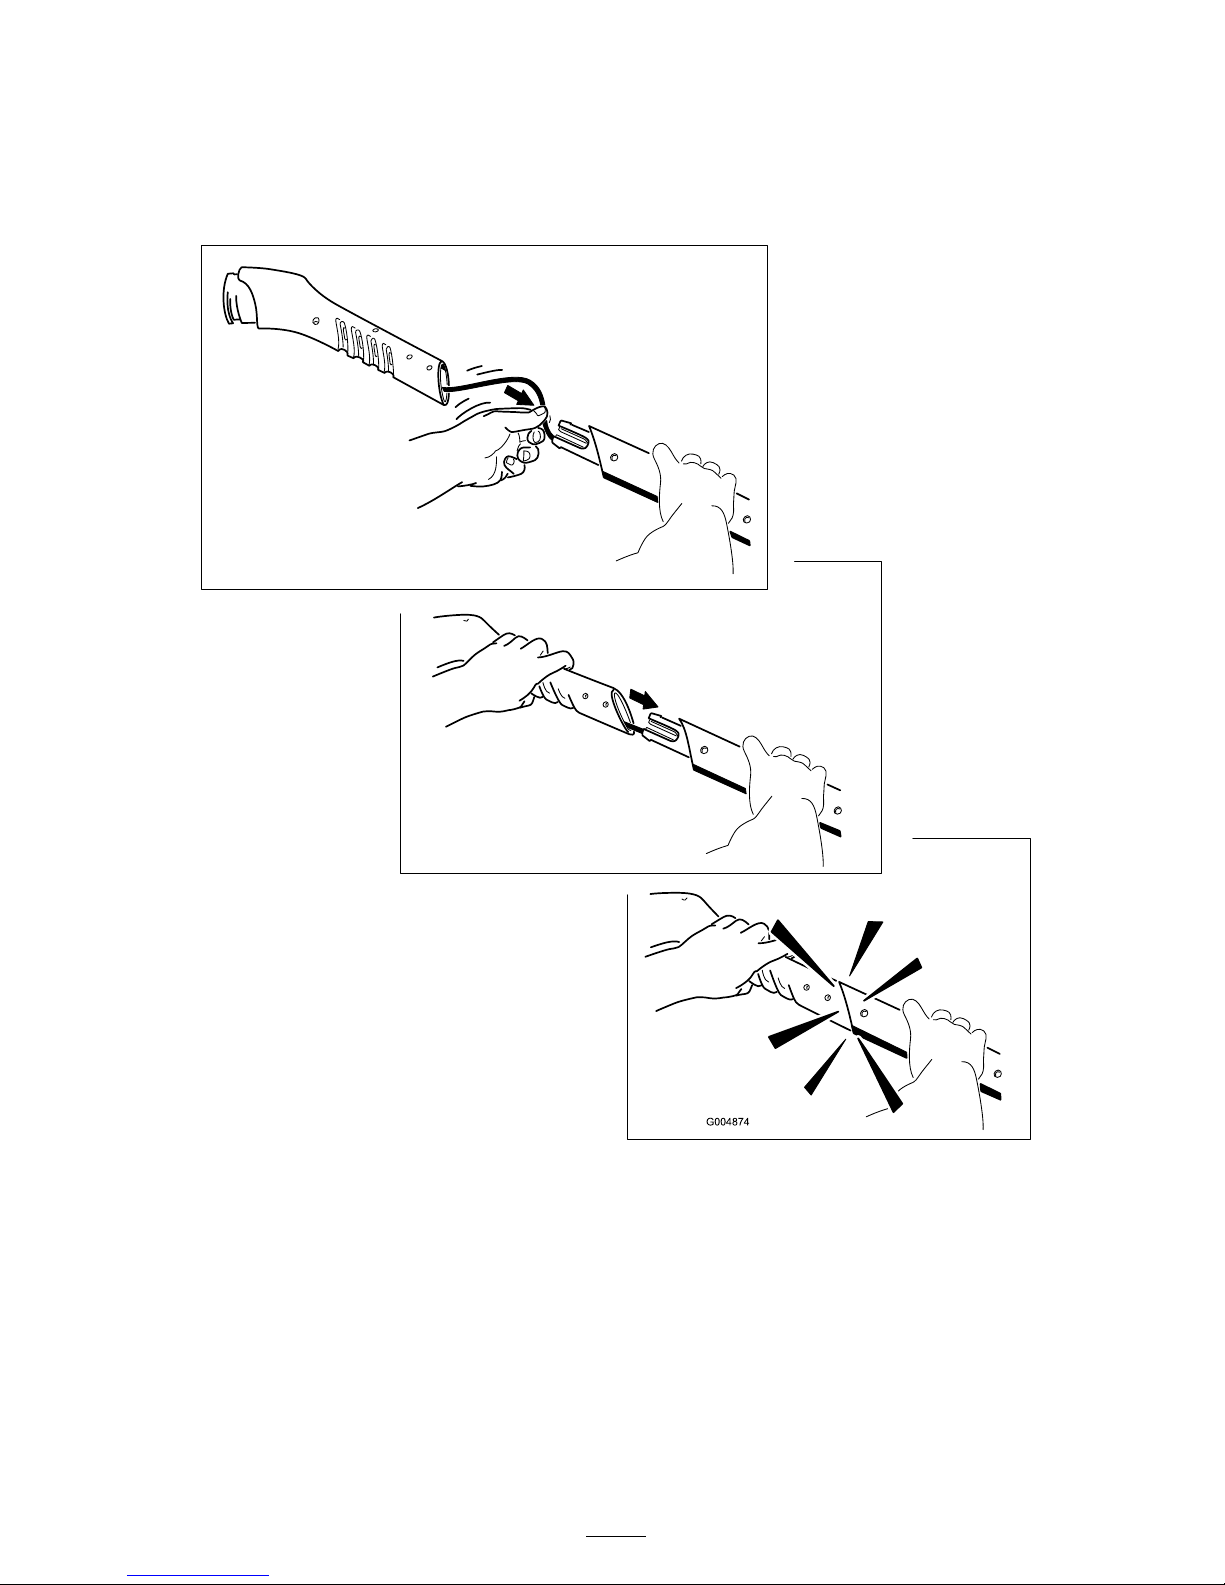
1. Feed the cord into the center section before assembling the
handle.
2
Setup
1. Assembling the Trimmer
F eed as m uc h wire into the center section as possible and snap the sections tog ether ( Figure 1 ).
Figure 1
3
2. Installing the Guard
Snap the guard into place ( Figure 2 ).
Figure 2
Operation
Charging the Battery
Charg e the batter y for 24 hours or until the c harg e light on the
c harg er is g reen before the first use and after eac h use thereafter .
Important: Al w ays charge the batter y after each use.
Storing the unit with a discharged batter y will r educe the life
of y our batter y . T his lead-acid batter y has no memor y and
does not need to be full y discharged bef or e charging .
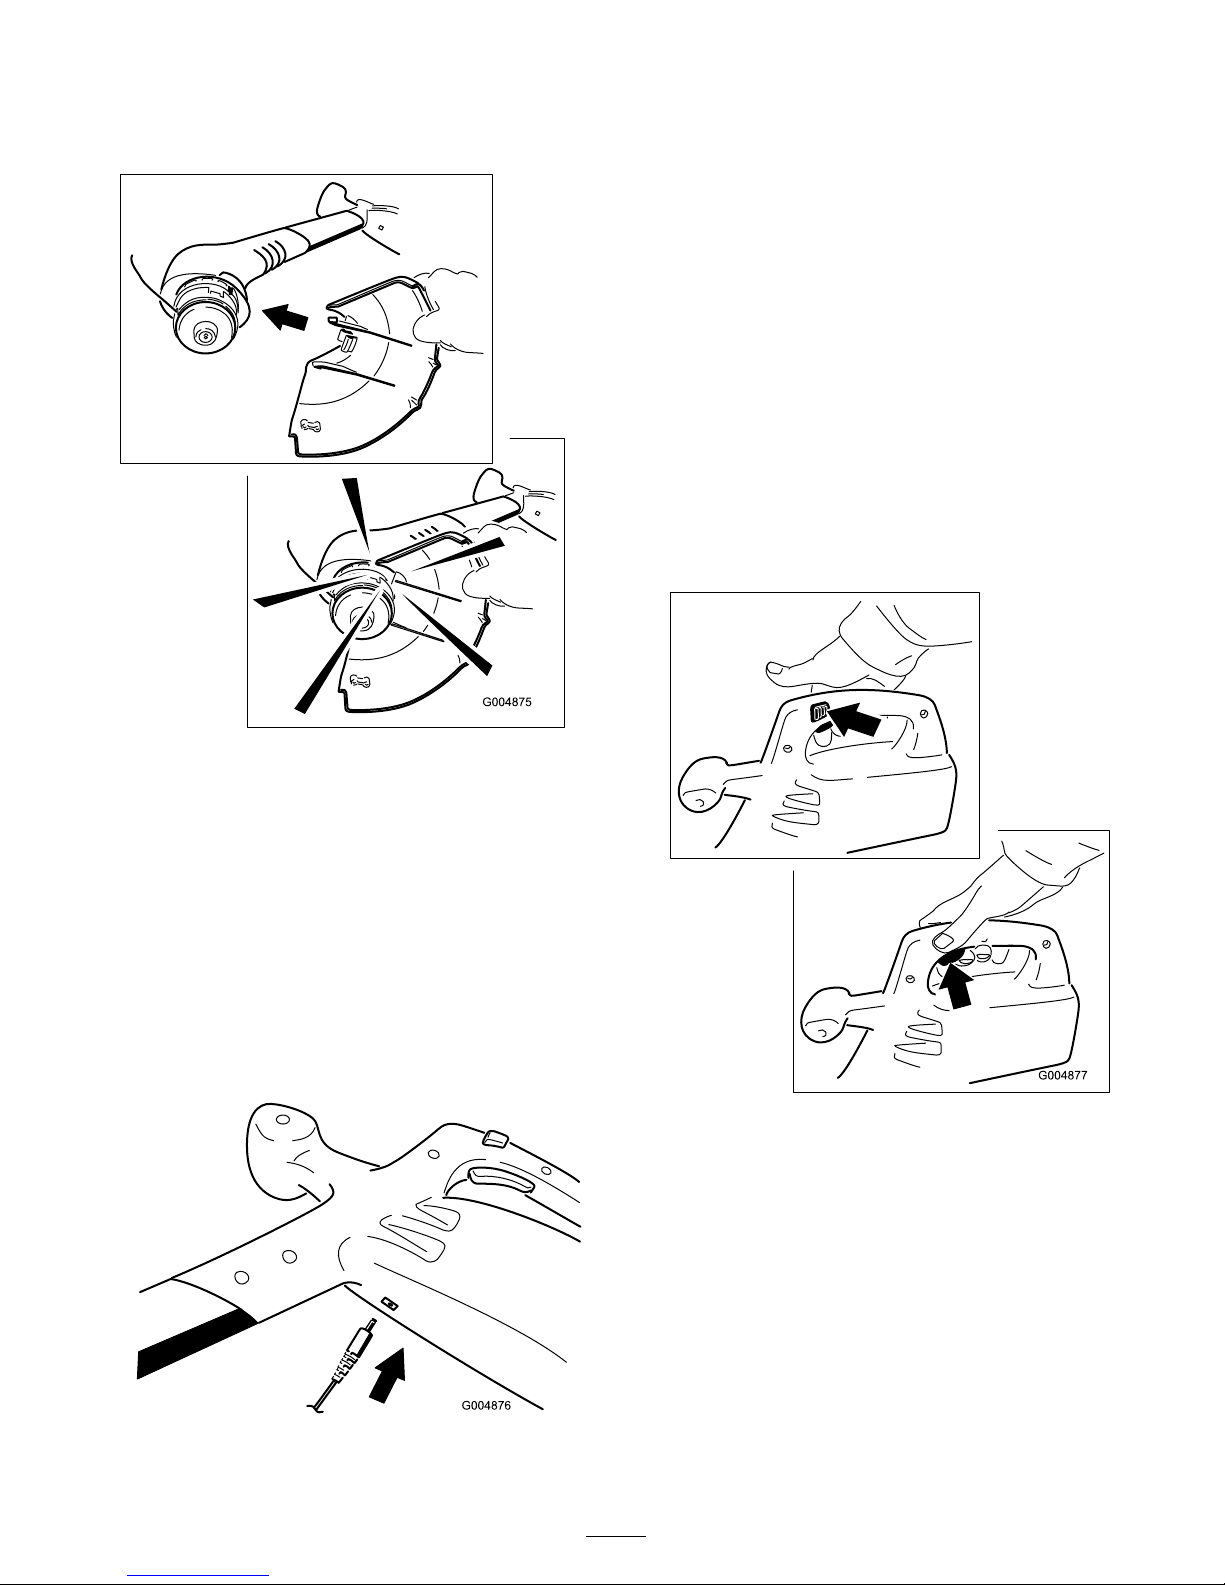
1. Inser t the c harg e plug into the trimmer rece ptacle ( Figure 3 ).
Figure 3
Important: Use onl y the charger supplied with the
trimmer or a T or o charger obtained fr om an Authoriz ed
T or o Ser vice Dealer .
2. Plug the c harg er into a po w er outlet.
Note: T he c harg e light is red while the batter y is c harging;
it tur ns g reen when the batter y is fully c harg ed or when the
trimmer is not connected.
3. Charg e the batter y for 24 hours or until the c harg e light tur ns
g reen.
4. Disconnect the c harg er from the po w er outlet and the
trimmer .
Note: T he c harg e light is alw a ys on when the trimmer is
connected to the c harg er and to the po w er outlet; it sta ys on
ev en after the batter y is fully c harg ed.
Starting the Trimmer
Push in the side button and then pull the trig g er ( Figure 4 ).
Figure 4
Stopping the Trimmer
R elease the trig g er .
4
Operating Tips
W hen the trimmer is r unning , the cutting head is
spinning . If y ou contact the cutting line or cutting head,
y ou could be injur ed.
• K eep the cutting head a w ay fr om y our feet and
bystander s.
• Ensur e that the cutting head has stopped and the
trimmer is unplug ged bef or e in v er ting it. Do not star t
the trimmer when it is in v er ted.
During operation, the trimmer may thr o w objects in the
operator’ s or a bystander’ s dir ection, causing injur y .
• W ear safety go g g les or other suita ble ey e pr otection,
long pants, and shoes while operating the trimmer .
• Do not use the trimmer as an edger .
• K eep people and pets a w ay fr om the trimming ar ea.
T o reduce line w ear and and impro v e trimming perfor mance , use
the follo wing tec hniques when trimming:
• Inspect the area to be trimmed for any wire , rope , or
string-lik e matter whic h could become entangled in the
rotating line . R emo v e any objects or debris that could be
thro wn b y the trimmer .
• T rim only when the g rass and w eeds are dr y .
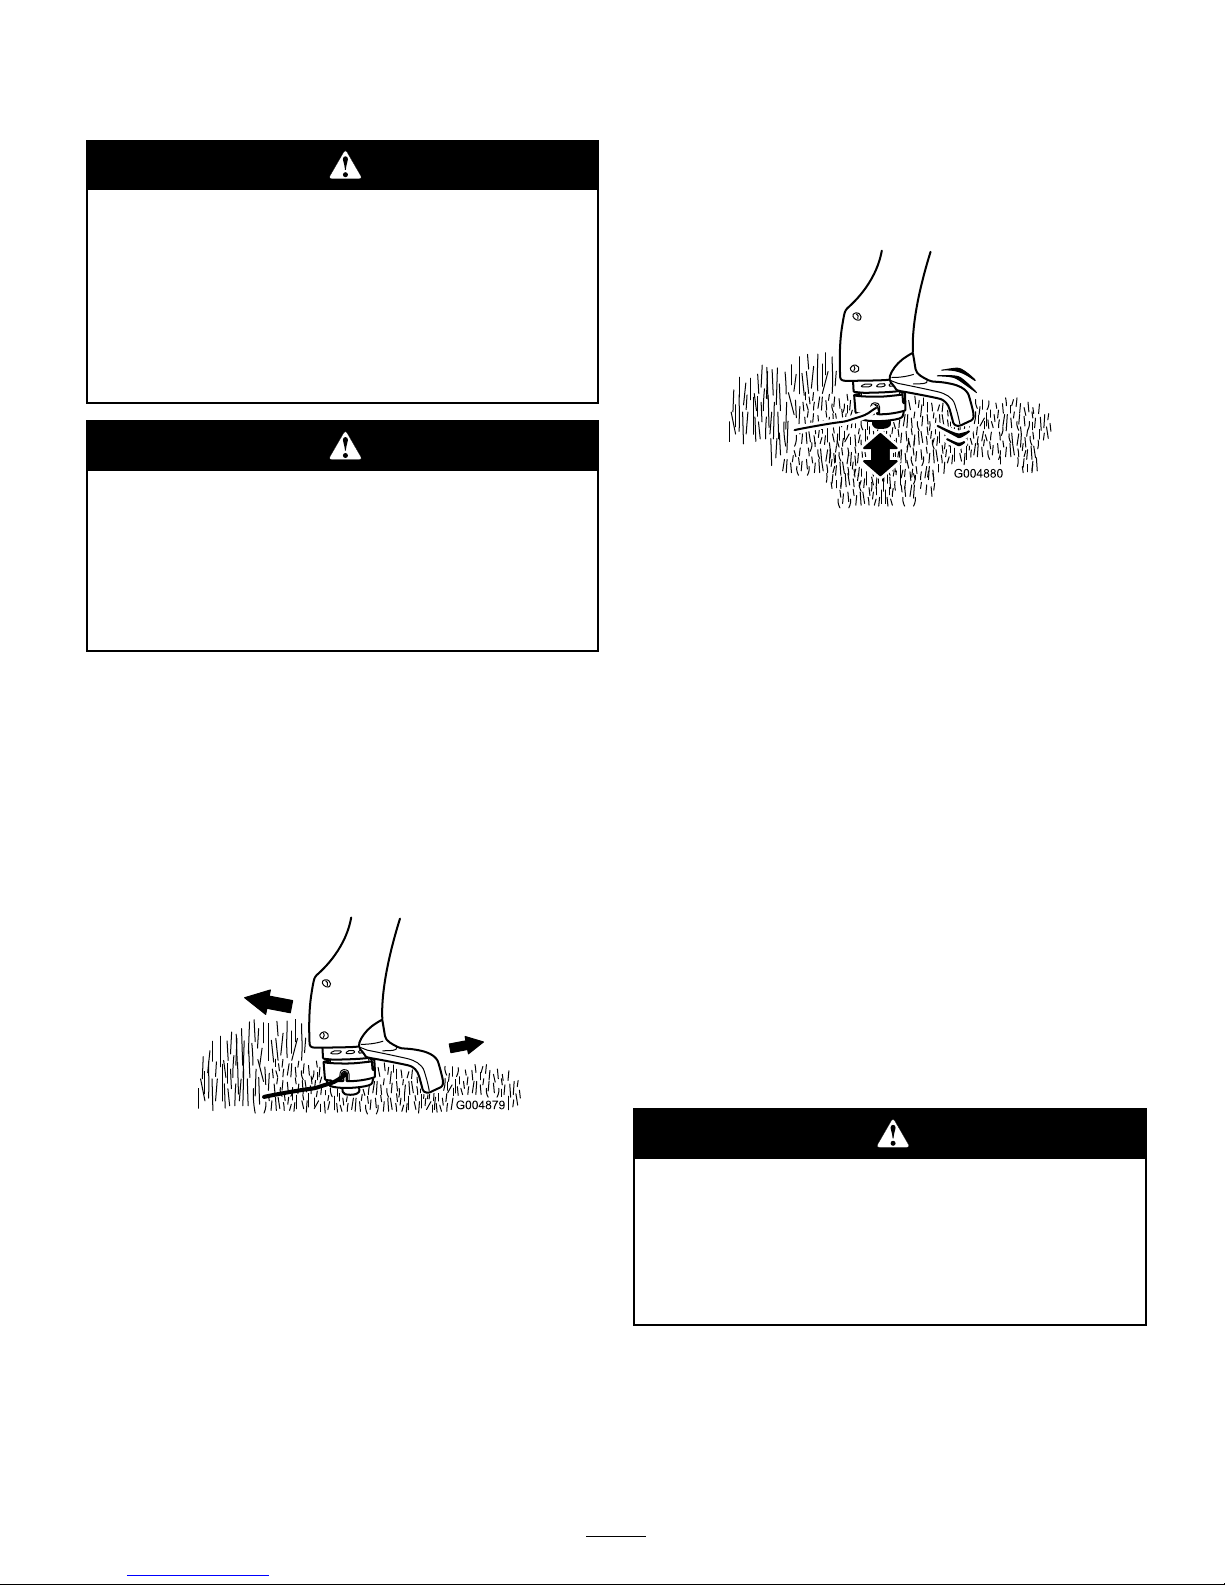
• Slo wly mo v e the trimmer in and out of the area being cut
( Figure 5 ).
Figure 5
• Cut g rass or w eeds o v er 8 inc hes tall from the top to the
bottom in small increments .
• Do not f orce the trimmer . Allo w the v er y tip of the nylon
line to do the cutting, especially along w alls .
• Do not dra g the trimmer spool on the g r ound while
trimming .
• After eac h use , feed out some line to prev ent it from
retracting into the cutting head.
• T he trimmer cannot be o v erc harg ed. K ee p it on the c harg er
when y ou are not using it during the trimming season.
• Store the trimmer in a cool, dr y location a w a y from direct
sunlight and heat sources .
Lengthening the Line
T he tip of the cutting line will w ear during use and reduce the
cutting sw ath.
T o increase the length of the line , tap the spool on the g round
while the trimmer is r unning ( Figure 6 ).
Figure 6
Note: T he blade under the guard will automatically cut the line
to the cor rect length.
Important: T ak e the f ollo wing pr ecautions to ensur e
optimal line perf or mance:
• Do not hold the spool on the g r ound.
• T ap the spool only once to lengthen the line . If y ou need
additional line , w ait a few seconds before tapping the spool.
• Do not allo w the line to w ear too shor t.
• K ee p the line length at full cutting diameter as m uc h as
possible .
• If the line is not adv anced occasionally , it will w ear do wn
to the eyelet. W hen the trimmer stops , the line tends to
relax and ma y retract into the cutter head. Should this occur ,
remo v e the spool, re-feed the line through the eyelet, and
assemble the spool to the trimmer .
Replacing the Line
F or re placement line , y ou can purc hase either a new , pre-w ound
spool of line (model no . 88185 or 88045) or bulk line (0.065 inc h
dia. x 10 ft.) that y ou can wind onto the old spool. Both are
a v ailable from an A uthorized T oro Ser vice Dealer .
If y ou use line other than T or o .065 inch dia. n ylon
monofilament, it could cut thr ough clothes and skin
causing injur y and/or o v er load the motor , possibl y
causing a fir e or electrical shock. Do not use metal wir e,
r ope, plastic kni v es, or an y cutting line or material other
than T or o .065 inch dia. n ylon monofilament, 10 f oot
maximum line length.
T he spool ma y w ear during nor mal use and require occasional
re placement.
Note: If the line should tangle or break at the eyelet, stop the
trimmer , remo v e the spool as described belo w , feed the line
through the eyelet, and reassemble the spool to the cutting head.
5
 Loading...