

Page 1

HYDRAULIC LIFT VALVE/CYLINDER MANUAL - WHEEL HORSE
Table of Contents – Page 1 of 1
FOREWORD
CONTROL VALVE SERVICE
GENERAL INFORMATION
MANUFACTURING DATE CODE (OMCO)
VALVE DESCRIPTION (OMCO)
OVERHAUL KIT CONTENTS (OMCO)
OVERHAUL PROCEDURE (OMCO) SERVICE NOTES
DISASSEMBLY & R EA SS EM BL Y
VALVE DESCRIPTION (VICTOR)
OVERHAUL KIT CONTENTS (VICTOR) VICTOR 110068 & 111066 CONTROL
VICTOR 110492 CONTROL VALVE
OVERHAUL PROCEDURE (VICTOR) SERVICE NOTES
DISASSEMBLY & REASSEMBLY (SINGLE SPOOL VICTOR)
DISASSEMBLY (TWO SPOOL VICTOR)
ASSEMBLY (TWO SPOOL VICTOR)
LIFT CYLINDER SERVICE
GENERAL INFORMATION
CYLINDER DESCRIPTION
O-RING & GASKET KIT CONTENTS
OVERHAUL PROCEDURE SERVICE NOTES
DISASSEMBLY & R EA SS EM BL Y
Page 2

HYDRAULIC
LIFT
VALVE
&
CYLINDER
REPAIR
MANUAL
Printed in U.S.A.
0984
PART
NO.
810242R3
Page 3
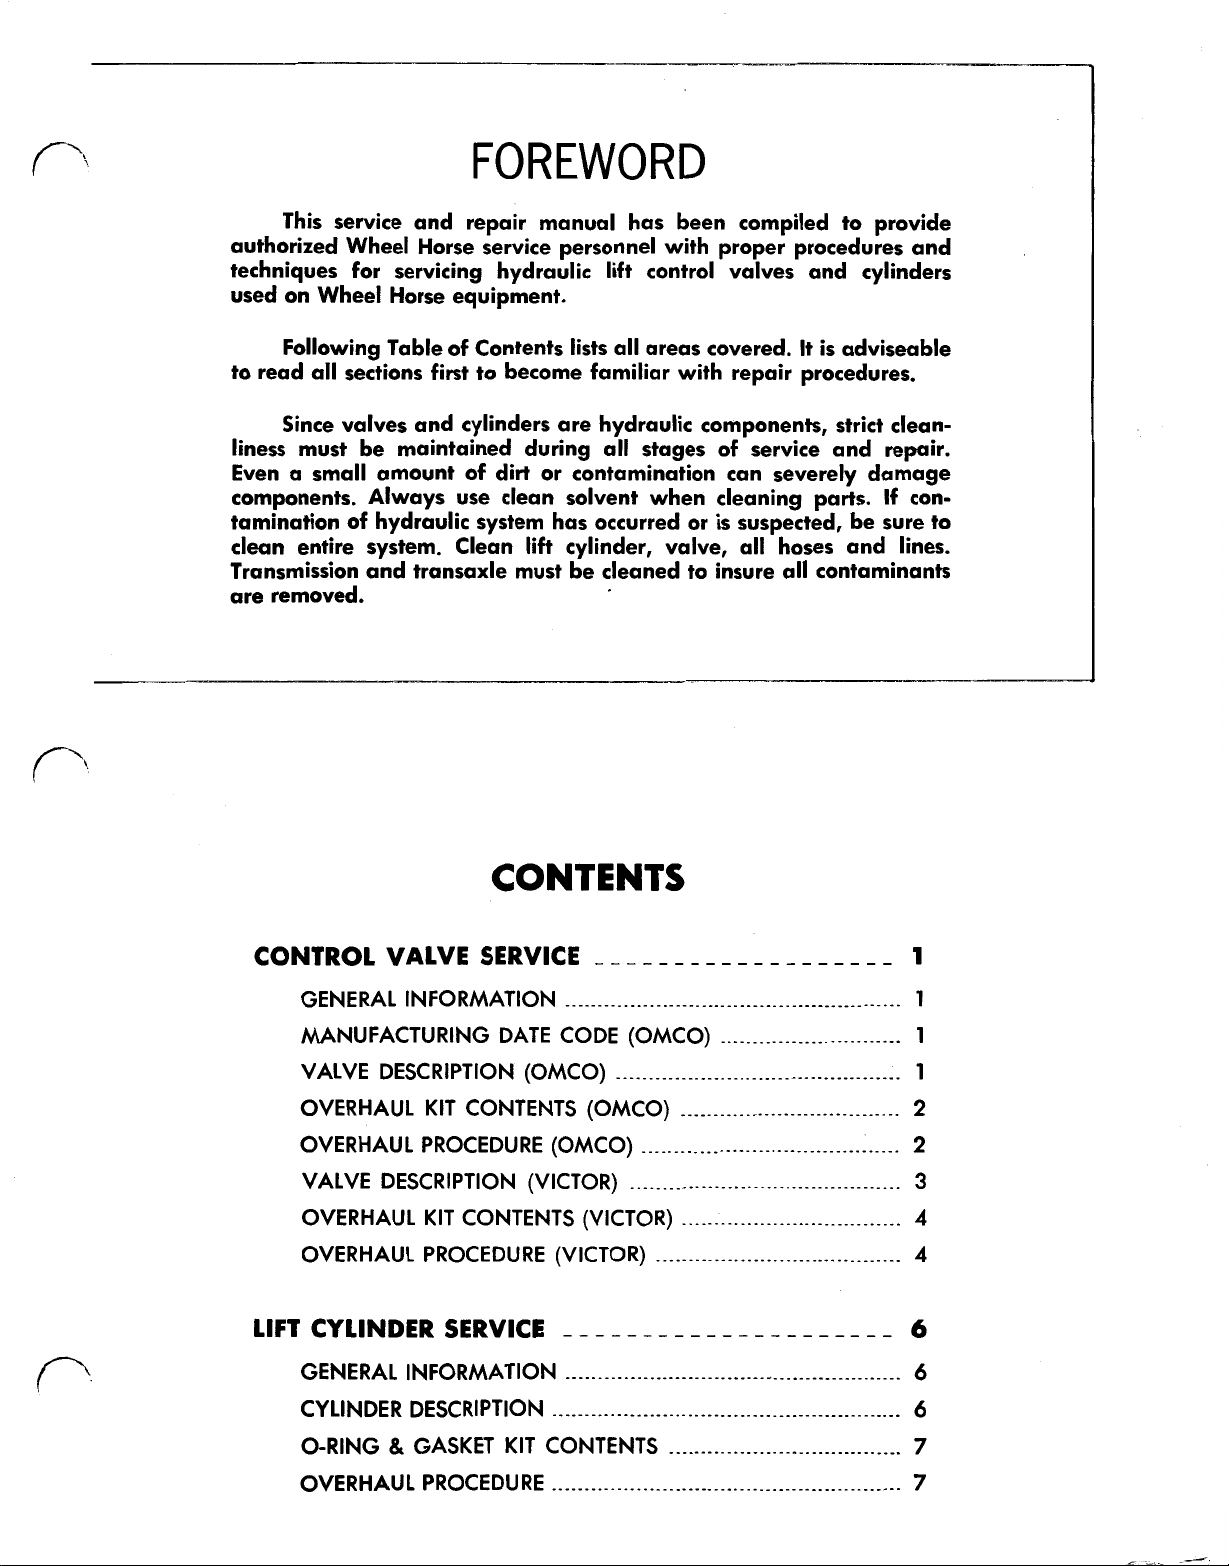
FOREWORD
This
service and repair manual has been compiled to provide
authorized Wheel Horse service personnel with proper procedures and
techniques for servicing hydraulic
used on Wheel Horse equipment.
Following Table of Contents
to read all sections first to become familiar with repair procedures.
Since valves and cylinders are hydraulic components, strict cleanliness must be maintained during all stages of service and repair.
Even a small amount of
components. Always use clean solvent when cleaning parts.
of
tamination
clean entire system. Clean
Transmission and transaxle must be cleaned to insure all contaminants
are removed.
hydraulic system has occurred or
dirt
or contamination can severely damage
lift
lift
control valves and cylinders
lists
all areas covered.
is
suspected, be sure to
cylinder, valve, all hoses and lines.
It
is
adviseable
If
con-
CONTROL VALVE SERVICE
GENERAL INFORMATION
MANUFACTURING DATE CODE (OMCO)
VALVE DESCRIPTION (OMCO)
OVERHAUL
OVERHAUL PROCEDURE (OMCO)
VALVE DESCRIPTION (VICTOR)
OVERHAUL
OVERHAUL PROCEDURE (VICTOR)
KIT
CONTENTS (OMCO)
KIT
CONTENTS (VICTOR)
________________________________________-~----.--~~~
- - - - -
- - - - - - - - - - - - - -
1
1
1
1
2
........................................
2
3
4
4
Page 4

GENERAL INFORMATION
This manual covers the overhaul of
lift control valves listed below.
&
102874
1973 18
tractors with Sundstrand hydrostatic transmission.
lift
relief valve located in the hydrostatic transmission.
103204
1973 16
tors with Sundstrand hydrostatic transmission.
system pressure
valve located in the hydrostatic transmission.
108494 (OMCO) Fig. 2
1980-82
Eaton hydrostatic transmission, except C-195. lift
system pressure
valve located to the right of the valve handle.
109679 (OMCO) Fig.
1982-83 C-195 Twin Automatic tractors.
pressure
located next to the outside valve handle.
110068
1983 & later
Eaton hydrostatic transmission, except C-195. AI-
though the valves are made by different vendors
and require different overhaul
changeable as complete assemblies. lift system
pressure
located next to the valve handle.
110492 (VICTOR) Fig. 11
1984 & later C-195 Twin Automatic tractors with
Eaton hydrostatic transmission.
is
inside valve handle.
10668 1 (OMCO) Fig. 1
HP
Automatic, 1974-80 D-Series Automatic
system pressure
&
106680 (OMCO)
HP
and 1974-80 C-Series Automatic trac-
is
is
regulated by an implement relief
-
C
&
GT-Series Automatic tractors with
is
regulated by an implement relief
2
-
is
regulated by an implement relief valve
&
11 1066 (VICTOR) Fig. 11
C
&
GT-Series Automatic tractors with
is
regulated by an implement relief valve
-
regulated by a relief valve located next to the
-
regulated by an implement
Fig.
1
-
the
-
kits,
they are inter-
lift
system pressure
hydraulic
lift
system
lift
set at 700
Severe transmission damage may result. Refer to the,
applicable repair manual for system pressure tests
and adjustments.
When the valve handle
valve inward, hydraulic port "A"
port
the spool valve
is
pressurized and port "A"
port. The spool valve
middle, "neutral" position, where ports "A" and
are sealed off from both the pressure and outlet ports.
These
to flow from the pressure port to the outlet port when
the spool
plished mechanically by the tractor's
MANUFACTURING
102874
PSI
-
do not attempt to alter this setting.
is
moved to push the spool
is
pressurized and
"B"
is
connected to the outlet port (Fig. 3). When
is
pulled outward, hydraulic port
is
connected to the outlet
is
spring loaded to return to
are open-center valves,
is
in neutral. Attachment "float"
so
hydraulic oil
lift
DATE
CODE
I03204
&
&
106681
VALVE
FIG
1.
OMCO
(Sundstrand Transmission)
MANUFACTURING
Control Valves
DATE
CODE
linkage.
I
06680
is
VALVE
"B"
"B"
is
free
accom-
a
MANUFACTURING DATE CODE (OMCO)
The month and year a particular hydraulic valve
was manufactured
outlet cover as shown in Figures 1
lines of information may be on the cover, which are
decoded as follows:
Example (on all valves): 0948 1 9
Example (on some valves): SR115 4
Manufacturer's Control numbers
Month Built
(1
=
January; 12
Year Built
(9
=
1979;
is
stamped on the flat side of the
&
2. One or two
=
December)
0
=
1980; 1 = 1981, etc)
0
VALVE DESCRIPTION (OMCO)
The hydraulic control valves are made up of one
or two
inlet and outlet cover. Normal working pressure
500-700
can be field adjusted. On Eaton systems the implement
relief valve
spool
valves and bodies, secured between an
PSI.
Sundstrand implement system pressure
is
part of the control valve and
is
factory
is
-1-
108494
VALVE
FIG.
FIG.
3.
109679
IMPLEMENT
2.
OMCO
(Eaton Transmission)
PRESSURE
FROM
TRANS.
OUTLET
TO
OMCO
Valve
VALVE
RELIEF
VALVE
Control Valves
INLET
TRANS.
Port
Identification
Page 5
OVERHAUL
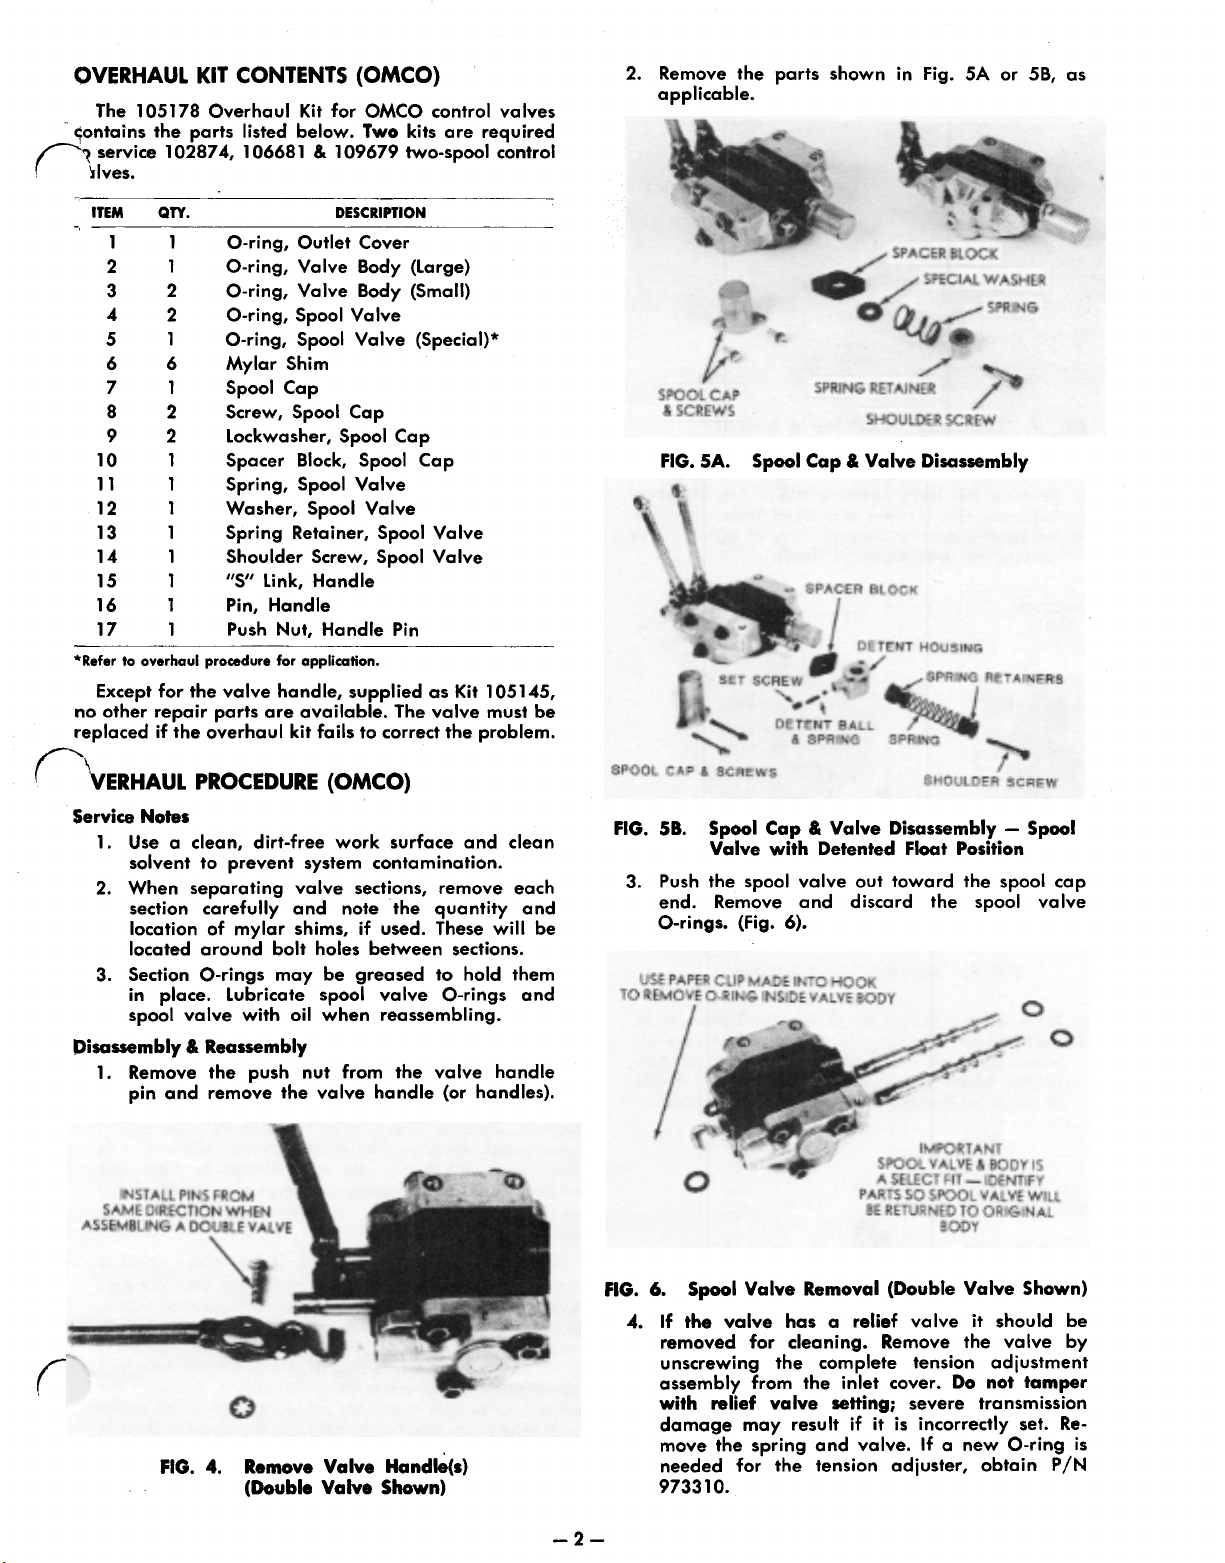
The 105178 Overhaul Kit for OMCO control valves
contains the parts listed below. Two kits are required
service 102874, 106681
KIT
CONTENTS
(OMCO)
&
109679 two-spool control
2.
Remove the parts shown in
applicable.
Fig.
5A
or 5B, as
ITEM
10
11
12
13
14
15
16
17
*Refer
Except for the valve handle, supplied as Kit 105145,
no other repair parts are available. The valve must be
replaced
QTY.
1
1
2
3
4
5
6
7
8
9
1
2
2
1
6
1
2
2
1
1
1
1
1
1
1
1
to
overhaul procedure
if
the overhaul
O-ring, Outlet Cover
O-ring, Valve Body (Large)
O-ring, Valve Body (Small)
O-ring, Spool Valve
O-ring, Spool Valve (Special)*
Mylar Shim
Spool Cap
Screw, Spool Cap
Lockwasher, Spool Cap
Spacer Block, Spool Cap
Spring, Spool Valve
Washer, Spool Valve
Spring Retainer, Spool Valve
Shoulder Screw, Spool Valve
"S"
Link, Handle
Pin, Handle
Push Nut, Handle Pin
PROCEDURE
Service
Disassembly
Notes
1. Use a clean, dirt-free work surface and clean
solvent to prevent system contamination.
2.
When separating valve sections, remove each
section carefully and note the quantity and
location of mylar shims,
located around bolt holes between sections.
3. Section O-rings may be greased to hold them
in place. lubricate spool valve O-rings and
spool valve with oil when reassembling.
&
Reassembly
1. Remove the push nut from the valve handle
pin and remove the valve handle (or handles).
DESCRIPTION
for
application.
kit
fails to correct the problem.
(OMCO)
if
used. These will be
&
SCREWS
FIG.
5A.
Spool
SPOOL CAP & SCREWS
FIG.
5B.
Spool
Cap
Valve
with
3. Push the spool valve out toward the spool cap
end. Remove and discard the spool valve
O-rings.
USE PAPER CLIP MADE INTO HOOK
TO REMOVE O-RING INSIDE VALVE BODY
(Fig.
6).
SHOULDER SCREW
Cap
&
Valve Disassembly
SPACER BLOCK
DETENT
&
Valve Disassembly
Detented
HOUSING
SHOULDER
Float
SCREW
-
Position
Spool
ASSEMBLING A DOUBLE VALVE
FIG.
4.
Remove Valve Handle(s)
(Double Valve
Shown)
IMPORTANT
SPOOL VALVE
A SELECT
PARTS
BE
FIG.
6.
Spool
Valve Removal (Double Valve Shown)
4.
If
the valve
removed for cleaning. Remove the valve by
unscrewing the complete tension adjustment
assembly from the inlet cover. Do not tamper
with
relief valve setting; severe transmission
damage may result
move the spring and valve.
needed for the tension adjuster, obtain P/N
9733 10.
has
a relief valve
if
it
FIT
SO
SPOOL VALVE WILL
RETURNED TO ORIGINAL
BODY
is
incorrectly set.
If
a new O-ring
&
BODY
-
IDENTIFY
it
should be
IS
Re-
is
Page 6

IO
SPRING
TENSION ADJUSTER
(IMPLEMENT CIRCUIT PRESSURE)
FIG.
7.
Implement Relief Valve Removed
(
108494/
5.
Remove the bolts securing the valve together.
Separate the sections one at a time, carefully
noting the location and quantity of mylar shims
around the bolt holes (if used).
CHECK FOR
SHIMS
FIG.
8.
6.
Remove and discard the O-rings and shims from
each section. Thoroughly clean and inspect all
parts. Generally, any deep scratches or scoring
of
the spool valve or bore, or other visible
damage will make the valve unserviceable.
FIG. 9.
109679
Separate Valve Sections
Single Valve Disassembled
Va Ives)
FIG.
10.
Double Valve Disassembled
7.
Reassemble the valve in reverse order, using
the new parts supplied in the overhaul kit. The
following assembly notes apply:
a. Use care not to pinch O-rings between sec-
tions. Torque bolts to
b.
Install an O-ring in valve body. Insert spool
valve from spool cap end, then install valve
handle.
c.
Install an O-ring in the groove at the spool
cap end
made before
Code"), use the special oversize O-ring,
which
ring.
d. When securing the shoulder screw (Fig.
be sure the shoulder passes through the
center of the special washer, or the spool
valve will operate in only one direction.
e. The float detent, on valves
(Fig.
the bottom of the valve. Properly adjusted,
the spool valve
tion when engaged, yet release easily when
light
VALVE
or two spool valves and a cast iron valve body.
Normal working pressure
ment relief valve
factory set at
setting. Severe transmission damage may
to the applicable repair manual for system pressure
tests and adjustments.
moved into valve, one port
becomes an outlet. When spool
ports are reversed.
return to a middle, "neutral" position, where both
lift
outlet ports. These are open-center valves,
oil
port when the spool
accomplished mechanically by the tractor's
age, or through a detented
one spool of the two-spool control valve.
DESCRIPTION
The hydraulic control valves are made up
There are two ports for each spool. When spool
cylinder ports are sealed
is
free to flow from the pressure port to the outlet
of
the valve body.
6-75
is
slightly thicker than the standard
5B),
is
adjusted using the set screw on
pressure
is
(VICTOR)
is
part of the control valve and
700
PSI
-
do not attempt
Spool
is
in neutral. Attachment float
72-75
(see "Manufacturing Date
will
lock into the float posi-
applied to the handle.
is
500-700
is
pressurized and one port
is
valve
off
from the pressure and
in. Ibs.
If
the valve was
so
equipped
PSI.
An imple-
to
alter this
result.
moved out of valve,
is
spring loaded to
so
hydraulic
lift
float
position provided on
of
5),
one
Refer
link-
is
is
is
3-
Page 7

1100
8
&
1
1
VALVE
RELIEF
VALVE
FIG. 11.
ATTACHMENT
BASE END
ATTACHMENT
CYL. ROD EN
FIG. 12.
OVERHAUL
VICTOR
contains the parts listed below.
The
1
10068 & 1
109081
VICTOR Control Valves
(Eaton Transmission)
TRANS. TRANS.
KIT
Overhaul Kit for VICTOR control valves
io
VICTOR Valve
CONTENTS (VICTOR)
1 1066
Control Valves
Port
Identification
10492
VALVE
i
TTACHMENT
YL. BASE END
ATTACHMENT
CYL.
ROD
TPH CYL.
BASE END
END
ITEM
10
11
12
13
14
15
16
17
Except for the valve handle, handle link, clevis pin
and cotter
The valve must be replaced if the overhaul kit fails
to solve the problem.
QTY.
1
2
3
4
5
6
7
8
9
2
4
4
1
2
3
1
1
1
1
1
2
2
1
1
2
1
pins,
"O"
"O"
Screw With Lockwasher
Spacer Screw
Steel
Washer
Spacer
Return Spring
Return Spring
Detent Spacer Screw
Spacer
Spring
Spring
Spring
Ball Retainer
Gasket
Steel
no other repair parts are available.
DESCRIPTION
Ring - Load Check Plug
Ring - Spool
Ball - Detent
-
Spool w/o Detent
-
Spool w/o Detent
-
Spool With Detent
-
Spool With Detent
-
Load
Check
Valve
-
Detent
-
Relief Valve
-
Relief Valve
Ball - Relief Valve
OVERHAUL PROCEDURE (VICTOR)
Service
Disassembly
Notes
1.
Use
a clean, dirt-free work surface and clean
solvent to prevent system contamination.
2.
lubricate spool valve O-rings and spool valve
with oil when reassembling.
&
Reassembly
1.
Remove the snap ring from
cap (Fig.
2.
Remove the screw and washer from the retainer
cap and remove the cap, spring and washer.
3.
Remove the clevis pin from
remove the handle and handle link (Fig.
4.
Pull the spool out of the valve body. Remove
and discard
13).
the
(SINGLE
O-rings.
SPOOL
the
spool retainer
the
handle and
VICTOR)
14).
ITEM
Except for the valve handle, handle link, clevis
pin and cotter pins, no other repair parts are avail-
\
able.
fails to correct the problem.
VICTOR
Tho
contains the parts listed below.
1
2
3
4
5
6
7
8
9
10
QTY.
2
The
valve must be replaced
1
10492
109097
O-ring,
Washer (Under Return Spring)
1
Spool Return Spring
1
1
Spool Retainer Cap
Snap Ring
1
Washer (Under
1
1
Screw,
1
Ball (Relief Valve)
1
Spring, White (Relief Valve)
1
Gasket,
Control Valve
Overhaul Kit for VICTOR control valves
Spool
Spool
Relief
DESCRIPTION
Valve
7)
Retainer
Valve Cap
if
the overhaul kit
4-
FIG.
RETAINER CAP
SCREW
SPRING
13.
Remove Retainer Cap and Return Spring
FIG.
14.
Remove Handle and
&
WASHER
SNAP RING
Spool
Page 8

5.
The
relief valve should be removed for cleaning.
Remove the cap nut; discard the gasket (Fig.
15).
6.
Using a center punch, lightly mark the adjustment set screw and valve body
can be returned to
tamper
mission damage may result
set.
7.
Remove the set screw, spring and ball.
8.
Reassemble the valve in reverse order, using
the new parts supplied in the kit. The following
assembly notes apply:
a. Be sure to place the relief valve set screw
b.
with
relief valve setting; severe trans-
FIG.
15.
Implement Relief Valve
in its exact original location.
The overhaul
spring and ball. Use these parts only
necessary due to damage or wear.
original parts are replaced, implement
system pressure should be checked using
an accurate gauge.
adjust the relief valve set screw to obtain
this value. Gauge connection
the Eaton Model
Repair Manual.
its
exact position. Do not
MUST
ORIGINAL POSITION
kit
contains a new relief valve
If
11
Automatic Transmission
BE
RETURNED
not
so
the set screw
if
it
is incorrectly
700
PSI,
is
TO
shown in
If
the
carefully
if
move cotter pin, clevis pin and handle from spool.
Remove
3.
Remove two detent plugs, springs and balls from
detent end cap (Fig.
cap screws and end cap from valve.
4.
Unscrew detent screw from spool and remove spac-
er, spring and two washers from valve.
5.
Remove cotter pin and link from valve body and
handle. Pull handle and spool out of valve.
move cotter pin, clevis pin and handle from spool.
Remove
NOTE: Relief valve should be removed for inspection and cleaning (Fig.
a new relief valve spring, ball retainer and ball.
Use
wear. Record number of turns of adjustment screw
during removal.
6.
Remove relief valve cap and steel gasket from
valve (Fig.
“O”
Rings from valve body.
FIG.
17.
"0"
Rings from valve body.
these parts only
18).
17).
Remove two detent end
Spool With Detent
18).
Overhaul
if
necessary due to damage or
kit
Re-
contains
Disassembly
IMPORTANT NOTE: Spools and valve body are
matched set and cannot be interchanged.
1.
Remove spool without detent first; Remove two
screws, end cap, spacer screw, spacer, spring, and
washer from valve (Fig.
2.
Remove cotter pin and link from valve body and
handle. Pull handle and spool out
FIG.
(TWO
SPOOL
16.
SPOOL VICTOR)
16).
BORE
SPOOL
Spool
Without Detent
LINK
a
COTTER
CLEVIS
PIN
COTTER PIN
of
valve. Re-
a
VALVE BODY
PIN
FIG.
18.
Pressure Relief Valve
7.
Punch aligning marks on end of adjustment screw
and valve body. loosen screw jam nut. Unscrew
adjustment screw and remove screw and steel
a
gasket from valve body. Record number of turns
taken to remove adjustment screw.
8.
Remove relief valve spring, ball retainer and ball
from valve.
9.
Remove two load check valve plugs,
springs and poppets from valve (Fig.
“O”
19).
Rings,
-5
Page 9

FIG.
19.
Load
Check Valves
Assembly
1.
2.
3.
(TWO
SPOOL
Coat two load check poppets and
lithium base grease (Fig. 19). Install plugs,
Rings, check poppets and springs into top center
bores of valve.
Position valve body
vertical (Fig. 18). Drop ball into bore
rests on relief seat. Apply grease to ball retainer
and spring and assemble. Enough grease should
be used
Insert spring and ball retainer assembly into bore
against ball.
screw and install screw into valve bore number of
turns recorded during disassembly. Hold adjustment screw and tighten jam nut to
torque. Insert metal gasket over adjustment screw
and screw cap onto adjustment screw.
Coat detent spool with oil and slide spool into
valve bore from relief valve side (Fig. 17). Push
spool into bore only far enough to expose handle
side
with lithium grease and install in groove of valve
body. Check that
groove. Push spool over
so
in valve body.
Coat
groove of valve body. Check that
properly seated in groove. Push spool over
so
spring and ball retainer
"0"
Ring groove in valve body. Coat
that other end of spool exposes
"0"
Ring with lithium grease and install in
VICTOR)
"0"
so
that relief valve bore
Slide
metal gasket on adjustment
"0"
Ring
is
properly seated in
"0"
Ring only far enough
"0"
Rings with
so
stick
45-52
Ring groove
"0"
"0"
that ball
together.
ft.
Ibs.
"0"
Ring
Ring
"0"
is
is
Ring until end of spool
Position handle into slot of spool and align bottom hole of handle and hole in spool. Install
clevis pin into handle and spool and secure using
cotter pin. Install link into holes of handle and
valve body and secure using cotter pin.
Apply grease to inside and outside of spacer and
install on spring. Slide two washers onto end of
spool. Install detent screw into spacer and spring
assembly. Install detent screw, spacer and spring
on end of spool. Torque to
in flat surface of end cover.
spring with notch positioned down and secure to
valve using two screws. Apply lithium grease into
holes
of
end cap and on two detent springs. Install steel balls, springs and plugs into holes in
end cap.
4.
Coat remaining spool with oil and slide spool into
valve bore from
spool into bore only far enough to expose handle
side
"0"
Ring groove in valve body. Coat
Ring with lithium grease and install in groove of
valve body. Check that
in groove. Push spool over
enough
Ring groove in valve body.
Coat
groove of valve body. Check that
properly seated in groove. Push spool over
Ring until end of spool
Position handle into slot of spool and align bottom
hole
into handle and spool and secure using cotter pin.
Install link into holes of handle and valve body
and secure using cotter pin.
Apply grease to inside and outside of spacer and
install on spring.
Install detent screw into spacer and spring assem-
bly. Install detent screw, spacer and spring on end
of
flat surface of end cap. Position end cap on valve
with notch down and secure to valve using two
screws.
so
that other end
"0"
Ring with lithium grease and install in
of
handle and hole in spool. Install clevis pin
spool. Torque to
is
flush with end of valve.
2-3
ft.
Ibs.
Slide
relief
valve side (Fig. 16). Push
"0"
Ring
is
properly seated
"O"
Ring only far
of
spool exposes
is
flush with end of valve.
Slide
washer onto end of spool.
2-3
ft.
Ibs.
Locate notch in
Locate notch
end cap over
"0"
Ring
"0"
"0"
is
"0"
LIFT
GENERAL
This
(lift
cylinders listed below. The
GT-14, 18HP Automatic and D-Series Automatic tractors
D-250
105254
1976-77
prior tractors where original equipment 6618
cylinder has been replaced by 105254.
106249
1978
INFORMATION
manual covers the overhaul of the hydraulic
is
not repairable, nor are the cylinders used on
tractors.
-
C-Series Automatic tractors, and 1975 and
&
108872
&
later
-
C
&
GT-Series Automatic tractors.
CYLINDER SERVICE
8365
cylinder used on
CYLINDER DESCRIPTION
The
lift
piston
cylinder consists
'secured to a chrome plated piston rod. The
of
a bidirectional steel
piston works in a machined steel cylinder, and the
direction of travel
valve. The cylinder
has a sealed piston rod guide bushing at the opposite
end.
Three
types
The
first has the piston welded to the piston rod and
uses a threaded clevis at the exposed end. The second
type has a piston secured with a nut and the clevis
is
welded to the exposed end. The welded clevis type
of cylinder was first used during the 1981 model year.
The third type has a piston threaded onto the piston
rod and the clevis
cylinder was
is
controlled by, the hydraulic lift
is
welded closed at one end and
of piston and rod construction are used.
is
welded to the exposed end.
first
used during the
1983
model year.
This
Page 10

ROUND-WIRE
FIG.
21.
O-RING & GASKET
The 101699 O-ring and Gasket
following items, and
(Fig. 21):
\
RETAINING
Hydraulic
KIT
CONTENTS
is
used on cylinders
Lift
THREADED CLEVIS
CLEVIS SHAPE
VARIES
RING
Cylinders
Kit
contains the
A
&
B
FIG.
22A.
Remove Clevis & Snap
. WORK POINTED TOOL
UNDER RETAINING RING
TO EASE REMOVAL
Ring
ITEM
*Removeable
The 109088 Service Kit contains the following
items, and
ITEM
No
must be replaced
problem.
QTY.
1
2
3
4
5
6
QTY.
1
2
3
4
5
6 1
7
8
other repair parts are available.
O-ring Piston and Guide Bushing
2
O-ring, Guide Bushing
1
Rod Wiper, Guide Bushing
1
Gasket, Piston
2
Snap Ring, Cylinder
1
O-ring, Piston Rod*
1
Piston Construction.
is
used on cylinder C (Fig. 21):
1
O-ring, Piston Rod
O-ring, Guide Bushing
1
Back-up Washer, (Wiper
1
1
1
1 O-ring, Piston
1 Retaining Ring
Guide Bushing O-ring)
Wiper, Guide Bushing
O-ring, Guide Bushing
Rectangular Section Seal, Piston
if
the service
DESCRIPTION
DESCRIPTION
kit
fails to solve the
O.D.
The
I.D.
I.D.
Side
lift
cylinder
of
O.D.
RETAINING RIN
1.
TAP
GUIDE
INTO CYLINDER
FIG.
22B.
3.
Thread
if
bushing and piston with a soft-faced mallet.
4. Cylinders serviced with 101699
in Fig. 24. Cylinders serviced with 109088
are shown in Fig.
card all O-rings and seals. Straighten out a
paper clip and form a hook in one end to
remove O-rings from grooves.
the
clevis partially onto the piston rod,
applicable. Tap the cylinder off the rod
BUSHING
Remove Retaining Ring
25
and 26. Remove and
114
DOWN
in.
Kit
are shown
Kit
dis-
OVERHAUL PROCEDURE
Service Notes
1. Use a clean, dirt-free work surface and clean
solvent to prevent system contamination.
2.
lubricate all internal parts with oil when
reassembling.
&
Disassembly
Loosen the setscrew and remove the clevis
1.
(threaded type).
with locking pliers just behind the clevis, if
necessary. and
Remove the snap ring or retaining ring from
2.
the cylinder (Fig.
Reassembly
The
22A
piston rod may be held
or
22B). unserviceable.
-7-
FlG. 23.
5.
Clean and carefully inspect all parts. In general, any deep scratches or scoring of the piston
its
bore,
of
the rod bushing will make the cylinder
Cylinder Removal
or
of the piston
rod
and the
I.D.
Page 11

FIG.
USE TAPE ON
\
24.
Piston, Rod & Bushing
THREADS WHEN INSTALLING O-RING AND CLEVIS
PISTON ROD
Seals
S
1/4
in.
DEEP)
TO REMOVE, USE STRAP WRENCH
DRILL TWO HOLES IN END, AS SHOWN,
FOR
PINS
RE-STAKE AFTER ASSEMBLY.
FIG.
25.
Piston Removal
USE TAPE ON THREADS
WHEN INSTALLING O-RING
ROD
GUIDE BUSHING
Y STAKED TO
OR
SPANNER WRENCH.
I
O-RING & BACK-UP
WASHER (WIPER SIDE)
FIG.
26.
Piston,
install the new O-rings, gaskets and seals con-
6.
tained
in
the service
on each side
cylinders). Use masking tape as indicated in
Fig.
24 & 26 to protect the O-rings from damage
during assembly.
7.
Use extreme care when installing parts into the
cylinder. Be sure the piston and bushing O-rings
are not cut on the grooves inside the cylinder.
Carefully align the parts before attempting to
insert them into the cylinder.
8.
After reinstalling the retaining ring
fully extend the piston rod until the piston
pushes the rod guide bushing up to "capture"
the retaining ring.
Rod
&
Bushing Seals
kit.
One gasket should be
of.
the piston O-ring (Fig. 24
(Fig.
ROD
OR
22B),
-
-8-
Page 12

of
Product Information and specifications are shown here in as
time
of printing Wheel Horse Products. Inc reserves the right to
change product specifications, designs and standard equipment without
notice and without incurring obligation
the
WHEEL
HOME
 Loading...