

Page 1
PowerClear™Snowthrower
ModelNo.38578—SerialNo.310000001andUp
FormNo.3362-571Rev B
Operator'sManual
Introduction
Thissnowthrowerisintendedtobeusedby
residentialhomeownersorprofessional,hired
operators.Itisdesignedprimarilyforremoving
snowfrompavedsurfaces,suchasdriveways
andsidewalks,andothersurfacesfortrafcon
residentialorcommercialproperties.Itisnot
designedforremovingmaterialsotherthansnow,
norisitdesignedforclearingoffgravelsurfaces.
Readthisinformationcarefullytolearnhowtooperate
andmaintainyourproductproperlyandtoavoidinjury
andproductdamage.Youareresponsibleforoperating
theproductproperlyandsafely.
YoumaycontactTorodirectlyatwww.Toro.comfor
productandaccessoryinformation,helpndinga
dealer,ortoregisteryourproduct.
Wheneveryouneedservice,genuineToroparts,or
additionalinformation,contactanAuthorizedService
DealerorToroCustomerServiceandhavethemodel
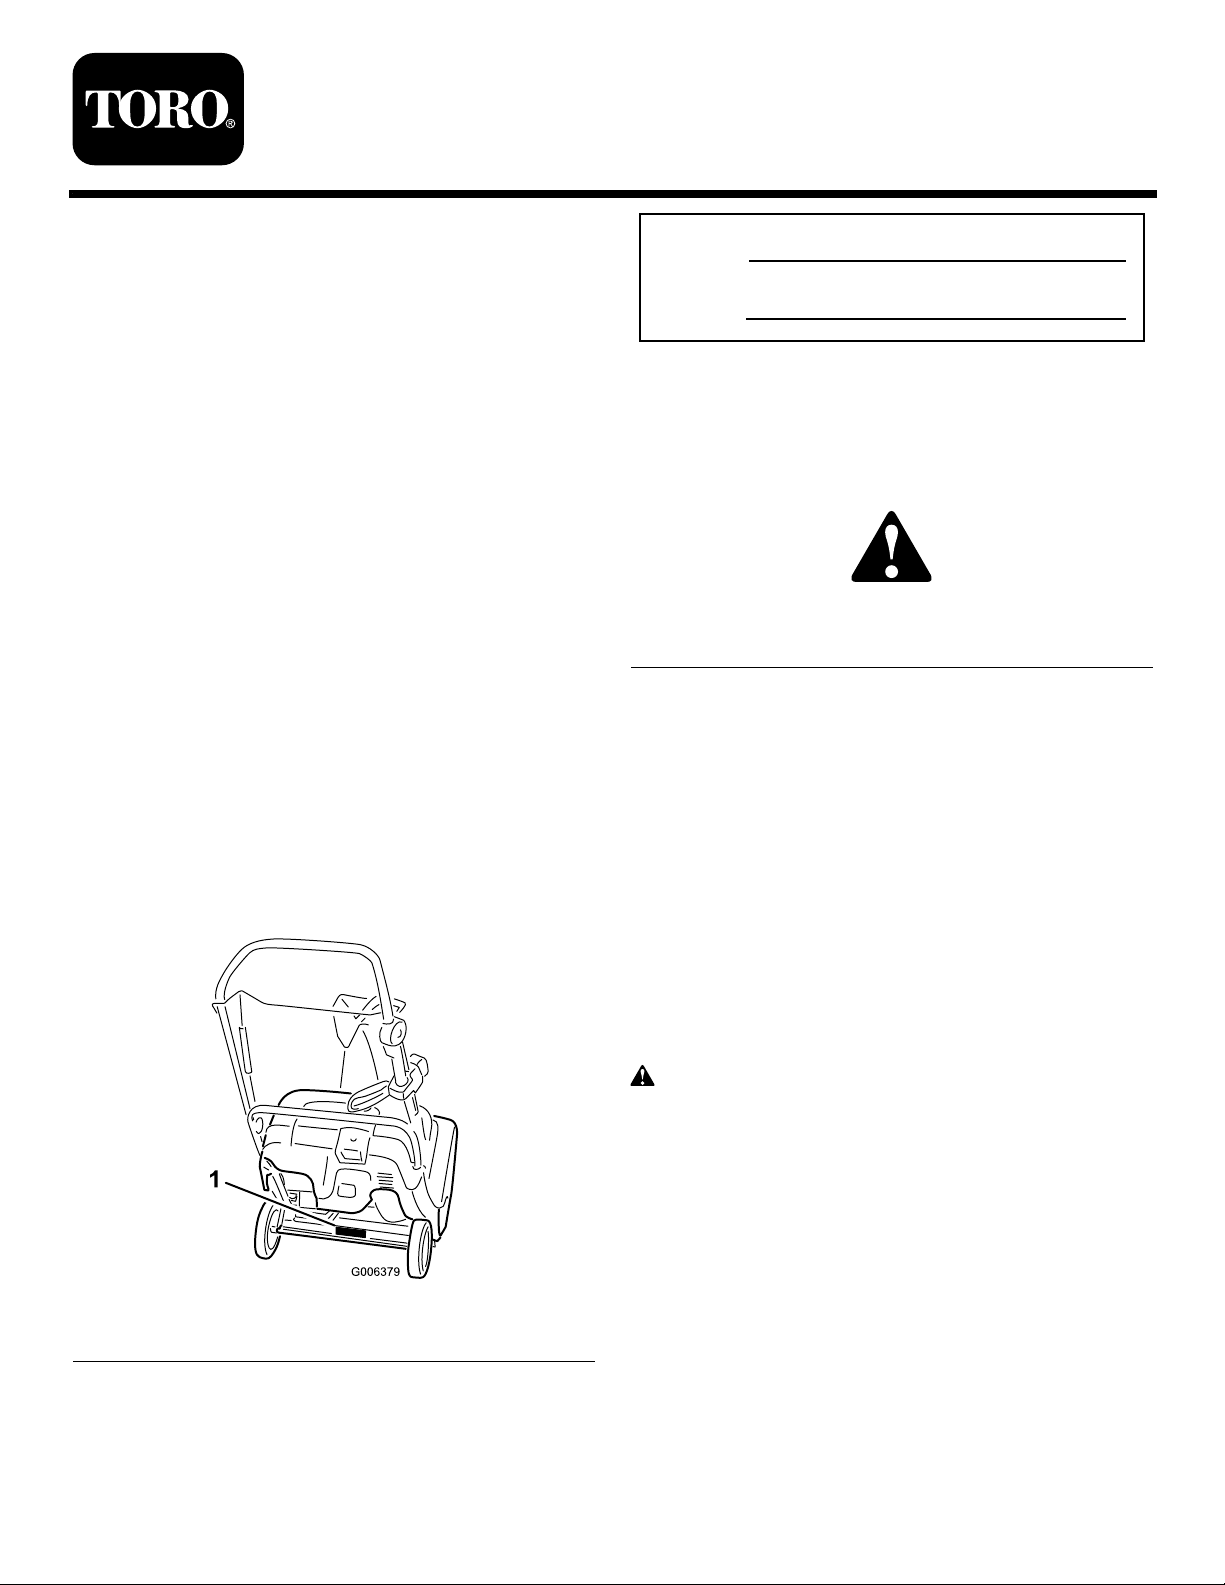
andserialnumbersofyourproductready.Figure1
identiesthelocationofthemodelandserialnumbers
ontheproduct.Writethenumbersinthespace
provided.
ModelNo.
SerialNo.
Thismanualidentiespotentialhazardsandhas
safetymessagesidentiedbythesafetyalertsymbol
(Figure2),whichsignalsahazardthatmaycauseserious
injuryordeathifyoudonotfollowtherecommended
precautions.
Figure2
1.Safetyalertsymbol
Thismanualuses2wordstohighlightinformation.
Importantcallsattentiontospecialmechanical
informationandNoteemphasizesgeneralinformation
worthyofspecialattention.
Safety
ThissnowthrowermeetsorexceedstheB71.3
specicationsoftheAmericanNationalStandards
Instituteineffectatthetimeofproduction.
1.Modelandserialnumberlocation
©2009—TheToro®Company
8111LyndaleAvenueSouth
Bloomington,MN55420
Figure1
Registeratwww.Toro.com.
Readandunderstandthecontentsofthismanual
beforeyoustarttheengine.
Thisisthesafetyalertsymbol.Itisusedtoalert
youtopotentialpersonalinjuryhazards.Obeyall
safetymessagesthatfollowthissymboltoavoid
possibleinjuryordeath.
Improperlyusingormaintainingthissnowthrower
couldresultininjuryordeath.Toreducethis
potential,complywiththefollowingsafety
instructions.
Thissnowthroweriscapableofamputatinghands
andfeetandofthrowingobjects.Failuretoobserve
thefollowingsafetyinstructionscouldresultin
seriousinjury.
OriginalInstructions(EN)
PrintedintheUSA
AllRightsReserved
Page 2

Training
•Read,understand,andfollowallinstructionsonthe
machineandinthemanual(s)beforeoperatingthis
unit.Bethoroughlyfamiliarwiththecontrolsand
theproperuseoftheequipment.Knowhowtostop
theunitanddisengagethecontrolsquickly .
•Donotattempttoclearsnowfromagravelor
crushedrocksurface.Thisproductisintendedfor
useonlyonpavedsurfaces.
•Neverattempttomakeanyadjustmentswhile
theengineisrunning(exceptwhenspecically
recommendedbymanufacturer).
•Neverallowchildrentooperatetheequipment.
Neverallowadultstooperatetheequipmentwithout
properinstruction.
•Keeptheareaofoperationclearofallpersons,
particularlysmallchildren.
•Exercisecautiontoavoidslippingorfalling.
Preparation
•Thoroughlyinspecttheareawheretheequipmentis
tobeusedandremovealldoormats,sleds,boards,
wires,andotherforeignobjects.
•Donotoperatetheequipmentwithoutwearing
adequatewintergarments.Avoidloosetting
clothingthatcangetcaughtinmovingparts.Wear
footwearthatwillimprovefootingonslippery
surfaces.
•Handlefuelwithcare;itishighlyammable.
–Useanapprovedfuelcontainer.
–Neveraddfueltoarunningengineorhotengine.
–Fillfueltankoutdoorswithextremecare.Never
llfueltankindoors.
–Neverllcontainersinsideavehicleorona
truckortrailerbedwithaplasticliner.Always
placecontainersontheground,awayfromyour
vehicle,beforelling.
–Whenpractical,removegas-poweredequipment
fromthetruckortrailerandrefuelitonthe
ground.Ifthisisnotpossible,thenrefuelsuch
equipmentonatrailerwithaportablecontainer,
ratherthanfromagasolinedispensernozzle.
–Keepthenozzleincontactwiththerimof
thefueltankorcontaineropeningatalltimes,
untilrefuelingiscomplete.Donotuseanozzle
lock-opendevice.
–Replacegasolinecapsecurelyandwipeupspilled
fuel.
•Alwayswearsafetyglassesoreyeshieldsduring
operationorwhileperforminganadjustmentor
repairtoprotecteyesfromforeignobjectsthatmay
bethrownfromthemachine.
Operation
•Donotputhandsorfeetnearorunderrotatingparts.
Keepclearofthedischargeopeningatalltimes.
•Exerciseextremecautionwhenoperatingonor
crossinggraveldrives,walks,orroads.Stayalertfor
hiddenhazardsortrafc.
•Afterstrikingaforeignobject,stoptheengine,
removetheignitionkey ,thoroughlyinspectthesnow
throwerforanydamage,andrepairthedamage
beforerestartingandoperatingthesnowthrower.
•Iftheunitshouldstarttovibrateabnormally,stop
theengineandcheckimmediatelyforthecause.
Vibrationisgenerallyawarningoftrouble.
•Stoptheenginewheneveryouleavetheoperating
position,beforeuncloggingtherotorbladehousing
ordischargechute,andwhenmakinganyrepairs,
adjustmentsorinspections.
•Whencleaning,repairing,orinspectingthesnow
thrower,stoptheengineandmakecertainthatthe
rotorbladesandallmovingpartshavestopped.
•Donotruntheengineindoors,exceptwhenstarting
theengineandfortransportingthesnowthrower
inoroutofthebuilding.Opentheoutsidedoors;
exhaustfumesaredangerous.
•Exerciseextremecautionwhenoperatingonslopes.
•Neveroperatethesnowthrowerwithoutproper
guardsandothersafetyprotectivedevicesinplace
andworking.
•Neverdirectthedischargetowardpeopleorareas
wherepropertydamagecanoccur.Keepchildren
andothersaway.
–Iffuelisspilledonclothing,changeclothing
immediately.
•Useextensioncordsandreceptaclesasspeciedby
themanufacturerforallunitswithelectricstarting
motors.
•Donotoverloadthemachinecapacitybyattempting
toclearsnowattoofastarate.
•Lookbehindandusecarewhenbackingupwiththe
snowthrower.
2
Page 3

•Disengagepowertotherotorbladeswhensnow
throweristransportedornotinuse.
•Neveroperatethesnowthrowerwithoutgood
visibilityorlight.Alwaysbesureofyourfooting,and
keeparmholdonthehandles.Walk;neverrun.
•Nevertouchahotengineormufer.
•Beforeadjusting,cleaning,repairing,andinspecting
thesnowthrower,andbeforeuncloggingthe
dischargechute,stoptheengine,removethekey ,
andwaitforallmovingpartstostop.
•Beforeleavingtheoperatingposition,stopthe
engine,removetheignitionkey,andwaitforall
movingpartstostop.
ClearingaCloggedDischarge
Chute
Handcontactwiththerotatingrotorbladesinsidethe
dischargechuteisthemostcommoncauseofinjury
associatedwithsnowthrowers.Neveruseyourhandto
cleanoutthedischargechute.
Toclearthechute:
•Shuttheengineoff!
•Wait10secondstobesuretherotorbladeshave
stoppedrotating.
•Alwaysuseaclean-outtool,notyourhands.
MaintenanceandStorage
•Checkallfastenersatfrequentintervalsforproper
tightnesstobesuretheequipmentisinsafeworking
condition.
•Neverstorethemachinewithfuelinthefueltank
insideabuildingwhereignitionsourcesarepresent,
suchashotwaterheaters,spaceheaters,orclothes
dryers.Allowtheenginetocoolbeforestoringin
anyenclosure.
•Ifashield,safetydevice,ordecalisdamaged,
illegible,orlost,repairorreplaceitbeforebeginning
operation.Also,tightenanyloosefasteners.
•Donotsmokewhilehandlinggasoline.
•Donotusethesnowthroweronaroof.
•Donottouchtheenginewhileitisrunningorsoon
afterithasstoppedbecausetheenginemaybehot
enoughtocauseaburn.
•Performonlythosemaintenanceinstructions
describedinthismanual.Beforeperformingany
maintenance,service,oradjustment,stoptheengine
andremovethekey.Ifmajorrepairsareeverneeded,
contactanAuthorizedServiceDealer.
•Donotchangethegovernorsettingsontheengine.
•Whenstoringthesnowthrowerformorethan30
days,drainthefuelfromthefueltanktoprevent
apotentialhazard.Storefuelinanapprovedfuel
container.Removethekeyfromtheignitionswitch
beforestoringthesnowthrower.
•PurchaseonlygenuineTororeplacementpartsand
accessories.
•AlwaysrefertotheOperator’sManualforimportant
detailsifthesnowthroweristobestoredforan
extendedperiod.
•Maintainorreplacesafetyandinstructionlabels,as
necessary.
•Runthemachineafewminutesafterthrowingsnow
topreventfreeze-upoftherotorblades.
ToroSnowthrowerSafety
Thefollowinglistcontainssafetyinformationspecic
toToroproductsorothersafetyinformationthatyou
mustknow.
•Rotatingrotorbladescaninjurengersor
hands.Staybehindthehandlesandawayfromthe
dischargeopeningwhileoperatingthesnowthrower.
Keepyourface,hands,feet,andanyotherpart
ofyourbodyorclothingawayfrommovingor
rotatingparts.
3
Page 4
SafetyandInstructionalDecals
Important:Safetyandinstructiondecalsarelocatednearareasofpotentialdanger.Replacedamaged
decals.
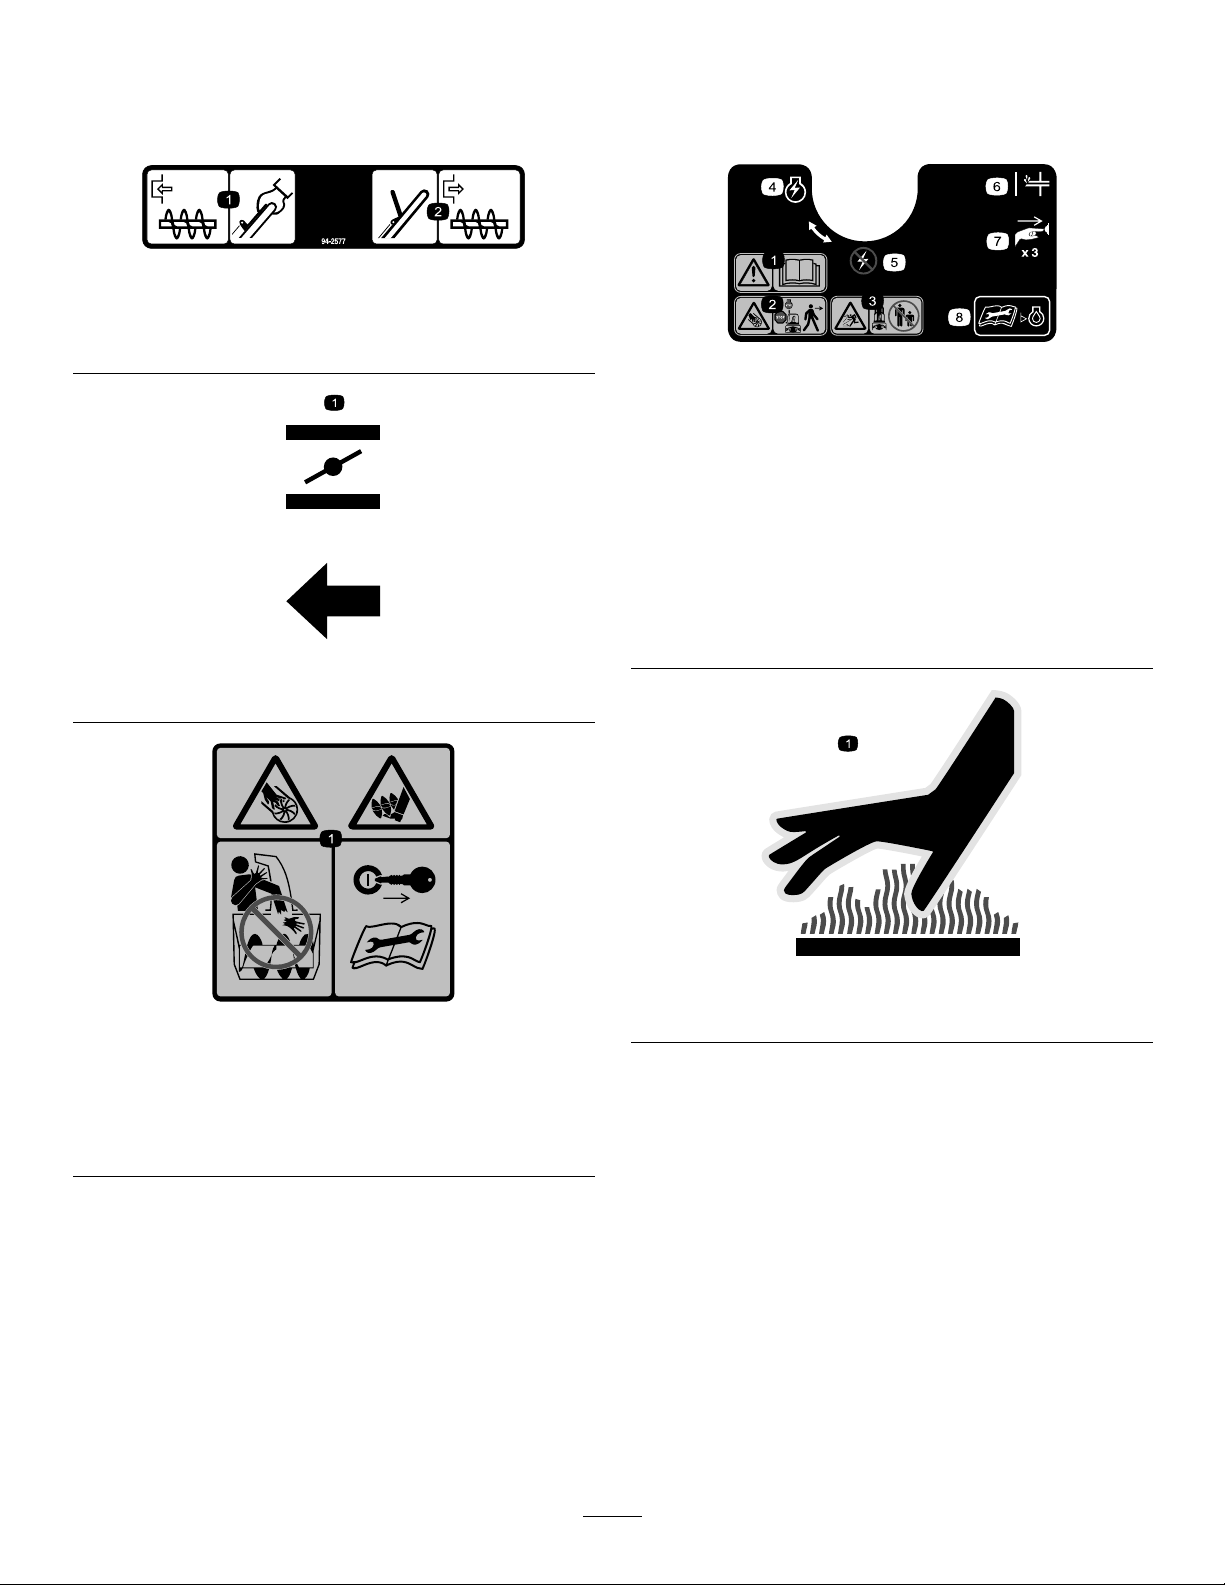
94-2577
1.Toengagetherotorblades,holdthecontrolbaragainst
thehandle.
2.Todisengagetherotorblades,releasethecontrolbar.
114-3753
1.Warning—readthe
Operator’sManual.
2.Cutting/dismemberment
hazard,rotorblades—stop
theenginebeforeleaving
themachine.
3.Thrownobject
hazard—keepbystanders
asafedistancefromthe
machine.
4.EngineswitchOn8.ReadtheOperator’s
110-9363
1.Choke
5.EngineswitchOff
6.Primer
7.Pushtheprimerthree
timestoprimetheengine.
Manualbeforechecking
engineoillevel.
114-1712
Orderpartno.1 14-1711
1.Cuttingdismemberment,impellerandcutting
dismemberment,augerhazards—donotplaceyourhandin
thechute;removetheignitionkeyandreadtheinstructions
beforeservicingorperformingmaintenance.
114-3794
1.Hotsurface(onexhaustbafe)
4
Page 5
Setup
LooseParts
Usethechartbelowtoverifythatallpartshavebeenshipped.
ProcedureDescription
1.
2.
Nopartsrequired
Screws
Chuteassembly
1.UnfoldingtheHandle
Procedure
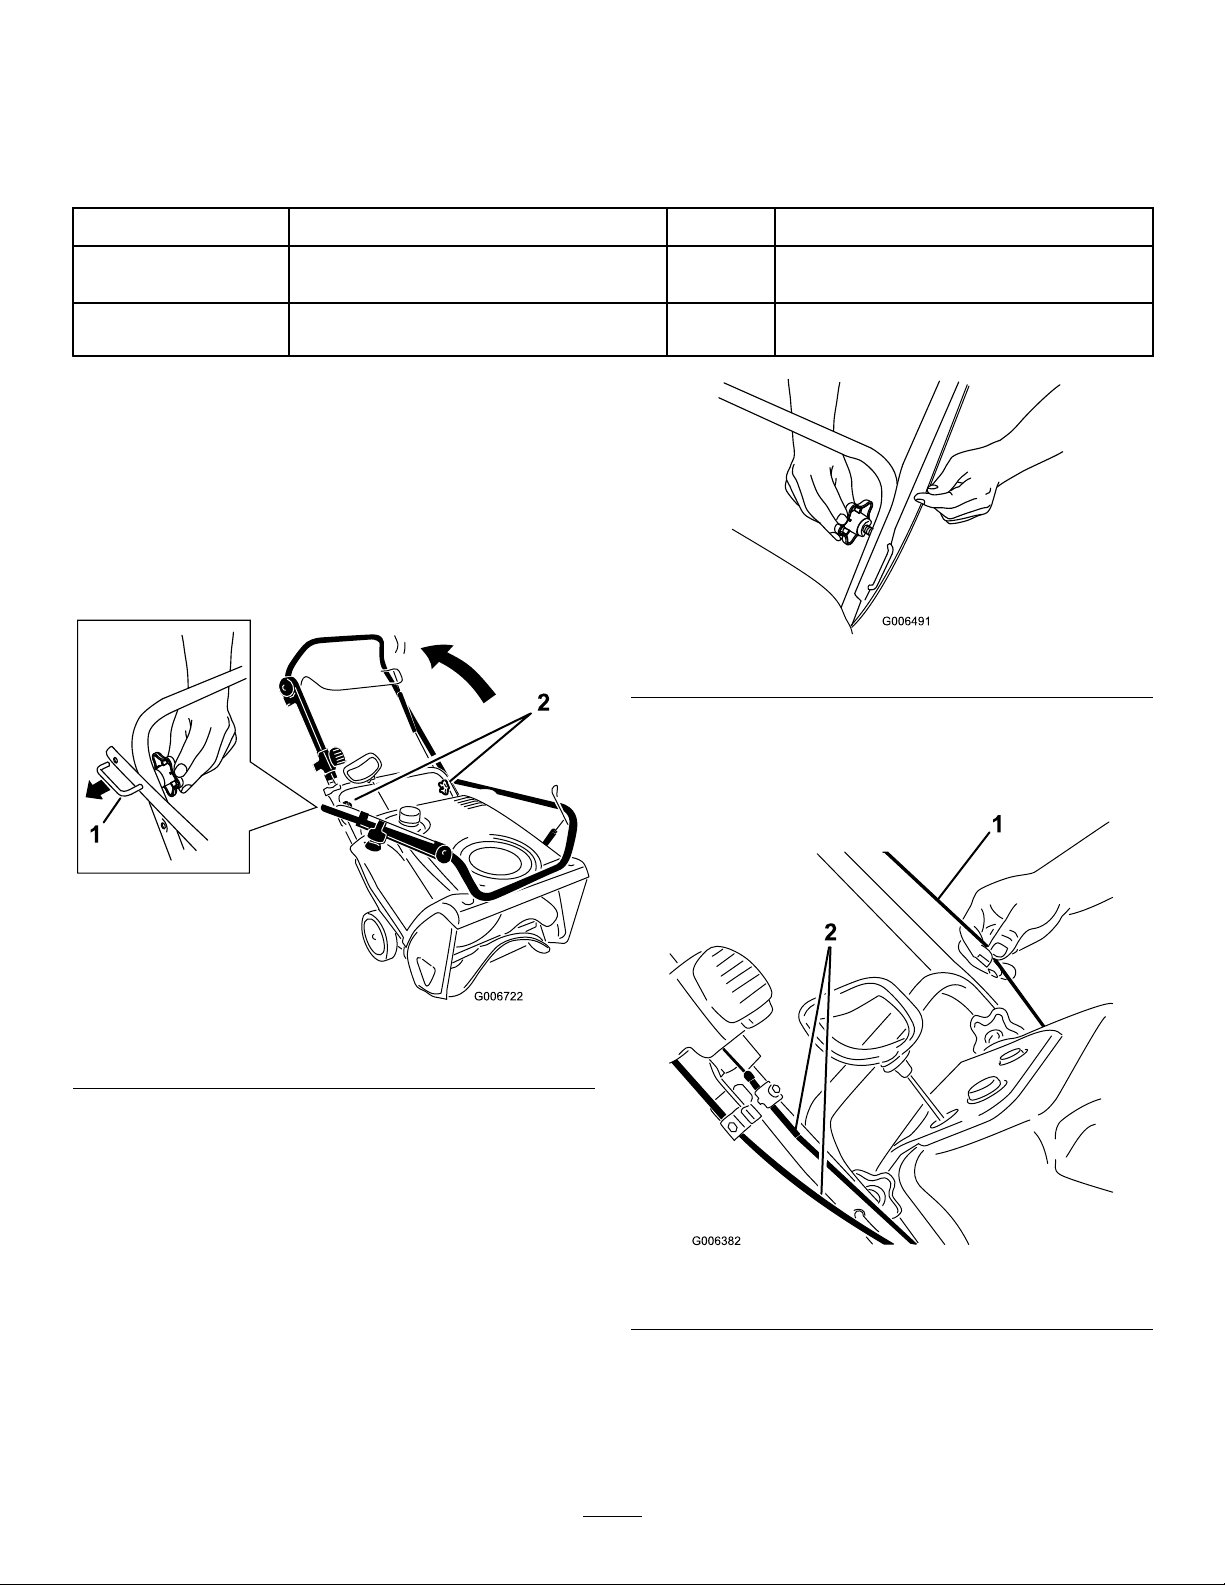
1.Loosenthehandleknobs,pulloutthe“U”-shaped
handlelocksuntilyoucanmovethehandlefreely,
androtatethehandletotheoperatingposition
(Figure3).
Qty.
–
3
1
Unfoldthehandle.
Installthedischargechute.
Figure4
Use
Important:Ensurethatyoudonotpinchor
kinkthecontrolcableortheQuickShoot™
cables(Figure5).
Figure3
1.“U”-shapedhandlelock(2)
2.Handleknobs
2.Inserttheendofthe“U”-shapedhandlelockinto
theopenholeinthehandleandtightenthehandle
knobsuntiltheyaresnug(Figure4).
Figure5
1.Controlcable2.QuickShoot™cables
5
Page 6
2.InstallingtheDischarge
Chute
3
Screws
1
Chuteassembly
Procedure
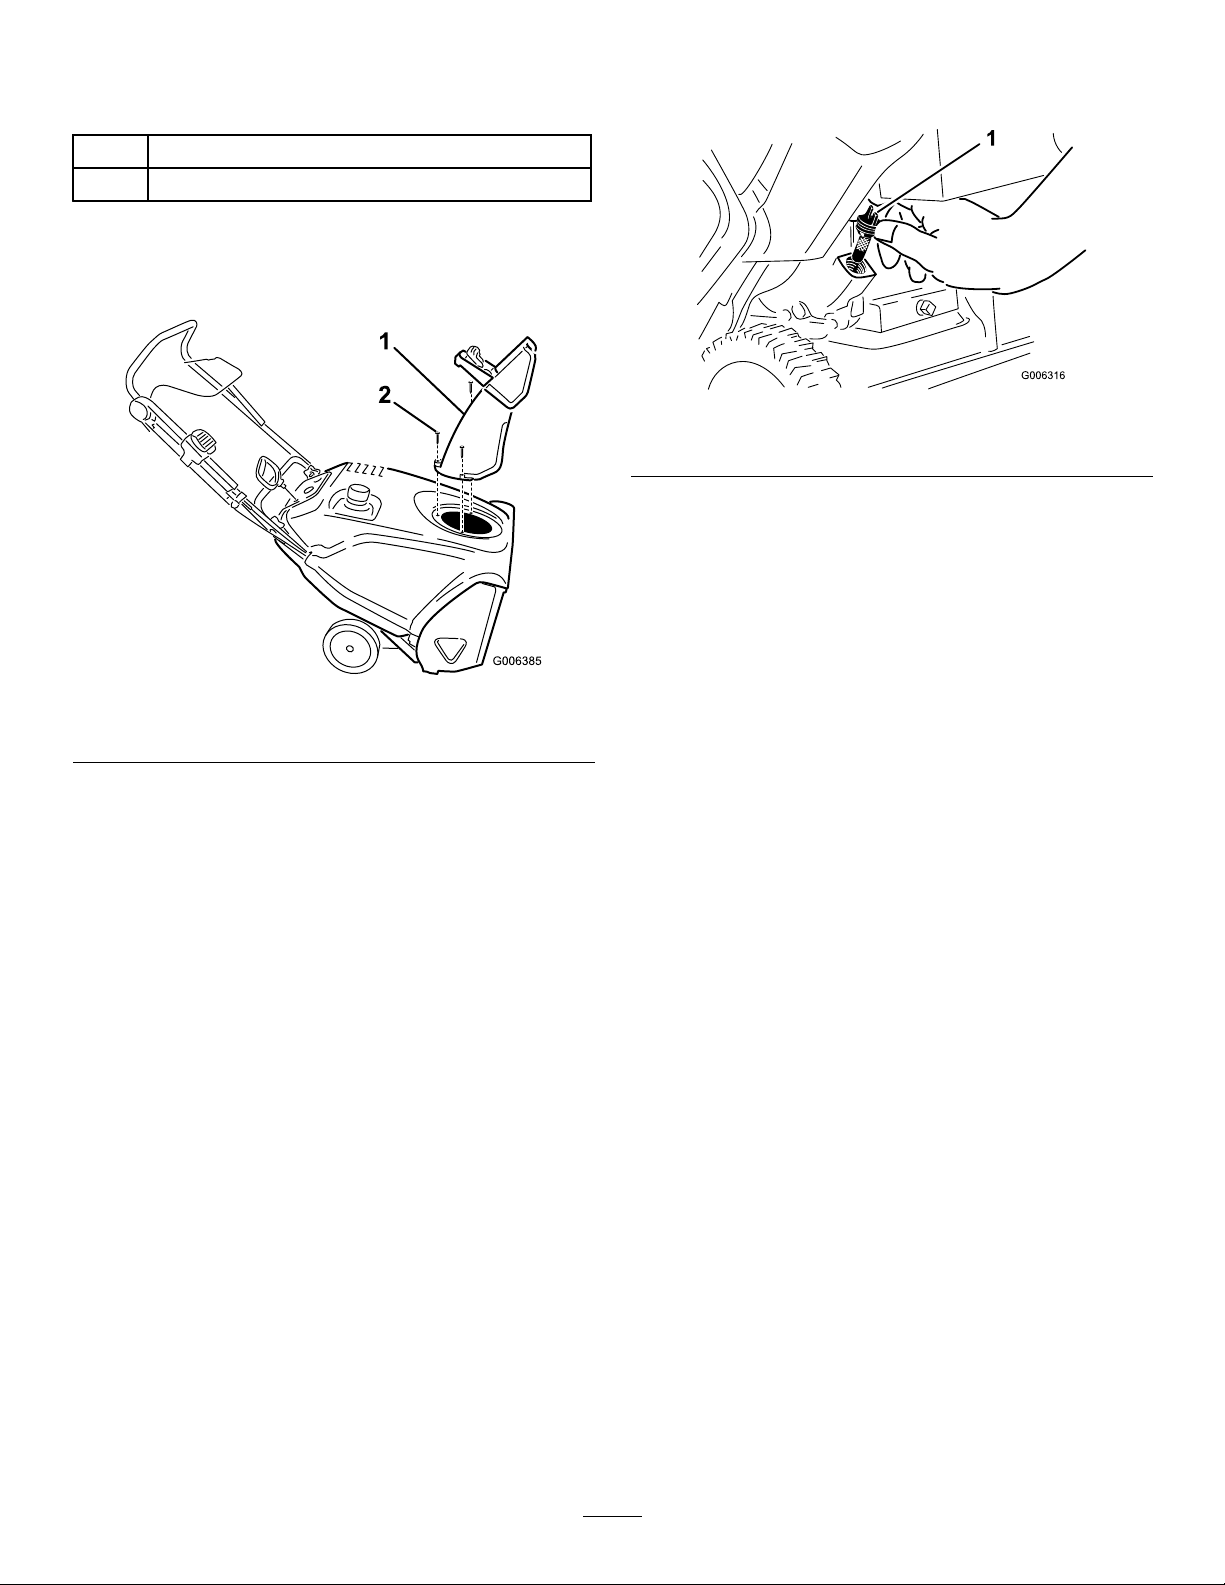
Installthedischargechuteasshown(Figure6).
Figure6
1.Dischargechute
2.Screw(3)
1.Movethesnowthrowertoalevelsurface.
2.Cleanaroundtheoilllcap(Figure7).
Figure7
1.Oilllcap
3.Unscrewtheoilllcapandremoveit.
4.Withthesnowthrowerintheoperatingposition,
carefullypouroilintothecrankcaseuntilthepoint
ofoverow.
5.Screwtheoilllcapintotheoilllholeandtighten
itsecurely.
4.AdjustingtheControlCable
Note:Foreasierinstallation,useasmallratchetwrench
totightenthescrews.
Important:Donotovertightenthescrews;
otherwiseyoumaydamagethedischargechuteand
preventitfromturningfreely.
3.FillingtheEnginewithOil
Procedure
Yoursnowthrowerdoesnotcomewithoilintheengine,
butitdoescomewithabottleofoil.
Important:Beforestartingtheengine,llthe
enginewithoil.
Note:Thebottleofoilmaycontainmorethanis
required.Donotoverlltheengine.
Maxll:21oz.(0.62l),type:automotivedetergentoil
withanAPIserviceclassicationofSJ,SL,orhigher.
•Fortemperaturesabove32°F(0°C),useSAE30.
•Fortemperaturesbetween0°Fand32°F(–18°Cand
0°C),useSAE5W30orSAE10.
Procedure
RefertoAdjustingtheControlCableinMaintenance.
•Fortemperaturesbelow0°F(–18°C),useSAE
0W30.
6
Page 7

ProductOverview
Figure8
1.Chutedeectortrigger
2.Dischargechute8.Ignitionkey
3.Fueltankcap
4.Controlbar10.Oildrainplug
5.QuickShoot™control11.Oilllcap
6.Recoilstarthandle
7.Primer
9.Chokelever
12.Chutedeector
FillingtheFuelTank
Fillthefueltankwithfreshunleadedgasolinehavingan
octaneratingatornear87fromamajorname-brand
servicestation(Figure9).
Figure9
1.1/4inch(6mm)
Important:Donotaddoiltothegasoline.
Operation
Note:Determinetheleftandrightsidesofthemachine
fromthenormaloperatingposition.
Gasolineisextremelyammableandexplosive.
Areorexplosionfromgasolinecanburnyou
andothers.
•Topreventastaticchargefromigniting
thegasoline,placethecontainerand/or
snowthroweronthegroundbeforelling,
notinavehicleoronanobject.
•Fillthetankoutdoorswhentheengineis
cold.Wipeupspills.
•Donothandlegasolinewhensmokingor
aroundanopenameorsparks.
•Storegasolineinanapprovedfuelcontainer,
outofthereachofchildren.
Important:DonotuseE85orE20fuel.Alternative
fuelswithhighalcoholcontentcancausehard
starting,poorengineperformance,andmaycause
internalenginedamage.
CheckingtheEngineOilLevel
ServiceInterval:Beforeeachuseordaily—Check
theengineoillevelandaddoilif
necessary.
1.Movethesnowthrowertoalevelsurface.
2.Cleanaroundtheoilllcap(Figure10).
Figure10
1.Oilllcap
3.Unscrewtheoilllcapandremoveit.
7
Page 8

4.Iftheoillevelislow,keepthesnowthrowerinthe
operatingpositionandcarefullypouroilintothe
crankcaseuntilthepointofoverow .(Max.ll:21
oz.(0.62l),type:SAE30detergentoilwithanAPI
serviceclassicationofSJ,SL,orhigher.)
5.Screwtheoilllcapintotheoilllholeandtighten
itsecurely.
StartingtheEngine
1.TurntheignitionkeyclockwisetotheOnposition
(Figure11).
Figure11
Figure13
Note:Removeyourglovewhenyoupushinthe
primersothataircannotescapefromtheprimer
hole.
Important:Donotusetheprimerorthechoke
iftheenginehasbeenrunningandishot.
Excessiveprimingmayoodtheengineand
preventitfromstarting.
4.Pulltherecoilstarthandle(Figure14).
2.Pulloutthechokelever(Figure12).
Figure12
1.Chokelever
3.Firmlypushintheprimer3timeswithyourthumb,
holdingtheprimerinaforasecondbeforereleasing
iteachtime(Figure13).
Figure14
Note:Ifyoupulltherecoilhandleandfeelno
resistance,thestartermaybefrozen.Thawoutthe
starterbeforeattemptingtostartthesnowthrower.
5.Whiletheengineisrunning,pushinthechokelever
slowly.
8
Page 9

EngagingtheRotorBlades
StoppingtheEngine
Toengagetherotorblades,holdthecontrolbaragainst
thehandle(Figure15).
Figure15
1.Controlbar
DisengagingtheRotorBlades
Todisengagetherotorblades,releasethecontrolbar
(Figure16).
Tostoptheengine,turntheignitionkey
counterclockwisetotheOffposition(Figure17).
Figure17
AdjustingtheDischargeChute
andChuteDeector
Toadjustthedischargechute,pressthetriggerofthe
QuickShoot™controlontherighthandsideofthe
handleandmoveitupordownalongthehandle.Moving
thecontroldownthehandlerotatesthedischargechute
totheleft;movingthecontrolupthehandlerotatesthe
dischargechutetotheright(Figure18).
Figure16
Figure18
9
Page 10

Toraiseorlowertheangleofthechutedeector,press
thetriggeronthechutedeectorandmovethechute
deectorupordown(Figure19).
Figure19
1.Chutedeectortrigger2.Chutedeector
ClearingaCloggedDischarge
Chute
Important:Handcontactwiththerotatingrotor
bladesinsidethedischargechuteisthemost
commoncauseofinjuryassociatedwithsnow
throwers.Neveruseyourhandtocleanoutthe
dischargechute.
PreventingFreeze-upafter
Use
•Lettheenginerunforafewminutestoprevent
movingpartsfromfreezing.Stoptheengine,wait
forallmovingpartstostop,andremoveiceand
snowfromthesnowthrower.
•Cleanoffanysnowandicefromthebaseofthe
chute.
•Rotatethedischargechuteleftandrighttofreeit
fromanyicebuildup.
•WiththeignitionkeyintheOffposition,pullthe
recoilstarterhandleseveraltimestopreventthe
recoilstarterfromfreezingup.
•Insnowyandcoldconditions,somecontrolsand
movingpartsmayfreeze.Donotuseexcessiveforce
whentryingtooperatefrozencontrols.Ifyouhave
difcultyoperatinganycontrolorpart,startthe
engineandletitrunforafewminutes.
OperatingTips
Toclearthechute:
•Shuttheengineoff!
•Wait10secondstobesuretherotorbladeshave
stoppedrotating.
•Alwaysuseaclean-outtool,notyourhands
(Figure20).
Therotorbladescanthrowstones,toys,and
otherforeignobjectsandcauseseriouspersonal
injurytotheoperatorortobystanders.
•Keeptheareatobeclearedfreeofallobjects
thattherotorbladescouldpickupand
throw.
•Keepallchildrenandpetsawayfromthe
areaofoperation.
•Removethesnowassoonaspossibleafteritfalls.
•Ifthesnowthrowerdoesnotpropelitselfforward
onslipperysurfacesorinheavysnow,pushforward
onthehandle,butallowthesnowthrowertowork
atitsownpace.
•Overlapeachswathtoensurecompletesnow
removal.
•Dischargethesnowdownwindwheneverpossible.
Figure20
10
Page 11

Maintenance
Note:Determinetheleftandrightsidesofthemachinefromthenormaloperatingposition.
RecommendedMaintenanceSchedule(s)
MaintenanceService
Interval
Afterthersthour
Aftertherst2hours
Beforeeachuseordaily
Yearly
Yearlyorbeforestorage
MaintenanceProcedure
•Checkthecontrolcableandadjustitifnecessary .
•Checkforloosefastenersandtightenthemifnecessary.
•Changetheengineoil.
•Checktheengineoillevelandaddoilifnecessary .
•Checkthecontrolcableandadjustitifnecessary .
•InspecttherotorbladesandhaveanAuthorizedServiceDealerreplacetherotor
bladesandscraperifnecessary.
•Changetheengineoil.
•Servicethesparkplugandreplaceitifnecessary .
•Checkforloosefastenersandtightenthemifnecessary.
•HaveanAuthorizedServiceDealerinspectthedrivebeltandreplaceitifnecessary .
•Preparethesnowthrowerforstorage.
AdjustingtheControlCable
CheckingtheControlCable
ServiceInterval:Afterthersthour—Check
thecontrolcableandadjustitif
necessary.
Note:Ensurethata1/16-inchto1/8-inch(2mmto3
mm)gapexistsbetweenthecontrolbarandthehandle
(Figure21).
Important:Thecontrolcablemustcontainsome
slackwhenyoudisengagethecontrolbarforthe
rotorbladestostopproperly.
Yearly—Checkthecontrolcableand
adjustitifnecessary.
Movethecontrolbarbacktowardthehandletoremove
theslackinthecontrolcable(Figure21).
Figure21
1.Controlbar2.1/16-inchto1/8-inch(2
mmto3mm)gap
AdjustingtheControlCable
1.Slideupthespringcoverandunhookthespring
fromtheadjusterlink(Figure22).
Figure22
1.Adjusterlink
2.Z-tting
3.Springcover
4.Unhookthespringhere.
11
Page 12

Note:Youcanpulluptheadjusterlinkandcableto
makeunhookingthespringeasier.
2.MovetheZ-ttingtoahigherorlowerholeonthe
adjusterlinkasneededtoobtainthe1/16-inchto
1/8-inch(2mmto3mm)gapbetweenthecontrol
barandthehandle(Figure21).
Note:MovingtheZ-ttinghigherdecreasesthe
gapbetweenthecontrolbarandthehandle;moving
itlowerincreasesthegap.
3.Hookthespringtotheadjusterlinkandslidethe
springcoverovertheadjusterlink.
4.Checktheadjustment;refertoCheckingtheControl
Cable.
Note:Afterextendeduse,thedrivebeltmaywear
andloseitsproperbelttension.Ifthedrivebelt
slips(continuouslysqueals)underaheavyload,
disconnectthespringfromtheadjustorlinkand
movetheupperendofthespringtotheholethat
isfurtherfromthepivotpointinthecontrolbar
(Figure23).Thenconnectthespringtotheadjustor
linkandadjustthecontrolcable.
InspectingtheRotorBlades
ServiceInterval:Yearly—Inspecttherotorbladesand
haveanAuthorizedServiceDealer
replacetherotorbladesandscraperif
necessary.
Beforeeachsession,inspecttherotorbladesforwear.
Whenarotorbladeedgehasworndowntothewear
indicatorhole,haveanAuthorizedServiceDealer
replacetherotorbladesandthescraper(Figure24).
Figure24
1.Wearindicatorhole
Figure23
1.Removetheupperendof
springfromthishole
2.Inserttheupperendof
springintothishole
3.Pivotpoint
4.Upperendofspring
Note:Thebeltmayslip(squeal)inwetconditions;
todryoutthedrivesystem,starttherotorandrun
itwithoutaloadfor30seconds.
ChangingtheEngineOil
ServiceInterval:Aftertherst2hours
Yearly
Runtheengineafewminutesbeforechangingtheoil
towarmit.Warmoilowsbetterandcarriesmore
contaminants.
1.Stoptheengineandwaitforallmovingpartstostop.
2.Movethesnowthrowertoalevelsurface.
3.Placeanoildrainpanundertheoildrainplug,
removetheoildrainplug,andtipthesnowthrower
backwardanddraintheusedoilintheoildrainpan
Figure25).
Figure25
4.Afterdrainingtheusedoil,returnthesnowthrower
totheoperatingposition.
5.Installtheoildrainplugandtightenitsecurely.
12
Page 13

6.Cleanaroundtheoilllcap(Figure26).
ServicingtheSparkPlug
ServiceInterval:Yearly—Servicethesparkplugand
replaceitifnecessary.
UseaChampionRN4Csparkplugorequivalent.
1.Stoptheengineandwaitforallmovingpartstostop.
2.Waituntiltheenginehasfullycooled.
Figure26
1.Oilllcap
7.Unscrewtheoilllcapandremoveit(Figure26).
8.Withthesnowthrowerintheoperatingposition,
carefullypouroilintotheoilllholetothepoint
ofoverow(Figure27).
Maxll:21oz.(0.62l),type:automotivedetergent
oilwithanAPIserviceclassicationofSJ,SL,or
higher.
•Fortemperaturesabove32°F(0°C),useSAE30.
•Fortemperaturesbetween0°Fand32°F(–18°C
and0°C),useSAE5W30orSAE10.
•Fortemperaturesbelow0°F(–18°C),useSAE
0W30.
Aftertheenginehasbeenrunning,themufer
andotherenginecomponentswillbeveryhot
andwillseverelyburnyouifyoutouchthem.
Thisprocedurerequiresyoutoremovethe
exhaustbafefromoverthemuferandto
placeyourhandclosetothemuferandengine.
Allowtheenginetofullycoolbeforestarting
thisprocedure.
3.Removeandsavethefastenersthatsecurethe
shroudasshown(Figure28).
Figure27
9.Screwtheoilllcapintotheoilllhole,andtighten
itsecurely.
10.Wipeupanyspilledoil.
11.Disposeoftheusedoilproperlyatalocalrecycling
center.
Figure28
1.Removethese4fasteners
4.Liftupontheleftrearcorneroftheshroudand
pulltheexhaustbafedownandoutoftheengine
compartment(Figure29).
13
Page 14

8.Setthegapontheplugto0.030inch(0.76mm)
(Figure31).
Figure31
1.Centerelectrodeinsulator3.Airgap(nottoscale)
2.Sideelectrode
9.Installthesparkplugandtightentheplugsecurely.
10.Connectthewiretothesparkplug.
11.Tipthesnowthrowerforwardontoitsfronttomake
installingtheexhaustbafeeasier(Figure32).
Figure29
1.Exhaustbafe
5.Disconnectthewirefromthesparkplug(Figure30).
Figure30
1.Spark-plugwire
6.Cleanaroundthesparkplug.
Figure32
12.Fromtherearleftposition,inserttheexhaustbafe
upintotheshroud.
Note:Ensurethattheupperlipoftheexhaust
bafetsintothetabsontheinsideoftheshroud
(Figure33).
7.Removethesparkplugfromthecylinderhead.
Important:Replaceacracked,fouled,or
dirtysparkplug.Donotcleantheelectrodes
becausegritenteringthecylindercandamage
theengine.
14
Page 15

Figure33
1.Tabs
13.Installthe2screwsintotheexhaustbafe.
14.Returnthesnowthrowertotheoperatingposition.
15.Tuckthelowerlipoftheguardbehindthebeltcover
(Figure34).
Figure34
16.Securetheexhaustbafeusingthesmallsidescrew
thatyoupreviouslyremoved(Figure35).
Figure35
1.Smallsidescrewhere
15
Page 16

ReplacingtheDriveBelt
Ifdrivebeltbecomesworn,oil-soaked,excessively
cracked,frayed,orotherwisedamaged,replacethebelt.
1.Removethedrivebeltcoverbyremovingthe3bolts
asshowninFigure36.
Note:Routethenewdrivebeltrstaroundthe
enginepulley,thentheidlerpulley ,andnallyaround
thelooserotorpulleypositionedjustabovetherotor
shaft(Figure36).
6.Installtherotorpulleyontotherotorshaft
(Figure36).
7.Installthecurvedwasherandtherotorpulleybolt
andtightenthemsecurely(Figure36).
Note:Theconcavesideofthecurvedwashergoes
againsttheoutsideofthepulley.
8.Installthebrakespringontotheidlerarm(Figure37).
9.Installthedrivebeltcoverwiththeboltsyou
removedinstep1.
Note:Ensurethatthedrivebeltisproperlyadjusted
andoperating;refertoCheckingtheControlCable
andAdjustingtheControlCable.
AdjustingtheQuickShoot™
Figure36
1.Drivebeltcover6.Drivebelt
2.Bolt(3)7.Rotorshaft
3.Rotorpulleybolt
4.Curvedwasher
5.Rotorpulley10.Enginepulley
8.Brakespring(unhookfrom
idlerarmhere)
9.Idlerpulley
2.Unhookthebrakespringfromtheidlerarmto
releasethebelttension(Figure36).
3.Removethescrewandcurvedwasherthatholdsthe
rotorpulley(Figure36).
4.Removetherotorpulleyandthedrivebelt
(Figure36).
5.Installthenewdrivebelt,routingitasshownin
(Figure37).
Control
Ifthereismorethan1/2inch(13mm)ofslackinthe
QuickShootcable(Figure38)orthedischargechute
doesnotrotateleftandrightinequalangles,adjustthe
QuickShootcontrolcables.
Figure38
1.1/2inch(13mm)maximumslack
1.LoosenthetwoQuickShootcontrolcableclamps
(Figure39).
Figure37
1.Brakespring(installon
idlerarmhere)
2.Idlerpulley4.Rotorpulley
3.Enginepulley
16
Page 17

Figure39
1.Cableclamps
2.PositiontheQuickShootcontrolbetweenthetwo
arrowslocatedontherighthandsideoftheupper
handle(Figure40).
Figure40
1.Arrows
3.Rotatethedischargechutesothatitfacesstraight
aheadandthearrowonthebackofthedischarge
chutealignswiththearrowontheshroud(Figure41).
Figure41
4.Holdthedischargechuteinthestraight-ahead
position,pullthelowercablecasingdownwarduntil
youremovetheslackinthecable,andtightenthe
screwonthelowercableclampsecurely(Figure42).
Figure42
1.Lowercablecasing
5.Pulltheuppercablecasingforwarduntilyouremove
theslackinthecable,andtightenthescrewonthe
uppercableclampsecurely(Figure43).
17
Page 18

Figure43
1.Uppercablecasing
Note:Donotover-tensionthecables.Ifthecables
areover-tensioned,theQuickShootwillbehardto
operate.
7.Whiletheengineisstillwarm,changetheengineoil.
RefertoChangingtheEngineOil.
8.Removethesparkplug.
9.Squirt2teaspoonsofoilintothesparkplughole.
10.Installthesparkplugbyhandandthentightenit
securely.Ifyoudonothaveatorquewrench,tighten
theplugrmly.
11.WiththeignitionkeyintheOffposition,pullthe
recoilstarterslowlytodistributetheoilontheinside
ofthecylinder.
12.Cleanthesnowthrower.
13.Touchupchippedsurfaceswithpaintavailable
fromanAuthorizedServiceDealer.Sandaffected
areasbeforepainting,andusearustpreventativeto
preventthemetalpartsfromrusting.
14.Tightenanyloosefasteners.Repairorreplaceany
damagedparts.
Storage
StoringtheSnowthrower
•Gasolinefumesarehighlyammable,
explosive,anddangerousifinhaled.Ifyou
storetheproductinanareawithanopen
ame,thegasolinefumesmayigniteand
causeanexplosion.
•Donotstorethesnowthrowerinahouse
(livingarea),basement,oranyotherarea
whereignitionsourcesmaybepresent,
suchashotwaterandspaceheaters,clothes
dryers,furnaces,andotherlikeappliances.
1.Onthelastrefuelingoftheyear,addfuelstabilizer
tofreshfuelasdirectedbytheenginemanufacturer.
2.Runtheenginefor10minutestodistributethe
conditionedfuelthroughthefuelsystem.
15.Coverthesnowthrowerandstoreitinaclean,dry
placeoutofthereachofchildren.Allowtheengine
tocoolbeforestoringitinanyenclosure.
3.Stoptheengine,allowittocool,andsiphonthefuel
tankorruntheengineuntilitstops.
4.Starttheengineandrunituntilitstops.
5.Chokeorprimetheengine,startitathirdtime,and
runtheengineuntilitwillnotstart.
6.Disposeofunusedfuelproperly.Recycleitaccording
tolocalcodes,oruseitinyourautomobile.
Note:Donotstorestabilizedgasolineformore
than90days.
18
Page 19

Notes:
19
Page 20

TheToro2-YearGTSStartingGuaranteeand
TheToroTotalCoverageGuarantee
AT wo-YearFullWarranty(45DayLimitedWarrantyforCommercialUse)
CCR
PowerClear
Single-StageSnowthrowers
TheToroStartingGuarantee
TheT oroCompanyanditsafliate,T oroWarrantyCompany,pursuant
toanagreementbetweenthem,jointlyguaranteethatyourT oroGTS
(GuaranteedtoStart)engine,whenusedforresidentialpurposes*,will
startontherstorsecondpullfortwo(2)yearsfromthedateofpurchase,
ifyouprovidetheroutinemaintenanceitrequires,orwewillxitfreeof
charge.
Thiswarrantycoversthecostofpartsandlabor,butyoumustpay
transportationcosts.
ConditionsandProductsCovered
TheT oroCompanyanditsafliate,ToroWarrantyCompany ,pursuantto
anagreementbetweenthem,jointlypromisetorepairtheToroProduct
listedbelowifusedforresidentialpurposes*,ifdefectiveinmaterialsor
workmanshiporifitstopsfunctioningduetothefailureofacomponent
fortheperiodlistedbelow.
Thiswarrantycoversthecostofpartsandlabor,butyoumustpay
transportationcosts.
Thefollowingtimeperiodsapplyfromthedateofpurchase:
ProductsWarrantyPeriod
PowerClearSnowthrowersandAttachments
2years
LimitedWarrantyforCommercialUse
Gas-poweredT oroProductsusedforcommercial,institutional,or
rentaluse,arewarrantedfor45daysagainstdefectsinmaterialsor
workmanship.Componentsfailingduetonormalweararenotcovered
bythiswarranty.
InstructionsforObtainingWarrantyService
IfyouthinkthatyourT oroProductcontainsadefectinmaterialsor
workmanship,followthisprocedure:
1.ContactanyAuthorizedT oroServiceDealertoarrangeserviceattheir
dealership.Tolocateadealerconvenienttoyou,refertotheYellow
Pagesofyourtelephonedirectory(lookunder“LawnMowers”)or
accessourwebsiteatwww.T oro.com.Y oumayalsocallthenumbers
listedinitem#3tousethe24-hourT oroDealerlocatorsystem.
2.Bringtheproductandyourproofofpurchase(salesreceipt)tothe
ServiceDealer.Thedealerwilldiagnosetheproblemanddetermine
ifitiscoveredunderwarranty.
3.IfforanyreasonyouaredissatisedwiththeServiceDealer’s
analysisorwiththeassistanceprovided,contactusat:
CustomerCareDepartment,ConsumerDivision
TheT oroCompany
811 1LyndaleAvenueSouth
Bloomington,MN55420-1196
Tollfreeat866-336-5205(U.S.customers)
Tollfreeat866-854–9033(Canadiancustomers)
OwnerResponsibilities
YoumustmaintainyourT oroProductbyfollowingthemaintenance
proceduresdescribedintheOperator’sManual.Suchroutine
maintenance,whetherperformedbyadealerorbyyou,isatyourexpense.
ItemsandConditionsNotCovered
Thereisnootherexpresswarrantyexceptforspecialemissionsystem
coverageandenginewarrantycoverageonsomeproducts.Thisexpress
warrantydoesnotcoverthefollowing:
•Costofregularmaintenanceorwearparts,suchasrotorblades
(paddles),scraperblades,belts,fuel,lubricants,oilchanges,spark
plugs,cable/linkageorbrakeadjustments
•Anyproductorpartwhichhasbeenalteredormisusedandrequires
replacementorrepairduetoaccidentsorlackofpropermaintenance
•Repairsnecessaryduetofailuretousefreshfuel(lessthanone
monthold),orfailuretoproperlypreparetheunitpriortoanyperiod
ofnon-useoveronemonth
•Pickupanddeliverycharges
•Operationalmisuse,neglect,oraccidents
•RepairsorattemptedrepairsbyanyoneotherthananAuthorized
ToroServiceDealer
•Repairsoradjustmentstocorrectstartingdifcultiesduetothe
following:
—failuretofollowpropermaintenanceprocedures
—snowthrowerauger/paddlesstrikinganobject
—contaminantsinthefuelsystem
—improperfuelorfuel/oilmixture(consultyourOperator’sManual
ifindoubt)
—failuretodrainthefuelsystempriortoanyperiodofnon-useover
onemonth
•Specialoperationalconditionswherestartingmayrequiremorethan
twopulls:
—rsttimestartsafterextendedperiodofnon-useoverthreemonths
orseasonalstorage
—improperstartingprocedures
Ifyouarehavingdifcultystartingyourunit,pleasechecktheOperator’s
Manualtoensurethatyouareusingthecorrectstartingprocedures.This
cansaveanunnecessaryvisittoaServiceDealer.
GeneralConditions
Allrepairscoveredbythesewarrantiesmustbeperformedbyan
AuthorizedT oroServiceDealerusingT oroapprovedreplacementparts.
RepairbyanAuthorizedT oroServiceDealerisyoursoleremedyunder
thiswarranty .
NeitherTheToroCompanynorToroWarrantyCompanyisliablefor
indirect,incidental,orconsequentialdamagesinconnectionwiththe
useoftheT oroProductscoveredbythesewarranties,includingany
costorexpenseofprovidingsubstituteequipmentorserviceduring
reasonableperiodsofmalfunctionornon-usependingcompletionof
repairsunderthesewarranties.
Somestatesdonotallowexclusionsofincidentalorconsequential
damages,sotheaboveexclusionsmaynotapplytoyou.
Thiswarrantygivesyouspeciclegalrights,andyoumayalsohaveother
rightswhichvaryfromstatetostate.
CountriesOtherthantheUnitedStatesorCanada
CustomerswhohavepurchasedT oroproductsexportedfromtheUnitedStatesorCanadashouldcontacttheirT oroDistributor(Dealer)toobtain
guaranteepoliciesforyourcountry,province,orstate.IfforanyreasonyouaredissatisedwithyourDistributor’sserviceorhavedifcultyobtaining
guaranteeinformation,contacttheT oroimporter.Ifallotherremediesfail,youmaycontactusatT oroWarrantyCompany .
*Residentialpurposesmeansuseoftheproductonthesamelotasyourhome.Useatmorethanonelocation,orinstitutionalorrentaluse,isconsidered
commercialuse,andthecommercialusewarrantywouldapply .
374-0264RevA
 Loading...