

Page 1

FORM NO. 3322–346
STRIPING KIT
FOR 44”/52” WAM DECKS
Model
No. 30121
INSTALLATION
INSTRUCTIONS
Loose
Note: Use the chart below to identify parts used for assembly.
DESCRIPTION QTY. USE
Mounting bracket
Wiper
Hex lock nut, 1/4–20
Hex head screw
Flat washer
Speed nut, 1/4”
Parts catalog
Installation Instructions
Parts
, 1/4–20 x 3/4” (19 mm)
, 1/4”
8
1
8
16
8
8
1
1
Installation of kit
Read before installing
Installation
1. 44” deck installation
A. Orient the wiper as shown in Fig. 1. From
the left hand end, count over to the seventh
set of holes. Measure 1-1/2 inches from the
center of these holes toward the right hand
end and make a mark. Cut and remove
excess material beyond this point.
1. Left
hand end
2.
Right hand end
3.
1st set of holes
3
1
Figure 1
4.
5.
5
4
Seventh set of holes
1–1/2” measurement
B. Install the speed nuts on each of the
mounting brackets as shown in Fig. 2.
1
Figure 2
1. 1/4–20
2
Speed nut
2
2.
Mounting bracket
m–4049
C. Attach the mounting brackets (with speed
nuts assembled) to holes 1,2,4,5,6 and 7
(Fig. 3) using the flat washers and 1/4–20 x
3/4” (19 mm) screws. Place the flat washers
on the screws and insert the screws through
Page 2
the wiper into the speed nuts. Align the
brackets vertical to the wiper and tighten
the screws.
Note: Use the upper holes for greater striping
effect and the lower holes for less
effect.
3. Installation to deck
A. Center the wiper, with the mounting
brackets assembled, against the rear of the
deck. Position the lower leg of each
mounting bracket under and up tight against
the bottom lip of the rear deck wall.
2. 52” deck installation
A. Orient the wiper as shown in Fig. 1. Use
the wiper without any modification.
B. Install the speed nuts on each of the
mounting brackets as shown in Fig. 2.
C. Install the mounting brackets (with speed
nuts) to holes 1 through 8 (Fig. 3) using the
flat washers and 1/4–20 x 3/4” (19 mm)
screws. Place the flat washers on the
screws and insert the screws through the
wiper into the speed nuts. Align the
brackets vertical to the wiper and tighten
the screws.
4
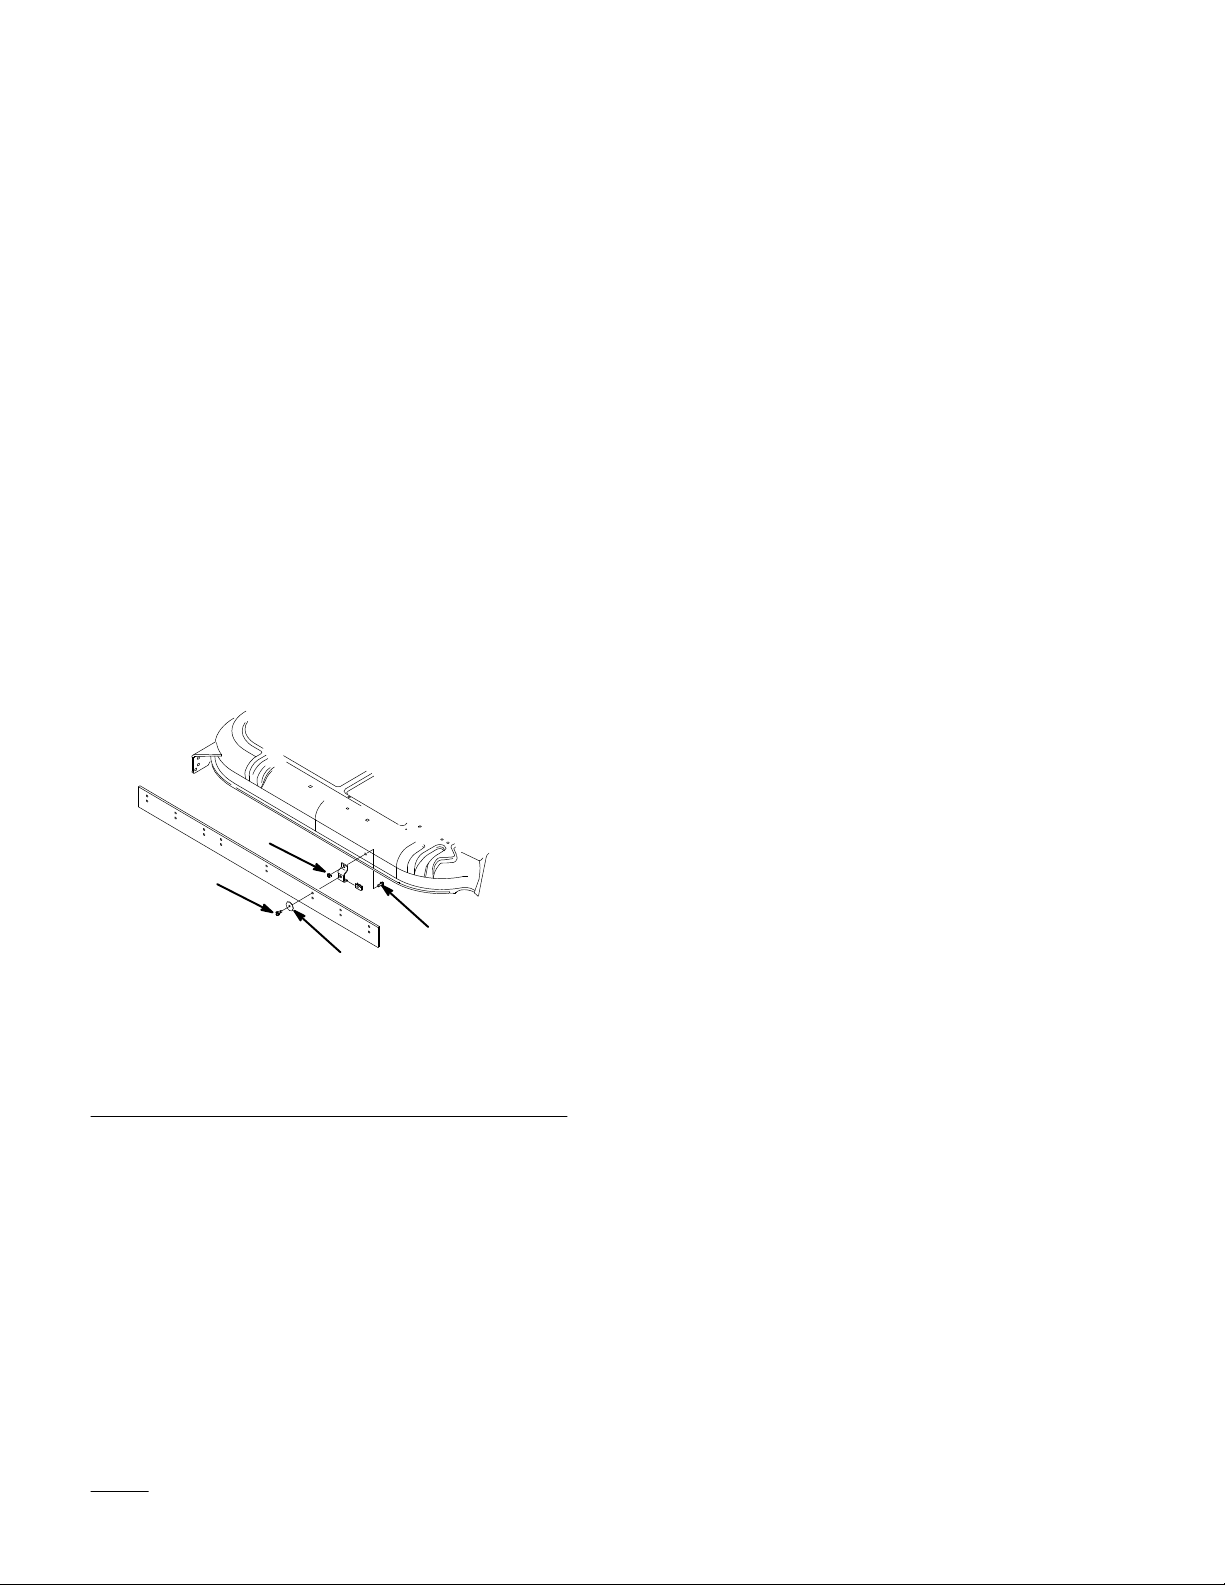
B. Using the mounting brackets as a template,
drill 9/32 inch diameter holes in the deck.
Secure in place with the 1/4–20 x 3/4” (19
mm) screws and 1/4–20 lock nuts. Install
the screws in the deck with the heads on the
inside and nuts to the outside as shown in
Fig. 3.
1. 1/4–20
screw
2.
Flat washer
1
x 3/4” (19 mm)
2
Figure 3
3
3.
1/4–20 x 3/4” (19 mm)
screw
4.
1/4–20 lock nut
m–4050
2
 Loading...