

Page 1
53cmMulching/RearBagging/SideDischarging
LawnMower
ModelNo.29730—SerialNo.316000001andUp
ModelNo.29732—SerialNo.316000001andUp
ModelNo.29734—SerialNo.316000001andUp
FormNo.3398-211RevA
Operator'sManual
Introduction
Thisrotary-blade,walk-behindlawnmowerisintended
tobeusedbyresidentialhomeowners.Itisdesigned
primarilyforcuttinggrassonwell-maintainedlawns
onresidentialproperties.Itisnotdesignedforcutting
brushorforagriculturaluses.
Readthisinformationcarefullytolearnhowtooperateand
maintainyourproductproperlyandtoavoidinjuryand
productdamage.Youareresponsibleforoperatingthe
productproperlyandsafely.
YoumaycontactTorodirectlyatwww .Toro.comforproduct
andaccessoryinformation,helpndingadealer,ortoregister
yourproduct.
Wheneveryouneedservice,genuineToroparts,oradditional
information,contactanAuthorizedServiceDealerorToro
CustomerServiceandhavethemodelandserialnumbersof
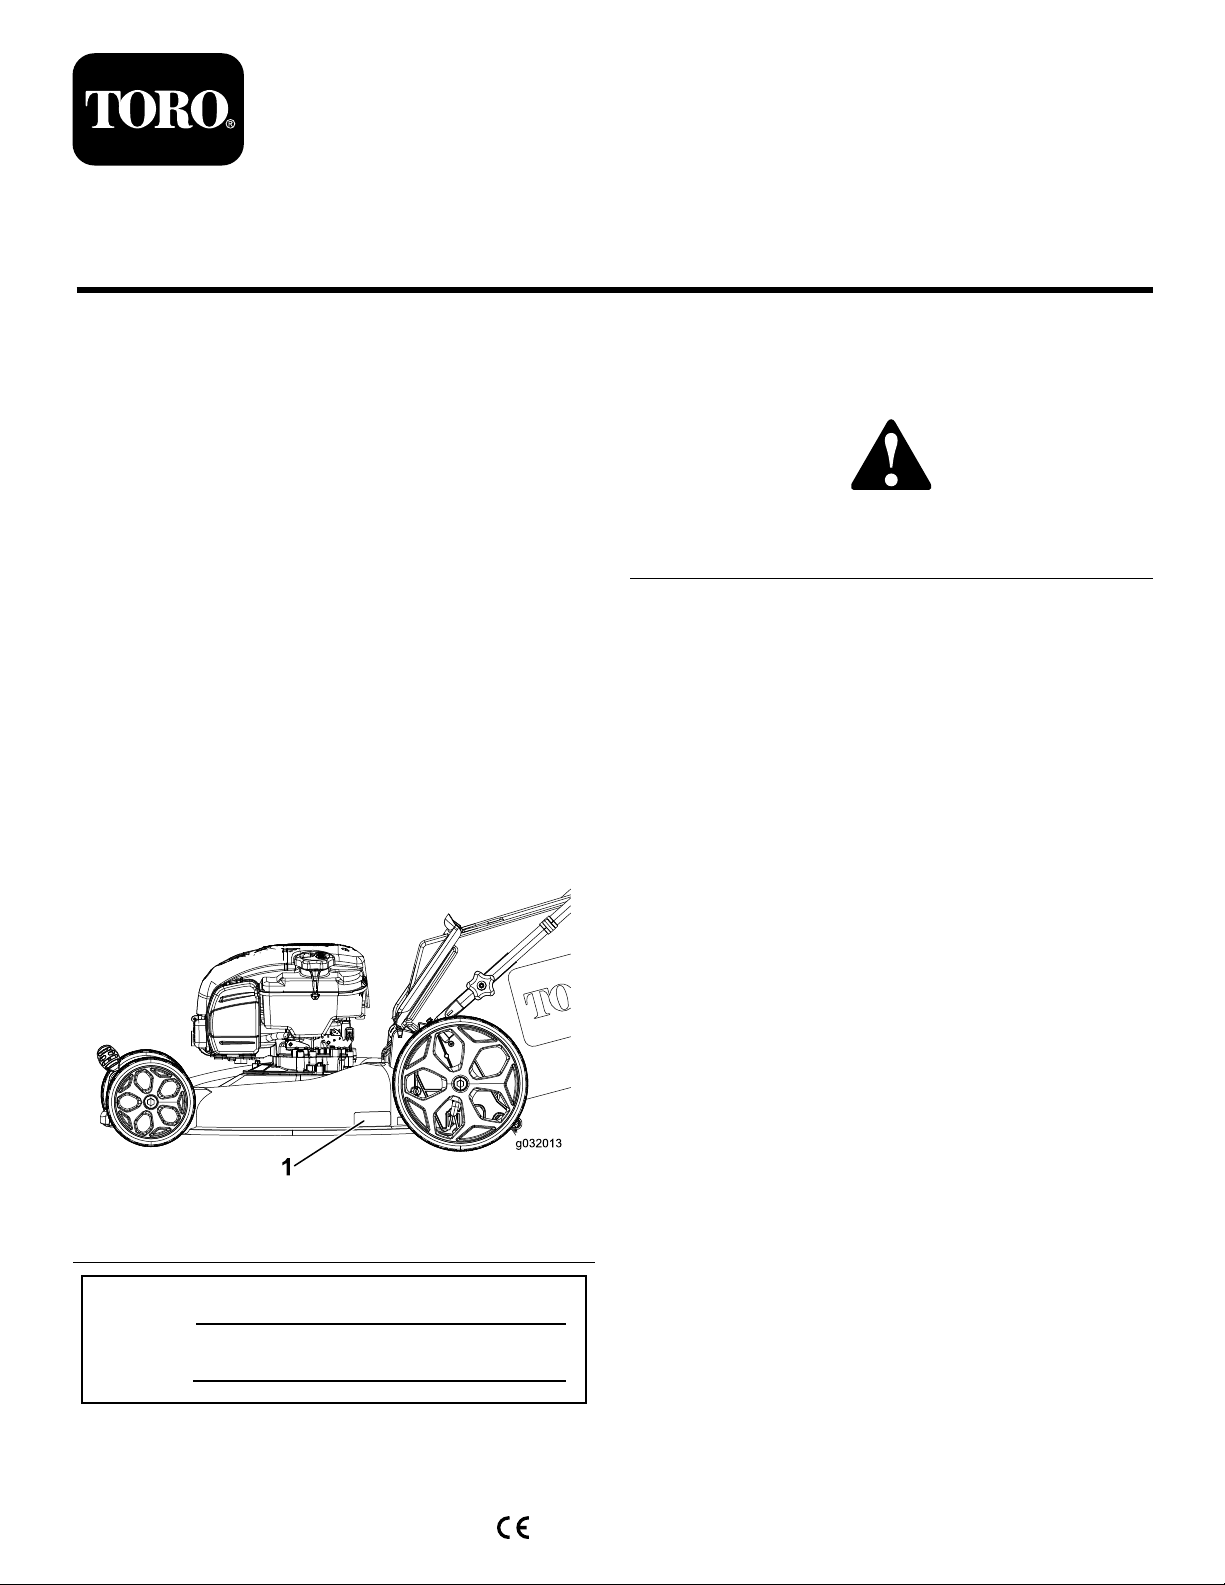
yourproductready.Figure1identiesthelocationofthe
modelandserialnumbersontheproduct.Writethenumbers
inthespaceprovided.
whichsignalsahazardthatmaycauseseriousinjuryordeath
ifyoudonotfollowtherecommendedprecautions.
Figure2
1.Safetyalertsymbol
Thismanualuses2wordstohighlightinformation.
Importantcallsattentiontospecialmechanicalinformation
andNoteemphasizesgeneralinformationworthyofspecial
attention.
ThissparkignitionsystemcomplieswithCanadianICES-002.
NetTorque
Thegrossornettorqueofthisenginewaslaboratoryrated
bytheenginemanufacturerinaccordancewiththeSocietyof
AutomotiveEngineers(SAE)J1940.Asconguredtomeet
safety,emission,andoperatingrequirements,theactualengine
torqueonthisclassofmowerwillbesignicantlylower.
Figure1
1.Modelandserialnumberplate
ModelNo.
SerialNo.
Thismanualidentiespotentialhazardsandhassafety
messagesidentiedbythesafetyalertsymbol(Figure2),
©2015—TheToro®Company
8111LyndaleAvenueSouth
Bloomington,MN55420
Registeratwww.T oro.com.
Contents
Introduction..................................................................1
Safety...........................................................................2
GeneralSafety.........................................................2
SoundPressure......................................................2
SoundPower..........................................................2
Hand/ArmVibration..............................................2
SafetyandInstructionalDecals.................................3
Setup............................................................................4
1UnfoldingtheHandle............................................4
2InstallingtheRecoil-StarterRopeintheRope
Guide.................................................................5
3FillingtheEnginewithOil......................................5
4ChargingtheBattery(Electric-startmodel
only)..................................................................6
5AssemblingtheGrassBag......................................6
ProductOverview..........................................................7
Specications.........................................................7
Attachments/Accessories.........................................7
Operation.....................................................................8
OriginalInstructions(EN)
PrintedintheUSA
AllRightsReserved
*3398-211*A
Page 2

BeforeOperation.......................................................8
BeforeOperationSafety...........................................8
FillingtheFuelTank................................................8
CheckingtheEngine-OilLevel..................................9
AdjustingtheCuttingHeight....................................9
DuringOperation.....................................................10
DuringOperatingSafety..........................................10
StartingtheEngine.................................................10
UsingtheSelf-propelDrive(Self-propelmodel
only).................................................................11
StoppingtheEngine...............................................11
MulchingtheClippings...........................................11
BaggingtheClippings.............................................11
Side-DischargingtheClippings.................................12
OperatingTips......................................................12
AfterOperation........................................................13
AfterOperatingSafety............................................13
FoldingtheHandle.................................................13
CleaningundertheMachine.....................................13
Maintenance.................................................................14
RecommendedMaintenanceSchedule(s)......................14
MaintenanceSafety.................................................14
PreparingforMaintenance.......................................14
ReplacingtheAirCleaner........................................15
ChangingtheEngineOil.........................................15
ChargingtheBattery(Electric-startmodel
only).................................................................16
ReplacingtheFuse(Electric-startmodel
only).................................................................16
ReplacingtheBlade................................................17
AdjustingtheSelf-PropelDriveCable(Self-propel
modelonly)........................................................17
Storage........................................................................18
StorageSafety........................................................18
PreparingtheMachineforStorage............................18
RemovingtheMachinefromStorage.........................18
•Donotoperatethemachinewithoutallguardsandother
safetyprotectivedevicesinplaceandworkingonthe
machine.
•Keepclearofanydischargeopening.Keepbystandersa
safedistancefromthemachine.
•Keepchildrenoutoftheoperatingarea.Neverallow
childrentooperatethemachine.
•Stopthemachineandshutofftheenginebeforeservicing,
fueling,oruncloggingthemachine.
Improperlyusingormaintainingthismachinecanresult
ininjury.T oreducethepotentialforinjury,complywith
thesesafetyinstructionsandalwayspayattentiontothe
safety-alertsymbol,whichmeansCaution,Warning,or
Danger—personalsafetyinstruction.Failuretocomplywith
theseinstructionsmayresultinpersonalinjuryordeath.
Youcanndadditionalitemsofsafetyinformationintheir
respectivesectionsthroughoutthismanual.
SoundPressure
Thisunithasasoundpressurelevelattheoperator’searof88
dBA,whichincludesanUncertaintyValue(K)of1dBA.
Thesoundpressurelevelwasdeterminedaccordingtothe
proceduresoutlinedinENISO5395:2013.
SoundPower
Thisunithasaguaranteedsoundpowerlevelof98dBA,
whichincludesanUncertaintyValue(K)of1dBA.
Thesoundpowerlevelwasdeterminedaccordingtothe
proceduresoutlinedinISO11094.
CAUTION
Safety
ThismachinehasbeendesignedinaccordancewithENISO
5395:2013andANSIB71.1-2012.
GeneralSafety
Thisproductiscapableofamputatinghandsandfeetand
ofthrowingobjects.Alwaysfollowallsafetyinstructionsto
avoidseriouspersonalinjury.
Usingthisproductforpurposesotherthanitsintendeduse
couldprovedangeroustoyouandbystanders.
•ReadandunderstandthecontentsofthisOperator’ s
Manualbeforeyoustarttheengine.Ensurethateveryone
usingthisproductknowshowtouseitandunderstands
thewarnings.
•Donotputyourhandsorfeetnearmovingcomponents
ofthemachine.
Long-termexposuretonoisewhileoperatingthe
machinemaycausesomehearingloss.
Wearadequatehearingprotectionwheneveryou
operatethemachineforanextendedperiodoftime.
Hand/ArmVibration
Model29730
Measuredvibrationlevelforrighthand=4.9m/s
Measuredvibrationlevelforlefthand=4.2m/s
UncertaintyValue(K)=2.5m/s
Measuredvaluesweredeterminedaccordingtotheprocedures
outlinedinENISO5395:2013.
Models29732and29734
Measuredvibrationlevelforrighthand=2.2m/s
Measuredvibrationlevelforlefthand=1.9m/s
2
2
2
2
2
2
Page 3
UncertaintyValue(K)=1.1m/s
Measuredvaluesweredeterminedaccordingtotheprocedures
outlinedinENISO5395:2013.
2
CAUTION
Long-termexposuretovibrationwhileoperating
themachinemaycausesomenumbnessinthe
handsandwrists.
Wearglovesthatdampenthevibrationwhenever
youoperatethemachineforanextendedperiodof
time.
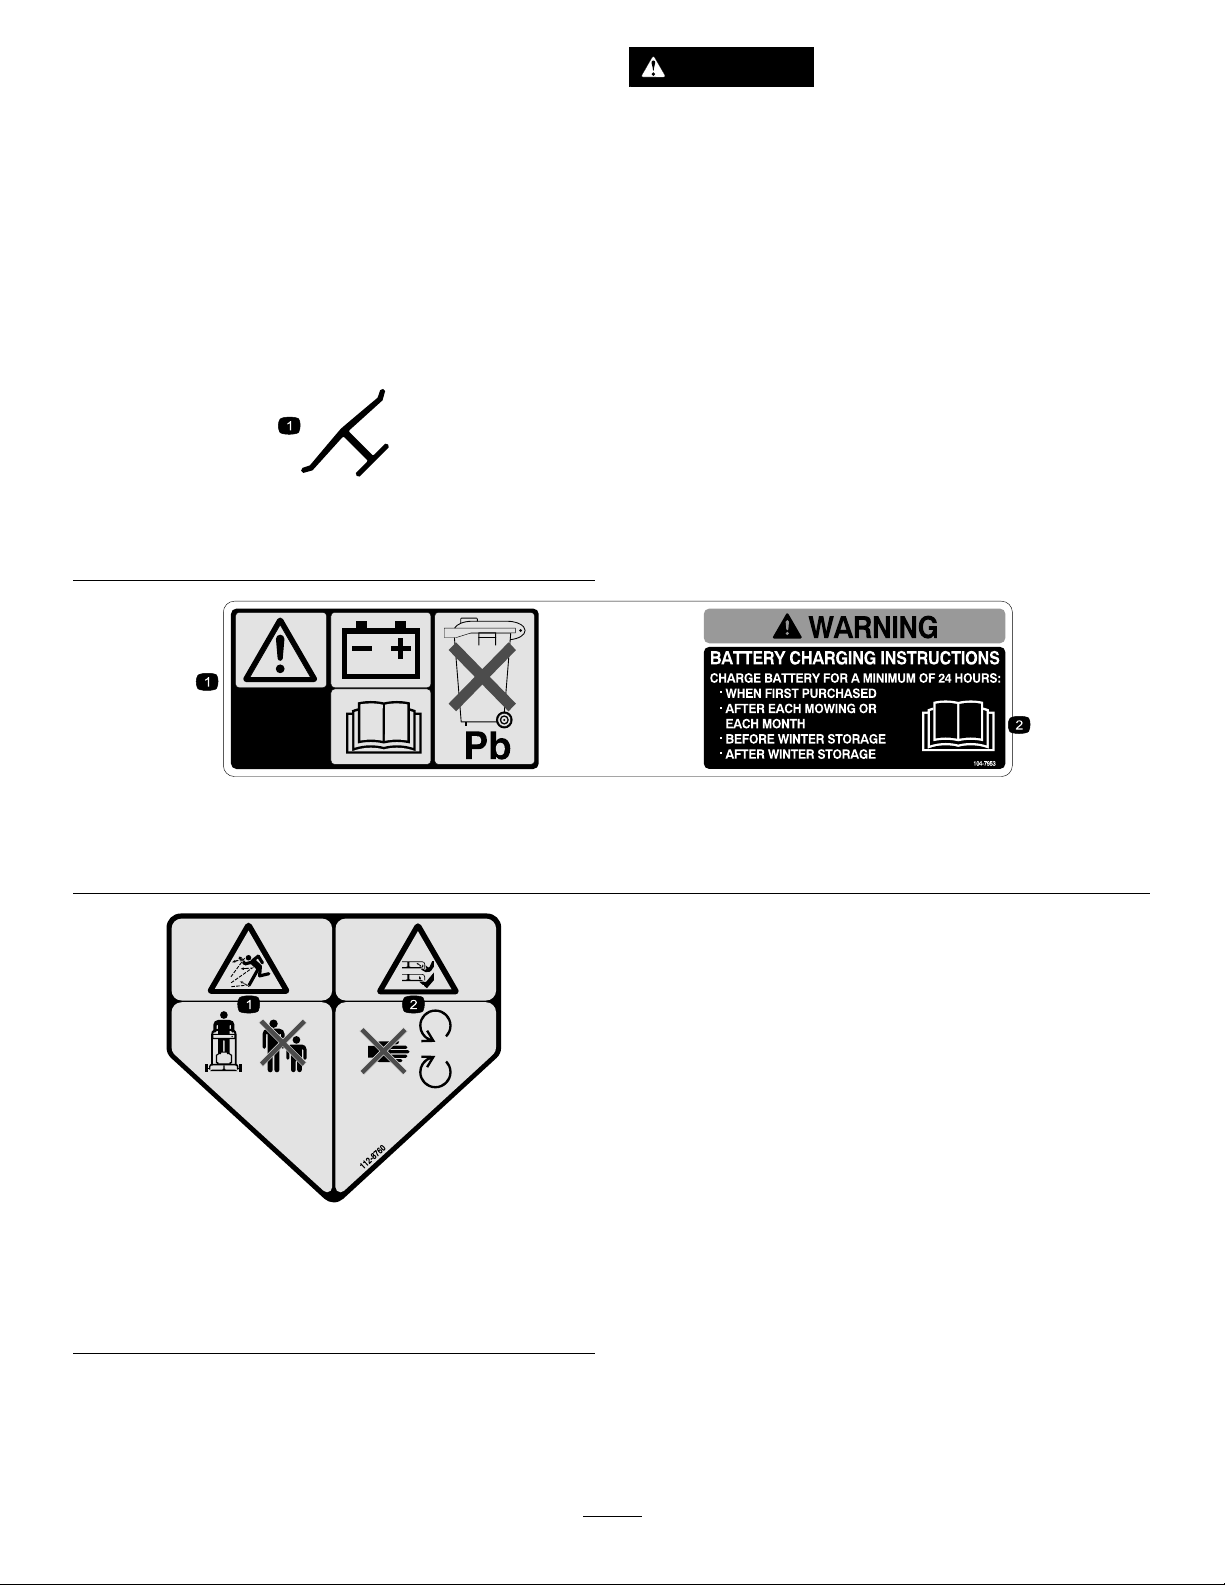
SafetyandInstructionalDecals
Important:Safetyandinstructiondecalsarelocatednearareasofpotentialdanger.Replacedamageddecals.
Manufacturer'sMark
1.Indicatesthebladeisidentiedasapartfromtheoriginal
machinemanufacturer.
104-7953
1.Warning—readtheOperator'sManualforinformationonchargingthebattery;containslead;donotdiscard.
2.ReadtheOperator'sManual.
112-8760
1.Thrownobjecthazard—keepbystandersasafedistance
fromthemachine.
2.Cutting/dismembermentofhandorfoot—stayawayfrom
movingparts.
3
Page 4
Setup
Important:Removeanddiscardtheprotectiveplastic
sheetthatcoverstheengine.
1
UnfoldingtheHandle
NoPartsRequired
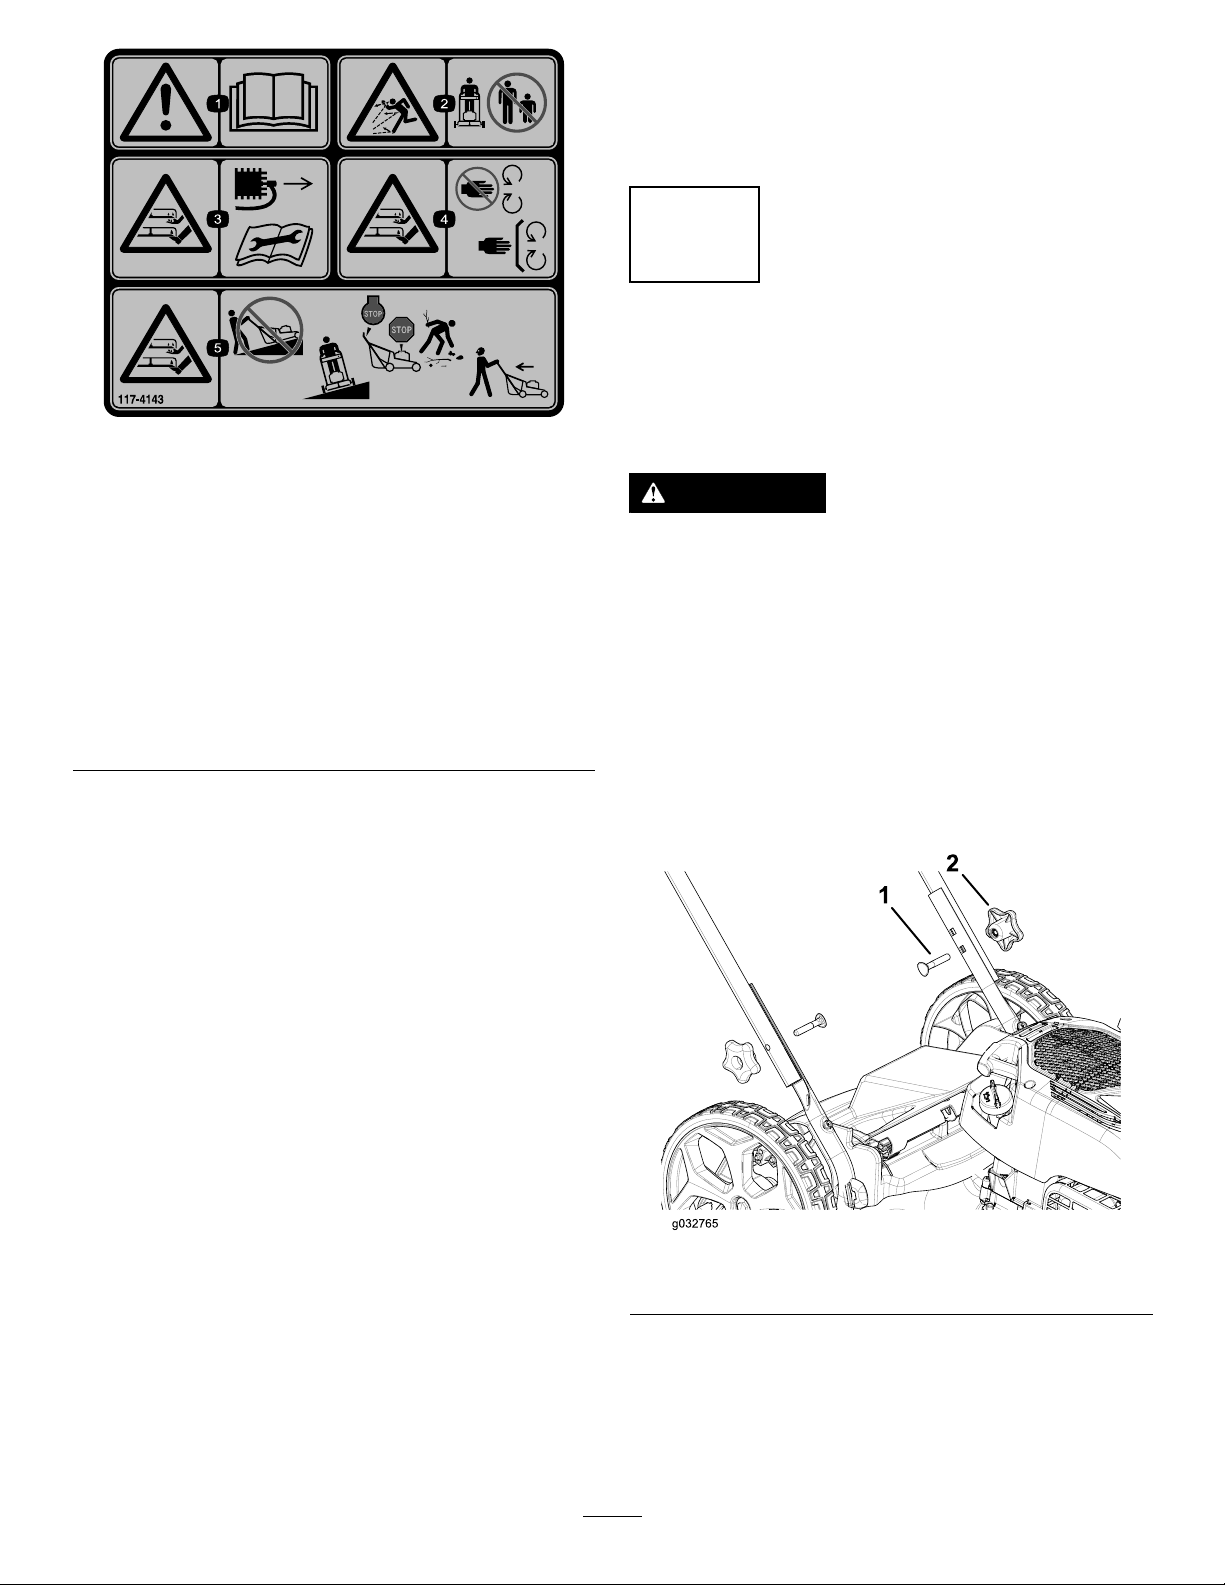
117-4143
1.Warning—readtheOperator'sManual.
2.Thrownobjecthazard—keepbystandersasafedistance
fromthemachine.
3.Cutting/dismembermenthazardofhandorfoot,mower
blade—disconnectthespark-plugwireandreadthe
instructionsbeforeservicingorperformingmaintenance.
4.Cutting/dismembermenthazardofhandorfoot,mower
blade—stayawayfrommovingpartsandkeepallguards
andshieldsinplace.
5.Cutting/dismembermenthazardofhandorfoot,mower
blade—donotmowupanddownslopes,onlymowacross;
stopthemowerandengine,pickupdebrisbeforeoperating;
lookbehindanddownwhenreversing.
Procedure
WARNING
Foldingorunfoldingthehandleimproperlycan
damagethecables,causinganunsafeoperating
condition.
•Donotdamagethecableswhenfoldingor
unfoldingthehandle.
•Ifacableisdamaged,contactanAuthorized
ServiceDealer.
1.Removethehandleknobsandboltsfromthemachine
housing().
2.Attachthehandletothemachinehousing().
Figure3
1.Bolt2.Knob
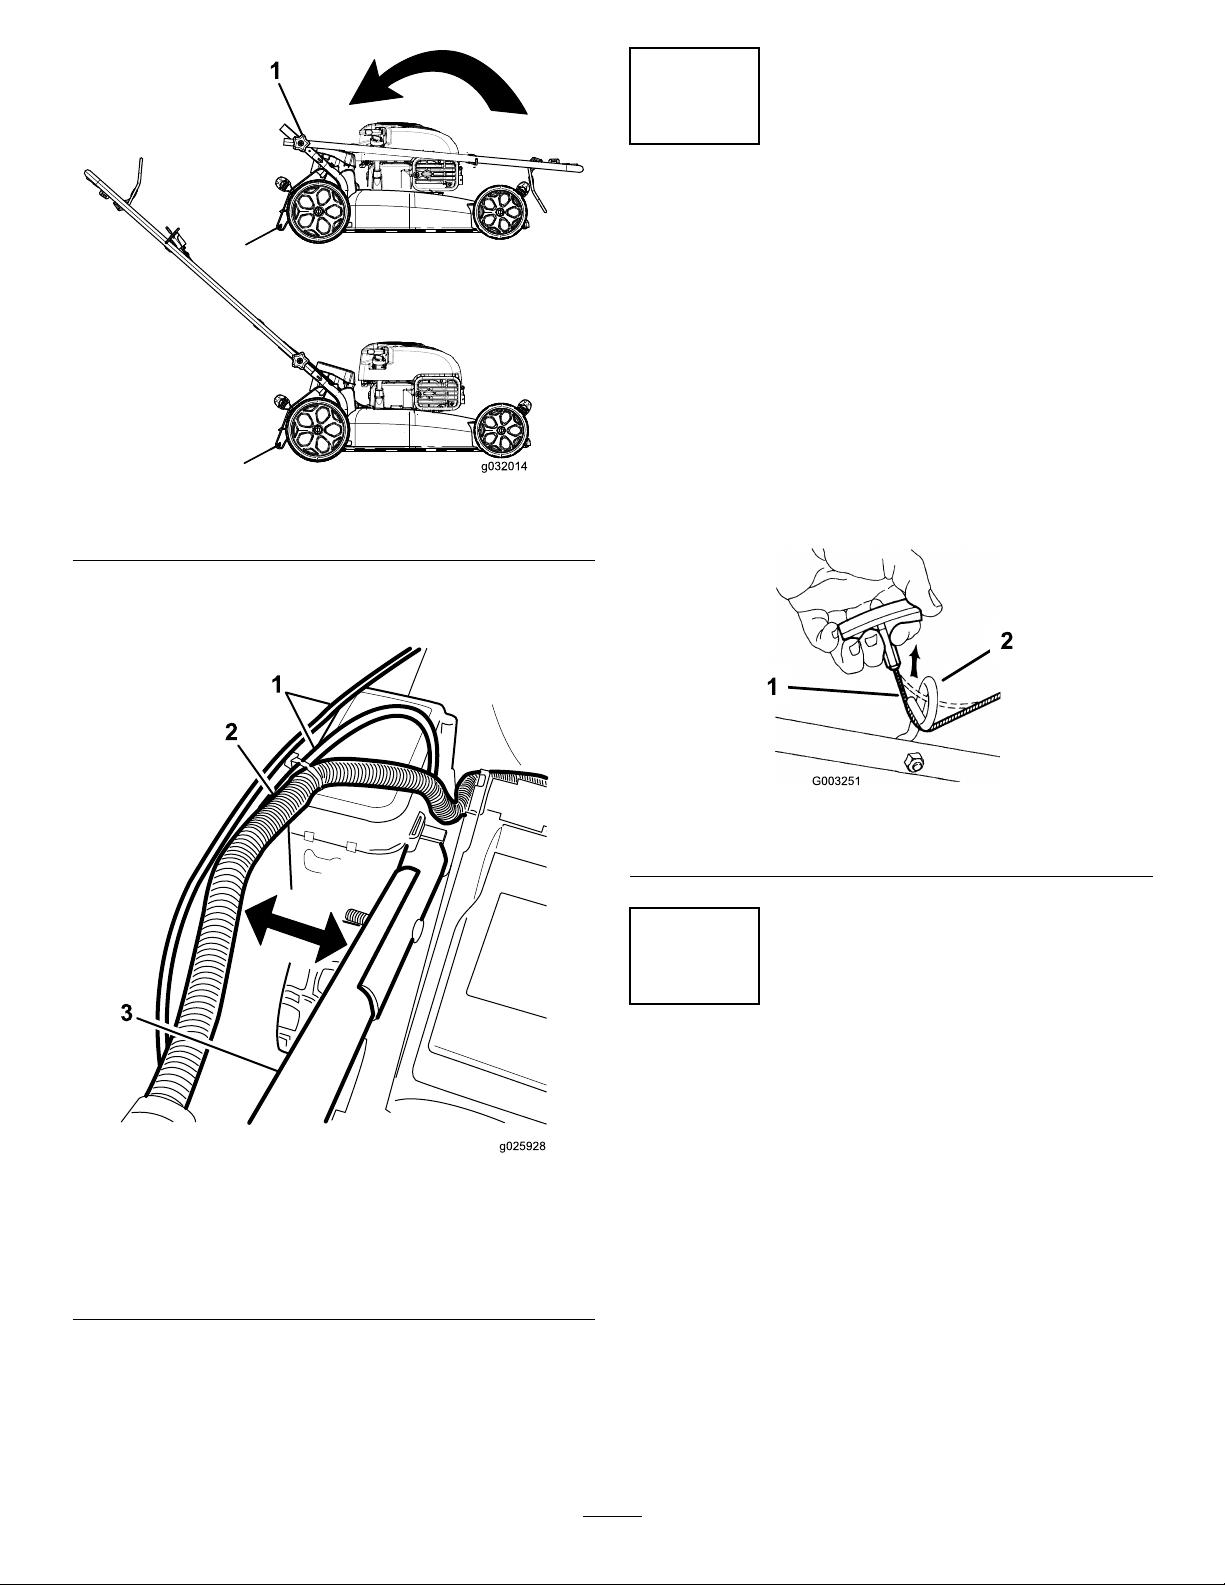
3.Movethehandletotheoperatingposition(Figure4).
4
Page 5
1
3
2
g025928
2
InstallingtheRecoil-Starter RopeintheRopeGuide
NoPartsRequired
Procedure
Important:Tostarttheenginesafelyandeasily
wheneveryouusethemachine,installtherecoil-starter
ropeintheropeguide.
Figure4
1.Handleknob(2)
Important:Routethecablestotheoutsideofthe
handleasyouunfoldthehandle(Figure5).
Holdtheblade-controlbartotheupperhandleandpullthe
recoil-starterropethroughtheropeguideonthehandle
(Figure6).
Figure6
1.Recoil-starterrope2.Ropeguide
3
FillingtheEnginewithOil
Electric-startmodelshown
1.Cables
2.Wiringharness
(electric-startmodelonly)
4.Installthehandleknobsandtightenthemrmlyby
hand.
Figure5
3.Handle
NoPartsRequired
Procedure
Important:Yourmachinedoesnotcomewithoilin
theengine.Beforestartingtheengine,lltheengine
withoil.
1.Movethemachinetoalevelsurface.
2.Removethedipstick(Figure7)andpourabout3/4of
thecrankcasecapacityofoilintotheoil-lltube.
Note:Max.ll:0.53L(18oz),type:10W -30orSAE
30detergentoilwithanAPIserviceclassicationof
SJorhigher.
5
Page 6
g032026
Figure7
g027543
1
2
3
3.Wipeoffthedipstickwithacleancloth.
4.Insertthedipstickintotheoil-lltubeandscrewitin
untilitstops.
5.Removethedipstickandreadtheoillevelonthe
dipstick(Figure7).
•IftheoillevelisbelowtheAddmarkonthe
dipstick,slowlyaddasmallamountofoiltothe
oil-lltube,andthenrepeatsteps3through5until
theoillevelisattheFullmarkonthedipstick.
•IftheoillevelisabovetheFullmarkonthe
dipstick,draintheexcessoiluntiltheoillevelisat
theFullmarkonthedipstick.Todraintheexcess
oil,refertoChangingtheEngineOil(page15).
5
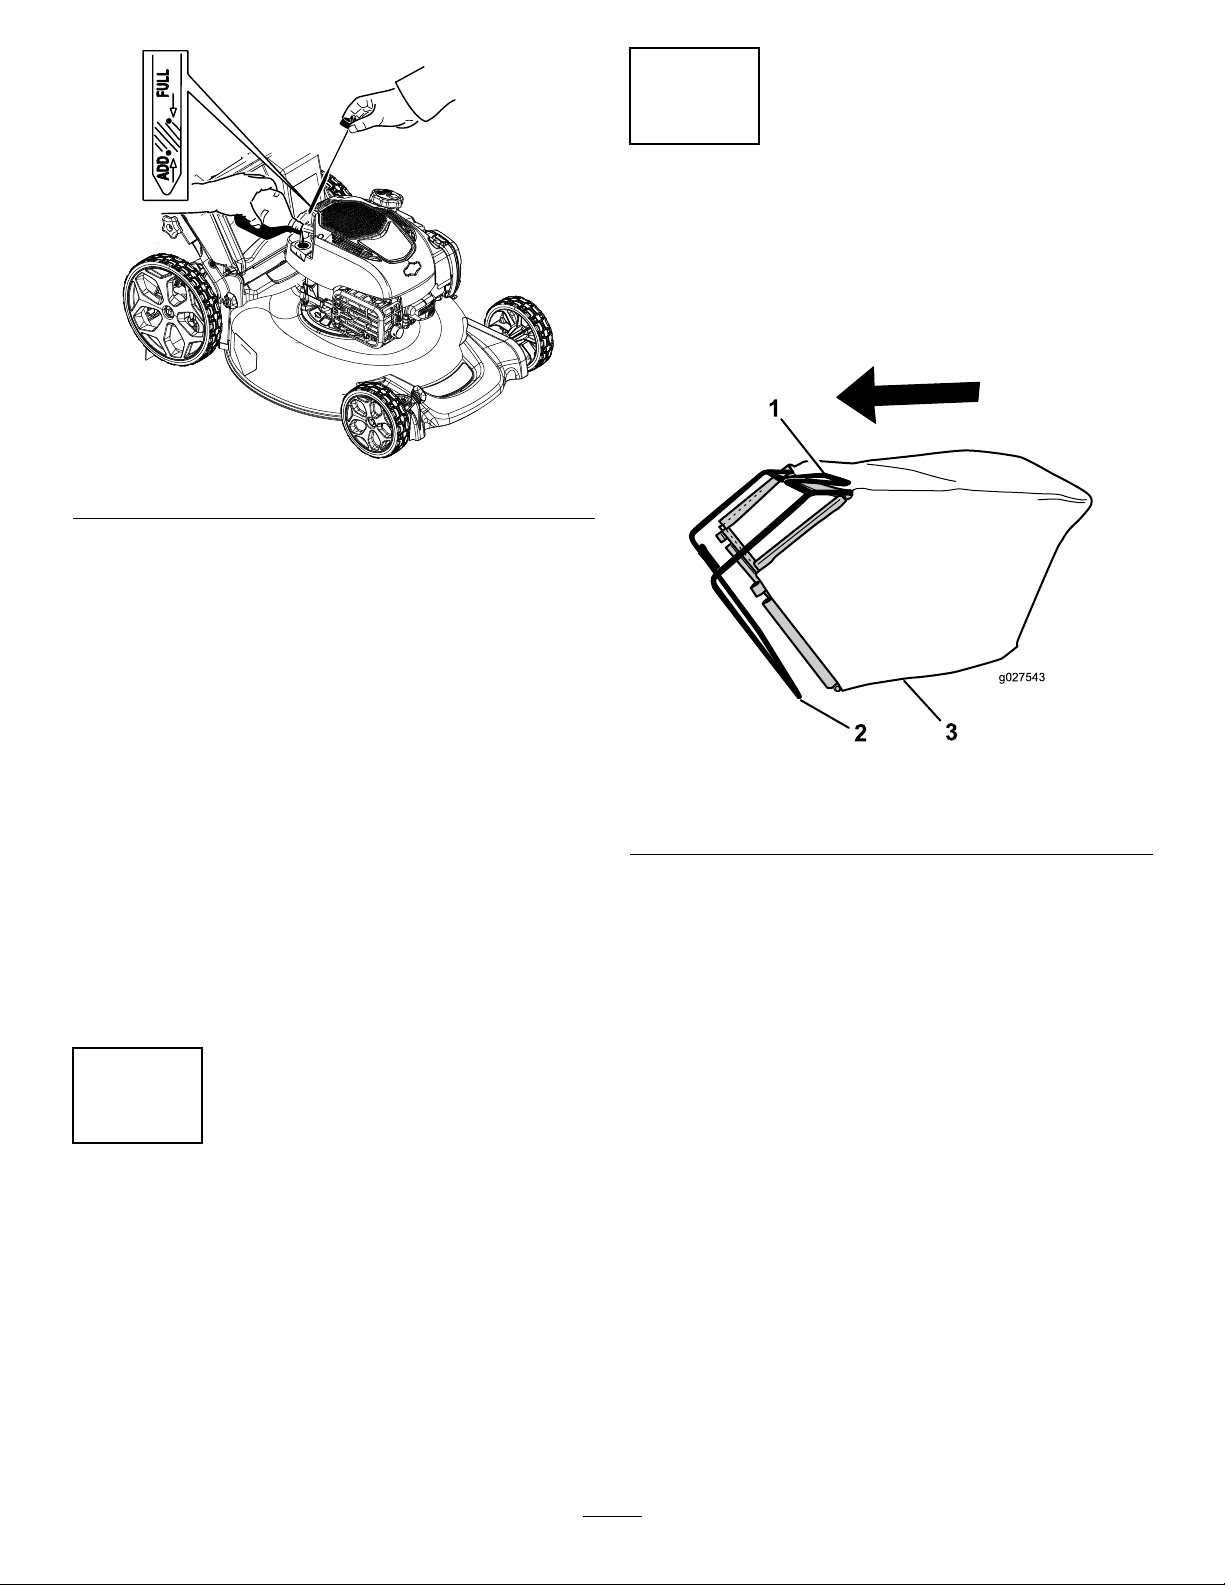
AssemblingtheGrassBag
NoPartsRequired
Procedure
1.SlipthegrassbagovertheframeasshowninFigure8.
Figure8
1.Handle
2.Frame
Note:Donotslipthebagoverthehandle(Figure8).
3.Grassbag
Important:Iftheoillevelinthecrankcaseis
toolowortoohighandyouruntheengine,
youmaydamagetheengine.
6.Installthedipsticksecurelybyhand.
4
ChargingtheBattery (Electric-startmodelonly)
NoPartsRequired
Procedure
RefertoChargingtheBattery(Electric-startmodelonly)
(page16).
2.Hookthebottomchannelofthebagontothebottom
oftheframe(Figure9).
6
Page 7

g027544
ProductOverview
Figure9
3.Hookthetopandsidechannelsofthebagontothetop
andsidesoftheframe,respectively(Figure9).
Figure10
Electric-startmodelshown
1.Self-propel-drivebar
(self-propelmodelonly)
2.Recoil-starthandle
3.Grassbag10.Ignitionkey(electric-start
4.Cutting-heightlever(4)
5.Sparkplug
6.Airlter13.Side-dischangechute
7.Fuel-tankcap
8.Battery(electric-start
modelonly)
9.Oilll/Dipstick
modelonly)
11.Blade-controlbar
12.Batterycharger
(electric-startmodelonly)
Specications
ModelWeightLengthWidthHeight
2973032kg
(71lb)
2973234kg
(76lb)
2973439kg
(85lb)
140cm
(55
inches)
140cm
(55
inches)
140cm
(55
inches)
56cm
inches)
56cm
inches)
56cm
inches)
(22
(22
(22
102cm
(40
inches)
102cm
(40
inches)
102cm
(40
inches)
Attachments/Accessories
AselectionofToroapprovedattachmentsandaccessoriesis
availableforusewiththemachinetoenhanceandexpand
itscapabilities.ContactyourAuthorizedServiceDealeror
7
Page 8

Distributororgotowww .Toro.comforalistofallapproved
attachmentsandaccessories.
Operation
WARNING
Fuelisharmfulorfatalifswallowed.Long-term
exposuretovaporscancauseseriousinjuryand
illness.
•Avoidprolongedbreathingofvapors.
BeforeOperation
BeforeOperationSafety
GeneralSafety
•Becomefamiliarwiththesafeoperationoftheequipment,
operatorcontrols,andsafetysigns.
•Checkthatallguardsandsafetydevices,suchasdeectors
and/orgrasscatcher,areinplaceandworkingproperly.
•Alwaysinspectthemachinetoensurethattheblades,
bladebolts,andcuttingassemblyarenotwornor
damaged.
•Inspecttheareawhereyouwillusethemachineand
removeallobjectsthatthemachinecouldthrow.
•Adjustingthecuttingheightmaybringyouintocontact
withthemovingblade,causingseriousinjury.
–Shutofftheengineandwaitforallmovingpartsto
stop.
–Donotputyourngersunderthehousingwhen
adjustingthecuttingheight.
FuelSafety
•Keepyourhandsandfaceawayfromthenozzle
andthefuel-tankopening.
•Keepfuelawayfromyoureyesandskin.
FillingtheFuelTank
•Forbestresults,useonlyclean,fresh(lessthan30days
old),unleadedgasolinewithanoctaneratingof87or
higher((R+M)/2ratingmethod).
•Oxygenatedfuelwithupto10%ethanolor15%MTBE
byvolumeisacceptable.
•Ethanol:Gasolinewithupto10%ethanol(gasohol)
or15%MTBE(methyltertiarybutylether)byvolume
isacceptable.EthanolandMTBEarenotthesame.
Gasolinewith15%ethanol(E15)byvolumeisnot
approvedforuse.Neverusegasolinethatcontains
morethan10%ethanolbyvolume,suchasE15
(contains15%ethanol),E20(contains20%ethanol),or
E85(containsupto85%ethanol).Usingunapproved
gasolinemaycauseperformanceproblemsand/orengine
damagewhichmaynotbecoveredunderwarranty.
•Donotusegasolinecontainingmethanol.
•Donotstorefueleitherinthefueltankorinfuel
containersoverthewinterunlessafuelstabilizerisused.
•Donotaddoiltogasoline.
DANGER
Fuelisextremelyammableandhighlyexplosive.
Areorexplosionfromfuelcanburnyouand
othersandcandamageproperty.
•Topreventastaticchargefromignitingthefuel,
placethecontainerand/ormachinedirectlyon
thegroundbeforelling,notinavehicleoron
anobject.
•Fillthefueltankoutdoors,inanopenarea,when
theengineiscold.Wipeupanyfuelthatspills.
•Donothandlefuelwhensmokingoraroundan
openameorsparks.
•Storefuelinanapprovedcontainerandkeepit
outofthereachofchildren.
Important:T oreducestartingproblems,addfuel
stabilizertothefuelallseason,mixingitwithgasoline
lessthan30daysold.
Figure11
8
Page 9

CheckingtheEngine-OilLevel
g032026
ServiceInterval:Beforeeachuseordaily
Max.ll:0.53L(18oz),type:10W-30orSAE30detergent
oilwithanAPIserviceclassicationofSJorhigher.
1.Movethemachinetoalevelsurface.
2.Removethedipstick(Figure12).
Figure12
AdjustingtheCuttingHeight
AdjustingtheCuttingHeight
(High-wheelmodelonly)
Adjustthecuttingheightasdesired.Setthefrontwheelsand
therearwheelstothesameheight.
Note:Toraiseorlowerthemachine,movethecutting-height
leversasshowninFigure13.
Figure13
1.Raisethemachine2.Lowerthemachine
Important:Thecuttingheightsettingsare32mm
(1-1/4inches);44mm(1-3/4inches);57mm(2-1/4
inches);70mm(2-3/4inches);83mm(3-1/4inches);
and95mm(3-3/4inches).
3.Wipeoffthedipstickendwithacleancloth.
4.Insertthedipstickintotheoil-lltubeandscrewitin
untilitstops.
5.Removethedipstickandreadtheoillevel;referto
Figure12.
•IftheoillevelisbelowtheAddmarkonthe
dipstick,addasmallamountofoilslowlytothe
oil-lltube,andthenrepeatsteps3through5until
theoillevelisattheFullmarkonthedipstick.
•IftheoillevelisabovetheFullmarkonthe
dipstick,draintheexcessoiluntiltheoillevelisat
theFullmarkonthedipstick.Todraintheexcess
oil,refertoChangingtheEngineOil(page15).
Important:Iftheoillevelinthecrankcaseis
toolowortoohighandyouruntheengine,
youmaydamagetheengine.
6.Installthedipsticksecurelybyhand.
9
Page 10

AdjustingtheCuttingHeight
(Regular-wheelmodelonly)
Adjustthecuttingheightasdesired.Setthefrontwheelsand
therearwheelstothesameheight.
Note:Toraiseorlowerthemachine,movethecutting-height
leversasshowninFigure14.
Figure14
•Watchforholes,ruts,bumps,rocks,orotherhidden
objects.Uneventerraincouldcauseaslip-and-fall
accident.
•Stopthemachineandinspectthebladesafterstrikingan
objectorifthereisanabnormalvibrationinthemachine.
Makeallnecessaryrepairsbeforeresumingoperation.
•Beforeleavingtheoperatingposition,shutofftheengine,
removethekey,andwaitforallmovingpartstostop.
•Iftheenginehasbeenrunningthemuferwillbehotand
canseverelyburnyou.Keepawayfromthehotmufer.
•Checkthegrasscatchercomponentsandthedischarge
guardfrequentlyandreplacethemwiththemanufacturer’ s
recommendedpartswhennecessary.
•UseaccessoriesandattachmentsapprovedbytheThe
Toro®Companyonly.
1.Raisethemachine2.Lowerthemachine
Important:Thecuttingheightsettingsare32mm
(1-1/4inches);44mm(1-3/4inches);57mm(2-1/4
inches);70mm(2-3/4inches);83mm(3-1/4inches);
and95mm(3-3/4inches).
DuringOperation
DuringOperatingSafety
GeneralSafety
•Wearappropriateclothing,includingeyeprotection;
slip-resistant,substantialfootwear;andhearing
protection.Tiebacklonghair,securelooseclothing,and
donotwearjewelry.
•Donotoperatethemachinewhileill,tired,orunderthe
inuenceofalcoholordrugs.
•Thebladeissharp;contactingthebladecanresultin
seriouspersonalinjury.Shutofftheengineandwaitfor
allmovingpartstostopbeforeleavingtheoperating
position.
•Whenyoureleasetheblade-controlbar,theengineshould
shutoffandthebladeshouldstopwithin3seconds.If
not,stopusingyourmachineimmediatelyandcontactan
AuthorizedServiceDealer.
SlopeSafety
•Mowacrossthefaceofslopes;neverupanddown.Use
extremecautionwhenchangingdirectiononslopes.
•Donotmowonexcessivelysteepslopes.Poorfooting
couldcauseaslip-and-fallaccident.
•Donotmowneardrop-offs,ditches,orembankments.
Youcouldloseyourfootingorbalance.
StartingtheEngine
1.Holdtheblade-controlbar(Figure15)againstthe
handle.
Figure15
1.Blade-controlbar
2.Turntheignitionkey(electric-startmodelsonly;refer
toFigure16)orpulltherecoil-starthandle(Figure17).
•Operatethemachineonlyingoodvisibilityand
appropriateweatherconditions.Donotoperatethe
machinewhenthereistheriskoflighting.
•Wetgrassorleavescancauseseriousinjuryifyouslipand
contacttheblade.Mowonlyindryconditions.
•Useextremecarewhenapproachingblindcorners,
shrubs,trees,orotherobjectsthatmayblockyourview .
Figure16
10
Page 11

Figure17
Note:Ifthemachinedoesnotstartafterseveral
attempts,contactanAuthorizedServiceDealer.
Figure19
MulchingtheClippings
UsingtheSelf-propelDrive (Self-propelmodelonly)
Tooperatetheself-propeldrive,squeezetheself-propeldrive
bar(Figure18)towardthehandleandholdit.
Figure18
1.Self-propeldrivebar
Todisengagetheself-propeldrive,releasetheself-propel
drivebar.
Yourmachinecomesfromthefactoryreadytomulchthe
grassandleafclippingsbackintothelawn.
Ifthegrassbagisonthemachine,removeitbeforemulching
theclippings.RefertoRemovingtheGrassBag(page12).
BaggingtheClippings
Usethegrassbagwhenyouwanttocollectgrassandleaf
clippingsfromthelawn.
InstallingtheGrassBag
1.Liftupthereardeector(Figure20).
Note:Themaximumself-propelgroundspeedisxed.To
reducethegroundspeed,increasethespacebetweenthe
self-propeldrivebarandthehandle.
StoppingtheEngine
ServiceInterval:Beforeeachuseordaily
Tostoptheengine,releasetheblade-controlbar(Figure19).
Note:Removetheignitionkeywhenyouleavethemachine
(electric-startmodelsonly).
Important:Whenyoureleasetheblade-controlbar,
boththeengineandbladeshouldstopwithin3seconds.
Iftheydonotstopproperly,stopusingyourmachine
immediatelyandcontactanAuthorizedServiceDealer.
Figure20
1.Reardeector3.Rodend(2)
2.Notchinthehandle
bracket(2)
2.Inserttherodendsofthegrassbagintothenotches
inthehandlebrackets(Figure20).
3.Allowthereardeectortorestonthebag.
11
4.Grassbag
Page 12

RemovingtheGrassBag
1.Liftupthereardeector(Figure20).
2.Liftthegrass-baghandleoutfromthenotchesonthe
handlebracketsandremovethebagfromthemachine.
3.Closethereardeector.
Side-Dischargingthe Clippings
InstallingtheSide-DischargeChute
1.Liftupthereardeector(Figure21).
OperatingTips
GeneralMowingTips
•Cleartheareaofsticks,stones,wire,branches,andother
debristhatthebladecouldhit.
•Avoidstrikingsolidobjectswiththeblade.Never
deliberatelymowoveranyobject.
•Ifthemachinestrikesanobjectorstartstovibrate,
immediatelystoptheengine,disconnectthewirefrom
thesparkplug,andexaminethemachinefordamage.
•Forbestperformance,installanewbladebeforethe
cuttingseasonbegins.
•ReplacethebladewhennecessarywithaToro
replacementblade.
CuttingGrass
•Cutonlyaboutathirdofthegrassbladeatatime.Donot
cutbelowthe2inch(51mm)settingunlessthegrassis
sparseoritislatefallwhengrassgrowthbeginstoslow
down.RefertoAdjustingtheCuttingHeight(page9).
Figure21
1.Reardeector
2.Rodend(2)4.Side-dischargechute
Note:Ifthegrassbagisonthemachine,removeit;
refertoRemovingtheGrassBag(page12).
2.Inserttherodendsoftheside-dischargechuteintothe
notchesonthehandlebrackets(Figure21).
3.Allowthereardeectortorestonthechute.
3.Notchinthehandle
bracket(2)
RemovingtheSide-DischargeChute
1.Liftupthereardeector(Figure21).
2.Lifttheside-dischargechuteoutformthenotcheson
thehandlebracketsandremovethechutefromthe
machine.
•Whencuttinggrassover6inches(15cm)tall,mowatthe
highestcuttingheightsettingandwalkslower;thenmow
againatalowersettingforthebestlawnappearance.If
thegrassistoolong,themachinemayplugandcause
theenginetostall.
•Mowonlydrygrassorleaves.Wetgrassandleavestend
toclumpontheyardandcancausethemachinetoplug
ortheenginetostall.
•Alternatethemowingdirection.Thishelpsdispersethe
clippingsoverthelawnforevenfertilization.
•Ifthenishedlawnappearanceisunsatisfactory,try1
ormoreofthefollowing:
–Replacethebladeorhaveitsharpened.
–Walkataslowerpacewhilemowing.
–Raisethecuttingheightonyourmachine.
–Cutthegrassmorefrequently .
–Overlapcuttingswathsinsteadofcuttingafullswath
witheachpass.
–Setthecuttingheightonthefrontwheelsanotch
lowerthantherearwheels.Forexample,setthefront
wheelsat2inches(51mm)andtherearwheelsat
2-1/2inches(64mm).
3.Closethereardeector.
12
Page 13

AfterOperation
2.MovethehandleforwardasshowninFigure22.
AfterOperatingSafety
GeneralSafety
•Cleangrassanddebrisfromthemachinetohelpprevent
res.Cleanupoilorfuelspills.
•Allowtheenginetocoolbeforestoringthemachinein
anyenclosure.
•Neverstorethemachineorfuelcontainerwherethereis
anopename,spark,orpilotlight,suchasonawater
heateroronotherappliances.
HaulingSafety
•Usecarewhenloadingorunloadingthemachineintoa
trailerortruck.
•Usefull-widthrampsforloadingthemachineintoa
trailerortruck.Donotexceeda15°anglebetweenthe
rampandthetrailerortruck.
•Tiethemachinedownsecurelyusingstraps,chains,cable,
orropes.Bothfrontandrearstrapsshouldbedirected
downandoutwardfromthemachine.
CleaningundertheMachine
ServiceInterval:Aftereachuse
1.Withtheenginerunningonaatpavedsurface,spraya
streamofwaterinfrontoftherightrearwheel(Figure
23).
Thewaterwillsplashintothepathoftheblade,
cleaningouttheclippings.
Figure23
2.Whennomoreclippingscomeout,stopthewaterand
movethemachinetoadryarea.
3.Runtheengineforafewminutestodrytheunderside
ofthemachinetopreventitfromrusting.
FoldingtheHandle
1.Loosenthehandleknobsuntilyoucanmovethe
handlefreely(Figure22).
1.Handleknob(2)
Figure22
13
Page 14

Maintenance
Note:Determinetheleftandrightsidesofthemachinefromthenormaloperatingposition.
RecommendedMaintenanceSchedule(s)
MaintenanceService
Interval
Beforeeachuseordaily
Aftereachuse
Every25hours
Every50hours
Every100hours
Beforestorage
Yearly
Important:Refertoyourengineowner’smanualforadditionalmaintenanceprocedures.
MaintenanceProcedure
•Checktheengine-oillevel.
•Ensurethattheenginestopswithin3secondsafterreleasingtheblade-controlbar.
•Cleangrassclippingsanddirtfromunderthemachine.
•Replacetheairlter;replaceitmorefrequentlyindustyoperatingconditions.
•Chargethebatteryfor24hours(electric-startmodelonly).
•Changetheengineoil.
•Cleanthecoolingsystem(refertoyourengineowner'smanual).
•Replacethesparkplug.
•Emptythefueltankbeforerepairsasdirectedandbeforeannualstorage.
•Changetheengineoil.
•Replacethebladeorhaveitsharpened(morefrequentlyiftheedgedullsquickly).
•Refertoyourengineowner'smanualforanyadditionalyearlymaintenance
procedures.
MaintenanceSafety
•Disconnectthespark-plugwirefromthesparkplug
beforeperforminganymaintenanceprocedure.
•Wearglovesandeyeprotectionwhenservicingthe
machine.
•Thebladeissharp;contactingthebladecanresultin
seriouspersonalinjury.Weargloveswhenservicingthe
blade.
•Nevertamperwithsafetydevices.Checktheirproper
operationregularly.
•Tippingthemachinemaycausethefueltoleak.Fuelis
ammableandexplosive,andcancausepersonalinjury.
Runtheenginedrytoremovethefuelwithahandpump;
neversiphonthefuel.
PreparingforMaintenance
1.Stoptheengineandwaitforallmovingpartstostop.
2.Disconnectthespark-plugwirefromthesparkplug
(Figure24)beforeperforminganymaintenance
procedure.
Figure24
1.Spark-plug
3.Afterperformingthemaintenanceprocedure(s),
connectthespark-plugwiretothesparkplug.
14
Page 15

ReplacingtheAirCleaner
ChangingtheEngineOil
ServiceInterval:Every25hours/Y early(whichevercomes
rst)
1.Pullthetabtoopentheair-ltercover(Figure25).
Figure25
1.Tab
2.Replacetheairlter.
ServiceInterval:Every50hours
Yearly
Note:Max.ll:0.59L(20oz),type:10W-30orSAE30
detergentoilwithanAPIserviceclassicationofSJorhigher.
1.Movethemachinetoalevelsurface.
2.Ensurethatthefueltankcontainslittleornofuelso
thatfueldoesnotleakoutwhenyoutipthemachine
ontoitsside.
3.Runtheengineafewminutesbeforechangingtheoil
towarmit.
Note:Warmoilowsbetterandcarriesmore
contaminants.
4.Disconnectthewirefromthesparkplug;referto
PreparingforMaintenance(page14).
5.Setanoil-drainpanbesidethemachineonthesideof
thedipstick.
6.Removethedipstickfromtheoil-lltube(Figure10).
7.Tipthemachineontoitsside,withtheoil-lltube
down,todraintheusedoiloutthroughtheoil-lltube
intotheoil-drainpan(Figure26).
3.Closetheair-ltercover.
Figure26
8.Afterdrainingtheusedoil,returnthemachinetothe
operatingposition.
9.Pourabout3/4ofthecrankcasecapacityofoilinto
theoil-lltube.
10.Wipeoffthedipstickendwithacleancloth.
11.Insertthedipstickintotheoil-lltubeandscrewitin
untilitstops.
12.Removethedipstickandreadtheoillevelonthe
dipstick(Figure27).
15
Page 16

g032026
Figure27
•IftheoillevelisbelowtheAddmarkonthe
dipstick,addasmallamountofoilslowlytothe
oil-lltube,andthenrepeatsteps10through12
untiltheoillevelisattheFullmarkonthedipstick.
•IftheoillevelisabovetheFullmarkonthe
dipstick,draintheexcessoiluntiltheoillevelisat
theFullmarkonthedipstick.
Figure28
2.Plugthechargerintoawalloutlet.
Note:Whenthebatterynolongerholdsacharge,
recycleordisposeofthelead-acidbatteryaccording
tolocalcodes.
Note:Yourbatterychargermayhavea2-colorLEDdisplay
thatindicatesthefollowingstatesofcharging:
•Aredlightindicatesthatthechargerischargingthe
battery.
•Agreenlightindicatesthatthechargerisfullychargedor
thechargerisdisconnectedfromthebattery.
•Aashinglightthatalternatesbetweenredandgreen
indicatesthatthebatteryisnearlyfullycharged.Thisstate
lastsonlyafewminutesuntilthebatteryisfullycharged.
Important:Iftheoillevelinthecrankcaseis
toolowortoohighandyouruntheengine,
youmaydamagetheengine.
13.Installthedipsticksecurelybyhand.
14.Recycletheusedoilproperly .
ChargingtheBattery (Electric-startmodelonly)
ServiceInterval:Every25hours
WARNING
CALIFORNIA
Proposition65Warning
Batteryposts,terminals,andrelated
accessoriescontainleadandleadcompounds,
chemicalsknowntotheStateofCalifornia
tocausecancerandreproductiveharm.
Washhandsafterhandling.
Chargethebatteryfor24hoursinitially,thenmonthly(every
25starts)orasneeded.Alwaysusethechargerinasheltered
areaandchargethebatteryatroomtemperature(70°or22°
C)wheneverpossible.
1.Connectthechargertothewireharnesslocatedbelow
theignitionkey(Figure28).
ReplacingtheFuse (Electric-startmodelonly)
Yourmachinecomeswithafusethatprotectstheelectric
starter.Ifthebatterydoesnotchargeortheenginedoesnot
runwiththeelectricstarter,thefusemaybeblown.Replace
itwitha40-ampplug-intypefuse.
Important:Y oucannotstartthemachinewiththe
electricstarterorchargethebatteryunlessyouinstall
thefuse.
1.Unclipthebatterycoverandremoveit(Figure29).
Figure29
1.Batterycover3.Battery
2.Foam4.Fuseholder
2.Insertthefuseintothefuseholder(Figure30).
16
Page 17

Figure30
6.Useatorquewrenchtotightenthebladeboltto82
N-m(60ft-lb).
Important:Abolttorquedto82N-m(60ft-lb)is
verytight.Whileholdingthebladewithablock
ofwood,putyourweightbehindtheratchetor
wrenchandtightentheboltsecurely.Thisboltis
verydifculttoovertighten.
3.Installthebatterycover.
ReplacingtheBlade
ServiceInterval:Yearly
Important:
blade pr oper l y
areuncomfortableperformingthisprocedure,contact
anAuthorizedServiceDealer.
Examinethebladewheneveryourunoutofgasoline.Ifthe
bladeisdamagedorcracked,replaceitimmediately.Ifthe
bladeedgeisdullornicked,haveitsharpenedorreplaceit.
1.Disconnectthespark-plugwirefromthesparkplug.
RefertoPreparingforMaintenance(page14).
2.Tipthemachineontoitsside,withtheairlterup.
3.Useablockofwoodtoholdthebladesteady.
4.Removetheblade(turnthebladebolt
counterclockwise),savingallthemounting
hardware.
5.Installthenewblade(turnthebladeboltclockwise)
andallmountinghardware(Figure31).
Y ou will need a torque wr ench to install the
.Ifyoudonothaveatorquewrenchor
AdjustingtheSelf-PropelDrive Cable(Self-propelmodelonly)
Wheneveryouinstallanewself-propelcableorifthe
self-propeldriveisoutofadjustment,adjusttheself-propel
drivecable.
1.Loosenthecable-supportnut(Figure32).
Figure32
1.25to38mm(1to1-1/2
inches)
2.Self-propeldrivebar5.Cablesupport
3.Cablejacket
4.Cable-supportnut
Figure31
Important:Positionthecurvedendsoftheblade
topointtowardthemachinehousing.
2.Holdtheself-propelbail25to38mm(1to1-1/2
inches)fromthehandle(Figure32).
3.Pulldownthecablejacket(towardthemachine)until
thereisnoslackinthecable(Figure32).
4.Tightenthenutonthecablesupport.
5.Releasetheself-propeldrivebarandensurethatthe
cableisloose.
Note:Thecablemustbeloosewiththeself-propel
drivebarinthereleasedposition;otherwise,the
machinemaycreepwhenyoudisengagethebar.
17
Page 18

Storage
3.Chargethebatteryfor24hours(electric-startmodel
only).
Storethemachineinacool,clean,dryplace.
StorageSafety
Keepthemachinefreeofgrass,leaves,orotherdebris
buildup.Cleanupoilorfuelspillsandremoveanyfuel-soaked
debris.Allowthemachinetocoolbeforestoringit.
PreparingtheMachinefor Storage
WARNING
Gasolinevaporscanexplode.
•Donotstoregasolinemorethan30days.
•Donotstorethemachineinanenclosurenear
anopename.
•Allowtheenginetocoolbeforestoringit.
1.Onthelastrefuelingoftheyear,addfuelstabilizerto
thefuelasdirectedbytheenginemanufacturer.
4.Connectthewiretothesparkplug.
2.Runthemachineuntiltheenginestopsfromrunning
outoffuel.
3.Primetheengineandstartitagain.
4.Allowtheenginetorununtilitstops.Whenyoucan
nolongerstarttheengine,itissufcientlydry.
5.Disconnectthewirefromthesparkplug.
6.Removethesparkplug,add30ml(1oz)ofoilthrough
thesparkplughole,andpullthestarterropeslowly
severaltimestodistributeoilthroughoutthecylinder
topreventcylindercorrosionduringtheoff-season.
7.Installthesparkplugandtightenitwithatorque
wrenchto20N-m(15ft-lb).
8.Tightenallnuts,bolts,andscrews.
9.Chargethebatteryfor24hours,thenunplugthe
batterychargeranstorethemachineinanunheated
area.Ifyoumuststorethemachineinaheatedarea,
youmustchargethebatteryevery90days(electric-start
modelonly).
RemovingtheMachinefrom Storage
1.Removethesparkplugandspintheenginerapidlyby
pullingtherecoil-starthandletoblowtheexcessoil
fromthecylinder.
2.Installthesparkplugandtightenitwithatorque
wrenchto20N-m(15ft-lb).
18
Page 19

InternationalDistributorList
Distributor:
AgrolancKft
AsianAmericanIndustrial(AAI)
B-RayCorporation
BrisaGoodsLLC
CascoSalesCompany
CeresS.A.CostaRica
CSSCTurfEquipment(pvt)Ltd.SriLanka
CyrilJohnston&Co.
CyrilJohnston&Co.RepublicofIreland
FatDragon
FemcoS.A.Guatemala
FIVEMANSNew-T echCo.,LtdChina
ForGarderOU
G.Y .K.CompanyLtd.
GeomechanikiofAthensGreece
GolfinternationalTurizm
HakoGroundandGardenSweden
HakoGroundandGarden
HayterLimited(U.K.)
HydroturfInt.CoDubai
HydroturfEgyptLLC
IrrimacPortugal351212388260ToroEuropeNVBelgium3214562960
IrrigationProductsInt'lPvtLtd.India00914424494387ValtechMorocco212537663636
JeanHeybroekb.v .Netherlands3130639461 1VictusEmakPoland48618238369
Country:
Hungary3627539640
HongKong85224977804
Korea82325512076
Mexico12104952417
PuertoRico7877888383
NorthernIreland442890813121
China
Estonia3723846060
Japan81726325861Riversa
Turkey902163365993
Norway4722907760
UnitedKingdom441279723444
UnitedArabEmirates97143479479T-MarktLogisticsLtd.Hungary3626525500
Egypt2025194308ToroAustraliaAustralia61395807355
PhoneNumber:Distributor:
MaquiverS.A.Colombia
MaruyamaMfg.Co.Inc.
Mountelda.s.CzechRepublic
Mountelda.s.Slovakia
5062391138
94112746100
442890813121ParklandProductsLtd.NewZealand6433493760
8861080841322
5024423277
86-10-63816136
30109350054
4635100000
MunditolS.A.
NormaGarden
OslingerTurfEquipmentSA
OyHakoGroundandGardenAb
Perfetto
PratoverdeSRL.
Prochaska&Cie
RTCohen2004Ltd.
LelyTurfcare
Lely(U.K.)Limited
SolvertS.A.S.
SpyprosStavrinidesLimitedCyprus
SurgeSystemsIndiaLimited
Country:
Japan81332522285
Argentina541148219999
Russia74954116120
Ecuador59342396970
Finland35898700733
Poland48618208416
Italy390499128128
Austria4312785100
Israel97298617979
Spain
Denmark4566109200
UnitedKingdom441480226800
France33130817700
India911292299901
PhoneNumber:
5712364079
420255704220
420255704220
34952837500
35722434131
EuropeanPrivacyNotice
TheInformationT oroCollects
ToroWarrantyCompany(T oro)respectsyourprivacy.Inordertoprocessyourwarrantyclaimandcontactyouintheeventofaproductrecall,weaskyou
tosharecertainpersonalinformationwithus,eitherdirectlyorthroughyourlocalT orocompanyordealer.
TheTorowarrantysystemishostedonserverslocatedwithintheUnitedStateswhereprivacylawmaynotprovidethesameprotectionasapplies
inyourcountry.
BYSHARINGYOURPERSONALINFORMA TIONWITHUS,YOUARECONSENTINGTOTHEPROCESSINGOFYOURPERSONALINFORMATION
ASDESCRIBEDINTHISPRIV ACYNOTICE.
TheWayToroUsesInformation
Toromayuseyourpersonalinformationtoprocesswarrantyclaims,tocontactyouintheeventofaproductrecallandforanyotherpurposewhichwetell
youabout.T oromayshareyourinformationwithT oro'safliates,dealersorotherbusinesspartnersinconnectionwithanyoftheseactivities.Wewillnot
sellyourpersonalinformationtoanyothercompany .Wereservetherighttodisclosepersonalinformationinordertocomplywithapplicablelawsand
withrequestsbytheappropriateauthorities,tooperateoursystemsproperlyorforourownprotectionorthatofotherusers.
RetentionofyourPersonalInformation
Wewillkeepyourpersonalinformationaslongasweneeditforthepurposesforwhichitwasoriginallycollectedorforotherlegitimatepurposes
(suchasregulatorycompliance),orasrequiredbyapplicablelaw.
Toro'sCommitmenttoSecurityofY ourPersonalInformation
Wetakereasonableprecautionsinordertoprotectthesecurityofyourpersonalinformation.Wealsotakestepstomaintaintheaccuracyandcurrent
statusofpersonalinformation.
AccessandCorrectionofyourPersonalInformation
Ifyouwouldliketorevieworcorrectyourpersonalinformation,pleasecontactusbyemailatlegal@toro.com.
AustralianConsumerLaw
AustraliancustomerswillnddetailsrelatingtotheAustralianConsumerLaweitherinsidetheboxoratyourlocalToroDealer.
374-0269RevK
Page 20

TheToroWarranty
TheT oroGTSStartingGuarantee
ResidentialProducts
and
ConditionsandProductsCovered
TheT oroCompanyanditsafliate,T oroWarrantyCompany ,pursuanttoanagreement
betweenthem,jointlypromisetorepairfortheoriginalpurchaser
listedbelowifdefectiveinmaterialsorworkmanshiporiftheT oroGTS(Guaranteedto
Start)enginewillnotstartontherstorsecondpull,providedtheroutinemaintenance
requiredintheOperator'sManualhavebeenperformed.
Thefollowingtimeperiodsapplyfromthedateofpurchase:
ProductsWarrantyPeriod
WalkPowerMowers
•CastDeck
5yearsResidentialUse
90DaysCommercialUse
•Engine
5yearsGTSGuarantee,
ResidentialUse
•Battery2years
•SteelDeck
2yearsResidentialUse
30DaysCommercialUse
•Engine
2yearsGTSGuarantee,
ResidentialUse
TimeMasterMowers3yearsResidentialUse
90DaysCommercialUse
•Engine
3yearsGTSGuarantee,
ResidentialUse
•Battery2years
ElectricHandHeldProducts
andWalkPowerMowers
2yearsResidentialUse
NoWarrantyforCommercialUse
Snowthrowers
•SingleStage
2yearsResidentialUse
45DaysCommercialUse
•Engine
•TwoStage
2yearsGTSGuarantee,
ResidentialUse
3yearsResidentialUse
45DaysCommercialUse
•Chute,chutedeectorand
impellerhousingcover
ElectricSnowthrowers
Lifetime(originalowneronly)
2yearsResidentialUse
NoWarrantyforCommercialUse
AllRide-OnUnitsBelow
•Engine
Seeenginemanufacturer'swarranty
•Battery2yearsResidentialUse
•Attachments2yearsResidentialUse
DHLawn&GardenTractors
2yearsResidentialUse
30DaysCommercialUse
XLSLawn&GardenTractors
3yearsResidentialUse
30DaysCommercialUse
TimeCutter
3yearsResidentialUse
30DaysCommercialUse
TITANMowers3yearsor240hours
•Frame
1
OriginalPurchasermeansthepersonwhooriginallypurchasedtheT oroProduct.
2
Residentialusemeansuseoftheproductonthesamelotasyourhome.Useatmorethanone
locationisconsideredcommercialuseandthecommercialusewarrantywouldapply .
3
TheT oroGTSStartingGuaranteedoesnotapplywhentheproductisusedcommercially.
4
SomeenginesusedonToroProductsarewarrantedbytheenginemanufacturer.
5
Whicheveroccursrst.
6
LifetimeFrameWarranty-Ifthemainframe,consistingofthepartsweldedtogethertoformthe
tractorstructurethatothercomponentssuchastheenginearesecuredto,cracksorbreaksin
normaluse,itwillberepairedorreplaced,atT oro'soption,underwarrantyatnocostforpartsand
labor.Framefailureduetomisuseorabuseandfailureorrepairrequiredduetorustorcorrosion
arenotcovered.
Warrantymaybedeniedifthehourmeterisdisconnected,altered,orshowssigns
ofbeingtamperedwith.
Lifetime(originalowneronly)
1
theT oroProduct
2
3
2
3
2
3
2
2
3
2
5
2
2
2
2
2
2
5
4
6
OwnerResponsibilities
YoumustmaintainyourT oroProductbyfollowingthemaintenanceprocedures
describedintheOperator'sManual.Suchroutinemaintenance,whetherperformedby
adealerorbyyou,isatyourexpense.
InstructionsforObtainingWarrantyService
IfyouthinkthatyourT oroProductcontainsadefectinmaterialsorworkmanship,
followthisprocedure:
1.Contactyoursellertoarrangeserviceoftheproduct.Ifforanyreasonitis
impossibleforyoutocontactyourseller,youmaycontactanyT oroAuthorized
Distributortoarrangeservice.SeeattachedDistributorList.
2.Bringtheproductandyourproofofpurchase(salesreceipt)totheservicing
outlet.Ifforanyreasonyouaredissatisedwiththeservicingoutlet’sanalysisor
withtheassistanceprovided,contactusat:
ToroCustomerCareDepartment,RLCDivision
ToroWarrantyCompany
811 1LyndaleAvenueSouth
Bloomington,MN55420-1196
001–952–948–4707
ItemsandConditionsNotCovered
Thereisnootherexpresswarrantyexceptforspecialemissionsystemcoverage
andenginewarrantycoverageonsomeproducts.Thisexpresswarrantydoesnot
coverthefollowing:
•Costofregularmaintenanceserviceorparts,suchaslters,fuel,lubricants,oil
changes,sparkplugs,airltersbladesharpeningorwornblades,cable/linkage
adjustments,orbrakeandclutchadjustments
•Componentsfailingduetonormalwear
•Anyproductorpartwhichhasbeenalteredormisusedorneglectedandrequires
replacementorrepairduetoaccidentsorlackofpropermaintenance
•Pickupanddeliverycharges
•RepairsorattemptedrepairsbyanyoneotherthananAuthorizedToroService
Dealer
•Repairsnecessaryduetofailuretofollowrecommendedfuelprocedure(consult
Operator'sManualformoredetails)
–Removingcontaminantsfromthefuelsystemisnotcovered
–Useofoldfuel(morethanonemonthold)orfuelwhichcontainsmorethan
10%ethanolormorethat15%MTBE
–Failuretodrainthefuelsystempriortoanyperiodofnon-useoverone
month
•Repairsoradjustmentstocorrectstartingdifcultiesduetothefollowing:
–Failuretofollowpropermaintenanceproceduresorrecommendedfuel
procedure
–Rotarymowerbladestrikinganobject
•Specialoperationalconditionswherestartingmayrequiremorethantwopulls:
–Firsttimestartsafterextendedperiodofnon-useoverthreemonthsor
seasonalstorage
–Cooltemperaturestartssuchasthosefoundinearlyspringandlateautumn
–Improperstartingprocedures-ifyouarehavingdifcultystartingyour
unit,pleasechecktheOperator'sManualtoensurethatyouareusing
thecorrectstartingprocedures.Thiscansaveanunnecessaryvisitto
anAuthorizedT oroServiceDealer.
GeneralConditions
Thepurchaseriscoveredbythenationallawsofeachcountry.Therightstowhichthe
purchaserisentitledwiththesupportoftheselawsarenotrestrictedbythiswarranty.
374-0268RevG
 Loading...