

Page 1
AuxiliaryValveKit
RT600TractionUnit
ModelNo.25445
FormNo.3388-147RevA
InstallationInstructions
Safety
WARNING
CALIFORNIA
Proposition65Warning
Thisproductcontainsachemicalorchemicals
knowntotheStateofCaliforniatocausecancer,
birthdefects,orreproductiveharm.
SafetyandInstructional
Decals
Safetydecalsandinstructionsareeasily
visibletotheoperatorandarelocatednear
anyareaofpotentialdanger.Replaceany
decalthatisdamagedorlost.
©2014—TheT oro®Company
8111LyndaleAvenueSouth
Bloomington,MN55420
Registeratwww.T oro.com.
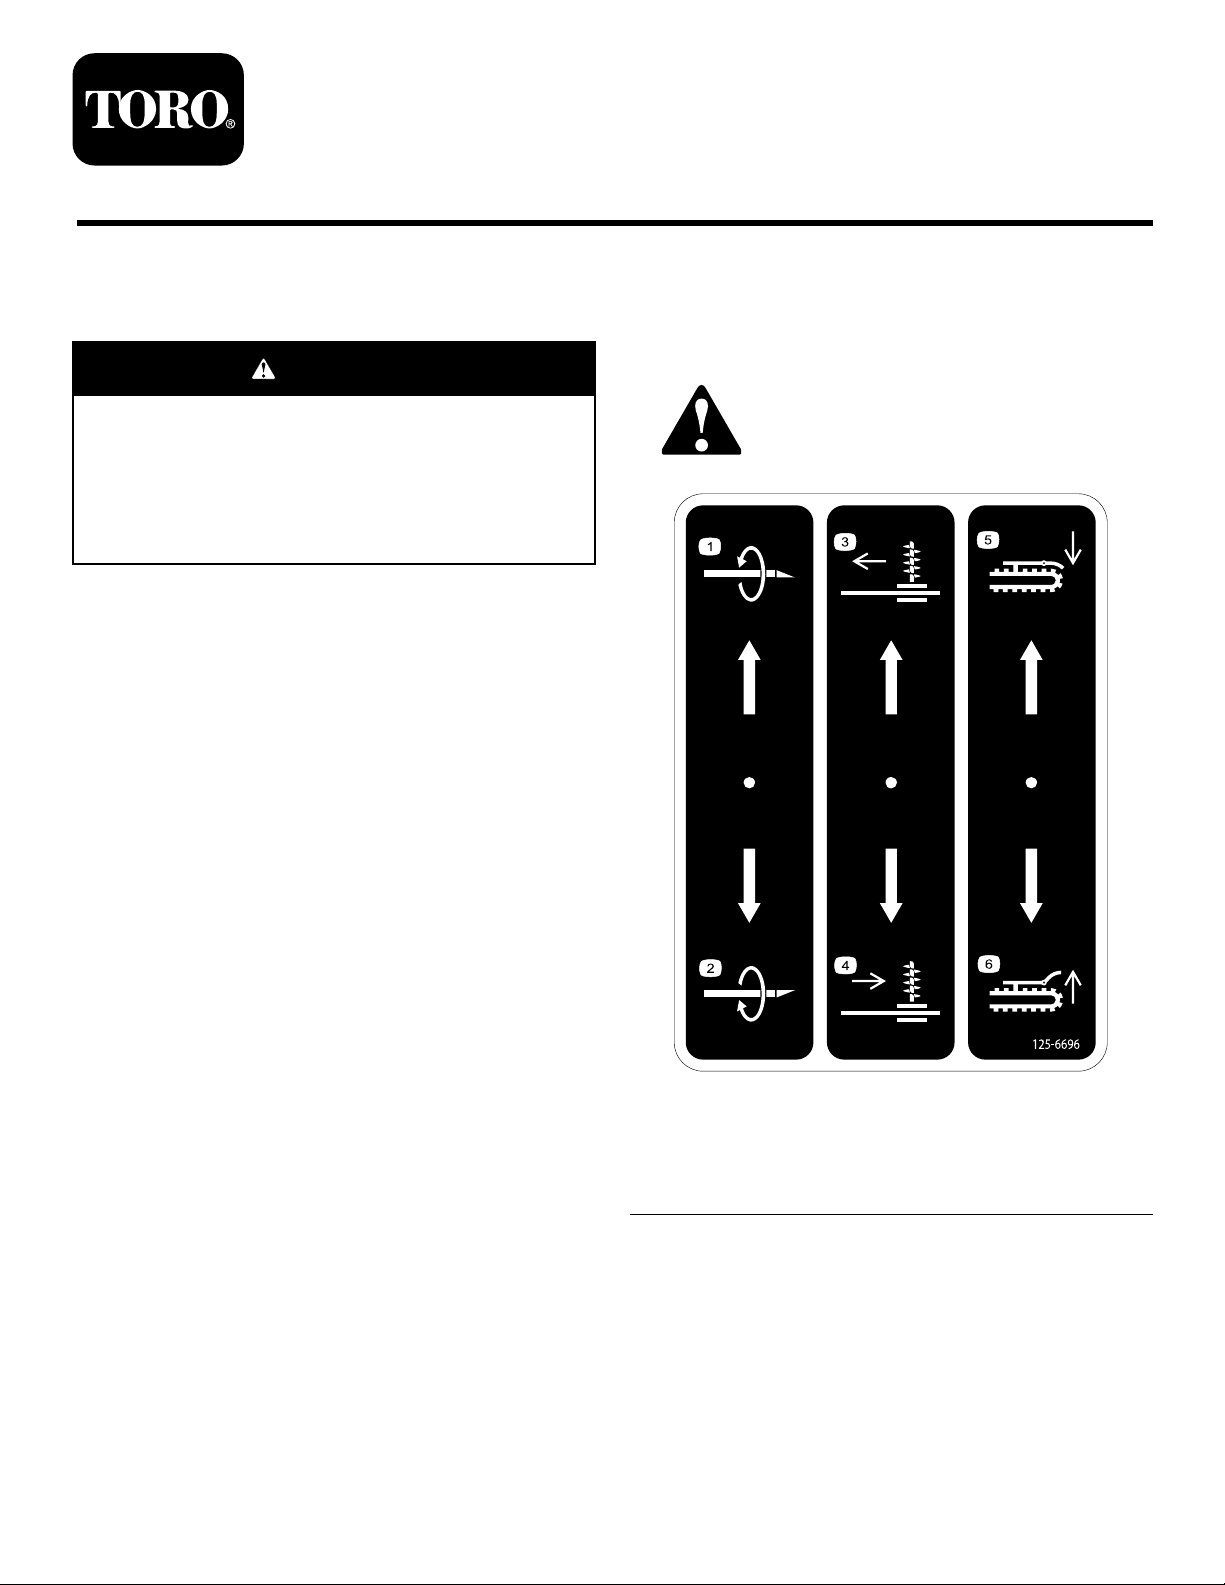
125-6696
1.Rotatecounterclockwise4.Moveright
2.Rotateclockwise5.Lowertheguard
3.Moveleft
OriginalInstructions(EN)
PrintedintheUSA
AllRightsReserved
6.Raisetheguard
*3388-147*A
Page 2

Installation
g027024
2
1
LooseParts
Usethechartbelowtoverifythatallpartshavebeenshipped.
Description
Nopartsrequired
Auxiliaryvalve1
Bracket1
Bolts(M8)
90-degreetting(1/2-inchmale,5/8-inch
male)
Cover
Clipnut
Bolts(M6)
90-degreetting(5/8-inchmale,male)
90-degreetting(5/8-inchmale,5/8-inch
female)
Teetting
Hydraulichose(30inches)
Directionalvalveassembly1
Bolts(5/16inch)
Washer2
ShortHydraulictube
Longhydraulictube1
Hydraulichose(24inches)
90-degreetting(5/8-inchmale,3/4-inch
female)
Decal1
Cableties
Qty.
Use
–
3
2
1
3
3
2
1
1
1
2
1
1
2
2
Preparethemachine.
Installtheauxiliaryvalve.
Installthedirectionalvalvecoverandassembly.
Installthehydraulichosesandthedecal.
PreparingtheMachine
1.Movethemachinetoalevelsurface.
2.Settheparkingbrakeandlowertheattachmentsto
theground.
3.Shutoffthemachineandremovethekey.
4.Removetheboltsandcoverfromtheexistingbulkhead
mountasshowninFigure1.
Figure1
1.Bolts
2.Cover
2
Page 3

InstallingtheAuxiliaryValve
InstallingtheDirectionalValve
1.Applythread-lockingadhesivetothe3bolts(M8)and
securetheauxiliaryvalvetothebracketasshownin
Figure2.
Figure2
1.90-degreettings3.Bolts(M8)
2.Bracket
2.Installthe2ttings(90degree,1/2-inchmale,5/8-inch
male)ontothevalveasshowninFigure2.
Note:Ensurethatthettingontherightsideis
turned25degrees.
3.Removethebolts,washers,andnutssecuringthelower
rightsidepaneltotheROPS(Figure3).
CoverandAssembly
1.Installthe3clipnutsontothenewcoverassemblyas
showninFigure4.
Figure4
1.Bolts(M6)3.Cover
2.Clipnuts
2.Applythread-lockingadhesivetothe3bolts(M6)and
securethecovertothebulkheadmountasshownin
Figure4.
3.Installbothofthe90-degreettings(5/8-inchmale,
male),theTeetting,andthe90-degreetting
(5/8-inchmale,5/8-inchfemale)ontothedirectional
valveasshowninFigure5.
Figure3
4.SecuretheauxiliaryvalveassemblytotheROPSusing
thebolts,washers,andnutsremovedintheprevious
stepasshowninFigure3.
Figure5
1.90-degreetting(5/8-inch
male,5/8-inchmale)
2.90-degreetting(5/8-inch
male,5/8-inchfemale)
3.Teetting6.90-degreetting(5/8-inch
4.Valvenut
5.Coil
male,male)
4.Torquethettingsto142to162N-m(105to120ft-lb).
5.Installthe30-inchhoseontothelower90-degree
tting(5/8-inchmale,male)(Figure5).
6.Loosenthevalvenutandrotatethecoilonthe
directionalvalve180degrees(Figure5).
3
Page 4

7.Torquethevalvenutto142to162N-m(105to120
1
g027031
ft-lb).
8.Applythread-lockingadhesivetothe2bolts(5/16
inch)andlooselysecurethedirectionalvalveassembly
tothecoverusingthe2bolts,and2washersasshown
inFigure6.
Note:Makesurethatport2isshowingontopofthe
valve.
90-degreettingontheauxiliaryvalveasshownin
Figure8.
Figure6
1.Bolts(5/16inch)3.Valvettingcover
2.Washers
9.Removethevalvettingcovercurrentlyinstalledon
thebulkheadasshowninFigure6.
InstallingtheHydraulicHoses
andtheDecal
1.Installthelonghydraulictubefromtheteettingto
thefurthest90degreettingonthebulkheadassembly
asshowninFigure7.
Figure8
1.Hydraulichose(30inches)3.Hydraulichose(24inches)
2.90-degreetting(5/8male,
female)
4.Installthe24-inchhosefromtheinnermost90-degree
ttingtothe90-degreettingontheteevalve
connectedtothedirectionalvalveassemblyasshown
inFigure8.
5.Securethehosestogetherwiththe2cableties.
6.Tightentheboltssecuringthedirectionalvalve
assemblytothecover(Figure6).
7.InstallthedecalasshowninFigure9.
Figure7
1.Longhydraulictube
2.90-degreetting(5/8inch
male,3/4inchfemale)
3.Shorthydraulictube
2.Installtheshorthydraulictubefromthe90-degree
ttingontopofthedirectionalvalveassemblytothe
closest90-degreettingonthebulkheadassemblyas
showninFigure7.
3.Connectthe30-inchhose,previouslyinstalledonthe
bottomofthedirectionalvalveassembly,totheoutside
Figure9
1.Decal
4
 Loading...