

Page 1
FormNo.3421-672RevA
20inTurfSeeder
ModelNo.23508—SerialNo.400000000andUp
ModelNo.33512—SerialNo.400000000andUp
Registeratwww.T oro.com.
OriginalInstructions(EN)
*3421-672*A
Page 2

ItisaviolationofCaliforniaPublicResourceCode
Section4442touseoroperatetheengineonany
forest-covered,brush-covered,orgrass-covered
landwithoutasparkarrestermufermaintainedin
workingorder,ortheengineconstricted,equipped,
andmaintainedforthepreventionofre.Otherstates
orfederalareasmayhavesimilarlaws.
Becauseinsomeareastherearelocal,state,or
federalregulationsrequiringthatasparkarresterbe
usedontheengineofthismachine,asparkarresteris
availableasanoption.Ifyourequireasparkarrester,
contactyourAuthorizedServiceDealer.GenuineT oro
sparkarrestersareapprovedbytheUSDAForestry
Service.
Theenclosedengineowner'smanualissupplied
forinformationregardingtheUSEnvironmental
ProtectionAgency(EPA)andtheCaliforniaEmission
ControlRegulationofemissionsystems,maintenance,
andwarranty.Replacementsmaybeorderedthrough
theenginemanufacturer.
WARNING
DealerorToroCustomerServiceandhavethemodel
andserialnumbersofyourproductready.Figure1
identiesthelocationofthemodelandserialnumbers
ontheproduct.Writethenumbersinthespace
provided.
Important:Withyourmobiledevice,youcan
scantheQRcode(ifequipped)ontheserial
numberdecalorgotowww.Toro.comtoaccess
warranty,parts,andotherproductinformation.
CALIFORNIA
Proposition65Warning
Theengineexhaustfromthisproduct
containschemicalsknowntotheStateof
Californiatocausecancer,birthdefects,
orotherreproductiveharm.
Useofthisproductmaycauseexposure
tochemicalsknowntotheStateof
Californiatocausecancer,birthdefects,
orotherreproductiveharm.
Introduction
Thismachineseeds,dethatches,andpowerrakes
turfbothforrevitalizingexistingturfandforspreading
seed.Itisintendedforsmalltomediumsizedlawn
applicationsinresidentialandcommercialproperties.
Readthisinformationcarefullytolearnhowtooperate
andmaintainyourproductproperlyandtoavoid
injuryandproductdamage.Youareresponsiblefor
operatingtheproductproperlyandsafely .
YoumaycontactTorodirectlyatwww.T oro.comfor
productandaccessoryinformation,helpndinga
dealer,ortoregisteryourproduct.
g252246
Figure1
1.Modelandserialnumberlocation
ModelNo.
SerialNo.
Thismanualidentiespotentialhazardsandhas
safetymessagesidentiedbythesafety-alertsymbol
(Figure2),whichsignalsahazardthatmaycause
seriousinjuryordeathifyoudonotfollowthe
recommendedprecautions.
g000502
Figure2
Safety-alertsymbol
Thismanualuses2wordstohighlightinformation.
Importantcallsattentiontospecialmechanical
informationandNoteemphasizesgeneralinformation
worthyofspecialattention.
Wheneveryouneedservice,genuineToroparts,or
additionalinformation,contactanAuthorizedService
©2018—TheToro®Company
8111LyndaleAvenueSouth
Bloomington,MN55420
Contactusatwww.Toro.com.
2
PrintedintheUSA
AllRightsReserved
Page 3

Contents
Safety.......................................................................4
GeneralSafety...................................................4
SafetyandInstructionalDecals..........................5
Setup........................................................................8
1UnfoldingtheHandle.......................................8
2CheckingtheEngine-OilLevel.........................8
ProductOverview.....................................................9
Controls.............................................................9
Specications...................................................11
TorqueRequirements........................................11
Attachments/Accessories..................................11
Operation................................................................12
BeforeOperationSafety...................................12
AddingFuel......................................................12
CheckingtheEngineOil...................................14
AdjustingtheCutting-BladeDepth....................14
AdjustingtheSeeding-RateGauge...................14
UsingtheSeedCover.......................................15
DuringOperationSafety...................................15
StartingtheMachine.........................................17
ShuttingOfftheMachine..................................17
OperatingtheSelf-PropelDrive........................17
OperatingtheBlade-ControlBail......................18
OperatingtheMachine.....................................18
OperatingTips..................................................19
AfterOperationSafety......................................20
TransportingtheMachine.................................20
DisengagingtheHydrostaticDrive....................20
Maintenance...........................................................21
RecommendedMaintenanceSchedule(s)...........21
Pre-MaintenanceProcedures..............................22
MaintenanceSafety..........................................22
DisconnectingtheSpark-PlugWire..................22
Lubrication..........................................................23
LubricatingtheSlicer-ShaftBearings................23
EngineMaintenance...........................................23
EngineSafety...................................................23
ServicingtheAirCleaner..................................23
ServicingtheEngineOil....................................24
ServicingtheSparkPlug...................................26
CheckingtheSparkArrester.............................26
FuelSystemMaintenance...................................27
DrainingtheFuelT ank......................................27
DriveSystemMaintenance..................................27
CheckingtheTirePressure...............................27
AdjustingtheSelf-PropelDrive.........................28
ChangingtheHydraulic-Transmission
Fluid..............................................................28
BeltMaintenance................................................29
CheckingtheConditionoftheBelts...................29
AdjustingtheSelf-PropelDrive-Belt
Tension.........................................................29
CuttingBladeMaintenance..................................30
CheckingandReplacingtheBlades..................30
SeedGateMaintenance.......................................31
CheckingtheSeedGate...................................31
AdjustingtheSeed-GateClosed
Position.........................................................32
Cleaning..............................................................32
CleaningtheEngineArea.................................32
CleaningundertheMachine.............................32
CleaningundertheBeltCover.........................33
CleaningtheSeedGate....................................33
Storage...................................................................34
StorageSafety..................................................34
StoringtheMachine..........................................34
RemovingtheMachinefromStorage................34
Troubleshooting......................................................35
3
Page 4

Safety
Thismachinehasbeendesignedinaccordancewith
ANSIB71.4-2017.Improperuseormaintenance
bytheoperatororownercanresultininjury .To
reducethepotentialforinjury ,complywiththese
safetyinstructionsandalwayspayattentiontothe
safety-alertsymbol(Figure2),whichmeansCaution,
Warning,orDanger—personalsafetyinstruction.
Failuretocomplywiththeinstructionmayresultin
personalinjuryordeath.
GeneralSafety
Thisproductiscapableofinjuringhandsandfeet
andofthrowingobjects.Alwaysfollowallsafety
instructionstoavoidseriouspersonalinjury.
Usingthisproductforpurposesotherthanitsintended
usecouldprovedangeroustoyouandbystanders.
•Readandunderstandthecontentsofthis
Operator’sManualbeforestartingtheengine.
•Donotputyourhandsorfeetnearmoving
componentsofthemachine.
•Donotoperatethemachinewithoutallguards
andothersafetyprotectivedevicesinplaceand
workingonthemachine.
•Keepchildrenandbystandersoutoftheoperating
area.Neverallowchildrentooperatethemachine.
•Stopthemachineandshutofftheenginebefore
servicing,fueling,oruncloggingthemachine.
Improperlyusingormaintainingthismachinecan
resultininjury .T oreducethepotentialforinjury,
complywiththesesafetyinstructionsandalwayspay
attentiontothesafety-alertsymbol(Figure2),which
meansCaution,Warning,orDanger—personalsafety
instruction.Failuretocomplywiththeseinstructions
mayresultinpersonalinjuryordeath.
Youcanndadditionalsafetyinformationwhere
neededthroughoutthismanual.
4
Page 5
SafetyandInstructionalDecals
Safetydecalsandinstructionsareeasilyvisibletotheoperatorandarelocatednearanyarea
ofpotentialdanger.Replaceanydecalthatisdamagedormissing.
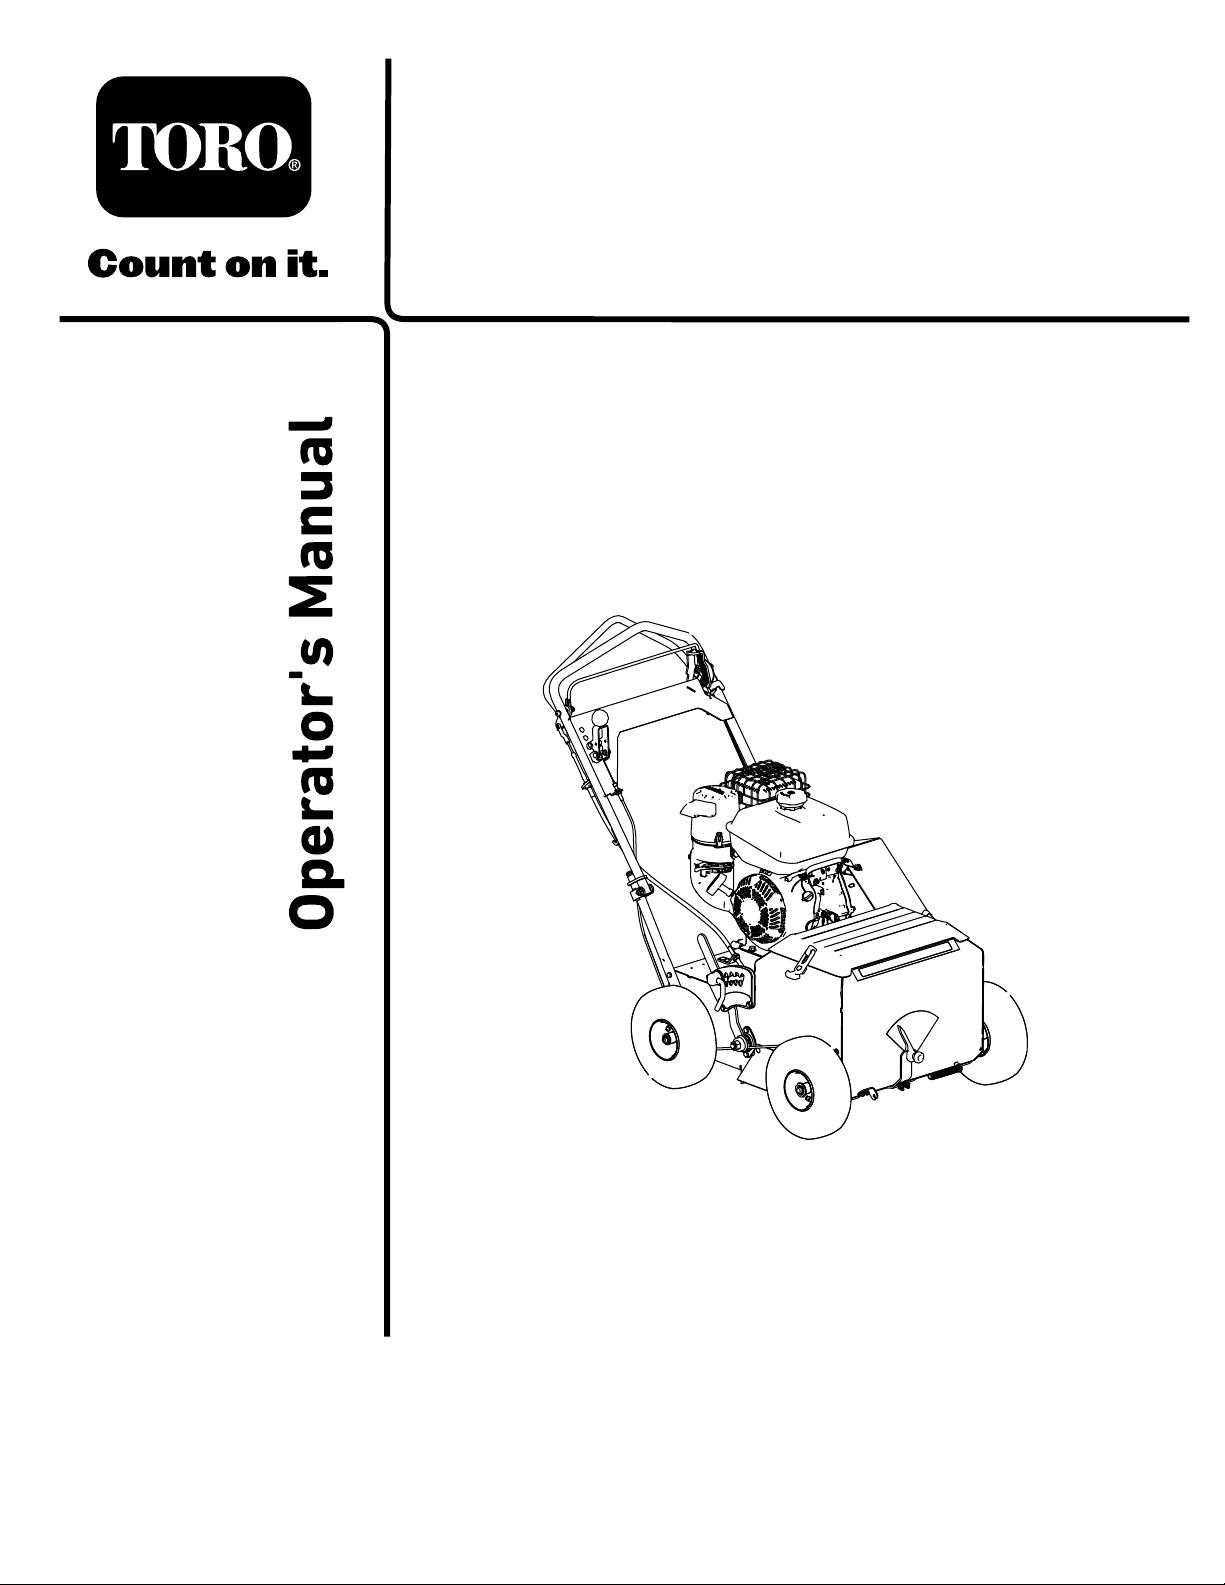
93-7321
1.Cutting/dismembermenthazardofhandsandfeet,rotating
knives/blades—stayawayfrommovingparts.
decal93-7321
decal116-8536
116-8536
1.Cuttingblades-pressdownonleverandpullbladecontrol
bailagainstthehandletoengagethecuttingblades.
decal115-9625
115-9625
1.Parking
brake—disengaged
2.Parkingbrake—engaged
decal116-8535
116-8535
1.Lowerseedowrate2.Higherseedowrate
5
Page 6
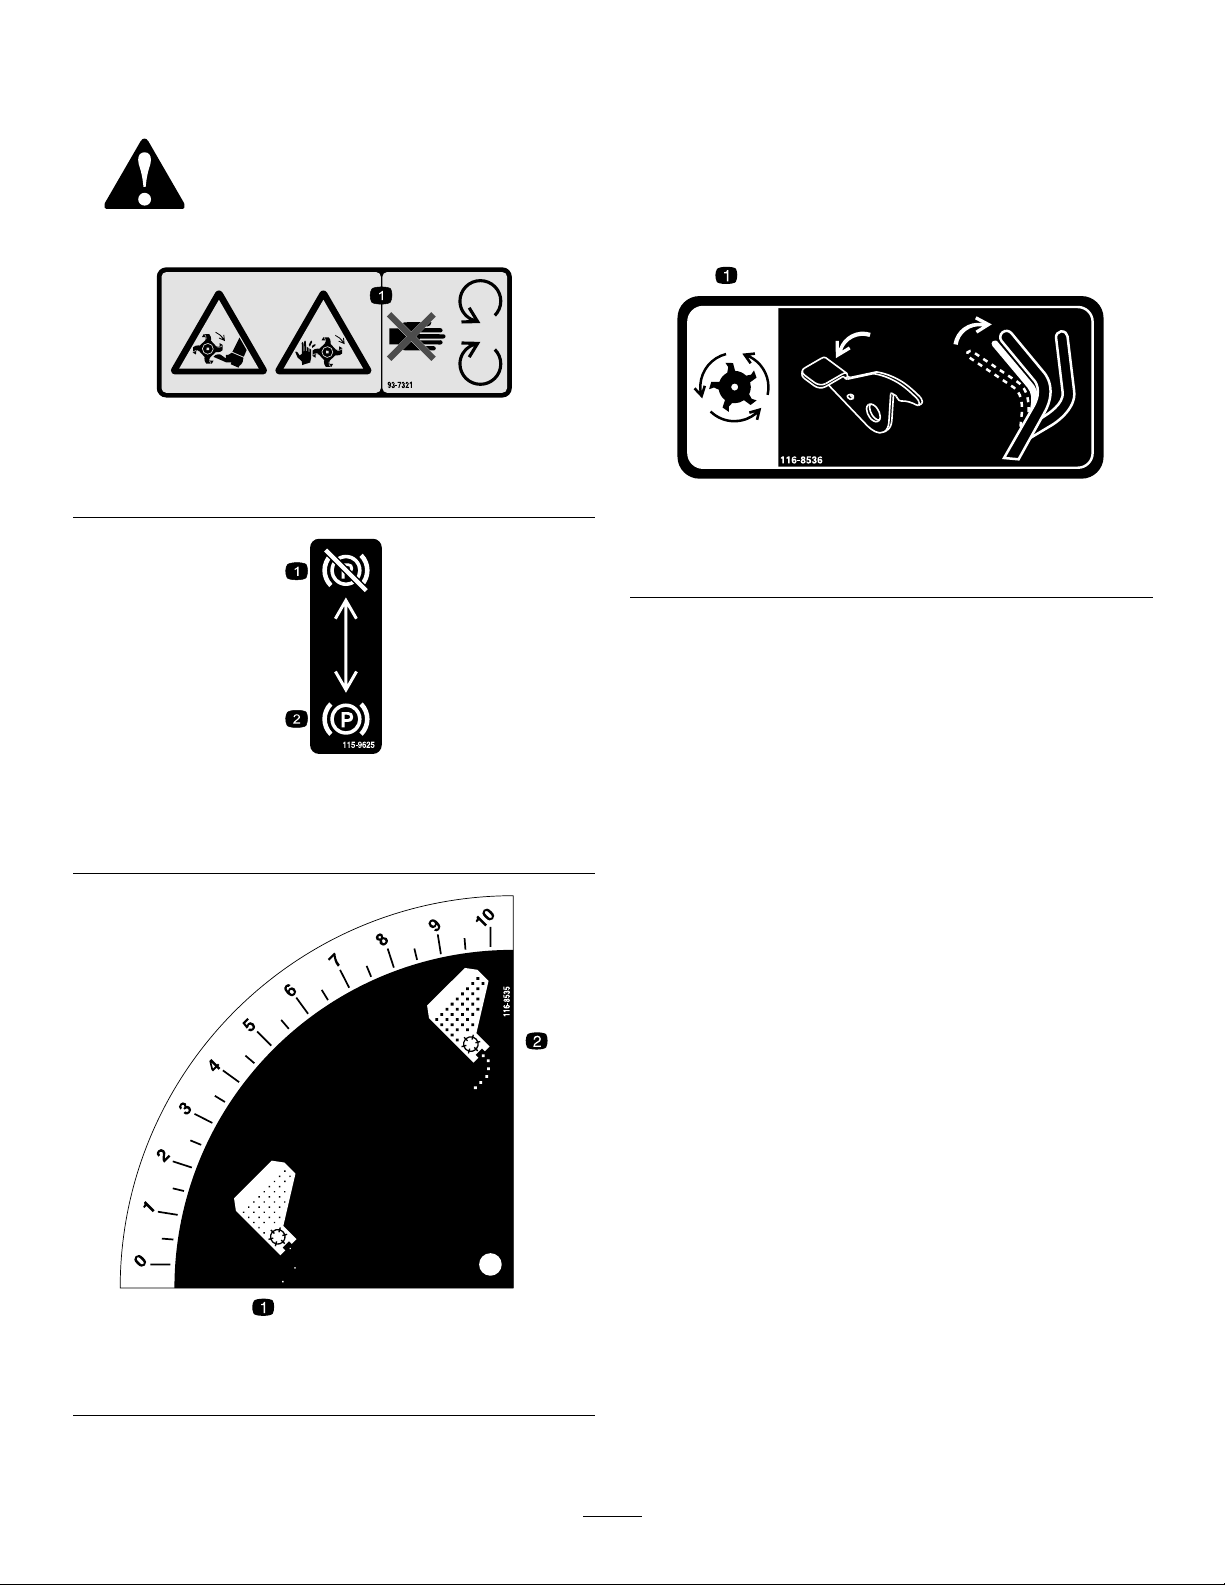
decal116-8537
116-8537
decal116-8648
116-8648
1.Tostarttheengine,readtheOperator’sManual-(1)Parkthe
machineonalevelsurface(2)Filltheenginewithoil(3)Move
thecontrolbarstoaneutralposition(4)Starttheengine.
2.Self-propeldrive-pushtheself-propeldrivebailforwardto
movethemachineforward;pulltheself-propeldrivebail
downwardtomovethemachinebackward.
decal117-2718
117-2718
3.Cuttingblades-releasethebladecontrolbail(neutral
position)todisengagethecuttingblades;holdtheblade
controlbailagainstthehandletoengagethecuttingblades.
4.Seedhopperon;seedhopperoff.
decal117-4979
117-4979
1.Entanglementhazard,belt—keepawayfrommovingparts;
keepallguardsandshieldsinplace.
6
Page 7
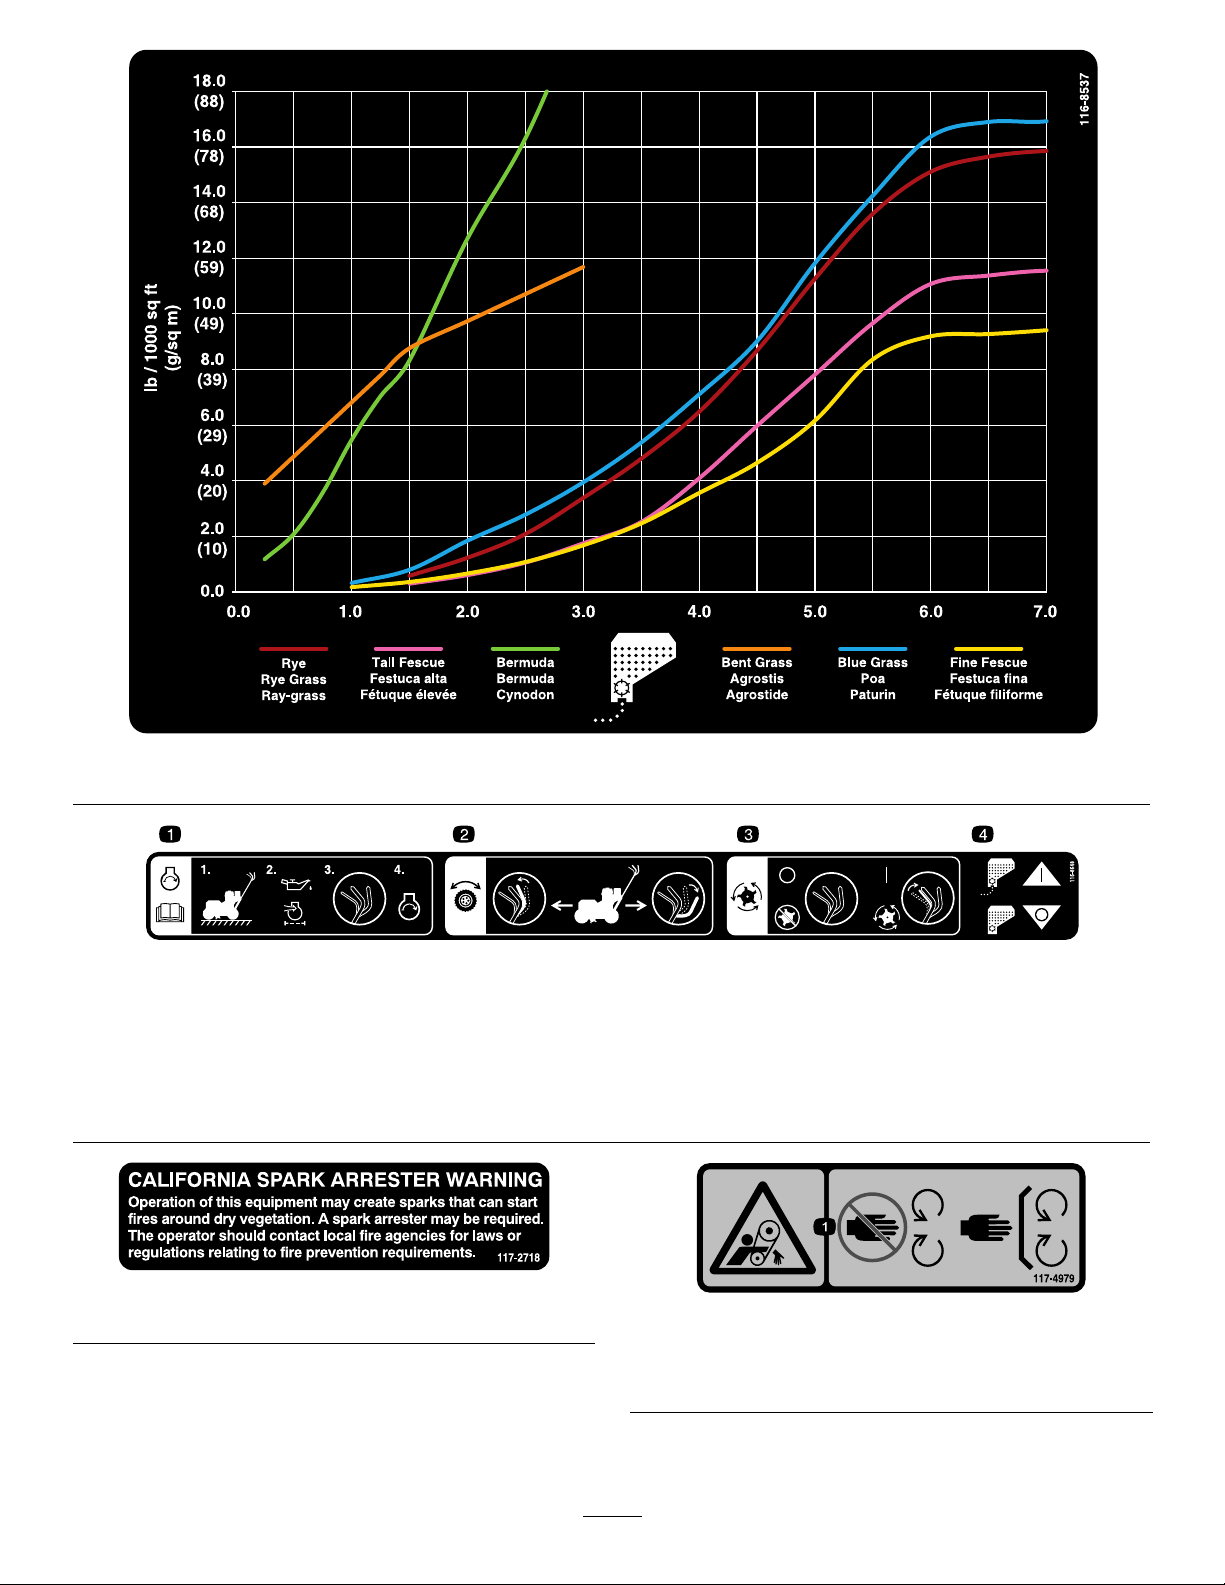
121-2011
decal121-2011
1.Warning—readthe
Operator’sManual.
2.Warning—donotoperate
thismachineunlessyou
aretrained.
1.Bypassleverpositionfor
operatingthemachine
2.Bypassleverpositionfor
pushingthemachine
3.Thrownobjecthazard;pick
updebrisbeforeoperating.
4.Warning—keephands
awayfrommovingparts,
keepallguardsandshields
inplace.
121-6203
3.ReadtheOperator’s
manual
5.Thrownobject
hazard—keepbystanders
asafedistancefromthe
machine.
7.Warning—shutoffthe
engineandremove
thesparkplugwire
beforeperformingany
maintenanceonthe
machine.
6.Warning—shutoffthe
enginebeforeleavingthe
machine.
decal126-0296
126-0296
1.Readandunderstandthe
operator’smanualbefore
decal121-6203
servicingthismachine
2.Checktirepressure—13
psi(4x)every50hours
3.Greasetheslicershaft
bearingsevery25hours
4.Checktransmissionbelt
drivetensionevery25
hours
5.Seeengineowner’s
manualforservice
1.Bladeup;“T”=Transport
2.“A”through“H”increasing
7
decal126-2446
126-2446
position
depthsettings
3.“H”=deepestblade
setting;bladedown
Page 8

Setup
2
1
UnfoldingtheHandle
NoPartsRequired
Procedure
1.Raisethehandletotheoperatingposition
(Figure3).
CheckingtheEngine-Oil Level
NoPartsRequired
Procedure
RefertoCheckingtheEngine-OilLevel(page25).
Figure3
2.Slidetheovallockingringsdowneachsideof
theupperhandleandoverthelowerhandle
(Figure3),lockingthehandlesectionstogether.
g029059
8
Page 9
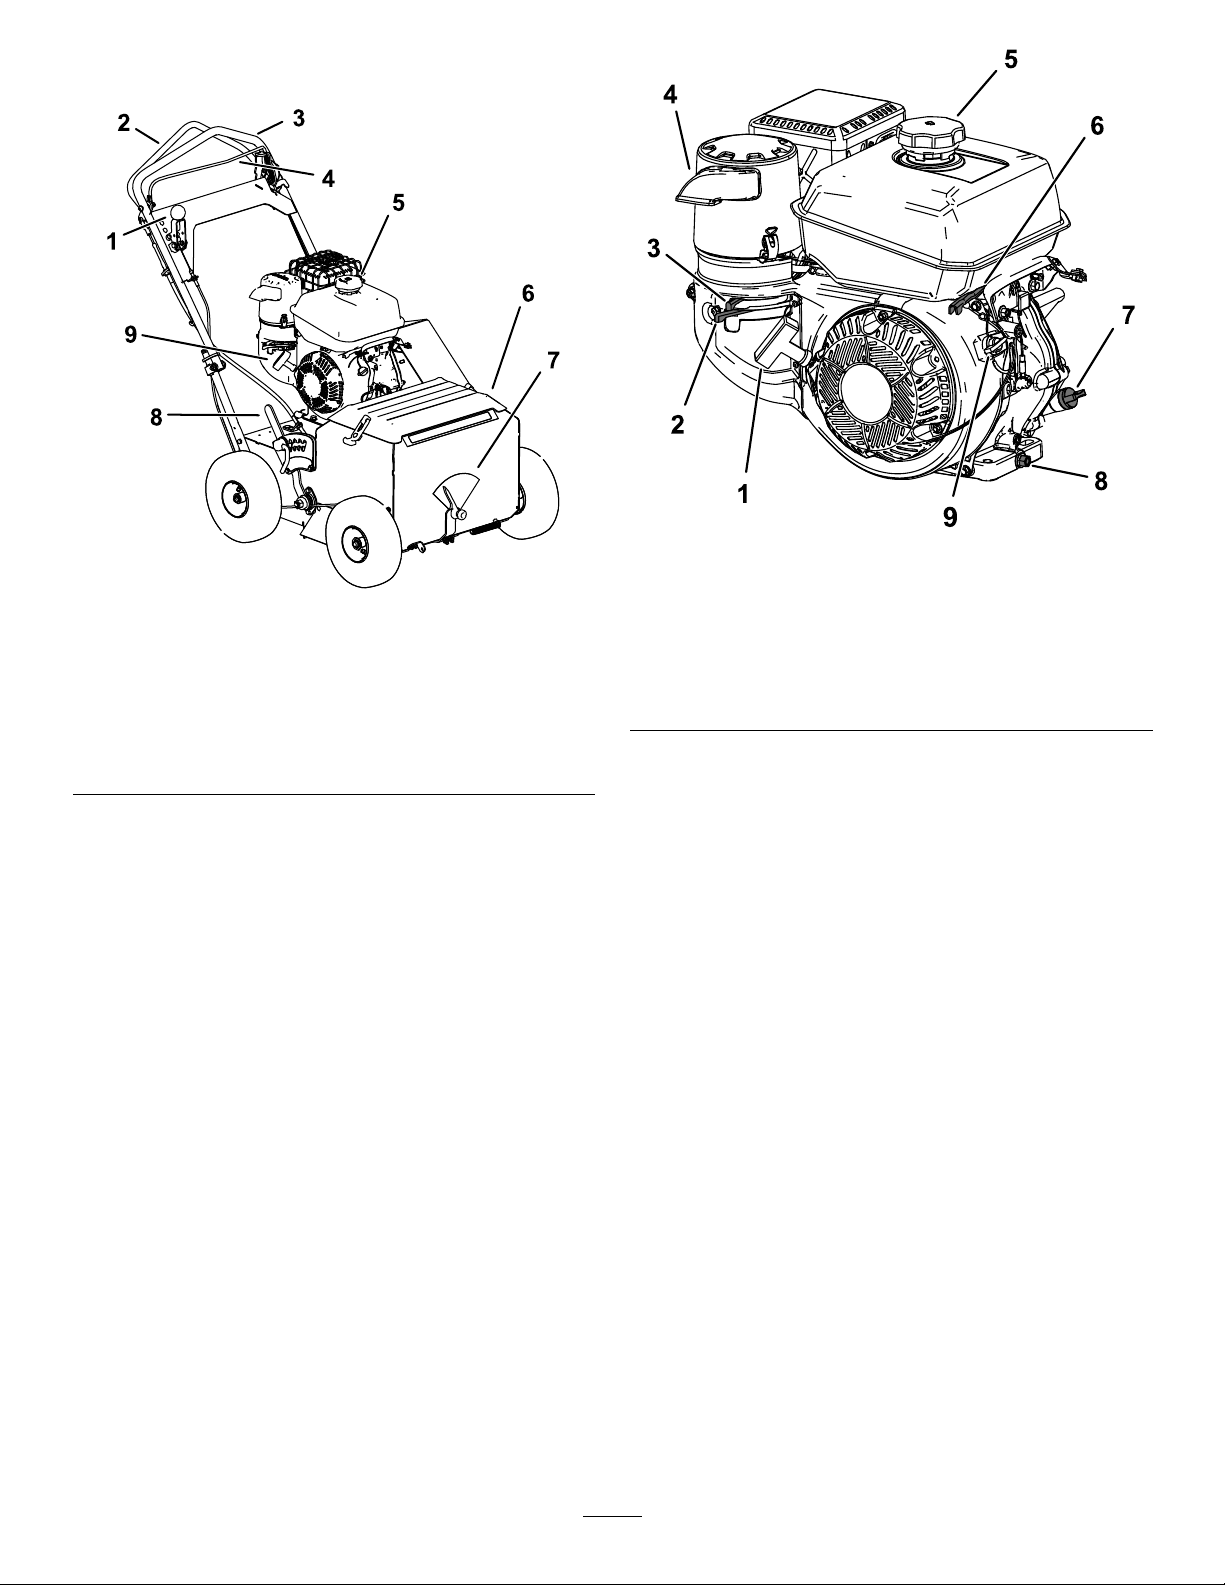
ProductOverview
g252291
Figure5
Figure4
1.Seeder-controllever6.Seedhopperandcover
2.Self-propeldrivebail7.Seeding-rategauge
3.Handle8.Depth-controllever
4.Blade-controlbail9.Recoil-starthandle
5.Fuel-tankcap
g252290
1.Recoil-starthandle6.Throttlelever
2.Fuel-shutoffvalve
3.Chokelever8.Oil-drainplug
4.Air-cleaner
5.Fuel-tankcap
7.Dipstick
9.On/Offswitch
Controls
ChokeLever
Beforestartingacoldengine,movethechokelever
(Figure5)totheleft.Aftertheenginestarts,regulate
thechoketokeeptheenginerunningsmoothly.As
soonaspossible,movethechokeleveralltheway
totheright.
Note:Awarmenginerequireslittleornochoking.
ThrottleLever
Thethrottlelever(Figure5)islocatedontheengine
andcontrolstheenginespeed.Movingthethrottle
leverrearwardincreasestheenginespeed,and
movingthethrottleleverforwarddecreasesthe
enginespeed.
EngineOn/OffSwitch
Theengineon/offswitch(Figure5)islocatedon
thefrontright-handsideoftheengine.Rotatethe
switchclockwisetotheONpositionbeforestarting
theengine.Rotatetheswitchcounterclockwisetothe
OFFpositiontoshutofftheengine.
9
Page 10
Fuel-ShutoffValve
Blade-ControlLock
Thefuel-shutoffvalve(Figure5)islocatedonthe
engineandisusedtoshutoffthefuelwhenthe
machinewillnotbeusedforafewdays,during
transporttoandfromthejobsite,andwhenparked
insideabuilding.
Rotateitdowntoopenitoruptocloseit.
Self-PropelDriveBail
Theself-propeldrivebail(Figure6),locatedunder
thehandle,controlstheforwardandreversemotion
ofthemachine.
Whenyousqueezetheself-propeldrivebailisagainst
thehandle,thegroundspeedofthemachinechanges
basedonthedistancebetweenthebailandthe
handle.Whenyoureleasethebail,themachinestops
moving.
Theblade-controllock(Figure6)islocatedontheleft
sideofthehandle,nexttotheblade-controlbail.
Movingtheblade-controllockintothefullforward
positionallowstheblade-controlbailtobesqueezed
againstthehandle.
Squeezingtheblade-controlbailagainstthehandle
engagestheblade.Releasingtheblade-controlbail
automaticallydisengagestheblade.Theblade-control
lockresetstolocktheblade-controlbail.
Seeder-ControlLever
Theseeder-controllever(Figure6)islocatedonthe
righthandlebar.
Pushtheleverforwardtostarttheseedow,andpull
itrearwardtostoptheseedow.
ParkingBrake
Settheparkingbrakewheneveryouleavethemachine
unattendedandwhenperformingmaintenance.To
engagetheparkingbrake,pullthebrakerodoutand
down,lockingitintheoutposition.T odisengagethe
brake,pullthebrakeupuntilitsnapsbackintothe
machine.
Figure6
1.Seeder-controllever4.Self-propeldrivebail
2.Handle5.Blade-controllock
3.Blade-controlbail
Blade-ControlBail
Theblade-controlbail(Figure6),locatedinfrontof
thehandle,engagesordisengagestheblade.
Iftheengineisrunning,thebladesengagewhenyou
squeezetheblade-controlbailtowardthehandle.
Whenyoureleasetheblade-controlbail,theblades
stop.
g020976
g017939
Figure7
(Rearofmachineshown)
1.Parkingbrake
10
Page 11
Hydrostatic-DriveBypassLever
Thehydrostatic-drivebypasslever(Figure8)releases
thehydrostatic-drivesystemsoyoucanmovethe
machinebyhand,withouttheenginerunning.
Fornormaloperatingposition,pulluponthehandle
andpushthehandleinuntilall3notchesareinside
theframe.
Note:Thelastnotchonthehandledoesnotlatch
ontheslot.
Toreleasethedrivewheels,pulluponthehandleand
pullitoutuntilthelastnotchengagesintheslot.Then
pushthehandledown.
Specications
Note:Specicationsanddesignaresubjectto
changewithoutnotice.
Width
Length(operating)137cm(54inches)
Length(withhandlestored)95.25cm(37.5inches)
Height(operating)113cm(44.5inches)
Height(withhandlestored)73.5cm(29inches)
Weight
TorqueRequirements
BoltLocationTorque
Enginemountingbolts
Clutchmountingbolts66to83N⋅m(49to61ft-lb)
Slicershaftnut88to115N⋅m(65to85ft-lb)
37to45N⋅m(27to33ft-lb)
76cm(30inches)
120.2kg(265lb)
1.Handlein—normaloperatingposition
2.Allnotchesinsideframe
3.Handleout—hydrostatic-driverelease
4.Lastnotchengagedinslot
Figure8
g021333
Attachments/Accessories
AselectionofT oroapprovedattachmentsand
accessoriesisavailableforusewiththemachine
toenhanceandexpanditscapabilities.Contact
yourAuthorizedServiceDealerorauthorizedT oro
distributororgotowww.Exmark.comforalistofall
approvedattachmentsandaccessories.
Toensureoptimumperformanceandcontinuedsafety
certicationofthemachine,useonlygenuineT oro
replacementpartsandaccessories.Replacement
partsandaccessoriesmadebyothermanufacturers
couldbedangerous,andsuchusecouldvoidthe
productwarranty.
11
Page 12

Operation
Note:Determinetheleftandrightsidesofthe
machinefromthenormaloperatingposition.
BeforeOperationSafety
GeneralSafety
•Neverallowchildrenoruntrainedpeopleto
operateorservicethemachine.Localregulations
mayrestricttheageoftheoperator.Theowner
isresponsiblefortrainingalloperatorsand
mechanics.
•Becomefamiliarwiththesafeoperationofthe
equipment,operatorcontrols,andsafetysigns.
•Knowhowtostopthemachineandshutoffthe
enginequickly.
•Checkthatoperator-presencecontrols,safety
switches,andshieldsareattachedandfunctioning
properly.Donotoperatethemachineunlessthey
arefunctioningproperly.
AddingFuel
Capacity:5.6L(1.48USgallons)
RecommendedFuel:
•Forbestresults,useonlyclean,fresh(lessthan
30daysold),unleadedgasolinewithanoctane
ratingof87orhigher((R+M)/2ratingmethod).
•Ethanol:Gasolinewithupto10%ethanol
(gasohol)or15%MTBE(methyltertiarybutyl
ether)byvolumeisacceptable.Ethanoland
MTBEarenotthesame.Gasolinewith15%
ethanol(E15)byvolumeisnotapprovedforuse.
Neverusegasolinethatcontainsmorethan
10%ethanolbyvolume,suchasE15(contains
15%ethanol),E20(contains20%ethanol),orE85
(containsupto85%ethanol).Usingunapproved
gasolinemaycauseperformanceproblemsand/or
enginedamagewhichmaynotbecoveredunder
warranty.
•Donotusegasolinecontainingmethanol.
•Donotstorefueleitherinthefueltankorfuel
containersoverthewinterunlessafuelstabilizer
isused.
•Inspecttheareawhereyouwillusethemachine
andremoveallobjectsthatthemachinecould
contact.
•Evaluatetheterraintodeterminetheappropriate
equipmentandanyattachmentsoraccessories
requiredtooperatethemachineproperlyand
safely.
FuelSafety
•Useextremecareinhandlingfuel.Itisammable
anditsvaporsareexplosive
•Extinguishallcigarettes,cigars,pipes,andother
sourcesofignition.
•Donotremovethefuelcaporllthefueltank
whiletheengineisrunningorhot.
•Donotaddordrainthefuelinanenclosedspace.
•Donotstorethemachineorfuelcontainerwhere
thereisanopename,spark,orpilotlight,such
asonawaterheaterorotherappliance.
•Ifyouspillfuel,donotattempttostarttheengine;
avoidcreatinganysourceofignitionuntilthefuel
vaporshavedissipated.
•Donotaddoiltogasoline.
Important:T oreducestartingproblems,addfuel
stabilizertothefuelallseason,mixingitwith
gasolinelessthan30daysold;runthemachine
drybeforestoringitformorethan30days.
Donotusefueladditivesotherthanafuel
stabilizer/conditioner.Donotusefuelstabilizers
withanalcoholbasesuchasethanol,methanol,
orisopropanol.
12
Page 13

DANGER
DANGER
Incertainconditions,gasolineisextremely
ammableandhighlyexplosive.Areor
explosionfromgasolinecanburnyouand
othersandcandamageproperty.
•Fillthefueltankoutdoors,inanopenarea,
whentheengineiscold.Wipeupany
gasolinethatspills.
•Neverllthefueltankinsideanenclosed
trailer.
•Donotllthefueltankcompletelyfull.Add
gasolinetothefueltankuntilthelevelis6
to13mm(1/4to1/2inch)belowthebottom
ofthellerneck.Thisemptyspaceinthe
tankallowsgasolinetoexpand.
•Neversmokewhenhandlinggasoline,and
stayawayfromanopenameorwhere
gasolinefumesmaybeignitedbyaspark.
•Storegasolineinanapprovedcontainer
andkeepitoutofthereachofchildren.
Neverbuymorethana30-daysupplyof
gasoline.
•Donotoperatewithouttheentireexhaust
systeminplaceandinproperworking
condition.
Incertainconditionsduringfueling,static
electricitycanbereleased,causingaspark
whichcanignitethegasolinevapors.Are
orexplosionfromgasolinecanburnyouand
othersandcandamageproperty.
•Alwaysplacegasolinecontainersonthe
groundawayfromyourvehiclebefore
lling.
•Donotllgasolinecontainersinsidea
vehicleoronatruckortrailerbed,because
interiorcarpetsorplastictruck-bedliners
mayinsulatethecontainerandslowthe
lossofanystaticcharge.
•Whenpractical,removefuel-powered
equipmentfromthetruckortrailer,and
fueltheequipmentwiththewheelsonthe
ground.Ifthisisnotpossible,thenrefuel
suchequipmentonatruckortrailerfrom
aportablecontainerratherthanfroma
gasolinedispensernozzle.
•Ifyoumustuseafuel-dispensernozzle,
keepthenozzleincontactwiththerimof
thefueltankorcontaineropeningatall
timesuntilfuelingiscomplete.
WARNING
Fuelisharmfulorfatalifswallowed.
Long-termexposuretovaporscancause
seriousinjuryandillness.
•Avoidprolongedbreathingofvapors.
•Keepyourfaceawayfromthenozzleand
thefueltankorconditioneropening.
•Keepfuelawayfromyoureyesandskin.
FillingtheFuelTank
1.Disengagethecuttingblades,shutoffthe
engine,waitforallmovingpartstostop,andturn
theengineswitchtotheOFFposition.
2.Allowtheenginetocool.
3.Cleanaroundthefuel-tankcapandremoveit.
Note:Thecapistetheredtothefueltank.
4.Addunleadedgasolinetothefueltankuntilthe
levelisjustinsidethemeshlterbasket.
Important:Thisspaceinthetankallows
gasolinetoexpand.Donotllthefueltank
completelyfull.
5.Installthefuel-tankcapsecurely.
6.Wipeupanyspilledfuel.
13
Page 14

CheckingtheEngineOil
AdjustingtheSeeding-Rate
Checktheengineoilbeforestartingtheengine;refer
toCheckingtheEngine-OilLevel(page25).
AdjustingtheCutting-Blade Depth
1.Bringthemachinetoafullstop.
2.Disengagethecuttingblades.
3.Shutofftheengineandwaitforallmovingparts
tostopbeforeleavingtheoperatingposition.
Disconnectthewirefromthesparkplug.
4.Unlockthecutting-bladedepthhandlebypulling
upward.
Figure9
Gauge
1.Bringthemachinetoafullstop.
2.Disengagethecuttingblades.
3.Shutofftheengineandwaitforallmovingparts
tostopbeforeleavingtheoperatingposition.
4.Tochangetheseedingrate,loosentheknobon
theseeding-rategaugelocatedonthefrontof
theseedhopper.Movethegaugepointertothe
desiredposition,andtightentheknob.
g013146
g020903
1.Gaugepointer
Figure10
1.Unlock3.Lock
2.Cutting-bladedepth
handle
5.Movethelevertothedesiredworkingdepthslot
setting.Rotateandpushthehandledownto
lockthehandle.
6.Adjustthesettingdownasthecuttingblades
wear.
Note:Refertotheseedinggraph,locatedonthe
machine,todeterminethecorrectgaugesettingfor
thetypeofgrassandthethicknesstobeplanted.
14
Page 15

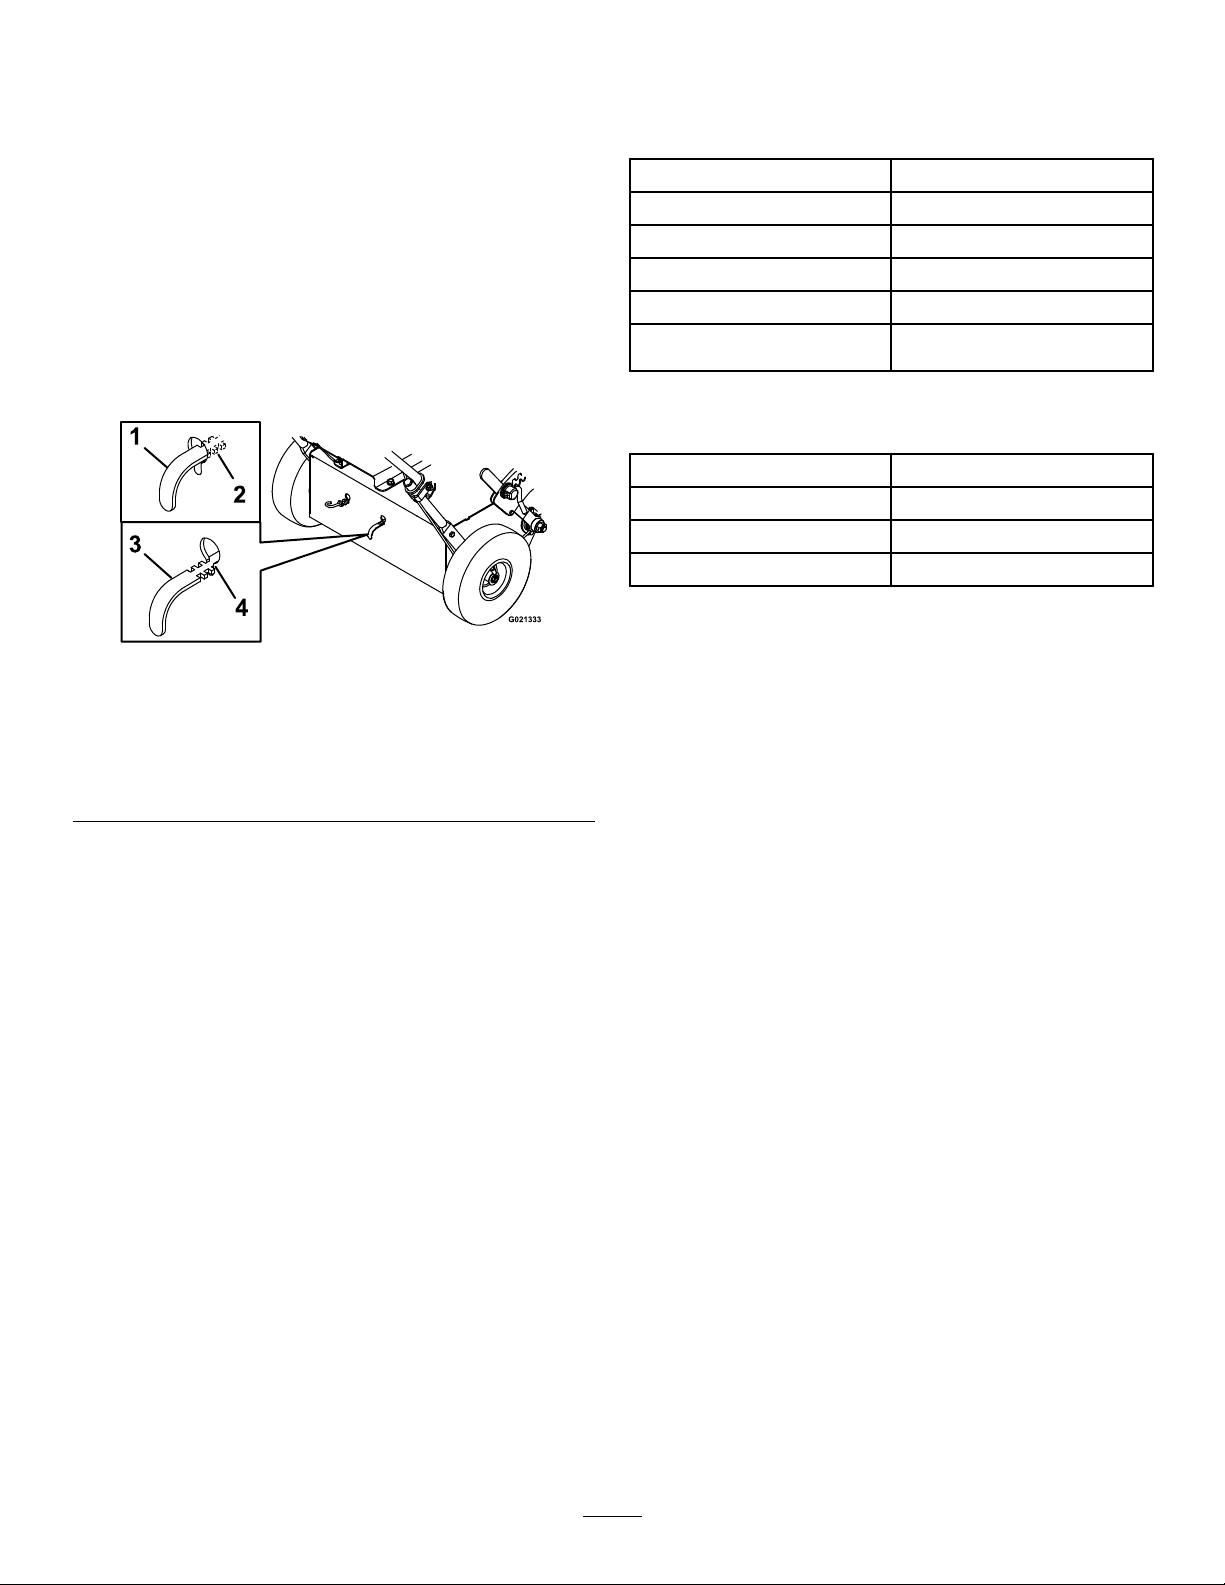
UsingtheSeedCover
•Toinstalltheseedcover(Figure11),placeitover
theseedhopperandfastenittothelatchpostson
eithersideusingtherubberlatches.
•Toremovetheseedcover,pulleachrubberlatch
downandawayfromthelatchpostsandremove
thecover.
Figure11
1.Seedcover
2.Seedhopper
3.Rubberlatch
4.Latchpost
DuringOperationSafety
GeneralSafety
•Theowner/usercanpreventandisresponsible
foraccidentsorinjuriesoccurringtopeople,or
damagetoproperty.
•Wearappropriateclothing,includingeye
protection;longpants;slip-resistant,substantial
footwear;andhearingprotection.Tiebacklong
hairanddonotwearloosejewelry .
•Useyourfullattentionwhileoperatingthe
machine.Donotengageinanyactivitythat
causesdistractions;otherwise,injuryorproperty
damagemayoccur.
•Donotoperatethemachinewhileill,tired,or
undertheinuenceofalcoholordrugs.
•Nevercarrypassengersonthemachineandkeep
bystandersandpetsawayfromthemachine
duringoperation.
g024773
•Operatethemachineonlyingoodvisibilitytoavoid
holesorhiddenhazards.
•Avoidoperatingonwetgrass.Reducedtraction
couldcausethemachinetoslide.
•Ensurethatalldrivesareinneutral,theparking
brakeisengaged,andyouareintheoperating
positionbeforeyoustarttheengine.
•Keepyourhandsandfeetawayfromtheblade
area.
•Lookbehindanddownbeforebackinguptobe
sureofaclearpath.
•Usecarewhenapproachingblindcorners,shrubs,
trees,orotherobjectsthatmayobscureyour
vision.
•Stopthebladeswheneveryouarenotoperating
themachine.
•Stopthemachine,shutofftheengine,engagethe
parkingbrake,andinspectthebladesafterstriking
anobjectorifthereisanabnormalvibrationin
themachine.Makeallnecessaryrepairsbefore
resumingoperation.
•Slowdownandusecautionwhenmakingturns
andcrossingroadsandsidewalkswiththe
machine.Alwaysyieldtheright-of-way.
•Shutofftheengine,anddisengagethecutting
bladesbeforeadjustingthecutting-bladedepth.
•Neverrunanengineinanareawhereexhaust
gasesareenclosed.
•Neverleavearunningmachineunattended.
•Beforeleavingtheoperatingpositionforany
reason,dothefollowing:
–Stopthemachineonlevelground.
–Shutofftheengine.
15
Page 16

–Engagetheparkingbrake.
–Waitforallmovingpartstostop.
–Raisetheblades.
•Donotoperatethemachinewhenthereistherisk
oflightning.
•Donotchangethegovernorspeedoroverspeed
theengine.
•Useonlyaccessoriesandattachmentsapproved
byToro.
SlopeSafety
•Slopesareamajorfactorrelatedtolossofcontrol
androlloveraccidents,whichcanresultinsevere
injuryordeath.Theoperatorisresponsiblefor
safeslopeoperation.Operatingthemachineon
anysloperequiresextracaution.
•Evaluatethesiteconditionstodetermineifthe
slopeissafeformachineoperationincluding
surveyingthesite.Alwaysusecommonsense
andgoodjudgmentwhenperformingthissurvey .
•Reviewtheslopeinstructions,listedbelow,for
operatingthemachineonslopesandreview
theconditionsinwhichthemachineisbeing
operatedtodeterminewhetherthemachinecan
beoperatedintheconditionsonthatdayandat
thatsite.Changesintheterraincanresultina
changeinslopeoperationforthemachine.
–Avoidstarting,stopping,orturningthemachine
onslopes.Avoidmakingsuddenchangesin
speedordirection.Maketurnsslowlyand
gradually.
–Donotoperateamachineunderanyconditions
wheretraction,steering,orstabilityisin
question.
–Removeormarkobstructionssuchasditches,
holes,ruts,bumps,rocks,orotherhidden
hazards.T allgrasscanhideobstructions.
Uneventerraincouldoverturnthemachine.
–Beawarethatoperatingthemachineonwet
grass,acrossslopes,ordownhillmaycause
themachinetolosetraction.Lossoftraction
mayresultinslidingandalossofbrakingand
steering.
–Useextremecautionwhenoperatingthe
machineneardropoffs,ditches,embankments,
waterhazards,orotherhazards.Themachine
couldsuddenlyrolloverifpartofthetraction
goesovertheedgeortheedgecavesin.
Establishasafetyareabetweenthemachine
andanyhazard.
–Identifyhazardsatthebaseoftheslope.
16
Page 17

StartingtheMachine
OperatingtheSelf-Propel
1.Ensurethattheblade-controlbailisintheOFF
position.
2.MovetheengineswitchtotheONposition,and
openthefuel-shutoffvalve.
3.Movethechokelevertotheleftifyouare
startingacoldengine.
Note:Awarmorhotenginemaynotrequire
choking.
4.Movethethrottlelevermidwaybetweenthe
SLOW(turtle)andFAST(rabbit)positions.
5.Pulltherecoil-starthandlesharplytostartthe
engine.
6.Aftertheenginestarts,graduallymovethe
choketotheright.
Note:Iftheenginestallsorhesitates,movethe
chokeleftagainuntiltheenginewarmsup.
7.Movethethrottlelevertothedesiredsetting.
ShuttingOfftheMachine
1.Bringthemachinetoafullstop.
2.Releasetheblade-controlbail.Thebladesstop,
andtheenginecontinuestorun.
3.PlacethethrottlemidwaybetweentheSLOW
andFASTpositions.
Drive
1.Starttheengine.
2.Movetheself-propeldrivebailfromtheneutral
position.
•Tomoveforward,squeezetheself-propel
drivebailagainstthehandle(Figure12).
Figure12
1.Self-propeldrivebail
(neutralposition)
2.Reverse—pushdownand
awayfromthehandle
3.Forward—pulltowardthe
handle
4.Handle
g020893
4.Allowtheenginetorunforaminimumof15
seconds,thenturntheengineon/offswitchto
theOFFpositiontoshutofftheengine.
Important:Inanemergencysituation,shut
offtheengineimmediately .
5.Closethefuel-shutoffvalve.
6.Waitforallmovingpartstostopbeforeleaving
theoperator’sposition.
Note:Youcanvarythegroundspeed
byincreasingordecreasingthedistance
betweentheself-propeldrivebailandthe
handle.Lowerthedrivebailtowardthe
neutralpositiontodecreasetheground
speedwhenmakingaturnorifthemachine
ismovingtoofast.
Ifyoureleasethedrivebail,itreturnsto
neutralandthemachinestopsmoving.
Squeezethedrivebailclosertothehandle
toincreasethegroundspeed.Whenyou
holdthedrivebailtightagainstthehandle,
themachinemovesatthemaximumground
speed.Releasethedrivebailtostopmoving
orwheneveryouleavethemachine.
•Toturnleftorright,decreasethespeed,push
downonthehandles,andturnthemachine
inthedesireddirection;thenresumenormal
operation.
•Tomoveinreverse,releasethedrivebail
andallowittoreturntoneutral.Pushthe
drivebaildownandawayfromthehandle.
Thegroundspeedvariesasthedistance
17
Page 18

increasesordecreasesfromtheneutral
position.
3.Todisengagetheself-propeldriveandplacethe
machineintotheneutralposition,releasethe
drivebail.
Note:Ifthemachinecreepsforwardor
rearwardwhenthedrivebailisintheneutral
position,shutofftheengineandadjustthe
self-propeldrivecable;refertoAdjustingthe
Self-PropelDrive(page28).
Operatingthe Blade-ControlBail
1.Starttheengine.
2.Pushandholdtheblade-controllockforwardto
releasetheblade-controlbail(Figure13).
DANGER
Whenthemachineisinoperation,contact
withrotatingormovingpartswillseverely
injurehandsandfeet.
•Beforeadjusting,cleaning,inspecting,
troubleshooting,orrepairingthemachine,
shutofftheengineandwaitforallmoving
partstostop.Disconnectthewirefrom
thesparkplugandkeepitawayfromthe
plugtopreventsomeonefromaccidentally
startingtheengine.
•Staybehindthehandleandawayfrom
theseedmixerandcuttingbladeswhile
operatingthemachine.
•Keepface,hands,feet,andanyother
partofyourbodyorclothingawayfrom
concealed,moving,orrotatingparts.
1.Ifseeding,lltheseedhopperandsetthe
seedingrategauge;refertoAdjustingthe
Seeding-RateGauge(page14).
Figure13
1.Blade-controllock(locked
position)
2.Push
3.Squeezetheblade-controlbailagainstthe
handleandreleasetheblade-controllock;the
bladesengage.
4.Releasetheblade-controlbailtodisengagethe
blades.Theblade-controllockresetstolockthe
blade-controlbail.
3.Blade-controlbail
4.Squeezeagainsthandle
OperatingtheMachine
2.Adjustthecutting-bladedepthtothedesired
setting;refertoAdjustingtheCutting-Blade
Depth(page14).
3.Starttheengine.
4.SettheenginethrottletotheFASTposition.
5.Pushdownonthehandletoraisethefront
g021243
wheelsslightlyofftheground.
6.Squeezetheblade-controlbailagainstthe
handletoengagetheblades.Slowlylowerthe
frontwheelstotheground,allowingtheblades
tograduallyworkintothegrassandsoil.
7.Ifseeding,pushtheseeder-controlleverforward
tostarttheseedow.
Note:Thereisnoneedtoturnthe
seeder-controlleveroffandonforeachturn.
Theseedowslowsand/orstopswhenthe
machineisstoppedorslowedforturning.T o
reduceseedloss,raisethefrontwheelsasthe
machineisturned.
Note:Themachineseedsatthesamerate
goingforwardorrearward.
DANGER
Therotatingbladesunderthemachineare
dangerous.Bladecontactcancauseserious
injuryordeath.
Donotputhandsorfeetunderthemachine.
Note:Ifthereisexcessivethatch,itmaybe
necessarytoremovethethatchpriortoseeding.
8.Engagetheself-propeldrivebailtobegin
operating.
18
Page 19

OperatingTips
Overseeding
•Setthecuttingbladestobe3to6mm(1/8to1/4
inch)intotheearth.
•Asseedowvariesgreatlybetweendifferentseed
types,llthehopperwithaminimalamountof
seedandrunatrialportionoftheyardtoensure
thatyouhavethedesiredseedoutput.
•Foroptimalcoverage,reducetheseedowto1/2
thedesiredamountandseedtheentireyardin
onedirection,thencompleteasecondcoverage
perpendiculartotherst.
Important:Donotputdownmoreseedthan
recommendedbytheseedcompany.Overseeding
cancausethegrasstobetoothickandcauseitto
besusceptibletofungus.
Dethatching
Setthecuttingbladestobe3to6mm(1/8to1/4
inch)pastthethatchlayer,intotheearth.Operatethe
machineovertheyardwiththeseeder-controllever
turnedoff.
PowerRaking/Renovating
Tobreaknewgroundortillanexistinglawn,setthe
cuttingbladestobe6to13mm(1/4to1/2inch)into
theearth.Goforwardandbackwardoverthearea
tobeleveled,ormakemultiplepassesfromdifferent
directions.
Themachineworksbestwhenthegroundishardand
dryandismostaggressiveinbreakingupthesoilin
reverse.Ifthegroundissoftandcausestheengineto
bogdown,raisethebladesslightlyandmakeafew
passesbeforeloweringthemtothefulldepth.
19
Page 20

AfterOperationSafety
TransportingtheMachine
GeneralSafety
•Cleangrassanddebrisfromthemachinetohelp
preventres.Cleanupoilorfuelspills.
•Turnoffthefuel-shutoffvalvebeforestoringor
transportingthemachine.
•Allowtheenginetocoolbeforestoringthemachine
inanyenclosure.
•Neverstorethemachineorfuelcontainerwhere
thereisanopename,spark,orpilotlight,such
asonawaterheateroronotherappliances.
•Useextremecarewhenloadingorunloadingthe
machineintoatrailerortruck.
WARNING
Loadingthemachineontoatrailerwithout
strongenoughorproperlysupportedramps
couldbedangerous.Therampscould
collapse,causingthemachinetofall,which
couldcauseinjury.
•Useproperrampsthataresecuredtothe
truckortrailer.
•Keepfeetandlegsoutfromunderthe
machinewhenloadingandunloading.
•Ifnecessary,useassistancewhenloading.
Besurethatthefuelshutoffvalveisclosed.
Securelyfastenthemachinetothetrailerwithstraps,
chains,cables,orropes.
Besurethatthetrailerhasallnecessarylightingand
markingasrequiredbylaw,andusesafetychains.
Disengagingthe HydrostaticDrive
Ifyouneedtopushthemachineunpowered,youmust
releasethehydrostaticdrive.T oreleasethedrive,
pullthehydrostatic-drivebypasslever(Figure14)
outanddown,lockingitintheoutposition.Thefront
wheelsnowrotatefreely.
Toengagethedrive,pulluponthebypassleveruntil
itsnapsbackintothemachine.
Figure14
(Rearofmachineshown)
g017940
1.Hydrostatic-drivebypasslever
20
Page 21

Maintenance
RecommendedMaintenanceSchedule(s)
MaintenanceService
Interval
Aftertherst5hours
Beforeeachuseordaily
Every25hours
Every50hours
Every100hours
Every200hours
MaintenanceProcedure
•Changetheengineoil.
•Inspecttheair-cleanerelements.
•Checktheengine-oillevel.
•Checkthetirepressure.
•Checkthebladesforwearordamage.
•Checktheseedgate.
•Cleantheengineandexhaustarea.
•Cleanthedebrisbuildupfromunderthemachine.
•Checkforloosefasteners.
•Greasetheslicer-shaftbearings.
•Checktheconditionofthebelts.
•Cleantheair-cleanerelements.Cleanthemmorefrequentlyindustyoperating
conditions.
•Changetheengineoil.
•Checkthesparkarrester(ifequipped).
•Cleanunderthebeltcover.
•Inspectandadjustthesparkplug;replaceitifnecessary .
•Changethehydraulic-transmissionuid.
•Replacethepaperair-cleanerelement.Replaceitmorefrequentlyindusty
operatingconditions.
•Replacethesparkplug.
Yearlyorbeforestorage
•Touchupchippedpaint.
21
Page 22

Pre-Maintenance
Disconnectingthe
Procedures
MaintenanceSafety
•Beforeadjusting,cleaning,orrepairingthe
machinedothefollowing:
–Parkthemachineonalevelsurface.
–Disengagethedrives.
–Shutofftheengine.
–Waitforallmovingpartstostop.
–Engagetheparkingbrake.
–Raisetheblades.
–Disconnectthespark-plugwire.
•Cleangrassanddebrisfromtheblades,drives,
mufer,andenginetohelppreventres.Cleanup
oilorfuelspillage.
•Cleanupoilorfuelspills.
•Donotallowuntrainedpersonneltoservicethe
machine.
•Usejackstandstosupportthemachineand/or
componentswhenrequired.
•Carefullyreleasepressurefromcomponentswith
storedenergy.
Spark-PlugWire
Beforeperforminganymaintenanceontheengine,
belt,orcuttingblades,disconnectthespark-plugwire
fromthesparkplug(Figure15).
g252737
Figure15
1.Spark-plugwire
•Removethespark-plugwirebeforemakingany
repairs.
•Usecarewhencheckingtheblades.Wrapthe
blade(s)orwearthicklypaddedgloves,anduse
cautionwhenservicingthem.Onlyreplaceblades;
donotstraightenorweldthem.
•Keepyourhandsandfeetawayfrommoving
parts.Ifpossible,donotmakeadjustmentswith
theenginerunning.
•Keepallpartsingoodworkingconditionandall
hardwaretightened.Replaceallwornordamaged
decals.
•Neverinterferewiththeintendedfunctionofa
safetydeviceorreducetheprotectionprovided
byasafetydevice.Checktheirproperoperation
regularly.
•Toensureoptimumperformanceandcontinued
safetycerticationofthemachine,useonly
genuineT ororeplacementpartsandaccessories.
Replacementpartsandaccessoriesmadeby
othermanufacturerscouldbedangerous,and
suchusecouldvoidtheproductwarranty.
•Checktheparkingbrakeoperationfrequently.
Adjustandserviceasrequired.
22
Page 23

Lubrication
EngineMaintenance
LubricatingtheSlicer-Shaft Bearings
ServiceInterval:Every25hours—Greasethe
slicer-shaftbearings.
1.Shutofftheengine,waitforallmovingpartsto
stop,andremovethespark-plugwire.
2.Engagetheparkingbrake.
3.Lubricatethettings(Figure16)with1or2
pumpsofNLGIgradeNo.2multi-purpose
grease.
Figure16
1.Greasetting
EngineSafety
•Shutofftheenginebeforecheckingtheoilor
addingoiltothecrankcase.
•Keepyourhands,feet,face,clothing,andother
bodypartsawaythemuferandotherhotsurfaces.
ServicingtheAirCleaner
ServiceInterval:Beforeeachuseordaily—Inspect
theair-cleanerelements.
Every50hours—Cleantheair-cleaner
elements.Cleanthemmorefrequentlyindusty
operatingconditions.
Every200hours/Monthly(whichevercomes
rst)—Replacethepaperair-cleanerelement.
Replaceitmorefrequentlyindustyoperating
conditions.
Important:Donotoperatetheenginewithout
theairlterassembly;extremeenginedamage
willoccur.
1.Shutofftheengineandwaitforallmovingparts
tostop;refertoMaintenanceSafety(page22).
g021348
2.Disconnectthewirefromthesparkplug;referto
DisconnectingtheSpark-PlugWire(page22).
3.Unhookthelatchthatsecurestheair-cleaner
cover(Figure17).
23
Page 24

Figure17
1.Air-cleanercover4.Paperelement
2.Latch5.Air-cleanerbase
3.Foamelement
4.Removetheair-cleanercover.
Note:Becarefultopreventdirtanddebrisfrom
enteringtheairductleadingtothecarburetor.
12.Installtheair-cleanerelementsandensurethat
theyareproperlypositioned.
13.Installthecoverandhookthelatchtosecureit.
ServicingtheEngineOil
ServiceInterval:Aftertherst5hours
Every50hours
ToroPremiumEngineOilisavailablefromyour
authorizedT orodealer.
Important:Use4-cycledetergentengineoilthat
meetsorexceedstherequirementsforAPIservice
categorySJorhigher.
CrankcaseCapacity:1.1L(44.7oz)
Important:Iftheoillevelinthecrankcaseistoo
g232363
lowortoohighandyouruntheengine,youmay
damagetheengine.Thistypeofdamageisnot
coveredbythewarranty.
Note:UseSAE10W-30forgeneraluse.Youcan
usetheotherviscositiesshowninthechartwhen
theaveragetemperatureinyourareaiswithinthe
indicatedrange(Figure18).
Note:Becarefultopreventdirtanddebrisfrom
fallingintothebase.
5.Removethefoamandpaperelementsfromthe
base(Figure17).
6.Removethefoamelementfromthepaper
element(Figure17).
7.Inspectthefoamandpaperelements,and
replacethemiftheyaredamagedorexcessively
dirty.
8.Cleanthepaperelementbytappingitgentlyto
removethedirt.
Note:Nevertrytobrushdirtoffthepaper
element;brushingforcesthedirtintothebers.
Replacetheelementiftappingitfailstoremove
thedirt.
9.Cleanthefoamelementinwarm,soapywater
orinanonammablesolvent.
Note:Donotusegasolinetocleanthefoam
elementbecauseitcouldcreateariskofreor
explosion.
g021783
Figure18
10.Rinseanddrythefoamelementthoroughly .
11.Wipedirtfromthebaseandthecoverwitha
moistrag.
24
Page 25

CheckingtheEngine-OilLevel
ServiceInterval:Beforeeachuseordaily
1.Stopthemachineonalevelsurface,andensure
thattheengineislevel.
2.Disengagethecuttingblades,shutoffthe
engine,waitforallmovingpartstostop,andturn
theengineswitchtotheOFFposition.
3.Allowtheenginetocool.
4.Cleanaroundthedipstick(Figure19)sothat
dirtcannotfallintothellholeanddamagethe
engine.
Figure19
1.Fillhole3.Upperlevel
2.Dipstick4.Lowerlevel
g252748
Figure20
1.Dipstick
2.Drainplug
g021851
5.Whentheoilhasdrainedcompletely ,lowerthe
frontwheelstotheground,replacethedrain
plug,andtorquetheplugto18N⋅m(13ft-lb).
5.Removethedipstick,andwipetheendclean.
6.Insertthedipstickfullyintothellhole,butdo
notscrewitin(Figure19).
7.Removethedipstickagainandlookattheend.
Iftheengine-oillevelislow,slowlypouronly
enoughoilintothellholetoraisethelevelto
theFullmarkonthedipstick(Figure19).
ChangingtheEngineOil
WARNING
Oilmaybehotaftertheenginehasbeenrun,
andcontactwithhotoilcancausesevere
personalinjury.
Avoidcontactingthehotengineoilwhenyou
drainit.
1.Disengagethecuttingblades,shutoffthe
engine,turnofftheengineswitch,andwaitfor
allmovingpartstostop.
Note:Disposeoftheusedoilatacertied
recyclingcenter.
6.Removethedipstick,andslowlypouroilintothe
llholeuntiltheoilpoursoutofthellhole.
7.Ensurethattheoilisatthecorrectlevelonthe
dipstick;refertoCheckingtheEngine-OilLevel
(page25).
8.Replaceandsecurethedipstick.
9.Wipeupanyspilledoil.
10.Connectthewiretothesparkplug.
2.Disconnectthewirefromthesparkplug.
3.Raisethefrontwheels5to8centimeters(2to
3inches)offtheground,andplaceapanunder
thedrainplugtocatchtheoil.
4.Removethedrainplug(Figure20).
25
Page 26

ServicingtheSparkPlug
CheckingtheSpark
ServiceInterval:Every100hours—Inspectand
adjustthesparkplug;replaceitif
necessary.
Every200hours—Replacethesparkplug.
UseanNGKBR6HSsparkplugorequivalent.
1.Shutofftheengineandwaitforallmovingparts
tostop.
2.Disconnectthewirefromthesparkplug.
3.Cleanaroundthesparkplug.
4.Removethesparkplugfromthecylinderhead.
Important:Replaceacracked,fouled,or
dirtysparkplug.Donotcleantheelectrodes,
becausegritenteringthecylindercan
damagetheengine.
5.Setthegapontheplugto0.6to0.7mm(0.024
to0.028inch);refertoFigure21.
Arrester
(IfEquipped)
ServiceInterval:Every50hours
Note:Asparkarresterisavailableasanoption.If
yourequireasparkarrester,contactyourAuthorized
ServiceDealer.
TorosparkarrestersareapprovedbytheUSDA
ForestryService.
WARNING
Iftheenginehasbeenrunning,themufer
willbehot.
1.Shutofftheengineandwaitforallmovingparts
tostop.
2.Waitforthemufertocool.
3.Removethesparkarresterfromtheexhaust
outletbyremovingthescrewsfromthemufer
coverandexhaustdeector.
Figure21
1.Sideelectrode
2.Centerelectrodeinsulator
3.Airgap—0.6to0.7mm(0.024to0.028inch)
6.Carefullyinstallthesparkplugbyhand(toavoid
crossthreading)untilitishandtight.
7.Tightenthesparkpluganadditional1/2turnif
itisnew;otherwise,tightenitanadditional1/8
to1/4turn.
Important:Aloosesparkplugcanbecome
veryhotandcandamagetheengine;
overtighteningasparkplugmaydamagethe
threadsinthecylinderhead.
8.Connectthewiretothesparkplug.
4.Ifthereareanybreaksorholesinthescreen,
replacethesparkarrester.
5.Useabrushtocarefullyremovecarbondeposits
fromthespark-arresterscreen.
g006998
6.Installthesparkarresterontheexhaustoutlet.
26
Page 27

FuelSystem
DriveSystem
Maintenance
WARNING
Fuel-systemcomponentsareunderhigh
pressure.Theuseofimpropercomponents
canresultinsystemfailure,fuelleakage,and
possibleexplosion.
Useonlyapprovedfuellinesandfuellters.
DrainingtheFuelTank
1.Shutofftheengineandwaitforittocooldown.
Engagetheparkingbrake.
Note:Draingasolinefromacoldengineonly.
2.Disconnectthewirefromthesparkplug.
3.Closethefuelshutoffvalve.
4.Disconnectthefuellinebylooseningthetube
clampatthecarburetor.
5.Openthefuelvalvebyturningthelevertothe
openposition.
Maintenance
Note:Thehydrostatictransmissionisfactory-lled
andsealed.Itdoesnotrequiremaintenance.For
service,contactyourAuthorizedServiceDealer.
CheckingtheTirePressure
ServiceInterval:Beforeeachuseordaily
Maintaintheairpressureinthetiresasspecied.T o
getthemostaccuratereading,checkthetireswhen
theyarecold.
Pressure:165kPa(24psi)
6.Drainthegasolinecompletelyfromthetankand
fuellineintoanapprovedfuelcontainer.
7.Closethefuelvalve.
g003793
Figure22
1.Valvestem
27
Page 28

AdjustingtheSelf-Propel
Changingthe
Drive
Ifthemachinecreepseitherforwardorrearwardwhen
theengineisonandtheself-propeldrivebailisin
neutral,completethefollowingprocedure:
1.Shutofftheengine,waitforallmovingpartsto
stop,andremovethespark-plugwire.
2.Raisethecuttingbladestothehighestposition.
3.Squeezetheself-propeldrivebailtothehandle
untilthetransmissionisfullystroked.
•Ifthebailcontactsthehandle,releasethe
bail.Ifthebaildoesnotcontactthehandle,
thenproceedtostep4.
•Loosenthetopadjustmentnut1turn,and
tightenthebottomadjustmentnut.
•Squeezethebailtothehandle.
•Repeatthisstepuntilthereisagapofupto
3.2mm(1/8inch)betweentheself-propel
drivebailandthehandle.
•Oncethegapisachieved,proceedwithstep
4.
Hydraulic-Transmission
Fluid
ServiceInterval:Every100hours
1.Shutofftheengine,waitforallmovingpartsto
stop,andremovethespark-plugwire.Engage
theparkingbrake.
2.Removethetransmissionfromthemachine.
3.Carefullycleantheareaaroundtheexpansion
tankandoil-llport.
Important:Donotallowanydirtor
contaminationtoenterthehydraulicsystem.
4.Removeandretaintheoil-llporttting,and
positionthetransmissionsothattheoildrains
completelyoutofthehousing.
5.Whenalltheoilhasdrainedfromthetransaxle,
removeandretainthe#10-32x1/2inch
self-tappingscrewandtheratchetfastener
holdingtheexpansiontanktothehousing.
6.Removetheexpansiontank,anddraintheoil.
Note:Donotremovetheventcapfromthe
tank.
Figure23
1.Adjustmentnuts4.Turnbuckle
2.Cable5.Self-propeldrivebail
3.Jamnut
4.Removethehairpinandrotatetheturnbuckle
clockwise1fullturn.
5.Installthehairpinandrotatethejamnutagainst
theturnbuckle.
Note:Donotremovethetankhoseorthe
O-ringunlessareplacementisneeded.
7.Installtheexpansiontankbyrstinsertingthe
hoseintothetank.Placethetankopeningover
theO-ring,andpushdowntoensureaproper
seal.Installthe#10–32x1/2inchself-tapping
screwandtorqueitto25in-lb(2.8N⋅m).
8.Fillthetransaxle,attheoil-llport,untiltheoil
levelisbetween1/2and1-1/4inches(between
13and32mm)belowthetopofthellport.
Note:T oroPremiumHydroOilisrecommended.
g021266
Mobil115W-50isanacceptablealternative.
9.Reinstalltheoil-llporttting.
6.Starttheengineandtesttheadjustment,
repeatingthisprocedureasnecessary.
28
Page 29

BeltMaintenance
AdjustingtheSelf-Propel Drive-BeltTension
CheckingtheConditionof theBelts
ServiceInterval:Every25hours
1.Shutofftheengine,waitforallmovingpartsto
stop,andremovethespark-plugwire.Engage
theparkingbrake.
2.Removethebeltcoverfromtheleftsideofthe
machine.
3.Checkthebeltsforcracks,frayededges,burn
marks,oranyotherdamage.
4.Ifabeltisdamaged,replaceit.
5.Checkthedrive-belttension;refertoAdjusting
theSelf-PropelDrive-BeltT ension(page29).
Iftheself-propeldrivebeltsquealsduringoperation
(suchaswhenmovedfromneutraltoforwardor
reverse),tightenthebeltasfollows:
1.Shutofftheengine,waitforallmovingpartsto
stop,andremovethespark-plugwire.
2.Raisethecuttingbladestothehighestposition.
3.Removeandretainthe4bolts,lockwashers,
and2spacerssecuringthebeltcovertotheleft
sideofthemachine,andremovethecover.
4.Checkthetensionofthebelt.Itshouldnotex
morethana6mm(1/4inch)withmoderate
ngerpressureappliedtothespanjustabove
themachineframe(Figure24).
Figure24
1.Belt3.Nut
2.Pulleycarriage
5.Totightenthebelt,loosenthe4mounting
nutsandboltssecuringthepulleycarriageto
theframe,andmovethecarriagetotheleft,
tighteningthebelt;thensecurethe4mounting
nutsandbolts(Figure24).
6.Installthebeltcoverusingthehardwareretained
instep3.
g021850
29
Page 30

CuttingBlade Maintenance
8.Inspectthebladesfordamageandwear,and
replacethemasrequired.
DANGER
CheckingandReplacing theBlades
ServiceInterval:Beforeeachuseordaily—Check
thebladesforwearordamage.
Whenthecuttingbladesareworndownandnolonger
functioningproperly,replacethemasfollows:
Important:Performthisprocedurewhenthefuel
tankisemptyornearlyempty.
1.Shutofftheengine,waitforallmovingpartsto
stop,andremovethespark-plugwire.Engage
theparkingbrake.
2.TurnthefuelshutoffvalvetotheOFFposition,
anddrainthefuelfromthefueltank;referto
DrainingtheFuelTank(page27).
3.Removethe4bolts,lockwashers,and2
spacerssecuringthebeltcoverontheleftside
ofthemachine,andremovethecover.
4.Removethebladedrivebeltfromthemachine.
5.Tiltthemachinerearwarduntiltheupperhandle
restsontheground,andplaceajackstand
underthemachine.
Note:Ifnecessary,use2peopletotiltthe
machinerearward.
CAUTION
Raisingthemachineandrelyingsolely
onmechanicalorhydraulicjackscould
bedangerous.Themechanicalor
hydraulicjacksmaynotprovideenough
supportormaymalfunctionallowingthe
machinetofall,whichcouldcauseinjury.
Donotrelysolelyonmechanical
orhydraulicjacksforsupport.Use
adequatejackstandsorequivalent
support.
Awornordamagedbladecanbreak.A
pieceofthebladecouldbethrowninto
theareaoftheoperatororabystander,
resultinginseriouspersonalinjuryor
death.
•Inspectthebladeperiodicallyforwear
ordamage.
•Replaceawornordamagedblade.
9.Removethe4carriageboltsandlocknuts
securingthecuttingbladeassembly(Figure25),
andremoveitfromtheforkmountingbracket.
Figure25
1.Carriagebolt
2.Forkmountingbracket10.Pulleyspacer
3.Flangedbearingwith
setscrews
4.Locknut
5.Pulley
6.Taperedhubwith
setscrews
7.Washer
8.Bolt
10.Removethe2boltsandwashersattachingthe
pulleytothebearing.Loosenthesetscrews
onthebearing,andslidethekeyofftheshaft
(Figure25).Removethebearingandpulleyby
removingthebearingfastenersfromthefork
mountingbracket.
9.Key
11.Slicer-shaftnut
12.Slicer-shaftspacer
13.Cuttingblade
14.Bladespacer
15.Shaft
g021373
6.Lowerthecuttingbladestothelowestposition.
7.Spinthecuttingbladeassembly.Itshouldspin
freely.Ifitmakesagrindingnoiseandishalting,
thebearingsareworn;replacethemwhenthe
bladesarereplaced.
30
Page 31

11.Loosenthe2setscrewslocatedontheanged
bearing,andslidethebearingoffoftheshaft.
12.Loosenandremovetheslicer-shaftnutand
pulleyspacerfromtheshaft.
13.Carefullyslidethealternatingbladesand
spacersoffoftheshaft,andreplacethemas
necessary.
14.Reversetheproceduretoinstalltheassembly.
Note:Rotateeachblade1/6turnfromthe
previousblade.
SeedGateMaintenance
CheckingtheSeedGate
ServiceInterval:Beforeeachuseordaily
Note:Trappeddebrismaypreventtheseedgate
frommovingfreely.
1.Shutofftheengine,waitforallmovingpartsto
stop,andremovethespark-plugwire.Engage
theparkingbrake.
WARNING
Incorrectinstallationofthebladeor
componentsusedtoretainthebladecan
bedangerous.Failuretousealloriginal
componentsandassembledasshown
couldallowabladeorbladecomponent
tobethrownoutfromunderthedeck
resultinginseriouspersonalinjuryor
death.
AlwaysinstallToroblades,bladedrivers,
andbladeboltsasshown.
15.Returnthemachinetotheuprightposition.
16.Connectthewiretothesparkplug.
2.Checktoverifythattheseedgatemovesfreely
andisclearofdebris.
3.Iftheseedgatedoesnotopentothestopwhen
theseeder-controlleverisintheONposition,
cleanthegateassembly;refertoCleaningthe
SeedGate(page33).
31
Page 32

AdjustingtheSeed-Gate ClosedPosition
Iftheseedgateispartiallyopenwhenthe
seeder-controlleverisintheOFFposition,complete
thefollowing:
1.Shutofftheengine,waitforallmovingpartsto
stop,andremovethespark-plugwire.
2.Raisethecuttingbladestothehighestposition.
3.Pulltheseeder-controllevertotheOFFposition.
4.Loosenthenutsontheseed-gatecontrolcable
(seeFigure26).
Cleaning
CleaningtheEngineArea
ServiceInterval:Beforeeachuseordaily(Cleanthe
engineandexhaustareamoreoften
indryordirtyconditions.)
CAUTION
Excessivedebrisaroundengineandexhaust
areacancauseengineandexhaustareato
overheat,whichcancreatearehazard.
Cleanalldebrisfromengineandexhaustarea.
1.Shutofftheengine,waitforallmovingpartsto
stop,andremovethespark-plugwire.
2.Cleanalldebrisfromtheengineair-intake
screenandaroundtheengine.
3.Wipeupanyexcessivegreaseoroilaroundthe
engine.
Figure26
1.Jamnut
5.Movethecablerighttoclosetheseedgateor
lefttoopenit.
2.Cable
Important:Donottightenthecabletothe
pointtheseedgateistighttotherightwith
extremetensiononthecableasthiswill
damagethegateandthecable.Onlyadjust
ituntiltheopeningsinthebottomofthe
seederareclosed.
6.Tightenthejamnutsandtesttheseeder-control
levertoensurethattheseedgateopensand
closescorrectly.
CleaningundertheMachine
ServiceInterval:Beforeeachuseordaily
1.Shutofftheengine,waitforallmovingpartsto
stop,andremovethespark-plugwire.
2.Toensurethebestperformance,keepthe
g013391
undersideofthemachineclean.
CAUTION
Themachinemaydislodgematerialfrom
underthehousing.
•Weareyeprotection.
•Stayintheoperatingposition(behind
thehandle).
•Donotallowbystandersinthearea.
3.TurnthefuelshutoffvalvetotheOFFposition,
anddrainthefuelfromthefueltank;referto
DrainingtheFuelTank(page27).
4.Tiltthemachinerearwarduntiltheupperhandle
restsontheground,andplaceajackstand
underthemachine.
Note:Ifnecessary,use2peopletotiltthe
machinerearward.
5.Removethedebriswithahardwoodscraperor
othersuitabledevice.Avoidburrsandsharp
edges.
6.Returnthemachinetotheuprightposition.
7.Fillthefueltank.
8.Connectthewiretothesparkplug.
32
Page 33

CleaningundertheBelt Cover
ServiceInterval:Every50hours
1.Shutofftheengineandwaitforallmovingparts
tostop.
2.Disconnectthewirefromthesparkplug.
3.Removeandretainthe4bolts,lockwashers,
and2spacerssecuringthebeltcovertotheleft
sideofthemachine.
4.Removethecover,andbrushoutallthedebris
aroundthebeltarea.
5.Installthebeltcover,andtightenallthe
hardware.
6.Connectthewiretothesparkplug.
CleaningtheSeedGate
1.Shutofftheengineandwaitforallmovingparts
tostop.
2.Disconnectthewirefromthesparkplug.
3.Drainthefuelfromthefueltank;refertoDraining
theFuelT ank(page27).
4.Tiltthemachinerearwarduntiltheupperhandle
restsontheground,andplaceajackstand
underthemachine.
Note:Ifnecessary,use2peopletotiltthe
machinerearward.
5.Cleanthedebrisbetweentheframeandthe
seedgate.
6.Lubricatetheslidingsurfacebetweentheframe
andseedgatewithadrylubricant.
7.Returnthemachinetotheuprightposition.
8.Fillthefueltank.
9.Connectthewiretothesparkplug.
33
Page 34

Storage
StorageSafety
7.Checkandtightenallbolts,nuts,andscrews.
Repairorreplaceanypartthatisdamaged.
8.Paintallscratchedorbaremetalsurfaceswith
paintfromanAuthorizedServiceDealer.
•Parkthemachineonalevelsurface,shutoffthe
engine,waitforallmovingpartstostop,engage
theparkingbrake,andallowthemachinetocool
beforestoringit.
•Donotstorethemachineorfuelnearamesor
drainthefuelindoors.
StoringtheMachine
1.Raisethecuttingblades,stopthemachine,shut
offtheengine,anddisconnectthespark-plug
wire.
2.Removedirtandgrimefromtheentiremachine.
Important:Youcanwashthemachine
withmilddetergentandwater.Donot
pressure-washthemachine.Avoid
excessiveuseofwater,especiallynearthe
engine.
3.Servicetheaircleaner;refertoServicingtheAir
Cleaner(page23).
4.Changetheengineoil;refertoChangingthe
EngineOil(page25).
5.Greasetheslicer-shaftbearings;referto
LubricatingtheSlicer-ShaftBearings(page23).
9.Storethemachineonalevelsurfaceinaclean,
drygarageorstoragearea.
10.Coverthemachinetoprotectitandkeepitclean.
RemovingtheMachine fromStorage
1.Checkandtightenallfasteners.
2.Inspectthesparkplugandreplaceitifitisdirty,
worn,orcracked;refertotheengineowner’s
manual.
3.Installthesparkpluguntilitishand-tight,then
anadditional1/2turnifitisnew;otherwise,
tightenitanadditional1/8to1/4turn.
4.Performanyneededmaintenanceprocedures;
refertoMaintenance(page21).
5.Checktheengine-oillevel;refertoCheckingthe
Engine-OilLevel(page25).
6.Fillthefueltankwithfreshfuel;refertoAdding
Fuel(page12).
7.Connectthewiretothesparkplug.
6.Forstorageover30days,preparethemachine
asfollows:
A.Addapetroleum-based
stabilizer/conditionertofuelinthe
tank.Followmixinginstructionsfrom
stabilizermanufacturer.Donotusean
alcohol-basedstabilizer(ethanolor
methanol).
Note:Afuelstabilizer/conditionerismost
effectivewhenmixedwithfreshfueland
usedatalltimes.
B.Runtheengineuntilitstopsfromrunning
outoffuel.
C.Choketheengine.
D.Startandruntheengineuntilitwillnotstart
again.
E.Disposeoffuelproperly.Recyclethefuel
accordingtolocalcodes.
Important:Donotstorefuelcontaining
stabilizer/conditionerlongerthanthe
durationrecommendedbythefuelstabilizer
manufacturer.
34
Page 35

Troubleshooting
Problem
Theenginedoesnotstart,startshard,or
failstokeeprunning.
Theenginelosespower.
Theengineoverheats.
PossibleCauseCorrectiveAction
1.Thefueltankisempty.1.Fillthefueltank.
2.Thefuel-shutoffvalveisclosed.2.Openthefuel-shutoffvalve.
3.Thereisdirtinfuellter.3.Replacethefuellter.
4.Dirt,water,orstalefuelisinthefuel
system.
5.Theaircleanerisdirty.
6.Thesparkplugisoldorimproperly
gapped.
7.Thespark-plugwireisnotconnected.
1.Theengineloadisexcessive.1.Reducethegroundspeedorslicing
2.Theaircleanerisdirty.
3.Theoillevelinthecrankcaseislow.3.Addoiltothecrankcase.
4.Thecoolingnsandairpassagesfor
theengineareplugged.
5.Dirtinfuellter.5.Replacethefuellter.
6.Dirt,water,orstalefuelisinthefuel
system.
1.Theengineloadisexcessive.1.Reducethegroundspeedorslicing
2.Theoillevelinthecrankcaseislow.2.Addoiltothecrankcase.
3.Thecoolingnsandairpassagesfor
theengineareplugged.
4.ContactanAuthorizedServiceDealer.
5.Cleanorreplacetheair-cleaner
elements.
6.Adjustorreplacethesparkplug.
7.Checkthespark-plugwireconnection.
depth.
2.Cleanorreplacetheair-cleaner
elements.
4.Removetheobstructionsfromthe
coolingnsandairpassages.
6.ContactanAuthorizedServiceDealer.
depth.
3.Removetheobstructionsfromthe
coolingnsandairpassages.
Themachinepullstotheleftortheright.
Themachinedoesnotdrive.
Thereisabnormalvibration.
1.Thetirepressureinthedrivetiresis
notcorrect.
1.Thedriveorpumpbeltisworn,loose,
orbroken.
2.Thedriveorpumpbeltisoffapulley.2.Changethebelt.
3.Thetransmissionoillevelislow.3.Addhydraulicoiltothetransmission.
4.Theself-propelcableneedsadjustment
orisbroken.
1.Theblade(s)is/arebent.1.Installnewblade(s).
2.Theenginemountingboltsareloose.2.Tightentheenginemountingbolts.
3.Theenginepulleyoridlerpulleyis
loose.
4.Theenginepulleyisdamaged.
5.Thebeltisdamaged.5.Installanewbelt.
1.Adjustthetirepressureinthedrive
tires.
1.Changethebelt.
4.Adjustorreplacethecable.
3.Tightentheappropriatepulley.
4.ContactanAuthorizedServiceDealer.
35
Page 36

Alimitedwarranty(seewarrantyperiodsbelow)
TheToroWarranty
SWS
TurfRenovation
ConditionsandProductsCovered
TheT oroCompanyanditsafliate,ToroWarrantyCompany,pursuanttoan
agreementbetweenthem,jointlywarrantyourT oroProductslistedbelowto
befreefromdefectsinmaterialsorworkmanship.
Thiswarrantycoversthecostofpartsandlabor,butyoumustpay
transportationcosts.
Thefollowingtimeperiodsapplyfromthedateofpurchase:
ProductsWarrantyPeriod
TurfRenovation
Walk-BehindAerator1year
•Engine2years
Stand-OnAerator
•Battery90daysPartsandLabor
•Engine2years
Dethatcher1year
•Engine2years
TurfSeeder
•Engine2years
Stand-OnSpreaderSprayer
•Battery90daysPartsandLabor
•Engine2years
Walk-BehindRotaryBroom1year
•Engine2years
Whereawarrantableconditionexists,wewillrepairtheProductatnocost
toyouincludingdiagnosis,labor,andparts.
1year
1yearPartsOnly
1year
1year
1yearPartsOnly
InstructionsforObtainingWarrantyService
IfyouthinkthatyourT oroProductcontainsadefectinmaterialsor
workmanship,followthisprocedure
1.ContactanyAuthorizedServicingOutlettoarrangeserviceattheir
dealership.T olocateoneconvenienttoyou,accessourwebsiteat
www.T oro.com.Select“WheretoBuy”andselect“Contractor”under
producttype.Y oumayalsocallourtollfreenumberbelow.
2.Bringtheproductandyourproofofpurchase(salesreceipt)tothem.
3.IfforanyreasonyouaredissatisedwiththeServiceOutlet’sanalysis
orwiththeassistanceprovided,contactusat:
SWSCustomerCareDepartment
ToroWarrantyCompany
811 1LyndaleAvenueSouth
Bloomington,MN55420-1196
TollFree:888-384-9939
**
ToroAuthorizedRentalCustomerswhohavepurchasedproductsdirectlyfromT oroandhave
signedtheToroRentalCustomerAgreementhavetheabilitytoperformtheirownwarrantywork.
PleasevisitT oro’sRentalPortalforelectronicwarrantyclamlingproceduresorcallthetollfree
numberabove.
**
:
OwnerResponsibilities
YoumustmaintainyourT oroProductbyfollowingthemaintenance
proceduresdescribedintheOperator’sManual.Suchroutinemaintenance,
whetherperformedbyadealerorbyyou,isatyourexpense.Parts
scheduledforreplacementasrequiredmaintenance(“MaintenanceParts”),
arewarrantedfortheperiodoftimeuptothescheduledreplacementtime
forthatpart.Failuretoperformrequiredmaintenanceandadjustmentscan
begroundsfordisallowingawarrantyclaim.
ItemsandConditionsNotCovered
Notallproductfailuresormalfunctionsthatoccurduringthewarrantyperiod
aredefectsinmaterialsorworkmanship.Thisexpresswarrantydoesnot
coverthefollowing:
•Productfailureswhichresultfrominstallationanduseofadd-on,
modied,orunapprovedaccessories
•Failuretoperformrequiredmaintenanceand/oradjustments
•Repairsnecessaryduetofailuretofollowrecommendedfuel
procedure(consultOperator'sManualformoredetails)
–Removingcontaminantsfromthefuelsystemisnotcovered
–Useofoldfuel(morethanonemonthold)orfuelwhichcontains
morethan10%ethanolormorethat15%MTBE
–Failuretodrainthefuelsystempriortoanyperiodofnon-use
overonemonth
•Productfailureswhichresultfromoperatingtheproductinanabusive,
negligentorrecklessmanner
•Partssubjecttoconsumptionthroughuseunlessfoundtobedefective.
Examplesofpartswhichareconsumed,include,belts,cutters,blades,
teeth,sparkplugs,tires,lters,etc.
•Failurescausedbyoutsideinuenceinclude,weather ,storage,
contamination,lubricants,additives,orchemicals,etc.
•Normal“wearandtear”itemsincudespaintedsurfacesandscratched
decals,etc.
•Anycomponentcoveredbyaseparatemanufacturer’swarranty
•Pickupanddeliverycharges
GeneralConditions
RepairbyanAuthorizedServicingOutletorSelf-ServiceasanAuthorized
RentalCustomerisyoursoleremedyunderthewarranty.
NeitherTheToroCompanynorToroWarrantyCompanyisliablefor
indirect,incidentalorconsequentialdamagesinconnectionwiththe
useoftheToroProductscoveredbythiswarranty,includingany
costorexpenseofprovidingsubstituteequipmentorserviceduring
reasonableperiodsofmalfunctionornon-usependingcompletionof
repairsunderthiswarranty .Allimpliedwarrantiesofmerchantability
andtnessforusearelimitedtothedurationofthisexpresswarranty .
Somestatesdonotallowexclusionsofincidentalorconsequential
damages,orlimitationsonhowlonganimpliedwarrantylasts,sothe
aboveexclusionsandlimitationsmaynotapplytoyou.
Thiswarrantygivesyouspeciclegalrights,andyoumayalsohaveother
rightswhichvaryfromstatetostate.
ExceptfortheenginewarrantycoverageandtheEmissionswarranty
referencedbelow,ifapplicable,thereisnootherexpresswarranty .The
EmissionsControlSystemonyourProductmaybecoveredbyaseparate
warrantymeetingrequirementsestablishedbytheU.S.Environmental
ProtectionAgency(EPA)ortheCaliforniaAirResourcesBoard(CARB).
RefertotheCaliforniaEmissionControlWarrantyStatementsuppliedwith
yourProductorcontainedintheenginemanufacturer’sdocumentationfor
details.
CountriesOtherthantheUnitedStatesorCanada
CustomerswhohavepurchasedT oroproductsoutsidetheUnitedStatesorCanadashouldcontacttheirT oroDistributor(Dealer)toobtainguarantee
policiesforyourcountry,province,orstate.IfforanyreasonyouaredissatisedwithyourDistributor'sserviceorhavedifcultyobtainingguarantee
information,contacttheT oroimporter .Ifallotherremediesfail,youmaycontactusatToroWarrantyCompany.
AustralianConsumerLaw:AustraliancustomerswillnddetailsrelatingtotheAustralianConsumerLaweitherinsidetheboxoratyourlocalToro
Dealer.
374-0289RevE
 Loading...