

Page 1
FormNo.3382-929RevA
G017901
BC-25BrushChipper
ModelNo.22614—SerialNo.314000001andUp
ModelNo.22614G—SerialNo.314000001andUp
ModelNo.32614—SerialNo.314000001andUp
Registeratwww.T oro.com.
OriginalInstructions(EN)
*3382-929*A
Page 2
WARNING
CALIFORNIA
Proposition65Warning
Thisproductcontainsachemicalorchemicals
knowntotheStateofCaliforniatocausecancer,
birthdefects,orreproductiveharm.
Theengineexhaustfromthisproduct
containschemicalsknowntotheStateof
Californiatocausecancer,birthdefects,
orotherreproductiveharm.
YoumaycontactTorodirectlyatwww .T oro.comforproduct
andaccessoryinformation,helpndingadealer,ortoregister
yourproduct.
Wheneveryouneedservice,genuineToroparts,oradditional
information,contactanAuthorizedServiceDealerorToro
CustomerServiceandhavethemodelandserialnumbersof
yourproductready.Writethenumbersinthespaceprovided.
ModelNo.
SerialNo.
DANGER
Watchforoverheadpowerlinesintheworkarea.
Shockorexplosionmayoccurifyoucomeinto
contactwiththem.
ThissparkignitionsystemcomplieswithCanadianICES-002.
Becauseinsomeareastherearelocal,state,orfederal
regulationsrequiringthatasparkarresterbeusedonthe
engineofthismachine,asparkarresterisavailableas
anoption.Ifyourequireasparkarrester,contactyour
AuthorizedToroServiceDealer.
GenuineT orosparkarrestersareapprovedbytheUSDA
ForestryService.
Important:ItisaviolationofCaliforniaPublic
ResourceCodeSection4442touseoroperatetheengine
onanyforest-covered,brush-covered,orgrass-covered
landwithoutasparkarrestermufermaintainedin
workingorder,ortheengineconstricted,equipped,and
maintainedforthepreventionofre.Otherstatesor
federalareasmayhavesimilarlaws.
Theenclosed
informationregardingtheUSEnvironmentalProtection
Agency(EPA)andtheCaliforniaEmissionControl
Regulationofemissionsystems,maintenance,and
warranty.Replacementsmaybeorderedthroughthe
enginemanufacturer.
Engine Owner's Man ual
issuppliedfor
Thismanualidentiespotentialhazardsandhassafety
messagesidentiedbythesafetyalertsymbol(Figure1),
whichsignalsahazardthatmaycauseseriousinjuryordeath
ifyoudonotfollowtherecommendedprecautions.
Figure1
1.Safetyalertsymbol
Thismanualuses2wordstohighlightinformation.
Importantcallsattentiontospecialmechanicalinformation
andNoteemphasizesgeneralinformationworthyofspecial
attention.
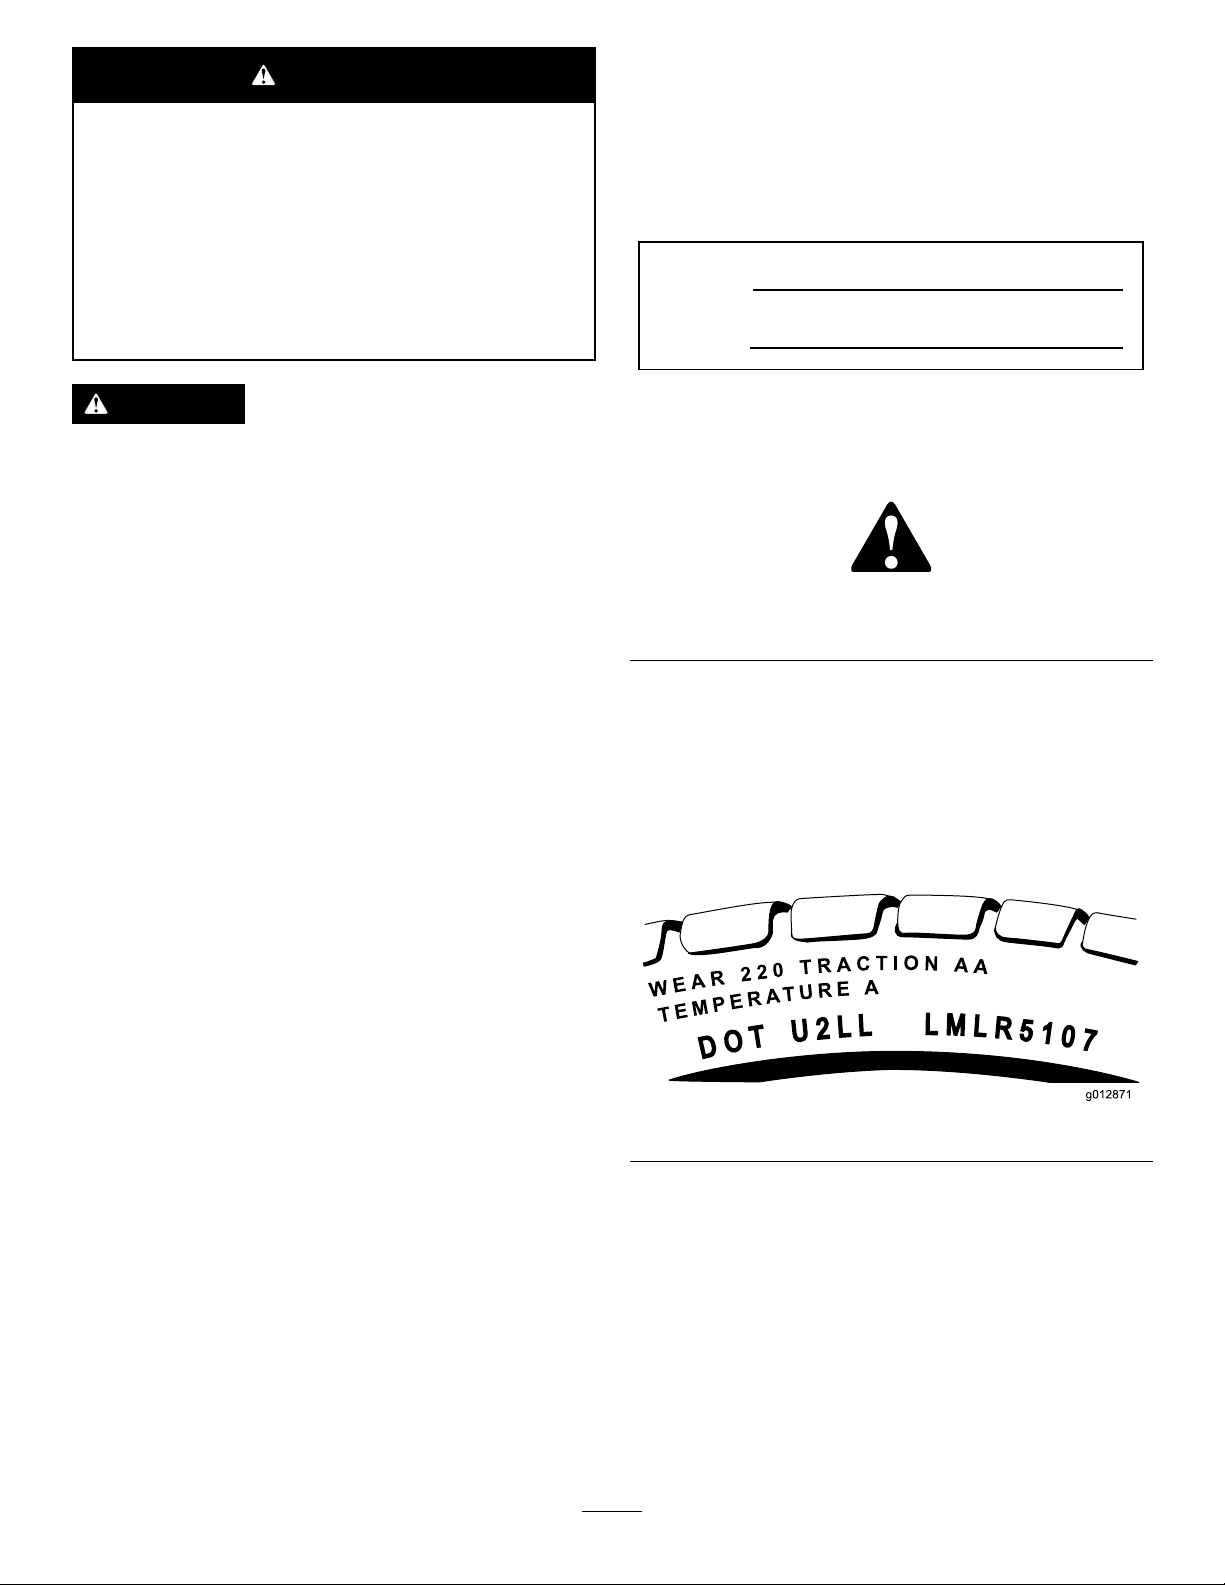
TireInformation
TheDOTtireidenticationnumber(TIN)isbrandedinto
thesidewallofallstreetlegaltires(Figure2).
Introduction
Thisbrushchipperisdesignedtochipbranches,vines,leaves,
andsmalltreelimbsupto15.24cm(6inches)indiameter.It
isnotintendedtochiprocks,wire,metal,oranymaterials
otherthanwood.Thebrushchippercanbetowedbehinda
vehicleequippedwithanappropriateballhitch.
Readthisinformationcarefullytolearnhowtooperateand
maintainyourproductproperlyandtoavoidinjuryand
productdamage.Youareresponsibleforoperatingthe
productproperlyandsafely.
©2014—TheToro®Company
8111LyndaleAvenueSouth
Bloomington,MN55420
Figure2
Contents
Safety...........................................................................3
SafeOperatingPractices...........................................3
SafetyandInstructionalDecals.................................6
ProductOverview..........................................................7
Controls................................................................7
Specications.........................................................7
Operation.....................................................................8
TowingtheMachine................................................8
Contactusatwww.Toro.com.
2
PrintedintheUSA.
AllRightsReserved
Page 3

MaintainingtheTiresandWheels..............................9
PreparingtoStarttheMachine..................................9
AddingFuel............................................................9
CheckingtheHourMeter........................................10
CheckingtheEngine-OilLevel.................................10
ChangingtheChutePosition....................................11
ChangingtheDeectorPosition...............................11
StartingandStoppingtheEngine..............................11
UsingtheBrushChipper.........................................12
Maintenance.................................................................14
RecommendedMaintenanceSchedule(s)......................14
Lubrication...............................................................14
LubricatetheCutterWheelBearings.........................14
LubricatetheWheelBearings...................................15
EngineMaintenance..................................................15
ServicingtheAirCleaner.........................................15
ServicingtheEngineOil..........................................16
ServicingtheSparkPlug..........................................17
FuelSystemMaintenance...........................................18
ChangingtheFuelFilter..........................................18
BeltMaintenance......................................................18
AdjustingtheDriveBeltTension..............................18
ReplacingtheDriveBelt..........................................19
CutterMaintenance....................................................19
InspectingtheCutterBlock......................................19
ReplacingtheCutterBlades.....................................19
ChargingtheBattery...................................................20
InspectingtheTires....................................................21
InspectingtheTires................................................21
Storage........................................................................22
Troubleshooting...........................................................23
Safety
Improperuseormaintenancebytheoperatororowner
canresultininjury.Toreducethepotentialforinjury,
complywiththesesafetyinstructionsandalways
payattentiontothesafetyalertsymbol
means:
instruction.Failuretocomplywiththeinstructionmay
resultinpersonalinjuryordeath.
Caution
,
W ar ning
,or
Danger
SafeOperatingPractices
Thisproductiscapableofamputatinghandsandfeet.Always
followallsafetyinstructionstoavoidseriousinjuryordeath.
WARNING
Engineexhaustcontainscarbonmonoxide,an
odorless,deadlypoisonthatcankillyou.
Donotruntheengineindoorsorinanenclosed
area.
Ifyoubelievethatyourmachinehasadefectwhichcould
causeacrashorcouldcauseinjuryordeath,youshould
immediatelyinformtheNationalHighwayTrafcSafety
Administration(NHTSA)inadditiontonotifyingTheToro
Company.
IfNHTSAreceivessimilarcomplaints,itmayopenan
investigation,andifitndsthatasafetydefectexistsina
groupofmachines,itmayorderarecallandremedycampaign.
However,NHTSAcannotbecomeinvolvedinindividual
problemsbetweenyou,yourdealer,orTheT oroCompany.
,which
—personalsafety
TocontactNHTSA,youmaycalltheVehicleSafetyHotline
toll-freeat1–888–327–4236(TTY :1–800–424–9153);go
tohttp://www .safercar.gov;orwriteto:Administrator,
NHTSA,400SeventhStreet,SW .,Washington,DC20590.
Youcanalsoobtainotherinformationaboutmotorvehicle
safetyfromhttp://www .safercar.gov.
Training
•ReadtheOperator'sManualandothertrainingmaterial.If
theoperator(s)ormechanic(s)cannotreadEnglish,itis
theowner'sresponsibilitytoexplainthismaterialtothem.
•Becomefamiliarwiththesafeoperationoftheequipment,
operatorcontrols,andsafetysigns.
•Alloperatorsandmechanicsshouldbetrained.The
ownerisresponsiblefortrainingtheusers.
•Neverletchildrenoruntrainedpeopleoperateorservice
theequipment.Localregulationsmayrestricttheageof
theoperator.
•Theowner/usercanpreventandisresponsiblefor
accidentsorinjuriesoccurringtopeople,ordamageto
property.
3
Page 4

TowingtheMachine
Checkwithyourlocalcountyorstatesafetytowing
regulations,inadditiontomeetingtheDepartmentof
Transportation(DOT)SafetyTowingRegulations,before
towingthemachine.
•Inordertoreducethepossibilityofanaccidentwhile
transportingthemachineonpublicroads,makesurethat
thetowingvehicleismechanicallysoundandingood
operatingcondition.
•Shutdowntheenginebeforetransportingthemachine.
•Inspectthehitchandcouplingforwear.Nevertowthe
machinewithdefectivehitches,couplings,chains,etc.
•Checkthetireairpressureonbothofthetowingvehicle
andthemachine.Thechippertiresshouldbeinatedto
410kPa(60ps)cold.
•Checkthetiretreadforwear.
•Properlyattachthesafetychainstothetowingvehicle.
•Ensurethatthetowingvehicle’sdirectional,backup,and
brakelightsareworkingproperly .
•Avoidsuddenstopsandstarts.Thiscancauseskidding,
orjackkning.Smooth,gradualstartsandstopswill
improvetowing.
•Avoidsharpturnstopreventrolling.T owonlywitha
vehiclethathasahitchdesignedfortowing.Donot
attachtowedequipmentexceptatthehitchpoint.
Beforetowingchecktomakecertainyourmachineiscorrectly
andsecurelyattachedtothetowingvehicle.
•Ensurethattheballhitchyouareusingisthepropersize
forthehitchcoupleronthemachine.
•Ensurethatthesafetychainsareproperlyhookedtothe
vehicle,leavingenoughslackforturning.
•EnsurethatthejackstandissecuredintheUpposition.
•Donottowthemachinefasterthan75km/h(45mph).
•Usecautionwhenbackingup;useaspotteroutsidethe
vehicletoguideyou.
•Donotallowanyonetositorrideonthemachine.
•Donotcarryanycargoorwoodonthemachinewhen
towing.
•Disconnectthemachinefromthetowvehiclebefore
usingit.
•Placechockblocksunderneaththewheeltoprevent
rollingwhilethemachineisparked.
PreparingtheMachine
Becomefamiliarwiththesafeoperationoftheequipment,
operatorcontrols,andsafetysigns.
•Evaluatetheterraintodeterminewhataccessoriesand
attachmentsareneededtoproperlyandsafelyperform
thejob.Onlyuseaccessoriesandattachmentsapproved
bythemanufacturer.
•Wearappropriateclothingincludinghardhat,faceshield,
safetyglasses,longpants,substantialslip-resistantsafety
shoes,andhearingprotection.Longhair,looseclothing
orjewelrymaygettangledinmovingparts.W eartight
ttinggloveswithoutdrawstringsorloosecuffs.
•Useextracarewhenhandlinggasolineandotherfuels.
Theyareammableandvaporsareexplosive.
–Useonlyanapprovedcontainer
–Neverremovethegascaporaddfuelwiththeengine
running.Allowtheenginetocoolbeforerefueling.
Donotsmoke.
–Neverrefuelordrainthemachineindoors.
–Replacethegasolinecapandtightenitsecurely.
–Keepthecontainernozzleincontactwiththetank
duringlling.
–Ifgasolineisspilled,wipeitofftheengineand
equipment.
•Ensurethatthemachineisonalevelsurfacebefore
operating.
•Alwaysoperatethemachinefromthesideofthehopper.
•Blockthewheelsofthemachinetopreventunintended
movement.
OperatingtheMachine
•Beforestartingthismachine,reviewtheSafety(page3)
section.Failuretofollowtheserulesmayresultinserious
injurytotheoperatororbystanders.
•Neverrunanengineinanenclosedarea.
•Onlyoperatethemachineingoodlight,keepingaway
fromholesandhiddenhazards.
•Onlystarttheenginefromtheoperator'sposition.
•Donotpassorstandonthedischargesideofthemachine
whentheengineisrunningorwhentheywheelis
turning.
•Ensurethatalltheguardsandshieldsaresecurelyinplace
beforeoperating.
•Ensurethatallinterlocksareattached,adjustedproperly,
andfunctioningproperly.
•Donotchangetheenginegovernorsettingoroverspeed
theengine.
•Stoponlevelground,andshutofftheenginebefore
leavingtheoperator'spositionforanyreason.
•Chockthemachineorkeepitattachedtothetowing
vehiclewhennotinusetopreventthemachinefrom
rolling.
•Keephandsandfeetawayfromanymovingparts.
•Nevercarrypassengers,andkeeppetsandbystanders
away.
•Donotoperatethemachineundertheinuenceof
alcoholordrugs.
•Ensurethattheareaisclearofotherpeoplebefore
operatingthemachine.Stopthemachineifanyoneenters
thearea.
4
Page 5

•Neverleavearunningmachineunattended.Alwaysstop
theengineandverifythechipperywheelhasstopped
rotating.
•Donottouchpartswhichmaybehotfromoperation.
Allowthemtocoolbeforeattemptingtomaintain,adjust,
orservicethemachine.
–Ensurethatthetiresareproperlyinatedas
recommended.
–Ensurethatthelugnutsaretightandtorqued
properly.
–Ensurethatthemachineisproperlysecured.
•Lightningcancausesevereinjuryordeath.Iflightning
isseenorthunderisheardinthearea,donotoperate
themachine;seekshelter.
•Donotallowanyonetooperatethismachinewithout
properinstruction.
•Keepareaofdischargeclearofpeople,animals,buildings,
glass,oranythingelsethatwillobstructcleardischarge,
causeinjury,ordamage.Windcanalsochangedischarge
direction.Ifitbecomesnecessarytopushmaterialinto
thehopper,useasmalldiameterwoodstick,notyour
hands.
•Donotusethemachinewiththehopperordischarge
chuteremoved.
•Cleartheareaofobjectssuchaswire,rope,etc.Inserting
theseobjectsintothehoppercoulddamagetheywheel
and/orcauseinjury.
•Keepyourfaceandbodyawayfromthehoppertoavoid
accidentalbouncebackofanymaterial.
•Ifyouhearorseematerialbeingkickedbackagainstthe
rubberap,shutthefeederchutedooruntilthematerial
haspassed.
•Whenfeedingmaterialintothehopper,beextremely
carefulthatpiecesofmetal,rocks,orotherforeign
objectsarenotincluded.Personalinjuryordamageto
themachinecouldresult.
•Shutofftheengineandwaitforthemovingpartstocome
toacompletestopbeforeremovingprocessedmaterial,
leaves,ordebrisfromthemachine.
•Removethekey ,disconnectthesparkplugwiresandkeep
thewireawayfromthesparkplugtopreventaccidental
startingwhileadjustingthemachine.
•Ifthecuttingmechanismstrikesaforeignobjectorif
yourmachineshouldstartmakinganunusualnoiseor
vibration,stoptheengineandwaitveminutesforall
movingpartstocometoacompletestopandcool.
Vibrationisgenerallyawarningoftrouble.Disconnect
thesparkplugwiresandinspectforcloggingordamage.
Cleanandrepairand/orreplacedamagedparts.
•Donottouchpartsthatmaybehotfromoperation.
Allowthemtocoolbeforeattemptingtomaintain,adjust,
orservicethemachine.
MaintainingandStoringtheMachine
•Stoptheengine.W aitforallmovementtostopbefore
adjusting,cleaning,orrepairing.
•Cleanthedebrisfromthemufersandenginetohelp
preventres.Cleanupanyoilorfuelspillage.
•Lettheenginecoolbeforestoring.
•Donotstorefuelnearamesordrainindoors.
•Parkthemachineonlevelground.Neverallowuntrained
personneltoservicethemachine.
•Removethesparkplugwirebeforemakinganyrepairs.
•Keephandsandfeetawayfrommovingparts.Ifpossible,
donotmakeadjustmentswiththeenginerunning.
•Keepallpartsingoodworkingconditionandallhardware
tightened.Replaceallwornordamageddecals.
•Keepallnuts,bolts,screws,hydraulicttings,andhose
clampssecurelytightened.Keepequipmentingood
condition.
•Donottamperwithsafetydevices.
•Useextracarewhenhandlinggasolineandotherfuels.
Theyareammableandvaporsareexplosive.
–Useonlyanapprovedcontainer.
–Neverremovethegascaporaddfuelwhenthe
engineisrunning.Allowtheenginetocoolbefore
refueling.Donotsmoke.
–Neverrefuelthemachineindoors.
–Neverstorethemachineorfuelcontainerinside
wherethereisanopename,suchasnearawater
heaterorfurnace.
–Neverllacontainerwhileitisinsideavehicle,trunk,
pick-upbed,oranysurfaceotherthantheground.
–Keepcontainernozzleincontactwiththetankduring
lling.
•Stopandinspectthemachineifyoustrikeanobject.
Makeanynecessaryrepairsbeforerestarting.
•UseonlygenuineT ororeplacementpartstoensurethat
theoriginalstandardsaremaintained.
•Nevermovethismachinewhiletheengineisrunning.
•Beforeeveryuse:
–Inspectthecoupler,ballandhitch.
–Ensurethatalllightsarefunctioningproperly.
5
Page 6
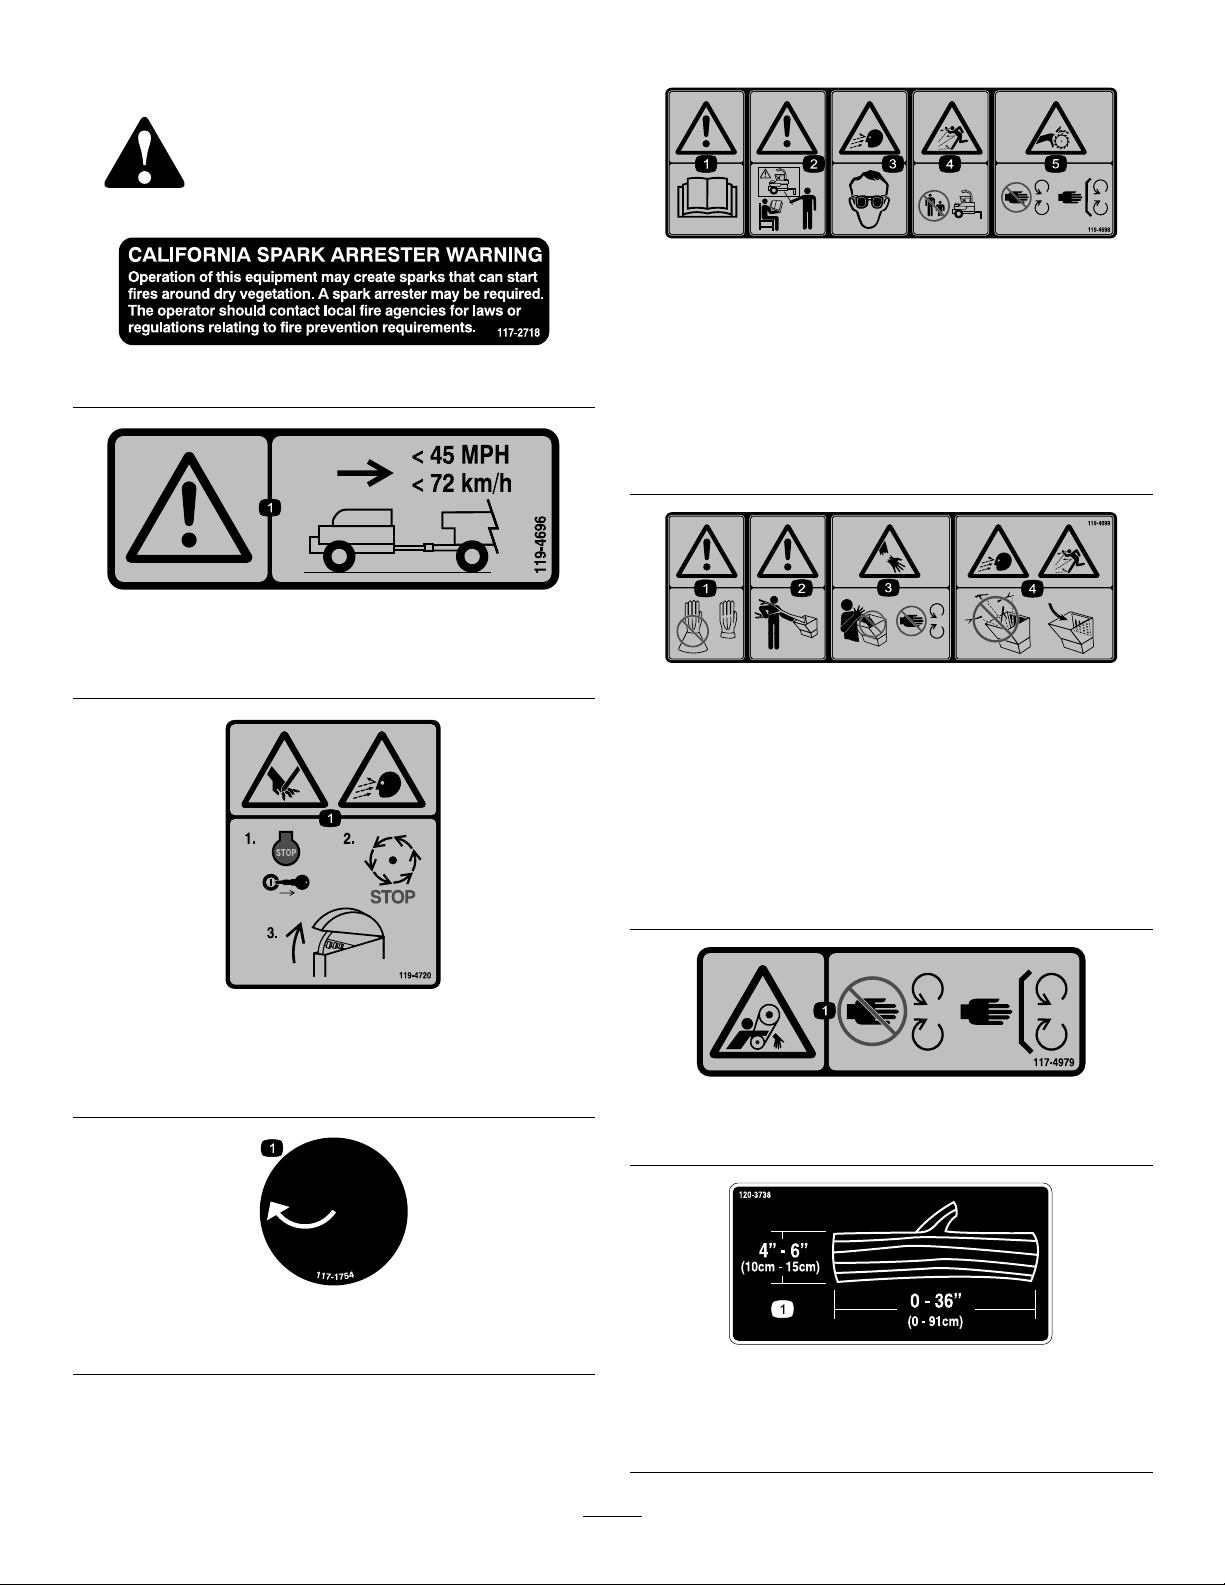
SafetyandInstructionalDecals
Safetydecalsandinstructionsareeasily
visibletotheoperatorandarelocatednear
anyareaofpotentialdanger.Replaceany
decalthatisdamagedorlost.
117–2718
119-4696
1.Warning—donotexceed72kmh(45mph)when
transportingthemachine.
119-4698
1.Warning—readtheOperator'sManual.
2.Warning—readtheOperator'sManual,donotoperatethis
machineunlessyouaretrained.
3.Thrownobjecthazard,face—weareyeprotection.
4.Thrownobjecthazard—keepbystandersasafedistance
fromthemachine.
5.Cutting/dismembermenthazardofhand,blade—stayaway
frommovingparts,keepallguardsandshieldsinplace.
119-4699
119-4720
1.Cutting/dismembermenthazardofhand;thrownobject
hazard,face—stoptheengine,removethekeyandwaitfor
allmovingpartstostopbeforeopeningtheguard.
1.Warning—donotoperatewearinggloveswithloose
gauntlets,usegloveswithoutloosematerial.
2.Warning—donotentanglebodywithmaterialwhenusing
machine.
3.Cutting/dismembermenthazardarm—donotplacearmin
hopper;stayawayfrommovingparts,keepallguardsand
shieldsinplace.
4.Thrownobjecthazard,faceandbody—donotletloose
materialescapefromthehopper ,puttheshroudinplace.
117–4979
1.Rotatingbelt—Keepguardinplace
1.Rotationaldirectionandspinindicator
117-1754
120-3738
1.Whenchippingbrancheswithwidthsof4to6inches,cut
thebranchestolengthsof36inchesorlesstoprevent
cloggingofthechipper.
6
Page 7
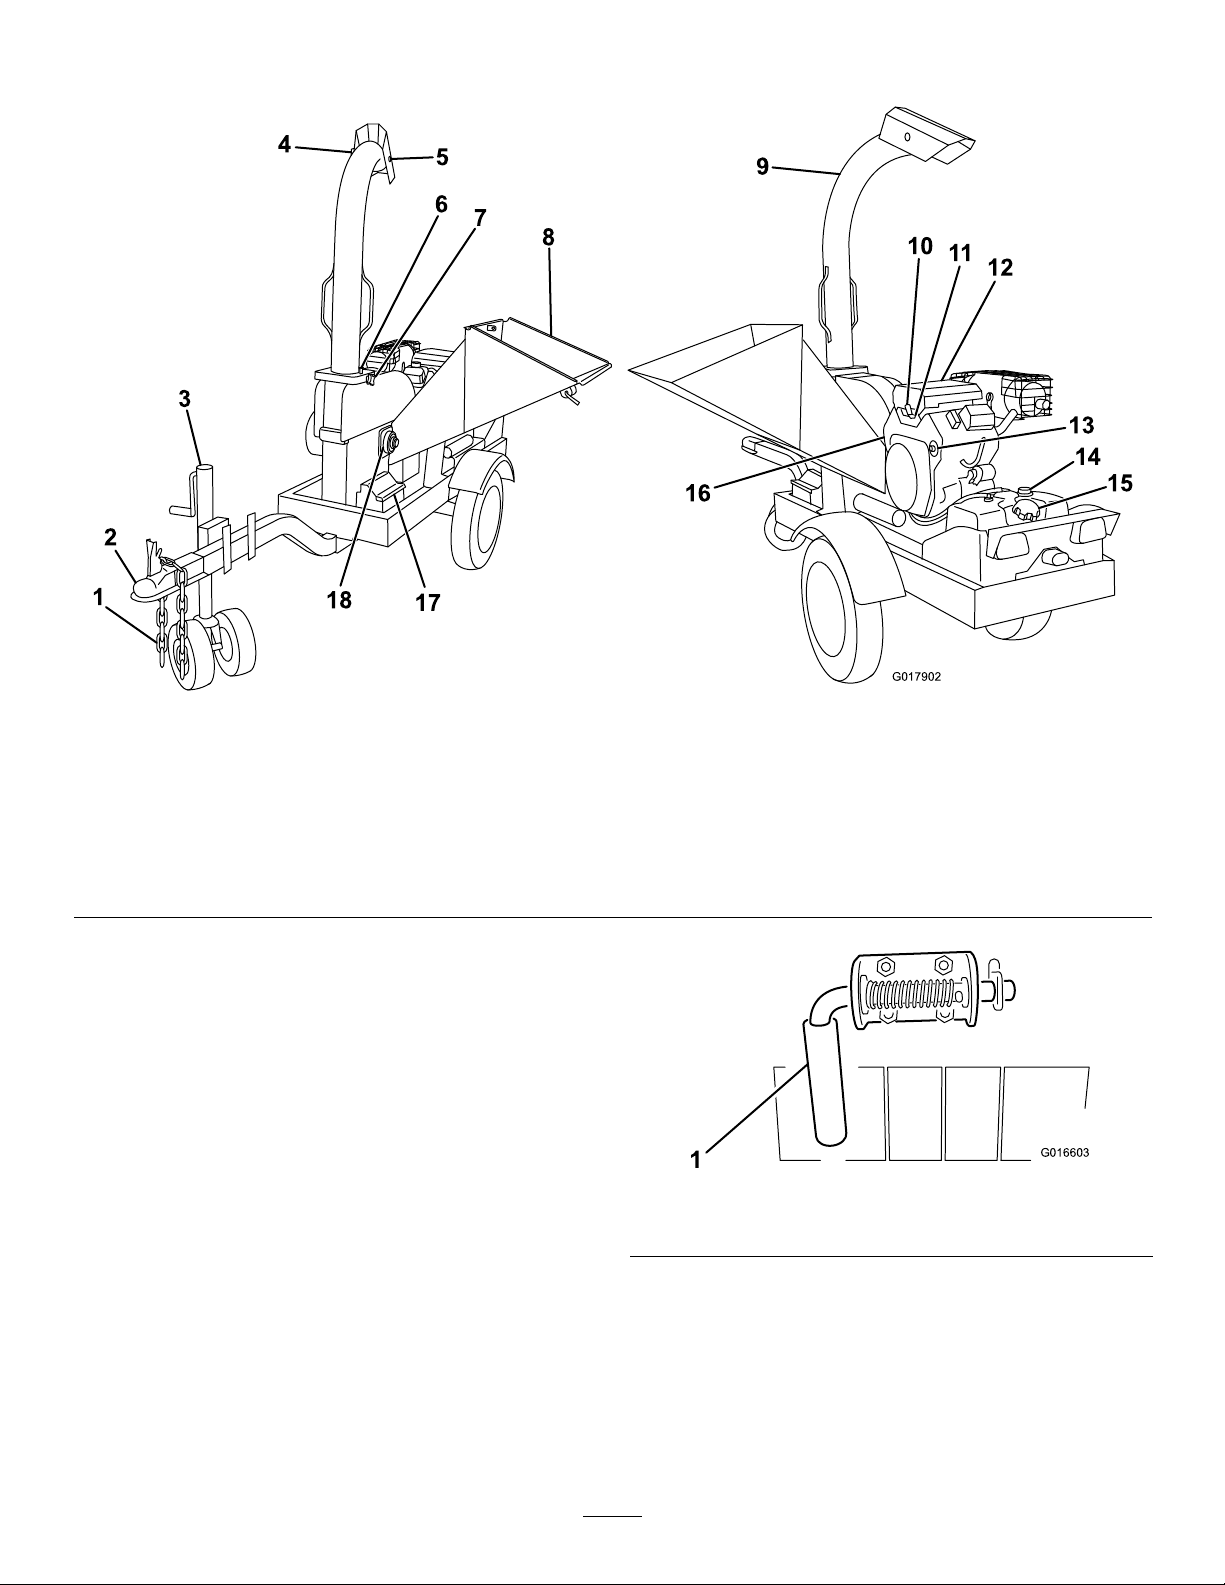
ProductOverview
1
2
3
4
5
6
7
8
9
10
11
12
13
14
15
16
17
18
G017902
G016603
Figure3
1.Safetychains7.Chutelockingknob
2.Coupler
3.Jackstand9.Dischargechute15.Fuelcap
4.Deectorlockingknob10.Choke16.Fuellter
5.Deector
6.Chutelockingpin12.Airlter
8.Hopper14.Fuellevelgauge
11.Throttle17.Battery
13.Keyswitch
18.Flywheelbearing
Controls
Becomefamiliarwithallthecontrolsbeforeyoustartthe
engineandoperatethemachine.
HopperLatch
Thehopper,mountedonthesideofthemachine,swings
downformachineoperation.Therevolvingbladesmounted
onaywheelbehindthehopperturnbranchesfedintothe
hopperintochips.Thechippercanchipbranchesandvines
ranginginsizeupto15cm(6inches)indiameterandup
to1meter(3feet)inlength.
Toreleasethehopperorhopperlatch(Figure4),pullon
thehandleandrotateitupordowntoengagethelatchpin
behindthestop.
Pullhopperdowntoopen.
Figure4
1.Hopperlatch
Specications
Note:Specicationsanddesignaresubjecttochange
withoutnotice.
7
Page 8
HopperOpening15cm(6inches)maximum
3
4
G016604
Length
Width
Height
Weight
EngineKohler725cc,V-Twin,gas
TirePressure
FuelT ankCapacity20.8L(5.5USgallons)
282cm(1 11inches)
89cm(35inches)
206cm(81inches)
478Kg(1056lbs)
413.5kPa(60psi)
diameter
Operation
Note:Determinetheleftandrightsidesofthemachine
fromthenormaloperatingposition.
Important:Beforeoperating,checkthefuelandoil
level,andremovedebrisfromthemachine.Ensurethat
theareaisclearofpeople.
TowingtheMachine
Important:Donottowover72km/h(45mph).
1.Raisehopperandlockitintheupposition.Rotate
thechutetowardtherearofthemachine,lockitin
positionwiththechutelockingpinandtightenchute
lockingknob(Figure3).
2.Crankthehandleoftheliftjacktoalignthecoupler
withtheballofthetowvehicle.
3.Removethelockingpinfromthelever,squeezethe
latchlock,andlifttheleveruptoopenthecoupler
(Figure4).
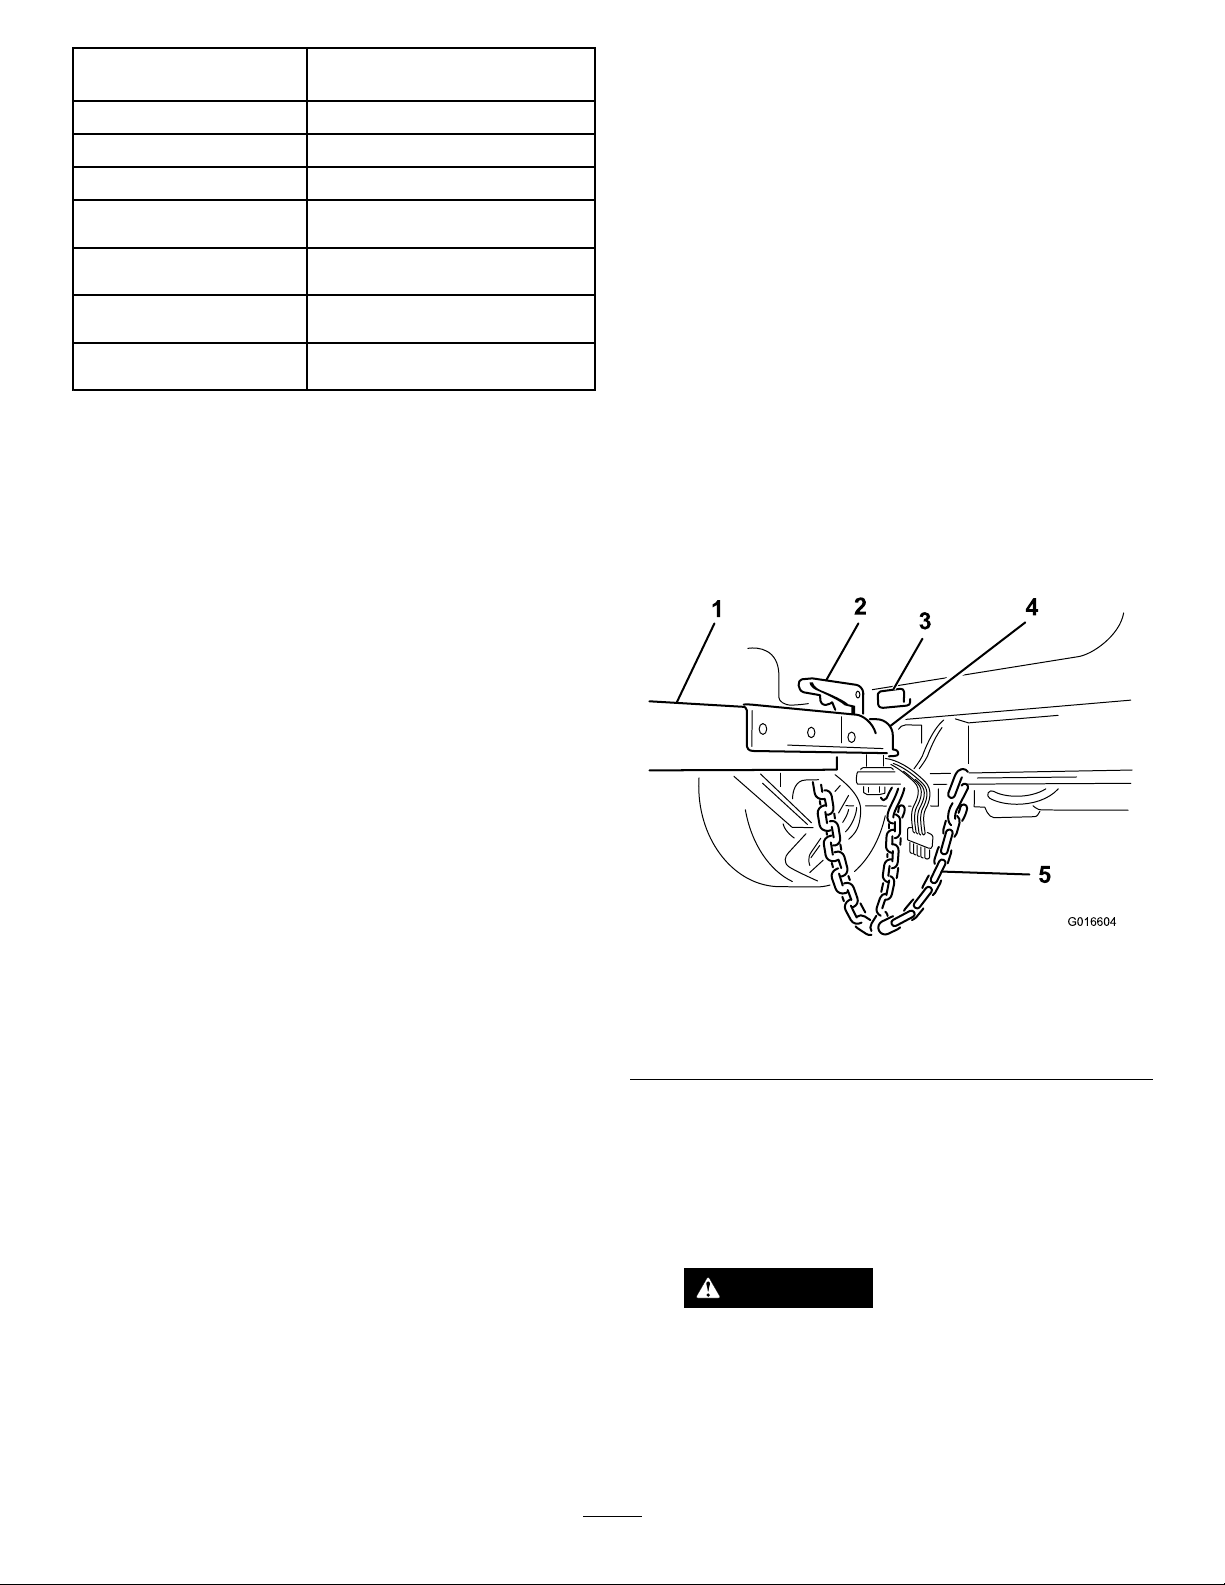
Figure5
1.Tongue
2.Leverinlockedposition
3.Lockingpin
4.Coupler
5.Safetychain
4.AttachcouplertoaclassIorhigher50.8mm(2inch)
ballonatowingvehicleandlatchsecurely.
•Ifcouplerdoesnottovertheball,turnthe
adjustmentnut1turncounter-clockwise.
•Ifcouplerhitchistoolooseontheball,turnthe
adjustmentnut1turnclockwise.
WARNING
Failuretoproperlyengagethehitchballin
thecouplerballsocketandsecurelylockthe
couplerlatchmechanismcancausetheunitto
becomedetachedfromthetowvehiclewhile
traveling,whichmaycauseseriousinjuryand
propertydamage.
8
Page 9

5.Installthelockingpintosecurethelever(Figure5).
G016605
6.Crossor“X”thesafetychainsandattachthemtothe
holesonthehitch.
7.Plugthetaillightwireharnessconnectortothetow
vehicleconnector.Checktomakesurethatthebrake
lightsilluminateproperlywiththebrakepedalapplied
andthetaillightsashwhentheturningsignalsareuse.
8.Raisethejackstandsothatthecasterwheelsarefreeof
theground,pullthereleasepinandrotatethewheels
rearwardandlockitinthehorizontalposition(Figure
6).
Figure6
1.Releasepin2.Jackstand
MaintainingtheTiresand Wheels
Themostcommoncauseoftiretroubleisunder-ination.It
isimportantthatyoumaintainfullairpressure.
Inatemainaxletiresto410kPa(60psi).
•Ensurethattheworkareasandbladesarefreefrom
metallicobjectssuchaswire,nails,etc.thatcouldbe
thrownoutandinjurepersonsinthevicinityanddamage
theequipment.
•Ensurethateveryone,includingchildrenandanimals,
maintainadistanceofatleast15meters(50feet)from
themachine.Debriscanbethrownoutandinjurepeople
andanimals.
•Disconnectthemachinefromthetowvehicle,positionit
onalevellocationandblockthewheelsfrontandback
topreventitfrommoving.
•Checkthefuelandoilleveloftheengine.
AddingFuel
Useunleadedgasoline(87pumpoctaneminimum).Leaded,
regulargasolinemaybeusedifunleadedisnotavailable.
•Forbestresults,useonlyclean,fresh(lessthan30days
old),unleadedgasolinewithanoctaneratingof87or
higher((R+M)/2ratingmethod).
•Ethanol:Gasolinewithupto10%ethanol(gasohol)
or15%MTBE(methyltertiarybutylether)byvolume
isacceptable.EthanolandMTBEarenotthesame.
Gasolinewith15%ethanol(E15)byvolumeisnot
approvedforuse.Neverusegasolinethatcontains
morethan10%ethanolbyvolume,suchasE15
(contains15%ethanol),E20(contains20%ethanol),or
E85(containsupto85%ethanol).Usingunapproved
gasolinemaycauseperformanceproblemsand/orengine
damagewhichmaynotbecoveredunderwarranty.
•Donotusegasolinecontainingmethanol.
•Donotstorefueleitherinthefueltankorfuelcontainers
overthewinterunlessafuelstabilizerisused.
•Donotaddoiltogasoline.
Checkthetorqueofthewheellugnutsinitiallyandafterthe
rst10hoursofoperation.
Torquewheellugnutsto108-122Nm(80-90ft.-lbs).
PreparingtoStarttheMachine
•Reviewallthemachine’ssafetydecals.
•Useahard-hat,hearingprotection,tightttinggloves
withoutdrawstringsorloosecuffs,andeyeprotection.
Ameshvisoralonedoesnotprovidesufcienteye
protection;supplementwithprotectiveglasses.
•Ensurethatyouarefamiliarwithsafetyregulations
andshutdownproceduresdescribedinthismachine’s
Operator’sManualandEngineOwner’sManual.
•Ensurethatallguardsareinplaceandingoodcondition.
•Ensurethatthebladesareinplaceandingoodcondition.
9
Page 10

DANGER
G016607
Incertainconditions,gasolineisextremely
ammableandhighlyexplosive.Areorexplosion
fromgasolinecanburnyouandothersandcan
damageproperty.
•Fillthefueltankoutdoors,inanopenarea,
whentheengineiscold.Wipeupanygasoline
thatspills.
•Neverllthefueltankinsideanenclosedtrailer.
•Donotllthefueltankcompletelyfull.Add
gasolinetothefueltankuntilthelevelis6to13
mm(1/4to1/2inch)belowthebottomofthe
llerneck.Thisemptyspaceinthetankallows
gasolinetoexpand.
•Neversmokewhenhandlinggasoline,andstay
awayfromanopenameorwheregasoline
fumesmaybeignitedbyaspark.
•Storegasolineinanapprovedcontainerand
keepitoutofthereachofchildren.Neverbuy
morethana30-daysupplyofgasoline.
•Donotoperatewithoutentireexhaustsystemin
placeandinproperworkingcondition.
Figure7
1.Fueltankcap
4.Addunleadedgasolinetothefueltank,untilthelevel
is6to13mm(1/4to1/2inch)belowthebottomof
thellerneck.
Important:Thisspaceinthetankallowsgasoline
toexpand.Donotllthefueltankcompletelyfull.
5.Installthefueltankcapsecurely ,turningituntilitclicks.
6.Wipeupanygasolinethatmayhavespilled.
DANGER
Incertainconditionsduringfueling,static
electricitycanbereleasedcausingasparkwhich
canignitethegasolinevapors.Areorexplosion
fromgasolinecanburnyouandothersandcan
damageproperty.
•Alwaysplacegasolinecontainersontheground
awayfromyourvehiclebeforelling.
•Donotllgasolinecontainersinsideavehicleor
onatruckortrailerbedbecauseinteriorcarpets
orplastictruckbedlinersmayinsulatethe
containerandslowthelossofanystaticcharge.
•Ifagasolinedispensernozzlemustbeused,
keepthenozzleincontactwiththerimofthe
fueltankorcontaineropeningatalltimesuntil
fuelingiscomplete.
Important:Donotusemethanol,gasolinecontaining
methanol,orgasoholcontainingmorethan10%ethanol
becausethefuelsystemcouldbedamaged.Donotmix
oilwithgasoline.
CheckingtheHourMeter
Thehourmeterrecordsthenumberofhourstheenginehas
operated.Itoperateswhentheengineisrunning.
Figure8
1.Hourmeter
CheckingtheEngine-OilLevel
FillingtheFuelTank
1.Parkthemachineonalevelsurface,andstopthe
engine.
2.Allowtheenginetocool.
3.Cleanaroundthefueltankcapandremoveit(Figure7).
ServiceInterval:Beforeeachuseordaily
1.Placethemachineonaatlevelsurface,andstopthe
engine.
2.Allowtheenginetocool.
3.Cleanaroundtheoildipstick.
10
Page 11

4.Removethedipstickandwipetheendclean.
G016608
1
2
G017903
5.Slidethedipstickfullyintothedipsticktubewithout
threadingitintothellerneck.
6.Pullthedipstickoutandlookattheend.Theoil
shouldbetothetopoftheupperlimitrange(Figure9).
Figure10
Figure9
1.Oildipstick
2.Oilllcap
Important:Runningtheenginewithlowoillevel
cancauseenginedamage.Thistypeofdamageis
notcoveredbywarranty.
7.Iftheoillevelislow ,slowlypouronlyenoughoilinto
thecrankcasetoraisetheleveltotheupperlimit.
Important:Donotoverllthecrankcasewithoil
becausetheenginemaybedamaged.
8.Replacethedipstick.
3.Valvecover
4.Metalend
ChangingtheChutePosition
Thedischargechuteonthismachinecanberotatedtousein
variouspositions.Rotatethechutetotheside,awayfromthe
hopper,whenusingthemachine.
1.Torotate,loosentheclampknob,thenpressthe
spring-loadedbuttononthelockingpinhandlein,and
pullthelockingpinfromthechuteplate(Figure10).
1.Lockingpinbutton
2.Rotatethechuteintothepositiondesiredandsecure
withclampknob.
2.Clampknob
ChangingtheDeector
Position
Thedeectorontheendofthechutecanberotatedupand
downtodirectthedischargeofchips.
1.Loosenthedeectorknobandrotatethechuteinto
thedesiredposition(Figure11).
Figure11
1.Chutedeector
2.Knob
2.Tightenthedeectorknob.
StartingandStoppingthe Engine
StartingtheEngine
1.MovethechokelevertotheOnposition(Figure12).
11
Page 12

Note:Awarmorhotenginemaynotrequirechoking.
G016610
G01661 1
2
3
4
tocooltheenginebeforestopping.Inanemergency,
theenginemaybestoppedimmediately .
2.TurntheignitionswitchtotheOffposition(Figure13).
UsingtheBrushChipper
ServiceInterval:Beforeeachuseordaily—Cleantheinside
ofthecuttingchambercover.
DANGER
Figure12
1.Choke
2.MovethethrottleleveronethirdofthewaytotheFast
position(Figure12).
3.TurntheengineignitionswitchtotheStartposition
(Figure13).
2.Throttle
Themachinewillcutandamputatehandsandfeet.
•Stayintheoperator'spositionwhilethemachine
isrunning.
•Keepallbystandersasafedistancefromthe
machine.
•Stopthemachineimmediatelyifanypeopleor
animalsentertheworkarea.
•Neverplaceanypartofyourbodyintoaposition
thatcausesanunsafeoperatingcondition.
WARNING
Usingthebrushchippermaythrowwoodchips,
soil,andotherdebrisintotheairwhichcouldinjure
youorbystanders.
•Alwayswearprotectivegear,suchassafety
gogglesorfaceshield,hearingprotection,
tight-ttinggloveswithoutdrawstringsorloose
cuffswhenusingthemachine.
Figure13
1.Ignitionswitch3.Run
2.Off4.Start
4.Aftertheenginestarts,releasekeytotheRunposition
(Figure13).
5.GraduallymovethechokeleverbacktotheOff
position.
Note:Iftheenginestallsorhesitates,movethechoke
backtoOnagainuntiltheenginewarmsup.Then
moveittotheOffposition.
6.MovethethrottlelevertotheFastpositiontobegin
chipping.
StoppingtheEngine
1.Movethethrottlelevertothemid-rangeposition.
Note:Iftheenginehasbeenworkinghardorishot,
letitrunforaminutebeforeturningitoff.Thishelps
•Keepfaceandbodyawayfromthefeedopening.
Donotoverreach.Keepproperbalanceand
footingatalltime.
•Keepallbystandersatleast15meters(50feet)
fromthemachineduringoperation.
1.Placethebrushchipperonlevel,dryground,
disconnectitfromthetowvehicle,andblockthefront
andbackofbothwheelstopreventanymovement.
2.Makesurethatyoureadalltherecommendationsfrom
theSafety(page3)sectionbeforeusingthebrush
chipper.
3.Starttheengine;refertoStartingtheEngine(page11)
andallowenginetowarmupatidlefortwominutes.
4.Lowerthehopper(Figure14).
12
Page 13

G016612
G016613
•Tomoveapileofprocessedmaterial,useaspade,
rake,orlonghandletool.Neveruseyourhands
orfeet!
•Limitthelengthoflargebranchesto3feetlong
orless;longerlengthscouldcausethechipperto
slowandjam.
•Washoutthecuttingchamberaftereachuseby
sprayingwaterfromagardenhoseintothehopper
whiletheengineisrunningatfullthrottle.Do
thisforafewminutestopreventaccumulationof
matterthatcandegradethechipperperformance.
Figure14
•Donotforcematerialintothechipper.Ifthe
machinedoesnotchipwell,thechipperknifeor
cutterblockmayneedtobesharpenedorreplaced.
•Extremelyhardknotsofwoodwillnotprocessvery
well.Shortstubsthathavenotself-fedthrough
thechippercanbepushedthroughwiththenext
branchtobechipped,otherwisesimplyclosethe
upperchute.
•Overloadingthehopperwillcausetherotorspeed
todecrease.IfyouheartheengineRPMdecreasing,
stopfeedingmaterialintothehopperuntilthe
enginehasreturnedtofullspeed(Figure15).
•Tostopthemachine;refertoStoppingtheEngine
(page12).
Figure15
•Ifyoujamthemachineanddonotstoptheengine,
itcandamagethemachine.Forthisreason,itis
importantthatyouimmediatelystoptheengineif
themachinebecomesjammed,wait5minutesto
makecertaintheywheelandallmovingpartshave
cometoacompletestopandcool.Disconnect
thesparkplugwires,keepingthemawayfromthe
sparkplugstopreventaccidentalstarting.
•Neverallowprocessedmaterialtobuildupwithin
76.2mm(3in)ofthedischargechuteopening.
Movethemachineorthepileasneeded.Failureto
dosocouldresultinunnecessaryjammingofthe
machine.
13
Page 14

Maintenance
G016615
Important:Beforeperforminganymaintenanceprocedures,rststoptheengine,wait5minutestoallowallmoving
partstocometoacompletestopandcool,anddisconnectthesparkplugwires.
RecommendedMaintenanceSchedule(s)
MaintenanceService
Interval
Aftertherst50hours
Beforeeachuseordaily
Every25hours
Every100hours
Every200hours
Every500hours
Yearlyorbeforestorage
Important:Refertoyour
MaintenanceProcedure
•Changetheengineoil.
•Checktheengineoillevel.
•Cleantheinsideofthecuttingchambercover.
•Greasethemachine.
•Checkthedrivebelttension.
•Checkthecutterblock.
•Inspectthecutterblades.
•Cleanthefoampre-lterontheairlter.
•Replacetheairlter.
•Changetheengineoil.
•Replacethedrivebelt.
•Inspectthetires.
•Checkthesparkplugs.
•Replacethefuellter.
•Lubricatewheelbearings.
•Replacethesparkplugs.
•Changetheengineoil.
Engine Operator's Man ual
foradditionalmaintenanceprocedures.
Lubrication
LubricatetheCutterWheel Bearings
ServiceInterval:Beforeeachuseordaily
GreaseType:General-purposegrease.
1.Cleanaroundgreasettingwitharagandlifttheplastic
capoffthegreasetting.
2.Pumpseveralshotsofgreaseintothettinguntilit
startstooozeoutofthebearing(Figure16).
Figure16
1.Greasetting2.Cutterwheelbearing
3.Wipeupanyexcessgrease.
Important:Pumpgreaseinslowlyandcarefully
topreventdamagetothebearingseals.
14
Page 15

LubricatetheWheelBearings
G016621
ServiceInterval:Every500hours
EngineMaintenance
LubricatethewheelbearingswithseveralpumpsofNo.2
generalpurposelithiumbasegrease(Figure17).
Figure17
1.Greasetting
ServicingtheAirCleaner
RemovingtheAirFilter
1.Unscrewtheknobandremovetheaircleanercover
(Figure18).
Figure18
1.Knob
2.Air-cleanercover
3.Covernut
4.Spacer
5.Cover
2.Carefullyslidethefoampre-lteroffofthepaper
element.
3.Unscrewthecovernutandremovethecover,spacer,
andpaperlter.
6.Foampre-lter
7.Paperlter
8.Rubberseal
9.Air–cleanerbase
CleaningtheFoamPre-Filter
ServiceInterval:Every25hours
1.Cleanaroundtheaircleanertopreventdirtfrom
gettingintotheengineandcausingdamage.
2.Removethefoampre-lter;SeeRemovingtheAir
Filter(page15).
15
Page 16

3.Washthefoampre-lterinliquidsoapandwarmwater.
Whenclean,rinseitthoroughly .
4.Drythepre-lterbysqueezingitinacleanclothand
allowittoairdry.
5.Put1or2ouncesofengineoilonthepre-lter(Figure
19).
Figure19
Note:Thiswarmstheoilsoitdrainsbetter.
2.Parkthemachinesothatthedrainsideisslightlylower
thantheoppositesidetoensurethattheoildrains
completely.
3.Placeoneendofahoseonthedrainvalveandthe
otherendinapan(Figure20).
1.Foamelement
2.Oil
6.Squeezethepre-ltertodistributetheoil.
7.Carefullyslidethefoampre-lterontothepaperlter
(Figure18).
8.Installtheaircleanercoverandsecureitwiththeknob
(Figure18).
ReplacingtheAirFilter
ServiceInterval:Every100hours
Note:Donotcleanthepaperelement.Replacethepaper
elementifitisdirtyordamaged.
Topreventenginedamage,alwaysoperatetheenginewiththe
completefoamandpaperaircleanerassemblyinstalled.
1.Carefullyslidethefoampre-lterontothepaperlter
(Figure18).
2.Placetheaircleanerassemblyontotheaircleanerbase.
3.Installthecoverandspacerandsecureitwiththecover
nut.
4.Torquethenutto7N-m(60in-lb).
5.Installtheaircleanercoverandsecureitwiththeknob.
Figure20
1.Oildrainvalve
2.Hose
4.Openthedrainvalvebyturningitcounterclockwise,
pullingoutasyouturnit(Figure20).
5.Whentheoilhasdrainedcompletely,closethedrain
valvebypushinginandrotatingclockwise,andremove
thehose.Wipeupanyspilledoil.
Note:Disposeoftheusedoilatacertiedrecycling
center.
6.Removetheoldlterandwipethelteradaptergasket
surface(Figure21).
ServicingtheEngineOil
Note:Changetheoilmorefrequentlywhentheoperating
conditionsareextremelydustyorsandy.
OilType:DetergentoilwithanAPIserviceofSG,SH,SJ
orhigher.
CrankcaseCapacity:withlter1.9liters(2qt)
Viscosity:SAE10W -30isrecommendedforgeneraluse.
ChangingtheEngineOil
ServiceInterval:Aftertherst50hours
Every100hours
Yearlyorbeforestorage
1.Starttheengineandletitrunfor5minutes.
Figure21
1.Oillter
2.Gasket
3.Adapter
7.Pournewoilofthepropertypeinthroughthecenter
holeofthelter.Stoppouringwhentheoilreaches
thebottomofthethreads.
8.Allow1or2minutesfortheoiltobeabsorbedbythe
ltermaterial,thenpourofftheexcessoil.
9.Applyathincoatofnewoiltotherubbergasketon
thereplacementlter.
10.Installthereplacementoilltertothelteradapter.
Turntheoillterclockwiseuntiltherubbergasket
16
Page 17

contactsthelteradapter,thentightenthelteran
6
G017152
additional3/4turn.
11.Removetheoilllcapandslowlypourapproximately
80%ofthespeciedamountofoilinthroughthevalve
cover(Figure9).
CheckingtheSparkPlug
1.Lookatthecenterofthesparkplug(Figure23).Ifyou
seelightbrownorgrayontheinsulator,theengineis
operatingproperly .Ablackcoatingontheinsulator
usuallymeansthattheaircleanerisdirty.
12.Checktheoillevel;refertoCheckingtheEngine-Oil
Level(page10).
13.SlowlyaddadditionaloiltobringtheleveltotheFull
markonthedipstick.
14.Replacethellcap.
ServicingtheSparkPlug
ServiceInterval:Every200hours—Checkthesparkplugs.
Every500hours
Ensurethattheairgapbetweenthecenterandsideelectrodes
iscorrectbeforeinstallingthesparkplug.Useasparkplug
wrenchforremovingandinstallingthesparkpluganda
gappingtool/feelergaugetocheckandadjusttheairgap.
Installanewsparkplugifnecessary.
Type:ChampionXC12YC(RFItype)orequivalent
AirGap:0.76mm(0.030inch)
RemovingtheSparkPlug
Important:Nevercleanthesparkplug.Always
replacethesparkplugwhenithasablackcoating,
wornelectrodes,anoilylm,orcracks.
Figure23
1.Centerelectrodeinsulator3.Airgap(nottoscale)
2.Sideelectrode
2.Checkthegapbetweenthecenterandsideelectrodes
(Figure23).Bendthesideelectrode(Figure23)ifthe
gapisnotcorrect.
1.Pullthewiresoffofthesparkplugs(Figure22).
Figure22
1.Sparkplugwire2.Sparkplug
2.Cleanaroundsparkplugs.
3.Removethesparkplugsandthemetalwashers.
InstallingtheSparkPlug
1.Threadthesparkplugintothesparkplughole.
2.Tightenthesparkplugto24.4–29.8N-m(18–22ft-lb).
3.Pushthewireontothesparkplug.
17
Page 18

FuelSystem
G016676
G016616
3
G016617
BeltMaintenance
Maintenance
ChangingtheFuelFilter
ServiceInterval:Every200hours
1.Clampthefuellinebetweenthecarburetorandthefuel
ltertoblockthefuelow.
2.Squeezetheendsofthehoseclampstogetherandslide
awayfromthefuellter(Figure24).
Figure24
1.Fuellter
2.Hoseclamp
3.Fuelhose
AdjustingtheDriveBelt Tension
ServiceInterval:Beforeeachuseordaily—Checkthedrive
belttension.
Note:Inspectthedrivebelttensionbyinsertingametal
scalethroughtheslotontopofthebeltcover(Figure25)
andpressingdownonthescalewithaforcegage.Theforce
shouldmeasure6.5-7.5kg(15±.75lbs)at1cm(0.40inch)
beltdeection.Adjustasrequired.
1.Removetheboltsandwasherssecuringthebeltguard
tomachine.
2.Removethebeltguard(Figure25).
3.Placeadrainpanunderthefuellinestocatchanyleaks,
thenremovethelterfromthefuellines(Figure24).
4.Installanewlter,witharrowpointingtowardthe
carburetor,andmovethehoseclampsclosetothelter.
5.Removetheclampblockingfuelow.
Figure25
1.Boltsandwashers3.Beltguard
2.Slotinbeltguard
3.Loosenthe4engineplatemountingboltsandthe4
boltssecuringtherearofthebeltguardtotheengine.
4.Loosenthebelttensionboltandjamnut(Figure26).
Figure26
1.Tensionboltandjamnut2.Engineplatemountingbolt
18
Page 19

5.Adjustthedrivebelttensionbylooseningthejam
G016618
G016620
nutandtighteningthetensionboltagainsttheengine
mountingplate,pushingtheenginerearward.
6.Layastraightedgeacrossclutchandywheelpulleys,
tightenbelttensionboltsothereis1cm(0.40inch)
ofexinthebeltwhenpushingdownwith6.8kg(15
lbs)force,atmid-span(whenre-tensioningabeltin
use)orwith8kg(18lbs)forcewheninstallinganew
belt(Figure27).
Figure27
1.Straightedge2.Flexof1cm(0.40inch)
CutterMaintenance
InspectingtheCutterBlock
ServiceInterval:Beforeeachuseordaily
Makesurethecutterblockhasacrispedgeandisnofarther
than3.2mm(1/8inch)awayfromtheblade.Ifthecutter
blockiswornorchippeditshouldbereplaced(Figure28).
Figure28
7.Ensurethatthepulleysarealignedandtheengineis
parallelwiththeframe(notangledtowardtheside),
thentightenthe4engineplatemountingbolts,the4
boltssecuringtherearofthebeltguardtotheengine,
andthejamnut.
8.Installthebeltguardandsecureitwiththepreviously
removedwashersandbolts.
ReplacingtheDriveBelt
ServiceInterval:Every100hours
Note:Replacethebeltifitshowsanysignsofwear,cracks,
glazing,ordamage.
1.Removetheboltsandwasherssecuringthebeltguard
tomachine.
2.Removethebeltguard(Figure25).
3.Loosenthe4engineplatemountingboltsandthe4
boltssecuringtherearofthebeltguardtotheengine.
4.Loosenthebelttensionboltandjamnut,slidethe
enginetowardtheywheelhousingtoloosenbelt
(Figure26).
5.Replacedrivebelt.
6.Adjusttensionofnewbeltto7.8-8.6kg(18±0.9lb)
forceat1cm(0.40inch)beltdeectionatmid-span.
7.Tightenthe4engineplatemountingbolts,the4bolts
securingtherearofthebeltguardtotheengine,and
thejamnut.
8.Installthebeltguardandsecureitwiththepreviously
removedwashersandbolts.
1.Blade
2.CutterBlock
ReplacingtheCutterBlades
ServiceInterval:Beforeeachuseordaily—Inspectthe
cutterblades.
Note:Usingadullbladewilldecreaseperformanceand
causeexcessivevibrationsthatwillcausedamagetotheBrush
Chipperorengine.
1.Removetheboltandwashersecuringtheywheel
housingcover,swingitforwardtoexposetheywheel.
2.Rotatetheywheelusingastickuntiltheboltsand
locknutsattachingthecutterbladestotheywheel
areaccessible(Figure29).
19
Page 20

G016619
Figure29
1
2
3
4
G003792
ChargingtheBattery
Important:Alwayskeepthebatteryfullycharged(1.265
specicgravity).Thisisespeciallyimportanttoprevent
batterydamagewhenthetemperatureisbelow32F
(05C).
Chargingthebatteryproducesgasesthatcanexplode.
Neversmokenearthebatteryandkeepsparksand
amesawayfrombattery.
1.Removethebatterycover.
2.Cleanthetopofthebatterywithapapertowel.
3.Chargethebatteryfor10to15minutesat25to30
ampsor30minutesat4to6amps.Donotovercharge
thebattery(Figure30).
1.Flywheel
2.Blade
3.Sequencefortightening
(3-1,3-2,3-3)
3.Removethedullordamagedcutterbladesandvisually
inspecttheywheelslots.Theblademountingareas
mustbecleansothereplacementbladeswillmount
ushagainsttheywheel.
Important:Itisveryimportanttoconsistently
maintainthe35-degreeangleforproperchipping
performance.
4.Reversethebladetousethesecondsharpedge,or
installneworsharpenedbladesandngertightenthe
boltsandlocknutstoholdthebladestotheywheel.
5.Tightenthecenterboltsandnutsrst,thentightenthe
outerboltsandnuts,andnallytightentheinnerbolts
andnut.Seesequencefortightening(Figure29).
6.Torquethebladeboltsto58-72N-m(43-53ft-lb).
7.Scrapeanysap,mulch,and/ordirtfrominsidethe
topcoverofthehousingtopreventtheywheelfrom
rubbingonit.
Figure30
1.Positivebatterypost
2.Negativebatterypost
3.Red(+)chargerlead
4.Black(-)chargerlead
4.Whenthebatteryisfullycharged,unplugthecharger
fromtheelectricaloutlet,thendisconnectthecharger
leadsfromthebatteryposts(Figure30).
5.Installthebatterycover.
20
Page 21

InspectingtheTires
InspectingtheTires
ServiceInterval:Every100hours
Note:Failuretomaintaincorrectpressuremayresultin
tirefailureandlossofcontrolresultinginseriousinjuryor
propertydamage.
•Operatingaccidentscandamageatireorrim,soinspect
tireconditionafteranaccident.
•Checkthetirepressurefrequentlytoensureproper
ination.Ifthetiresarenotinatedtothecorrect
pressure,thetireswillwearprematurely .
•AlwaysreplacewornordamagedtireswithDOT
approvedtires.
•LocatetheDOTtireidenticationnumbers(Figure31).
Figure33
Exampleoftirewearcausedbyover-ination.
1.Overinatedtire
Exampleoftirewearcausedbyunder-ination.
1.Underinatedtire
Figure31
Figure32
21
Page 22

Storage
Forstorageover30days,preparethemachineasfollows:
1.Removedirtandgrimefromtheexternalpartsofthe
entiremachine,especiallytheengine.Cleandirtand
sawdustchipsfromtheoutsideoftheenginecylinder
headnsandblowerhousing.
Important:Youcanwashthemachinewithmild
detergentandwater.
2.Addapetroleumbasedstabilizer/conditionertofuel
inthetank.Followmixinginstructionsfromstabilizer
manufacturer.(1oz.perUSgallon).Donotusean
alcoholbasedstabilizer(ethanolormethanol).
Note:Fuelstabilizer/conditionerismosteffective
whenmixedwithfreshgasolineandusedatalltimes.
Important:Donotstorestabilizer/conditioned
gasolineover90days.
3.Runtheenginetodistributeconditionedfuelthrough
thefuelsystem(5minutes).
4.Stoptheengine,allowittocool,anddrainthefueltank
usingapumptypesiphon.Disposeoffuelproperly;
recycleasperlocalcodes.
5.Starttheengineandrunituntilitstops.
6.Choketheengine.
7.Startandruntheengineuntilitwillnotstartagain.
8.Changethefuellter;refertoChangingtheFuelFilter
(page18).
9.Servicetheaircleaner;refertoServicingtheAir
Cleaner(page15).
10.Changetheenginecrankcaseoil;refertoServicingthe
EngineOil(page16).
11.Removethesparkplugandchecktheconditionofthe
sparkplug;refertoServicingtheSparkPlug(page17).
12.Withthesparkplugremovedfromtheengine,pour
twotablespoonsofengineoilintothesparkplughole.
13.Pullthestarterslowlytocranktheengineanddistribute
theoilinsidethecylinder.
14.Installthesparkplug,butdonotinstallthewireon
thesparkplug.
15.Checkandtightenallbolts,nuts,andscrews.Repairor
replaceanypartthatisdamaged.
16.Paintallscratchedorbaremetalsurfaces.Paintis
availablefromyourAuthorizedServiceDealer.
17.Storethemachineinaclean,drygarageorstoragearea.
18.Coverthemachinetoprotectitandkeepitclean.
22
Page 23

Troubleshooting
Problem
Theenginewillnotstart.
Theenginerunsrough.
Chippingactionseemssloworthe
ywheelisstalling.
Theywheeldoesnotrotate.
PossibleCauseCorrectiveAction
1.Thechokeisopen.
2.Thefueltankisempty.2.Fillthetankwithfreshfuel.
3.Thesparkplugwireislooseor
disconnected.
1.Thechokeislefton.1.Openthechoke.
2.Theairlterisclogged.2.Cleanorreplacetheairlter.
3.Thefuellineisclogged.3.Cleanthesedimentcup.
4.Thereiswaterorcontaminantsinthe
fuel.
5.Thesparkplugsarewornorhave
buildupontheelectrodes.
1.Theenginespeedistooslowcausing
theclutchtoslip.
2.Checkforalooseordamageddrive
belt.
3.Checkfordullordamagedblades.
4.Theclutchshoesareworn.4.Replacetheclutch.
1.Build-upofchipsanddebrisaround
ywheel.
2.Thebeltislooseordamaged.
3.Theclutchoverheated,isdamaged,or
theshoesareworn.
1.Closethechokewhenstartingacold
engine.
3.Checktheelectrodegapandcleanor
replacethesparkplug.
4.Drainandllthetankwithfreshfuel.
5.Checktheelectrodegapandcleanor
replacethesparkplug.
1.Runtheengineatfullthrottle.
2.Tightenorreplacethedrivebelt.
3.Replacewithsharpblades.
1.Cleanoutthebuild-upofchipsand
debrisaroundtheywheel,onthe
outerdiameterofthewheel,upperlid
ofthegrinder,andinsidethehousing
cover.
2.Checkthedrivebelt.
3.Replacetheclutch.
Drivebeltisworn,burned,orjumpsoffof
pulley.
Themachinehasexcessivevibration.
1.Improperdrivebeltadjustment.
2.Thedrivebeltmaybestretched.2.Replacethedrivebelt.
3.Pulleysareoutofalignment.3.Aligntheengine/clutchpulleywith
1.Checkfordullordamagedblades.
2.Bladesmaynotbeproperlyseatedon
theywheel.
3.Gapbetweenthebladesandcutter
blockistoogreat.
1.Checkthedrivebelttension.
ywheel.
1.Replacewithsharpblades.
2.Loosentheblademountingscrews,
resetthebladesandtightenthe
screws.
3.Adjusttheywheelpositioninthe
housingtoattaina1/8inch(3mm)
clearancebetweenthebladeand
cutterblock.
23
Page 24

ToroCompactUtilityEquipmentWarranty
AOne-Y earLimitedWarranty
CompactUtilityEquipment
(CUE)Products
ConditionsandProductsCovered
TheT oroCompanyanditsafliate,T oroWarrantyCompany,pursuantto
anagreementbetweenthem,jointlywarrantyourT oroCompactUtility
Equipment(“Product”)tobefreefromdefectsinmaterialsorworkmanship.
Thefollowingtimeperiodsapplyfromthedateofpurchase:
ProductsWarrantyPeriod
ProSneak
CompactUtilityLoaders,
Trenchers,StumpGrinders,
andAttachments
KohlerEngines3years
AllotherEngines2years
Whereawarrantableconditionexists,wewillrepairtheProductatnocost
toyouincludingdiagnosis,labor,andparts.
*
SomeenginesusedonToroProductsarewarrantedbytheenginemanufacturer.
1yearor1000operatinghours,
whicheveroccursrst
*
*
InstructionsforObtainingWarrantyService
IfyouthinkthatyourT oroProductcontainsadefectinmaterialsor
workmanship,followthisprocedure:
1.ContactanyAuthorizedToroCompactUtilityEquipment(CUE)
ServiceDealertoarrangeserviceattheirdealership.Tolocatea
dealerconvenienttoyou,accessourwebsiteatwww.Toro.com.You
mayalsocallourToroCustomerCareDepartmenttollfreeatthe
numberbelow.
2.Bringtheproductandyourproofofpurchase(salesreceipt)tothe
ServiceDealer.
3.IfforanyreasonyouaredissatisedwiththeServiceDealer’s
analysisorwiththeassistanceprovided,contactusat:
SWSCustomerCareDepartment
ToroWarrantyCompany
811 1LyndaleAvenueSouth
Bloomington,MN55420-1196
TollFree:888-384-9940
OwnerResponsibilities
YoumustmaintainyourT oroProductbyfollowingthemaintenance
proceduresdescribedintheOperator’sManual.Suchroutinemaintenance,
whetherperformedbyadealerorbyyou,isatyourexpense.Parts
scheduledforreplacementasrequiredmaintenance(“MaintenanceParts”),
arewarrantedfortheperiodoftimeuptothescheduledreplacementtime
forthatpart.Failuretoperformrequiredmaintenanceandadjustmentscan
begroundsfordisallowingawarrantyclaim.
ItemsandConditionsNotCovered
Notallproductfailuresormalfunctionsthatoccurduringthewarrantyperiod
aredefectsinmaterialsorworkmanship.Thisexpresswarrantydoesnot
coverthefollowing:
•Productfailureswhichresultfromtheuseofnon-T ororeplacement
parts,orfrominstallationanduseofadd-on,modied,orunapproved
accessories
•Productfailureswhichresultfromfailuretoperformrequired
maintenanceand/oradjustments
•ProductfailureswhichresultfromoperatingtheProductinanabusive,
negligentorrecklessmanner
•Partssubjecttoconsumptionthroughuseunlessfoundtobedefective.
Examplesofpartswhichareconsumed,orusedup,duringnormal
productoperationinclude,butarenotlimitedto,belts,wipers,spark
plugs,tires,lters,gaskets,wearplates,seals,O-rings,drivechains,
clutches.
•Failurescausedbyoutsideinuence.Itemsconsideredtobeoutside
inuenceinclude,butarenotlimitedto,weather ,storagepractices,
contamination,useofunapprovedcoolants,lubricants,additives,or
chemicals,etc.
•Normal“wearandtear”items.Normal“wearandtear”includes,butis
notlimitedto,wornpaintedsurfaces,scratcheddecals,etc.
•Repairsnecessaryduetofailuretofollowrecommendedfuel
procedure(consultOperator'sManualformoredetails)
–Removingcontaminantsfromthefuelsystemisnotcovered
–Useofoldfuel(morethanonemonthold)orfuelwhichcontains
morethan10%ethanolormorethat15%MTBE
–Failuretodrainthefuelsystempriortoanyperiodofnon-use
overonemonth
•Anycomponentcoveredbyaseparatemanufacturer’swarranty
•Pickupanddeliverycharges
GeneralConditions
RepairbyanAuthorizedT oroCompactUtilityEquipment(CUE)Service
Dealerisyoursoleremedyunderthiswarranty.
NeitherTheToroCompanynorToroWarrantyCompanyisliablefor
indirect,incidentalorconsequentialdamagesinconnectionwiththe
useoftheToroProductscoveredbythiswarranty,includingany
costorexpenseofprovidingsubstituteequipmentorserviceduring
reasonableperiodsofmalfunctionornon-usependingcompletionof
repairsunderthiswarranty.Allimpliedwarrantiesofmerchantability
andtnessforusearelimitedtothedurationofthisexpresswarranty .
Somestatesdonotallowexclusionsofincidentalorconsequential
damages,orlimitationsonhowlonganimpliedwarrantylasts,sothe
aboveexclusionsandlimitationsmaynotapplytoyou.
Thiswarrantygivesyouspeciclegalrights,andyoumayalsohaveother
rightswhichvaryfromstatetostate.
ExceptfortheenginewarrantycoverageandtheEmissionswarranty
referencedbelow,ifapplicable,thereisnootherexpresswarranty .The
EmissionsControlSystemonyourProductmaybecoveredbyaseparate
warrantymeetingrequirementsestablishedbytheU.S.Environmental
ProtectionAgency(EPA)ortheCaliforniaAirResourcesBoard(CARB).
ThehourlimitationssetforthabovedonotapplytotheEmissions
ControlSystemWarranty .RefertotheCaliforniaEmissionControl
WarrantyStatementsuppliedwithyourProductorcontainedintheengine
manufacturer’sdocumentationfordetails.
CountriesOtherthantheUnitedStatesorCanada
CustomerswhohavepurchasedT oroproductsoutsidetheUnitedStatesorCanadashouldcontacttheirT oroDistributor(Dealer)toobtainguarantee
policiesforyourcountry,province,orstate.IfforanyreasonyouaredissatisedwithyourDistributor'sserviceorhavedifcultyobtainingguarantee
information,contacttheToroimporter .Ifallotherremediesfail,youmaycontactusatT oroWarrantyCompany.
AustralianConsumerLaw:AustraliancustomerswillnddetailsrelatingtotheAustralianConsumerLaweitherinsidetheboxoratyourlocalToro
Dealer.
374-0261RevE
 Loading...