

Page 1

HeavyDutySpringKit
TimeCutter
ModelNo.140-2051
®
MyRideRidingMower
Installation
LooseParts
Usethechartbelowtoverifythatallpartshavebeenshipped.
FormNo.3436-773RevA
InstallationInstructions
Description
Nopartsrequired
Nopartsrequired
Spring
Springspacer
Setscrew
Spring-lifttube
PreparingtheMachine
1.Parkthemachineonalevelsurface.
2.Disengagetheblade-controlswitch.
3.Movethemotion-controlleversoutwardtothe
NEUTRAL-LOCKposition.
4.Shutofftheengineandremovethekey.
Qty.
–
–
1Installthenewheavy-dutyspring.
2
2
1
Preparethemachine.
Removetheexistingfrontspring.
Installthespringspacers.
Use
©2019—TheT oro®Company
8111LyndaleAvenueSouth
Bloomington,MN55420
Registeratwww.T oro.com.
OriginalInstructions(EN)
PrintedintheUSA
AllRightsReserved
*3436-773*A
Page 2
RemovingtheExisting
InstallingtheNew
FrontSpring
1.Placea38x89mm(2x4inch)boardunderthe
footresttoblockthefrontoftheplatform.
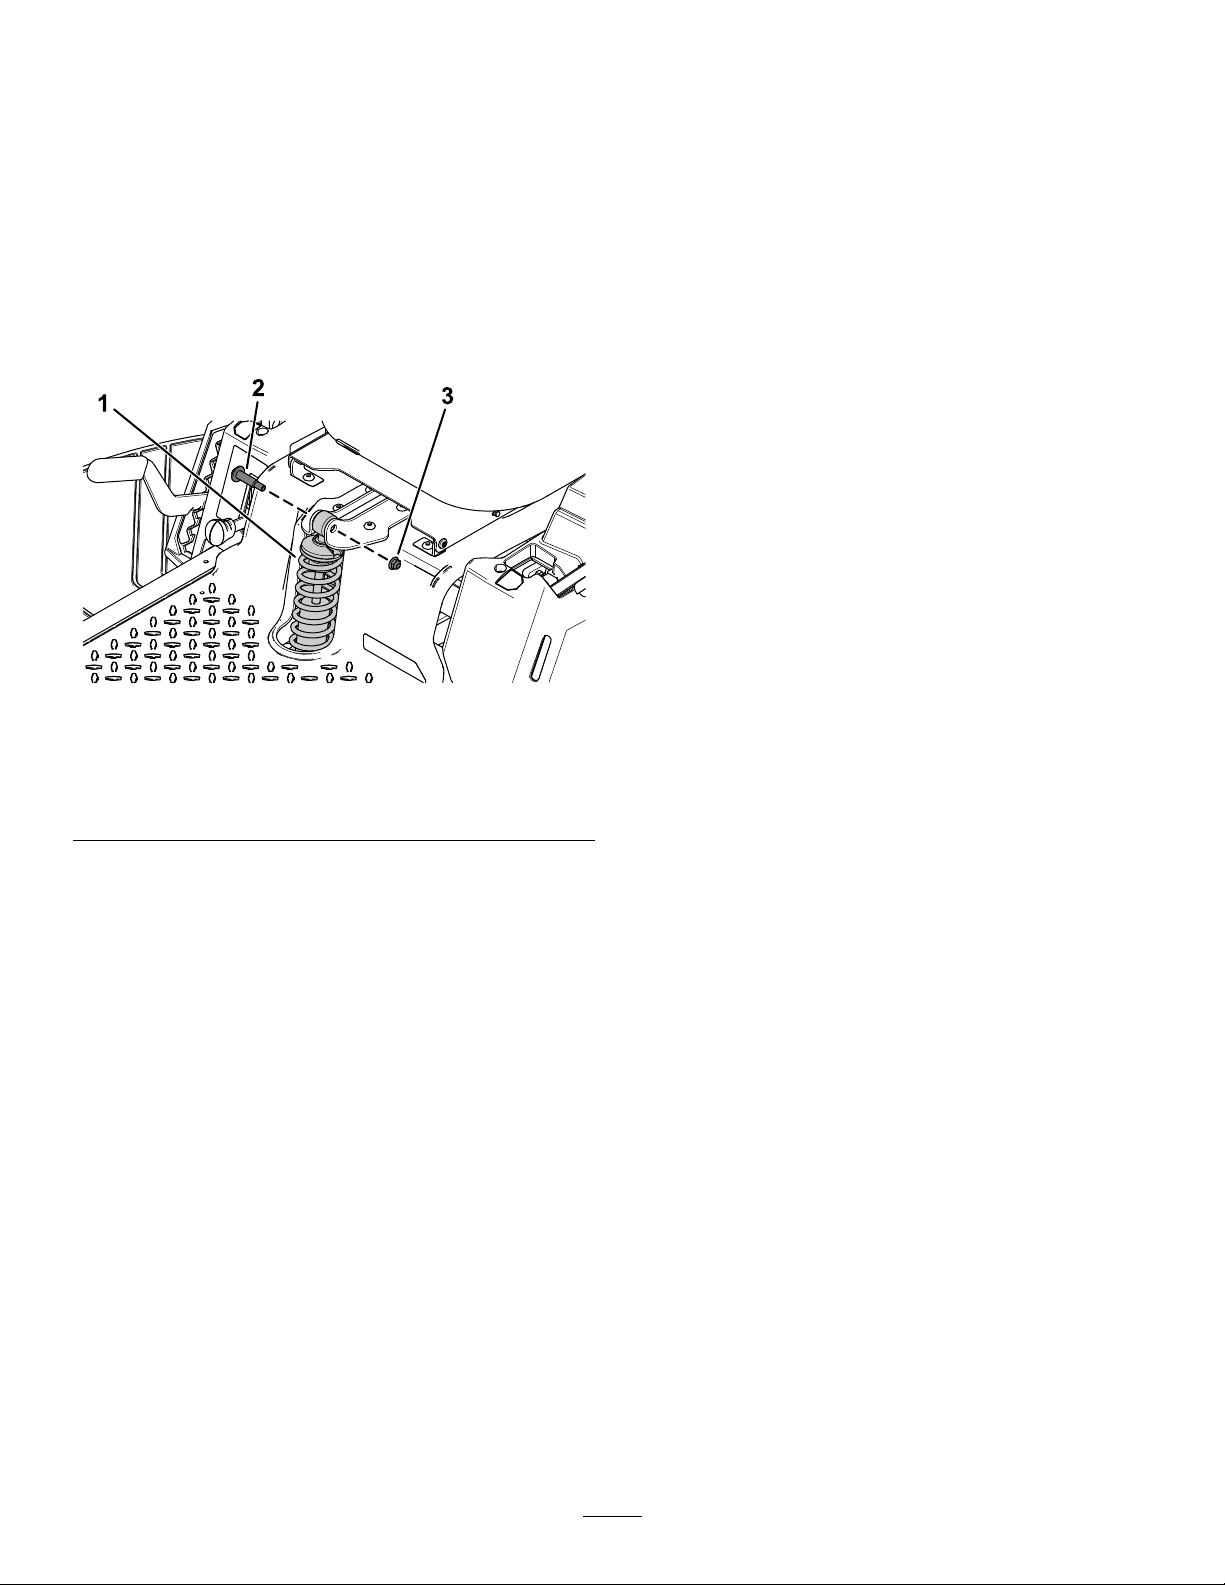
2.Removethe2shoulderboltsand2locknuts(3/8
inch)securingtheexistingfrontspring(Figure
1).
Retainthe2shoulderboltsand2locknuts(3/8
inch).
3.Removetheexistingfrontspring(Figure1).
Figure1
Topofthefrontspringshown
Heavy-DutySpring
Installthenewspringusingthepreviouslyremoved
2shoulderboltsand2locknuts(3/8inch)asshown
inFigure1.
g308390
1.Frontspring
2.Shoulderbolt
3.Locknut(3/8inch)
2
Page 3

InstallingtheSpring
Spacers
1.Raisetheseat.
2.Placethespring-lifttubeontotheendofthe
torsionspring(Figure2).
Note:Ensurethatthespring-lifttubeissecurely
seatedontheendofthetorsionspring.
5.Securethespringspacertotheswing-armpost
usingthesetscrew(Figure4).
Figure2
1.Spring-lifttube
2.Torsionspring
3.Slidethespringspacerontotheswing-armpost
(Figure3).
4.Useonehandtolifttheendofthetorsionspring
offtheswing-armpostandslidethespacer
betweenthetorsionspringandswing-armpost
(Figure3).
g309475
Figure4
1.Swing-armpost3.Setscrew
2.Springspacer
g309473
6.Repeatthisprocedureontheotherside.
7.Lowertheseat.
Figure3
1.Springspacer
2.Swing-armpost4.Spring-lifttube
3.Torsionspring
g309474
3
Page 4

 Loading...