

Page 1
MotionControlLinkKit
XLSLawnTractor
ModelNo.121-4040
Installation
LooseParts
Usethechartbelowtoverifythatallpartshavebeenshipped.
FormNo.3373-603RevA
InstallationInstructions
Description
Tractionbracketlinkarm1
Frontmotioncontrollinkarm1
Rearmotioncontrollinkarm1
Flatwasher2
Hairpincotter2
Shoulderbolt
Pivotwasher1
Locknut(5/16inch)
Qty.
Use
Installmotioncontrollinkkit
1
1
©2012—TheT oro®Company
8111LyndaleAvenueSouth
Bloomington,MN55420
Registeratwww.T oro.com.
OriginalInstructions(EN)
PrintedintheUSA.
AllRightsReserved
*3373-603*A
Page 2
1.Stoptheengine,waitforallmovingpartstostop,and
g018864
1
2
3
4
5
g018844
1
2
3
4
removetheignitionkey.
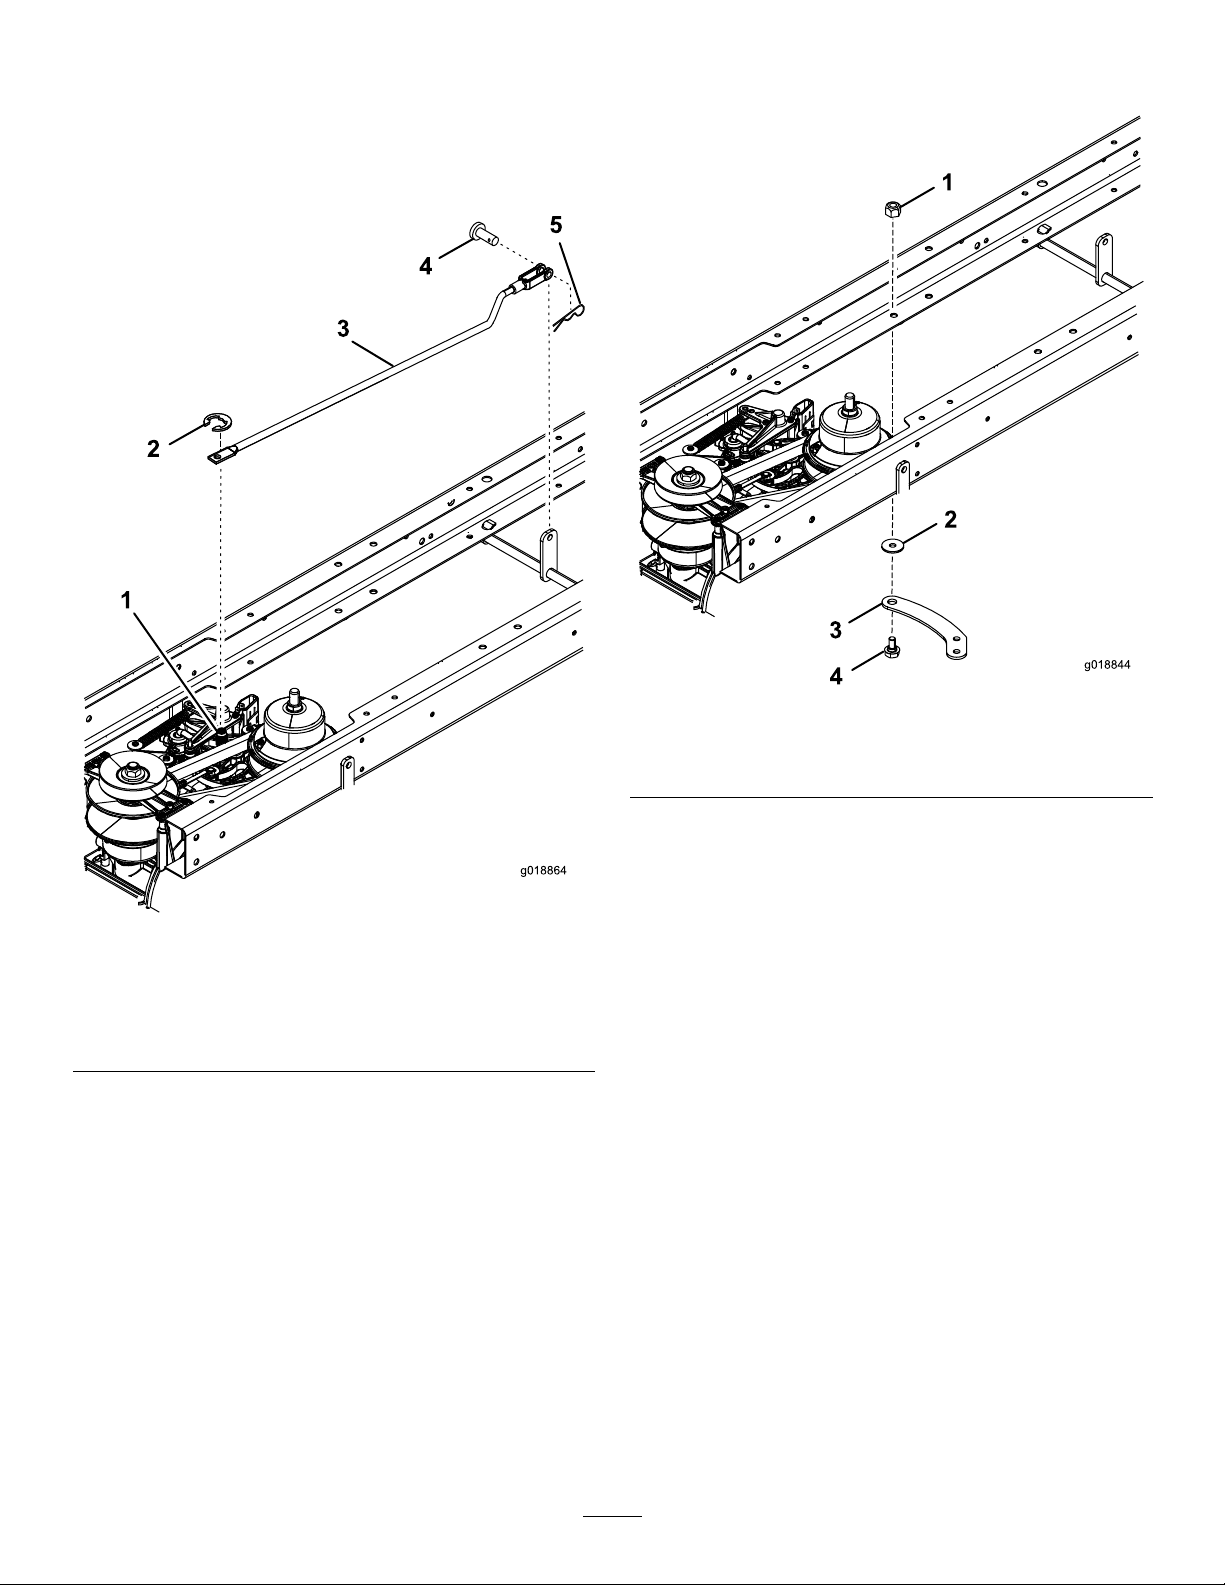
2.Removetheexitingmotioncontrollinkarm(Figure1).
Savetheexistingclevispin,hairpincotterandE-clip.
Note:E-clipisspringloaded.
3.Installthetractionbracketlinkarmusingthelocknut
(5/16inch),pivotwasherandshoulderbolt(Figure2).
Figure1
1.Post4.Existingclevispin
2.ExistingE-clip5.Existinghairpincotter
3.Existingmotioncontrollink
arm
Figure2
1.Locknut(5/16inch)
2.Pivotwasher
3.Tractionbracketlinkarm
4.Shoulderbolt
2
Page 3

4.Installtherearmotioncontrollinkarmusingtheat
3
4
6
5
g018842
7
1
2
9
g018843
1
2
3
4
5
6
7
8
3
4
8
5
washerandhairpincotter(Figure3)suppliedwiththis
kitandtheexistingE-clipfromstep2.
1.Hairpincotter5.Rearmotioncontrollink
2.Flatwasher6.Tractionbracketlinkarm
3.Post7.Holenearestouteredge
4.E-clip
Figure3
1.Hairpincotter6.Existingclevispin
2.Flatwasher7.Existinghairpincotter
3.Rearmotioncontrollink
arm
4.Tractionbracketlinkarm9.10.59inchesto10.64
arm
5.Frontmotioncontrollink
arm
Figure4
8.Frame
inches(26.91cmto27.04
cm)
5.Installthefrontmotioncontrollinkarmtothetraction
bracketlinkarmusingtheatwasherandhairpin
cotter(Figure4).
6.Installtheotherendofthefrontmotioncontrollink
armandadjusttheyokeasnotedinFigure4.
Note:Usetheexistingclevispinandthehairpin
cotterfromstep2.
3
Page 4

Notes:
4
 Loading...