

Toro 108-5543 Installation Instructions
6in x 2ft Soil Chain Kit
For Dingo® Compact Utility Loaders
Model No. 108–5540
Installation
Loose Parts
Use the chart below to verify that all parts have been shipped.
Form No. 3353-228 Rev -
Installation Instructions
Step
1
2
3
Note: Deter mine the left and right sides of the mac hine from the nor mal operating position.
No parts required
Left soil tooth
Right soil tooth
Spacer 6
Tube
Bolt (3/8 x 4 inches)
Bolt (3/8 x 1-1/4 inches)
Locknut (3/8 inch)
No parts required
Description
Step
1
Removing the Spoils Auger
Qty.
–
Remove the spoils auger.
3
3
3
Install the teeth.
3
6
9
–
Install the spoils auger.
Step
2
Installing the Teeth
Use
No Parts Required
Procedure
1. Lo w er the loader ar ms , stop the engine , and
remo v e the k ey .
2. R emo v e the bolt and n ut securing the spoils
aug er to the trenc her ( Figure 2 ).
3. Star t the engine and raise the loader ar ms
slightly (2 to 3 inc hes).
4. Stop the engine and remo v e the k ey .
5. R emo v e the aug er and retain the bolt and n ut.
© 2005—The Toro® Company
8111 Lyndale Avenue South
Bloomington, MN 55420
Register at www.Toro.com. Original Instructions (EN)
Parts needed for this step:
3
Left soil tooth
3
Right soil tooth
6 Spacer
3
Tube
3
Bolt (3/8 x 4 inches)
6
Bolt (3/8 x 1-1/4 inches)
9
Locknut (3/8 inch)
Procedure
T he c hain on y our trenc her comes from the
factor y with teeth designed to dig a 4 inc h trenc h
in soil. T his kit contains the par ts y ou need to
con v er t the c hain into an 6 inc h cutting width
Printed in the USA.
All Rights Reserved
c hain. T he c hain has 24 links , and eac h link can
ha v e dig ging teeth fastened to it and is refer red to
as a tooth position. F or the 4 inc h soil c hain, the a
teeth are fastened onto ev er y other link, for a total
of 16 teeth. T o mak e it into a 6 inc h c hain, y ou add
a 6 inc h tooth configuration betw een 2 existing
teeth ev er y 8 links . At eac h tooth position, the
teeth are fastened in v arious configurations with
spacers and tubes to v ar y the width of cut. T he
tooth configurations are ar rang ed along the c hain
to maximize dig ging efficiency .
6. Eight c hain links bac k from the last tooth y ou
installed, install right and left soil teeth on both
sides of the c hain as illustrated in Figure 1 .
7. T or que all bolts and n uts y ou installed
previously to 27 to 33 ft-lb (37 to 45 N ⋅ m).
Step
3
T he teeth are cupped differently de pending on the
side of the c hain to whic h they are fastened (left
or right). T he teeth are fastened to the c hain links
with bolts , n uts , tubes , and spacers of v ar ying sizes .
1. Lo w er the loader ar ms , stop the engine , and
remo v e the k ey .
2. On an empty c hain link in the front of the
trenc her , install right and left soil teeth on both
sides of the c hain as illustrated in Figure 1 .
Installing the Spoils Auger
No Parts Required
Procedure
Important: F ailing to position the spoils
auger cor r ectl y may dama ge the tr encher .
1. Star t the engine and raise the loader ar ms
slightly (2 to 3 inc hes).
2. Stop the engine and remo v e the k ey .
3. Using the bolt and n ut y ou remo v ed previously ,
connect the spoils aug er to the aug er shaft.
P air the hole far thest from the aug er blade ,
in the end of the aug er with 2 holes , with the
inner hole on the shaft ( Figure 2 ).
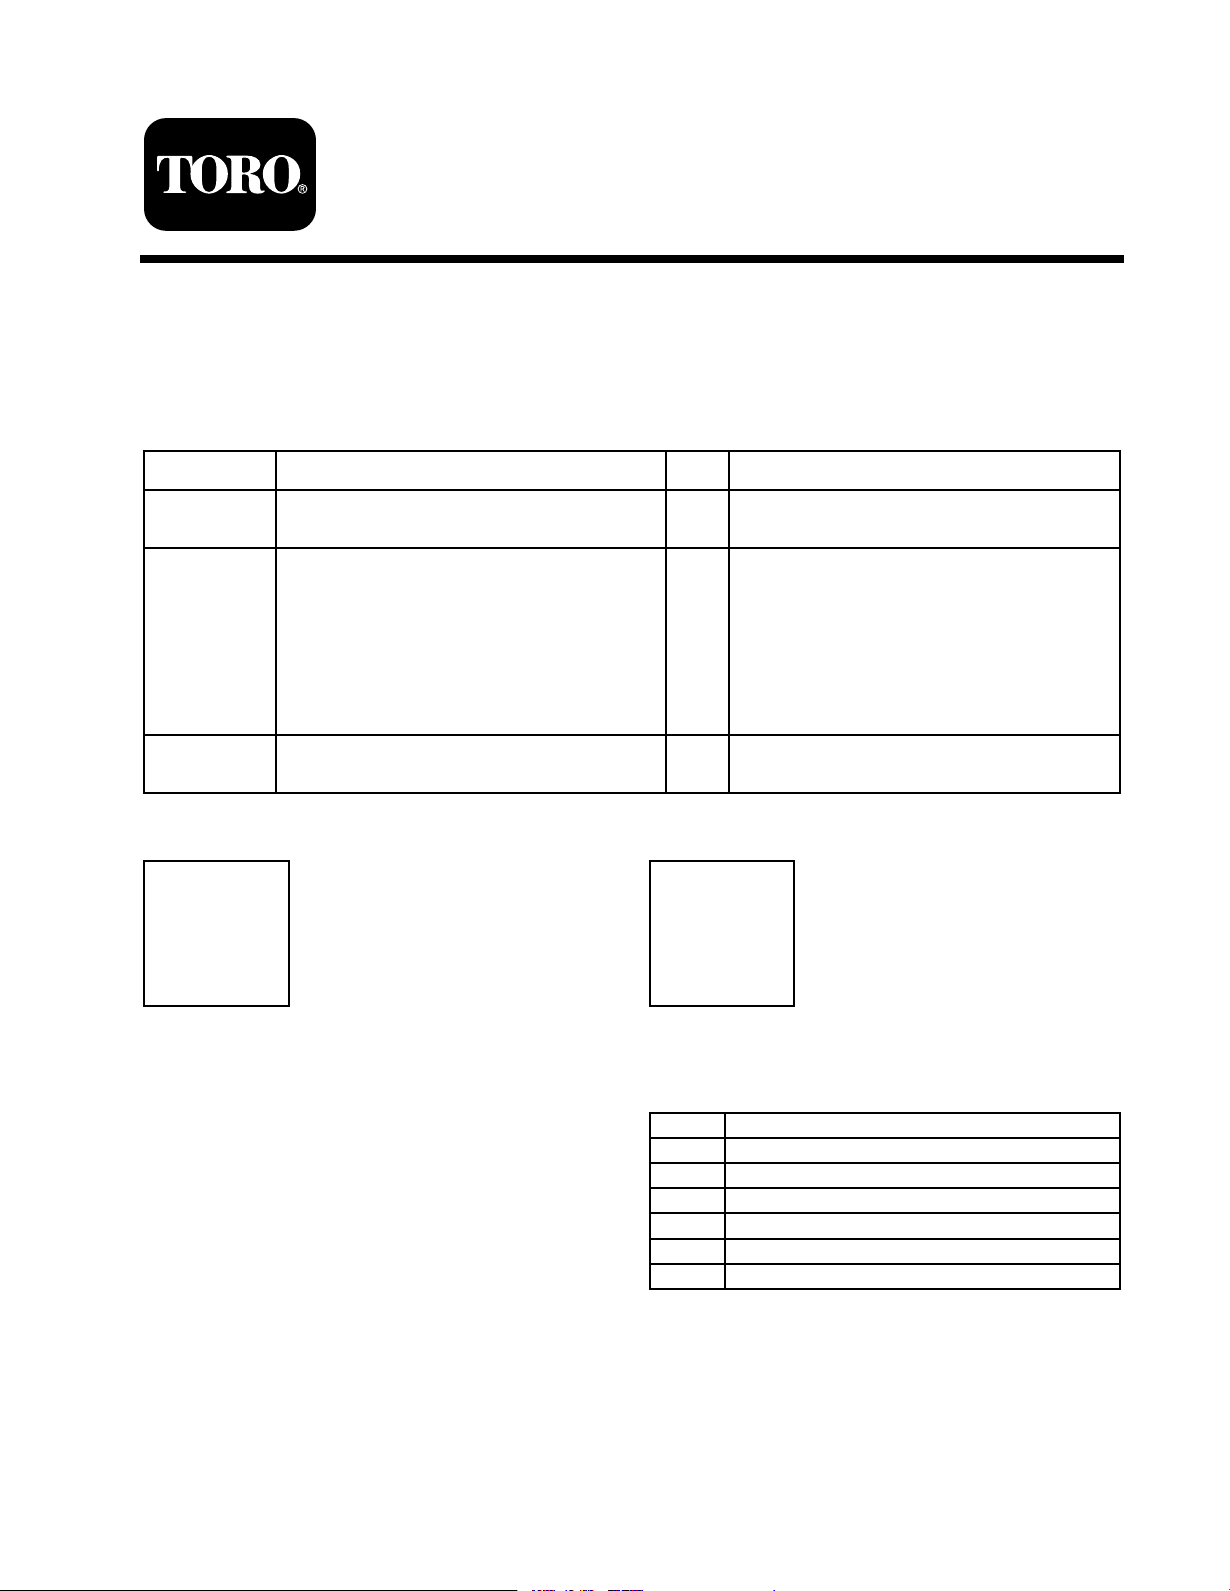
Figure 1
1. Chain link
2. Left soil tooth 6. Tube
3. Right soil tooth
4. Bolt (3/8 x 4 inches)
5. Bolt (3/8 x 1-1/4 inches)
7. Locknut (3/8 inch)
8. Spacer
3. Eight c hain links bac k, install right and left soil
teeth on both sides of the c hain as illustrated
in Figure 1 .
4. Star t the engine , raise the trenc her slightly off
the g round using the loader ar ms , and slo wly
r un the c hain forw ard to mo v e the other 12
links to the top .
5. Lo w er the loader ar ms , stop the engine , and
remo v e the k ey .
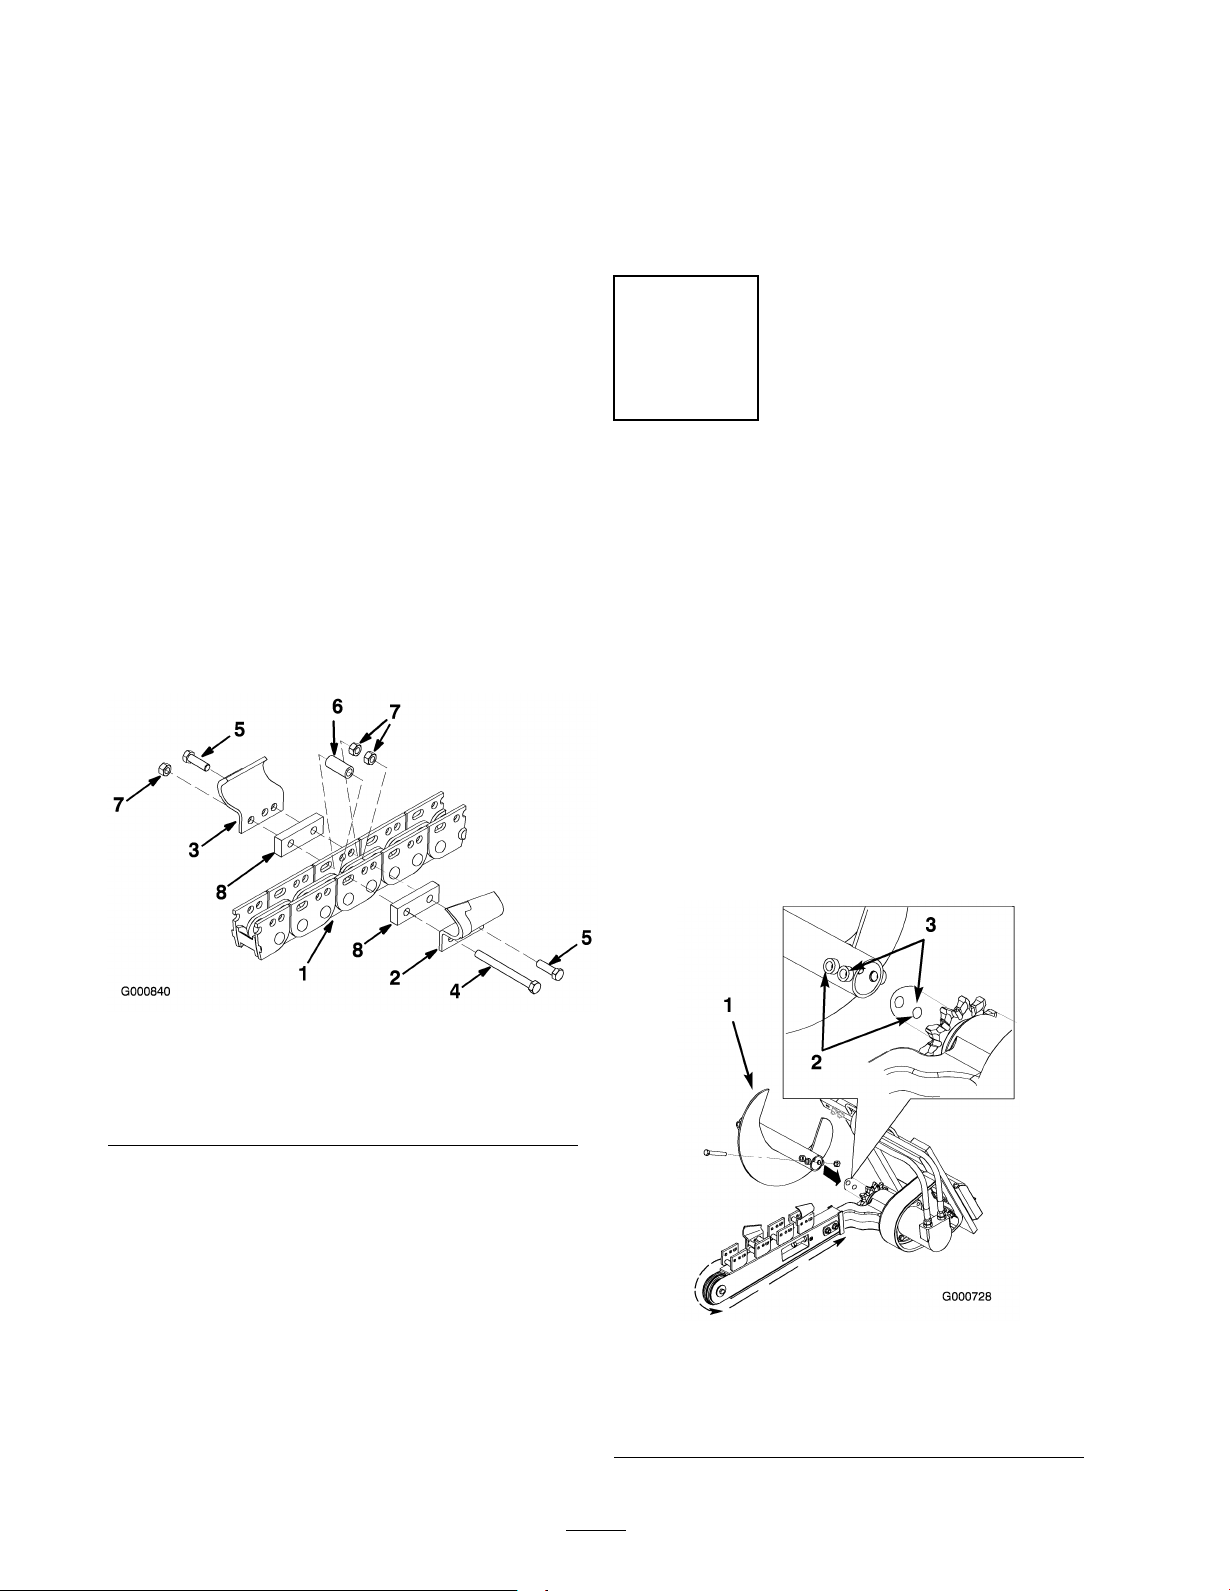
Figure 2
1. Spoils auger 3. Hole position for a 6 inch
chain.
2. Hole position for a 4 inch
chain.
2
 Loading...