

Page 1
Rear Attach–A–Matic Kit
XT Series Garden Tractors
Part No. 106–5694
Installation Instructions
Note: Determine the left and right sides of the machine from the normal operating position.
Loose Parts
Note: Use the chart below to identify parts used for assembly.
DESCRIPTION QTY. USE
Form No. 3329–608
Attach–A–Matic hitch assembly
Capscrew, 1/2 x 1–1/4 inch
Lock nut, 1/2 inch
Installing the Rear
Attach–A–Matic Hitch
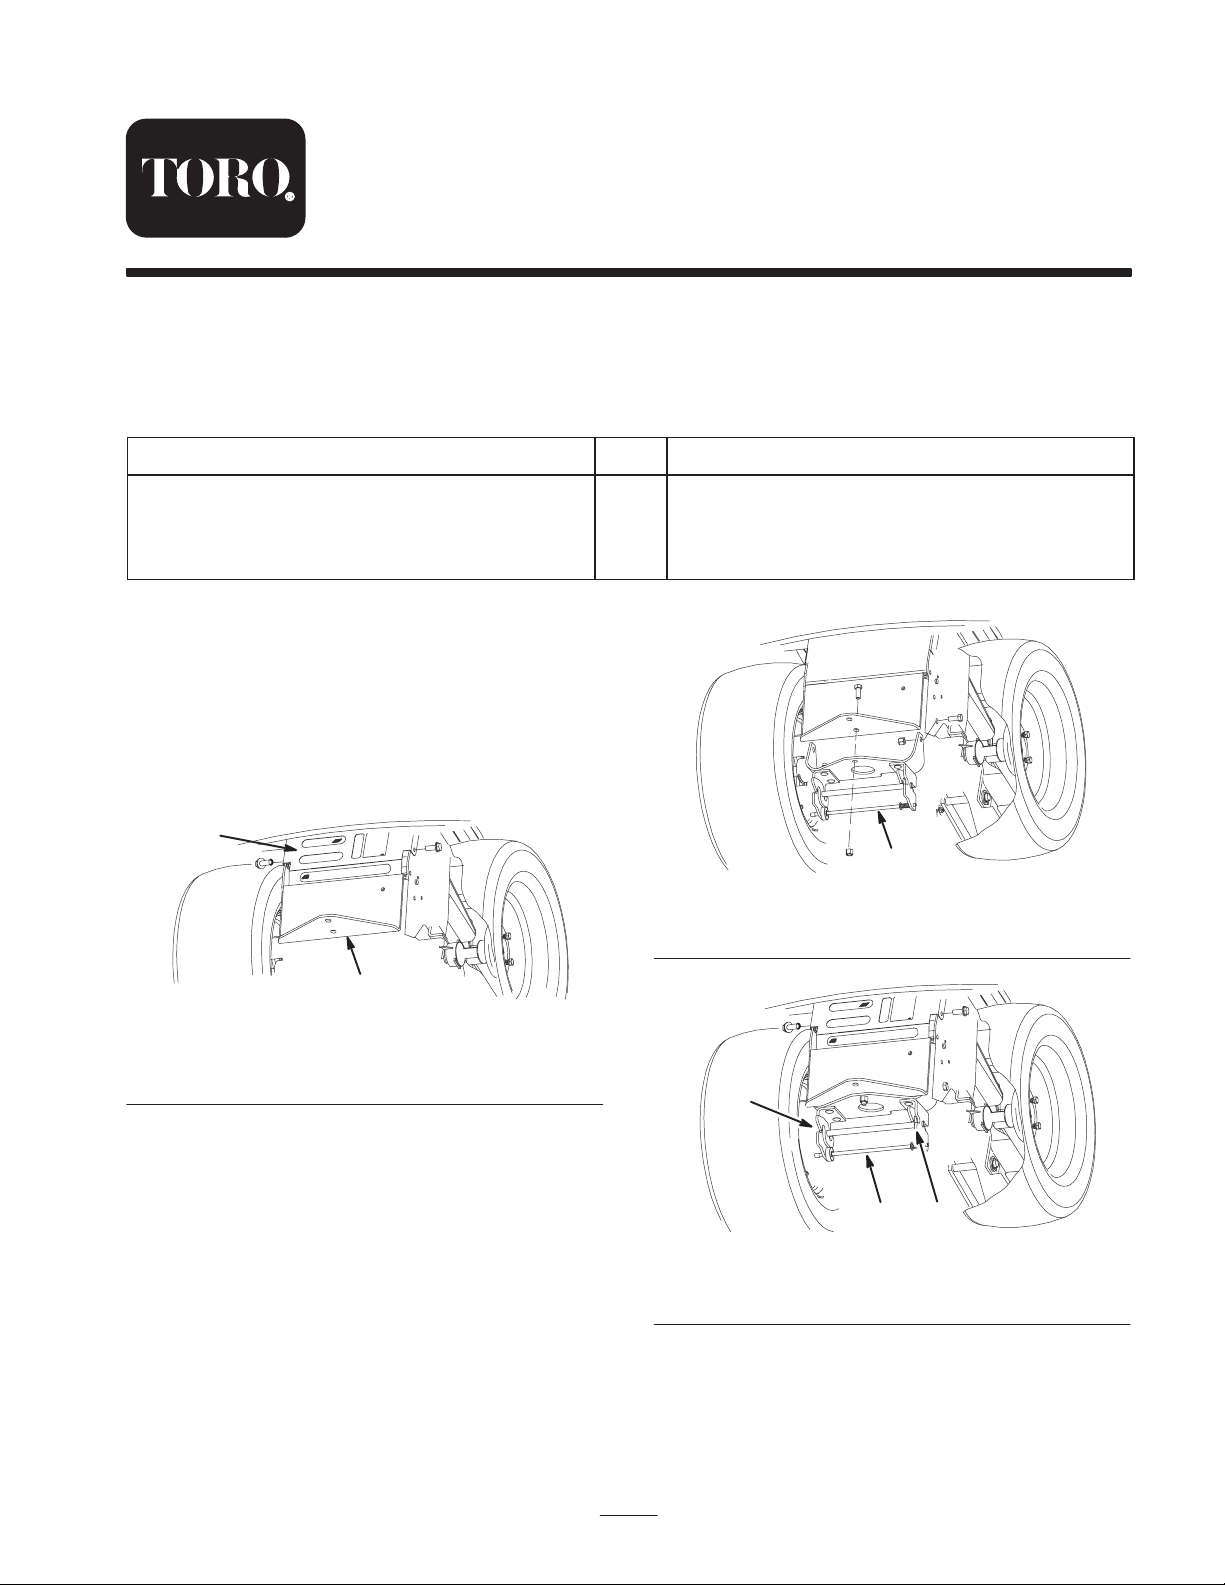
The Attach–A–Matic hitch mounts to the rear of the tractor.
1. Remove the fasteners securing the panel, above the
hitch, to the rear of tractor (Fig. 1). Retain the fasteners.
1
2
m–6717
Figure 1
1. Rear panel 2. Hitch
1
3
3
Install the Attach–A–Matic hitch to the tractor
1. Attach–A–Matic
1
Figure 2
2
m–6715
2. Position the Attach–A–Matic hitch under the rear of the
tractor while aligning the mounting holes with the holes
in the sides of the frame and in the tractor hitch (Fig. 2).
3. Secure the Attach–A–Matic hitch to the frame and to
the hitch with 3 capscrews (1/2 x 1–1/4 inch) and lock
nuts (1/2 inch) (Fig. 2).
4. Install the panel to the rear of the tractor with the
fasteners previously removed (Fig. 3).
5. When mounting an attachment to the rear
Attach–A–Matic, press in on the latch rod and open the
latches (Fig. 3). Place the attachment bar hitch into the
Attach–A–Matic, then close the latches (Fig. 3).
2003 by The Toro Company
8111 Lyndale Avenue South
Bloomington, MN 55420-1196
1
Figure 3
2. Latch rod 3. Latch
1
2
All Rights Reserved
m–6716
Printed in the USA
 Loading...