

Page 1
ProStripe560Mower
g018205
1
ModelNo.02656—SerialNo.315000001andUp
FormNo.3392-604RevA
Operator'sManual
Introduction
WARNING
CALIFORNIA
Proposition65Warning
Thisproductcontainsachemicalorchemicals
knowntotheStateofCaliforniatocausecancer,
birthdefects,orreproductiveharm.
Theengineexhaustfromthisproduct
containschemicalsknowntotheStateof
Californiatocausecancer,birthdefects,
orotherreproductiveharm.
Readthisinformationcarefullytolearnhowtooperateand
maintainyourproductproperlyandtoavoidinjuryand
productdamage.Youareresponsibleforoperatingthe
productproperlyandsafely.
YoumaycontactTorodirectlyatwww .Toro.comforproduct
andaccessoryinformation,helpndingadealer,ortoregister
yourproduct.
Wheneveryouneedservice,genuineToroparts,oradditional
information,contactanAuthorizedServiceDealerorToro
CustomerServiceandhavethemodelandserialnumbersof
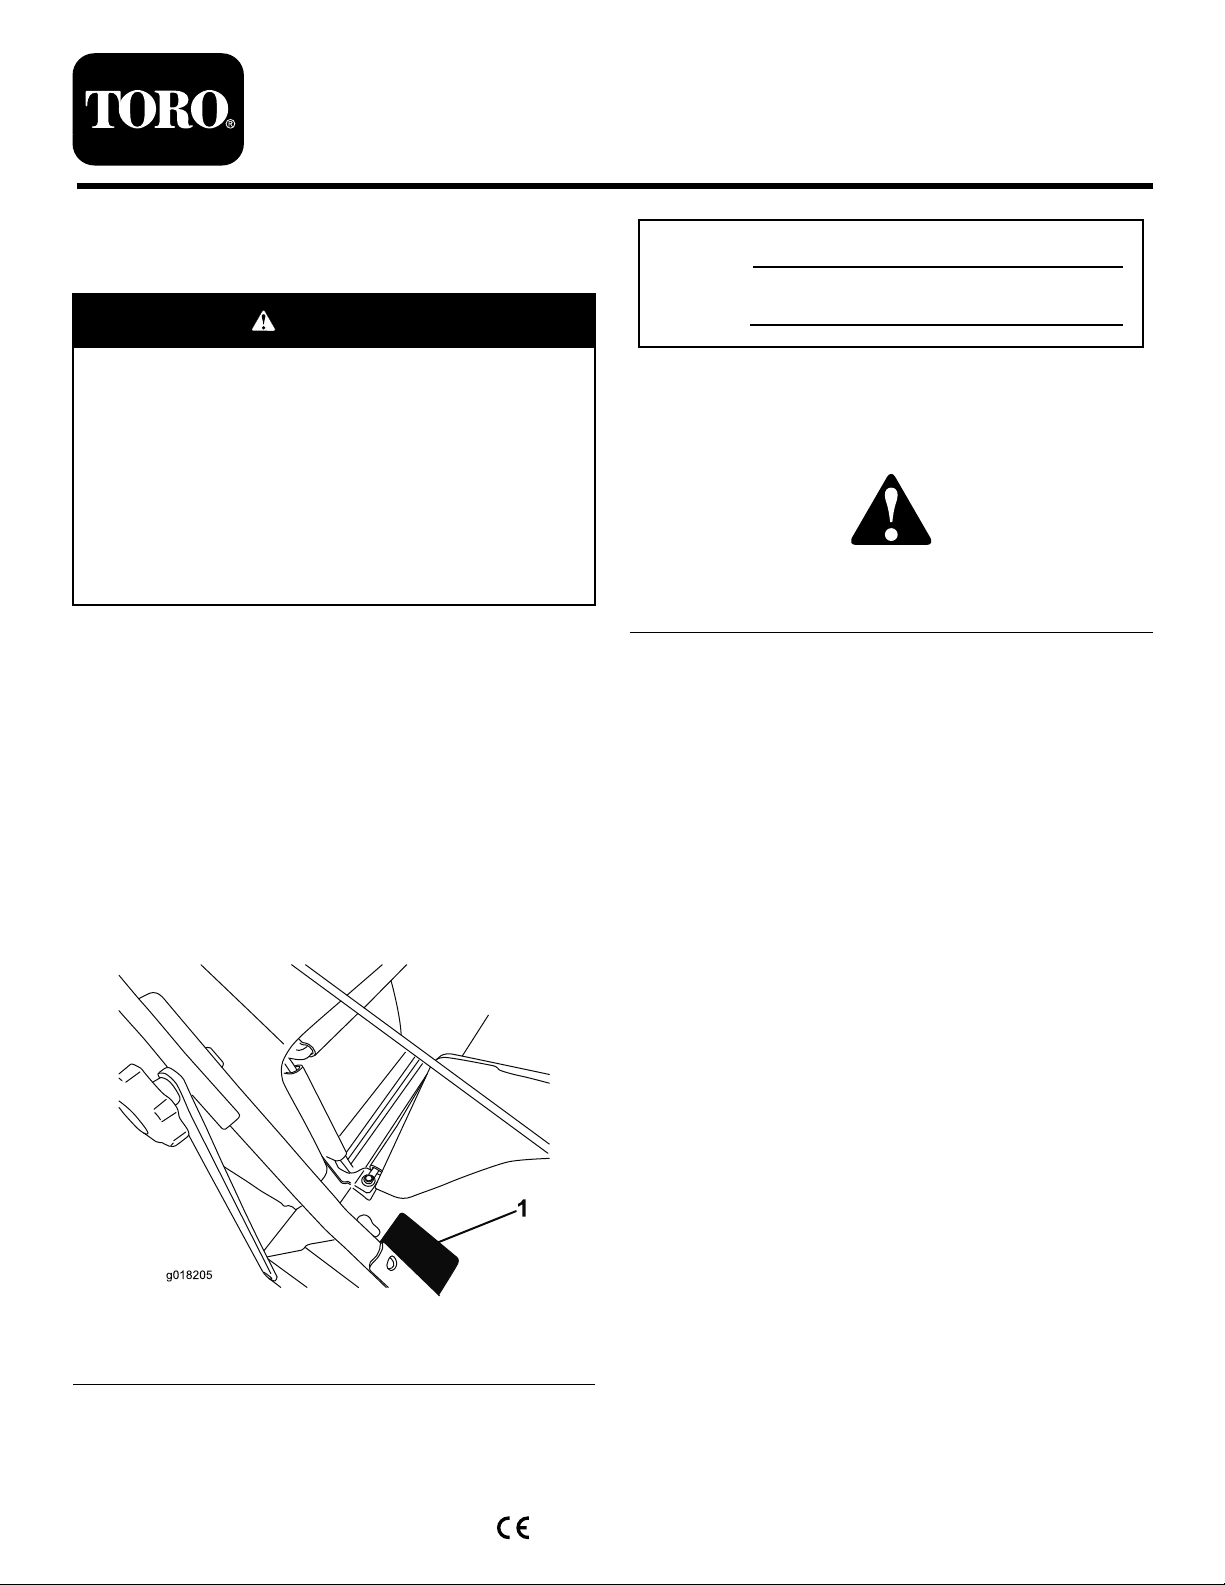
yourproductready.Figure1identiesthelocationofthe
modelandserialnumbersontheproduct.
ModelNo.
SerialNo.
Thismanualidentiespotentialhazardsandhassafety
messagesidentiedbythesafetyalertsymbol(Figure2),
whichsignalsahazardthatmaycauseseriousinjuryordeath
ifyoudonotfollowtherecommendedprecautions.
Figure2
1.Safetyalertsymbol
Thismanualuses2wordstohighlightinformation.
Importantcallsattentiontospecialmechanicalinformation
andNoteemphasizesgeneralinformationworthyofspecial
attention.
Formodelswithstatedenginehorsepower,thegross
horsepoweroftheenginewaslaboratoryratedbytheengine
manufacturerinaccordancewithSAEJ1940.Ascongured
tomeetsafety,emission,andoperatingrequirements,the
actualenginehorsepoweronthisclassoflawnmowerwill
besignicantlylower.
Figure1
1.Modelandserialnumberplate
Writetheproductmodelandserialnumbersinthespace
below:
©2014—TheT oro®Company
8111LyndaleAvenueSouth
Bloomington,MN55420
Registeratwww.T oro.com.
Contents
Introduction..................................................................1
Safety...........................................................................2
GeneralLawnMowerSafety.....................................2
SoundPressure.......................................................4
SoundPower..........................................................4
Hand-ArmVibration...............................................4
SafetyandInstructionalDecals.................................5
Setup............................................................................6
1UnfoldingtheHandle............................................6
2AssemblingtheGrassBag......................................7
3FillingtheEnginewithOil......................................8
ProductOverview..........................................................9
Specications.........................................................9
Operation....................................................................10
FillingtheFuelTank...............................................10
CheckingtheEngine-OilLevel.................................11
AdjustingtheCuttingHeight....................................11
StartingtheEngine.................................................12
UsingtheSelf-PropelDrive.....................................12
OriginalInstructions(EN)
PrintedintheUK
AllRightsReserved
*3392-604*A
Page 2

StoppingtheEngine...............................................13
BaggingtheClippings.............................................13
OperatingTips......................................................13
Maintenance.................................................................14
RecommendedMaintenanceSchedule(s)......................14
PreparingforMaintenance.......................................14
ReplacingtheAirFilter............................................14
ChangingtheEngineOil.........................................15
AdjustingtheSelf-PropelCable................................16
ReplacingtheBlade................................................17
SharpeningtheBlade..............................................17
CleaningtheMachine..............................................18
Storage........................................................................19
PreparingtheMachineforStorage............................19
FoldingtheHandle.................................................20
RemovingtheMachinefromStorage.........................20
Safety
ThismachinehasbeendesignedinaccordancewithENISO
5395:2013.
Improperlyusingormaintainingthismachinecanresult
ininjury.T oreducethepotentialforinjury,complywith
thesesafetyinstructions.
Torodesignedandtestedthismachineforreasonablysafe
service;however,failuretocomplywiththefollowing
instructionsmayresultinpersonalinjury.
Toensuremaximumsafety,bestperformance,and
togainknowledgeoftheproduct,itisessentialthat
youandanyotheroperatorofthemachinereadand
understandthecontentsofthismanualbeforethe
engineiseverstarted.Payparticularattentiontothe
safetyalertsymbol(Figure2)whichmeansCaution,
Warning,orDanger—“personalsafetyinstruction.”
Readandunderstandtheinstructionbecauseithasto
dowithsafety.Failuretocomplywiththeinstruction
mayresultinpersonalinjury.
GeneralLawnMowerSafety
Thiscuttingmachineiscapableofamputatinghandsandfeet
andofthrowingobjects.Failuretoobservethefollowing
safetyinstructionscouldresultinseriousinjuryordeath.
Training
•Readtheinstructionscarefully .Befamiliarwiththe
controlsandtheproperuseoftheequipment.
•Neverallowchildrenorpeopleunfamiliarwiththese
instructionstousethemachine.Localregulationscan
restricttheageoftheoperator.
•Keepinmindthattheoperatororuserisresponsiblefor
accidentsorhazardsoccurringtootherpeopleortheir
property.
•Understandexplanationsforallpictogramsusedonthe
machineorintheinstructions.
Gasoline
WARNING-Gasolineishighlyammable.Takethe
followingprecautions.
•Storefuelincontainersspecicallydesignedforthis
purpose.
•Refueloutdoorsonlyanddonotsmokewhilerefueling.
•Addfuelbeforestartingtheengine.Neverremovethe
capofthefueltankoraddgasolinewhiletheengineis
runningorwhentheengineishot.
•Ifgasolineisspilled,donotattempttostarttheengine
butmovethemachineawayfromtheareaofspillageand
avoidcreatinganysourceofignitionuntilgasolinevapors
havedissipated.
•Replaceallfueltankandcontainercapssecurely .
Preparation
•Whilemowing,alwayswearsubstantial,slip-resistant
footwearandlongtrousers.Donotoperatethe
equipmentwhenbarefootorwearingopensandals.
•Thoroughlyinspecttheareawheretheequipmentisto
beusedandremoveallstones,sticks,wires,bonesand
otherforeignobjects.
•Beforeusing,alwaysvisuallyinspecttoseethatguardsand
safetydevices,suchasdeectorsand/orgrasscatchers,
areinplaceandworkingcorrectly.
•Beforeusing,alwaysvisuallyinspecttoseethattheblades,
bladeboltsandcutterassemblyarenotwornordamaged.
Replacewornordamagedbladesandboltsinsetsto
preservebalance.
Starting
•Donottiltthemachinewhenstartingtheengineunless
themachinemustbetiltedforstarting.Inthiscase,do
nottiltitmorethanabsolutelynecessaryandliftonlythe
partwhichisawayfromtheoperator.
•Starttheenginecarefullyaccordingtoinstructionsand
withfeetwellawayfromtheblade(s)andnotinfrontof
thedischargechute.
Operation
•Nevermowwhilepeople,especiallychildren,orpetsare
nearby.
•Mowonlyindaylightoringoodarticiallight.
•Stayalertforholesintheterrainandotherhiddenhazards.
•Donotputhandsorfeetnearorunderrotatingparts.
Keepclearofthedischargeopeningatalltimes.
•Neverpickuporcarryalawnmowerwhiletheengineis
running.
•Useextremecautionwhenreversingorpullinga
pedestrian-controlledmowertowardyou.
•Walk,neverrun.
•Slopes:
2
Page 3

–Donotmowexcessivelysteepslopes.
–Exerciseextremecautionwhenonslopes.
–Mowacrossthefaceofslopes,neverupanddown,
andexerciseextremecautionwhenchangingdirection
onslopes.
–Alwaysbesureofyourfootingonslopes.
•Reducespeedonslopesandinsharpturnstoprevent
overturningorlossofcontrol.
•Stopthebladeifthemachinemustbetiltedfor
transportationwhencrossingsurfacesotherthangrass
andwhentransportingthemachinetoandfromthearea
tobemowed.
•Donotoperatetheengineinaconnedspacewhere
dangerouscarbonmonoxideandotherexhaustgasses
cancollect.
•Stoptheengine
–wheneveryouleavethemachine.
–beforerefueling.
–beforeremovingthegrasscatcher.
–beforemakingheightadjustmentunlessadjustment
canbemadefromtheoperatingposition.
•Stoptheengineanddisconnectthespark-plugwire.
–beforeclearingblockagesoruncloggingchute.
–beforechecking,cleaningorworkingonthemachine.
–afterstrikingaforeignobject,inspectthemachine
fordamageandmakerepairsbeforerestartingand
operatingthemachine.
–ifthemachinestartstovibrateabnormally(check
immediately).
•Lightningcancausesevereinjuryordeath.Ifyousee
lightningorhearthunderinthearea,donotoperatethe
machine;seekshelter.
•Watchoutfortrafcwhencrossingornearroadways.
•Replacefaultysilencers.
•Ifthefueltankhastobedrained,dothisoutdoors.
•Donotchangetheenginegovernorsettingsoroverspeed
theengine.Operatinganengineatexcessivespeedcan
increasethehazardofpersonalinjury.
•Becarefulwhileadjustingthemachinetoprevent
entrapmentofthengersbetweenmovingbladesand
xedpartsofthemachine.
•Toensurethebestperformanceandsafety ,
purchaseonlygenuineT ororeplacementpartsand
accessories.Donotuse
theymaycauseasafetyhazard.
will t
partsandaccessories;
Hauling
•Usecarewhenloadingorunloadingthemachineintoa
traileroratruck.
•Usefull-widthrampsforloadingthemachineintoa
traileroratruck.
•Tiethemachinedownsecurelyusingstraps,chains,cable,
orropes.Boththefrontandtherearstrapsshouldbe
directeddownandoutwardfromthemachine.
MaintenanceandStorage
•Keepallnuts,bolts,andscrewstighttobesurethatthe
equipmentisinsafeworkingcondition.
•Donotusepressure-cleaningequipmentonthemachine.
•Neverstoretheequipmentwithgasolineinthetankand
insideabuildingwherefumescanreachanopename
orspark.
•Allowtheenginetocoolbeforestoringinanyenclosure.
•Toreducetherehazard,keeptheengine,silencer,
batterycompartmentandgasolinestorageareafreeof
grass,leaves,orexcessivegrease.
•Checkgrasscatchercomponentsandthedischargeguard
frequentlyandreplacewithmanufacturer'srecommended
parts,whennecessary.
•Replacewornordamagedpartsforsafety.
3
Page 4

SoundPressure
Thisunithasasoundpressurelevelattheoperator’searof
89dBA,whichincludesanUncertaintyValue(K)of2dBA.
Thesoundpressurelevelwasdeterminedaccordingtothe
proceduresoutlinedinENISO5395:2013.
SoundPower
Thisunithasaguaranteedsoundpowerlevelof98dBA,
whichincludesanUncertaintyValue(K)of1dBA.Thesound
powerlevelwasdeterminedaccordingtotheprocedures
outlinedinISO11094.
Alwayswearhearingprotectionwhenoperatingthemachine.
Hand-ArmVibration
Measuredvibrationlevelforthelefthand=2.8m/s
Measuredvibrationlevelfortherighthand=3.2m/s
UncertaintyValue(K)=1.6m/s
Themeasuredvaluesweredeterminedaccordingtothe
proceduresoutlinedinENISO5395:2013.
2
2
CAUTION
Long-termexposuretovibrationwhileoperating
themachinemaycausesomenumbnessinthe
handsandwrists.
Wearglovesthatdampenthevibrationwhenever
youoperatethemachineforanextendedperiodof
time.
2
4
Page 5
SafetyandInstructionalDecals
g018197
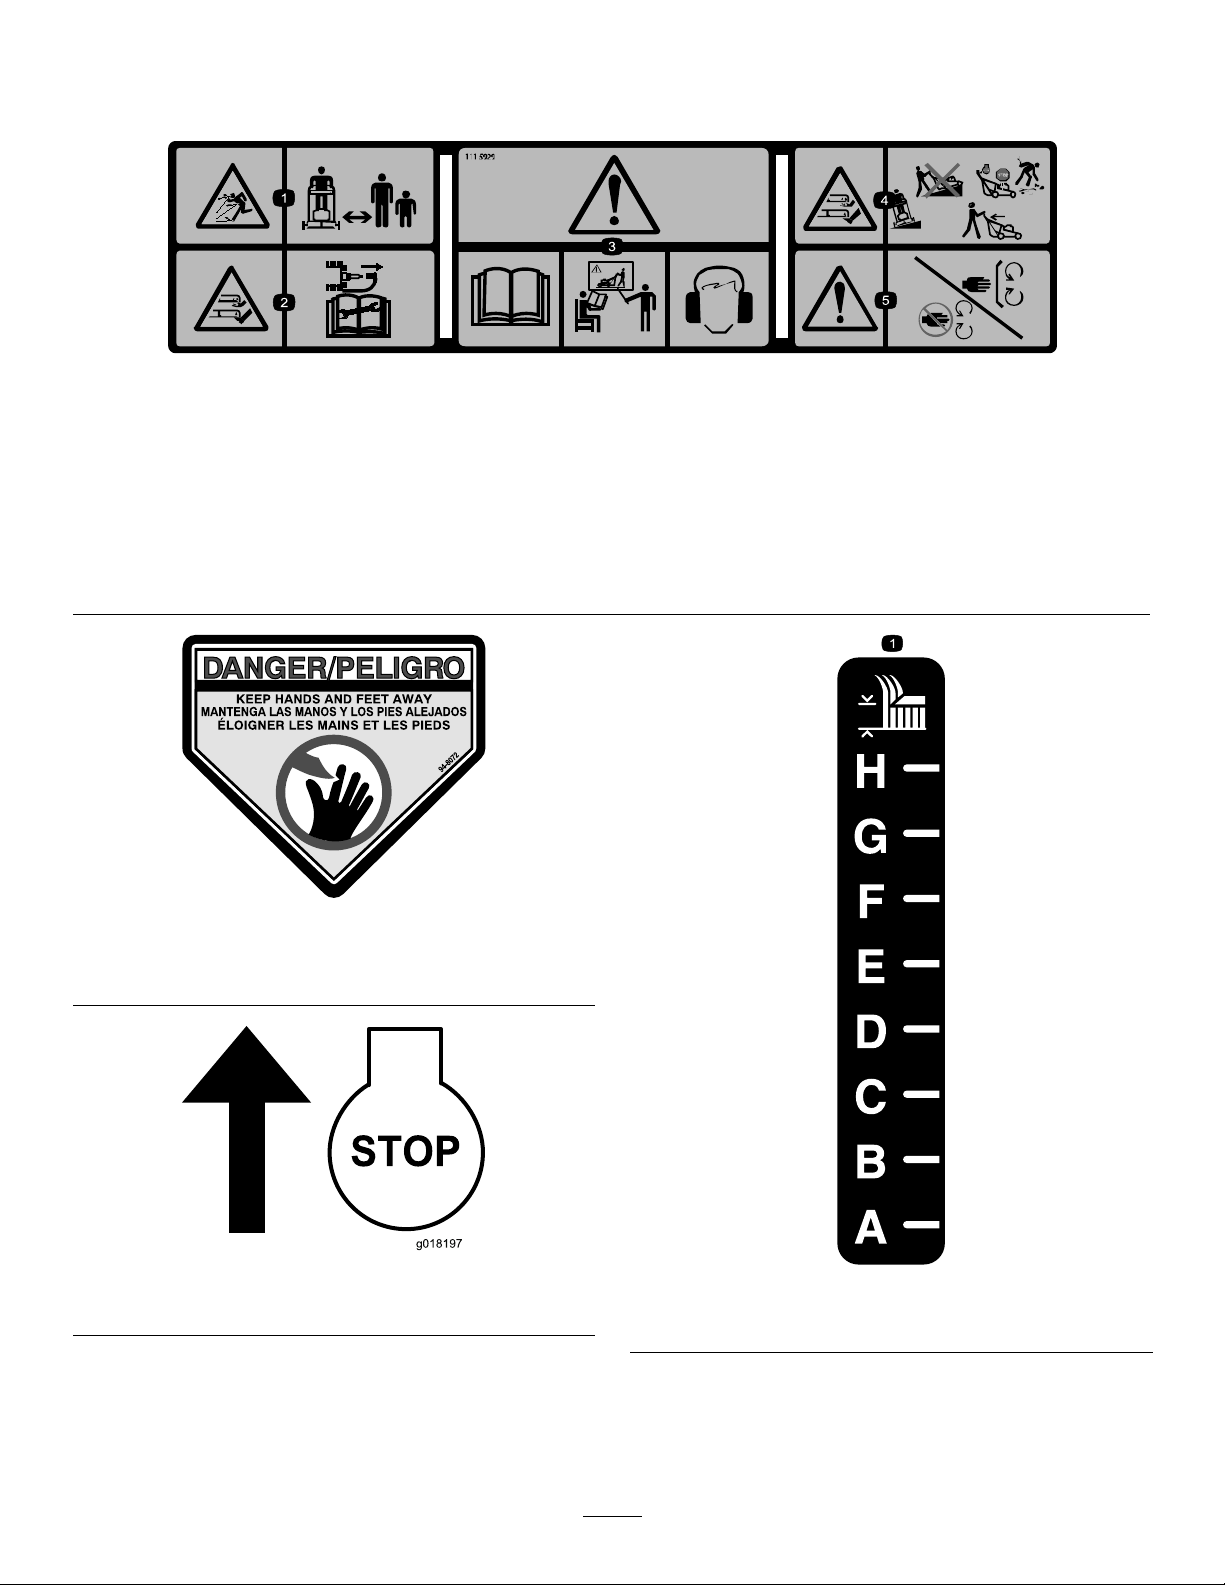
Important:Safetyandinstructiondecalsarelocatednearareasofpotentialdanger.Replacedamageddecals.
111–5929
1.Thrownobjecthazard—keepbystandersasafedistancefrom
themachine.
2.Cutting/dismembermenthazardofhandorfoot,mower
blade—disconnectthesparkplugandreadtheOperator’s
Manualbeforeservicingorperformingmaintenance.
3.Warning—readtheOperator’sManual;donotoperatethis
machineunlessyouaretrained;wearearprotection.
94-8072
1.Warning—cutting/dismembermenthazardofhandorfoot,
cuttingmechanism.
4.Cutting/dismembermenthazardofhandorfoot,mower
blade—operatesidetosideonslopes;donotoperateupand
downslopes;stoptheengineandpickupanydebris;look
behindyouwhenmovingthemachinebackwards.
5.Warning—keepawayfrommovingparts;keepallguardsin
place.
1.BladeControlBar
340179
1.Bladeheightadjustment
111–6866
5
Page 6
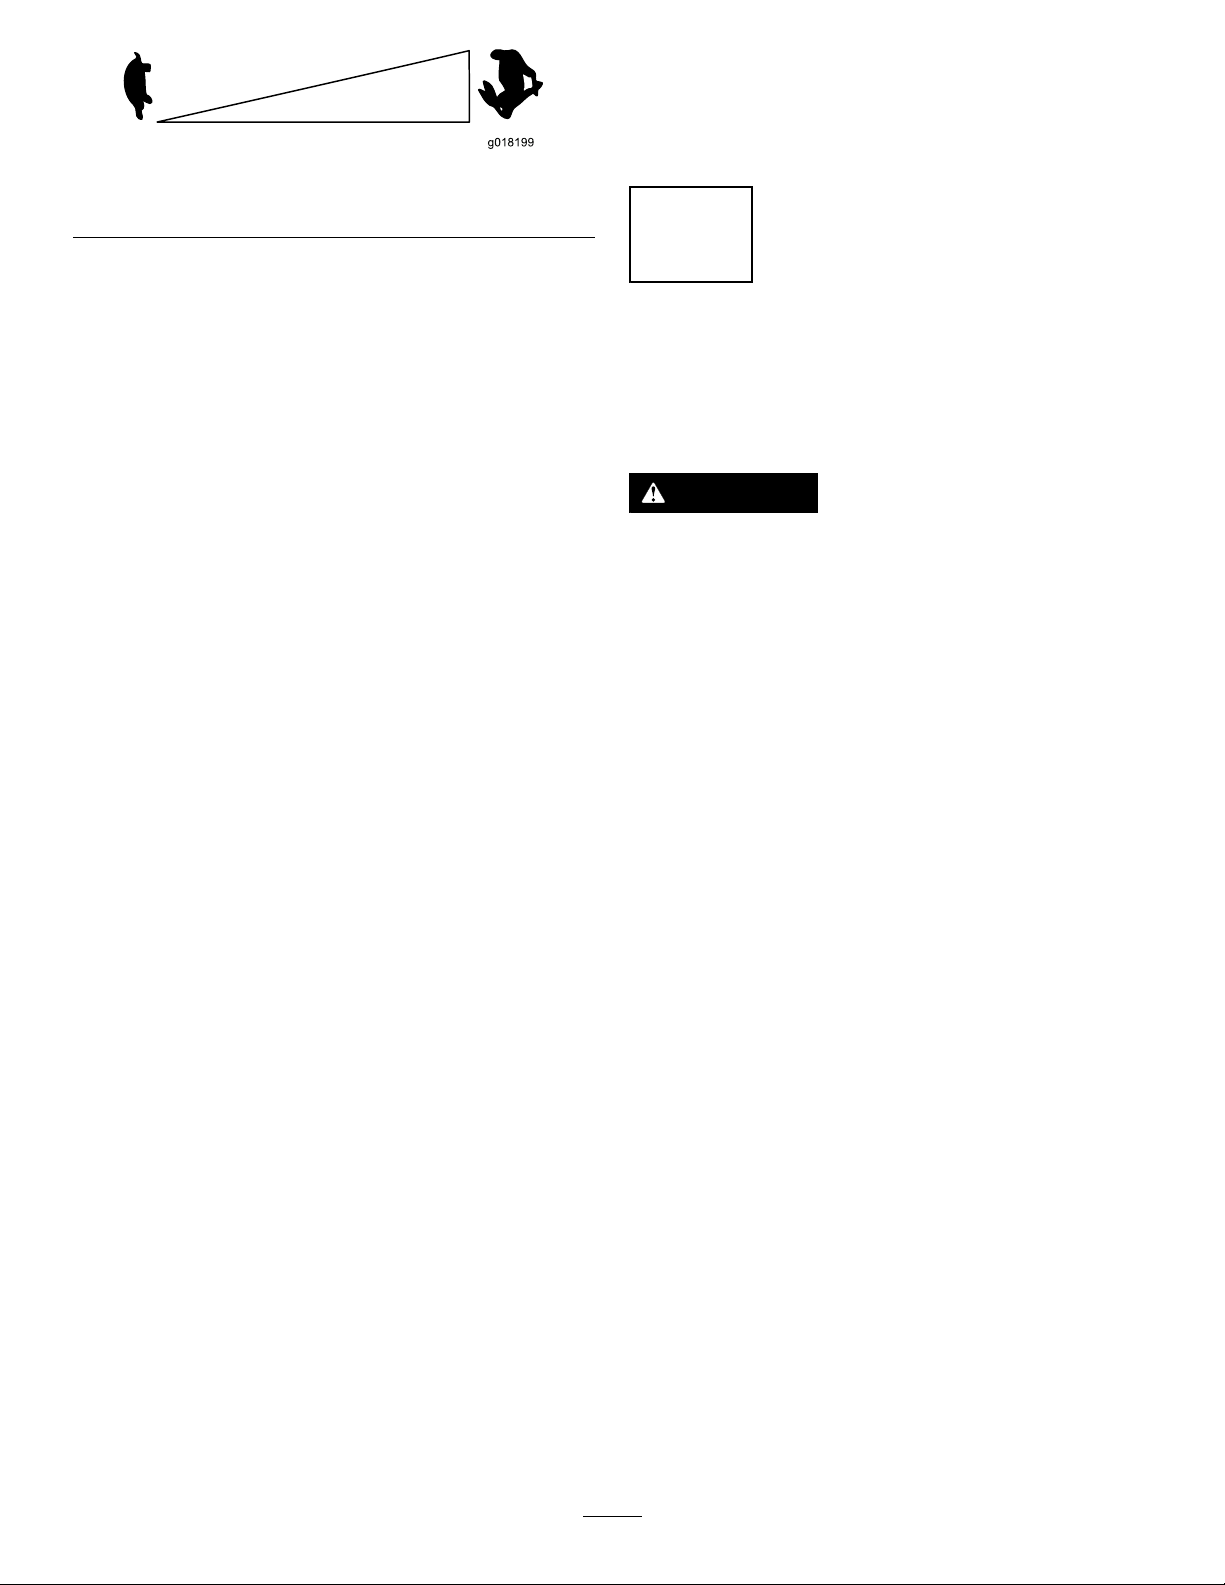
g018199
Engine-SpeedController
Setup
Important:Removeanddiscardtheprotectiveplastic
sheetthatcoverstheengine.
111–3444
1
UnfoldingtheHandle
NoPartsRequired
Procedure
WARNING
Assemblingandunfoldingthehandleimproperly
candamagethecables,causinganunsafeoperating
condition.
•Donotdamagethecableswhenassemblingand
unfoldingthehandle.
•Ifacableisdamaged,contactanAuthorized
ServiceDealer.
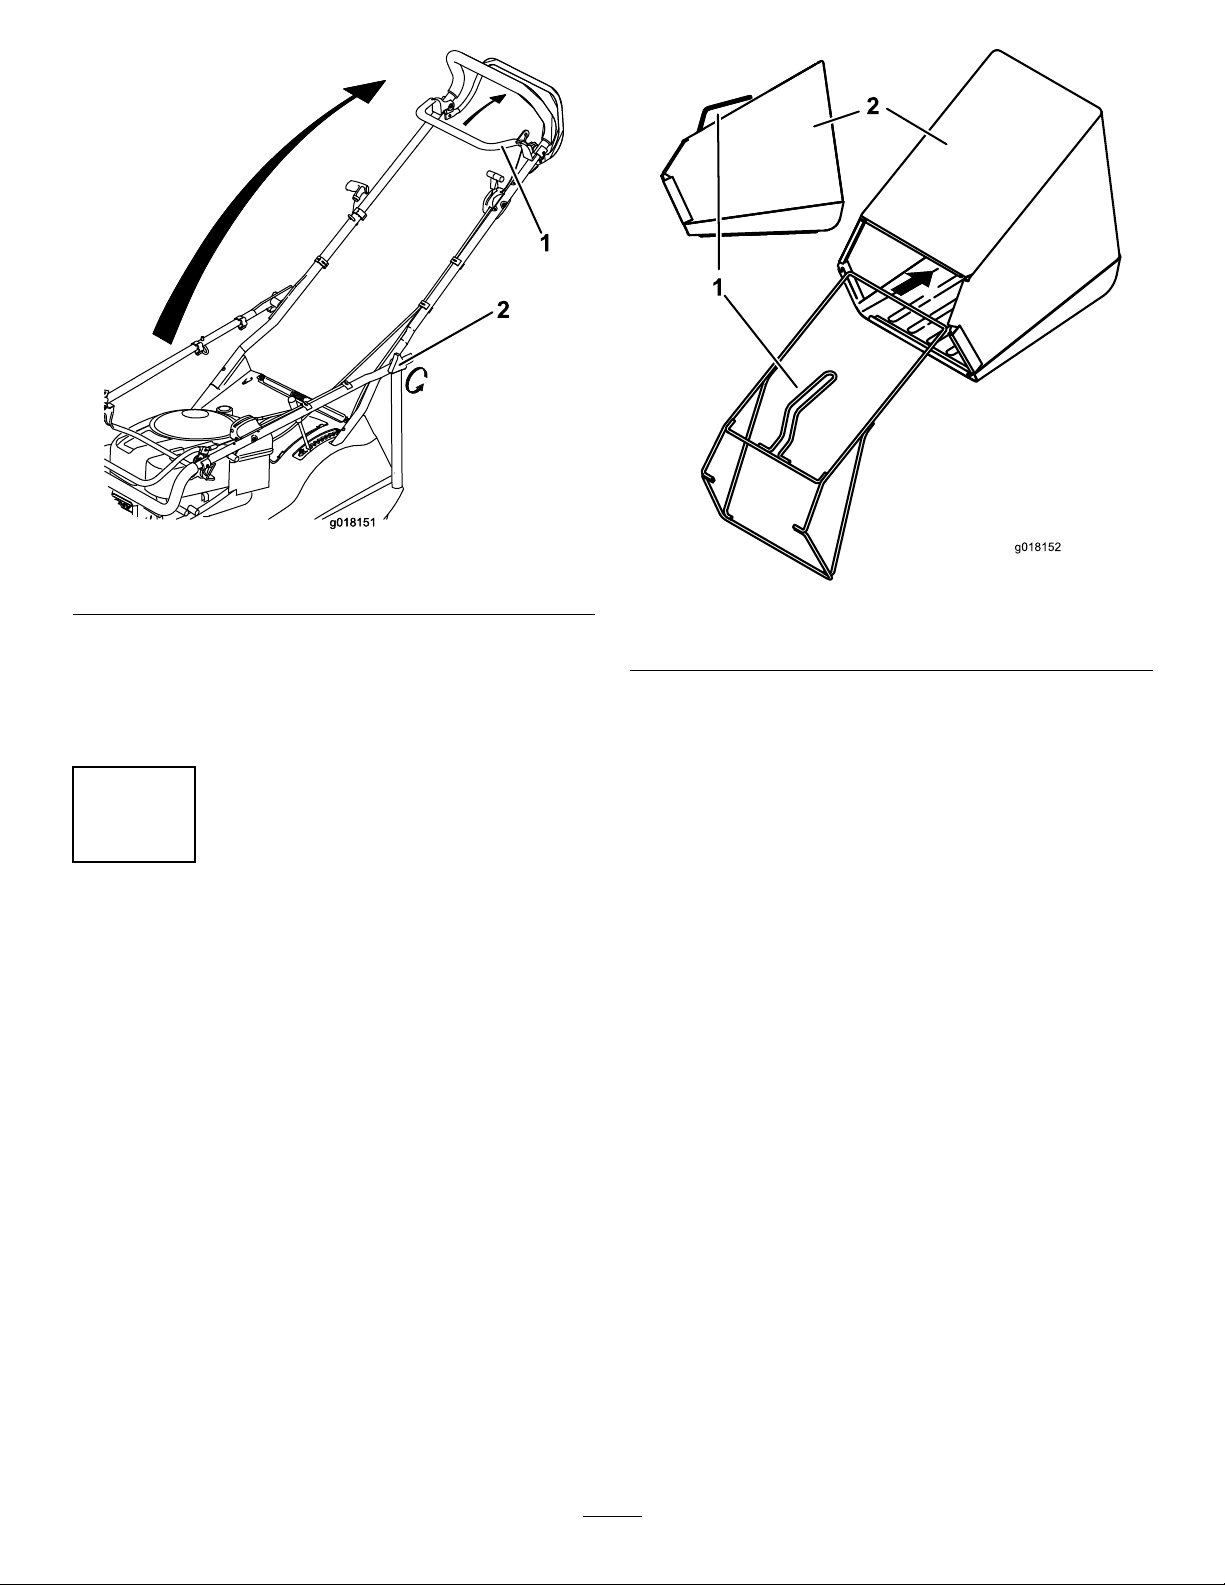
1.Loosenthehandlebarknobs(Figure3).
6
Page 7
g018151g018151
1
2
Figure3
g018152
2
1
1.Bladecontrolbar2.Handlebarknobs
2.Holdtheblade-controlbaragainstthehandlebar,
unfoldthehandlebartotheproperoperatingposition,
thenreleasetheblade-controlbar.
3.Tightenthehandlebarknobs.
2
AssemblingtheGrassBag
NoPartsRequired
Procedure
1.Inserttheframeintothegrassbag,keepingthehandle
abovethegrassbag(Figure4).
Figure4
1.Frame
2.Grassbag
7
Page 8
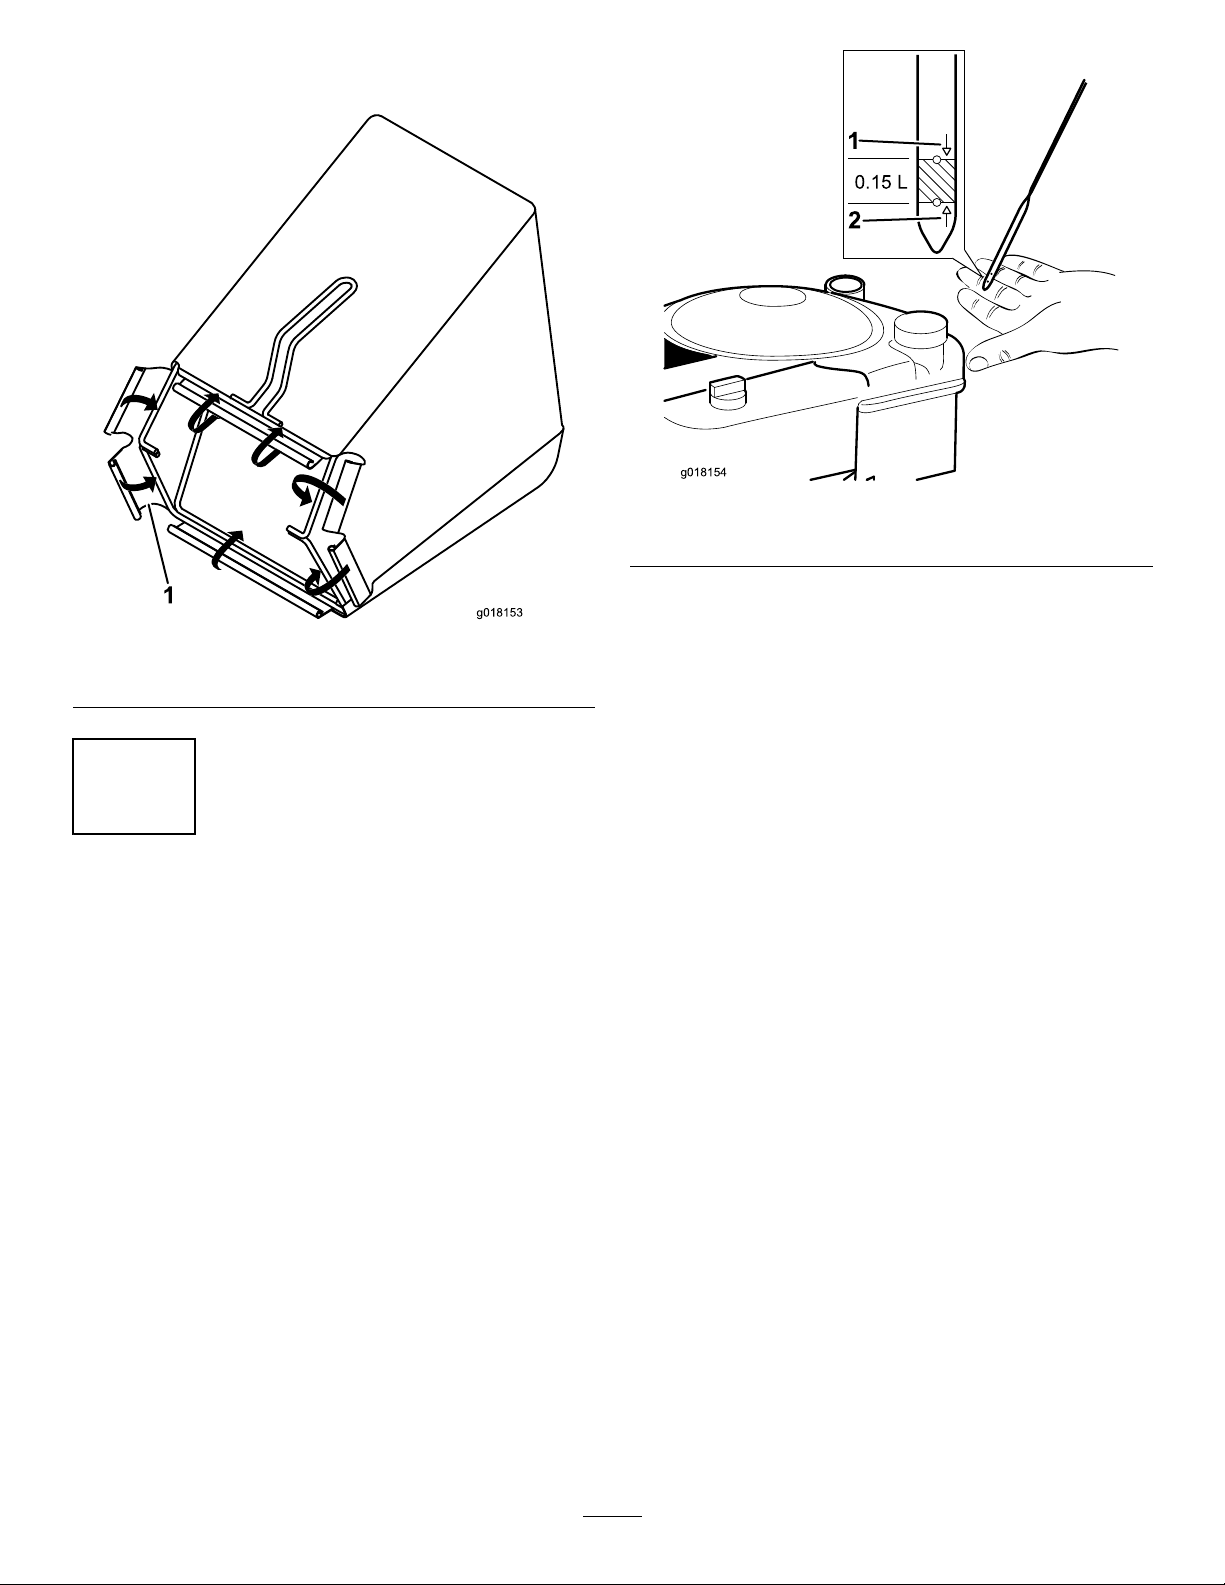
2.Attachtheplasticclipstothegrass-bagframe(Figure
g018153
1
g018154
0.15 L
1
2
5).
Figure5
1.Plasticclips
Figure6
1.Full2.Add
2.Slowlypouroilintotheoil-lltube,wait3minutes,
andchecktheoillevelonthedipstickbywipingthe
dipstickcleanandthenfullyinsertingthedipstickinto
thetube(Figure6).
3.Filltheenginewithoiluntiltheengineoillevelis
correctonthedipstick,asshowninFigure6.
3
FillingtheEnginewithOil
NoPartsRequired
Procedure
Yourmachinedoesnotcomewithoilintheengine.
Beforestartingtheengine,lltheenginewithoil.
Max.ll:0.59l(20oz),type:SAE30detergentoilwithan
APIserviceclassicationofSF,SG,SH,SJ,SL,orhigher.
1.Removethedipstick(Figure6).
Note:Ifyouoverlltheenginewithoil,removethe
excessoilasdirectedinChangingtheEngineOil(page
15).
4.Installthedipstickandtightenitsecurely.
Important:
operating hour s
toChangingtheEngineOil(page15).
Change the engine oil after the r st 5
;changeityearlythereafter;refer
8
Page 9

ProductOverview
7
8
9
10
11
12
13
14
15
16
g018149
1
2
3
4
5
6
g018150
1
2
3
4
5
6
7
8
9
Specications
ModelWeightLengthWidthHeight
0265651kg
(112lb)
156.5cm
(61.6
inches)
58.5cm
(23
inches)
108cm
(42.5
inches)
Figure7
1.Spark-plugwire
2.Enginecover10.Handlebar
3.Aircleaner
4.Fuel-llercap
5.Oil-llercap/dipstick13.Grass-bagassembly
6.Serialnumberlabel14.Reardeector
7.Handlebarknob
8.Recoil-starthandle16.Batterycover
1.Spark-plugwire
2.Exhaust7.Fuelcap
3.Exhaustguard8.Aircleaner
4.Cover9.Carburetor
5.Recoil-starthandle
9.Blade-controlbar
11.Self-propel-drivebar
12.Engine-speedcontroller
15.Height-of-cutadjuster
Figure8
6.Dipstick
9
Page 10

Operation
g018155
FillingtheFuelTank
DANGER
Gasolineisextremelyammableandexplosive.A
reorexplosionfromgasolinecanburnyouand
others.
•Topreventastaticchargefromignitingthe
gasoline,placethecontainerand/ormachine
directlyonthegroundbeforelling,notina
vehicleoronanobject.
•Fillthetankoutdoorswhentheengineiscold.
Wipeupspills.
•Donothandlegasolinewhensmokingoraround
anopenameorsparks.
•Storegasolineinanapprovedfuelcontainer,out
ofthereachofchildren.
RecommendedFuel:
Figure9
•Forbestresults,useonlyclean,fresh(lessthan30days
old),unleadedgasolinewithanoctaneratingof87or
higher((R+M)/2ratingmethod).
•Ethanol:Gasolinewithupto10%ethanol(gasohol)
or15%MTBE(methyltertiarybutylether)byvolume
isacceptable.EthanolandMTBEarenotthesame.
Gasolinewith15%ethanol(E15)byvolumeisnot
approvedforuse.Neverusegasolinethatcontainsmore
than10%ethanolbyvolume,suchasE15(contains15%
ethanol),E20(contains20%ethanol),orE85(contains
85%ethanol).Usingunapprovedgasolinemaycause
performanceproblemsand/orenginedamagewhichmay
notbecoveredunderwarranty.
•Donotusegasolinecontainingmethanol.
•Donotstorefueleitherinthefueltankorfuelcontainers
overthewinterunlessafuelstabilizerisused.
•Donotaddoiltogasoline.
10
Page 11

CheckingtheEngine-OilLevel
g018154
0.15 L
1
2
g018156
1
CAUTION
ServiceInterval:Beforeeachuseordaily
1.Removethedipstickandwipeitwithacleancloth.
2.Fullyinsertthedipstick.
3.Iftheoillevelislow,slowlypouroilintotheoil-ll
tube,wait3minutes,andchecktheoillevelonthe
dipstickbywipingthedipstickcleanandtheninserting
thedipstickintothetube(Figure10).
Iftheenginehasbeenrunning,themuferwillbe
hotandcanseverelyburnyou.
Keepawayfromthehotmufer.
1.Griptheleverandpullsidewaystodisengageitfrom
thelockingnotch(Figure11).
Figure11
Figure10
1.Full2.Add
4.Filltheenginewithoiluntilthedipstickindicatesthat
theengineoilleveliscorrectasshowninFigure10.If
youoverlltheenginewithoil,removetheexcessoil
asdirectedinCheckingtheEngine-OilLevel(page11).
5.Installthedipstickandtightenitsecurely.
Important:
operating hour s
toChangingtheEngineOil(page15).
Change the engine oil after the r st 5
;changeityearlythereafter.Refer
AdjustingtheCuttingHeight
WARNING
Adjustingthecuttingheightmaybringyouinto
contactwiththemovingblade,causingserious
injury.
•Stoptheengineandwaitforallmovingparts
tostop.
1.Height-of-cutadjustinglever
2.Pushitforwardstolowerorpullitbackwardstoraise
theheightofcut(Figure11).
3.Releasetheleverattherequiredpositionandensure
thatitlocksrmlyinto1ofthe8settingnotches
(Figure11).
•Donotputyourngersunderthehousingwhen
adjustingthecuttingheight.
11
Page 12

StartingtheEngine
g018157
1
2
g018158
1
UsingtheSelf-PropelDrive
1.Holdtheblade-controlbaragainstthehandlebar
(Figure12).
Figure12
1.Recoil-starthandle2.Blade-controlbar
Tooperatetheself-propeldrive,squeezetheself-propeldrive
bartowardthehandleandholditinplace(Figure13).
Figure13
1.Self-propel-drivebar
2.Pulltherecoil-starthandle(Figure12).
Important:T opreventdamagetothemachine,
neverpulltherecoilstarthandlewhentheengine
isrunning.
Note:Ifthemachinedoesnotstart,contactan
AuthorizedServiceDealer.
Todisengagetheself-propeldrive,releasetheself-propel-drive
bar.
12
Page 13

StoppingtheEngine
g018206
1
2
Releasetheblade-controlbar.
Important:Whenyoureleasethebladecontrolbar,
thebladeshouldstopwithin3seconds.Ifitdoesnot
stopproperly,stopusingyourmachineimmediatelyand
contactanAuthorizedServiceDealer.
OperatingTips
GeneralMowingTips
•Cleartheareaofsticks,stones,wire,branches,andother
debristhatthebladecouldhit.
•Avoidstrikingsolidobjectswiththeblade.Never
deliberatelymowoveranyobject.
BaggingtheClippings
Installthegrassbagtocollectgrassandleafclippingsfrom
thelawn.
WARNING
Aworngrassbagcouldallowdebristobethrown
andresultinseriouspersonalinjuryordeathtothe
operatororbystanders.
Checkthegrassbagfrequently.Ifitisdamaged,
installanewTororeplacementbag.
WARNING
Thebladeissharp;contactingthebladecanresult
inseriouspersonalinjury.
Stoptheengineandwaitforallmovingpartstostop
beforeleavingtheoperatingposition.
1.Stoptheengineandwaitforallmovingpartstostop.
•Ifthemachinestrikesanobjectorstartstovibrate,
immediatelystoptheengine,disconnectthewirefrom
thesparkplug,andexaminethemachinefordamage.
•Forbestperformance,installanewbladebeforethe
cuttingseasonbegins.
•ReplacethebladewhennecessarywithaToro
replacementblade.
CuttingGrass
•Cutonlyaboutathirdofthegrassbladeatatime.Donot
cutbelowthe51mm(2-inch)settingunlessthegrassis
sparseoritislatefallwhengrassgrowthbeginstoslow
down.RefertoAdjustingtheCuttingHeight.
•Whencuttinggrassover15cm(6inches)tall,mowatthe
highestcuttingheightsettingandwalkslower;thenmow
againatalowersettingforthebestlawnappearance.If
thegrassistoolong,themachinemayplugandcause
theenginetostall.
•Mowonlydrygrassorleaves.W etgrassandleavestend
toclumpontheyardandcancausethemachinetoplug
ortheenginetostall.
2.Raiseandholdupthereardeector.
3.Hookthegrassbagintoposition(Figure14).
Figure14
1.Reardeector2.Grassbag
4.Lowerthereardeector.
WARNING
Wetgrassorleavescancauseseriousinjuryif
youslipandcontacttheblade.Mowonlyindry
conditions.
•Alternatethemowingdirection.Thishelpsdispersethe
clippingsoverthelawnforevenfertilization.
•Ifthenishedlawnappearanceisunsatisfactory,tryone
ormoreofthefollowing:
–Replacethebladeorhaveitsharpened.
–Walkataslowerpacewhilemowing.
–Raisethecuttingheightonyourmachine.
–Cutthegrassmorefrequently.
–Overlapcuttingswathsinsteadofcuttingafullswath
witheachpass.
CuttingLeaves
Aftercuttingthelawn,ensurethathalfofthelawnshows
throughthecutleafcover.Youmayneedtomakemorethan
onepassovertheleaves.
13
Page 14

Maintenance
g018207
Note:Determinetheleftandrightsidesofthemachinefromthenormaloperatingposition.
RecommendedMaintenanceSchedule(s)
MaintenanceService
Interval
Aftertherst5hours
Beforeeachuseordaily
Every25hours
Every50hours
Beforestorage
Yearly
Important:Refertoyour
MaintenanceProcedure
•Changetheengineoil.
•Checktheengineoillevel.
•Ensurethattheenginestopswithin3secondsafterreleasingthebladecontrolbar.
•Cleangrassclippingsanddirtfromunderthemachine.
•Replacetheairlter.
•Checktheself-propelcableandadjustifneeded.
•Replacethebladeorhaveitsharpened(morefrequentlyiftheedgedullsquickly).
•Sharpentheblade.
•Changetheengineoil.
•Emptythefueltankbeforerepairsasdirectedandbeforeannualstorage.
•Refertoyourengineoperator'smanualforanyadditionalyearlymaintenance
procedures.
engine operator's man ual
PreparingforMaintenance
1.Stoptheengineandwaitforallmovingpartstostop.
2.Disconnectthespark-plugwirefromthesparkplug
(Figure15)beforeperforminganymaintenance
procedure.
foradditionalmaintenanceprocedures.
Important:Beforetippingthemachinetochange
theoilorreplacetheblade,allowthefueltankto
rundrythroughnormalusage.Ifyoumusttip
themachinepriortorunningoutoffuel,usea
handfuelpumptoremovethefuel.Alwaystipthe
machineontoitssidewiththeairlterup.
Figure15
3.Afterperformingthemaintenanceprocedure(s),
connectthespark-plugwiretothesparkplug.
WARNING
Tippingthemachinemaycausethefuelto
leak.Gasolineisammable,explosive,and
cancausepersonalinjury.
Runtheenginedryorremovethegasoline
withahandpump;neversiphon.
ReplacingtheAirFilter
ServiceInterval:Every25hours
1.Performthepre-maintenanceprocedures;referto
PreparingforMaintenance(page14).
2.Loosentheknobsecuringtheair-ltercover(Figure
16).
14
Page 15

g018161
1
2
3
4
Figure16
g018154
0.15 L
1
2
g018162
Figure17
1.Full2.Add
3.Tipthemachineontoitsside,withtheairlterup,to
draintheusedoiloutthroughtheoil-lltube(Figure
18).
1.Knob
2.Air-ltercover4.Foamlter
3.Cartridge
3.Removethecover.
4.Carefullyremovethefoamlterandthecartridge
together,thenseparatethefoamlterfromthe
cartridge(Figure16).
5.Ifthelterisextremelydirty,replaceit.
6.Placethelterbackintothecartridge,thenplaceboth
intotheairlter.
7.Installthecover(Figure16).
Figure18
ChangingtheEngineOil
ServiceInterval:Aftertherst5hours
Every50hours
Runtheengineafewminutesbeforechangingtheoiltowarm
it.Warmoilowsbetterandcarriesmorecontaminants.
1.Performthepre-maintenanceprocedures;referto
PreparingforMaintenance(page14).
4.Slowlypouroilintotheoillltube,wait3minutes,
andchecktheengineoillevelonthedipstickbywiping
thedipstickcleanandtheninsertingitintothetube
(Figure17).
Note:Max.ll:20oz(0.59l),type:SAE30detergent
oilwithanAPIserviceclassicationofSF,SG,SH,
SJ,SL,orhigher
2.Removethedipstickandwipeitwithacleancloth
(Figure17).
15
Page 16

5.Filltheenginewithoiluntilthedipstickindicatesthat
g018190
11
g018191
1
g018192
1
2
theengineoilleveliscorrectasshowninFigure17.If
youoverlltheenginewithoil,removetheexcessoil.
6.Installthedipstickandtightenitsecurely.
7.Disposeoftheusedoilproperlyatalocalrecycling
center.
AdjustingtheSelf-Propel Cable
ServiceInterval:Every25hours
1.Stoptheengine.
2.Pullthemachinebackwardwhileslowlyengagingthe
self-propelbaruntiltherearrollerslock.
Note:Theself-propelbarshouldnowbe6cm(2-3/8
inches)fromthehandlebar.
Figure20
1.Cableadjuster
4.Checkthespringontheself-propelcableattachedto
thegearboxtoensureitissetcorrectly.
Figure19
1.6cm(2-3/8inches)
3.Ifthedistancebetweentheself-propelbarandthe
handlebarislessthan6cm(2-3/8inches),adjustthe
blackplasticcableadjustertosetthecorrectdistance.
Note:Usethemetaladjuster,andmakesurethatthe
plasticadjusterisfullywoundin
Figure21
1.1.3cm(1/2inch)2.Self-propelspring
5.Oncethespringissetcorrectly,tightentheinnernut
tosecureitinplace.
16
Page 17

g018193
1
2
3
Figure22
1
2
3
g018163
Figure23
1.Metaladjuster
2.Innernut
3.Self-propelcable
ReplacingtheBlade
ServiceInterval:Every25hours—Replacethebladeorhave
itsharpened(morefrequentlyiftheedge
dullsquickly).
Important:
blade pr oper l y
areuncomfortableperformingthisprocedure,contact
anAuthorizedServiceDealer.
Examinethebladewheneveryourunoutofgasoline.Ifthe
bladeisdamagedorcracked,replaceitimmediately.Ifthe
bladeedgeisdullornicked,haveitsharpenedorreplaceit.
WARNING
Thebladeissharp;contactingthebladecanresult
inseriouspersonalinjury.
Weargloveswhenservicingtheblade.
1.Disconnectthesparkplugwirefromthesparkplug.
RefertoPreparingforMaintenance(page14).
2.Tipthemachineontoitssidewiththeairlterup.
3.Useablockofwoodtoholdthebladesteady.
Y ou will need a torque wr ench to install the
.Ifyoudonothaveatorquewrenchor
1.Bolt
2.Springwasher
6.Assemblethebladewiththeturnedupedgesfacing
towardtheengine.
7.Securethenewbladeinplacewiththebolt,washer,
andspacerthatyouremovedpreviously(Figure23).
8.Useatorquewrenchtotightenthebladeboltto
54N-m(40ft-lb).
Important:Abolttorquedto40ft-lb(54N-m)is
verytight.Whileholdingthebladewithablock
ofwood,putyourweightbehindtheratchetor
wrenchandtightentheboltsecurely.Thisboltis
verydifculttoovertighten.
3.Spacer
SharpeningtheBlade
ServiceInterval:Every25hours
Aslightlywornblademaybere-sharpened.Bothbladeedges
mustbesharpenedequallytoensurebalance.
1.Removethebladefromthemachine;refertoReplacing
theBlade(page17).
2.Cleanthebladeusingabrushandwater,theninspect
thebladeforsignsofdamage.
3.Sharpenbothcuttingedgeswithaatle.
4.Usingaglovedhand,griptheendoftheblade.
5.Removethebolt,washer,andspacer,thenremovethe
blade(Figure23).
17
Page 18

g018194
30° - 45°
Figure24
g018195
g018196
4.Slideascrewdriverthroughthecenterholeandhold
thebladehorizontal.
Note:Abalancedbladewillremainhorizontal.
Figure26
CleaningtheMachine
ServiceInterval:Beforeeachuseordaily
WARNING
Themachinemaydislodgematerialfromunderthe
machinehousing.
•Weareyeprotection.
•Stayintheoperatingposition(behindthe
handle)whentheengineisrunning.
•Donotallowbystandersinthearea.
Forbestresults,cleanthemachinesoonafteryouhave
completedmowing.
Note:Neverspraytheenginewithwaterduringcleaning.
•Cleanupanyoilorfuelspill.
Figure25
5.Sharpentheheavyenduntilthebladeiscorrectly
balanced.
Note:Ifthebladeisnotbalanced,theheavyendwill
rotatedown.
•Removeallgrassanddebrisfromtheengineincluding
theexhaust/exhaustguard,theairwaysinthetopcowl,
andthesurroundingdeckusingabrushorcompressed
air(Figure27).
18
Page 19

g018164
Figure27
g018165
•Removegrassdebrisfromthetopandundersideofthe
deckhousingimmediatelyafteruse(Figure28).
Storage
Storethemachineinacool,clean,dryplace.
PreparingtheMachinefor Storage
WARNING
Gasolinevaporscanexplode.
•Donotstoregasolinemorethan30days.
•Donotstorethemachineinanenclosurenear
anopename.
•Allowtheenginetocoolbeforestoringit.
1.Onthelastrefuelingoftheyear,addfuelstabilizerto
thefuelasdirectedbytheenginemanufacturer.
2.Runthemachineuntiltheenginestopsfromrunning
outoffuel.
3.Allowtheenginetorununtilitstops.Whenyoucan
nolongerstarttheengine,itissufcientlydry.
Figure28
•Thoroughlycleanthemachinedeckimmediatelyafter
useontreatedgrass.
4.Removethewirefromthesparkplugandleaveloose.
5.Removethesparkplug,add15ml(0.5oz)ofoil
throughthesparkplughole,andpullthestarterrope
slowlyseveraltimestodistributeoilthroughoutthe
cylindertopreventcylindercorrosionduringthe
off-season.
6.Installthesparkplugandtightenitwithatorque
wrenchto20N-m(15ft-lb).
7.Tightenallnuts,bolts,andscrews.
19
Page 20

FoldingtheHandle
g018166
1
1.Loosenthehandlebarknobs.
2.Rotatethehandleforward(Figure29).
Important:Routethecablestotheoutsideofthe
handlebarknobsasyoufoldtheupperhandle.
Figure29
1.Handlebarknob
RemovingtheMachinefrom Storage
Referto1UnfoldingtheHandle(page6)forremovingthe
machinefromstorage.
Connectthewiretothesparkplug.
20
Page 21

Notes:
21
Page 22

Notes:
22
Page 23

InternationalDistributorList
Distributor:
AgrolancKft
BalamaPrimaEngineeringEquip.HongKong85221552163
B-RayCorporation
CascoSalesCompany
CeresS.A.CostaRica
CSSCTurfEquipment(pvt)Ltd.SriLanka
CyrilJohnston&Co.
CyrilJohnston&Co.RepublicofIreland
EquiverMexico525553995444ParklandProductsLtd.NewZealand6433493760
FemcoS.A.Guatemala
ForGarderOU
G.Y .K.CompanyLtd.
GeomechanikiofAthensGreece
GolfinternationalTurizm
GuandongGoldenStarChina
HakoGroundandGardenSweden
HakoGroundandGarden
HayterLimited(U.K.)
HydroturfInt.CoDubai
HydroturfEgyptLLC
IrrimacPortugal351212388260ToroEuropeNVBelgium3214562960
IrrigationProductsInt'lPvtLtd.India0091442449
JeanHeybroekb.v.Netherlands3130639461 1VictusEmakPoland48618238369
Country:
Hungary3627539640
Korea82325512076
PuertoRico7877888383
NorthernIreland442890813121
Estonia3723846060
Japan81726325861
Turkey902163365993Riversa
Norway4722907760
UnitedKingdom441279723444
UnitedArabEmirates97143479479T-MarktLogisticsLtd.Hungary3626525500
Egypt2025194308ToroAustraliaAustralia61395807355
PhoneNumber:Distributor:
5062391 138
94112746100
442890813121
5024423277
30109350054
862087651338
4635100000
4387
Country:
MaquiverS.A.Colombia
MaruyamaMfg.Co.Inc.
Mountelda.s.CzechRepublic
Mountelda.s.Slovakia
MunditolS.A.
NormaGarden
OslingerTurfEquipmentSA
OyHakoGroundandGarden
Ab
Perfetto
PratoverdeSRL.
Prochaska&Cie
RTCohen2004Ltd.
LelyTurfcare
SolvertS.A.S.
SpyprosStavrinidesLimitedCyprus
SurgeSystemsIndiaLimited
ValtechMorocco21253766
Japan81332522285
Argentina54114821
Russia74954116120
Ecuador59342396970
Finland35898700733
Poland48618208416
Italy390499128
Austria4312785100
Israel97298617979
Spain
Denmark4566109200
France331308177
India911292299901
Phone
Number:
5712364079
420255704
220
420255704
220
9999
128
34952837500
00
35722434131
3636
EuropeanPrivacyNotice
TheInformationT oroCollects
ToroWarrantyCompany(Toro)respectsyourprivacy .Inordertoprocessyourwarrantyclaimandcontactyouintheeventofaproductrecall,weaskyou
tosharecertainpersonalinformationwithus,eitherdirectlyorthroughyourlocalT orocompanyordealer.
TheTorowarrantysystemishostedonserverslocatedwithintheUnitedStateswhereprivacylawmaynotprovidethesameprotectionasapplies
inyourcountry.
BYSHARINGYOURPERSONALINFORMATIONWITHUS,YOUARECONSENTINGTOTHEPROCESSINGOFYOURPERSONALINFORMATION
ASDESCRIBEDINTHISPRIVACYNOTICE.
TheWayToroUsesInformation
Toromayuseyourpersonalinformationtoprocesswarrantyclaims,tocontactyouintheeventofaproductrecallandforanyotherpurposewhichwetell
youabout.ToromayshareyourinformationwithToro'safliates,dealersorotherbusinesspartnersinconnectionwithanyoftheseactivities.Wewillnot
sellyourpersonalinformationtoanyothercompany.Wereservetherighttodisclosepersonalinformationinordertocomplywithapplicablelawsand
withrequestsbytheappropriateauthorities,tooperateoursystemsproperlyorforourownprotectionorthatofotherusers.
RetentionofyourPersonalInformation
Wewillkeepyourpersonalinformationaslongasweneeditforthepurposesforwhichitwasoriginallycollectedorforotherlegitimatepurposes
(suchasregulatorycompliance),orasrequiredbyapplicablelaw.
Toro'sCommitmenttoSecurityofY ourPersonalInformation
Wetakereasonableprecautionsinordertoprotectthesecurityofyourpersonalinformation.Wealsotakestepstomaintaintheaccuracyandcurrent
statusofpersonalinformation.
AccessandCorrectionofyourPersonalInformation
Ifyouwouldliketorevieworcorrectyourpersonalinformation,pleasecontactusbyemailatlegal@toro.com.
AustralianConsumerLaw
AustraliancustomerswillnddetailsrelatingtotheAustralianConsumerLaweitherinsidetheboxoratyourlocalT oroDealer.
374-0269RevH
Page 24

TheToroTotalCoverageGuarantee
ALimitedWarranty
ConditionsandProductsCovered
TheT oroCompanyanditsafliate,T oroWarrantyCompany ,pursuant
toanagreementbetweenthem,jointlywarrantyourToroCommercial
product(“Product”)tobefreefromdefectsinmaterialsorworkmanship
fortwoyearsor1500operationalhours*,whicheveroccursrst.This
warrantyisapplicabletoallproductswiththeexceptionofAerators
(refertoseparatewarrantystatementsfortheseproducts).Wherea
warrantableconditionexists,wewillrepairtheProductatnocosttoyou
includingdiagnostics,labor,parts,andtransportation.Thiswarranty
beginsonthedatetheProductisdeliveredtotheoriginalretailpurchaser .
*Productequippedwithanhourmeter.
InstructionsforObtainingWarrantyService
YouareresponsiblefornotifyingtheCommercialProductsDistributoror
AuthorizedCommercialProductsDealerfromwhomyoupurchasedthe
Productassoonasyoubelieveawarrantableconditionexists.Ifyouneed
helplocatingaCommercialProductsDistributororAuthorizedDealer,or
ifyouhavequestionsregardingyourwarrantyrightsorresponsibilities,
youmaycontactusat:
ToroCommercialProductsServiceDepartment
ToroWarrantyCompany
811 1LyndaleAvenueSouth
Bloomington,MN55420-1196
952–888–8801or800–952–2740
E-mail:commercial.warranty@toro.com
OwnerResponsibilities
AstheProductowner,youareresponsibleforrequiredmaintenanceand
adjustmentsstatedinyourOperator'sManual.Failuretoperformrequired
maintenanceandadjustmentscanbegroundsfordisallowingawarranty
claim.
ItemsandConditionsNotCovered
Notallproductfailuresormalfunctionsthatoccurduringthewarranty
periodaredefectsinmaterialsorworkmanship.Thiswarrantydoesnot
coverthefollowing:
•Productfailureswhichresultfromtheuseofnon-Tororeplacement
parts,orfrominstallationanduseofadd-on,ormodiednon-T oro
brandedaccessoriesandproducts.Aseparatewarrantymaybe
providedbythemanufactureroftheseitems.
•Productfailureswhichresultfromfailuretoperformrecommended
maintenanceand/oradjustments.Failuretoproperlymaintainyour
ToroproductpertheRecommendedMaintenancelistedinthe
Operator’sManualcanresultinclaimsforwarrantybeingdenied.
•ProductfailureswhichresultfromoperatingtheProductinanabusive,
negligent,orrecklessmanner .
•Partssubjecttoconsumptionthroughuseunlessfoundtobedefective.
Examplesofpartswhichareconsumed,orusedup,duringnormal
Productoperationinclude,butarenotlimitedto,brakepadsand
linings,clutchlinings,blades,reels,rollersandbearings(sealedor
greasable),bedknives,sparkplugs,castorwheelsandbearings,tires,
lters,belts,andcertainsprayercomponentssuchasdiaphragms,
nozzles,andcheckvalves,etc.
•Failurescausedbyoutsideinuence.Conditionsconsideredtobe
outsideinuenceinclude,butarenotlimitedto,weather,storage
practices,contamination,useofunapprovedfuels,coolants,lubricants,
additives,fertilizers,water,orchemicals,etc.
•Failureorperformanceissuesduetotheuseoffuels(e.g.gasoline,
diesel,orbiodiesel)thatdonotconformtotheirrespectiveindustry
standards.
•Normalnoise,vibration,wearandtear,anddeterioration.
•Normal“wearandtear”includes,butisnotlimitedto,damagetoseats
duetowearorabrasion,wornpaintedsurfaces,scratcheddecalsor
windows,etc.
Parts
Partsscheduledforreplacementasrequiredmaintenancearewarranted
fortheperiodoftimeuptothescheduledreplacementtimeforthatpart.
Partsreplacedunderthiswarrantyarecoveredforthedurationofthe
originalproductwarrantyandbecomethepropertyofToro.T orowillmake
thenaldecisionwhethertorepairanyexistingpartorassemblyorreplace
it.Toromayuseremanufacturedpartsforwarrantyrepairs.
DeepCycleandLithium-IonBatteryWarranty:
DeepcycleandLithium-Ionbatterieshaveaspeciedtotalnumberof
kilowatt-hourstheycandeliverduringtheirlifetime.Operating,recharging,
andmaintenancetechniquescanextendorreducetotalbatterylife.Asthe
batteriesinthisproductareconsumed,theamountofusefulworkbetween
chargingintervalswillslowlydecreaseuntilthebatteryiscompletelyworn
out.Replacementofwornoutbatteries,duetonormalconsumption,
istheresponsibilityoftheproductowner.Batteryreplacementmaybe
requiredduringthenormalproductwarrantyperiodatowner’sexpense.
Note:(Lithium-Ionbatteryonly):ALithium-Ionbatteryhasapartonly
proratedwarrantybeginningyear3throughyear5basedonthetime
inserviceandkilowatthoursused.RefertotheOperator'sManualfor
additionalinformation.
MaintenanceisatOwner’sExpense
Enginetune-up,lubrication,cleaningandpolishing,replacementoflters,
coolant,andcompletingrecommendedmaintenancearesomeofthe
normalservicesT oroproductsrequirethatareattheowner’sexpense.
GeneralConditions
RepairbyanAuthorizedT oroDistributororDealerisyoursoleremedy
underthiswarranty.
NeitherTheToroCompanynorToroW arrantyCompanyisliablefor
indirect,incidentalorconsequentialdamagesinconnectionwiththe
useoftheT oroProductscoveredbythiswarranty,includingany
costorexpenseofprovidingsubstituteequipmentorserviceduring
reasonableperiodsofmalfunctionornon-usependingcompletion
ofrepairsunderthiswarranty.ExceptfortheEmissionswarranty
referencedbelow,ifapplicable,thereisnootherexpresswarranty.All
impliedwarrantiesofmerchantabilityandtnessforusearelimitedto
thedurationofthisexpresswarranty.
Somestatesdonotallowexclusionsofincidentalorconsequential
damages,orlimitationsonhowlonganimpliedwarrantylasts,sotheabove
exclusionsandlimitationsmaynotapplytoyou.Thiswarrantygivesyou
speciclegalrights,andyoumayalsohaveotherrightswhichvaryfrom
statetostate.
Noteregardingenginewarranty:
TheEmissionsControlSystemonyourProductmaybecoveredby
aseparatewarrantymeetingrequirementsestablishedbytheU.S.
EnvironmentalProtectionAgency(EPA)and/ortheCaliforniaAirResources
Board(CARB).Thehourlimitationssetforthabovedonotapplytothe
EmissionsControlSystemWarranty .RefertotheEngineEmissionControl
WarrantyStatementsuppliedwithyourproductorcontainedintheengine
manufacturer’sdocumentationfordetails
CountriesOtherthantheUnitedStatesorCanada
CustomerswhohavepurchasedT oroproductsexportedfromtheUnitedStatesorCanadashouldcontacttheirT oroDistributor(Dealer)toobtain
guaranteepoliciesforyourcountry,province,orstate.IfforanyreasonyouaredissatisedwithyourDistributor'sserviceorhavedifcultyobtaining
guaranteeinformation,contacttheToroimporter.
374-0253RevB
 Loading...