

HandlebarExtensionKit
HoverPro
ModelNo.02628
Installation
MediaandAdditionalParts
FormNo.3449-865RevA
®
450/550Machine
InstallationInstructions
Description
Handlebarextension1
Operator-presencecontrolcable
Handwheelknobs2
U-bolt2
Cabletie
Note:Retainallremovedpartsforlaterinstallation
unlessotherwiseindicated.
1.Shutofftheengine,removethekey(if
equipped),waitforallmovementtostop,and
allowthemachinetocool.
2.Removetheoperator-presencecontrolcable
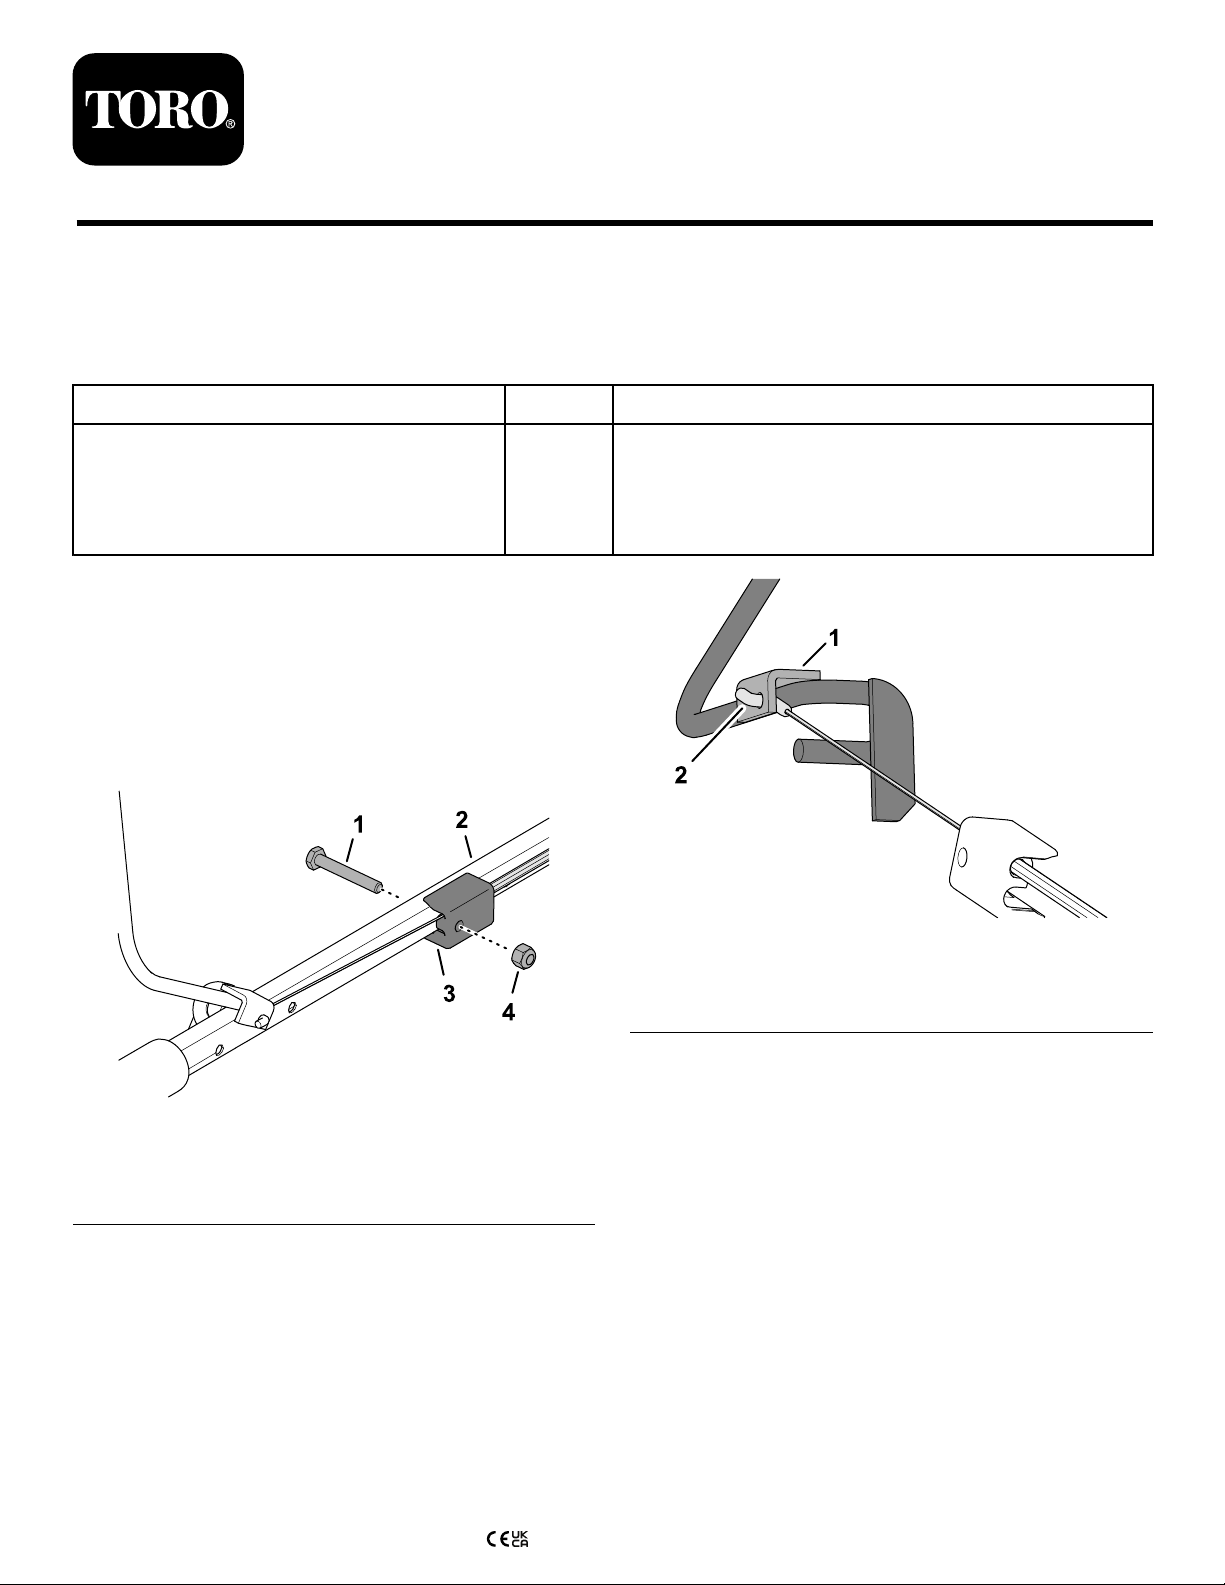
fromthehandlebar(Figure1).
Qty.
Use
1
Installthehandlebarextensionkit.
3
g367355
Figure2
1.Operator-presencebail
bracket
2.Cabletting
Figure1
1.Bolt(1/4x1-3/4inches)3.Handlebartting
2.Upperhandlebar
4.Locknut(1/4inch)
3.Disconnecttheremovedcablefromthe
operator-presencebailbracketbyanglingthe
cablettingfree(Figure2).
©2021—TheT oro®Company
8111LyndaleAvenueSouth
Bloomington,MN55420
Registeratwww.T oro.com.
4.Removetheotherendoftheremovedcable
g367354
fromtheengine.
Important:Notehowthecableisconnected
totheengine,thenewcableisinstalledin
thesameway.
Note:Youmaydiscardtheremoved
operator-presencecontrolcable.
5.Removethe2handwheelknobs,washers,and
U-boltsthatsecuretheupperhandlebartothe
lowerhandlebar(Figure3).
OriginalInstructions(EN)
PrintedintheUK.
AllRightsReserved
*3449-865*

Figure3
1.Lowerhandlebar4.Upperhandlebar
2.Handwheelknob5.U-bolt
3.Washer(6mm)
6.Securethehandlebarextensiontothelower
handlebarusingthe2handwheelsand2U-bolts
provided(Figure4).
g364684
g373226
Figure4
1.Operator-presencecontrol
cable
2.Handwheel4.Handlebarextension
3.U-bolt
7.Usingthe2handwheelsand2U-boltsyou
removedinstep5,securetheupperhandlebar
tothehandlebarextension(Figure3).
8.Usethemountingfastenersyouremovedinstep
2,securetheprovidedlongeroperator-presence
controlcabletotheupperhandlebar(Figure1).
9.Connectthenewlyinstalledcabletothe
operator-presencebailbracketasshownin
Figure2.
10.Hooktheloosecablettingonthenewcable
intotheywheelbrakelever,thenpullthebrake
controlcabletautandslideitintothebracket
asshowninFigure5.
2
 Loading...