

Torklift A7720R, A7720RS Important Owner-operator Installation Instructions

IMPORTANT OWNER-OPERATOR INSTALLATION
INSTRUCTIONS
A7720R, A7720RS
Warning!!
This battery box is made of aluminum and is
conductive! Do not allow the battery terminals to touch the aluminum
battery box. Be careful not to touch the battery box with a wrench while
tightening the battery terminals, as this could cause a short!
Version 1 BY: CW 5/11/2015
TECH SUPPORT (800) 246-8132

1
Replacement Battery Mats
The battery mat included with the Power Armor Battery
Box is acid neutralizing, and will help reduce any corrosion
from spilled battery acid. It is a “wear” item and may
eventually need to be replaced. New battery mats are
available through Torklift International. Part numbers
below.
PN: A7722- A7720R(S)/A7720R(S) Battery Mat
Inventory List
A7720R/A7720RS
Item:
Quantity:
Power Armor Battery Box
1
Power Armor Lid (preassembled)
1
Battery Mat 16”
1
Battery Strap
1
Angle Extensions
2
1/4" x 5/8” x 1/4" Nylon Spacer
4
1/4" x 1” Self-Drilling Screw
6
1/4"-20 x 1” SS Hex Bolt
6
1/4"-20 x 2” SS Hex Bolt
4
1/4"-20 SS Nylock Nuts
8
1/4" USS SS Flat Washers
16
15A Fuse Holder (Solar Models Only)
1
6A Regulator (preassembled)
1
7/16” Square Profile O-rings
6
2
Step 1:
Remove the Power Armor Lid by sliding the lid away from the side with
the lock, then lifting the front edge and unhooking the lid from the tabs on
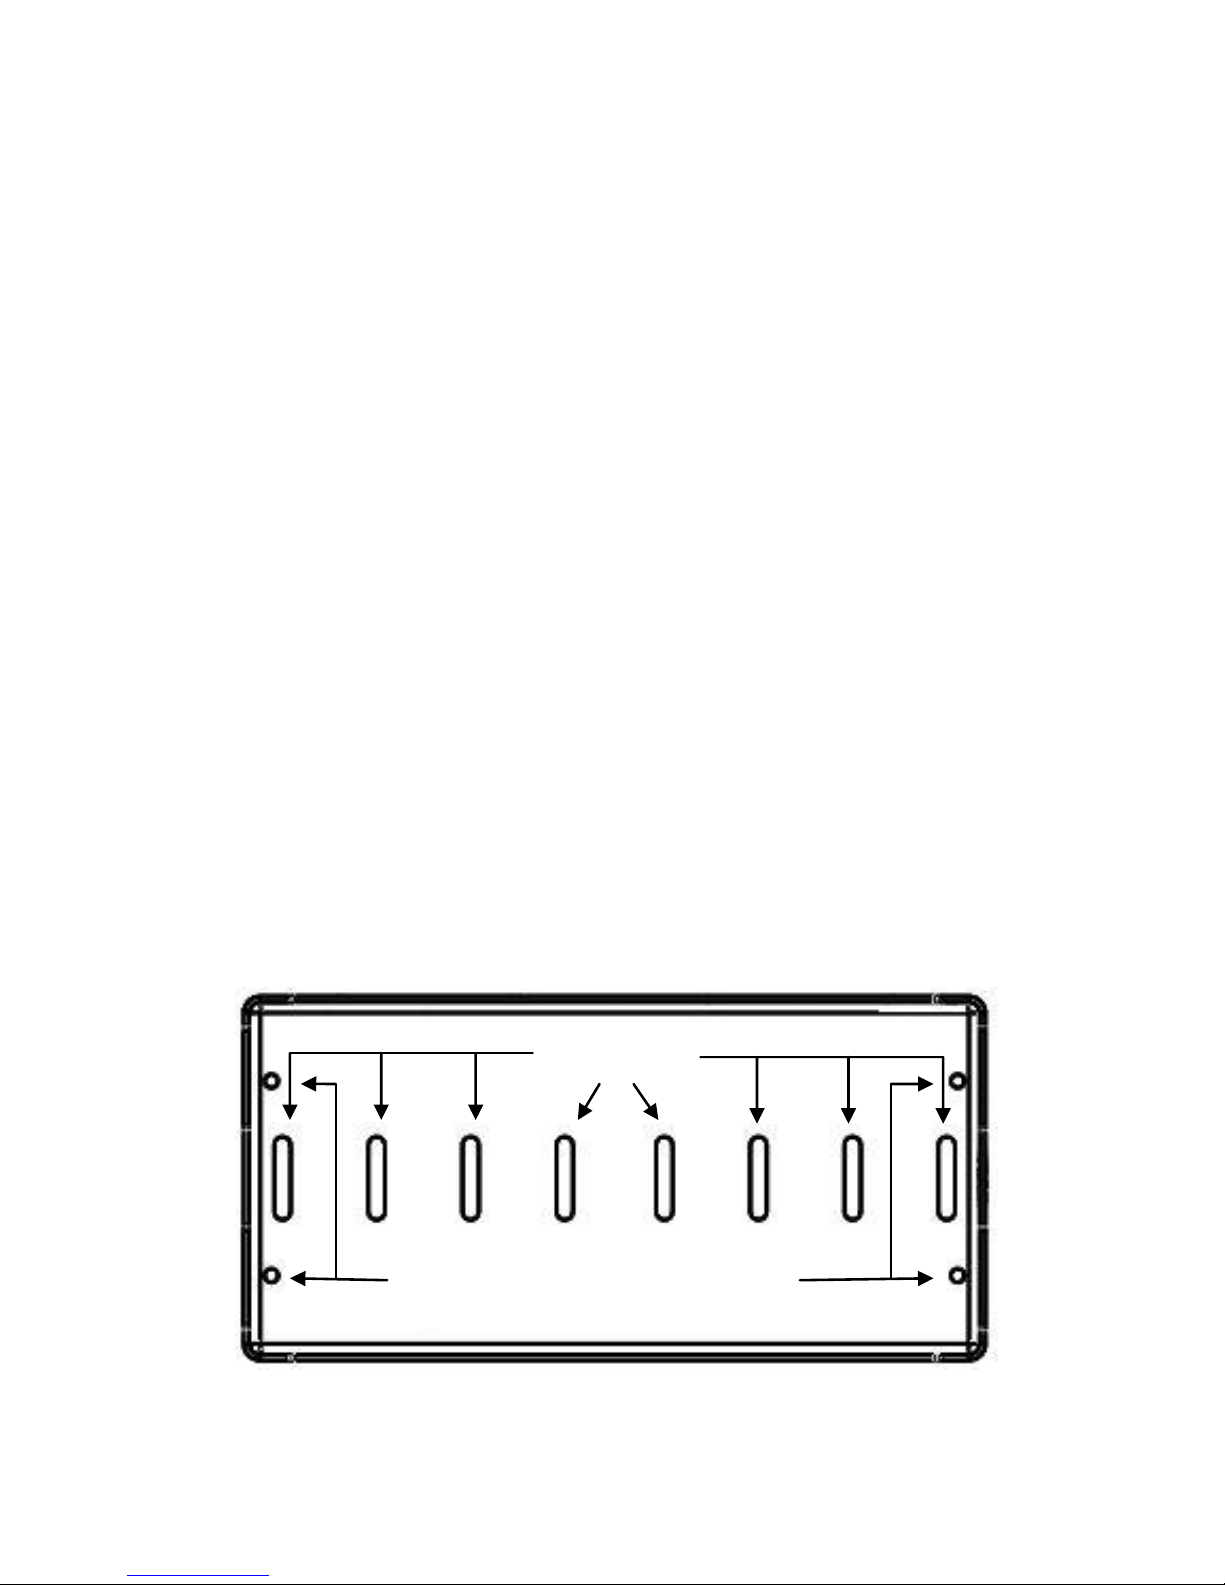
the rear of the box. The Power Armor Battery Box has slots cut into the
bottom of the box. Use a sharp knife to make an incision in the Battery Mat
over each of the slots you plan to use for the battery strap.
Step 2:
On one side of the Power Armor Battery Box, insert the non-buckled end
of the Battery Strap down through the one of the slots you plan to use and
back up through the other slot (see figure 2.1 for slot locations.) Leave
approximately 10” of the buckled end inside of the box.
Battery Slots
Figure 2.1
Angle Extension Mounting Holes

3
Depending on mounting, the battery strap will not be able to slide through
the slots after the box is mounted. Place a battery into the Power Armor
Battery Box and adjust the Battery Straps into a suitable position on both
sides. Remove the battery and Battery Mat before proceeding.
Step 3:
The 2” hole in the front/back panel of the Power Armor Battery Box is
used to allow the battery cables to enter the battery box. It can be mounted
towards either the front or back as long as there is sufficient room to open
and remove the Power Armor Lid.
The A7720R and A7720RS power armor battery boxes may be mounted in
two ways.
Option 1: Universal mounting Page 4
Option 2: Mounting over the stock angle rails Page 5
4
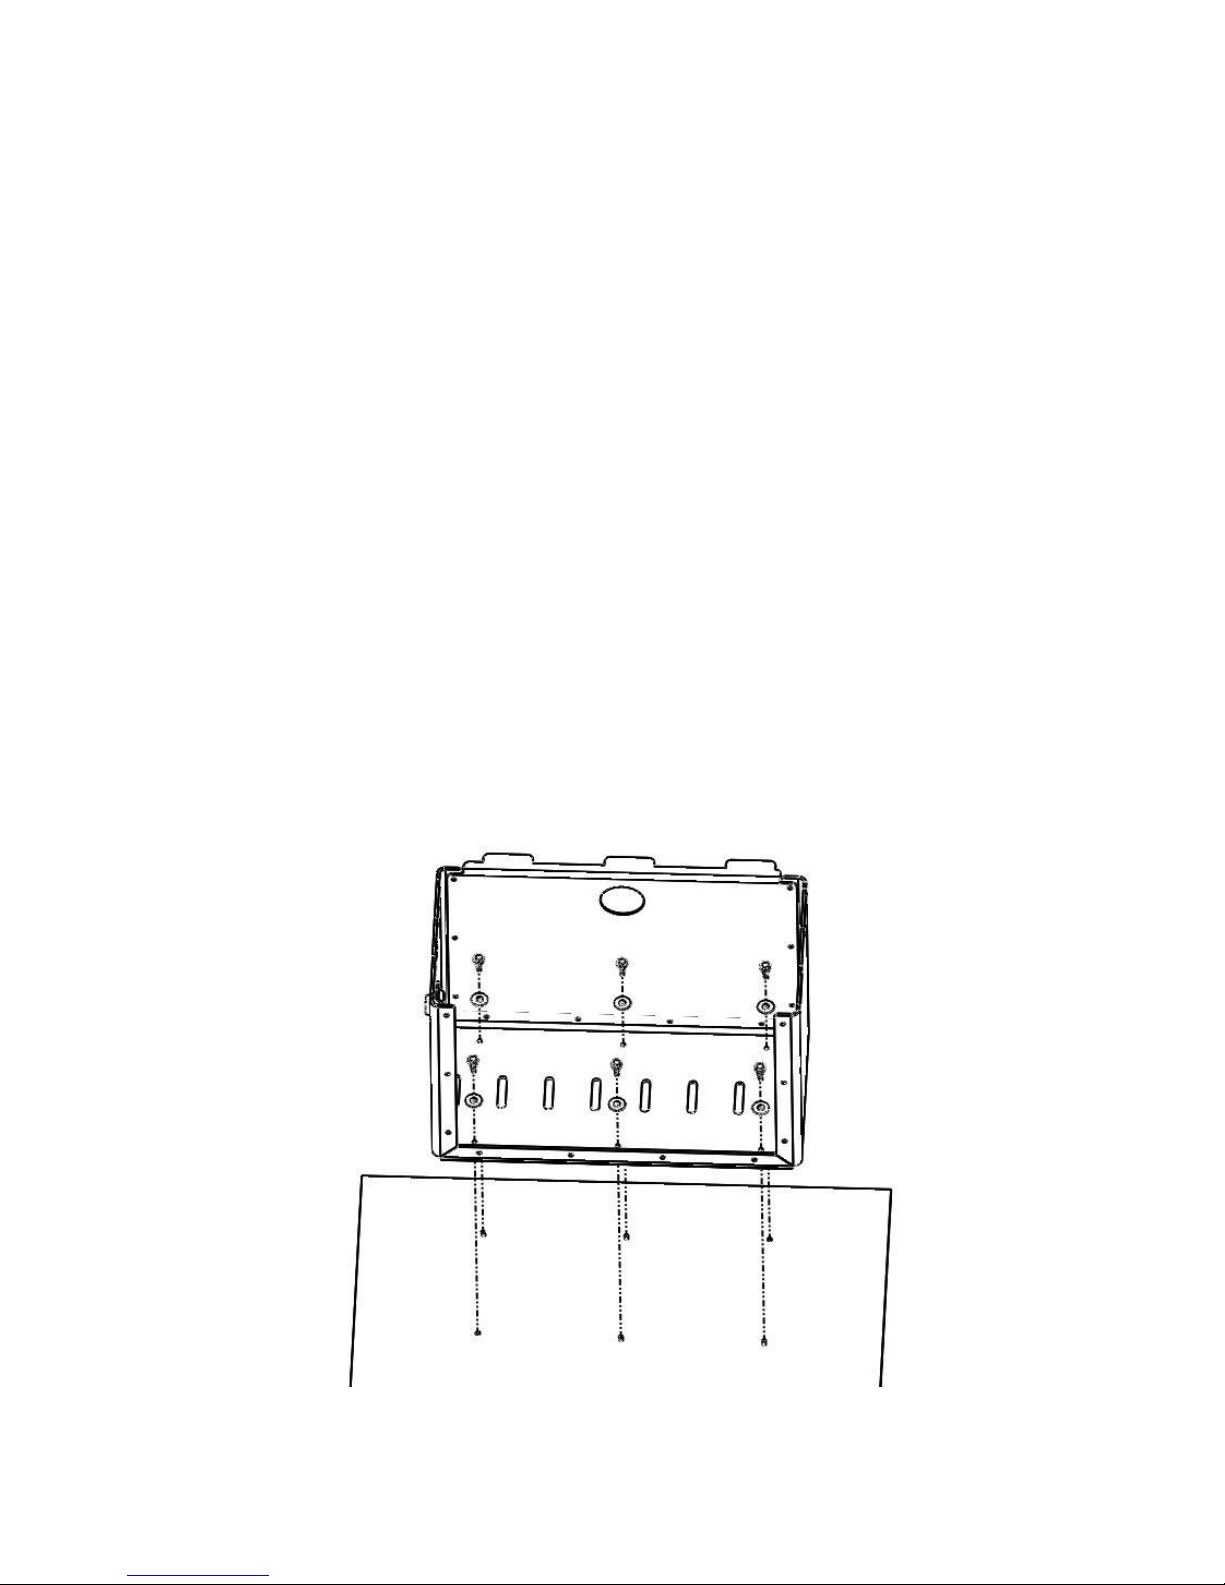
Step 3 – Option 1
Place the Power Armor Battery Box on top of the mounting surface. Mark
four to six locations in the box where it will screw down, and drill a 3/16”
pilot hole in each. Use the 1/4" x 1” Self-Drilling Screws and 1/4" SS USS
Flat Washers to screw the Power Armor Battery Box down onto the
surface. See figure 3.1. Place a 7/16” square profile O-ring around the
head of each screw to protect the battery mat from abrasion.
1/4”-20 x 1” SS Hex Bolts, 1/4" USS SS Flat Washers, and 1/4”-20 SS
Nylock Nuts have been included if you would prefer to use them instead of
the self drill screws. If using the hex bolts, the holes will need to be drilled
to 1/4” instead of 3/16”.
Proceed to step 4.
Figure 3.1
 Loading...