

Page 1
TOK2000-F007 / EA98670 / FCC ID: ARSM560S
Your Work Never Looked Better
USER MANUAL
TABL E OF CO NTENTS
FOR YOUR SAFETY -------------------------------------------------- 1
SAFETY PRECAUTIONS -------------------------------------- 2
BEFORE YOU OPERATE THE MONITOR ----------------------3
FEATURES -------------------------------------------------------- 3
PACKING LIST --------------------------------------------------- 3
INSTALLATION INSTRUCTIONS --------------------------- 3
CONTROLS AND CONNECTORS -------------------------- 4
OPERATING INSTRUCTIONS ------------------------------------- 5
GENERAL INSTRUCTIONS ---------------------------------- 5
HOW TO ADJUST A SETTING ------------------------------ 6
ADJUSTING THE PICTURE ---------------------------------- 7
POWER MANAGEMENT FEATURE ----------------------- 7
PLUG AND PLAY ------------------------------------------------ 9
TECHNICAL SUPPORT(FAQ) -------------------------------------10
APPENDIX ---------------------------------------------------------------11
SPECIFICATIONS ------------------------------------------
FACTORY PRESET TIMING TABLE -----------------------13
CONNECTOR PIN ASSIGNMENT ------------------------- 13
LIMITED THREE-YEAR WARRANTY -----------------------14-15
Thank y ou very much for choosing th e AOC Color Monitor.
We recommend that you take a few minutes to read carefully through this brief but
comprehensive manual before installing and switching on the mo nitor. Please keep
11-12
ENGLISH
DEUTSCH
FRANÇAIS
ESPAÑOL
ITALIANO
Page 2
Before operating the monitor please read this manual thoroughly. This manual should be retained for future
reference.
FCC Class B Radio Frequency Interference Statement
WARNING: (FOR FCC CERTIFIED MODELS)
NOTE:
pursuant to Part 15 of the FCC Rules. These limits are designed to provide reasonable protection against
harmful interference in a residential installation. This equipment generates, uses and can radiate radio
frequency energy, and if not installed and used in accordance with the instructions, may cause har mful
interference to radio communications. However, there is no guarantee that interference will not occur in a
particular installation. If this equipment does cause harmful interference to radio or television reception,
which can be determined by turning the equipment off and on, the user is encouraged to try to correct the
interference by one or more of the following measures:
1. Reorient or relocate the receiving antenna.
2. Increase the separation between the equipment and receiver.
3. Connect the equipment into an outlet on a circuit different from that to which the receiver is connected.
4. Consult the dealer or an experienced radio/TV technician for help.
1. The changes or modifications not expressly approved by the party responsible for compliance could
2. Shielded interface cables and AC power cord, if any, must be used in order to comply with the emission
3. The manufacturer is not responsible for any radio or TV interference caused by unauthorized
As an
S
This equipment has been tested and found to comply with the limits for a Class B digital device,
NOTICE :
void the user's authority to operate the equipment.
limits.
modification to this equipment. It is the responsibilities of the user to correct such interference.
NERGY STAR
E
TAR guidelines for energy efficiency.
Partner AOC International has determined that this product meets the
NERGY
E
Page 3

PRECAUTIONS
! Do not use the monitor near water, e.g. near a bathtub, washbowl, kitchen sink, laundry tub, swi mming
pool or in a wet basement.
! Do not place the monitor on an unstable cart, stand, or table. If the monitor falls, it can injure a person
and cause serious damage to the appliance. Use only a cart or stand recommended by the manufacturer
or sold with the monitor. If you mount the monitor on a wall or shelf, use a mounting kit approved by the
manufacturer and follow the kit instructions.
! Slots and openings in the back and bottom of the cabinet are provided for ventilation. To ensure reliable
operation of the monitor and to protect it from overheating, be sure these openings are not blocked or
covered. Do not place the monitor on a bed, sofa, rug, or similar surface. Do not place the monitor near
or over a radiator or heat register. Do not place the monitor in a bookcase or cabinet unless proper
ventilation is provided.
! The monitor should be operated only from the type of power source indicated on the label. If you are not
sure of the type of power supplied to your home, consult your dealer or local power company.
! T he monitor is equipped with a three-pronged grounded plug, a plug with a third (grounding) pin. This
plug will fit only into a grounded power outlet as a safety feature. If your outlet does not accommodate
the three-wire plug, have an electrician install the correct outlet, or use an adapter to ground the
appliance safely. Do not defeat the safety purpose of the grounded plug.
! Unplug the unit during a lightning storm or when it will not be used for long periods of time. T his will
protect the monitor from damage due to power surges.
! Do not overload power strips and extension cords. Overloading can result in fire or electric shock.
! Never push any object into the slot on the monitor cabinet. It could short circuit parts causing a fire or
electric shock. Never spill liquids on the monitor.
! Do not attempt to service the monitor yourself; opening or removing covers can expose you to
dangerous voltages and other hazards. Please refer all servicing to qualified service personnel.
! T o ensure satisfactory operation, use the monitor only with UL listed computers which have appropriate
configured receptacles marked between 100 - 240V AC, Min. 1.5A.
Page 4
BEFORE YOU OPER ATE THE MONITOR
FEATURES
15” Color Monitor
•
Crisp, Clear Display for Windows
•
Supports Resolutions up to 1280 x 1024
•
Power Management
•
Ergonomic Design (MPR II Approved for )
•
Space Saving, Compact Case Design
•
CHECKING THE CONT ENTS O F THE MONIT OR PACKAGE
The product package should include the following items:
1. Monitor
2. Owner's Manual
3. Power Cord ( Refer to the "Using the right power cord" statement )
4. Swivel Base
5. Audio Cable ( For 7ElrA/7ElrA+ only )
INSTALLATIO N INST RUCTIO NS
SWIVEL BASE
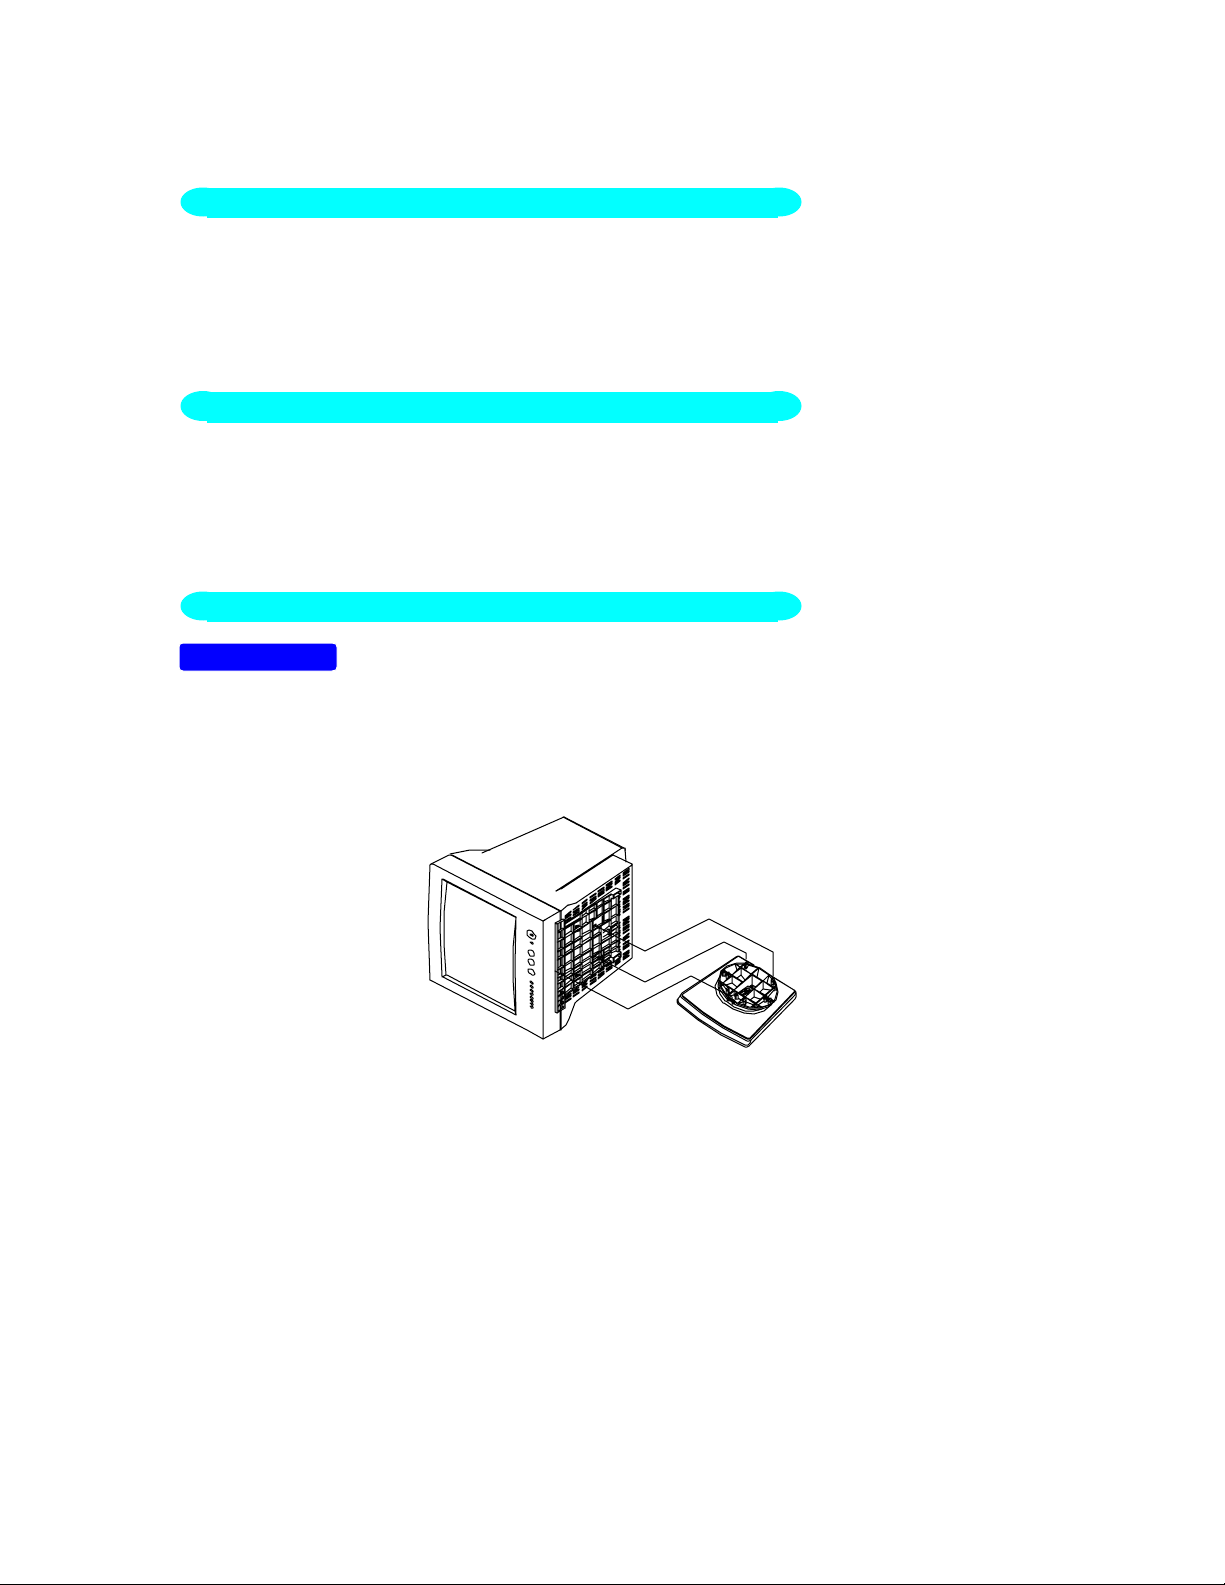
To attach the swivel base to the monitor, do the following:
Carefully turn the monitor on its side or upside down. ( see figure 1 )
•
Locate the cavities at the bottom front of the monitor.
•
Insert the pegs on the swivel base into these cavities. Push the swivel base forward until the swivel base
•
locks in place.
To remove the swivel base, hold the bottom of the swivel base, then push it out.
•
Figure 1 Installing and Removing the Swivel Base
Page 5
POW ER CORD
Power Source:
1. Make sure the power cord is the correct type that required in your area.
2. T his monitor has a universal power supply that allows operation in either 100/120V AC or 220/240V AC
voltage area ( No user adjustment is required. )
3. Connect the power cord into your monitor’s power input socket, and then plug the other end into a 3-pin
AC power outlet. The power cord may be connected to either a wall power outlet or the power outlet
socket on your PC, depending on the type of power cord supplied with your monitor.
CONTRO LS AND CON NECTO RS
VIDEO CABLE
Connecting the Video Cable:
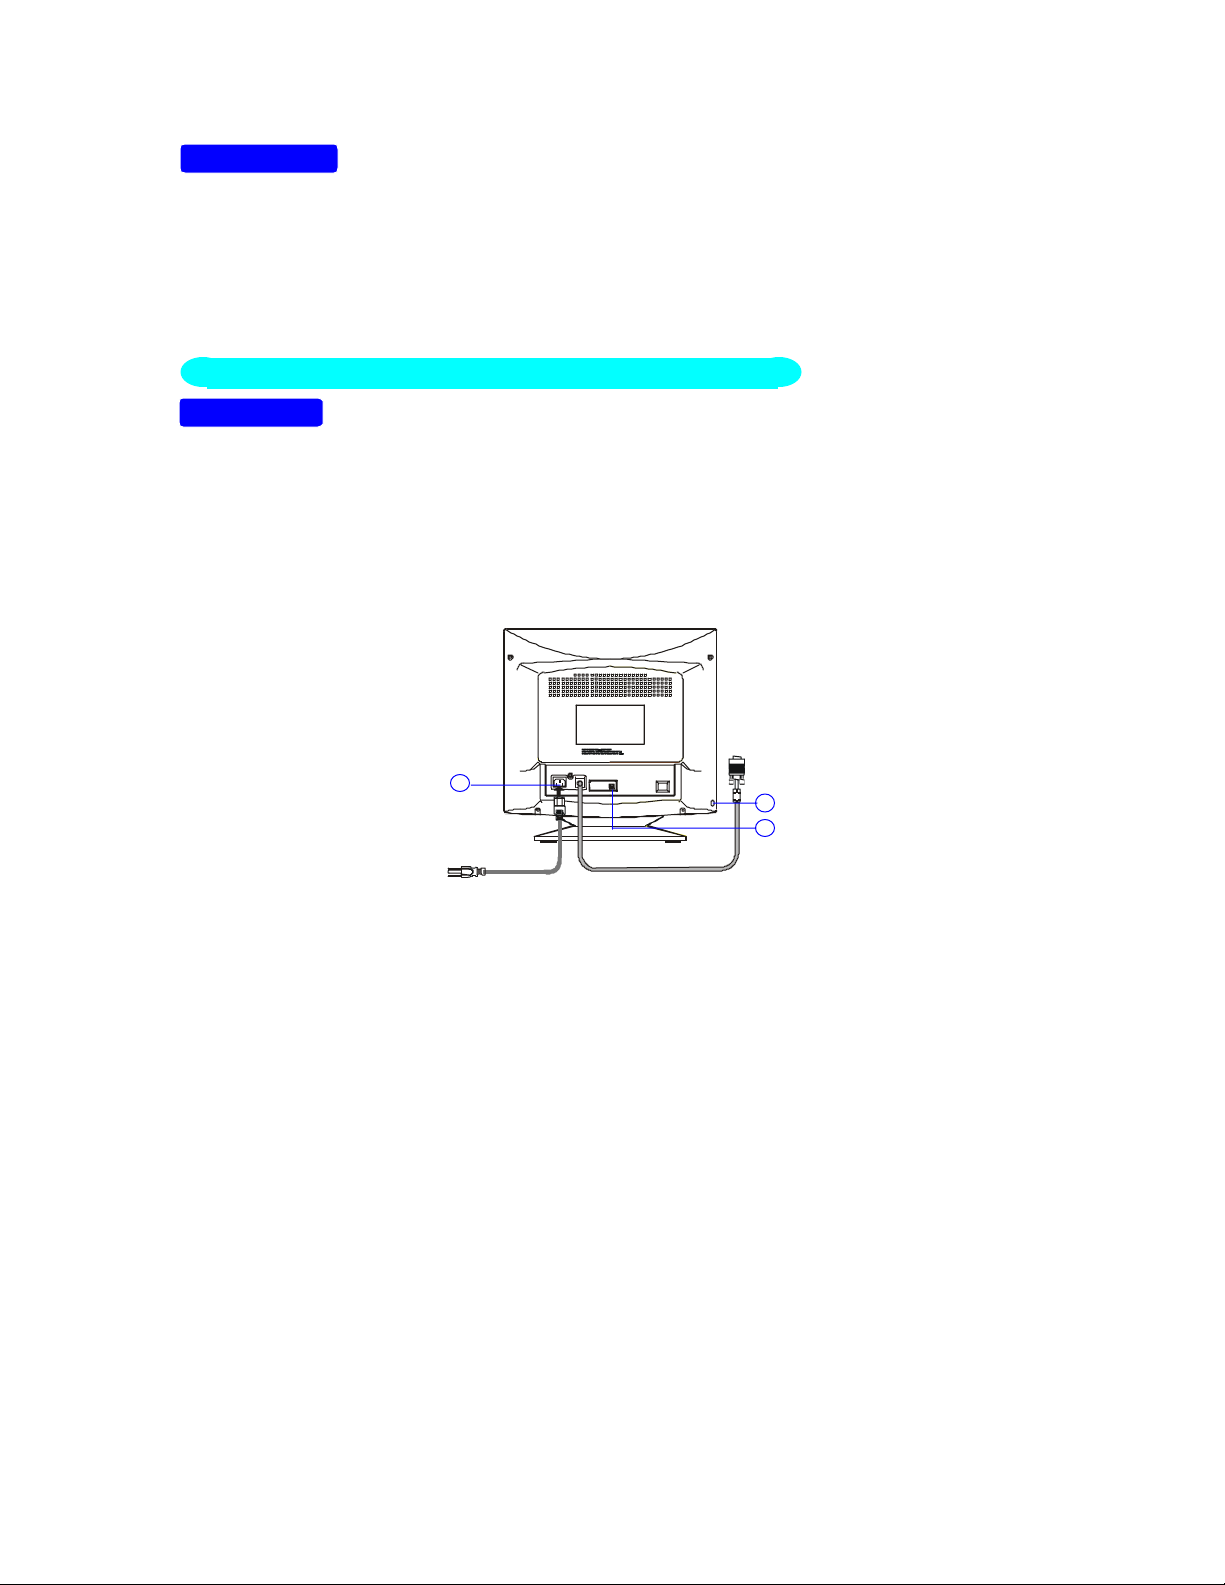
the monitor comes with a built-in video cable. Plug the signal cable′s 15-pin
connector into the computer's video port and tighten the two screws on the cable connector. (see figure 2)
Caution:Don’t bend the signal cable, otherwise it will break the inner wire.
Connecting the Power Cord:
Plug the power cord into the monitor's AC power jack. Then plug the
power cord into a grounded AC outlet, UL-approved power strip, or the power output socket on your PC.
Caution: If the AC outlet is not grounded, install the proper grounding adapter (not supplied).
Connecting the Earphone Cable ( 7ElrA/7ElrA+ only ):
Connecting the Audio Cable (7ElrA/7ElrA+ only ):
Plug earphone cable into earphone output jack.
Plug one end of the audio cable into the computer’s
multi-media (or sound) card′s audio output and the other end into the monitor's audio input.
1
2
3
Figure 2 Connecting Cables
 Loading...