

Page 1
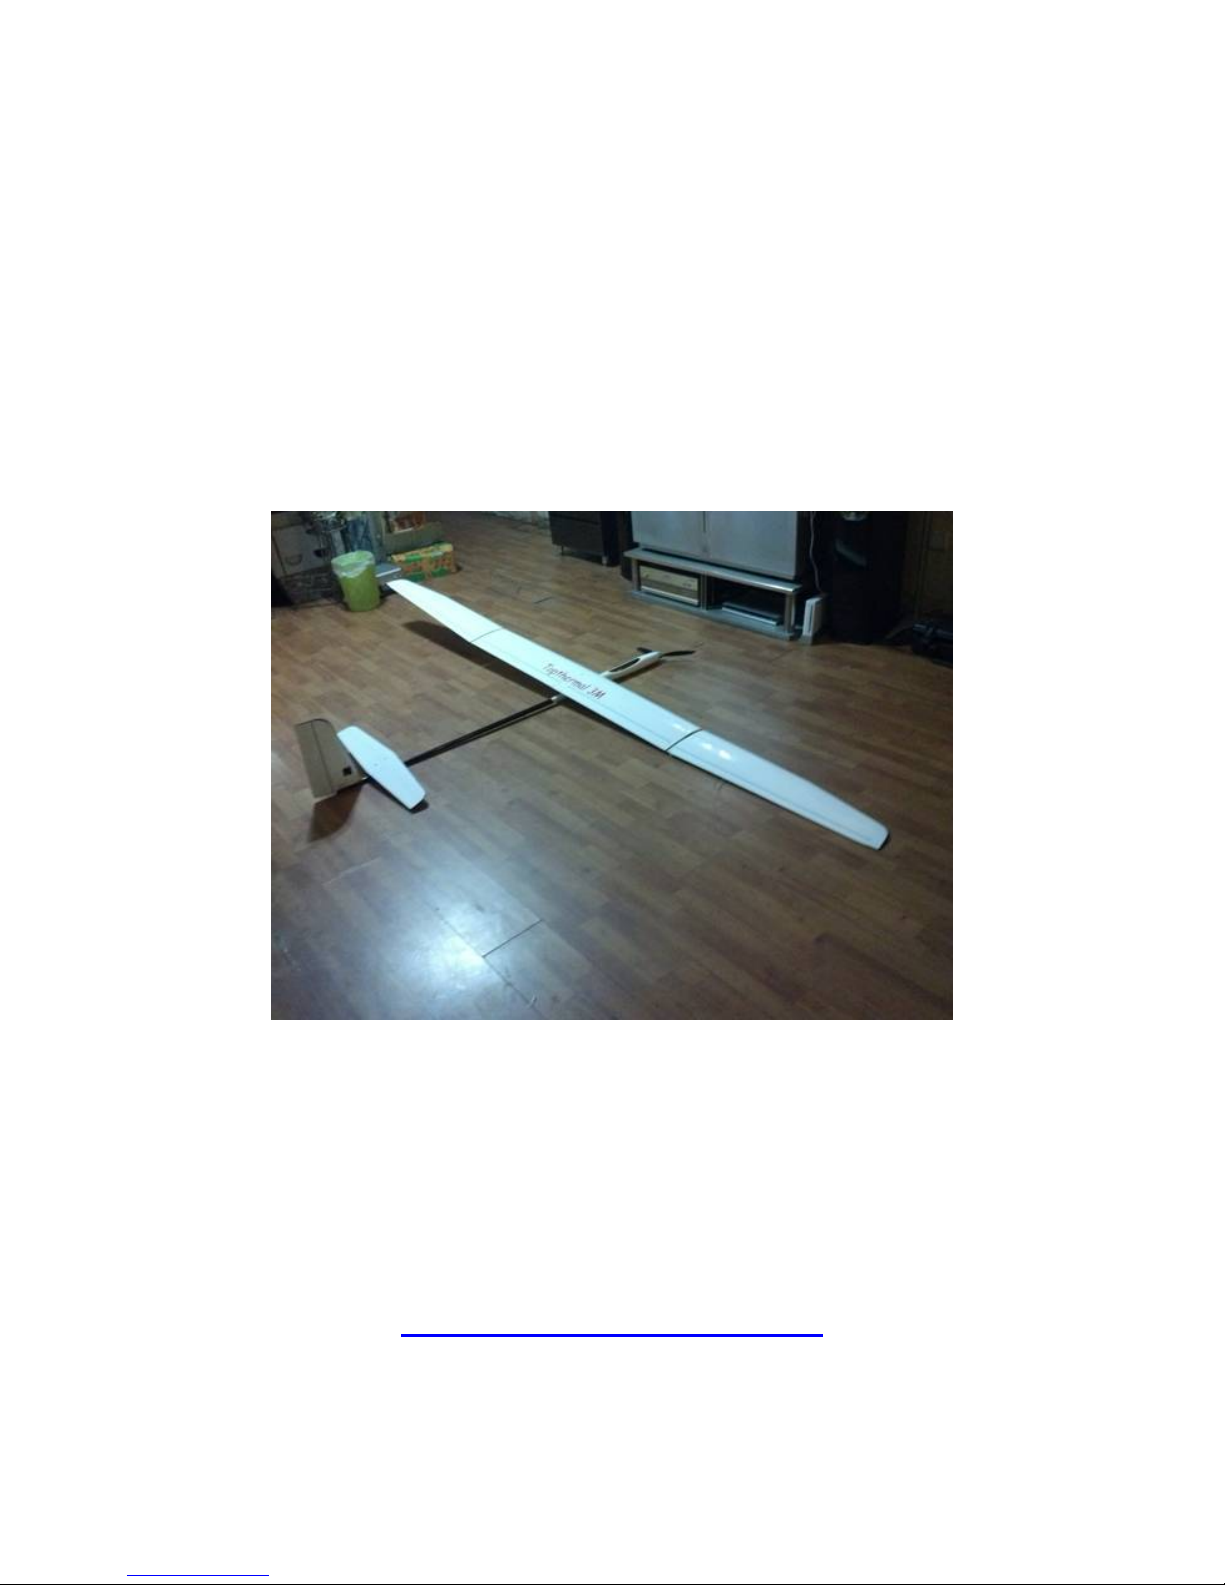
Topthermal 3M EP glider
assembling manual
Topsoaring New Technology Co. LTD
www.topsoaring.com
Page 2
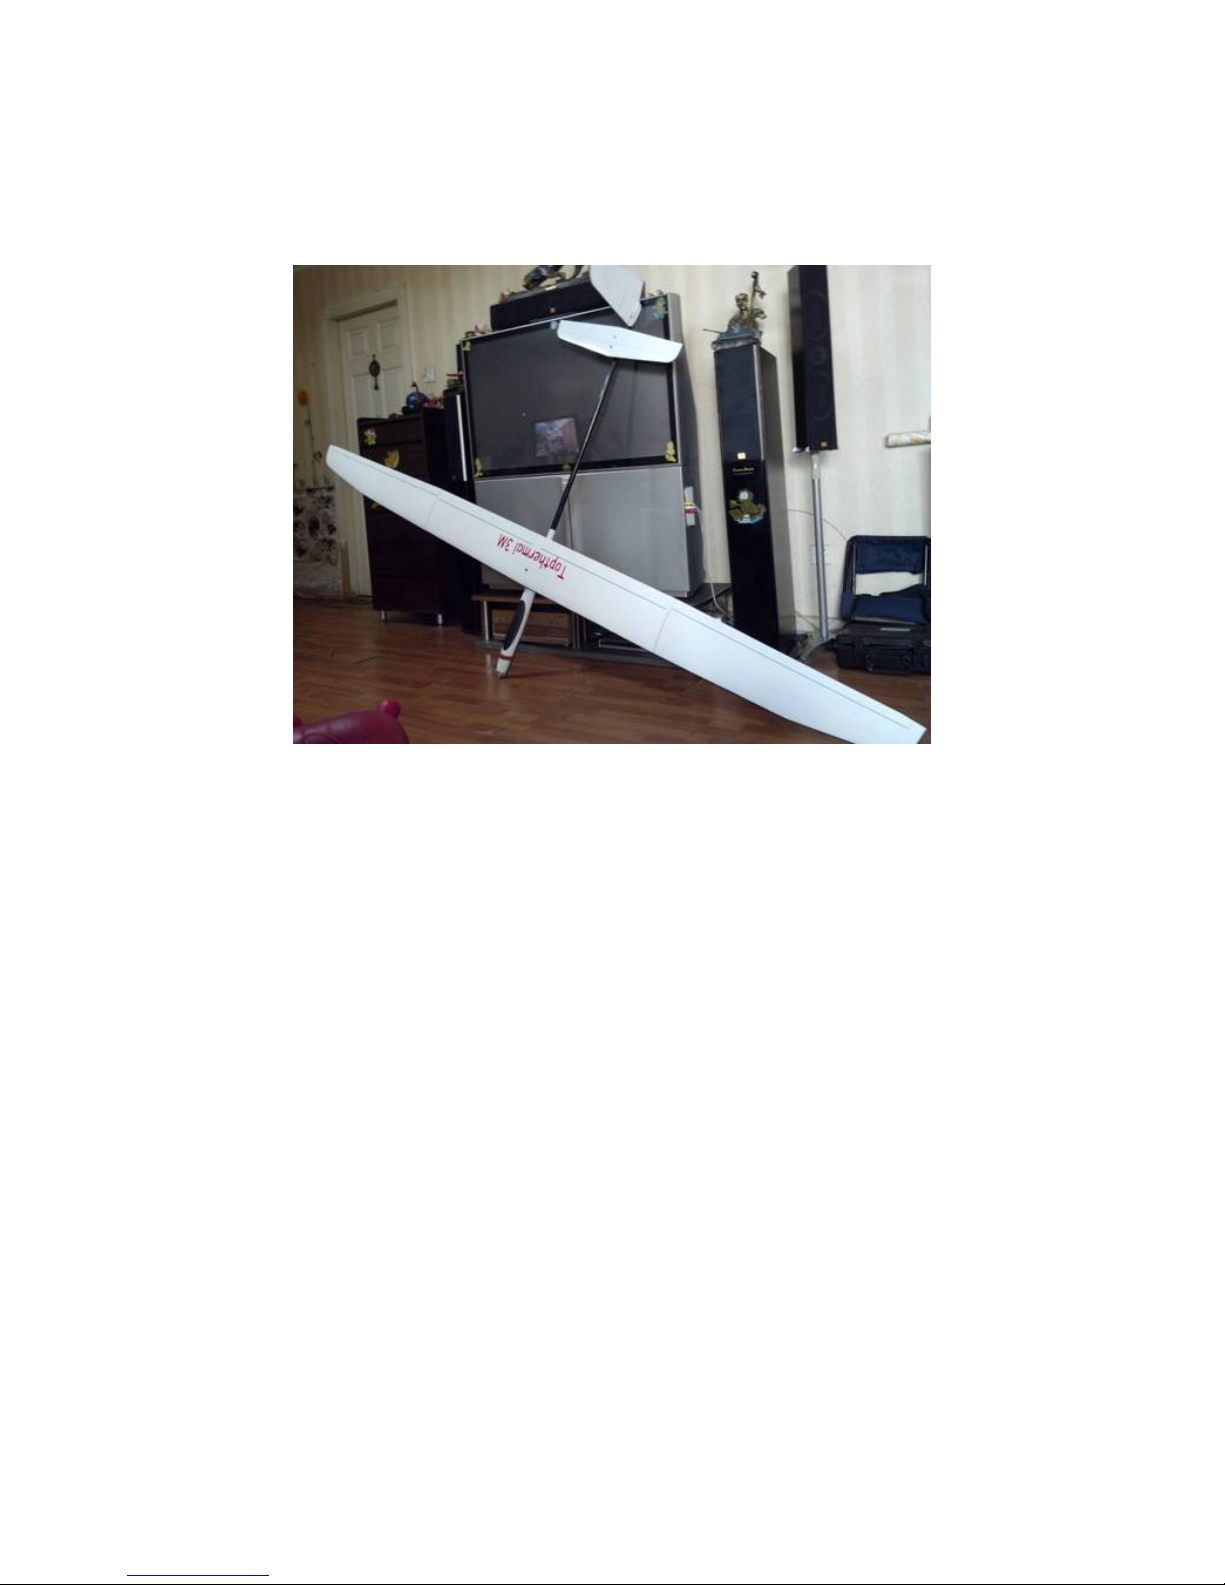
Topthermal 3M EP glider is an electric powered, vacuum bag style sailplane with stiff
boom tail and 3 pieces of main wing for all weather conditions. It’s design and
produced by Topsoaring, follows their traditional concepts – easy to assemble and
easy to fly for either old hand or newbies.
Wing foil: MH32
Wing span: 3000mm
Wing area: 54dm^2
Auw: 1700 grams
Wing load: 33.3grams/dm^2
Control: ele-rud-ail-flap-throt
Recommended equipment(not include):
Battery: 4s 2200mah Li
ESC: 40A
Motor+propeller: Hacker A30-12XL(700kv)+14*9 Folding,
Hyperion Gs3020-12(780kv)+14*8 Folding
Receiver: >7ch
Servo: JR DS171 or JR DS 181(alie,flap) , Hitec HS82MG (rud,ele)
Page 3
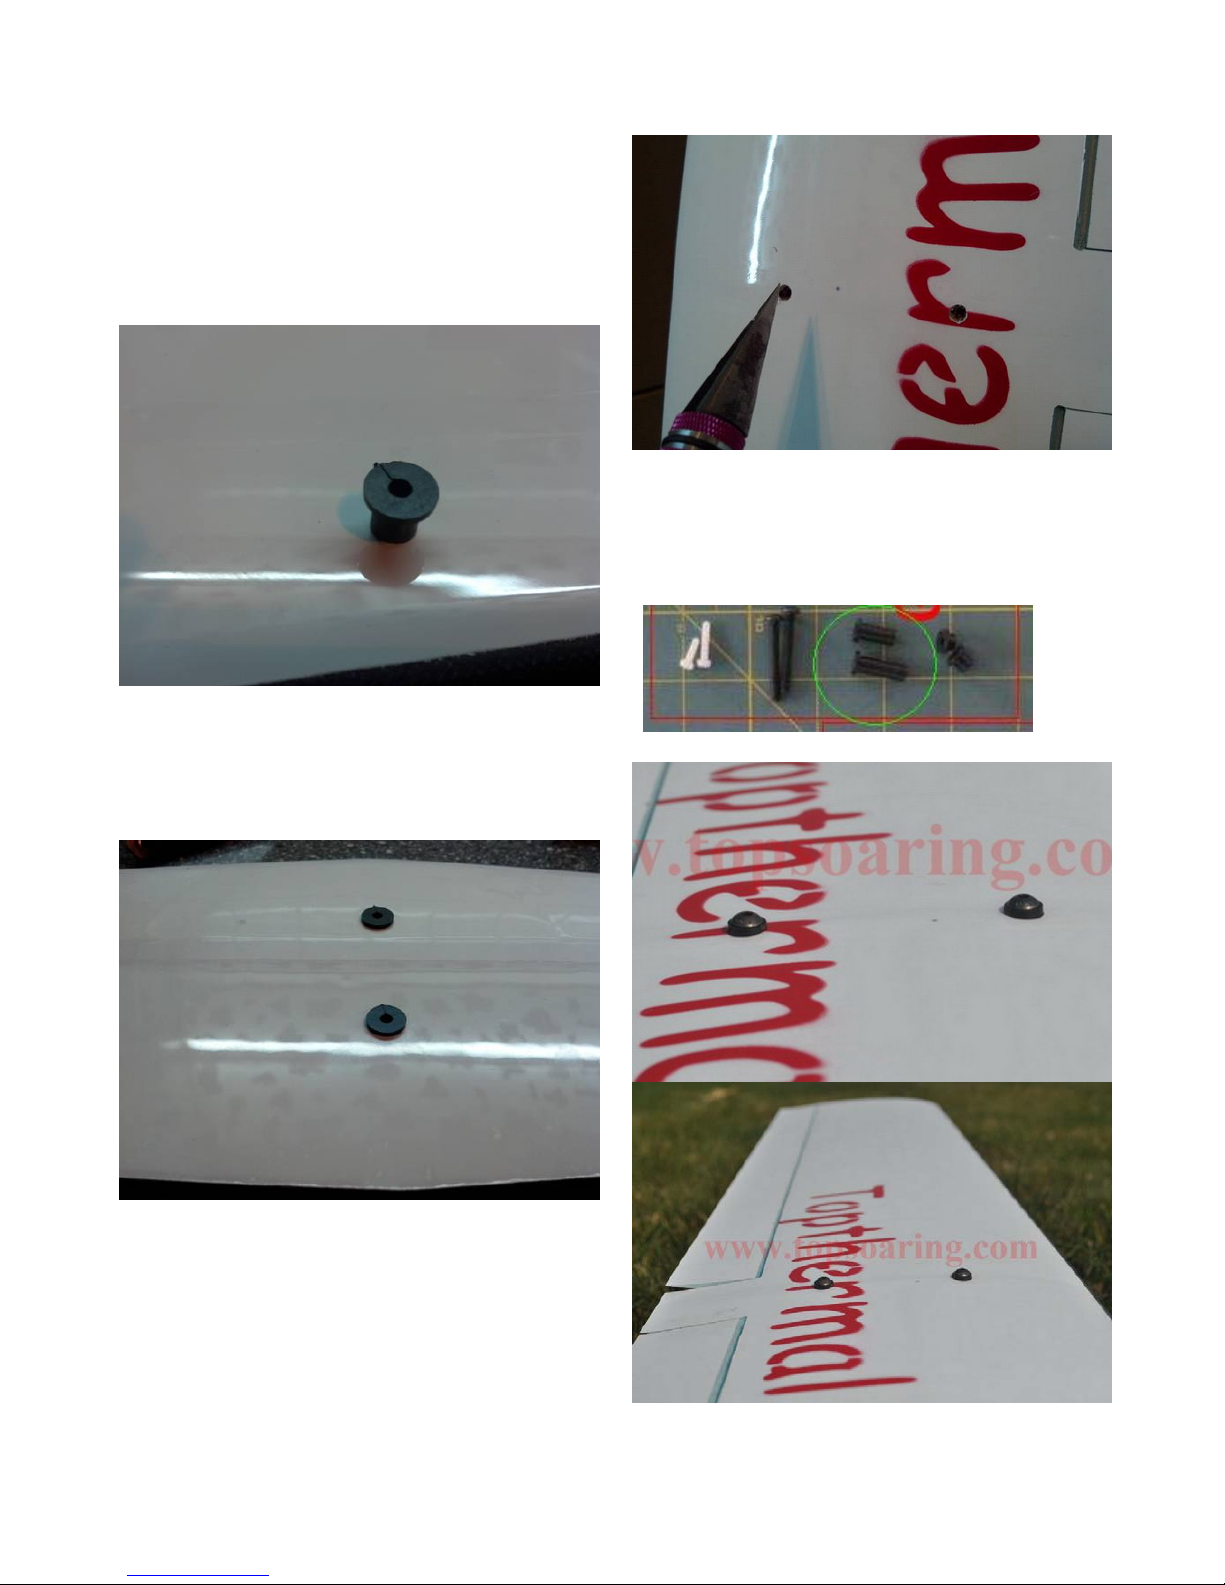
1. fix the screw sleeves for wing and
elevator
These are sleeves(supplied within the accessory
package) for attach the elevator to the V mount.
You can see the mark on the sleeve, and be sure it
facing to front.
Insert the sleeves into the hole of elevator and
glued with epoxy, the longer on at the front and the
shorter on after.
Draw the hole for
screw on the center wing. There
are already two holes inside the center wing, you
only need to drill the fiberglass on the wing surface .
Before you drill it, you can hold it facing the strong
light, you can find two hole already existed .
These are sleeves for center wing too , as circled
by the green line in the following picture. Insert the
sleeves into the hole of center wing and glued
with epoxy, the longer on the front and the shorter
on the back, make sure the mark facing to the
front.
Like this:
Page 4
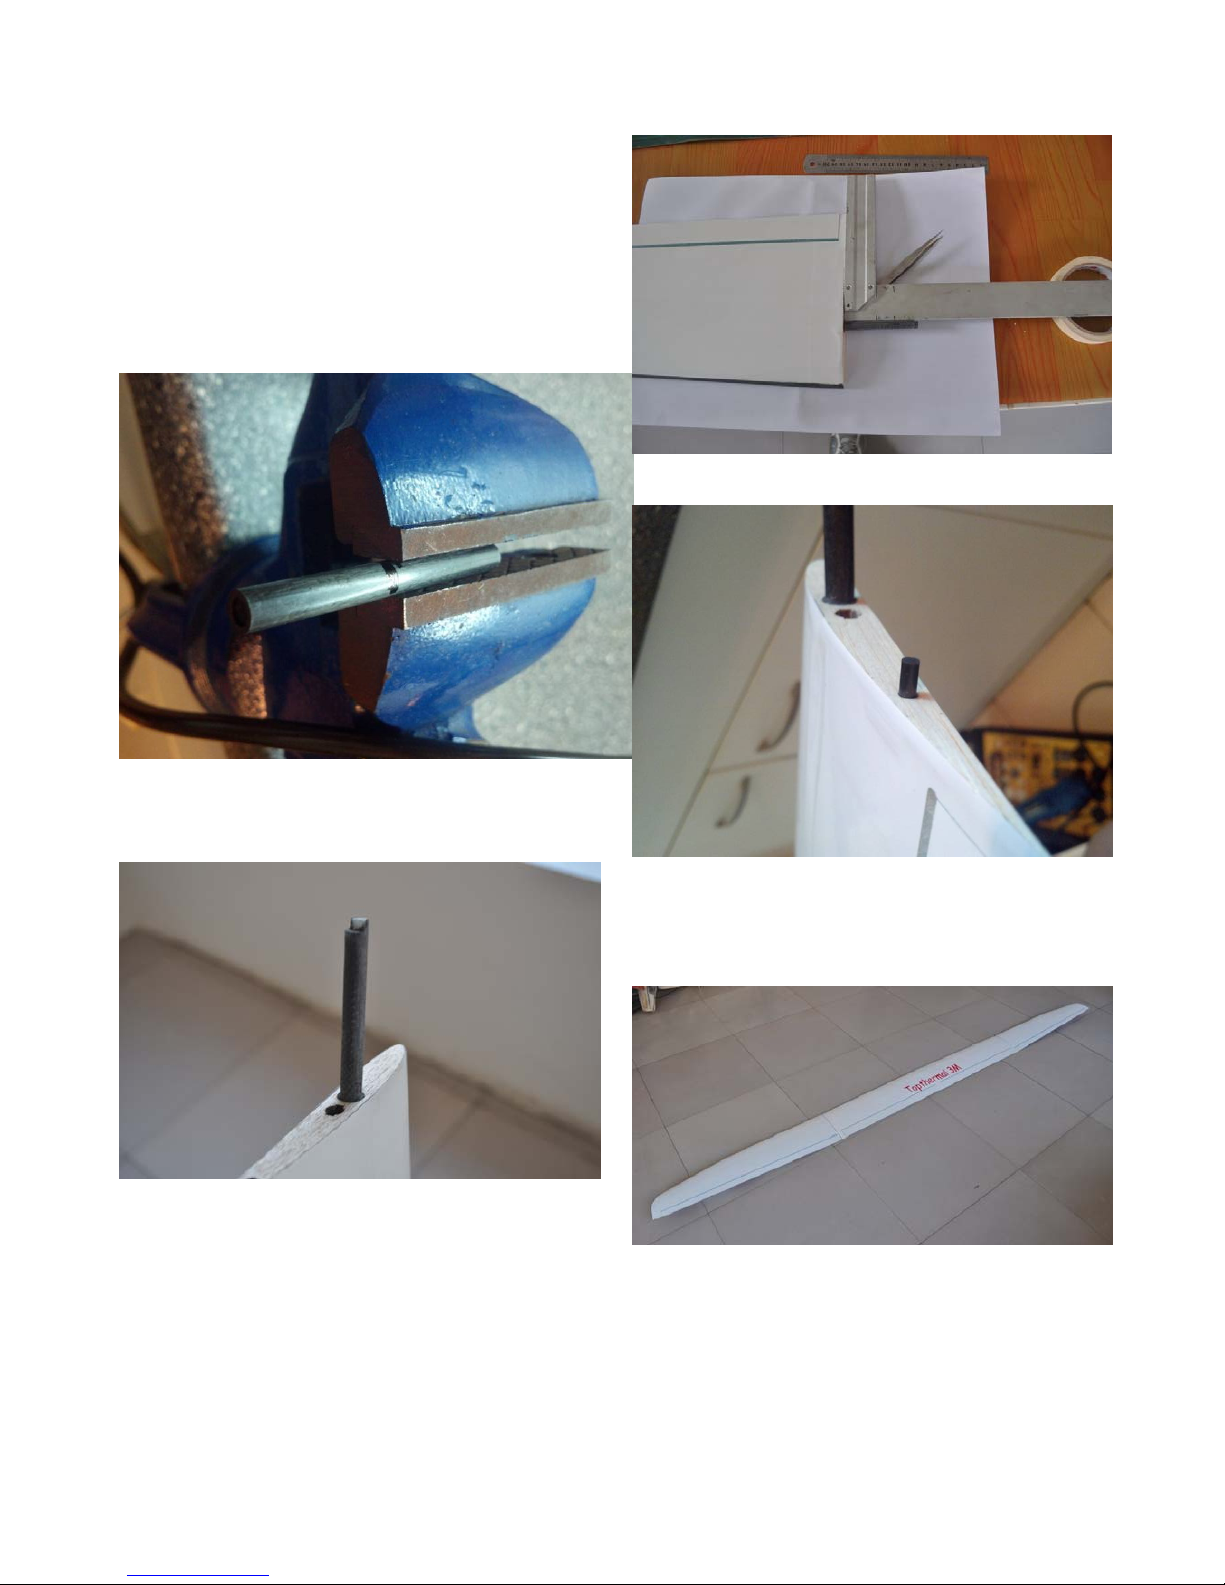
2. Join the main wing
Topthermal 3M has 3 pieces of wings, joined by
using bolt and positioning bar.
Cut the positioning bar(tube and stick, Within the
accessory package), glue the tube bar inside the
center wing and the stick bar will be glued inside
the outside wing in the next step. please make sure
the tube bar in center wing is horizonal.
Insert the bolt to the outside wings, make sure the
flat_tip of the bolt is in the outside of the outside
wing.
Glue with epoxy, rotate the bolt to make the angle
between bolt and side face of outside wing is rjght
angle. Clear the remain epoxy.
Glue the positioning bar(stick bar) in the outside
wing.
Join the center wing and outside wing on the
platform, rotate the bolt untill the outside wings
attached to the center piece very tight if you need ,
and the tip height is about 80 mm.
Page 5
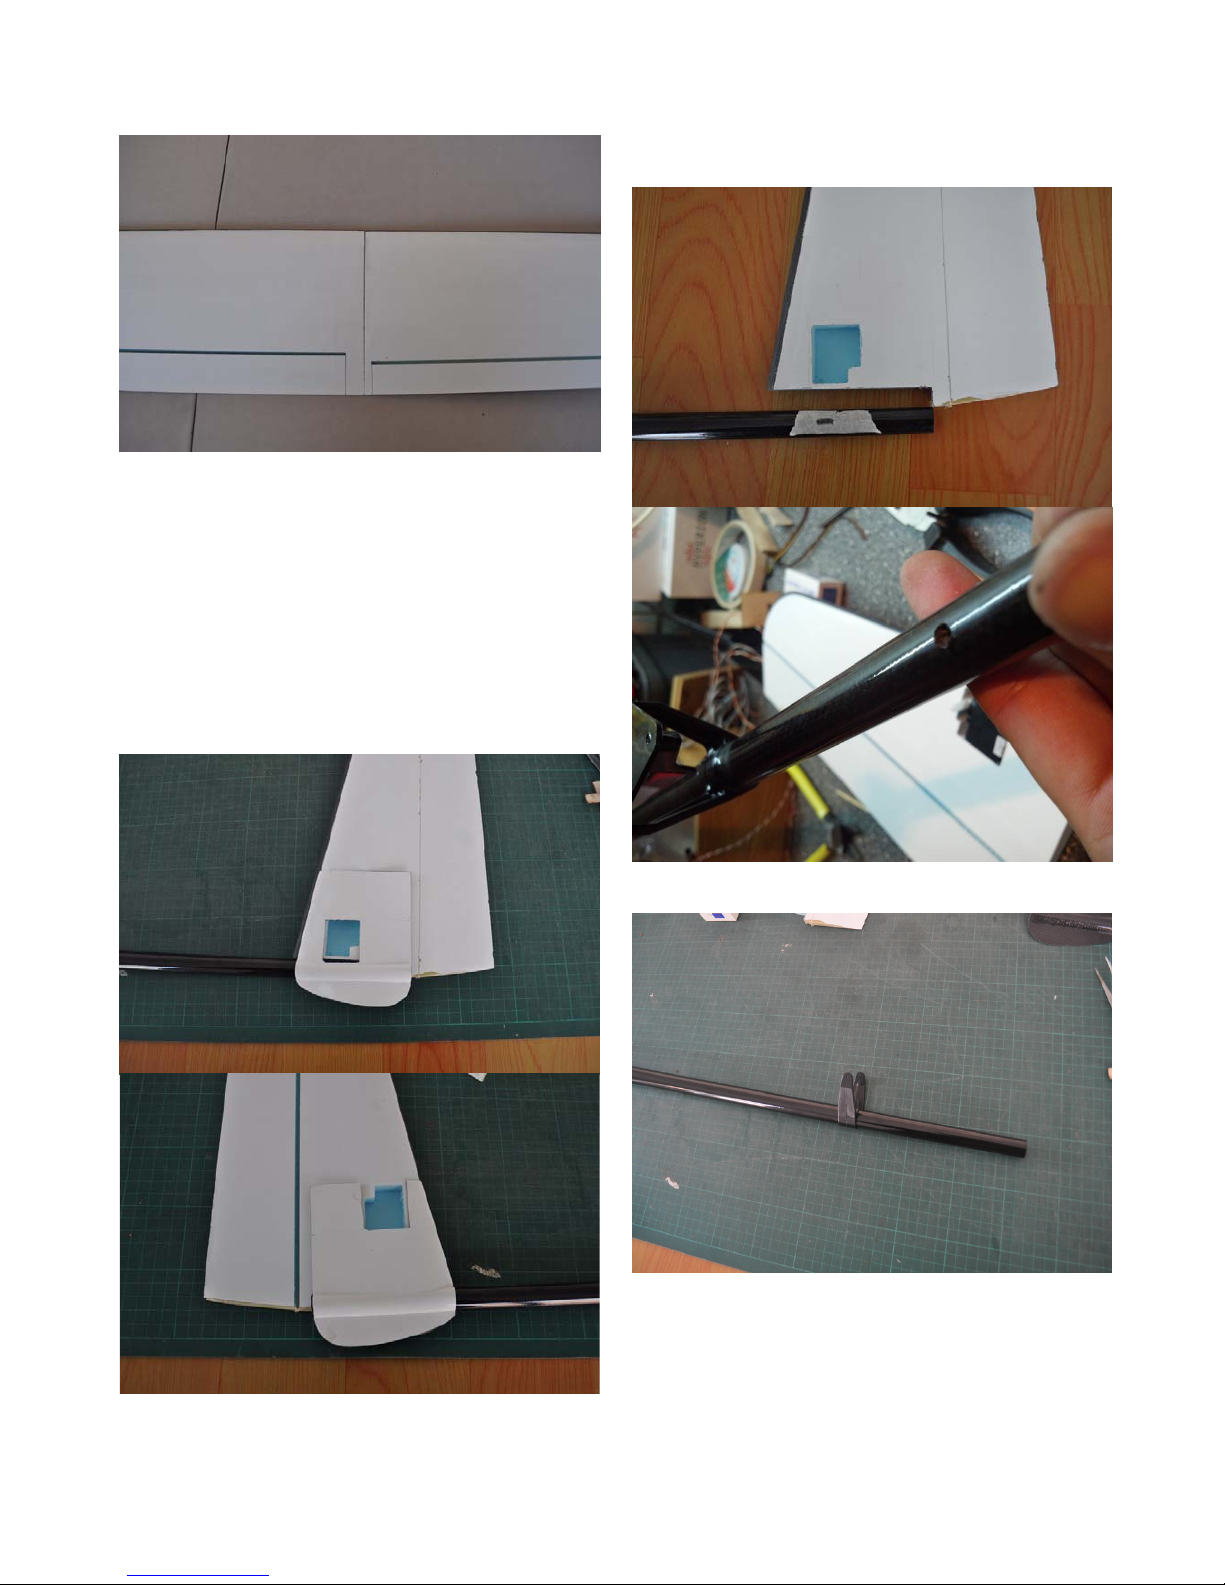
Redraw the outside wing 1~2mm, in order to avoid
the epoxy flood into the center wing.
Waitting the epoxy to be solidfy
3.
Install boom ,V mount, rudder and
elevator
Cut the frame of the rudder according to the servo
hole in rudder
Draw a hole on the end of the boom to pass the
servo harness to receiver
Install the frame of V mount on the boom(no glue)
Sand everywhere you want to glue(the area
surrounded by red line in the following pictures):
Page 6
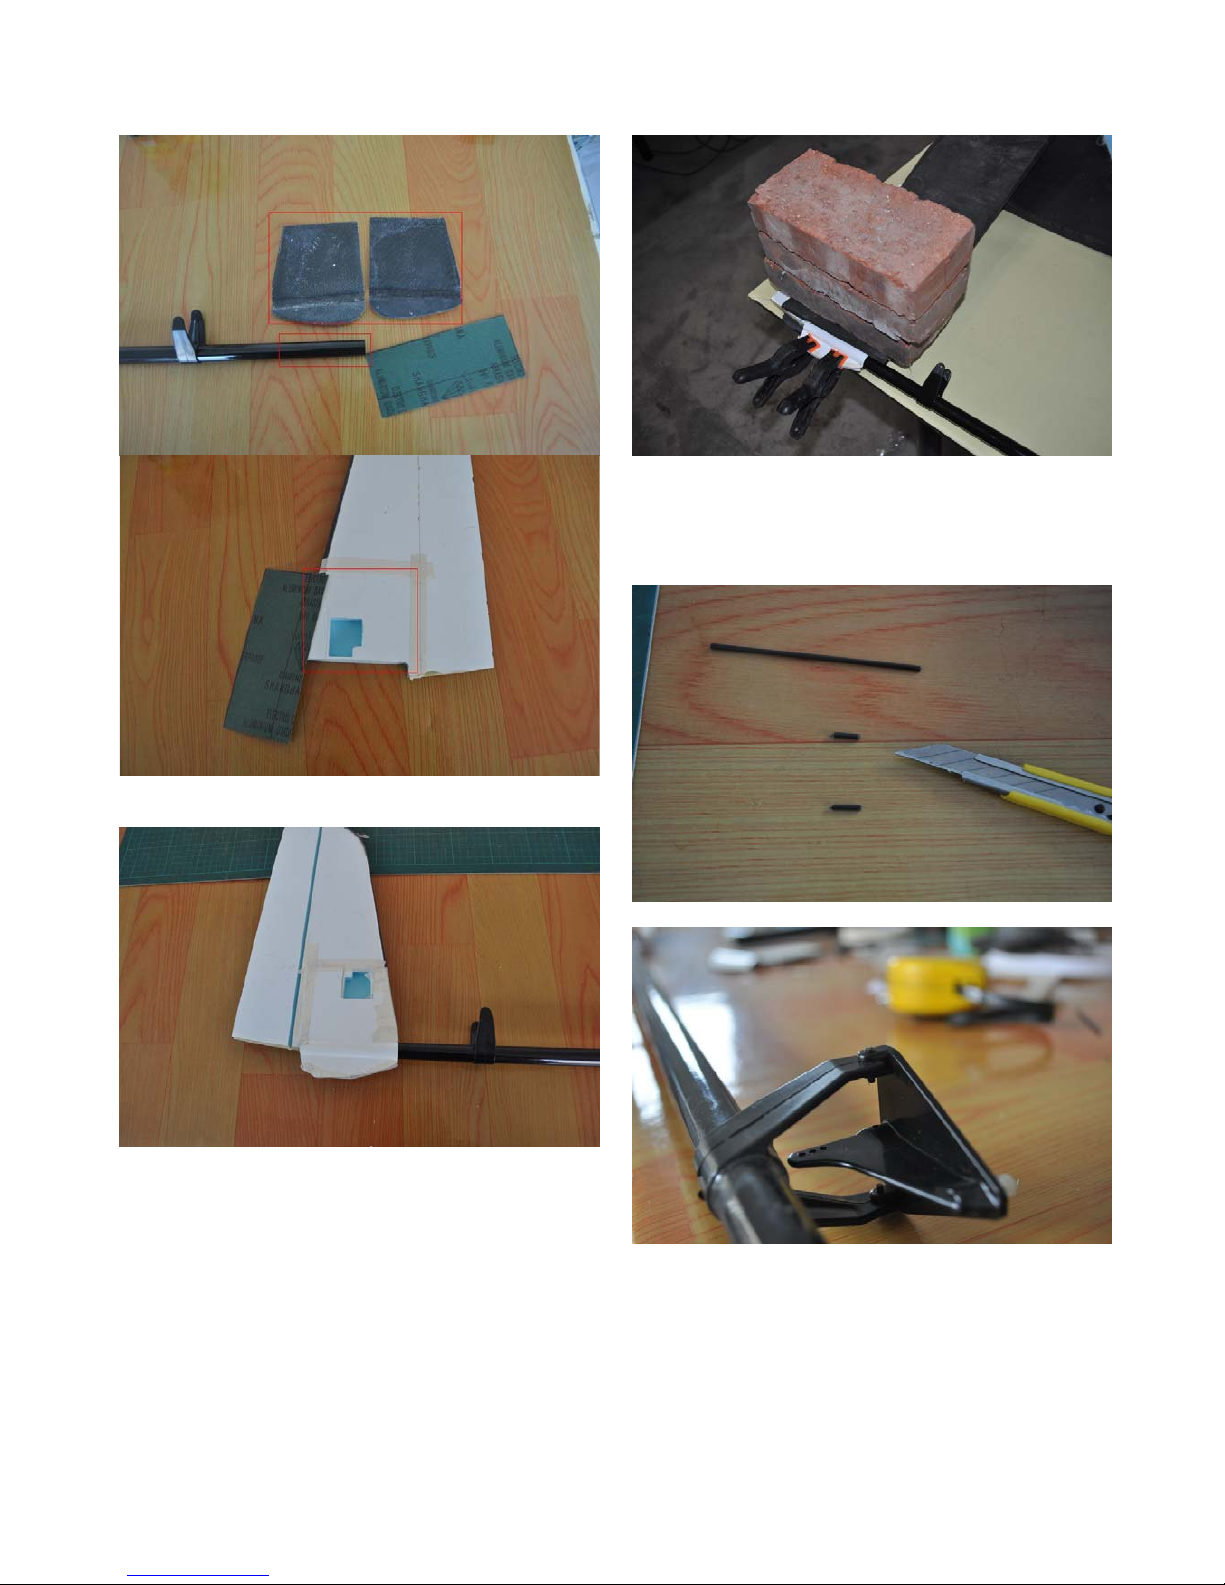
Glue the rudder and frame and boom with epoxy
Press with weight
Cut twe short carbon rod (supplied within the
accessory package) to connect the elevator bracket
and glued with little CA or apply some z-poxy at
the end point of the carbon rod..
Fix the elevator, Determine where to install the V
mount, then sand the boom tail, Apply the
30minutes Z-poxy to the boom tail and V mount.
Page 7
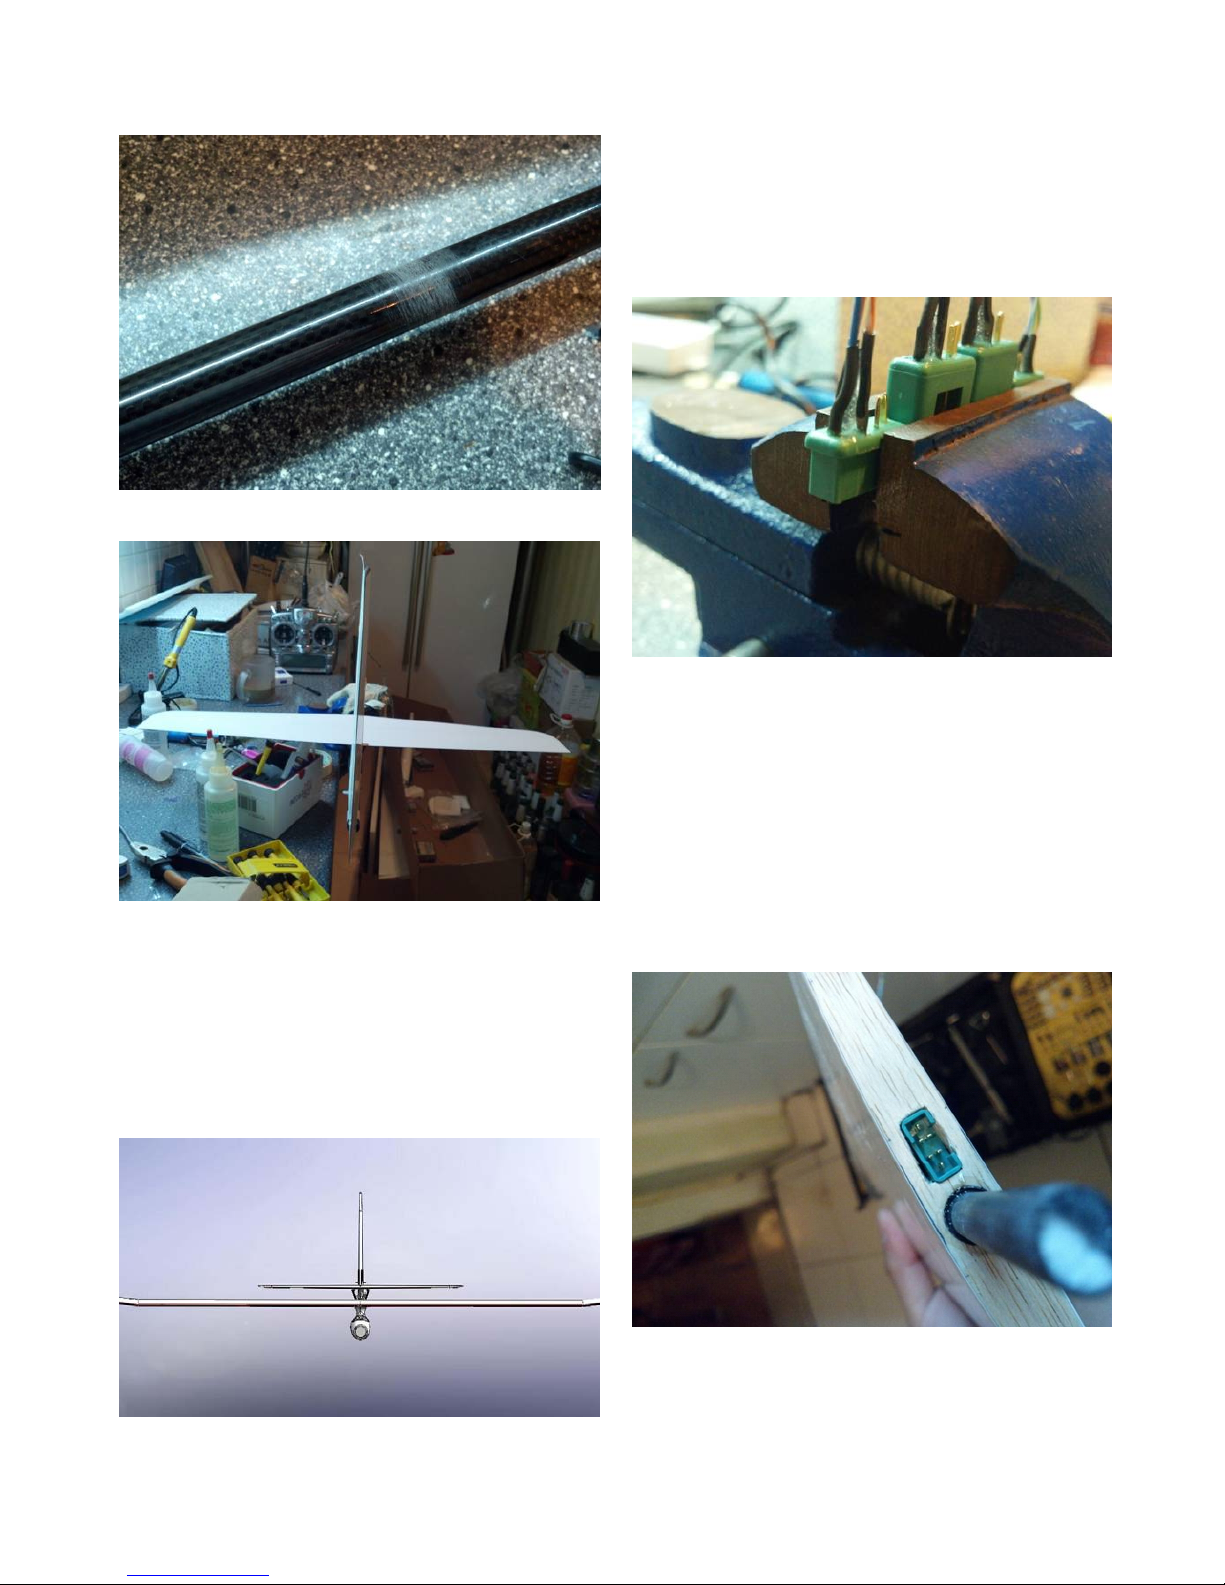
make sure the rudder is vertical to the elevator.
4. Connect the boom and pod
Fix the centor wing on the pod and elevator on the
V mount.
Sand the tail of the pod and the inside of the
boom, and join pod tail into the boom, glued with
Epoxy , rotate the boom untill the elevator is
parallel to the center wing.
5. harness
Make harness for main wings, left wing and right
wing, rudder and elevator as well. MPX 6 pin
connector is recommended (Not included in the
package).
Please make sure the wire is long enough from the
servo to the joint surface. After it soldered, protect
it with shrinkable tube.
6. install servo for wing
Install the female and male connectors in position.
(Test it before glue it)
Male connector for centor wing(not for outside
wing showed in the following picture ) and female
cnnnector for outside wing..
Page 8
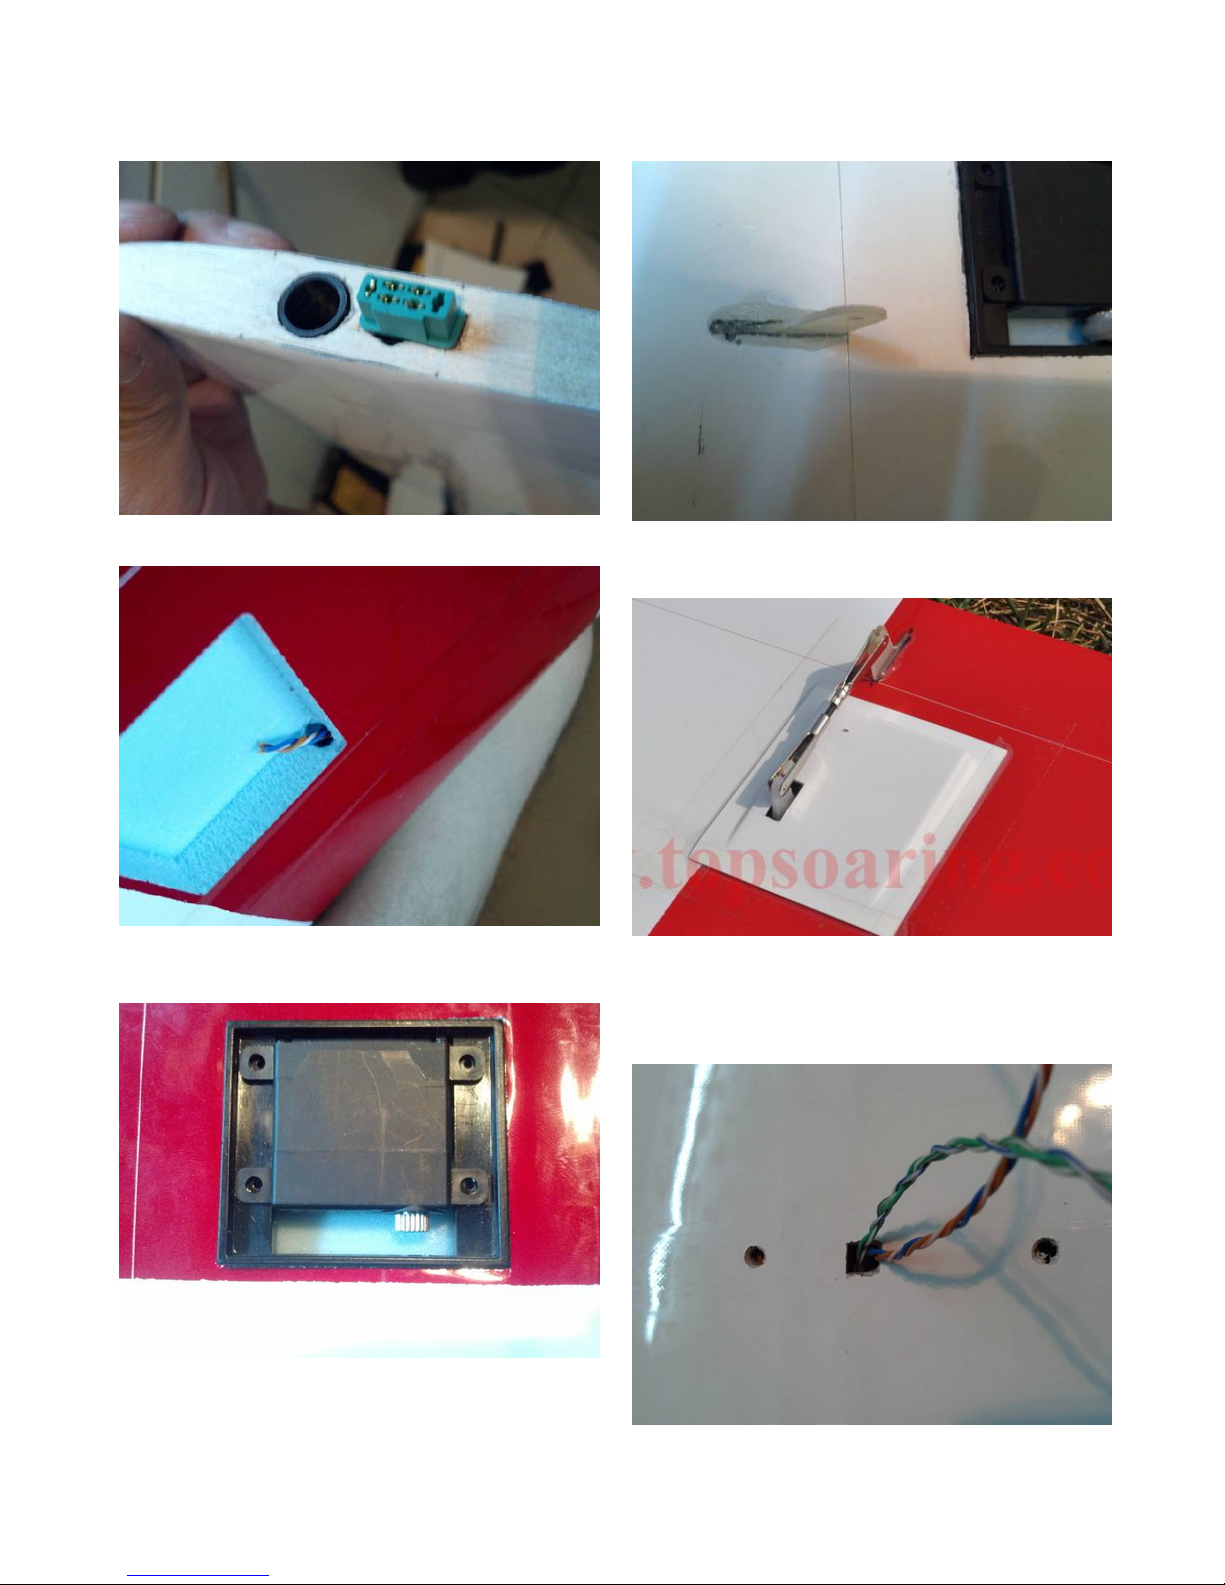
Fishing out the extend wires.
Glue the servo frame in the servo hole with epoxy.
And then install the servos for aileron and flap.
Cut s slot in flap and aileron, and glue the horn .
Install the linkage and cover the servo with the
servo cover.
Fishing out the wire from downside of the center
wing , and connect them to reciever. You’d better
fix a wire connecter just under the center wing.
Page 9
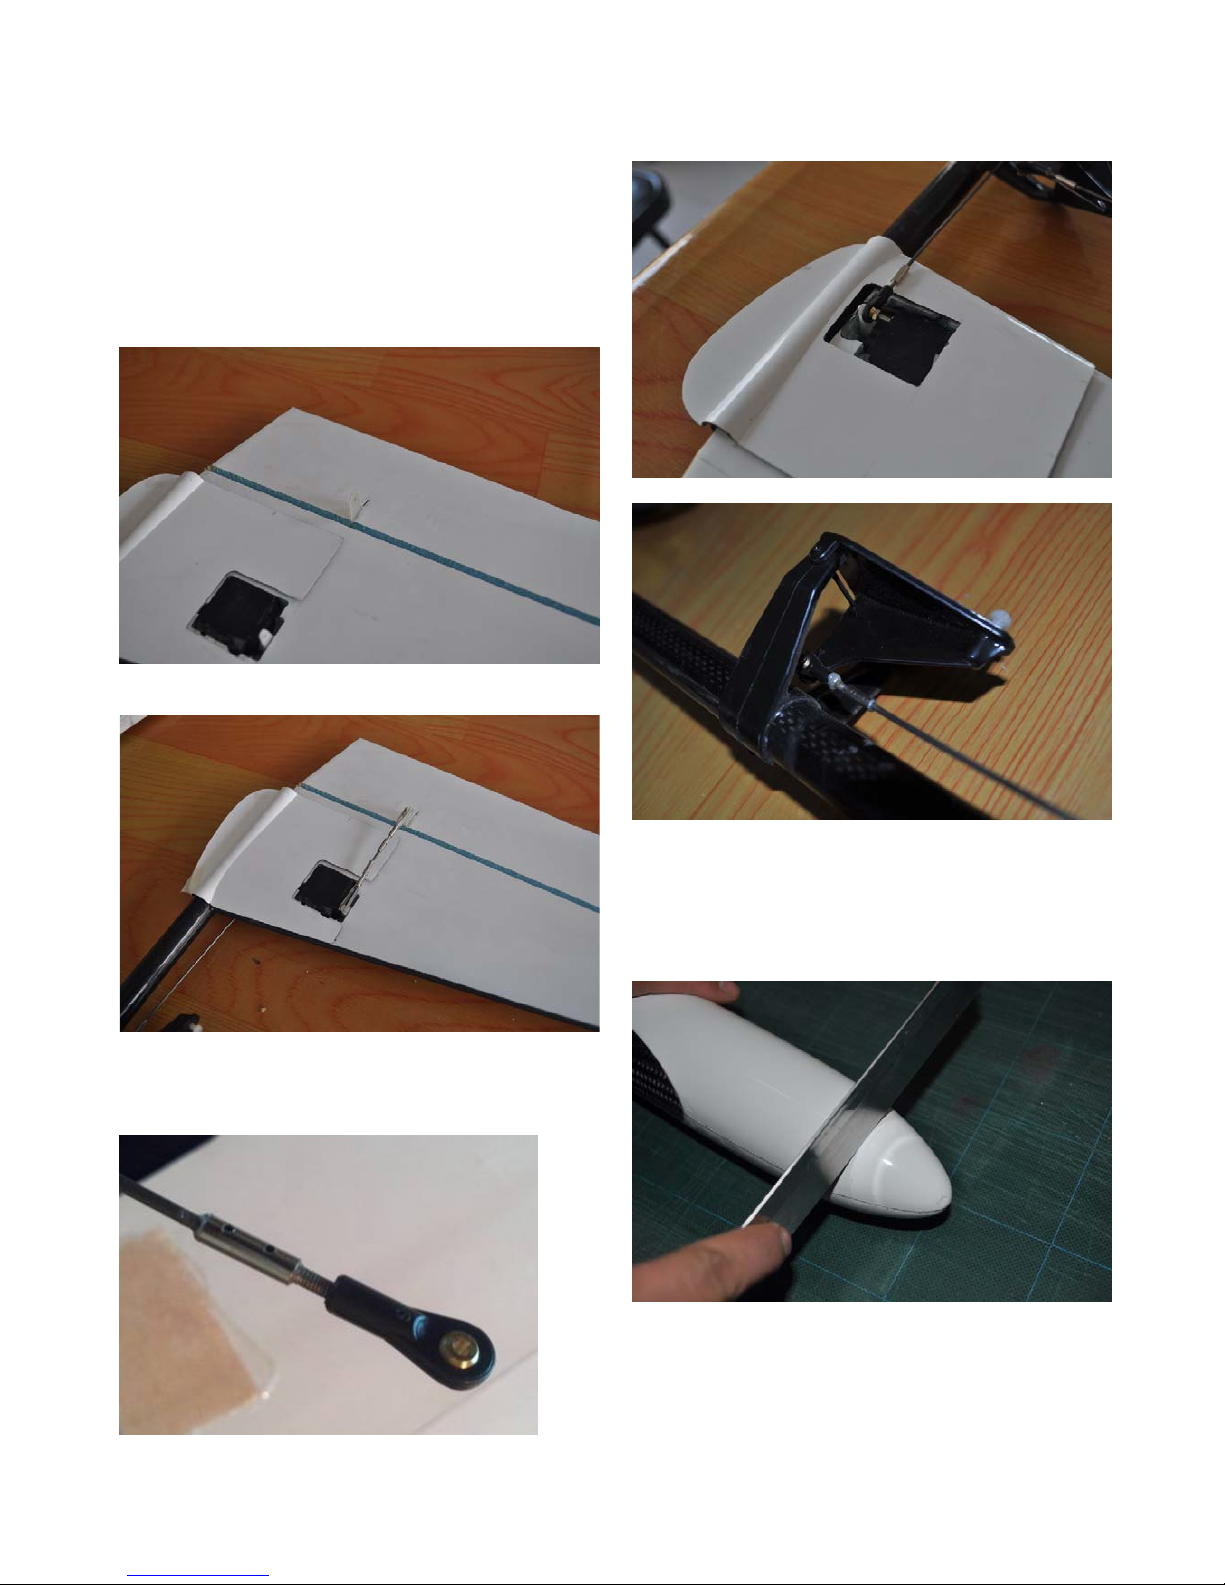
7. Install the servo for tail
Extend the wire of rudder and elevator servos to
receiver located in pod along inside of the boom.
Fix the servos in rudder hole, glued with Epoxy.
Cut a slot on the rudder ,and install the horn, glued
with epoxy
Connect the rudder servo and the horn
Install the linkage for elevator, using the ball head
connector for connecting the servo arm and the V
mount.
8. Power
Cut the nose of the pod along the circle on the pod
if you want to install motor for Topthermal. If you
want launch it with towline, you can ignore this
step.
Gule the wood cross and motor plate with dual-face
glue tape
Page 10
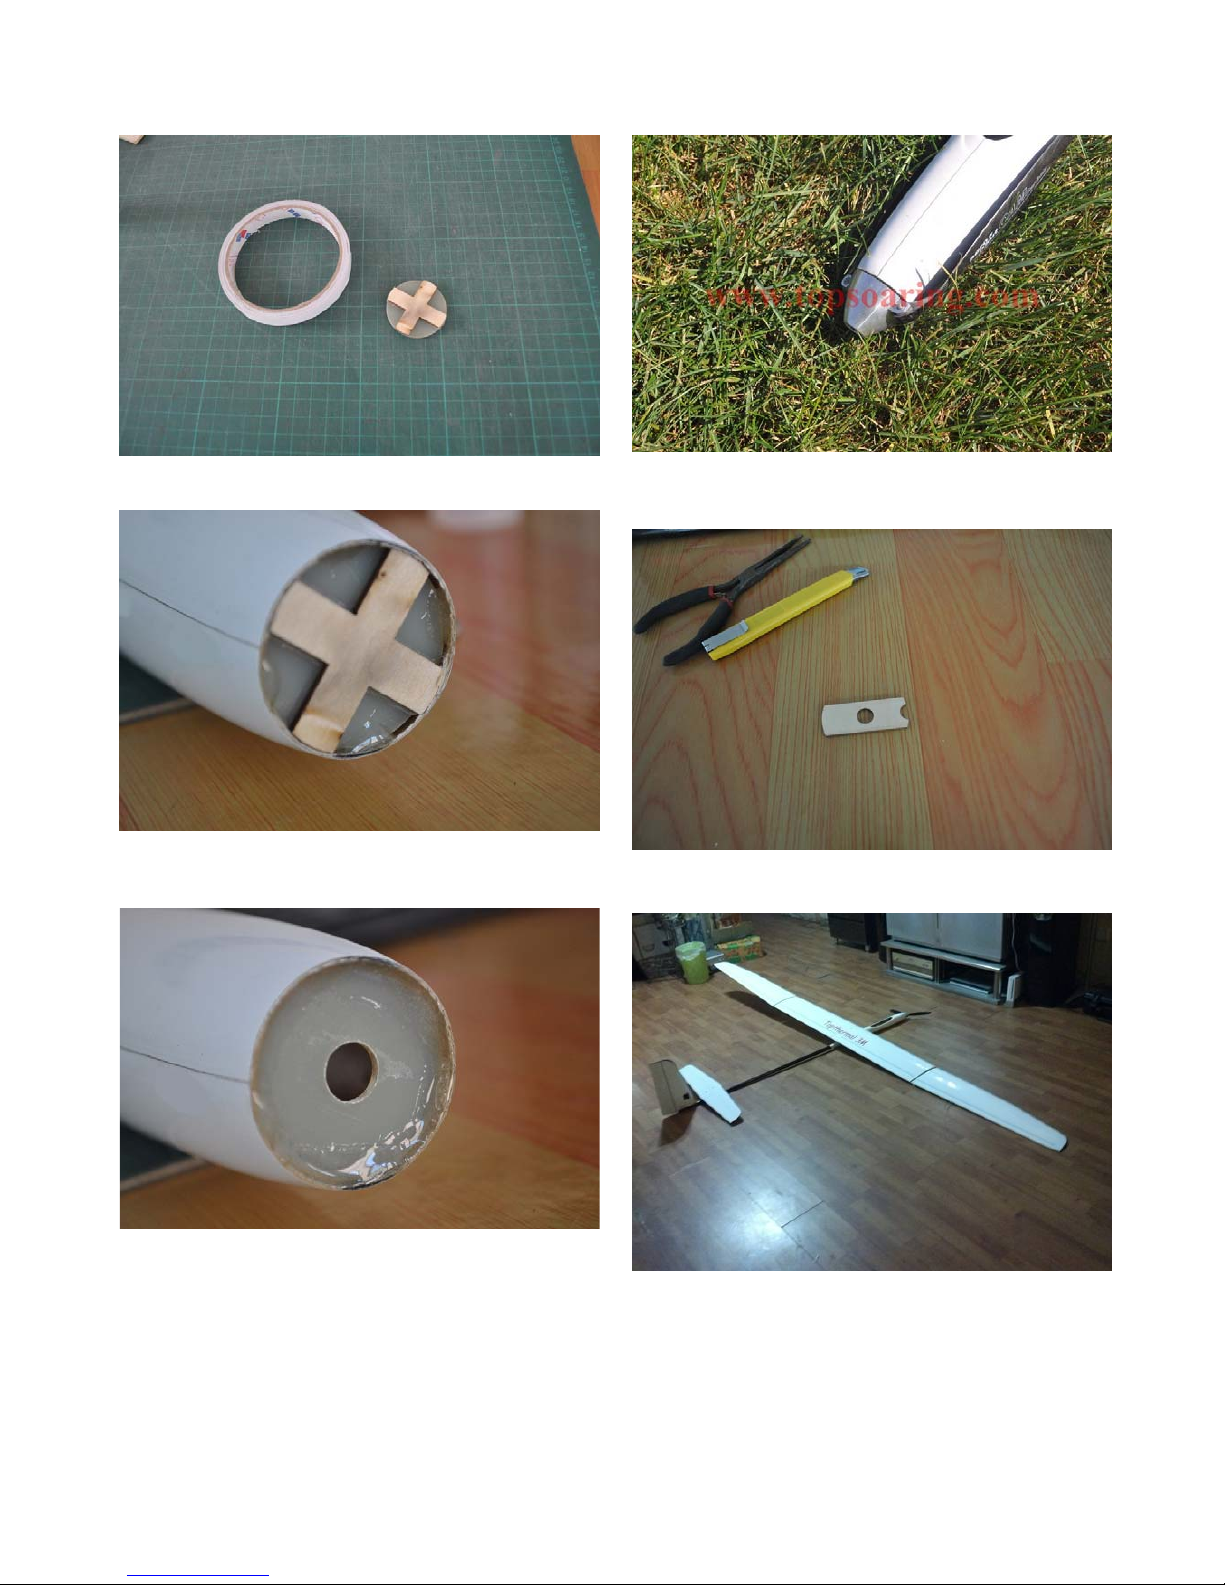
Insert them inside the leading end of the pod,and
glued with little 5 mins epoxy
Remove the wood cross,and glue the else place ,
don’t forget to glue the slot after motor plate inside
the pod.
And install your motor ,spinner and propeller
Glue this wood plate at the end of the motor inside
the pod to protect the battery
All done. Enjoy your flight.
 Loading...