

Topp Music Gear ARGO 8A, ARGO 12A, ARGO 10A, ARGO 15A, ARGO 8A-MP User Manual
...
ARGO 8A-MP/10A-MP/12A-MP/15A-MP
ARGO
10
8
ARGO 8A/10A/12A/15A
ARGO
ARGO
2
INTRODUCTION
WIRE CONNECTIONS
FREQUENCY RESPONSE DIAGRAM
PANEL DESCRIPTION
8
RIGGING
7
WARRANTY
15
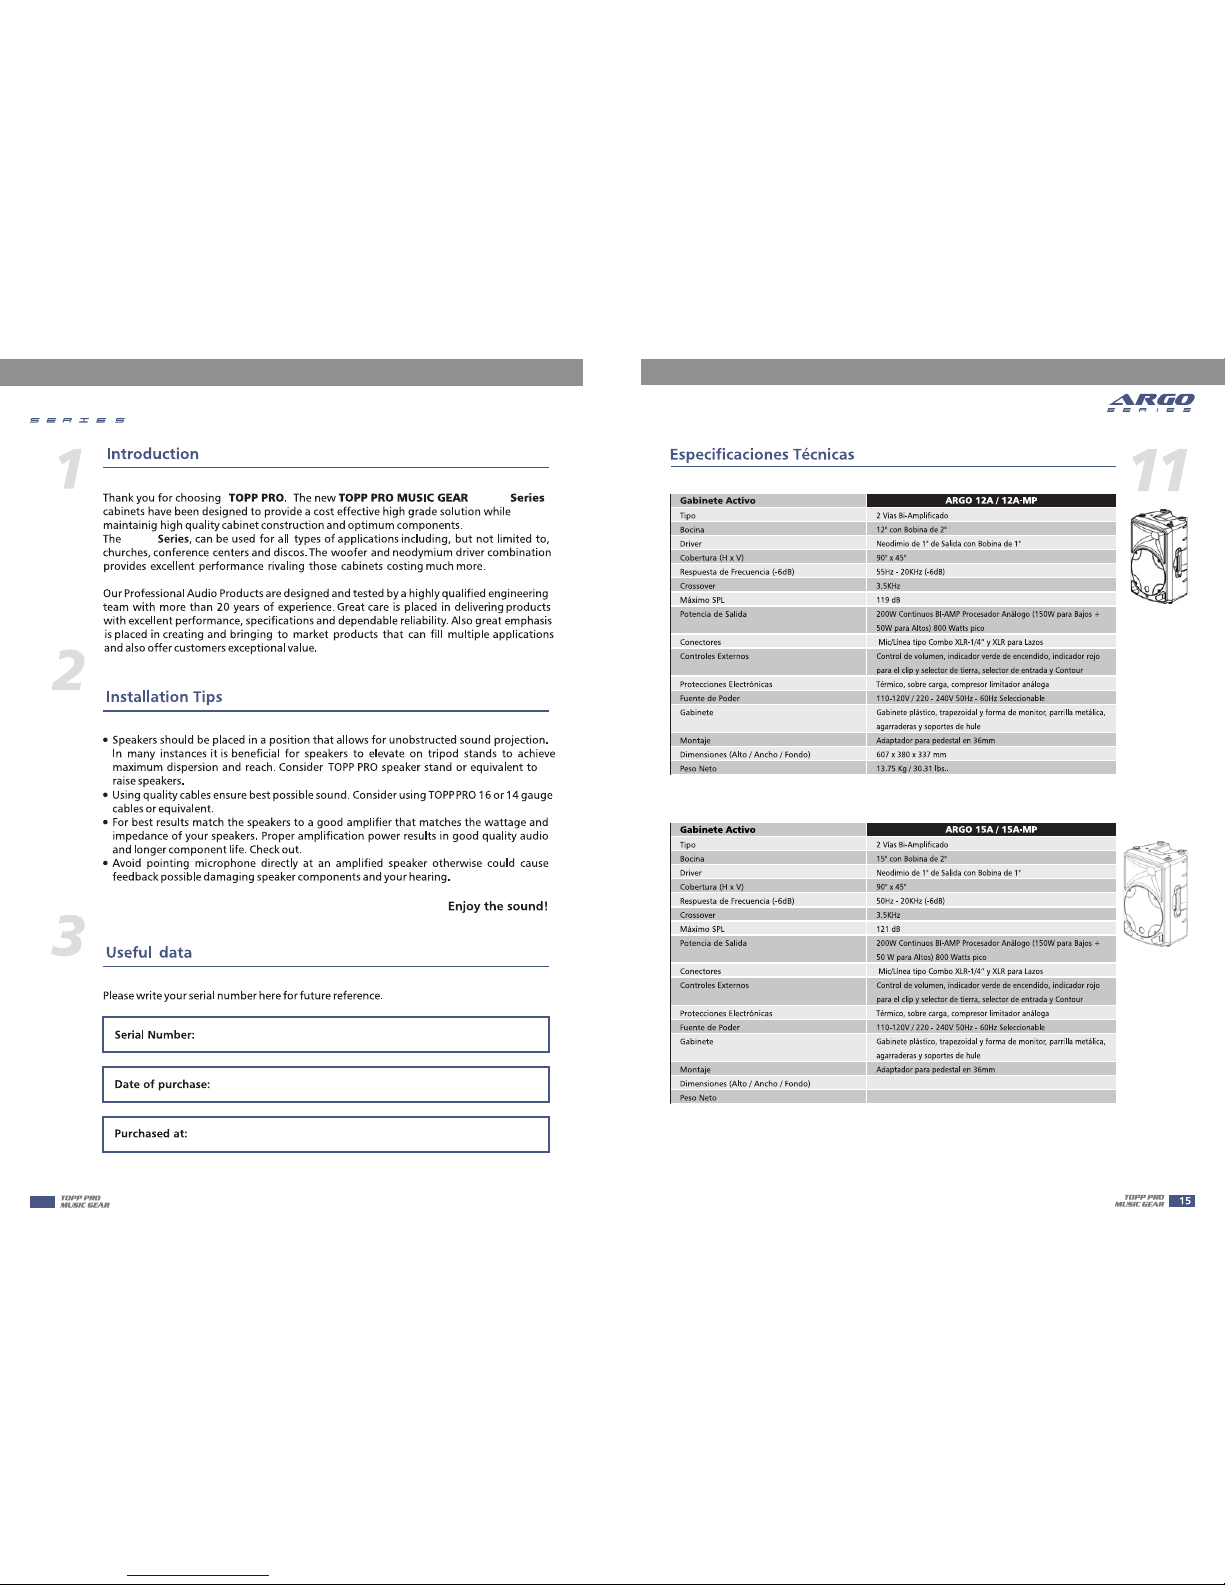
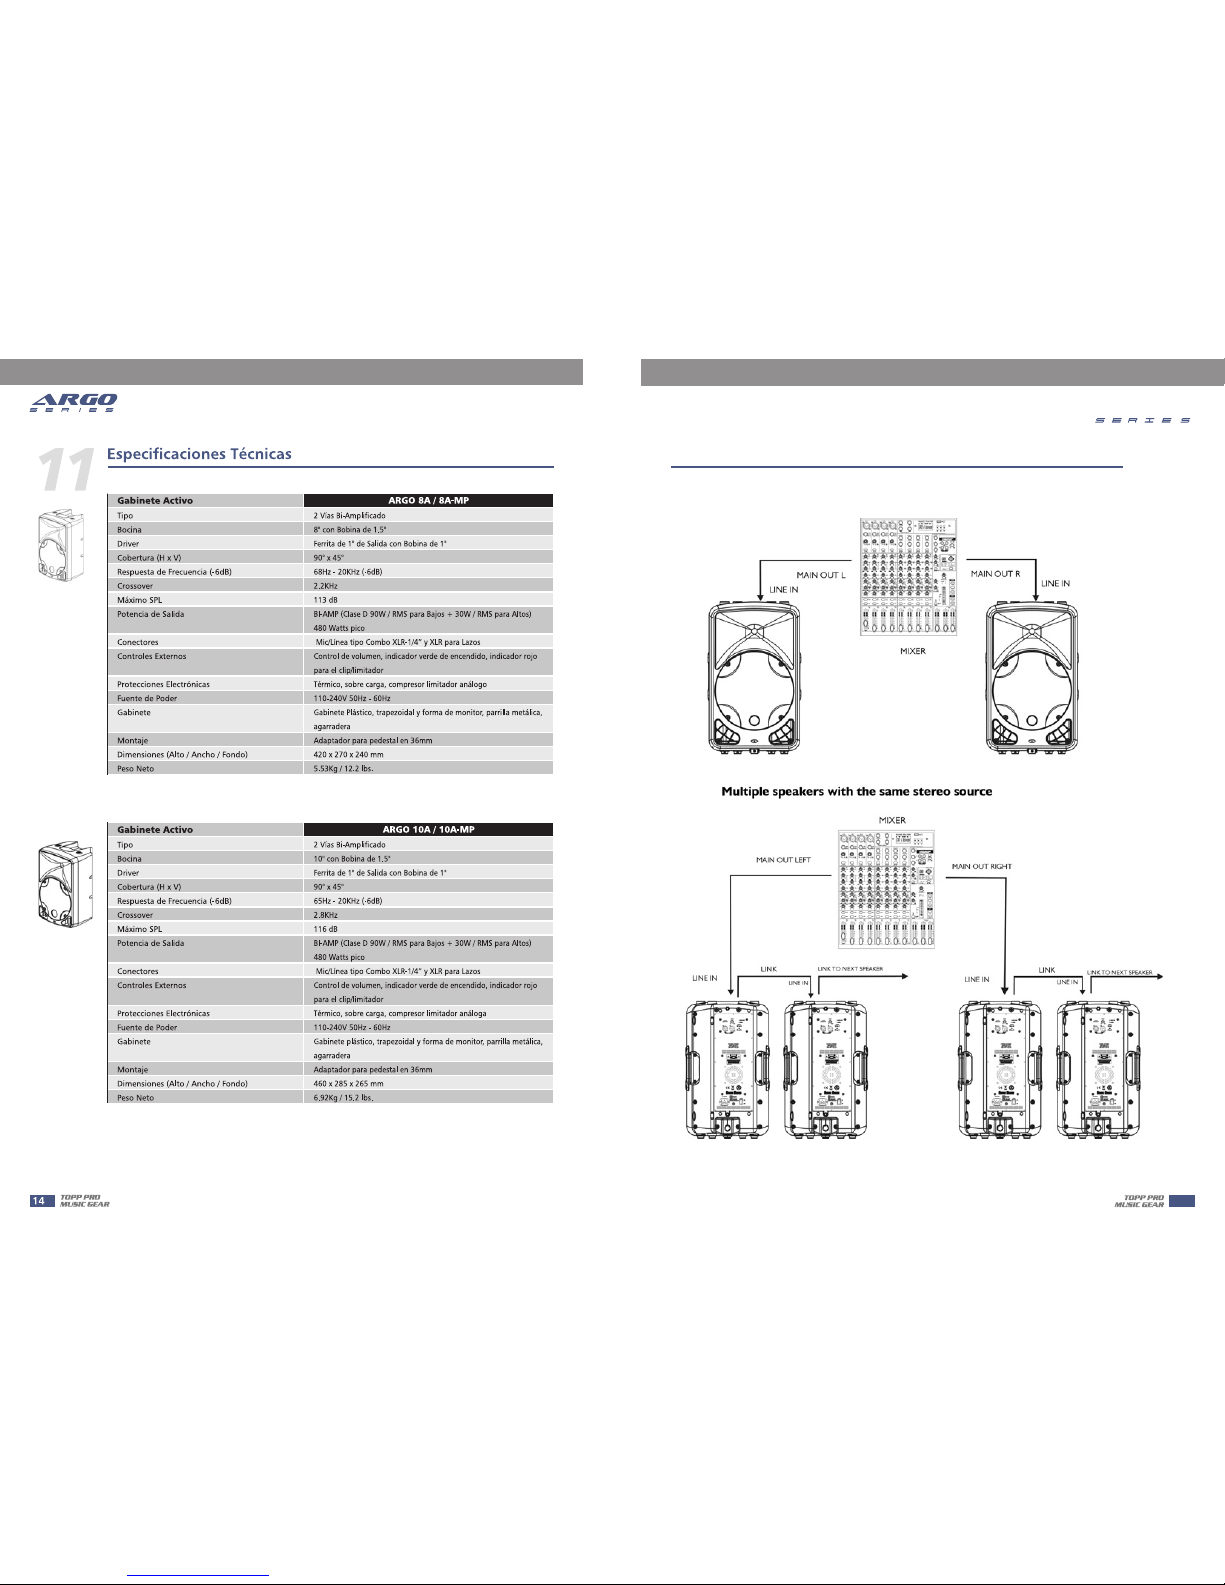
TECHNICAL SPECIFICATIONS
13
INDEX
12
4
10
HOOKUP DIAGRAMS
5
QUICK START
6
3
ARGO
ARGO
ARGO
4
ARGO
625x386x366mm
14.86kg/32.80 Ibs
4
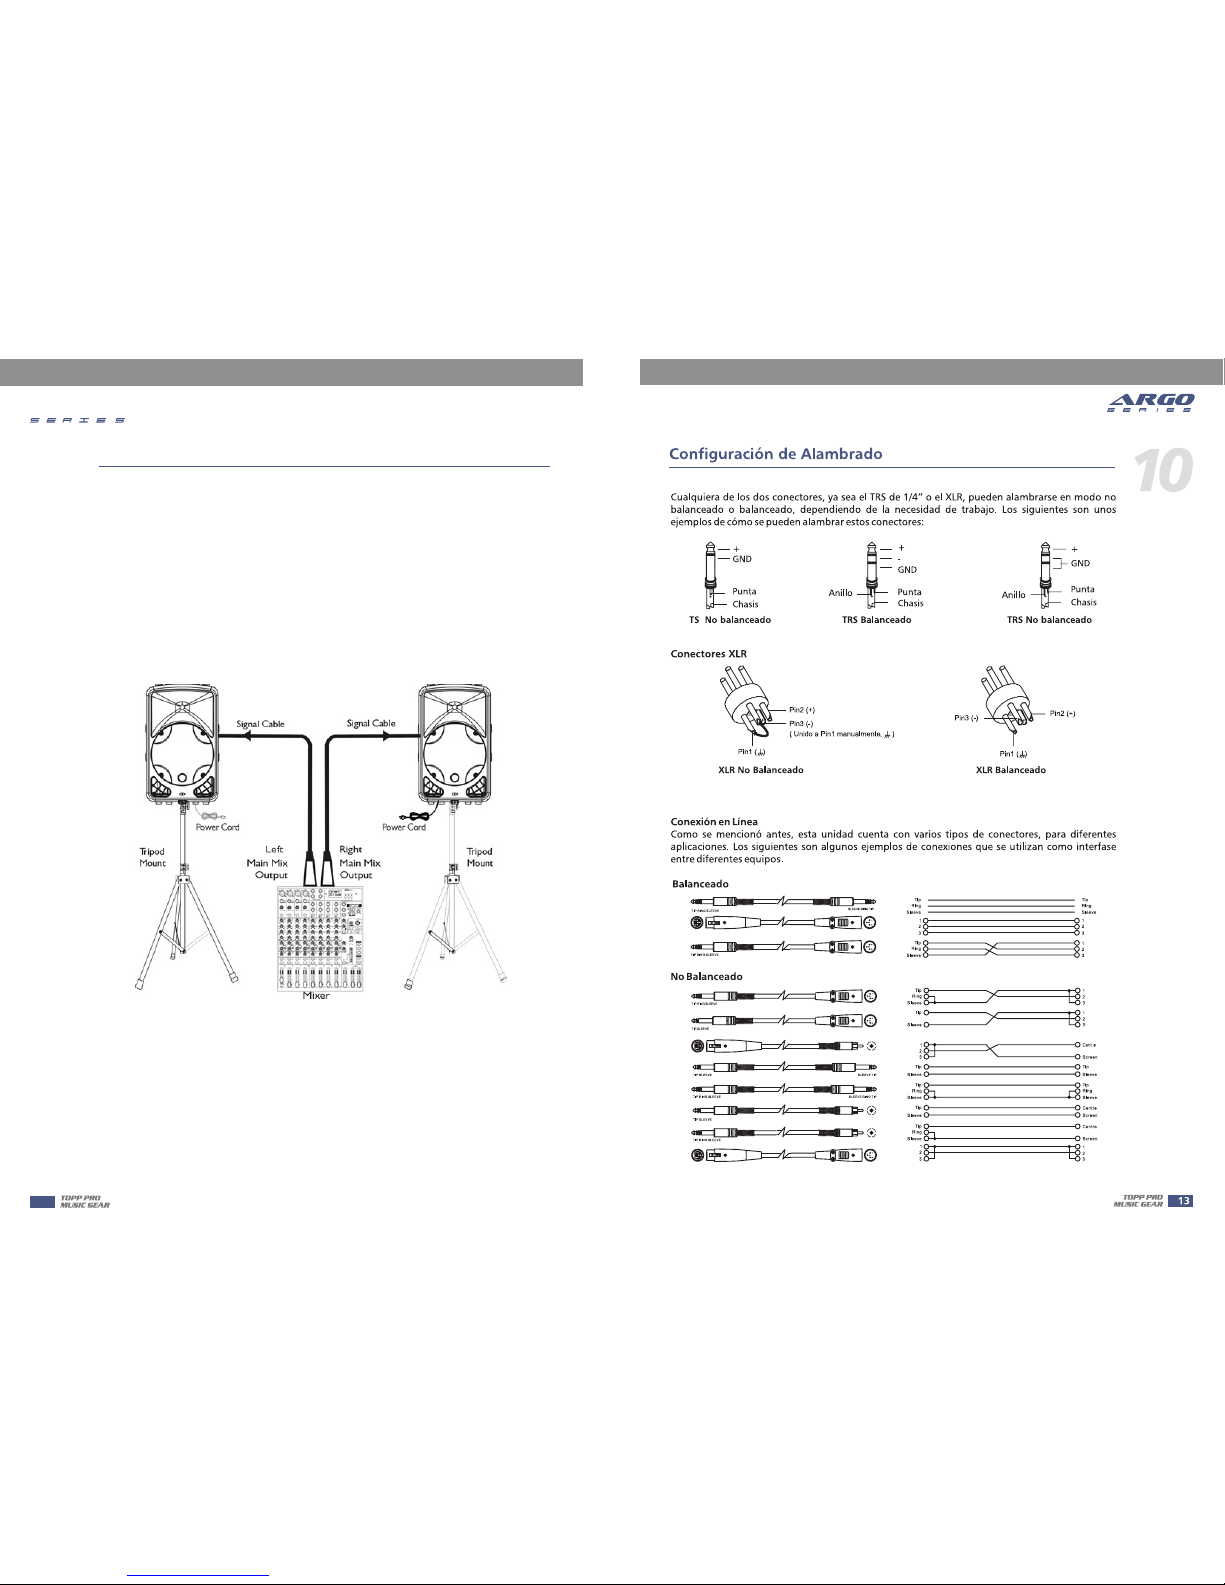
Two speaker in stereo operation
Hookup Diagrams
5
ARGO
5
Quick Start
Make all initial connections with all the equipments powered off, and ensure that all the main
volume controls are turned completely down.
1). Connect one side of the signal cable at your audio mixer into output left / right (with Stereo-
speaker cabinet.
Jack or XLR) and the other side of the cable into the line input Stereo-Jack) of your active
2). Connect the power cord to mains.
3). Turn on your mixer first, then the active speaker cabinets.
4). Turn up the volume control of the active speaker cabinets.
5). Use PFL function to get the proper input level for the mixer, and adjust the
main mix level control to manipulate the output level.
6). After using, turn off your active speaker cabinets first, then the mixer.
6
ARGO
 Loading...