

Topnics TP-VCA7203 User Manual
TP-VCA7203 User Manual
Form one-stop shopping
your best choice and professional partner
http://www.topnics.com
Tel : +86 755 22202283 / +86 755 25932575
Fax : +86 755 25932565
Email : robert@topnics.com
1/20
TP-VCA7203 Encryption HD Enforcement Recorder
Menu Book
Instructions: Before using the machine, please read the instructions carefully and save it
for future reference
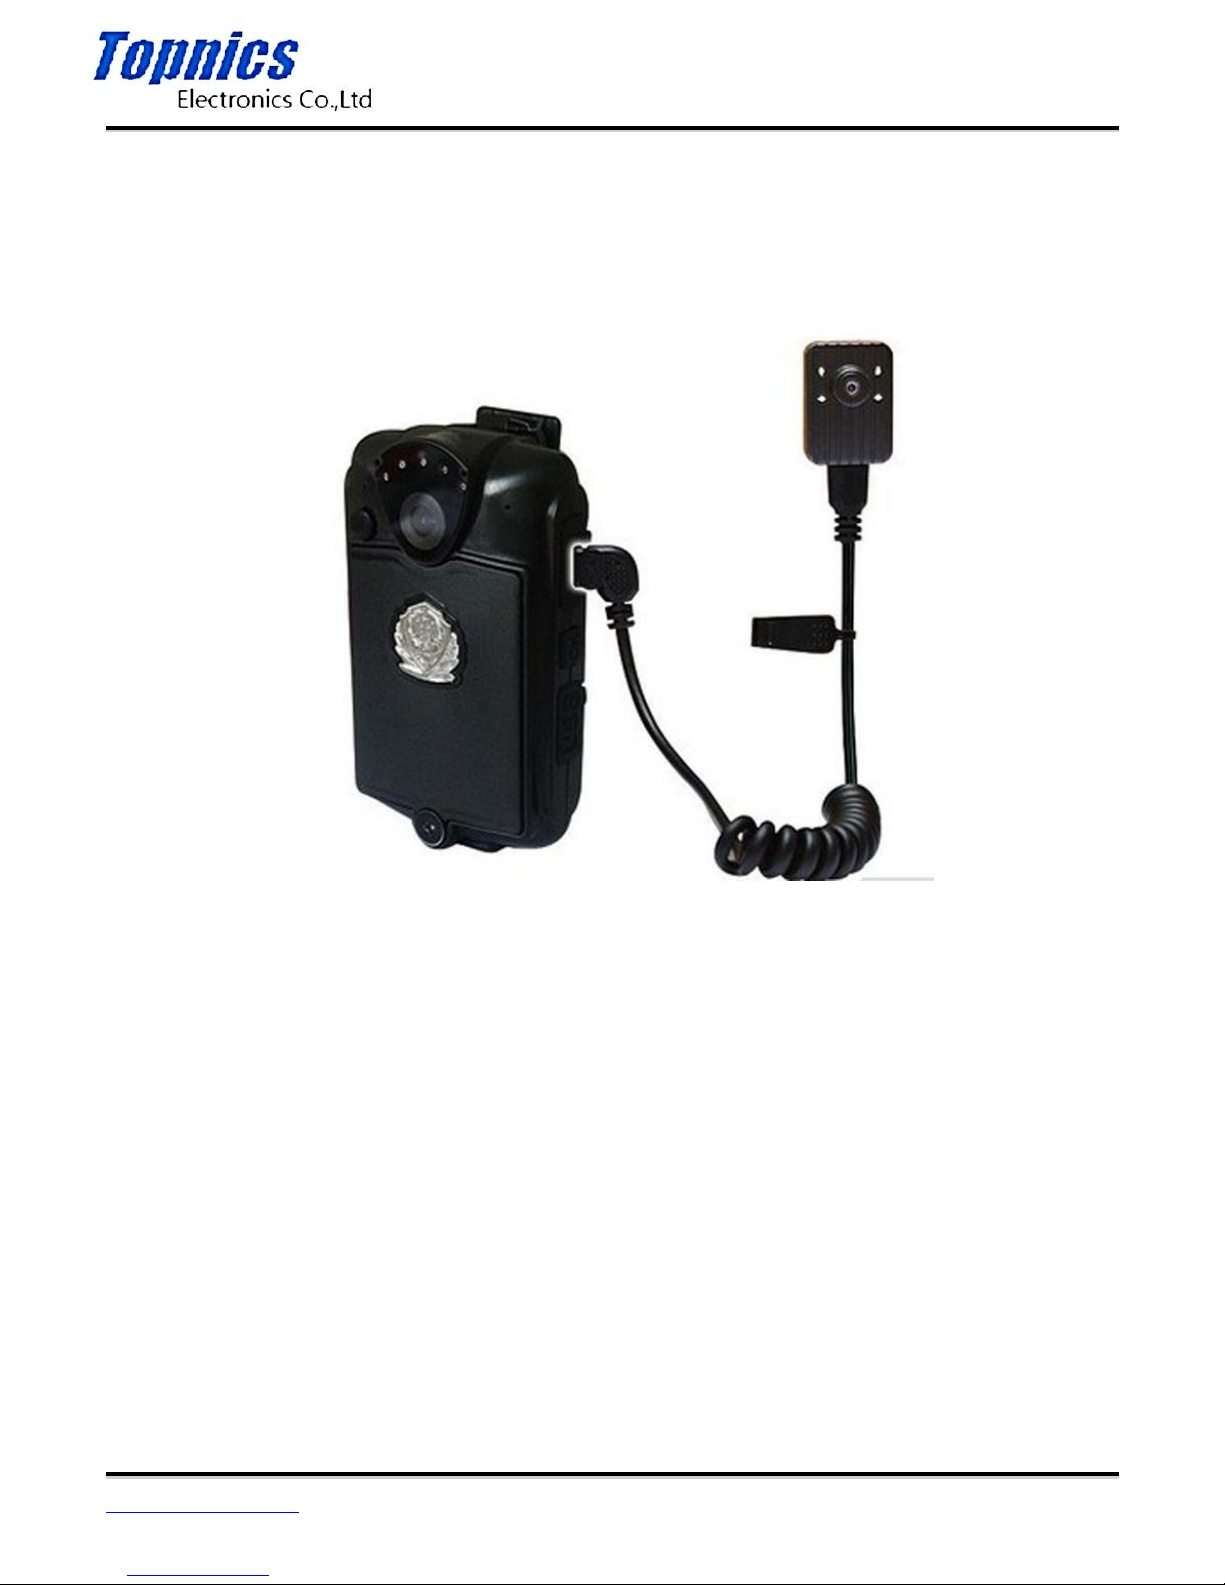
Structure schematic
1)Host schematic diagram

TP-VCA7203 User Manual
Form one-stop shopping
your best choice and professional partner
http://www.topnics.com
Tel : +86 755 22202283 / +86 755 25932575
Fax : +86 755 25932565
Email : robert@topnics.com
2/20
TP-VCA7203 User Manual
Form one-stop shopping
your best choice and professional partner
http://www.topnics.com
Tel : +86 755 22202283 / +86 755 25932575
Fax : +86 755 25932565
Email : robert@topnics.com
3/20
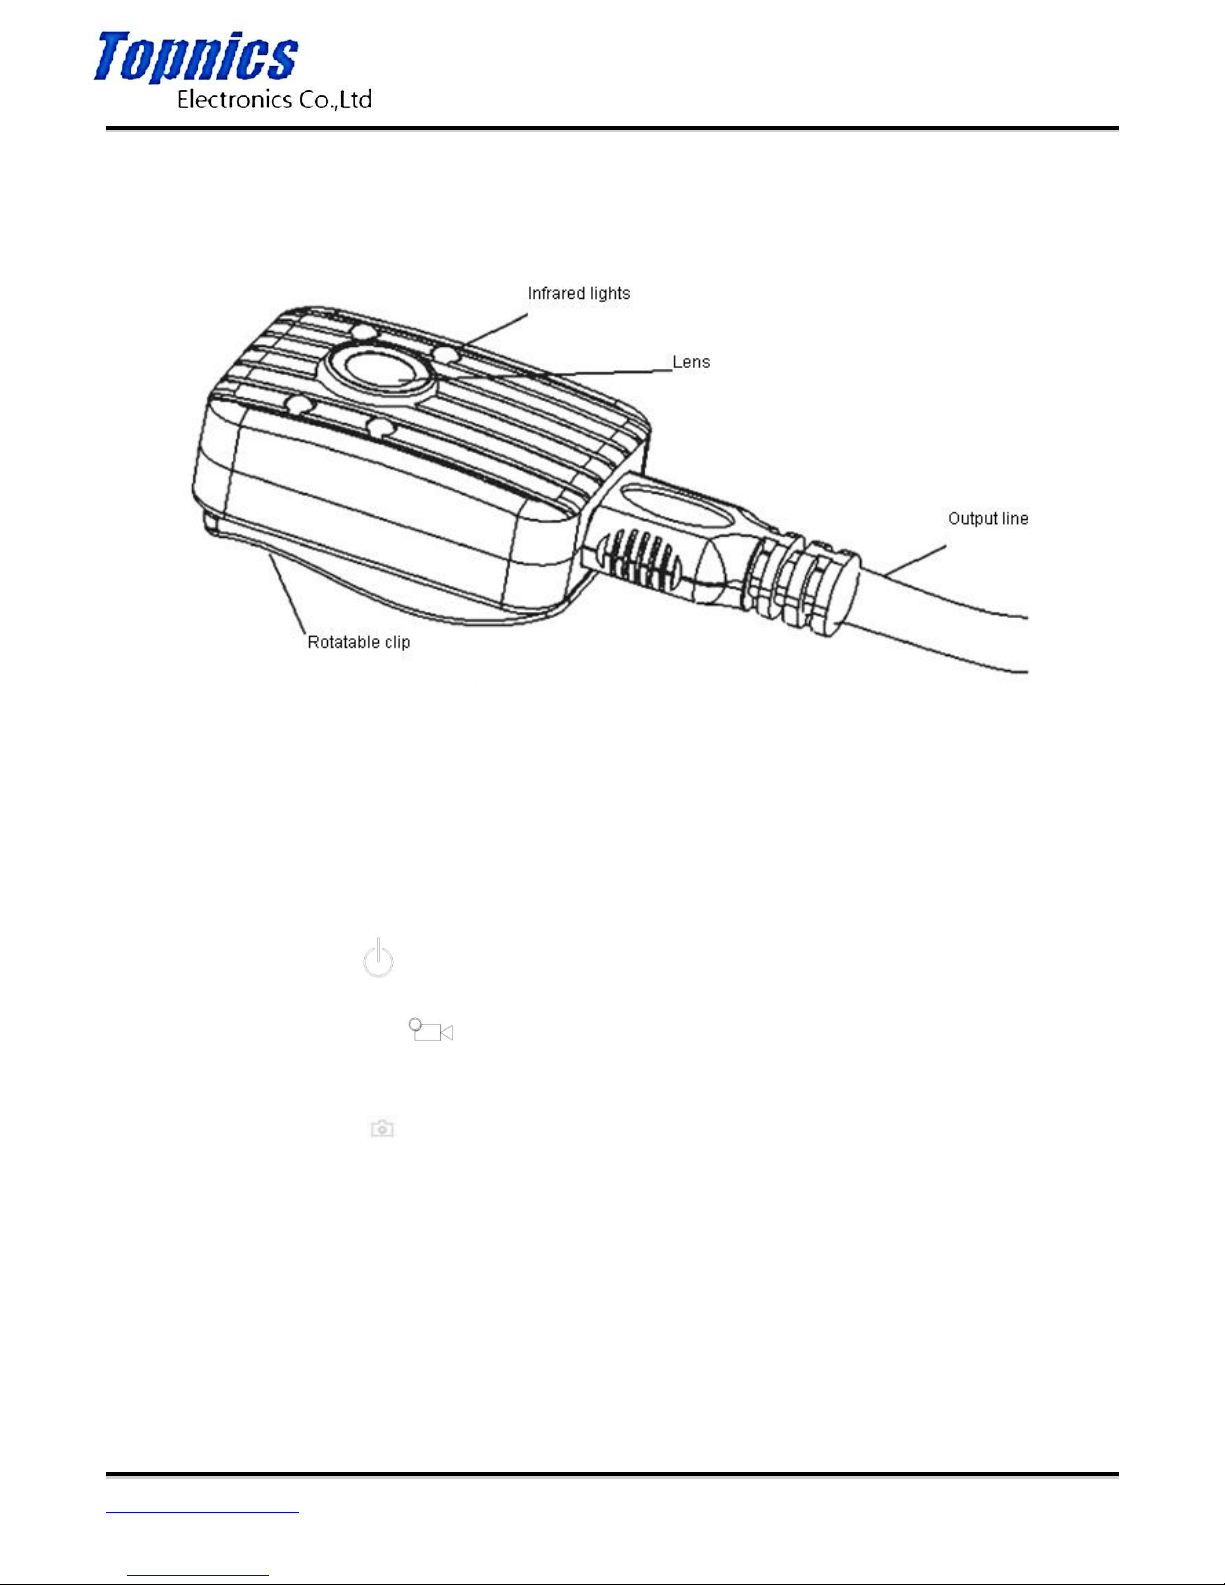
2)Hanging outside camera schematic diagram
Key operating instructions
1. Power on/off button( ): Press 3 seconds to switch on/off
2. Video/Intercom button ( ): Short press to conduct start or stop recording, long press to
conduct intercom operation
3. Pictures/menu button( ): Short press to take pictures, long press to set menu
4. Recording/return button( ): Short press to separate recording; to return to the previous menu in the
settings menu.
5. Confirm/Playback button(OK): Short press to confirm the selection; confirm playback when the video
playback / recording playback.
TP-VCA7203 User Manual
Form one-stop shopping
your best choice and professional partner
http://www.topnics.com
Tel : +86 755 22202283 / +86 755 25932575
Fax : +86 755 25932565
Email : robert@topnics.com
4/20
6. Direction/Up button(△): In the Settings menu move up or right to the selected item; when take
pictures or video recording in 1280 * 720P long press the button to role the zoom (pull away).
7. Direction/down button(▽): In the Settings menu move down or left to the selected item; when take
pictures or video recording in 1280 * 720P long press the button to role the zoom (closer).。
8. Infrared on/off button(IR):
A. When not connected the external camera, turn on/off the camera night light to switch the infrared
filters
B. When connected the external camera, turn on/off the external camera night light
9.Work indicator light work or standby status indicator in the following table
Red/green/orange indicator
Work indicator lights
Switch on
green
red
video
Red lights flash
red
standby
Not light
Red lights flash
charging
red
blue
Charging full
green
Blue light not shine
intercom
red
red
picture
Red lights flash once
red
recording
Orange
red
Iv The basic function operation
Press "switch" button for 3 seconds, the screen displays the boot LOGO (LOGO is commonly badge) after
entering the normal display. In any display mode, press the "switch" button for 3 seconds, After
the display "off......" Prompt it shutdown.
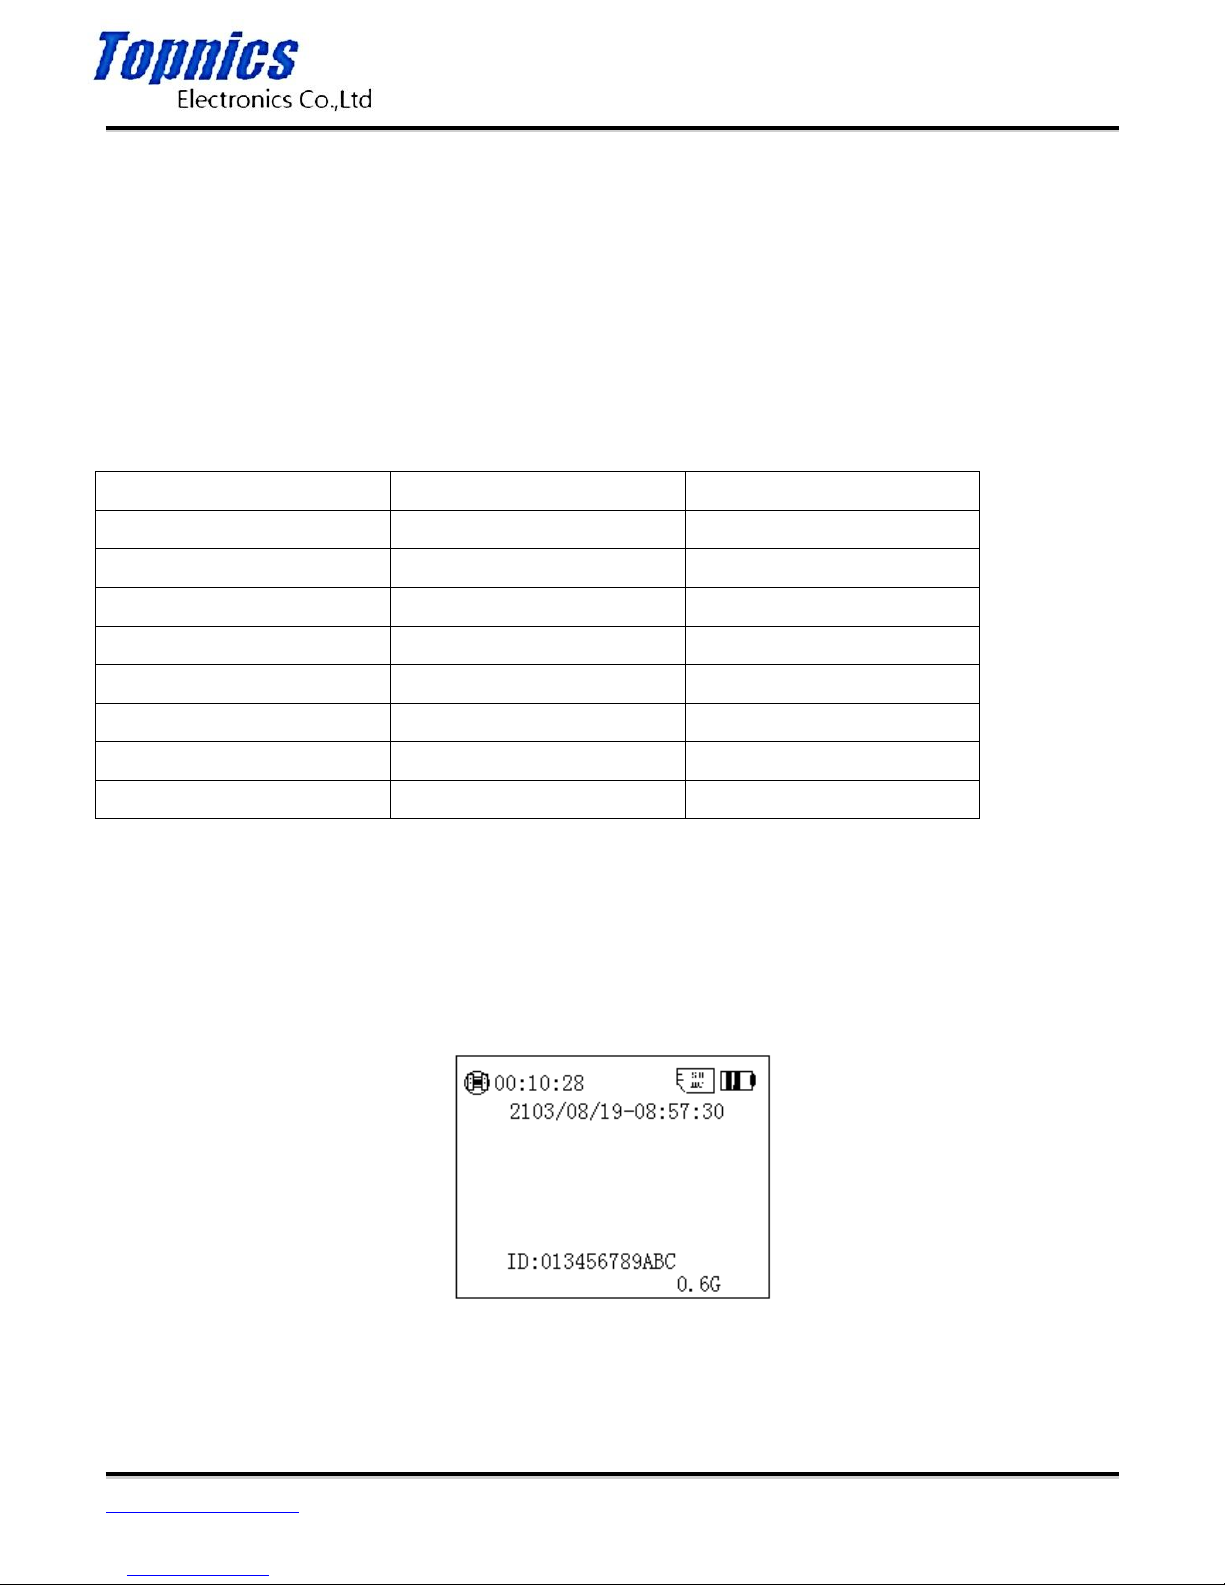
The normal display
4.1 In normal display status screen displays: 1 left corner displays the time remaining memory card
TP-VCA7203 User Manual
Form one-stop shopping
your best choice and professional partner
http://www.topnics.com
Tel : +86 755 22202283 / +86 755 25932575
Fax : +86 755 25932565
Email : robert@topnics.com
5/20
recording; 2 upper right corner of the display memory card and battery icon; 3 The second line
shows the system date and time; 4 penultimate line shows the police. .. member ID number; 5
lower right corner displays the remaining capacity of the memory card.
4.2 Standby
Within three minutes without any key operation, the unit enters standby hibernation, LCD off,
red status indicator 2 flashing. In standby mode, press any key to activate dormant.
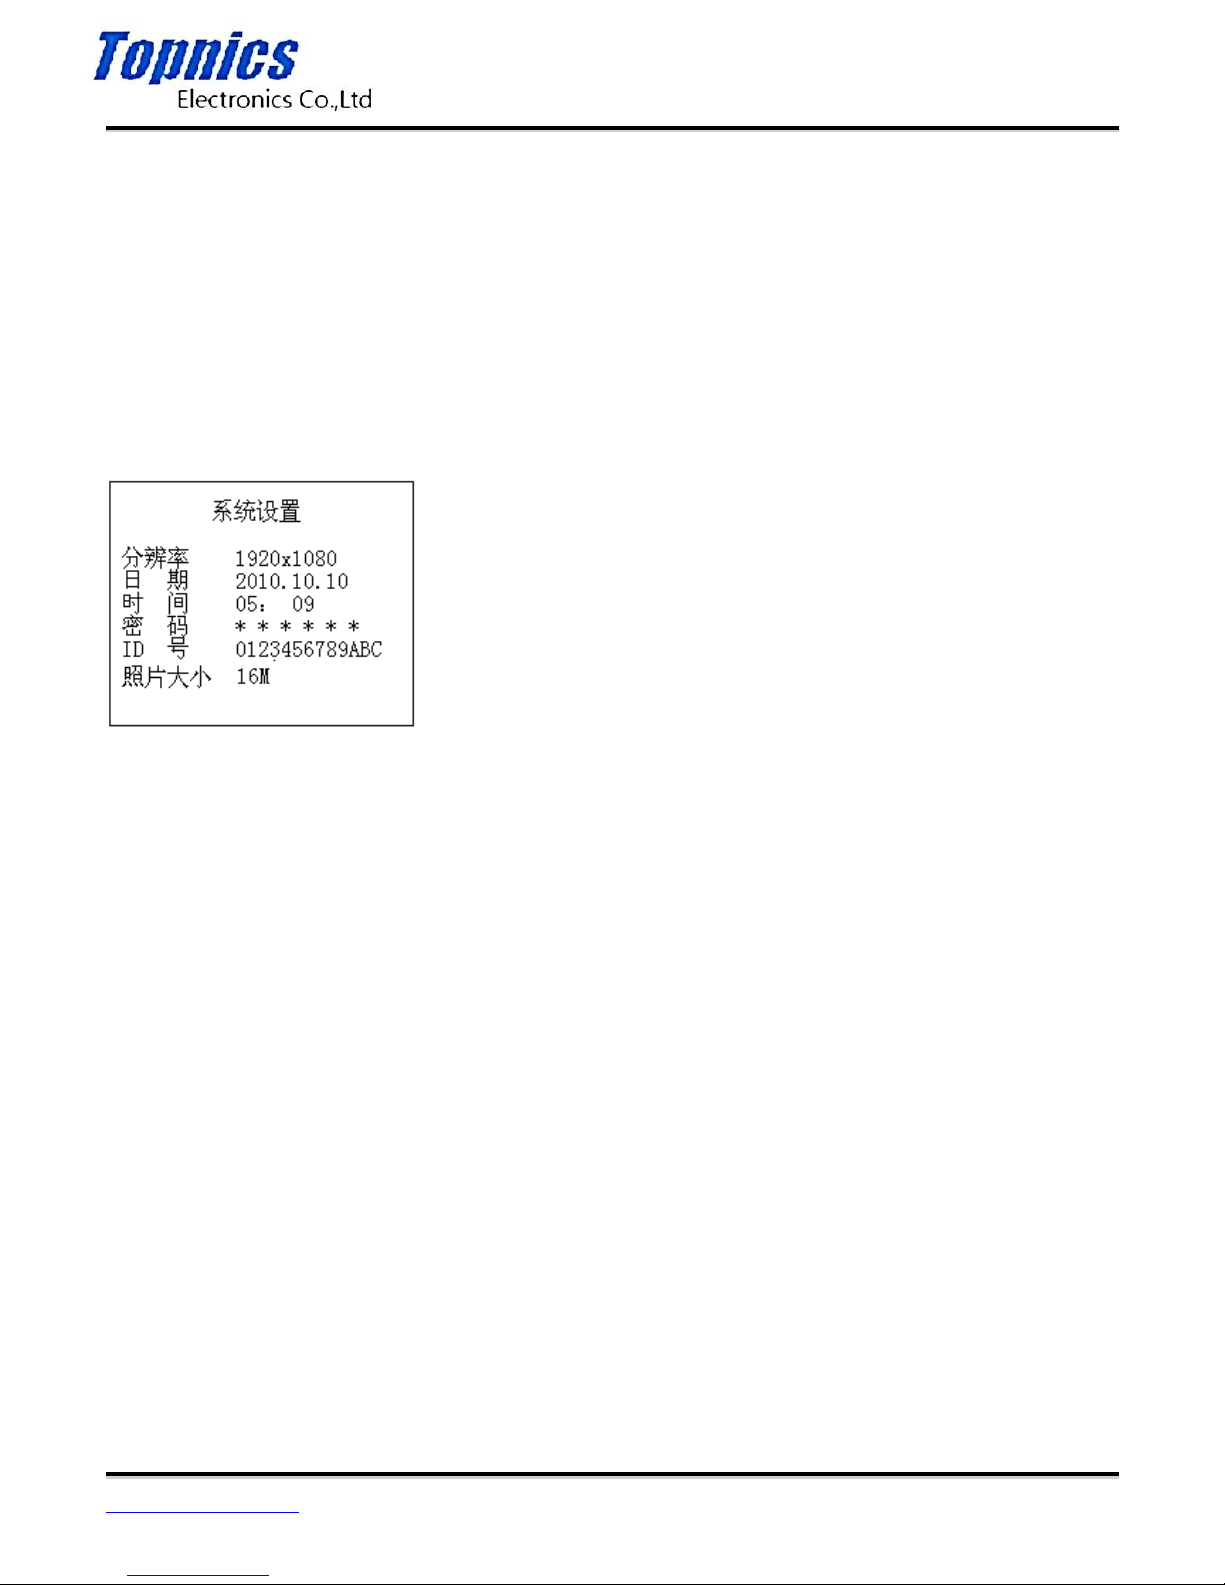
4.3 System settings
Long press "camera / Menu" key for 3 seconds to enter the "System Settings", shown below:
System setting display
1. Resolution setting: Press "OK" to display the highlight press "△" or "▽" to select the desired
resolution, then press "OK" to confirm
2. Photo size settings: Press "△" or "▽" button to select "Photo Size" field, press the "OK" button to
display highlight, press "△" or "▽" key to select the desired photo size (16M/5M / 3M), then
press "OK."
3. After setting, press "Record / Back" button to exit the settings return to the normal display.
Note:
1. In this interface setting camera resolution and photo size.
2. Date / time / resolution / password / ID number can not be set on the machine, connected to the
computer, setting date / time / password / TD No by background management software. For
information on setting the reference "Police enforcement recorder Management Software" in
User Manual section.
4.4 IR lamps and filter switch on / off
After the IR light is switched off by default, filter switch to color film, suitable for daytime use. If it is used

TP-VCA7203 User Manual
Form one-stop shopping
your best choice and professional partner
http://www.topnics.com
Tel : +86 755 22202283 / +86 755 25932575
Fax : +86 755 25932565
Email : robert@topnics.com
6/20
at night you can press the "night vision ON / OFF" button to turn on the infrared light, filter
switch is switched to the white pieces, suitable for night use. Press the "night vision ON / OFF"
button to switch between day and night mode of operation modes. Daytime mode color display
screen images, night mode display image is black and white display.
4.5 camera and zoom
1 photo: In the boot display, press the "Capture" button to take pictures, the upper left corner of the
screen display the camera icon accompanied a short red and a "click" sound, , when each time
taking the camera icon with a picture photographs with the date and time named, JPG extension,
stored in the memory card. View photos see "View / Playback Video" section.
2 Zoom: In camera mode: Press "△" key or "▽" 3 秒, the right slider display appears on, when
the right slider moved along with, the picture being shot zooming in or out.
4.6 Video / zoom / capture
A video: In normal display mode, press the "record" button for video, upper left corner of the
video screen displayed the red dots, each time press button to start recording, press it again to
stop recording, and recording with date and time named to MP4 suffix, stored in the memory
card. View video see "View / Playback Video" section. If in the recording process not press the
"record" button to stop recording, the machine will automatically cycle to 30 minutes
automatically packaged archive.
2 Zoom: This machine has a zoom function in 1280 * 720P recording, press and hold the right
"△" key or "▽" 3 秒 slider appears on the display, along with a screen slider mobile video was
shot near or pull away .
3 capture: during recording, press "camera / Menu" button once to capture a photo, continue
recording after saving photos. In this process, recorded significantly lower right corner of the
screen appears a box to move. (Note: The photos capture the same resolution and video
resolution)
4.7 Recording
The machine can be individually recorded in the boot display, press the "Record" button to
record, in the middle of the display shows "Recording" prompt, press it again to stop recording,
recording named by the date and time, WAV suffix saved in the memory card. View recordings
see "View / Playback Video" section.
 Loading...