

Top Gun Pro Heli Rapier 450, Rapier250 Instruction Manual


2
Rapier 450
ELECTRIC POWERED 6 CHANNEL RTF RC HELICOPTER
INSTRUCTION MANUAL
WARNINGS BEFORE USE
As the user of this product, you are solely
responsible for operating it in a manner that does
not endanger yourself and others or result in
damage to the product or the property of others.
This model is controlled by a radio signal that is
subject to interference from many sources outside
your control. This interference can cause
momentary loss of control so it is advisable to
always keep a safe distance in all directions around
your model, as this margin will help to avoid
collisions or injury.
1. Never operate your model with low transmitter
batteries.
2. Avoid operating your model in the street where
injury or damage can occur. Always operate your
model in an open area away from cars, traffic, or
people. Never operate the model out into the
street or populated areas for any reason.
3. Carefully follow the directions and warnings for
this and any optional support equipment
(chargers, rechargeable battery packs, etc.) that
you use.
4. Keep all chemicals, small parts and anything
electrical out of the reach of children Moisture
causes damage to electronics. Avoid water
exposure to all equipment not specifically
designed and protected for this purpose.
5. Never lick or place any portion of your model in
your mouth as it could cause serious injury or
even death.
6. This RC helicopter is not a toy! Incorrect
operation may cause serious injury or damage. If
you are a novice pilot we strongly suggest that
you should find an experienced pilot in RC
helicopters to assist you.
7. It is absolutely necessary to read the manual of
the helicopter before operation ,it is mandatory
to check all control systems and mechanical
linkages for proper operation before every flight.
Safety first!
CONGRATULATIONS ON PURCHASING THE TOP GUN PRO HELI RAPIER

3
8. Since the helicopter can fly very fast, it may
cause potential danger, so the choice of the flight
field is of great importance.
9. Do not fly near crowds, high voltage cables or
trees to ensure the safely of yourself and others.
10. Do not fly in bad weather such as rain or
thunder storms to ensure the safety of yourself.
11. It is suggested to fly at an open field for
beginners, and fly with a training set to practice
BATTERY & CHARGING WARNING
It is important that you only charge the included
3S 11.1V 2200mAh Li-Po Battery with the included
3S 11.1V 1.0-Amp Li-Po Balancing Charger. Your
battery is equipped with special Charge Protection
Circuitry and Balance Charge Leads with connector
that are only compatible with this charger.
Attempting to charge the battery using another LiPo charger or non Li-Po compatible charger could
result in serious damage.
Please familiarize yourself thoroughly with the
Battery Warnings and Guidelines section before
continuing.
A detailed Guideline and Safety page on
handing and charging LiPo batteries can be found at
the rear of the manual.
The included 3S 11.1V 1.0Amp Li-Po Balancing Charger will charge a near
fully discharged (not over-discharged) 3S 11.1V
2200mAh Li-Po battery in approximately 1.5-2.0
hours. Insome cases the charge time may be shorter
depending on the actual amount of capacity left in
the battery after a flight.
NEVER
charge the battery unattended.
NEVER
charge the battery by flammable material.
AL
W
AYS charge the battery in a tin or LiPo safe
sack, away from combustable material to contain
any possible fire risk.
NOTICE
The Li-Po battery included
with your Rapier 3D will
arrive partially charged. For this reason the initial
charge may only take approximately 30-50 minutes.
The charger requires up to 3-Amps of 11.515 Volt
DC input power that can be supplied by the optional
AC to 12V DC, 3-Amp Power Supply for convenient
charging anywhere an AC outlet is available. NEVER
attempt to power the charger from an AC outlet
without the use of a proper AC to DC adapter/power
supply.
QUICK START GUIDE
TRANSMITTER & RECEIVER BIND
INSTRUCTIONS
Please Note: The Rapier features automatic binding
when the TX & RX are turned on. If you happen to be
flying with a friend or colleague using the same
radio system, please ensure that one is properly
bound before binding another, as it could be
possible for one TX to be bound to two Rapier
receivers if by chance they are turned on at exactly
the same time.
OVERVIEW
We have put together a quick start guide to get
you up and running with your Rapier ASAP. If you
are not a novice you can be up and running with in
the hour.
These models are set up and factory tested to fly
out of the box. Minor trimming may be required and
some basic set up tips are advised for the more
advanced pilot.
Out of the box your Rapier will hover and in the
3D Fly mode is more than capable of basic 3D, with
a tweak or two to the settings
it is even capable of the more advanced 3D. We
have tested many of them out of the box and have
them flying inverted as well as flipping about with
no changes at all to the out of the box set up.
If you are a first time modeller it is
recommended you use a flight simulator to
familiarise your self with the basic controls, the
RealityCraft RC Helimaster SIM is a good starting
point.
Once you are familiar crack on with our quick
start check over and 10 step check:
1. First of all set up your flight battery to be
installed in the machine using the supplied
Velcro to hold the battery in position in the
battery tray, make sure it is secure and not likely
to come loose during flight.
2. Put the battery on charge using the supplied
balancing charger, this should take no more than
an hour (FOLLOW ALL SAFETY GUIDES)
3. Put the 8AA batteries in to the transmitter (not
supplied).
4. Check all the switches on the transmitter are in
the away / up position when ever you turn it on
and the throttle is at the low position, the most
4
important note here is to ensure the FLY switch
in the up / away position or NOR. The transmitter
has a safety feature to stop it turning on at full
throttle but treat it like a loaded weapon when
the model and the heli are turned on.
5. Check the model over paying important attention
to make sure all ball links are connected, also
check the main and tail blades as well as giving
the model a good once over for anything obvious
6. Put your fully charged battery back in to place
and secure it in the model with velcro.
7. Put the throttle at the low position and turn on
the transmitter.
8. Now plug the battery into the speed controller
and put the canopy back on – be careful as the
helicopter is now armed and dangerous
9. Put the model in a safe place to take off and take
a few step back and test the control surfaces,
right aileron for right aileron, backward for
backward and left tail command will send the
lower tail blade turning clockwise when viewing
the model from behind, although this is not an
issue out of the box it is worth a quick sanity
check each time you go out to fly.
10. Slowly lift off and enjoy.
ADVANCED SET UP TIPS
When flying inverted or flying around you may
want to increase the throttle at the mid point with
the FLY switch in the 3D position.
The basics of flying inverted involve introducing
negative pitch while increasing the throttle, this is
unlike the normal throttle setting (in the up / away
position) where when you bring the stick to the
bottom of the box the throttle is reduced. This
introduction of negative pitch and more power will
mean you can start to fly the model inverted, roll,
loop and general fly the model around with a little
more vigour.
When you get to the stage where you want to do
more 3D flying you may want to introduce more
throttle a the mid stick throttle position.
We would recommend to use the following
throttle settings, 100% at low stick, 80% at mid
stick and 100% at high stick position. To achieve
this you will need to follow the next steps:
NOTE: disconnect the three bullet connectors
between the motor and ESC.
1. Flip dip switch EXP to the ON position, with dip
switch PLT/PITCH and RUDD/GYRO SENS (dips 9
and 10) in the off position.
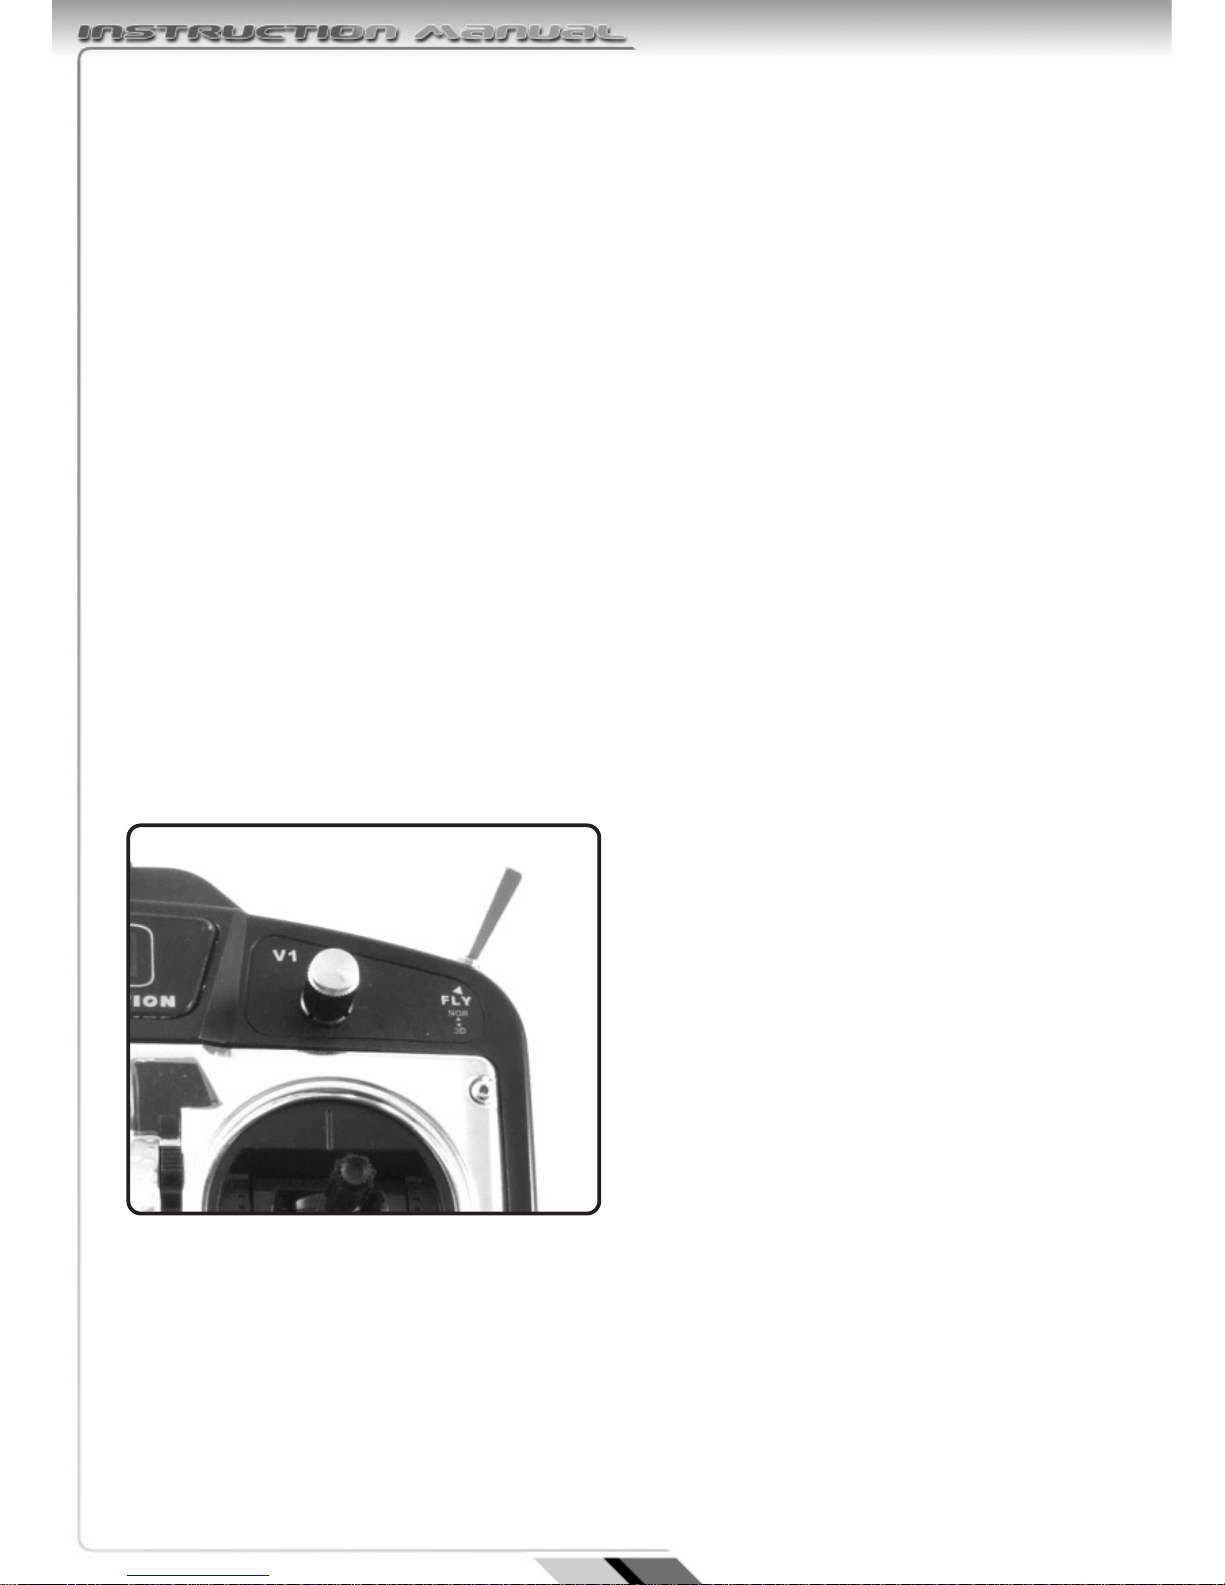
2. Now turn the rotational dial on the front top right
of the transmitter clockwise to the + position.
3. Now turn the dip switch EXP (dip 8) to the OFF
position and turn the transmitter off and on.
COMMON REPLACEMENT PARTS:
Should you be unfortunate enough to bump you
new Rapier you will be pleased to know there is a
full range of well priced spares available. Should
you have a crash or an impact be sure to check the
following to get the best from the model and to
keep it and you safe from harm. If you have any
wobbles you can normally relate it to these spinning
parts:
• Main blades
• Tail Blades
• Main rotor shaft
• Feathering spindle
• Tail output shaft
• Boom
The Rapier is a great model offering some
amazing performance and great value. Here are a
couple of things to ‘DO’ to make sure you can enjoy
it for as long as possible:
• Do check the model over before and after every
flight, pay special attention to the blades and
control rods / balls.
• Check for a full charged transmitter and main
battery pack.
3D Switch
5
DETAILED SET-UP & FUNCTION
GUIDES
HELICOPTER LIPO BATTERY CONNECT
1. First turn the transmitter on and lower the
throttle/collective stick completely, also make
sure the FLY mode switch is in NOR or away
psosition.
2. Once the battery has been properly positioned,
fasten the hook and loop strap around the
battery for added security. Then, plug the battery
into the battery leads of the ESC.
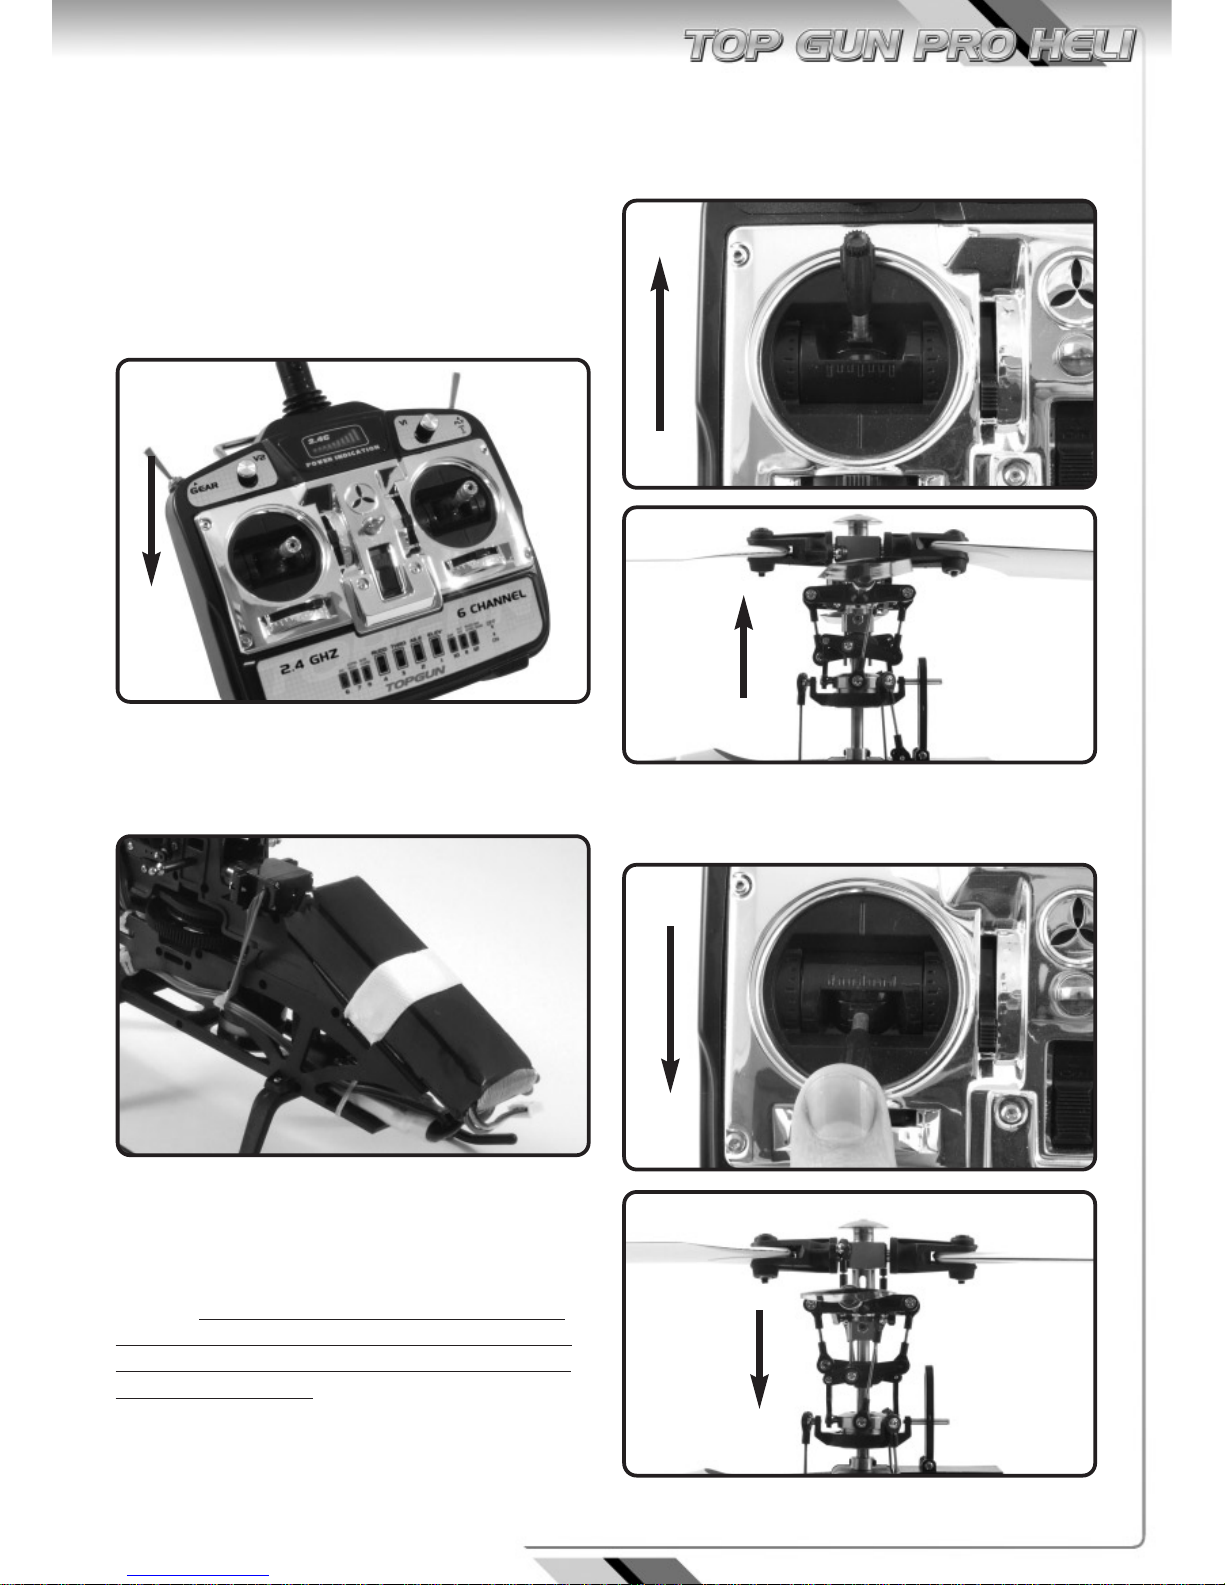
CONTROL TEST
Although each Rapier 3D is control tested at the
factory, it is a good idea to test the controls prior to
the first flight to ensure none of the servos, linkages
or other parts were damaged during shipping and
handling.
Before proceeding,
disconnect the three
bullet connectors between the motor and ESC.
It is
not safe to perform the control test with the motor
connected to the ESC.
Position the helicopter to view it from the left or
right side. Move the left-hand stick up and down to
check the collective pitch control.
When the stick is pushed up, the swashplate
should raise, increasing the pitch of the main
blades.
With the stick pulled back down, the swashplate
should lower, decreasing the pitch of the main
blades.
fly mode
switch in
NOR
 Loading...