

Page 1
User's Guide
NINJA CO2+ / NINJA CO2
EN
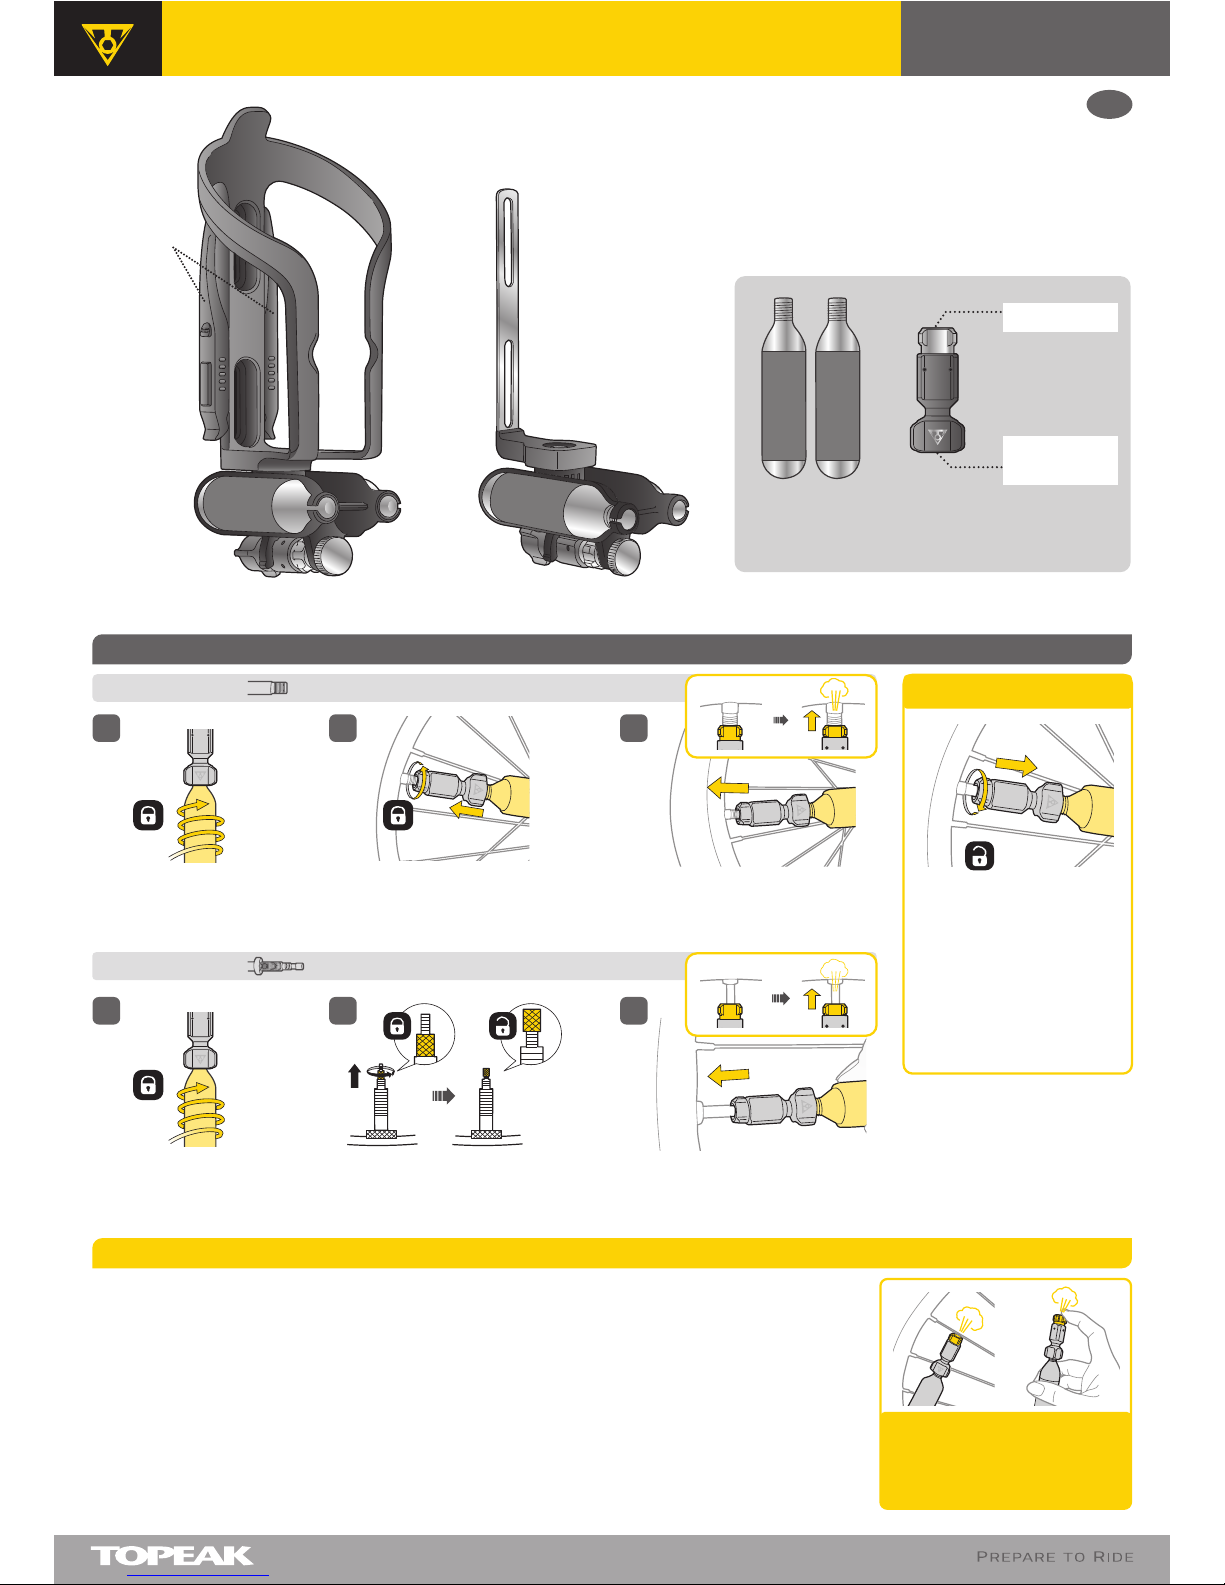
HOW TO USE MICRO AIRBOOSTER
WARNING
• Accepts all 16g threaded CO2 cartridges.
• Recommended to use Topeak 16g threaded CO2 cartridges.
• Please read all instructions before first use.
• Periodically check that components are still securely
fastened to your bike.
• Compatible with Ninja Cage series.
• If using the Micro AirBooster inflator continuously, make sure to wait 20 seconds in between cartridges for the
rubber grommet inside the inflation head to return to its original position. Otherwise, a gas leak may occur and
prevent proper inflation.
• Tighten the CO
2 cartridge before using CO2 inflation function. Failure to do so will cause improper operation and
may cause injury.
• DO NOT remove CO
2 cartridge if it is still charged with gas. Completely discharge the CO2 cartridge before removal.
• When opening the CO
2 cartridge, point the inflator head away from yourself and others.
• DO NOT use Micro AirBooster Inflator if any part is cracked or broken.
• DO NOT expose the CO
2 cartridge to heat, or store at temperatures above 120˚F (49˚C), or store in enclosed vehicles.
• Make sure to wear gloves when inflating to avoid injury.
• The barrel and CO
2 cartridge may become extremely cold/ frosty when the CO2 gas is expelled.
• DO NOT try to unscrew the Micro AirBooster inflation head until it has warmed sufficiently to touch.
• Keep out of reach of children.
Presta Valve
Thread-in CO2 cartridge. Loosen valve core before inflation.
1 2
Start and regulate CO2 flow by pushing
inflation head onto valve stem.
3
Install and thread-in inflation head
to Schrader valve.
Schrader Valve
Thread-in CO2 cartridge. Start and regulate CO2 flow by pushing
inflation head onto valve stem.
1 2 3
After each inflation, make sure
all CO
2
gas has been discharged
by pushing the Micro AirBooster
inflation head several times.
Micro AirBooster16g Topeak
Threaded CO2
Cartridge x 2
CO2 Cartridge
Engagement
Inflation Head
To avoid possible personal
injury and damage to bike
and /or tool, ensure to
disengage CO2 inflator
properly after use by
unthreading inflation head
in correct direction.
NOTE
Tire Lever
NINJA CO2+ NINJA CO2
YES NO
Page 2
Compatible
with Ninja
Cage series.
Unscrew with
T15 tool.
User's Guide
NINJA CO2+ / NINJA CO2
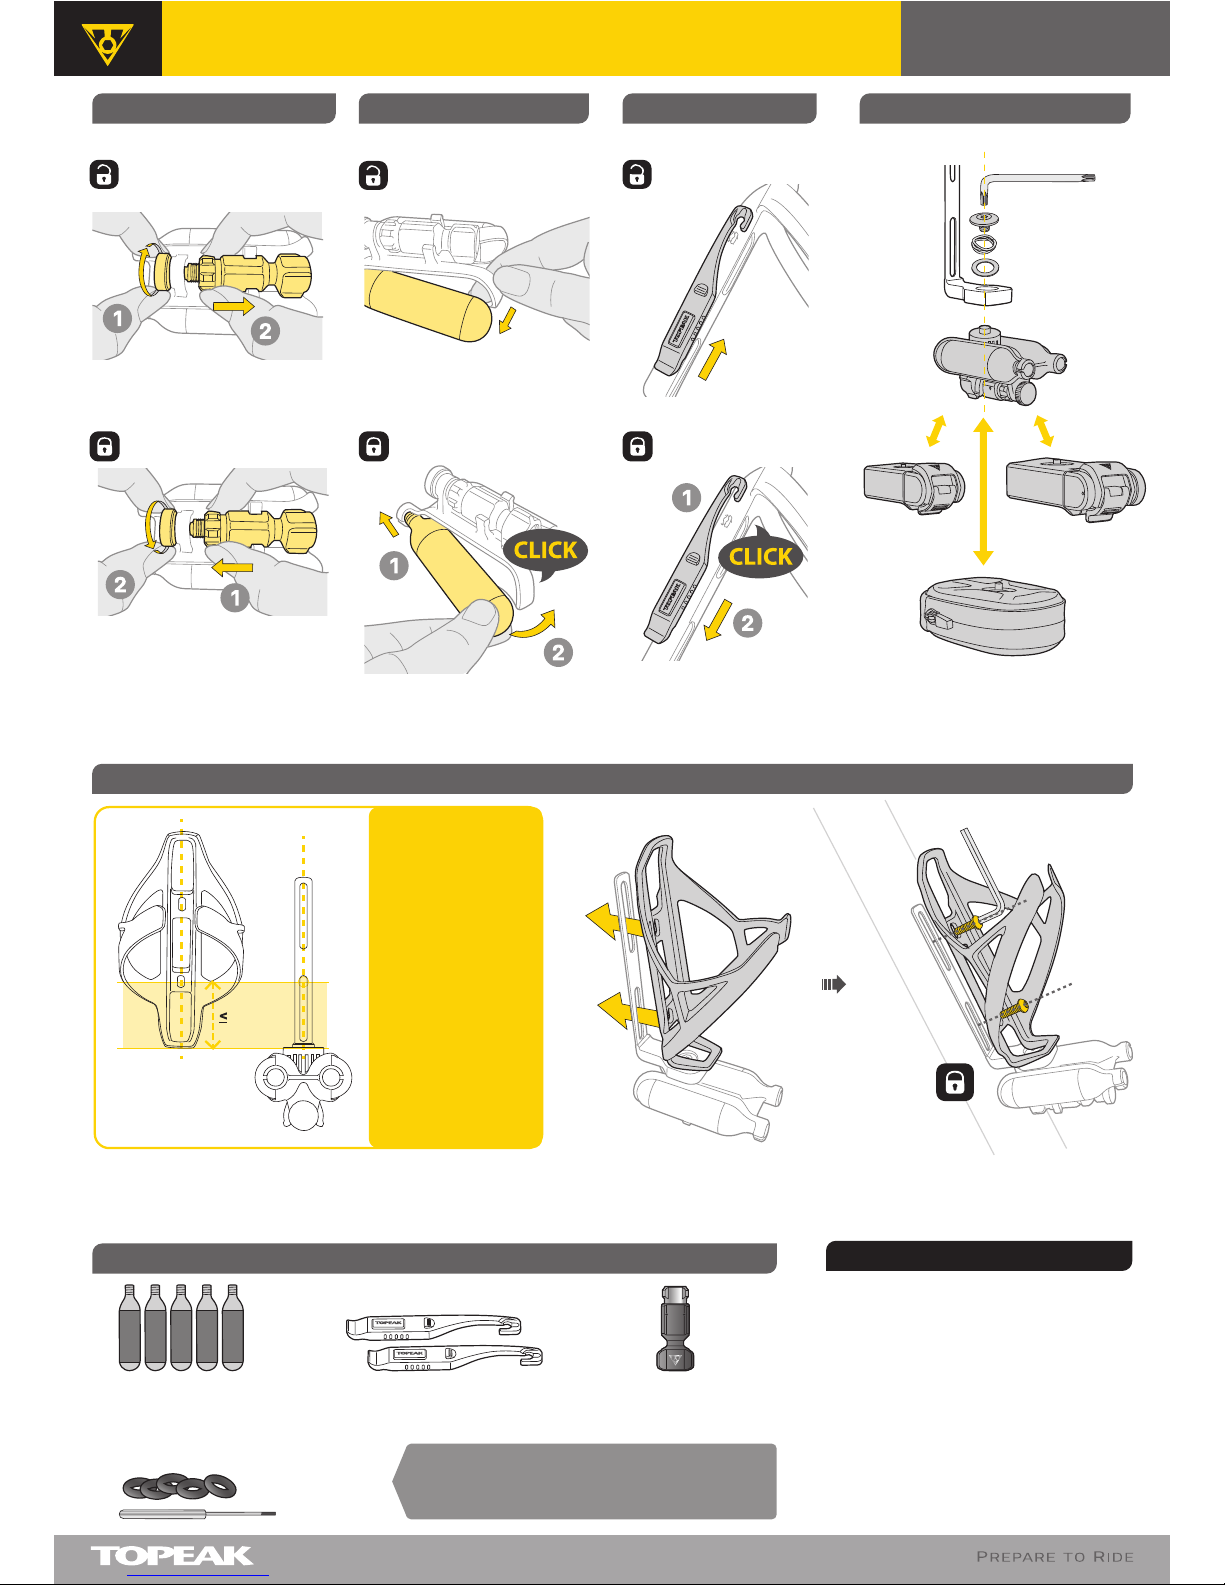
MICRO AIRBOOSTER PARTS REPLACEMENTCO2 CARTRIDGE TIRE LEVER
(NINJA CO2+)
SPARE PARTS
2-year Warranty: All mechanical components against
manufacturer defects only.
Warranty Claim Requirements
To obtain warranty service, you must have your original
sales receipt. Items returned without a sales receipt will
assume that the warranty begins on the date of
manufacture. All warranties will be void if the product is
damaged due to user crash, abuse, system alteration,
modification, or used in any way not intended as
described in this manual.
* The specifications and design are subject to change
without notice.
Please contact your Topeak dealer with any questions.
For USA customer service, call: 1-800-250-3068
www.topeak.com
WARRANTY
M-TNJ-CO2_CO2P-EN 10/16Copyright © Topeak, Inc. 2016
The valve head o-ring is subject to wear and may
cause air leakage over time. Periodically inspect
and replace o-ring if needed.
16g Threaded CO2 cartridge
Art no. TCOT-2 (2 pcs)
TCOT-5 (5 pcs)
O-ring
Replacement Kit
Art no. TRK-HR01
PUSH
RELEASE
RELEASE
RELEASE
PUSH
Tire Lever
Art no. TRK-T086
Micro AirBooster
Art no. TMB-1
HOW TO INSTALL ON BIKE WITH OTHER CAGE (NINJA CO2 only)
CAGE
COMPATIBILITY
Ninja CO2 is only
compatible with
cages that have a
distance of 42 mm
or less between
lower mounting
bolt hole centerline
and bottom of
bottle cage
42 mm
INSTALL
INSTALL
INSTALL
T15
NINJA T ROAD
Art no. TNJ-TR
NINJA T MOUNTAIN
Art no. TNJ-TM
NINJA POUCH ROAD
Art no. TNJ-PR
 Loading...