

Topeak NINJA C User Manual
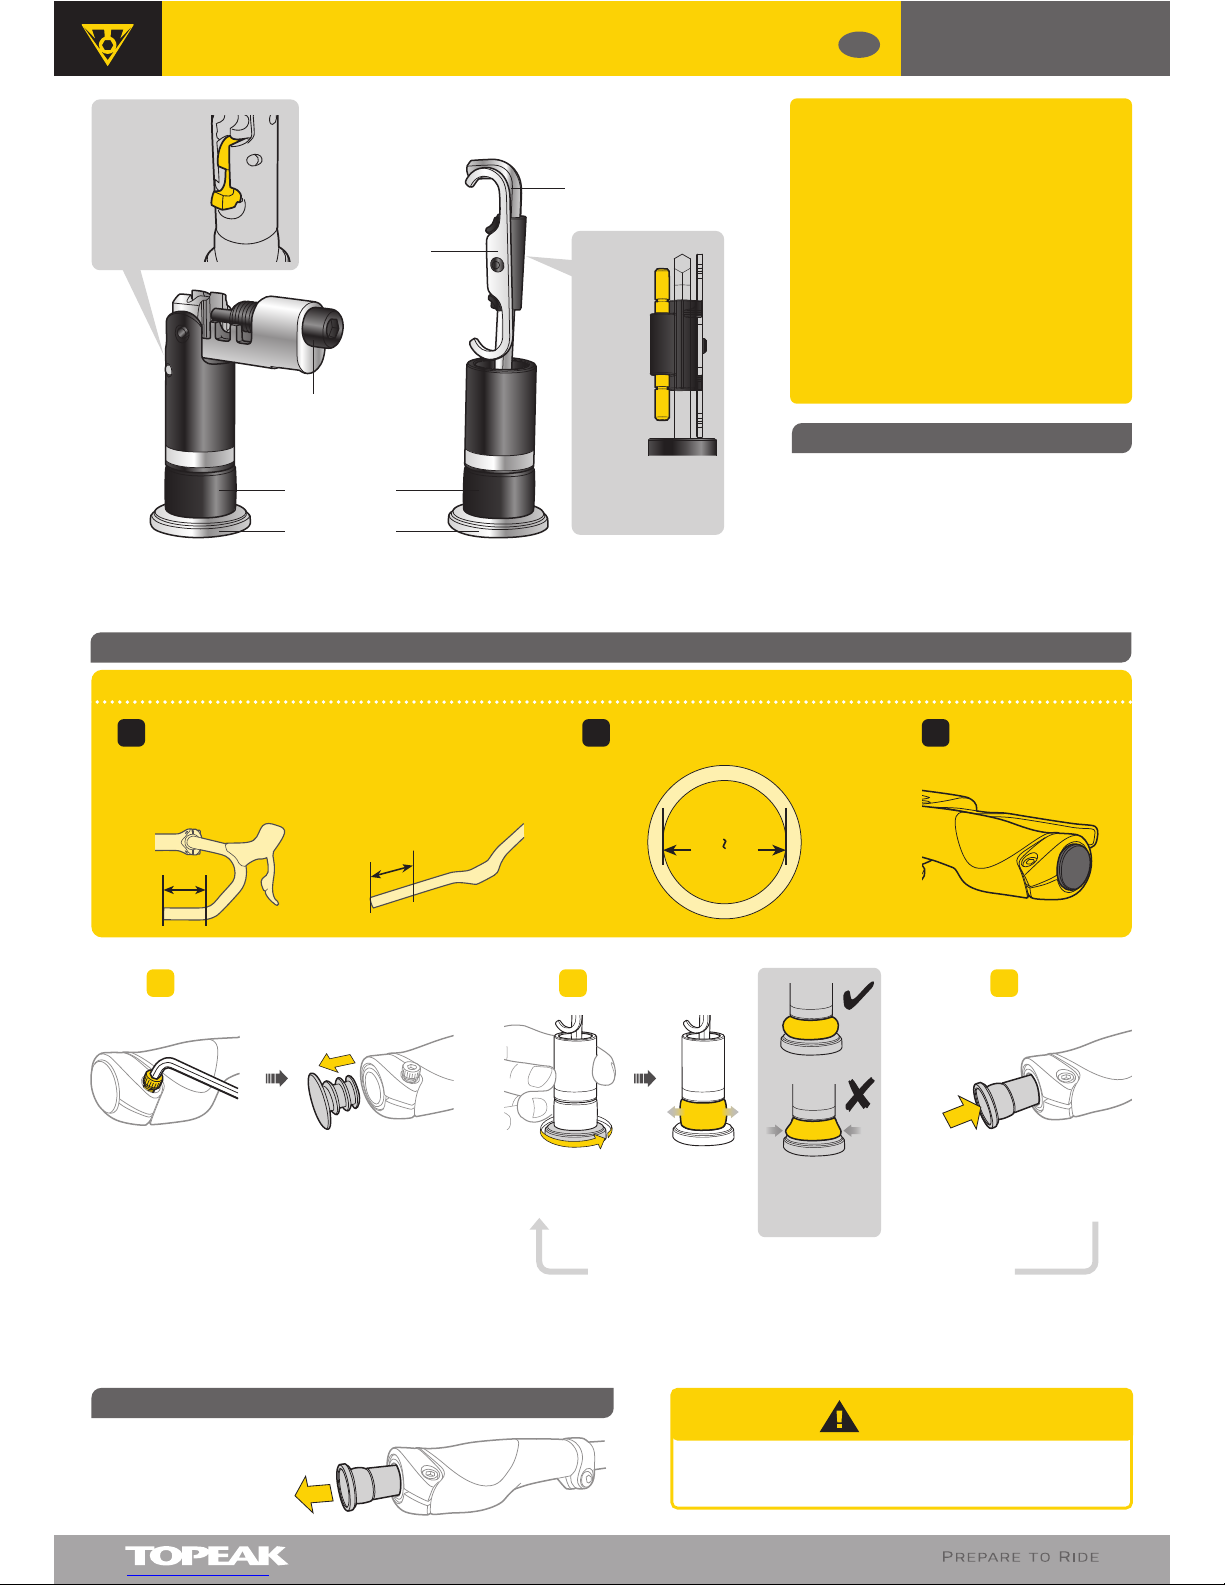
HOW TO REMOVE NINJA C FROM HANDLEBAR
Periodically check that NINJA C is seated in
handlebar properly.
WARNING
PULL OUT
User's Guide
NINJA C
GB
HOW TO STORE NINJA C IN HANDLEBAR
LIMITATIONS
Handlebar with minimum 70 mm straight
section end
Fits inner ø 16.5-20 mm tube Fits grips with
end caps
MAINTENANCE
Loosen bolt and remove end cap of grip on both
sides. (Depends on the type of handlebar)
(Example for grips with end caps)
Turn the cap to expand the
rubber ring as little as necessary.
Press to adjust
the shape of
rubber ring as
shown.
Push NINJA C into the end
of handlebar on both sides.
If NINJA C does not fit properly into handlebar, adjust
tension of rubber ring as necessary and reinstall.
PUSH
Rubber Ring Chain Pin x 2
Compartment
• Fits Road handlebar with
minimum 70 mm straight
section end.
• Fits inner ø 16.5-20 mm tube.
• Fits multi-speed chains up to
Campagnolo® 11 speed hollow
pin chain.
• Please read these instructions
before first use.
Chain Hook
4 mm Allen Key
(Chain
Pin is not
included)
Adjusting Knob and
Chain Pin Breaker
• Lubricate and maintain tool with Teflon®
based lubricant as needed.
• To prevent rusting, keep tool dry.
1STEP 2STEP 3STEP
Cap
Rivet Anvil
of hollow pin
1 2 3
ø 16.5 mm
ø 20 mm
ROAD HANDLEBARS FLAT BARS
70 mm
70 mm
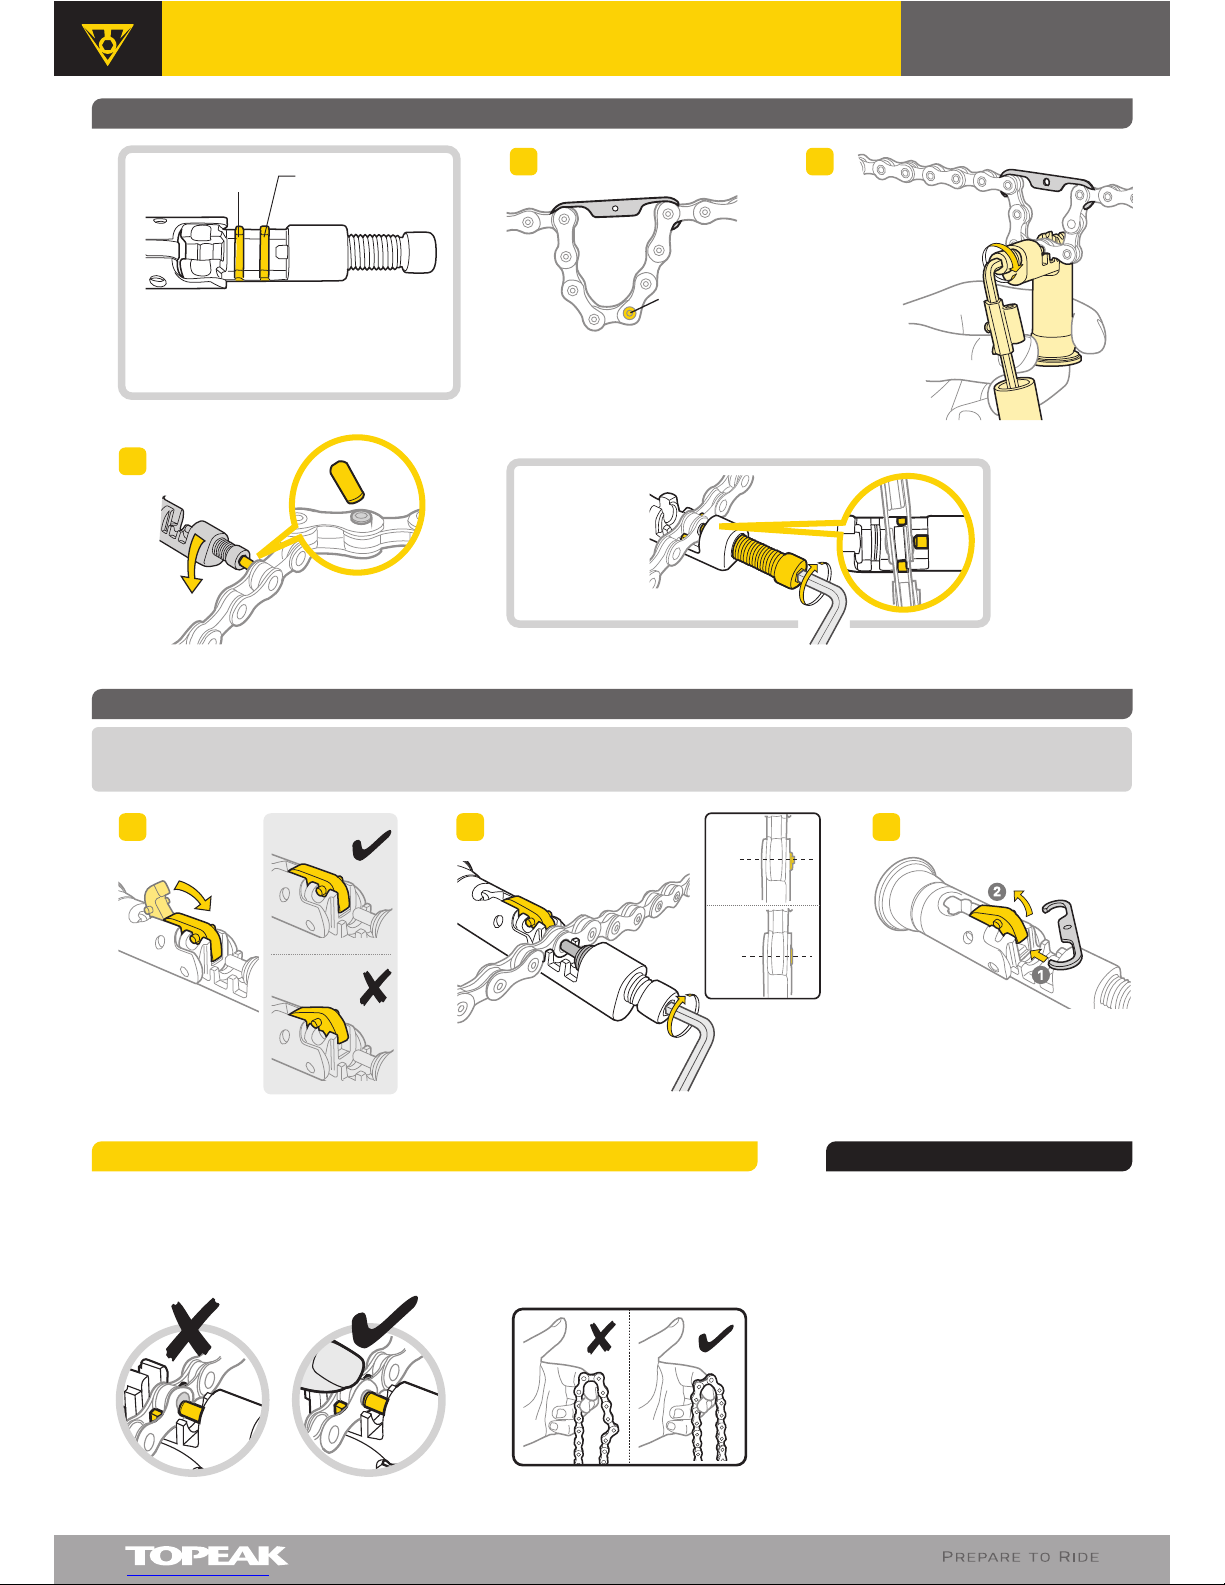
HOW TO REPLACE CHAIN PIN
HOW TO INSTALL CAMPAGNOLO® 11-SPEED HOLLOW CHAIN PIN
WARNING
User's Guide
NINJA C
2-year Warranty: All mechanical components against
manufacturer defects only.
Warranty Claim Requirements
To obtain warranty service, you must have your
original sales receipt. Items returned without a
sales receipt will assume that the warranty begins
on the date of manufacture. All warranties will be
void if the product is damaged due to user crash,
abuse, system alteration, modification, or used in
any way not intended as described in this manual.
* The specifications and design are subject to
change without notice.
Please contact your Topeak dealer with any
questions. For USA customer service,
call: 1-800-250-3068
www.topeak.com
WARRANTY
M-TNJ-C-GB 10/15
Copyright © Topeak, Inc. 2015
After pressing the special replacement pin into Campagnolo® 11- Speed chain and breaking off the guide portion,
the break off end of the chain rivet is required to be peened to prevent chain failure.
* Campagnolo® is a registered trademark of Campagnolo S.r.I. * Teflon® is a registered trademark of DuPont.
3/4 Turn
Use Primary Chain Link Fence to install
or remove chain pin. Use Secondary
Chain Link Fence to loosen stiff links.
Primary Chain
Link Fence
Secondary Chain
Link Fence
When pressing in the chain pin, push down on
the top of the chain to keep it fully engaged
in the chain tool cradle. Make sure the press
pin of the chain tool is centered against the
chain pin.
Inspect chain rivet again and be
sure chain links can bend freely
after replacement.
Press out old
chain pin and
replace with
new chain pin.
Hook chain and hold the target
chain rivet in center position.
The rivet anvil might be too tight to
release after use. Lift rivet anvil with
chain hook for storage.
Snap off new chain pin guide.
1 2
Target
chain rivet
Press chain
pin as little
as possible
to loosen
stiff link if
necessary
Before
After
3
1
2
3
 Loading...