

Top Dawg TDCAM01 Quick Start Manual
Premium 720P DVR Dash Cam Quick Start Guide
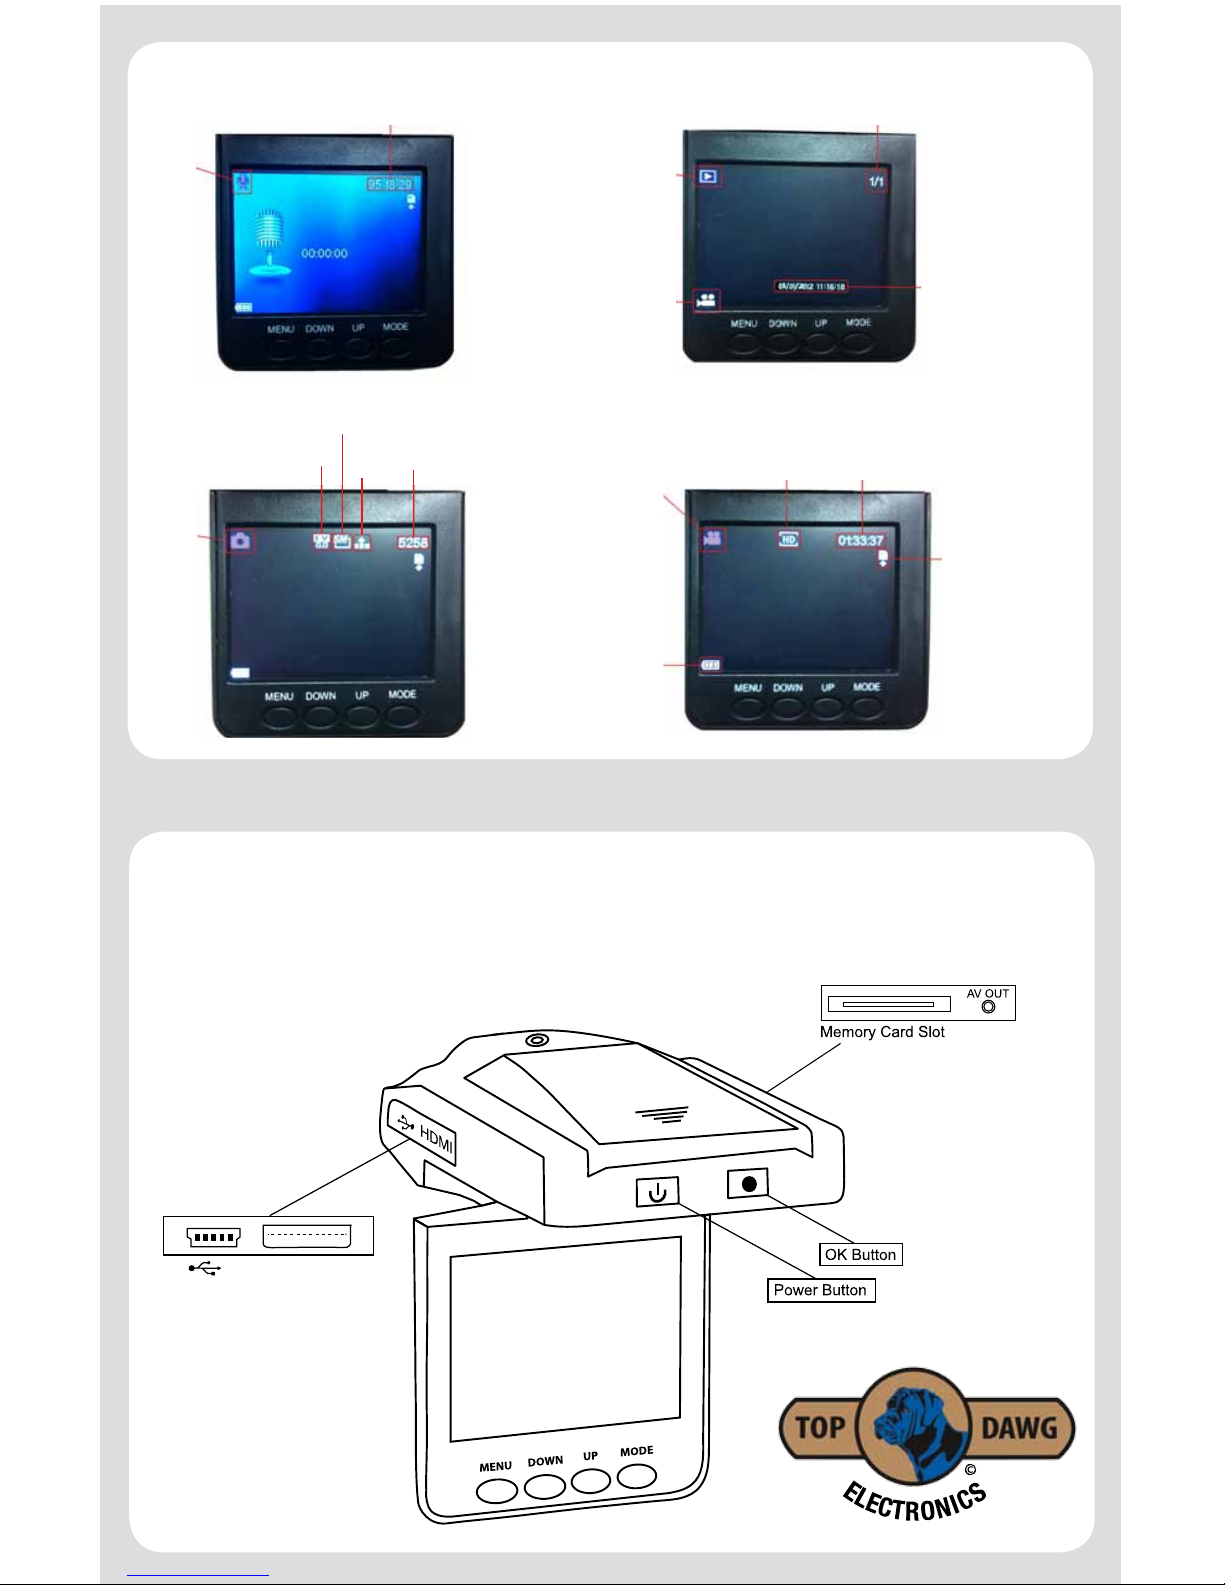
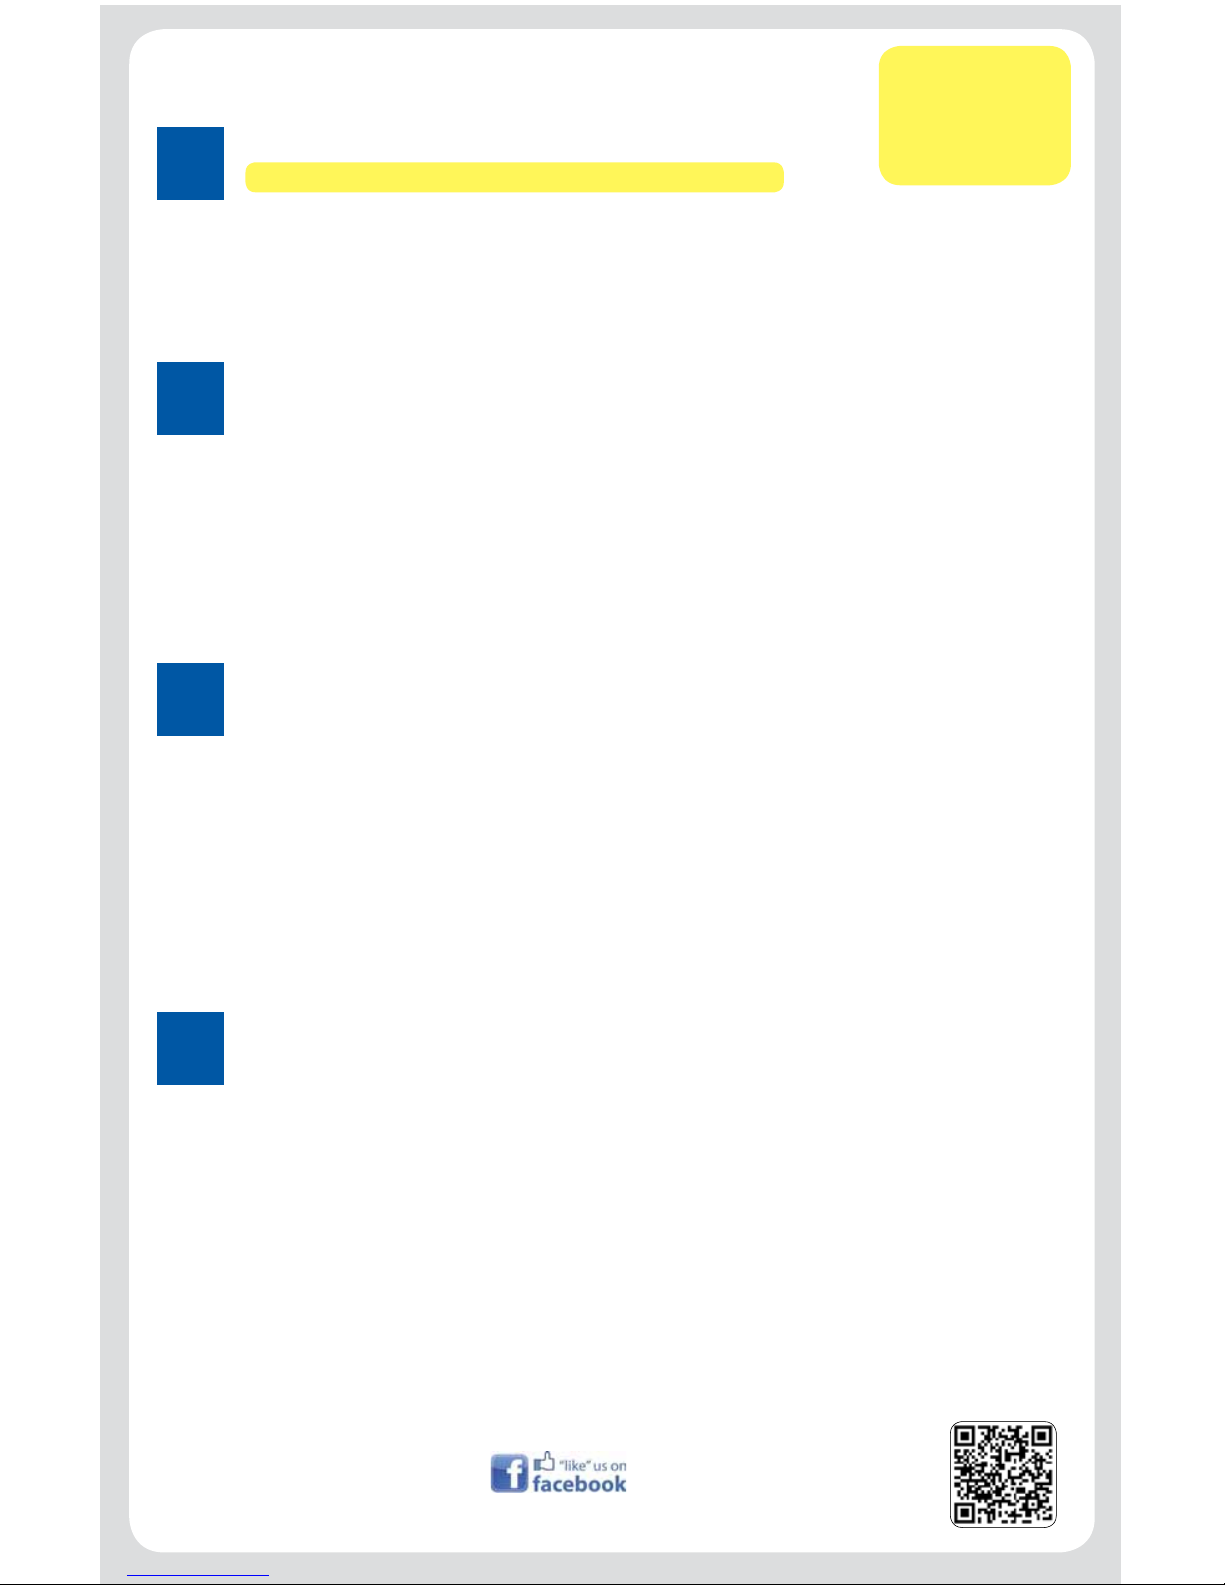
Getting to know your device
AV OUT
HDMI
USB 2.0
Audio
Mode
This counter indicates how much
time is left to record audio until
Memory Card is full.
Camera
Mode
Exposure
Value
Picture
Size
Picture
Quality
This number indicates
how many photos are left
to fill the Memory Card.
These numbers indicate which file
you are looking at. In this instance it is
video one of one.
This is your Date
and Time stamp.
Playback
Mode
This is the file
type indicator.
This counter shows
how much time is left
until camera loops.
Video Quality
Video
Mode
This is the battery
indicator. When
battery is fully
charged it will have
three solid white
blocks inside.
This Memory Card
icon indicates
there is a Memory
Card inserted in
the camera.
*Note: If this icon
is ever RED, there
is a Memory Card
error. *Replace.
Part # TDCAM01
Dash Cam Quick Start Guide
1
General Settings
• Press “MENU”, and then press “MODE” to get to the “General” settings.
• Press “DOWN” button until you get to “Date & Time…”.
• Press the “OK” button to enter the “Date & Time” menu.
• Use the “UP” and “DOWN” buttons to adjust and press the “MODE” button to change to a
different eld. (Note: Time is in military format. This cannot be changed.)
• Once the Date and Time is adjusted, press the “OK” button to set.
• Press “MENU” button to exit the menu.
2
Ready to Record and Play
• Once you have installed the Memory Card, install the battery, plug in the power cord and set the
Date and Time, press “OK” button to start recording.
• If the camera is functioning properly, you will see the “Date & Time” appear on the bottom of the
display in YELLOW. (Ensure that the Date & Time is correct)
• If you want to watch a video you have recorded; press the “OK” button to stop recording if you are
recording, then press the “MODE” button three times until you get to “Playback” mode.
• Use the “UP” and “DOWN” buttons to select the preferred video you would like to watch then press
the “OK” button to play the video. You can pause the video during playback using the “UP” button
and resume the playback by pressing the “UP” button.
3
Powering Down and Storage
• At the end of the day, when you no longer need to use the camera, it is best to place the camera
in “Charge Mode Only”. Do this by leaving the camera plugged into your provided “DC Charger
Cord” (if your port is “HOT” when your vehicle is off).
• Press and hold the “Power” button until a large battery icon appears on your screen, then release
the “Power” button. The display will turn off in a few seconds. The camera is now charging only.
• To check the status of your battery while in this mode, simply press any of the buttons
momentarily and the large battery icon will display again. It will either be solid white (fully charged)
or alternating, white, red, green (charging).
• If it is still charging, do nothing and let it continue to charge.
• If it is solid white, press and hold the “Power” button until you hear a beep, and release the
“Power” button. The unit will exit charge mode and return to normal operating mode.
4
Powering Up and Memory Card
• Before you install the battery or power cable, install memory card.
• Install battery.
• Insert power cable.
• Upon insertion of DC charger, camera will turn on and start recording.
Press “OK” button to stop recording.
Customer Service
Contact Info:
1-866-258-5521
/TopDawgElectronics
LEARN ABOUT TOP DAWG &
FOLLOW US ON FACEBOOK
VISIT US ONLINE AT
TOPDAWGELECTRONICS.COM
 Loading...