Topaz Labs LLC TP-CLA-C-001-GN User manual


User Manual
Topaz Clarity
I. Installation
A. How to Install 3
B. Entering Your Key 3
C. Host-Specic Installation 3
1. Paint Shop Pro 4
2. Photo Impact 5
3. Irfanview 6
D. Uninstalling 7
II. Introduction
A. About Topaz Clarity 8
B. Main Features 9
D. Advanced Masking . 10
E. Masking Tools 11
F. Collections 13
G. Presets 14
III. Work Area
A. Interface 19
B. Preview 23
C. Eects & Presets 25
1. Adding Presets 26
2. Deleting Presets 26
3. Favorites 26
4. Snapshots 26
5. Importing Presets 27
6. Exporting Presets 27
7. Sharing Presets 27
D. Tools 28
E. Menu 29
1. Preferences 29
2. Check for Update 29
3. Enter Key 30
4. What’s This? 30
5. User Guide 30
6. Tech Support 30
7. Product Info 30
8. Gallery 30
9. MyTopaz 30
10. Tutorials 30
11. About 30
IV. Settings & Parameters
A. Clarity - Dynamics 31
B. Clarity - Tone Level 32
C. Hue/Sat/Lum 33
VII. Additional Resources
A. Shortcut Keys 35
B. FAQ’s 36
C. Connect 38
D. Company Info 39
2

User Manual
Topaz Clarity is a plug-in, which means it won’t run by
itself and requires a compatible host program for use.
To Install in Photoshop
Topaz Clarity
1. Close Photoshop or other image editing program if
you are using it.
Installation
Entering Your Key
Entering your trial key allows you to save your projects
and print them during your evaluation period. Entering
your license key allows you do the same, except without any time limitations.
2. Double-click on the Topaz Clarity folder to access the
installer, and then follow the on-screen instructions.
Mac dmg Windows exe
3. Your Topaz Clarity plug-in will automatically be installed in your Photoshop plug-ins folder.
4. After the installation, you will need to enter your
license or trial key.
Important for Mac Users:
After installation, Topaz Clarity will be installed in the
following folder: “ Macintosh HD -> Library -> Application Support -> Topaz Labs -> Clarity”.
1. Start by opening up an image in Photoshop.
2. Go to Filters -> Topaz Labs -> Clarity -> Menu
-> Enter key.
3. You can then copy and paste or type your key in.
Important: To install the product on a second computer, you will need to download Topaz Clarity and then
enter your same license key.
3
Host-Specic Installation
Topaz Clarity is also compatible with Lightroom, Aperture and iPhoto. To use Clarity in any of these programs you will need to download and install the free
Topaz Fusion Express compatibility add on. You can
get it online at: www.topazlabs.com/downloads
In Windows, Topaz Clarity is supported by most host
applications that support Photoshop plug-ins. This
includes Paint Shop Pro, Photo Impact and Irfanview,
although there are additional host programs that may
also support Topaz Clarity.
If your Photoshop is installed in a customized location,
you will need to manually create a shortcut (alias) link
inside folder “<Photoshop install folder> -> Plug-ins”
that links to “ Macintosh HD -> Library -> Application
Support -> Topaz Labs -> Clarity -> Plug-ins”.
To install Clarity in either Paint Shop Pro, Photo Impact,
or Irfanview rst download Topaz Clarity to the default
location. Then, to congure it into each program, follow the host-specic instructions on the next page.
User Manual
Installation
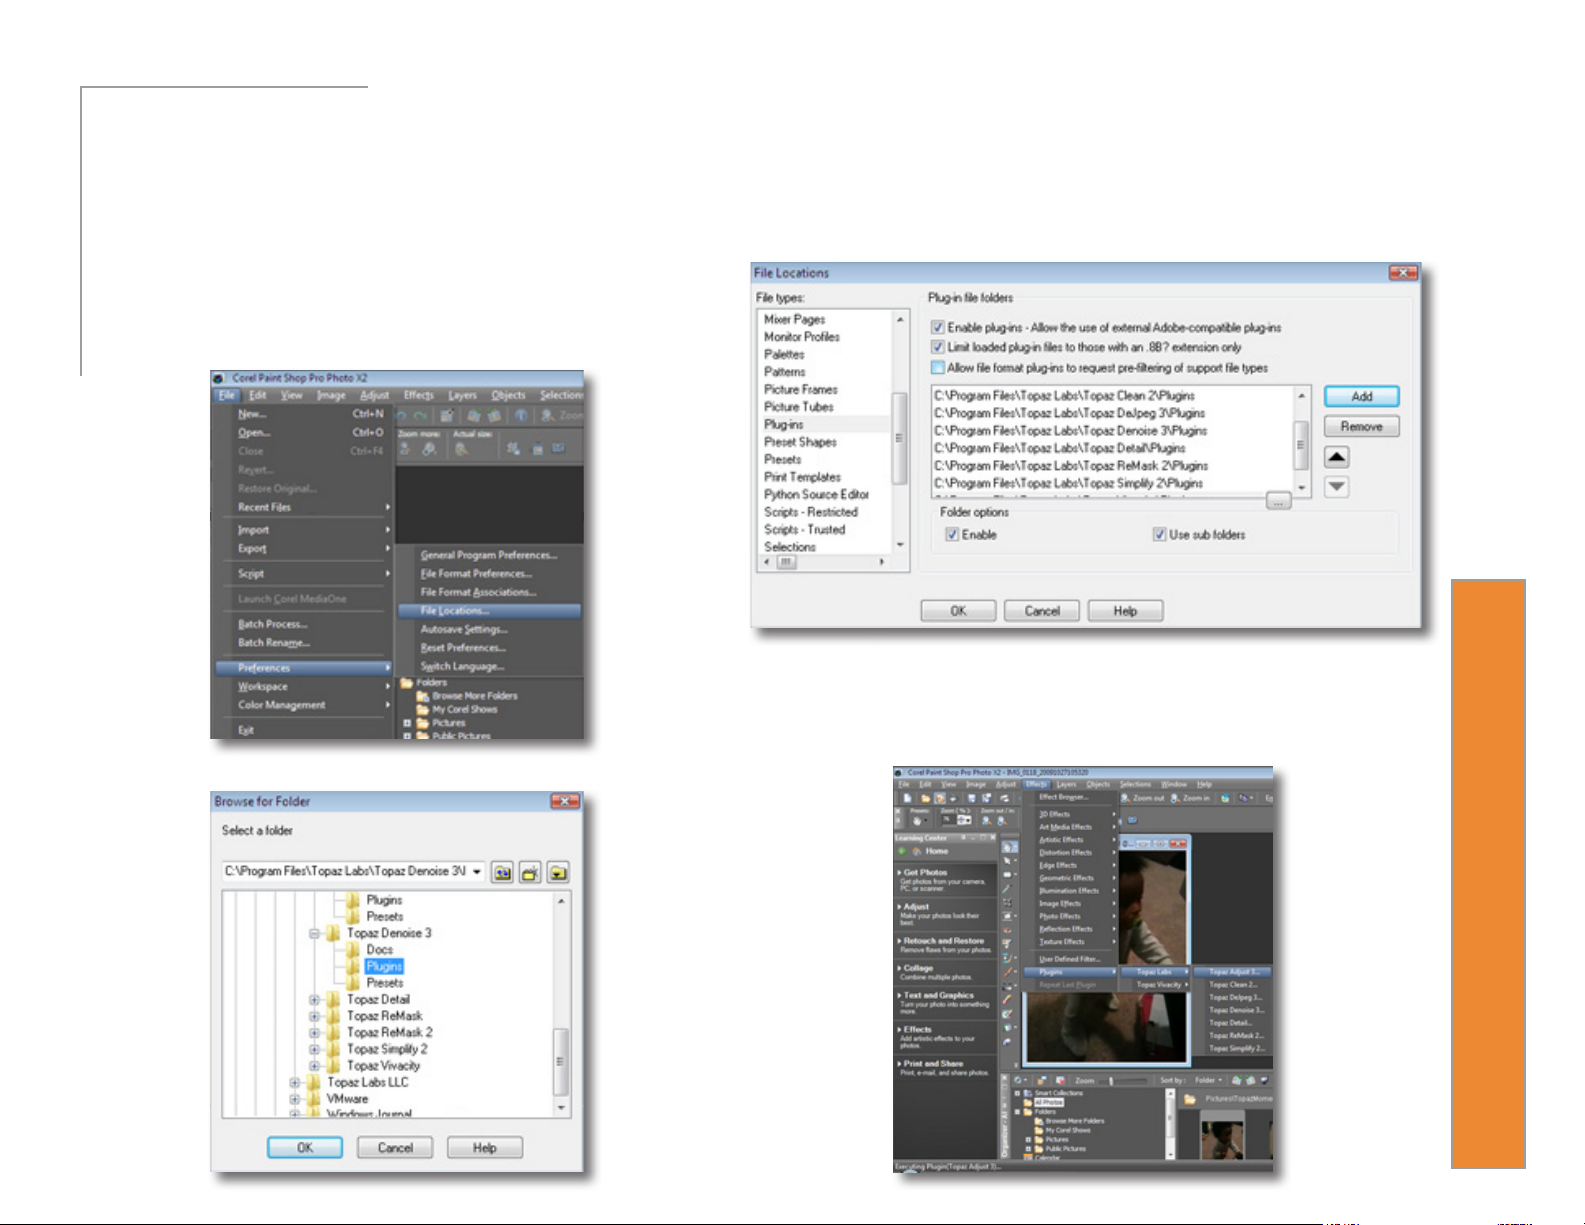
How to install Topaz Clarity in Paintshop Pro
1. First launch PaintShop Pro / Photo Impact.
2. Go to Menu le -> Preferences -> File Locations.
Topaz Clarity
Select “Plug-ins” from the “File Types” list and click
“Add”.
3. Choose C: \ Program Files \ Topaz Labs \ Topaz Clarity\
Plugins and click “OK”.
4
4. Topaz Clarity is now available to use. Simply go to Effects -> Plug-ins and select “Clarity”.
User Manual
Installation
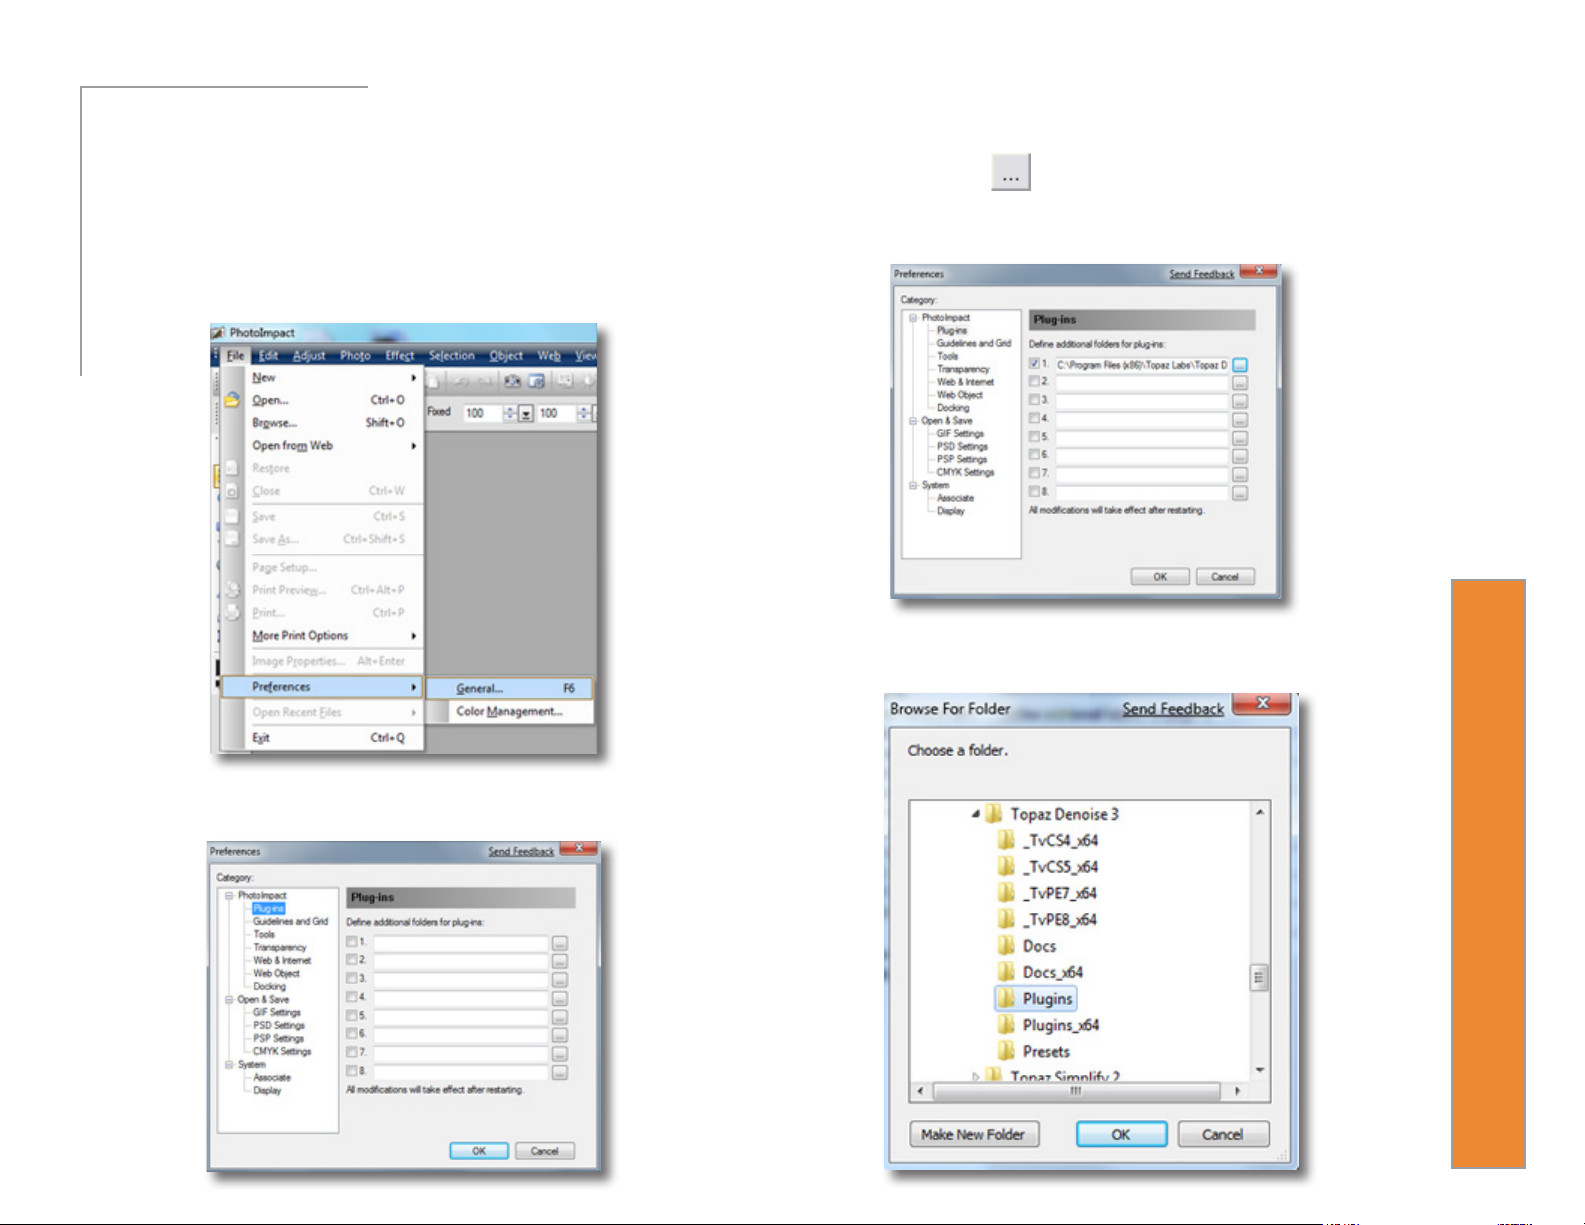
How to install Topaz Clarity in Photo Impact
1. First launch Photo Impact.
2. Go to File -> Preferences -> General or use shortcut
Topaz Clarity
key F6.
Then click on the button and browse to nd the
Clarity plug-in folder located in: C:\Program Files\Topaz
Labs\Topaz Clarity plug-ins and click “OK”.
5
4. Restart Photo Impact. Go to Menu -> Eect to access
the plug-in.
3. Select Plug-ins from the Categories list.
User Manual
Installation
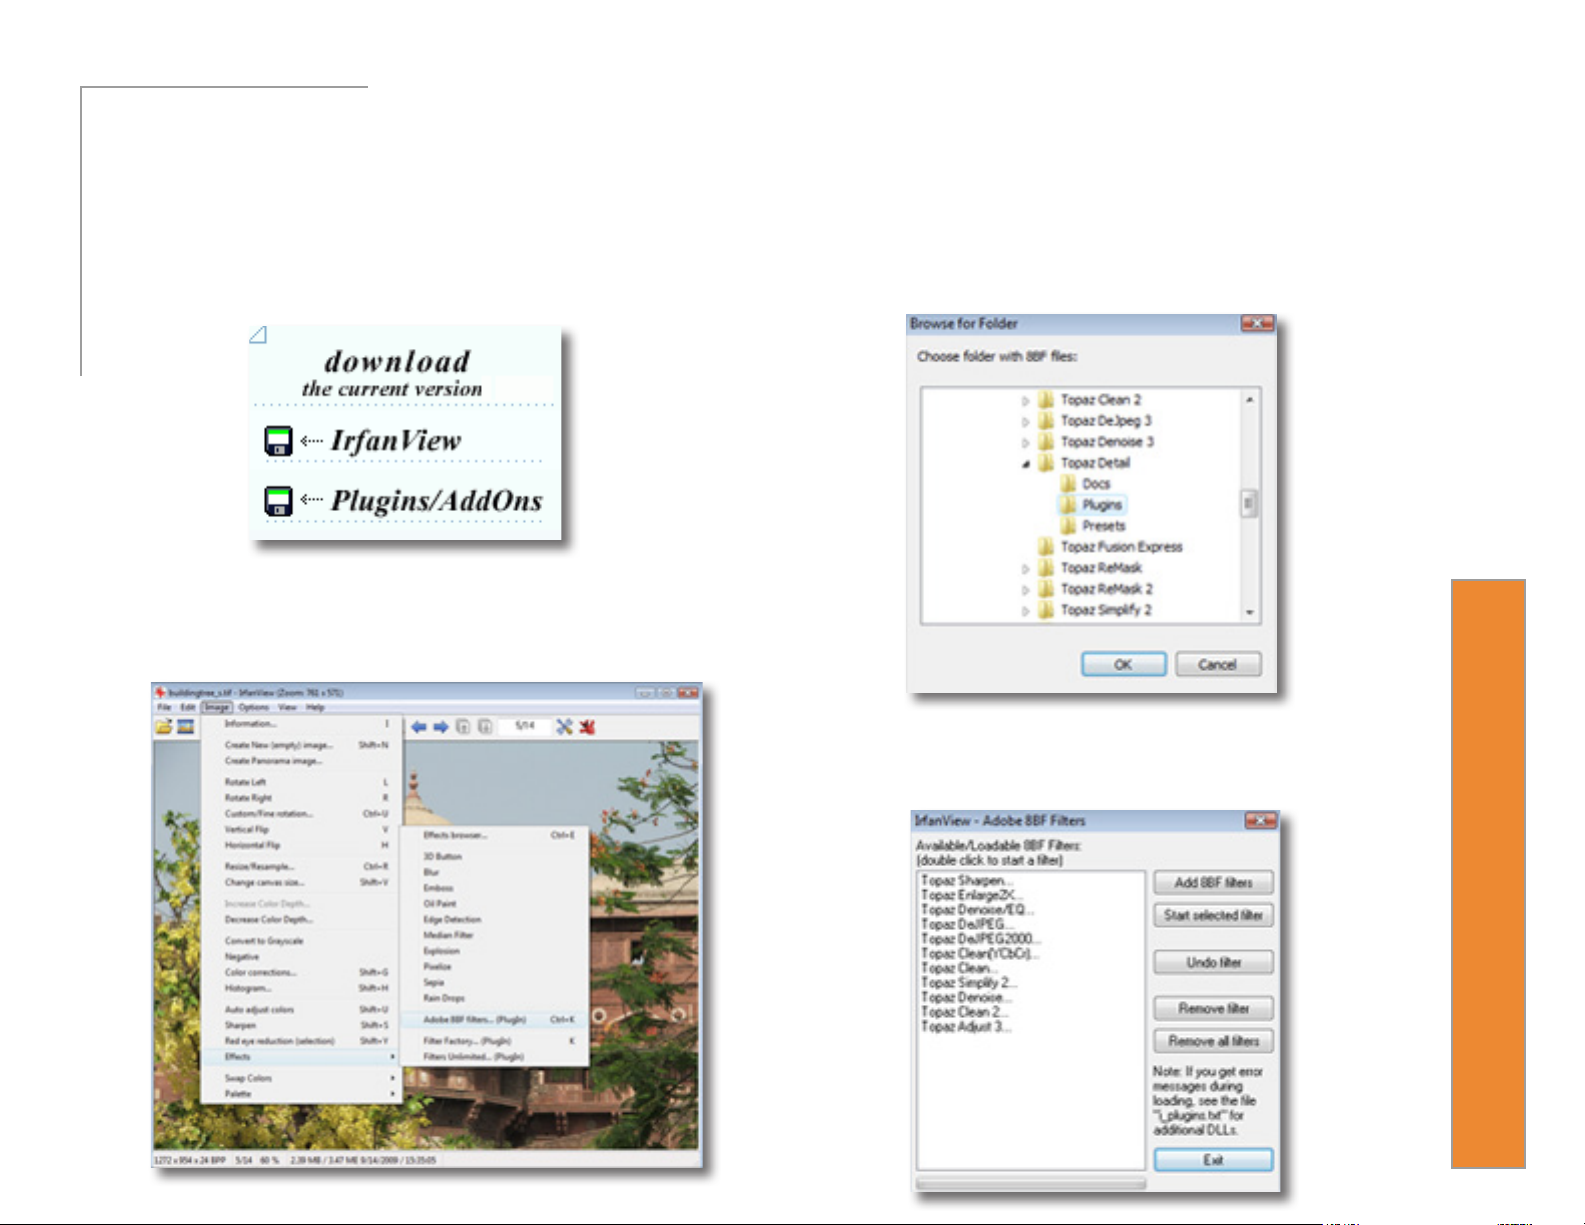
How to install Topaz Clarity in Irfanview
1. Make sure that you have downloaded and installed
the 8bf plug-in add-on, available on the Irfanview
webpage.
Topaz Clarity
2. Open Irfanview and go to Image -> Eects -> Adobe
8BF lters.
(http://www.software.com/irfanview-plugin)
3. In the screen that pops up, select “Add 8BF lters”
and navigate to the C:\Program Files\Topaz Labs\
Topaz Clarity \Plug-ins folder and click “OK”. You will
then see “Topaz Clarity” in the Available/Loadable 8BF
Filters section.
6
4. To use Topaz Clarity in the future, simply go to
Image -> Eects> Adobe 8BF lters again and select
“Topaz Clarity”.
User Manual
To uninstall Topaz Clarity follow these instructions:
Mac
1. Quit Photoshop (or other editing program).
Topaz Clarity
2. Navigate to the Topaz Labs support les and frames
located at: Macintosh HD -> Library -> Application Support -> Topaz Labs.
3. Locate the Topaz Clarity folder and move it to the
trash. You will need to enter your system password to
OK this change.
Uninstalling
3. Select Programs, then Uninstall a Program.
4. Select Topaz Clarity and click remove.
Windows 7
1. Quit Photoshop (or other editing program).
2. Click on the Start Menu and select Control Panel ->
Programs -> Programs and Features.
3. Select Topaz Clarity and click uninstall.
*
4. Navigate to your Photoshop plug-ins folder located
at: Applications -> Photoshop -> Plug-ins
5. Locate any leftover Topaz Clarity les and move it
to the trash.
Windows XP
1. Quit Photoshop (or other editing program).
2. Click on the Start Menu and select Control Panel.
3. Double-click on Add / Remove programs.
4. Select Topaz Clarity and click remove.
Windows Vista
1. Quit Photoshop (or other editing program).
2. Click on the Start Menu and select Control Panel.
*
*
*Please note that if you also have the 64-bit version
of Clarity installed, then you will need to rst uninstall
this version before you can uninstall the regular version.
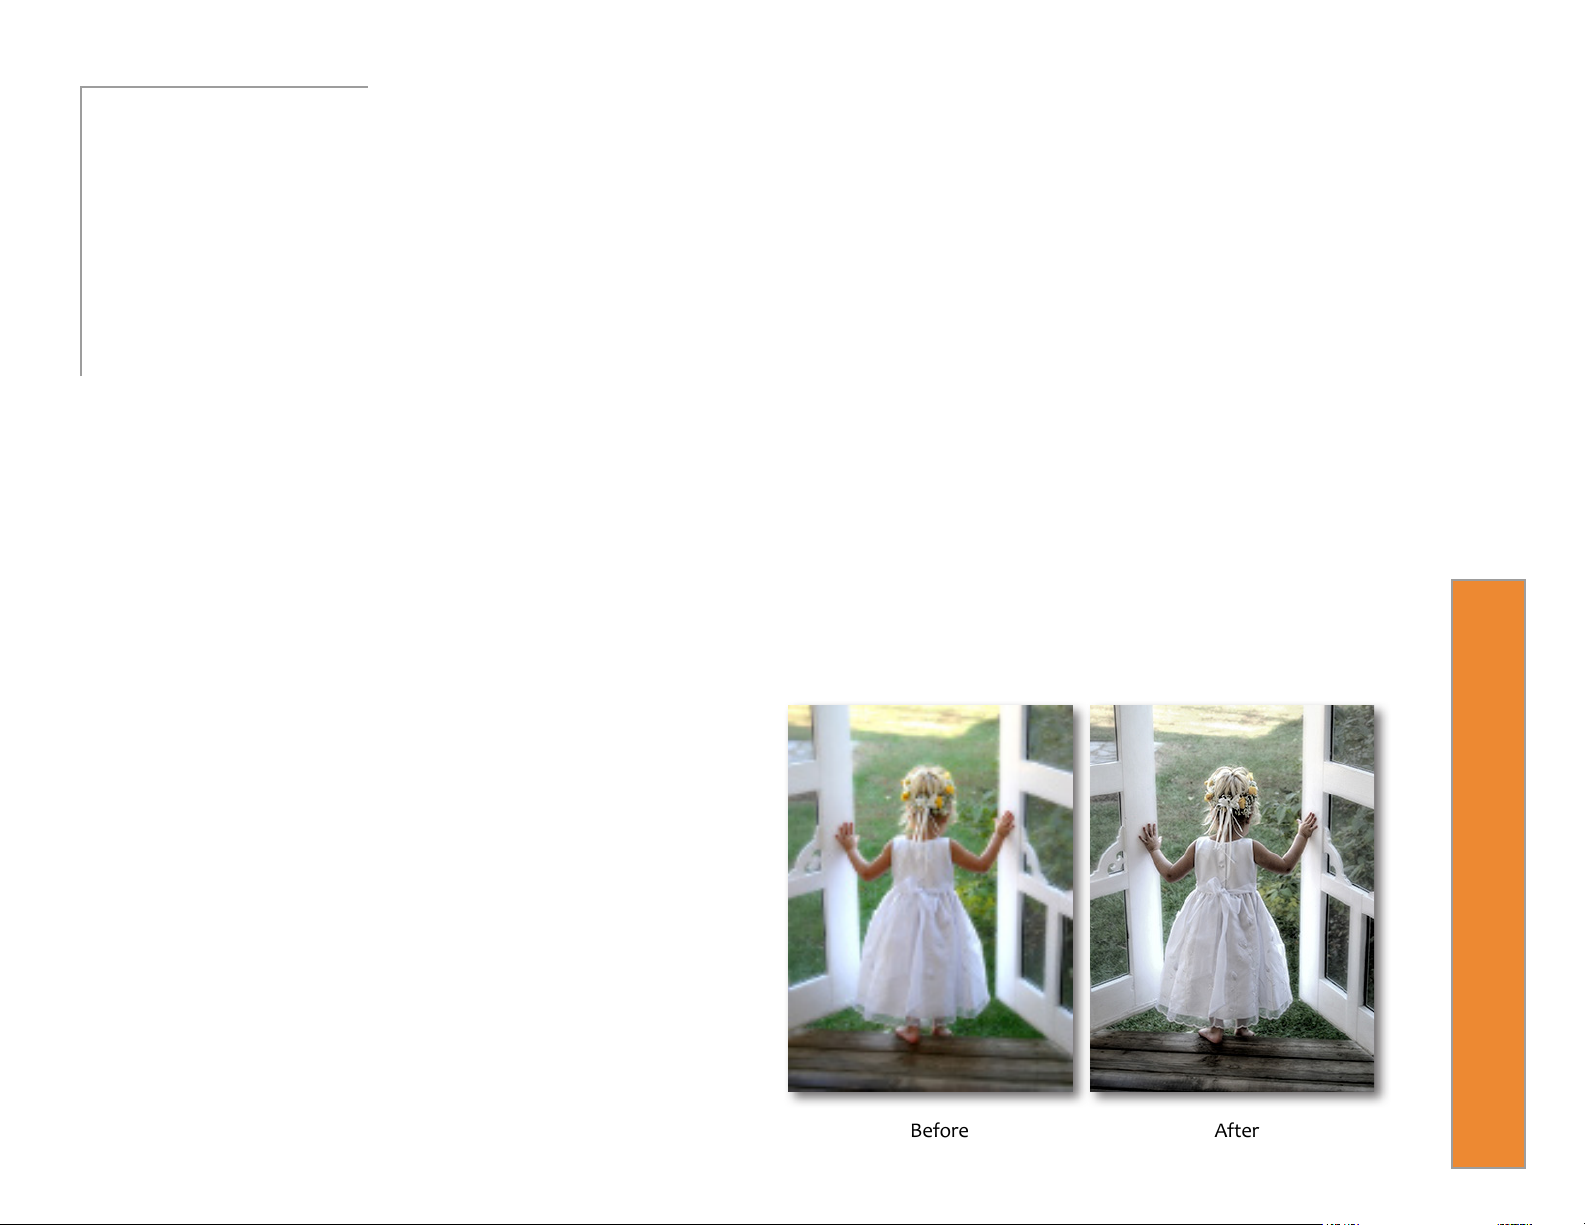
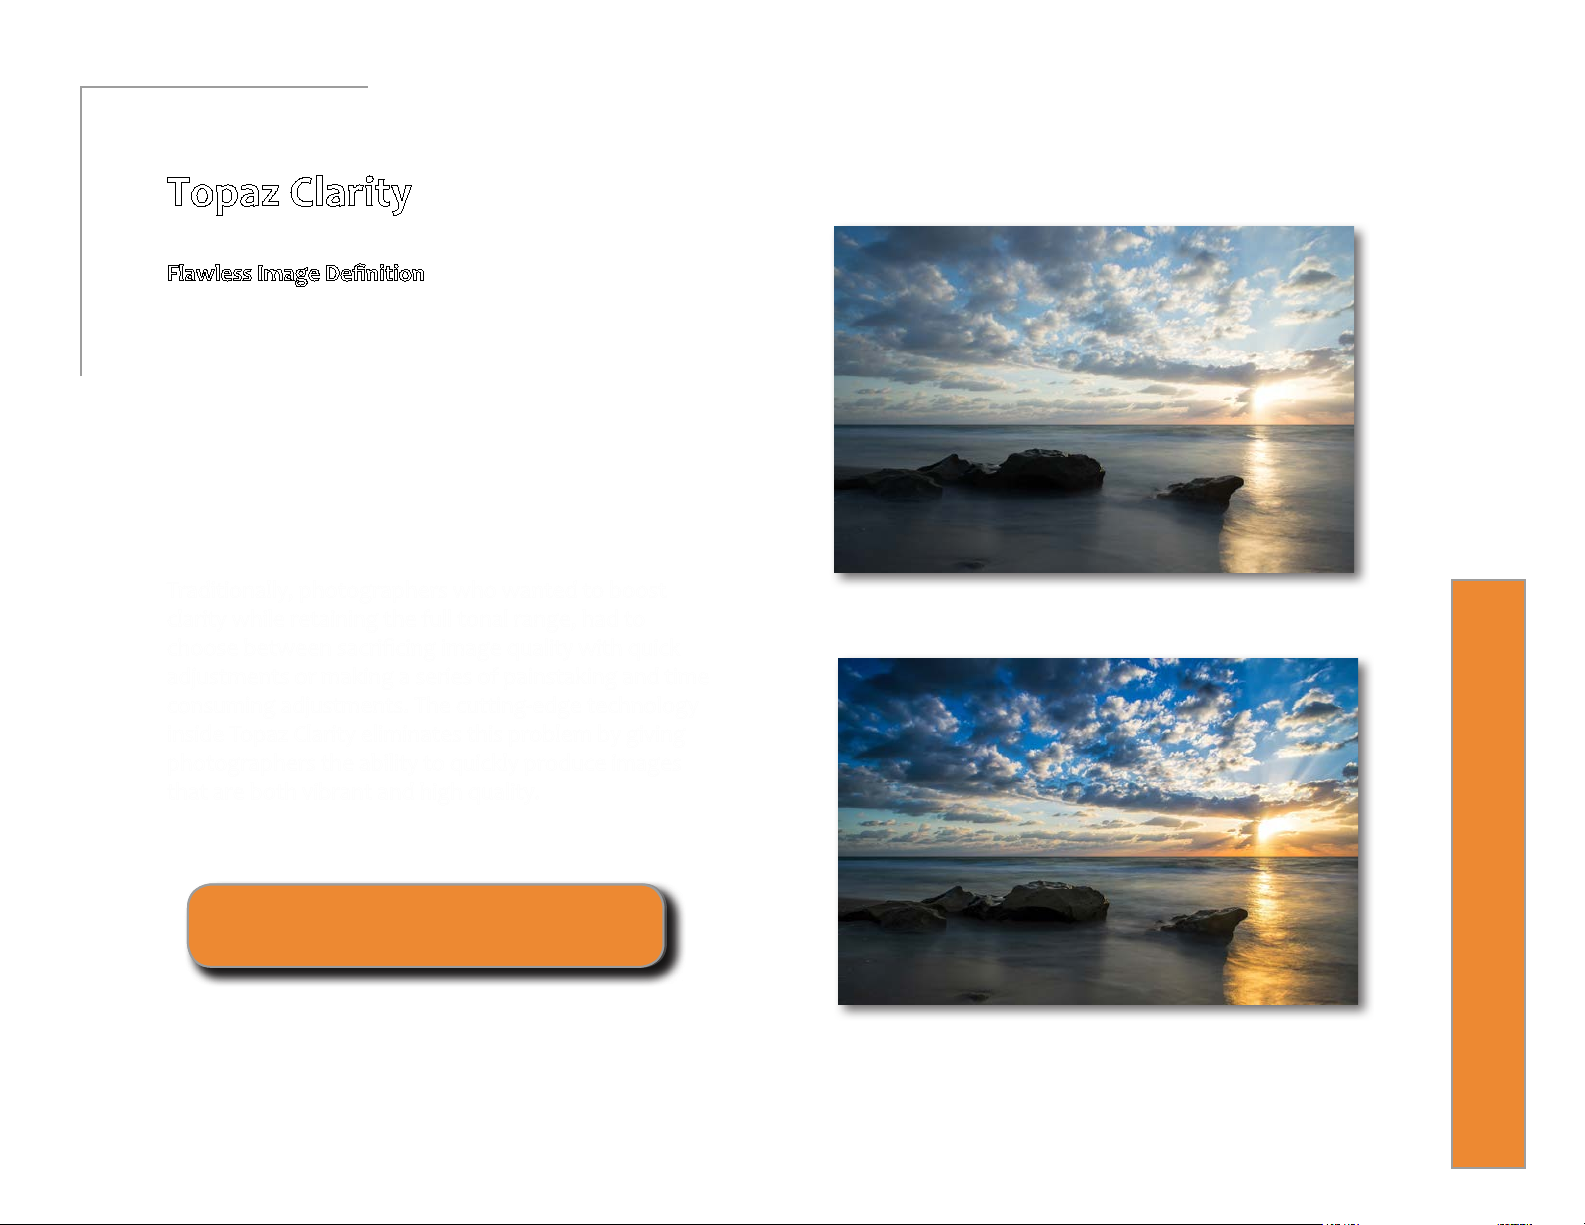
Before After
7
User Manual
Topaz Clarity
Flawless Image Denition
Topaz Clarity
Topaz Clarity is the ultimate tool to create compelling
and powerful images by intelligently enhancing contrast and clarity with absolutely no artifacts or halos.
With just a few clicks you can easily manipulate your
micro, mid-tone and overall contrast, transforming
your image from at to vibrant, all while maintaining a
natural quality and tonality.
Introduction
Traditionally, photographers who wanted to boost
clarity while retaining the full tonal range, had to
choose between sacricing image quality with quick
adjustments or making a series of painstaking and time
consuming adjustments. The cutting-edge technology
inside Topaz Clarity eliminates this problem by giving
photographers the ability to quickly produce images
that are both vibrant and high quality.
Visit the Clarity Gallery to see more examples:
gallery.topazlabs.com/Photography/Topaz-Clarity
Before - By Topaz User Steve Huskisson
After - By Topaz User Steve Huskisson
8
User Manual
Main Features
The Primary Features of Topaz Clarity Include:
Topaz Clarity
1. Selective Contrast Control. Use a cutting-edge
process to select specic contrast variations in your
original image, allowing you to quickly target and then
increase or decrease the contrast and clarity in that
specic variation.
2. Breakthrough Halo-Free Algorithm. Boost contrast
and clarity without emphasizing transitions between
light and dark areas, eliminating the common problem
of halos, noise and artifacts.
3. Advanced Hue/Saturation/Luminance Technology.
Using IntelliColor technology, you can easily enhance
your image with the HSL lter, getting stronger, yet
more natural HSL adjustments.
Introduction
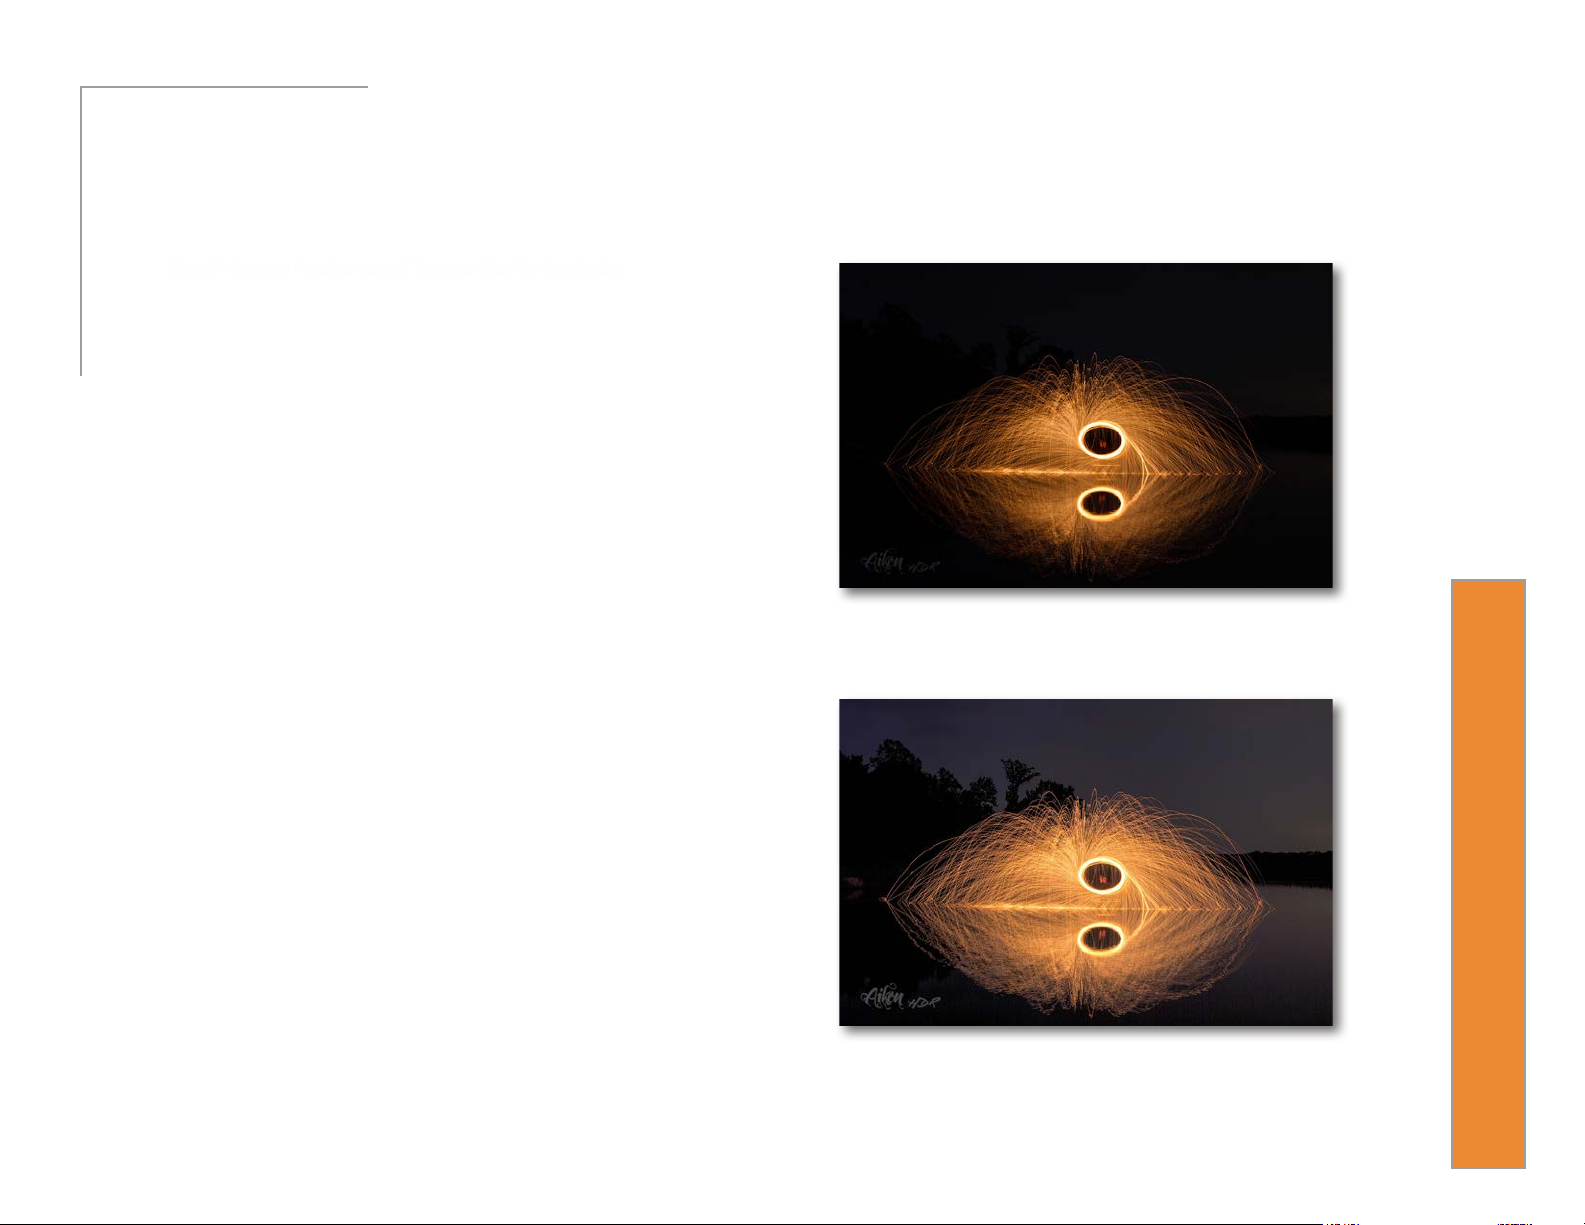
Before - By Topaz User Steve Rich
9
4. Re-Imagined Masking Workow. The masking mod-
ule, now attached to each adjustment tab contains a
comprehensive set of tools including an edge-aware
brush, gradient mask, smart feather tool, color aware
tool and more.
5. User Interface Design. With Clarity, we have contin-
ued to develop a cleaner, more modern and ecient
interface to improve usability, workow and overall
aesthetics.
After - By Topaz User Steve Rich
User Manual
Advanced Masking
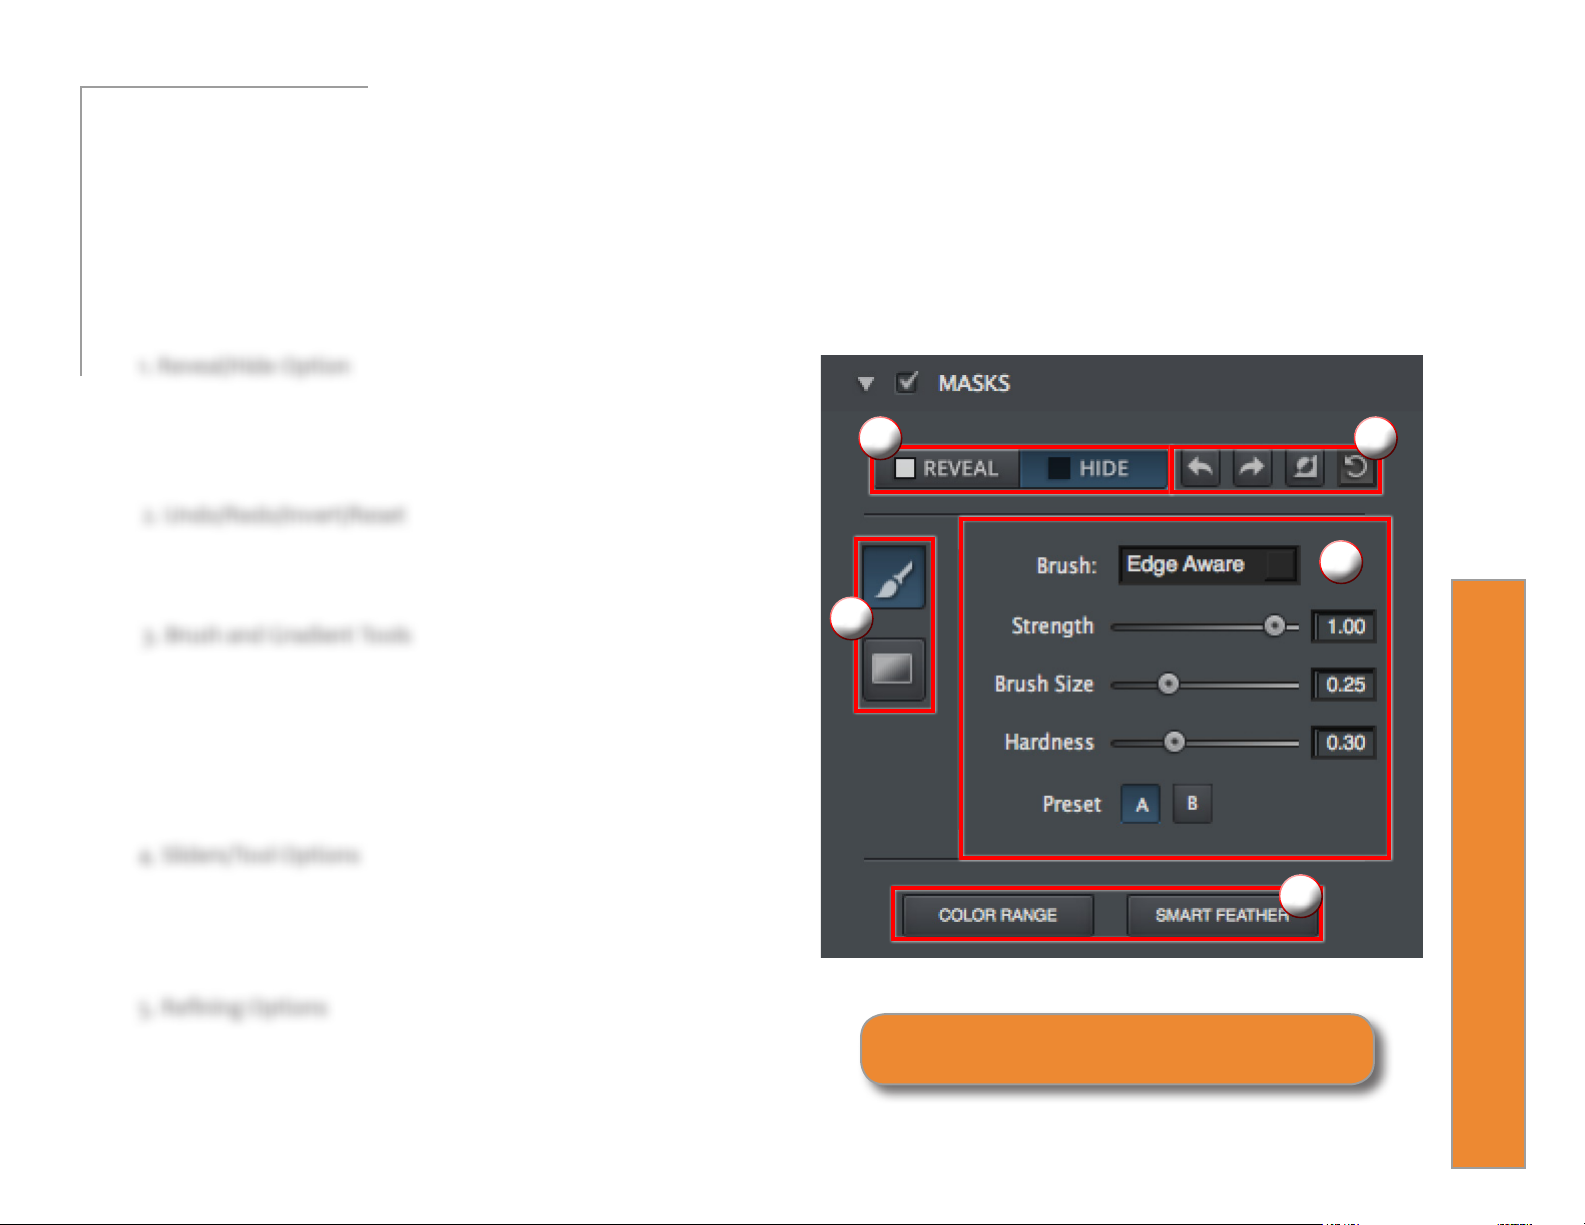
Topaz Clarity introduces a new masking workow designed to help you
easily and eectively achieve selective adjustments. Additionally, each
adjustment module now has an individual mask attached.
Topaz Clarity
1. Reveal/Hide Option
Choose which color you would like paint with: white (reveal) or
black (hide). If you are masking on a white mask, you’ll want to
start with a black brush color and vice versa.
2. Undo/Redo/Invert/Reset
Features
1
2
From the left: Undo and redo your steps, invert your mask colors
and reset all values to a white (reveal) mask.
3. Brush and Gradient Tools
Switch between a brush or gradient tool to
create our mask. The brush tool has 3 dierent
brushes: normal, edge aware and color aware.
The gradient tool can create 3 dierent types of
gradients: linear, radial and reective.
4. Sliders/Tool Options
Controls the masking tool selected using sliders and buttons to adjust the available settings.
This area will change with each tool.
5. Rening Options
Use the Color Range and Smart Feather adjust-
ments to rene or even create your mask.
3
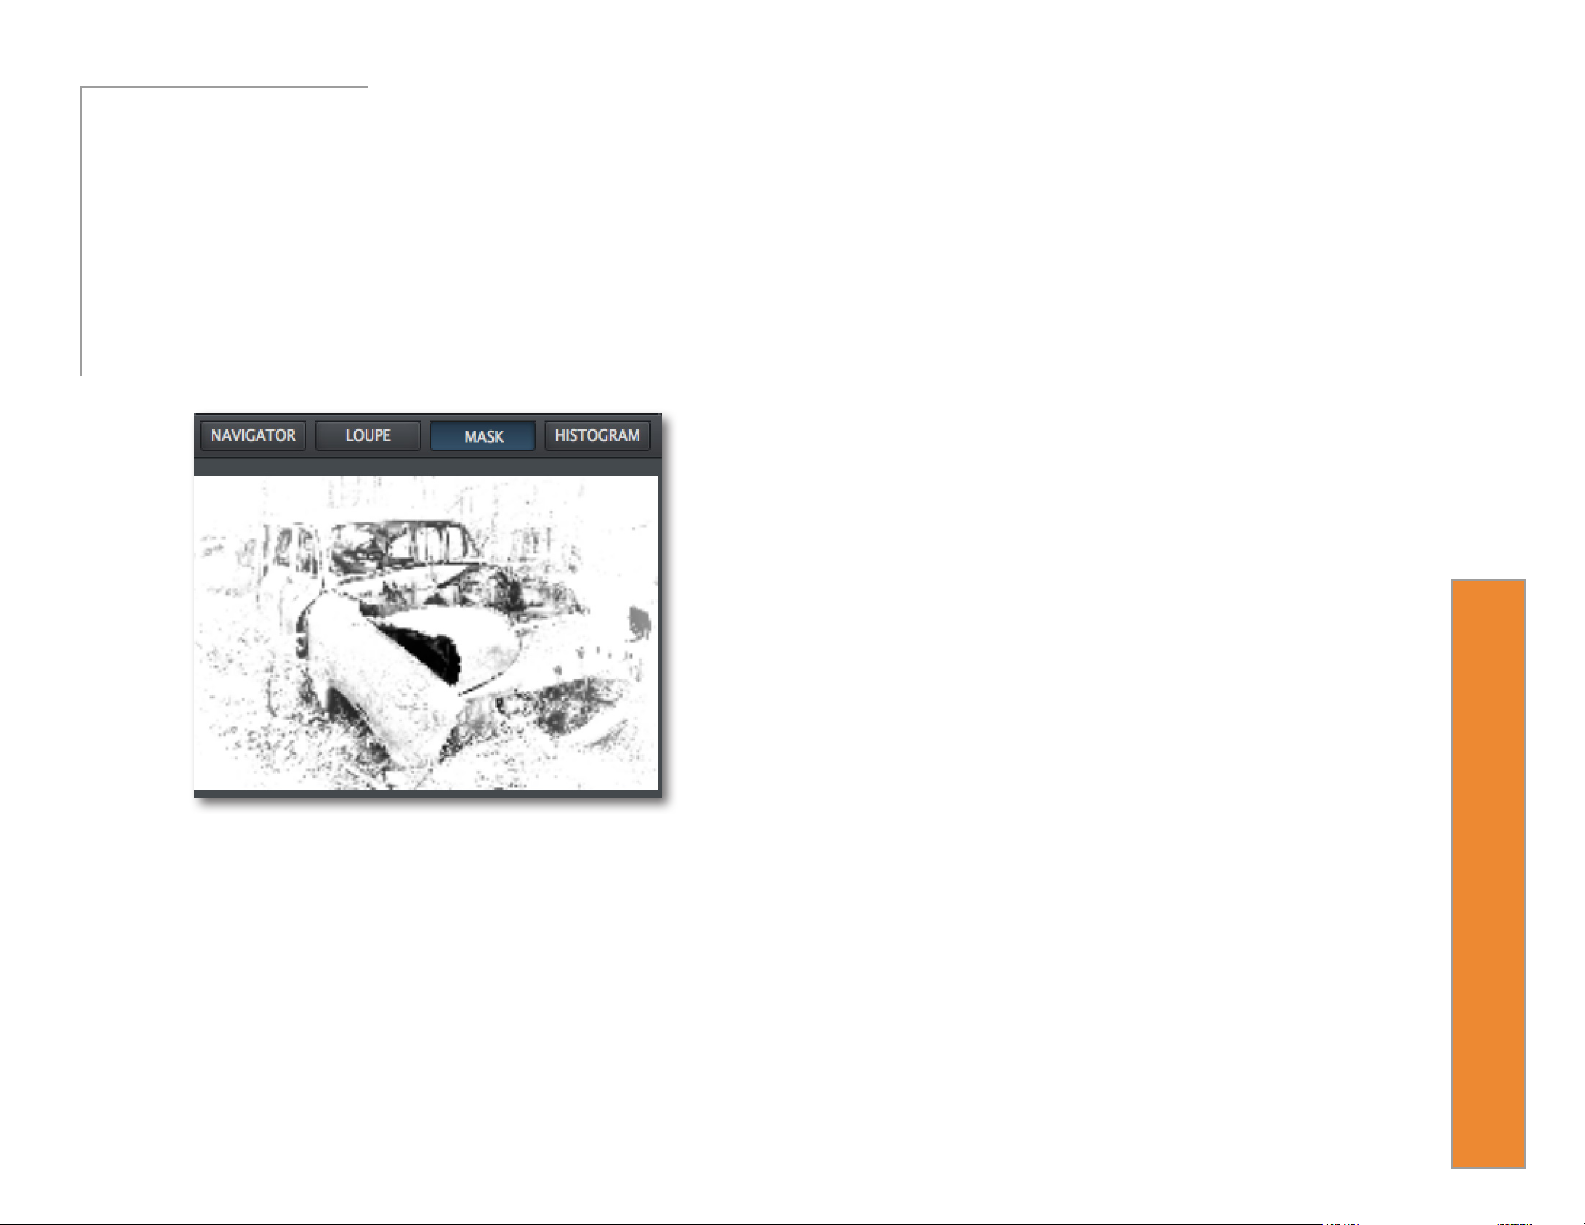
The mask view allows you to see the areas where your
selective adjustments are being applied in your image.
4
10
5
User Manual
Masking Tools
Features
Along with a new masking workow, several new
Topaz Clarity
masking tools are introduced in Topaz Clarity alongside some of our redesigned tools.
Brush Tool
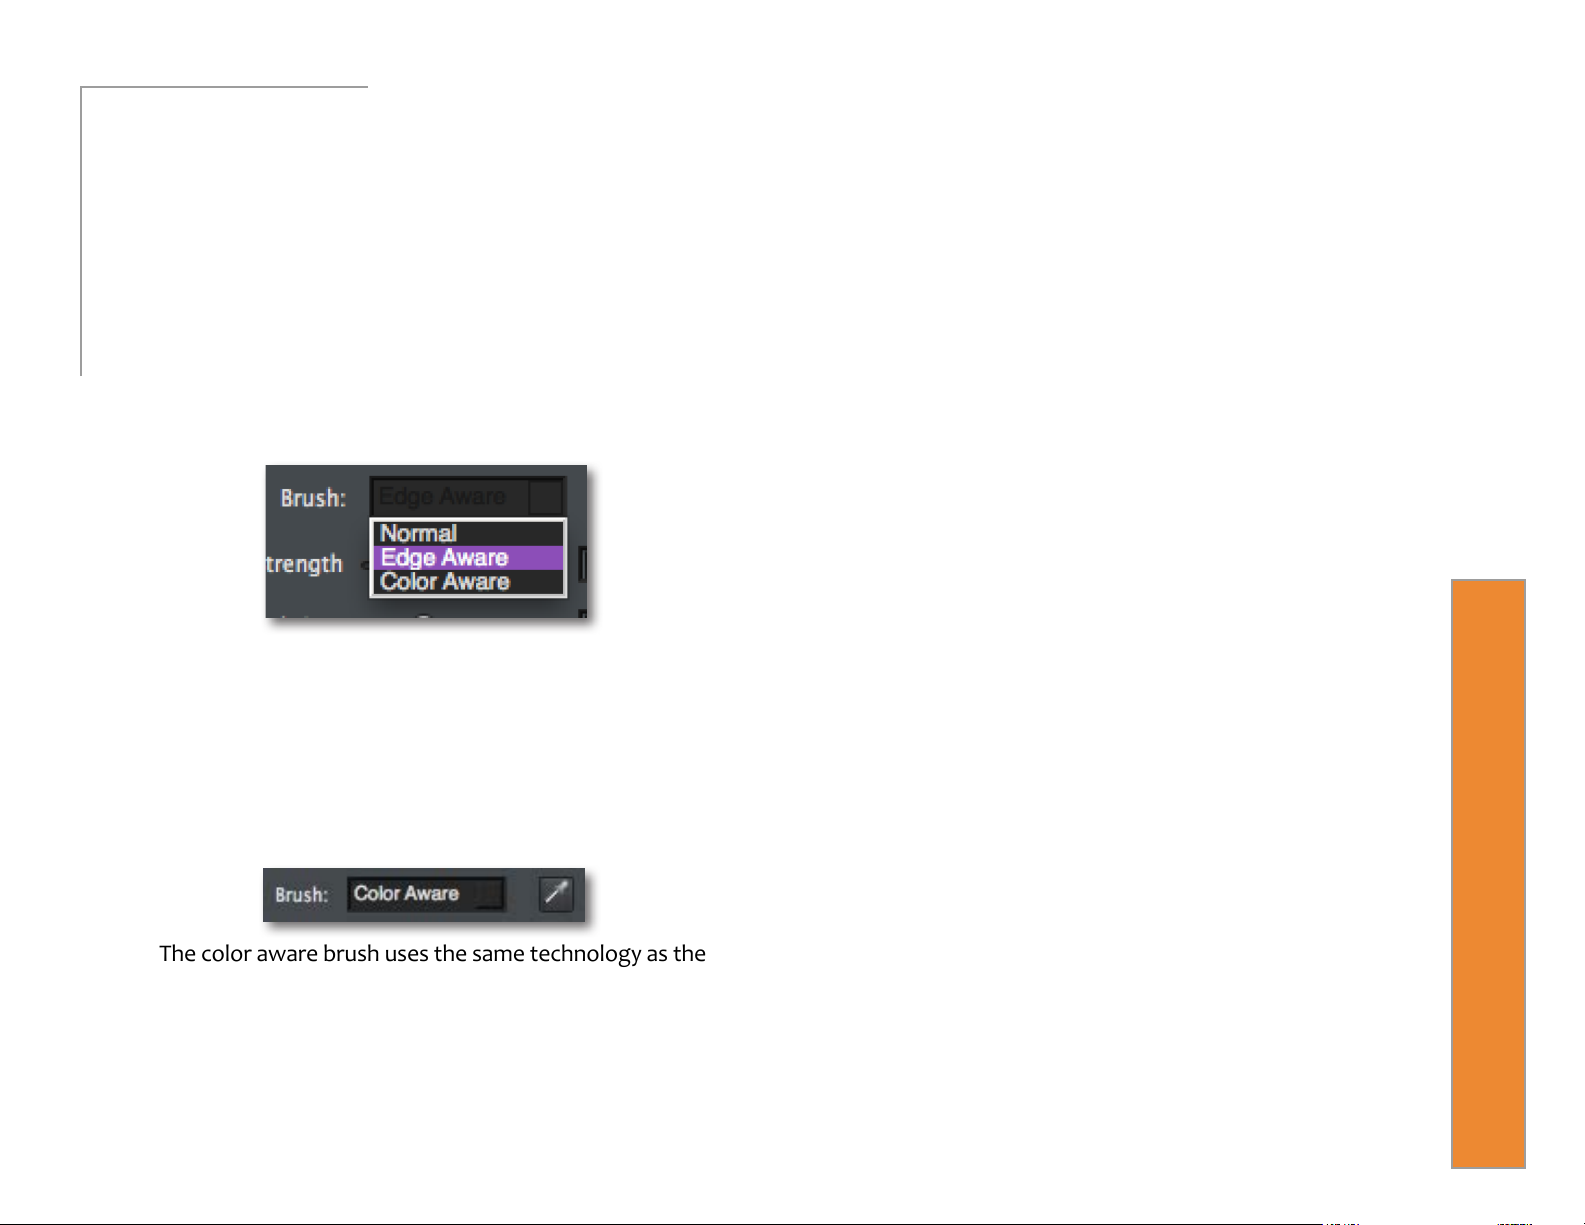
The brush tool has 3 dierent brushes to choose from:
normal, edge aware and color aware.
The normal brush is a standard brush controlled by the
sliders below.
The edge aware brush is a smart brush that detects the
edges of the area you are masking. Just keep the cross
hairs of your brush on the area/color you want to eect
and the brush will not bleed into any other areas.
Strength
Controls the strength of the brush value being applied.
At 1, the strength is 100% and will apply at the strongest
value of the brush....at lower values it will only apply a
percentage of the strength each time.
Brush Size
Controls the size of the brush.
Hardness
Controls the edge hardness of the brush. A value of 0
is 100% hard, while a value of 1.00 is 100% soft.
Preset
The A/B presets allow you to create more than one
size/type brush so you can quickly switch back and
forth.
Gradient Tool
The brush tool has 3 dierent gradients to choose
from: linear, radial, reective. Just click and drag in
your image to create the gradient.
11
The color aware brush uses the same technology as the
edge aware brush, but gives you a color picker instead
of having to keep your cross hairs in the area you are
masking. Just click the color picker icon, select a color
in your image that you’d like to mask, then brush away
without fear of going into another color. You can continue to select colors during your masking session.
Linear Gradient
The gradient follows a line.
Radial Gradient
The gradient radiates from a dened point
Reected Gradient
User Manual
Features
Color Range
The Color Range tool selects a specied color within
an image and creates a mask based upon that color.
To use the Color Range tool, click on the button
Topaz Clarity
within the mask module, then select the color in your
image that you would like to mask out (the green dot
lets you know which color is selected).
Smart Feather
The Smart Feather tool blurs the edges of the mask
to create a softer transition between the masked and
unmasked areas.
Feather Radius
Determines the size of the feathered edge. Use a small
radius for harder edged, and a large one for softer
edges.
Feather Aware
Controls how edge aware the feathered area is. Higher
values increase awareness, which is good for precise
yet natural transitions. Lower values indicate less
awareness, allowing for a more soft and blurred transition.
Mask Contrast
Determines the edge brightness of the mask. Increasing this parameter will give the mask edges more detail
and denition.
12
Size
Controls the size of the area eected by the Color
Range selection.
Sensitivity
Adjust the range of the color selected using the Sensitivity slider. Set a high Sensitivity value to restrict the
color range to only the selected color, a lower value to
increase the range.
Mask Strength
Determines how hard your mask is applied to subject
edges in your image. The higher the parameter the
harder your edges will be. The lower the parameter,
the softer your edges will be.
 Loading...