

Topaz SL Series User Manual
Design Led – Solutions Driven
TOPAZ™ SL Display
Hardware User
Manual
TOPAZ™ SL Series
Hardware User Manual
Design Led – Solutions Driven
TOPAZ™ SL Display
Hardware User
Manual
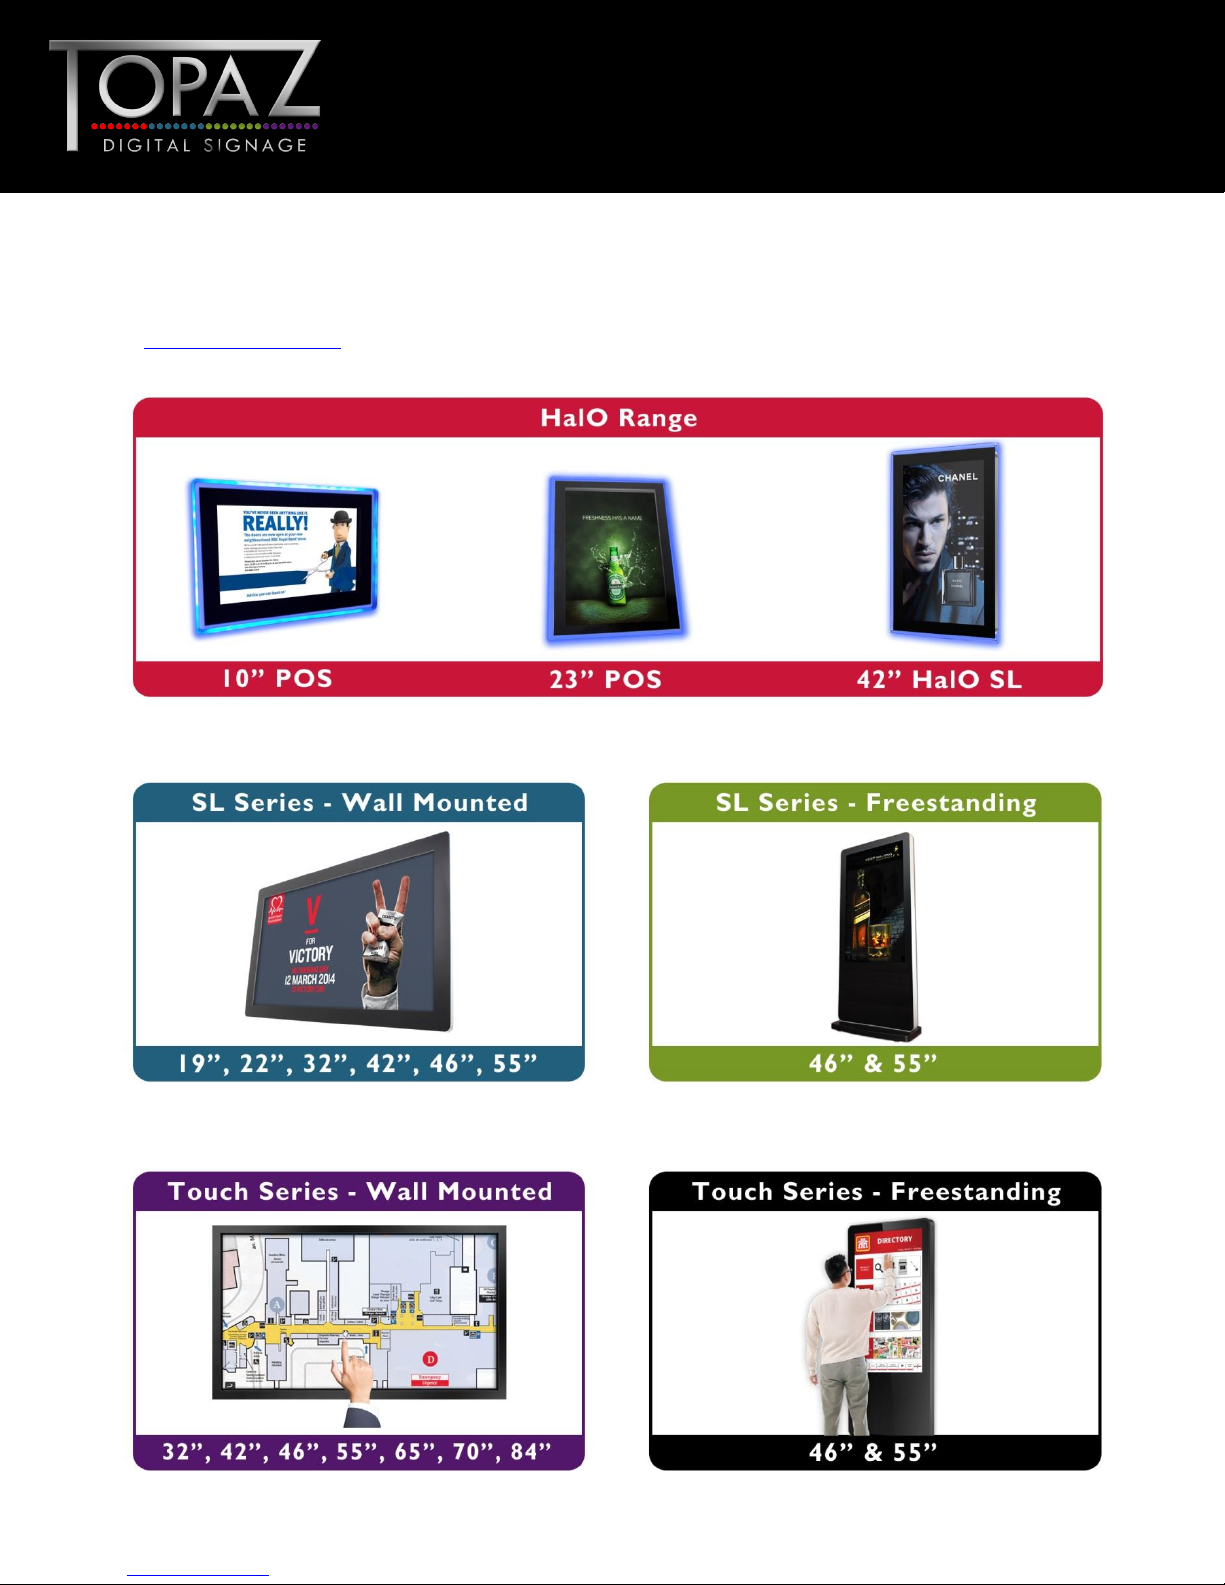
Our Full Product Range
Full details of all TOPAZ™ products available can be found by visiting our web site
www.topazdigital.com
1
Design Led – Solutions Driven
TOPAZ™ SL Display
Hardware User
Manual
Please keep the display away from any heat sources such as radiators or
direct sunlight. Place the display in a stable and well‐ventilated place.
Please handle with care as this product contains glass
The holes or openings on the display are designed for ventilation. Do not
cover or block the ventilation holes or openings with any objects.
Remove protective covering from the screen before you use the display.
Shut off the power supply before cleaning. Use a soft lint‐free cloth instead
of a tissue to wipe the screen.
You may use a glass cleaner to clean the product as required. However,
never spray the cleaner directly onto the display surface.
Do not attempt to repair this product yourself. Any modification to the
product or repair carried out that is not done with our authorization may
invalidate the warranty and could be potentially dangerous.
If you have a problem that cannot be solved using the "Troubleshooting"
guidelines, please contact your supplier or visit the Technical Support section on
our web site www.topazdigital.com .
Safety Instructions
2

Design Led – Solutions Driven
TOPAZ™ SL Display
Hardware User
Manual
Contents:
1. Introduction.................................................................................................................................................. 5
1.1 Box Contents .................................................................................................................................. 5
1.2 Product Overview ......................................................................................................................... 5
1.3 Remote Control ............................................................................................................................. 6
1.4 Replacing the Remote Control Battery .................................................................................... 7
1.5 System Menu Operation .............................................................................................................. 8
1.5.1 System Settings ....................................................................................................................... 9
1.5.2 Network Setting ................................................................................................................... 12
1.5.3 Date & Time .......................................................................................................................... 17
1.5.4 On/Off Timer ........................................................................................................................ 18
1.5.5 Screen Mode ......................................................................................................................... 20
1.5.6 File Management ................................................................................................................... 21
1.5.7 Exit .......................................................................................................................................... 21
1.6 Display Settings ............................................................................................................................. 22
2. System Operation ..................................................................................................................................... 25
2.1 Supported Media Files................................................................................................................. 25
2.2 Inputs .............................................................................................................................................. 25
3. F.A.Qs and Troubleshooting Guide ........................................................................................................ 26
3.1 Why is my screen displaying "Error (Screen Mode Unmatch)"? ........................................ 26
3.2 How do I update my screen if it is not connected to the internet? (Plug and play
method) ......................................................................................................................................................... 27
3.3 How do I play PowerPoint presentations on my display? ................................................... 33
3.4 Video Format Conversion ......................................................................................................... 34
3.4.1 Format Factory (Standard Definition) ............................................................................. 34
3.4.2 HD Video Converter Deluxe (High Definition) ............................................................ 40
3.5 My media file does not fit properly on the screen ............................................................... 41
3.6 My moving GIF files will not move. .......................................................................................... 41
3

Design Led – Solutions Driven
TOPAZ™ SL Display
Hardware User
Manual
Table of Figures
Figure 1 Product Overview ................................................................................................................................. 5
Figure 2 Home Screen .......................................................................................................................................... 8
Figure 3 Screen Inputs ........................................................................................................................................ 25
4
Design Led – Solutions Driven
TOPAZ™ SL Display
Hardware User
Manual
1. Introduction
Congratulations on your purchase of our product. Please read carefully and follow all instructions in the
manual before first use.
The product should not be exposed to liquids dripping or splashing and no objects filled with liquids,
such as vases, should be placed on the product.
For user convenience, a number of operations can be performed through the remote control.
Attention:
1. Do not change any default setting when it is unnecessary.
2. Keep the product far away from water during installation and use.
1.1 Box Contents
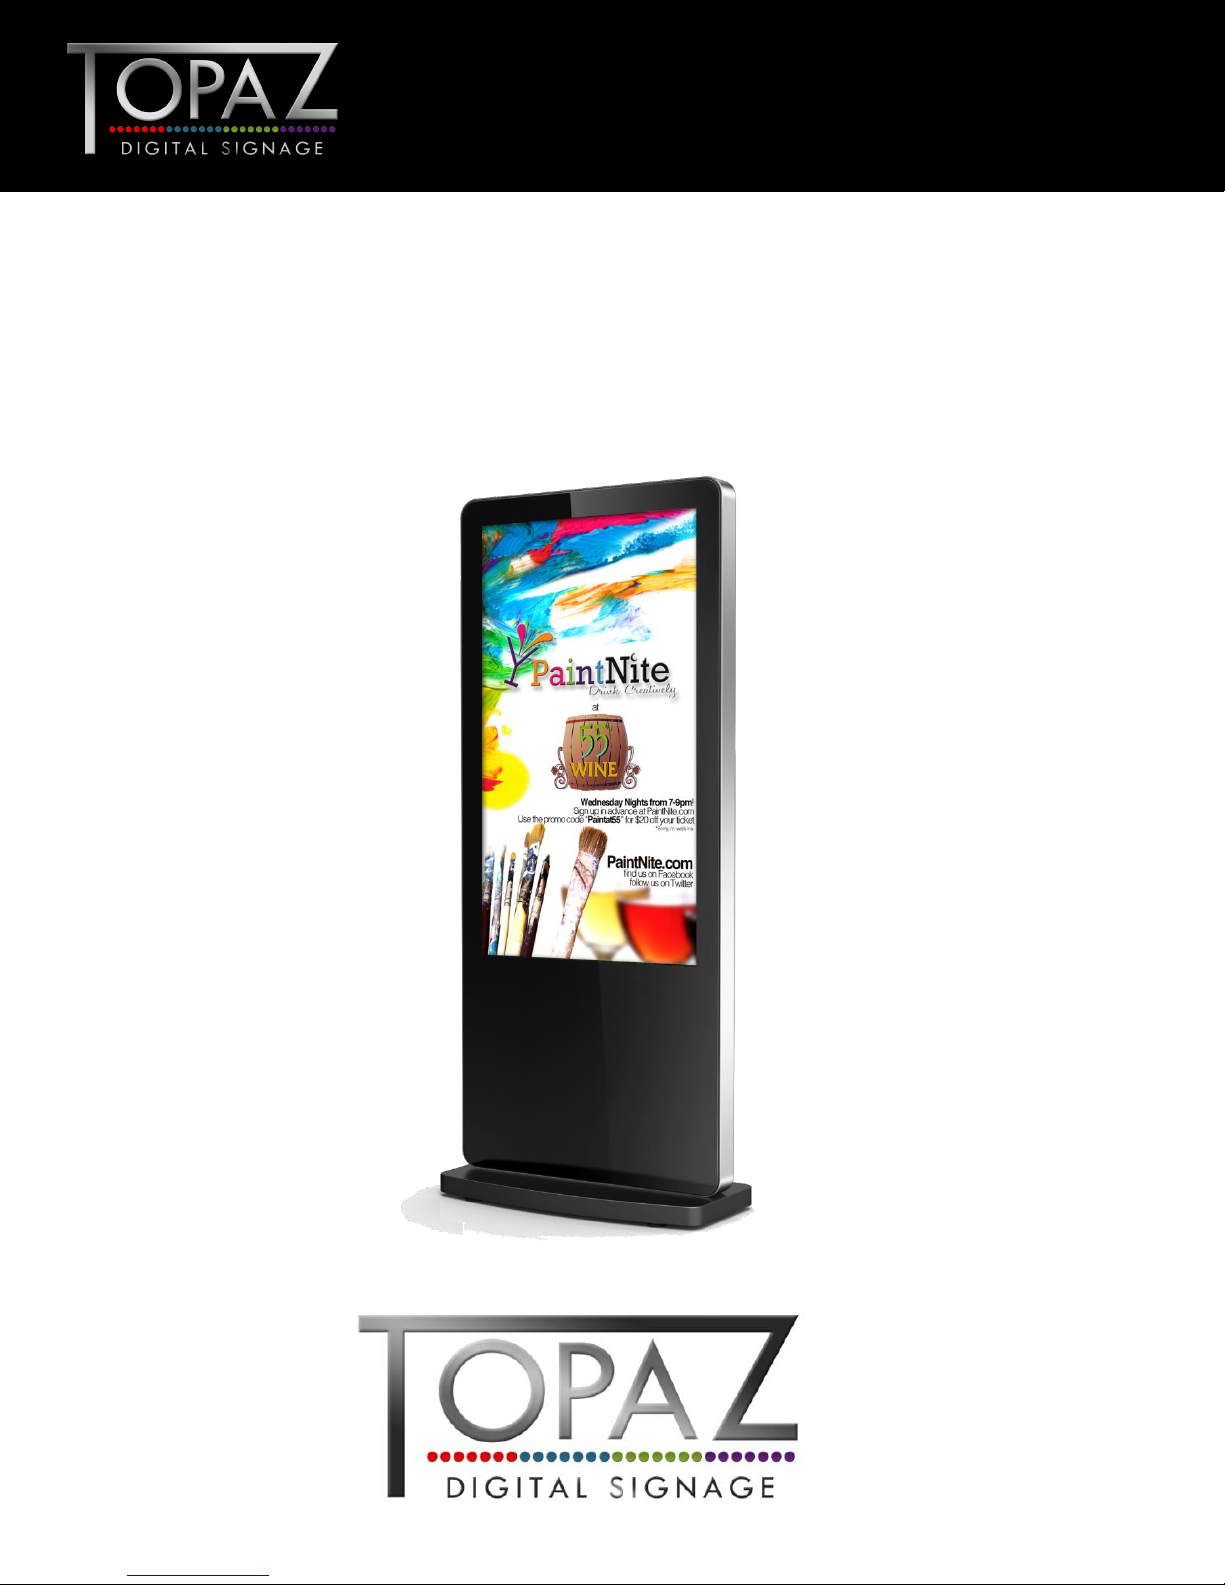
1 x TOPAZ Freestanding Display.
1 x Remote Control (with 2xAAA batteries).
1 x Key.
1 x Wi-Fi Aerial.
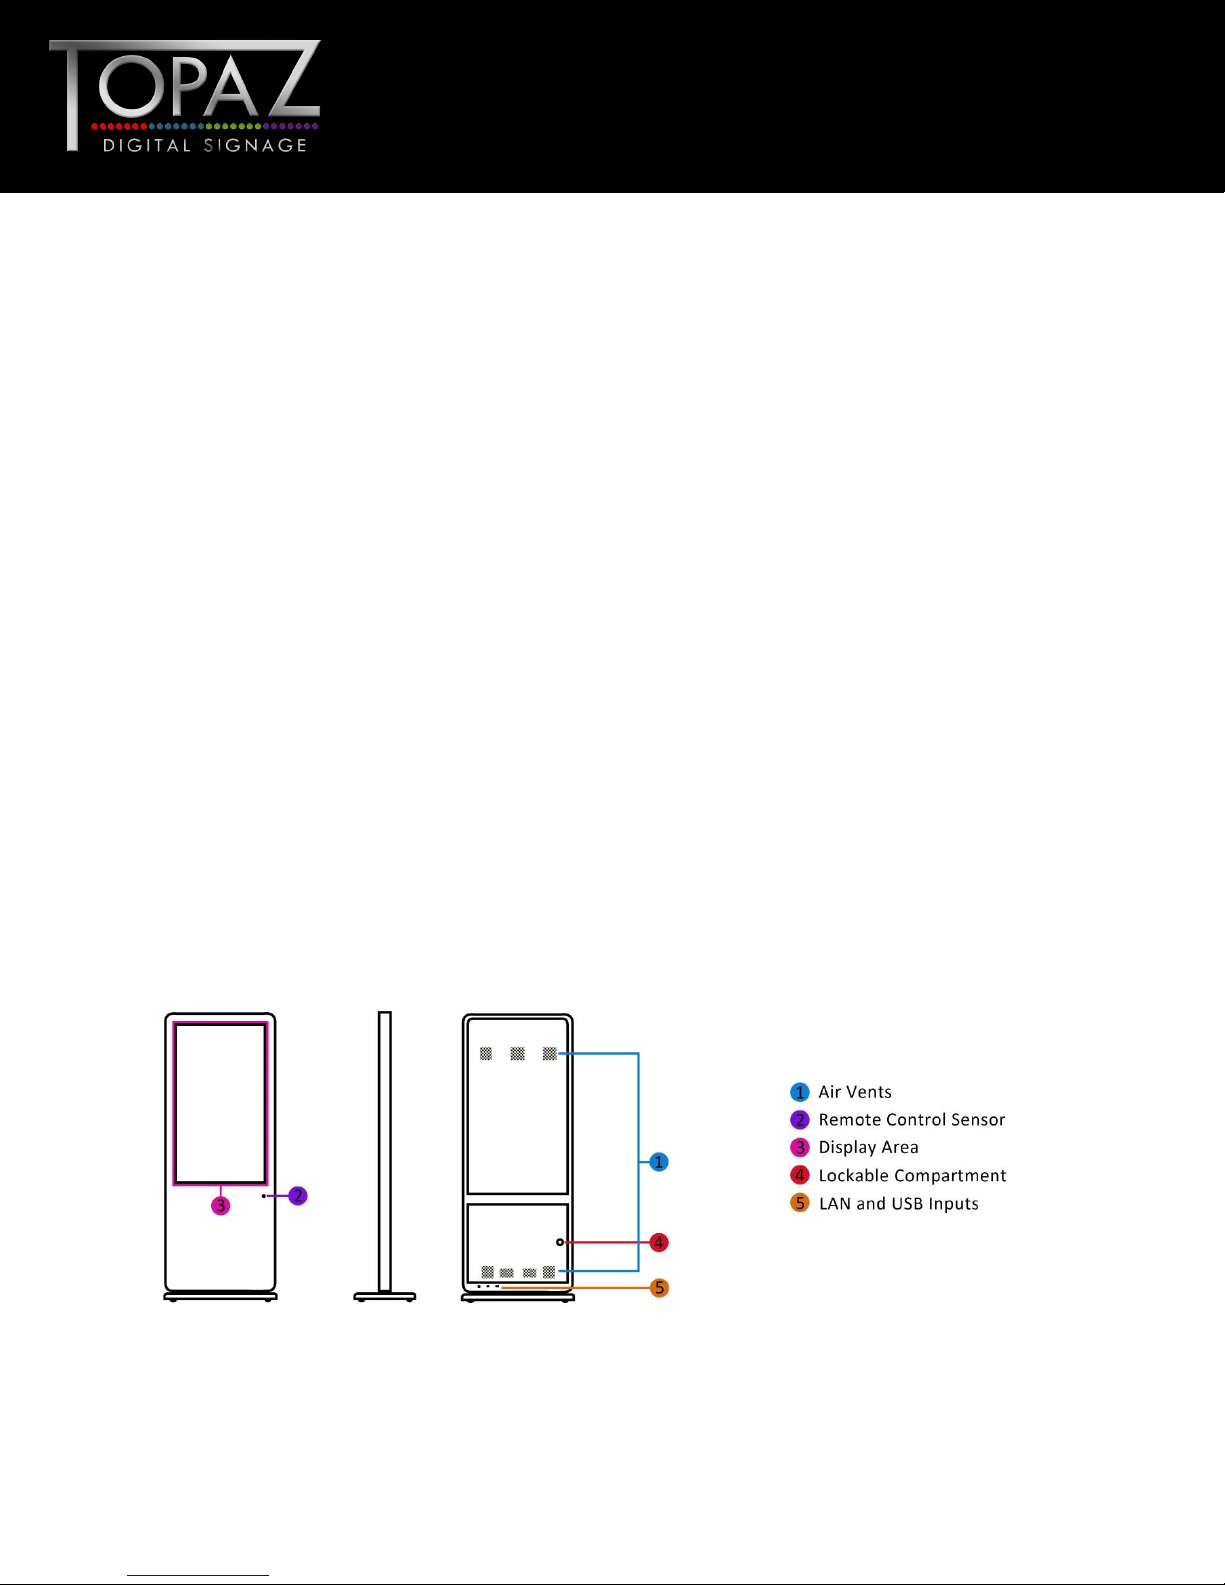
1.2 Product Overview
Figure 1 Product Overview
5
Design Led – Solutions Driven
TOPAZ™ SL Display
Hardware User
Manual
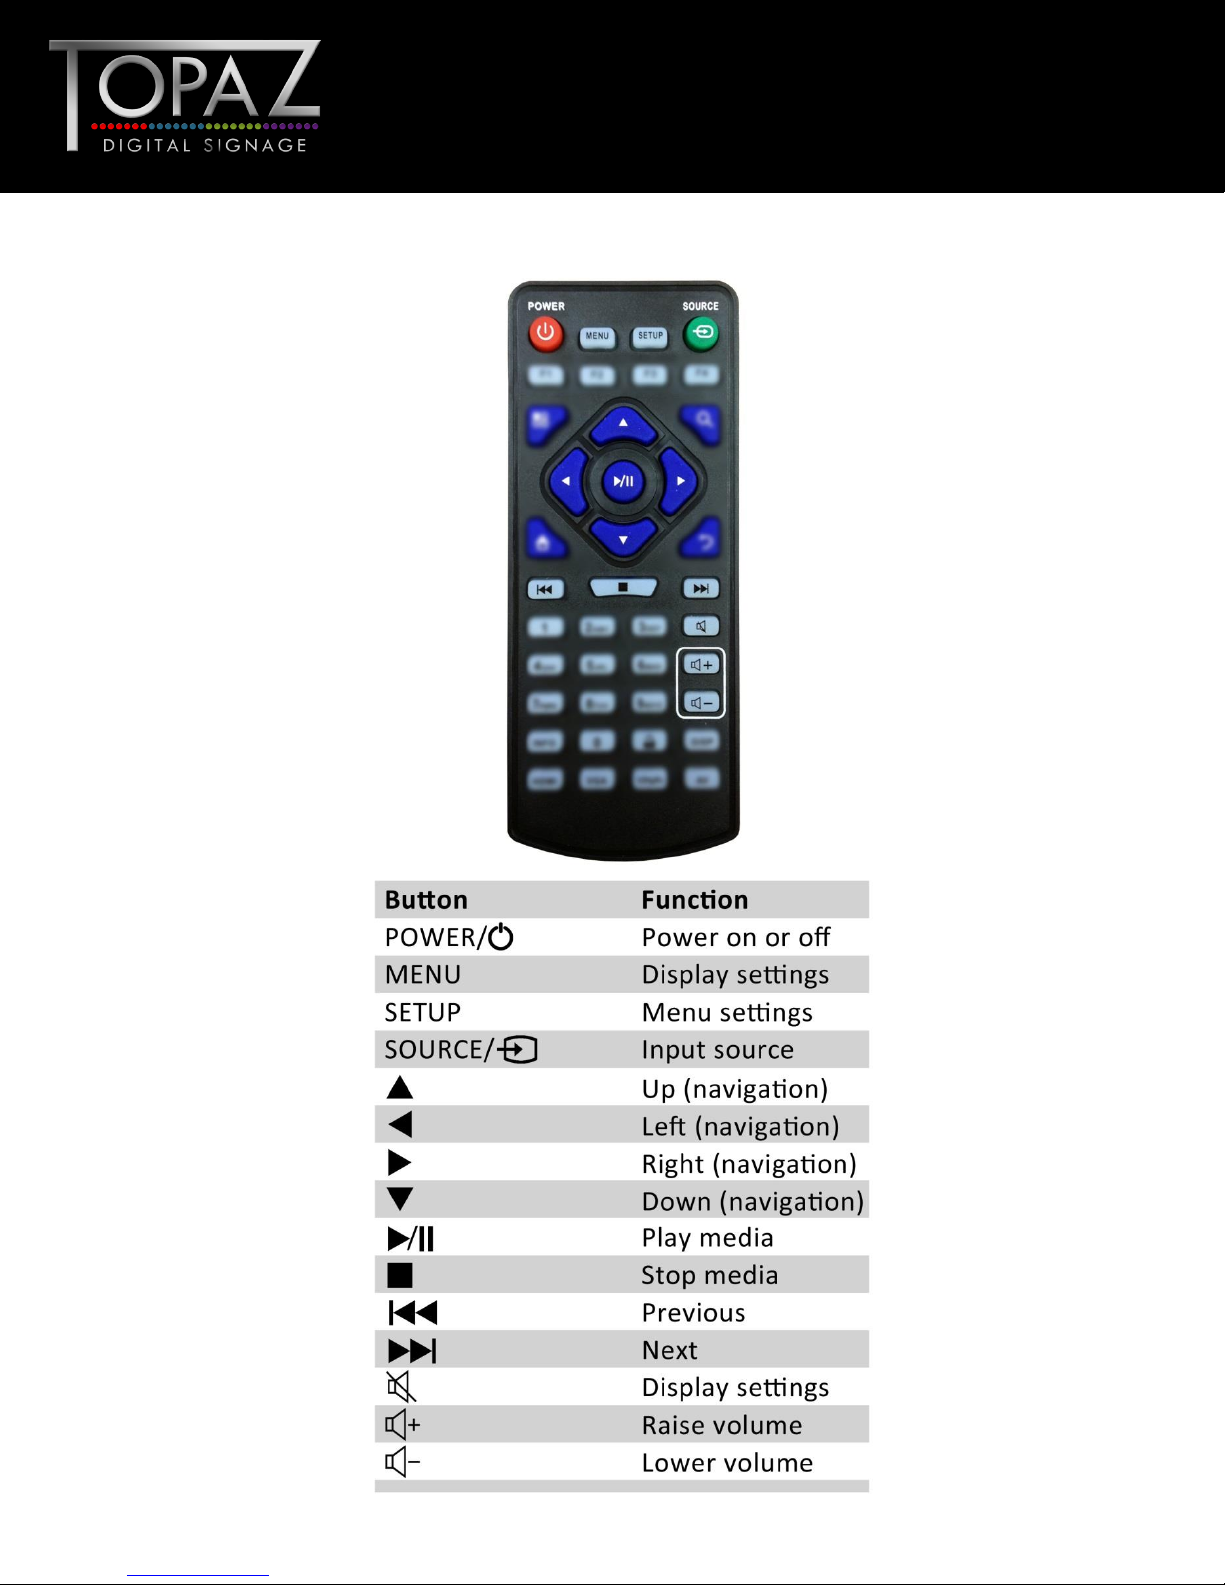
1.3 Remote Control
6
Design Led – Solutions Driven
TOPAZ™ SL Display
Hardware User
Manual
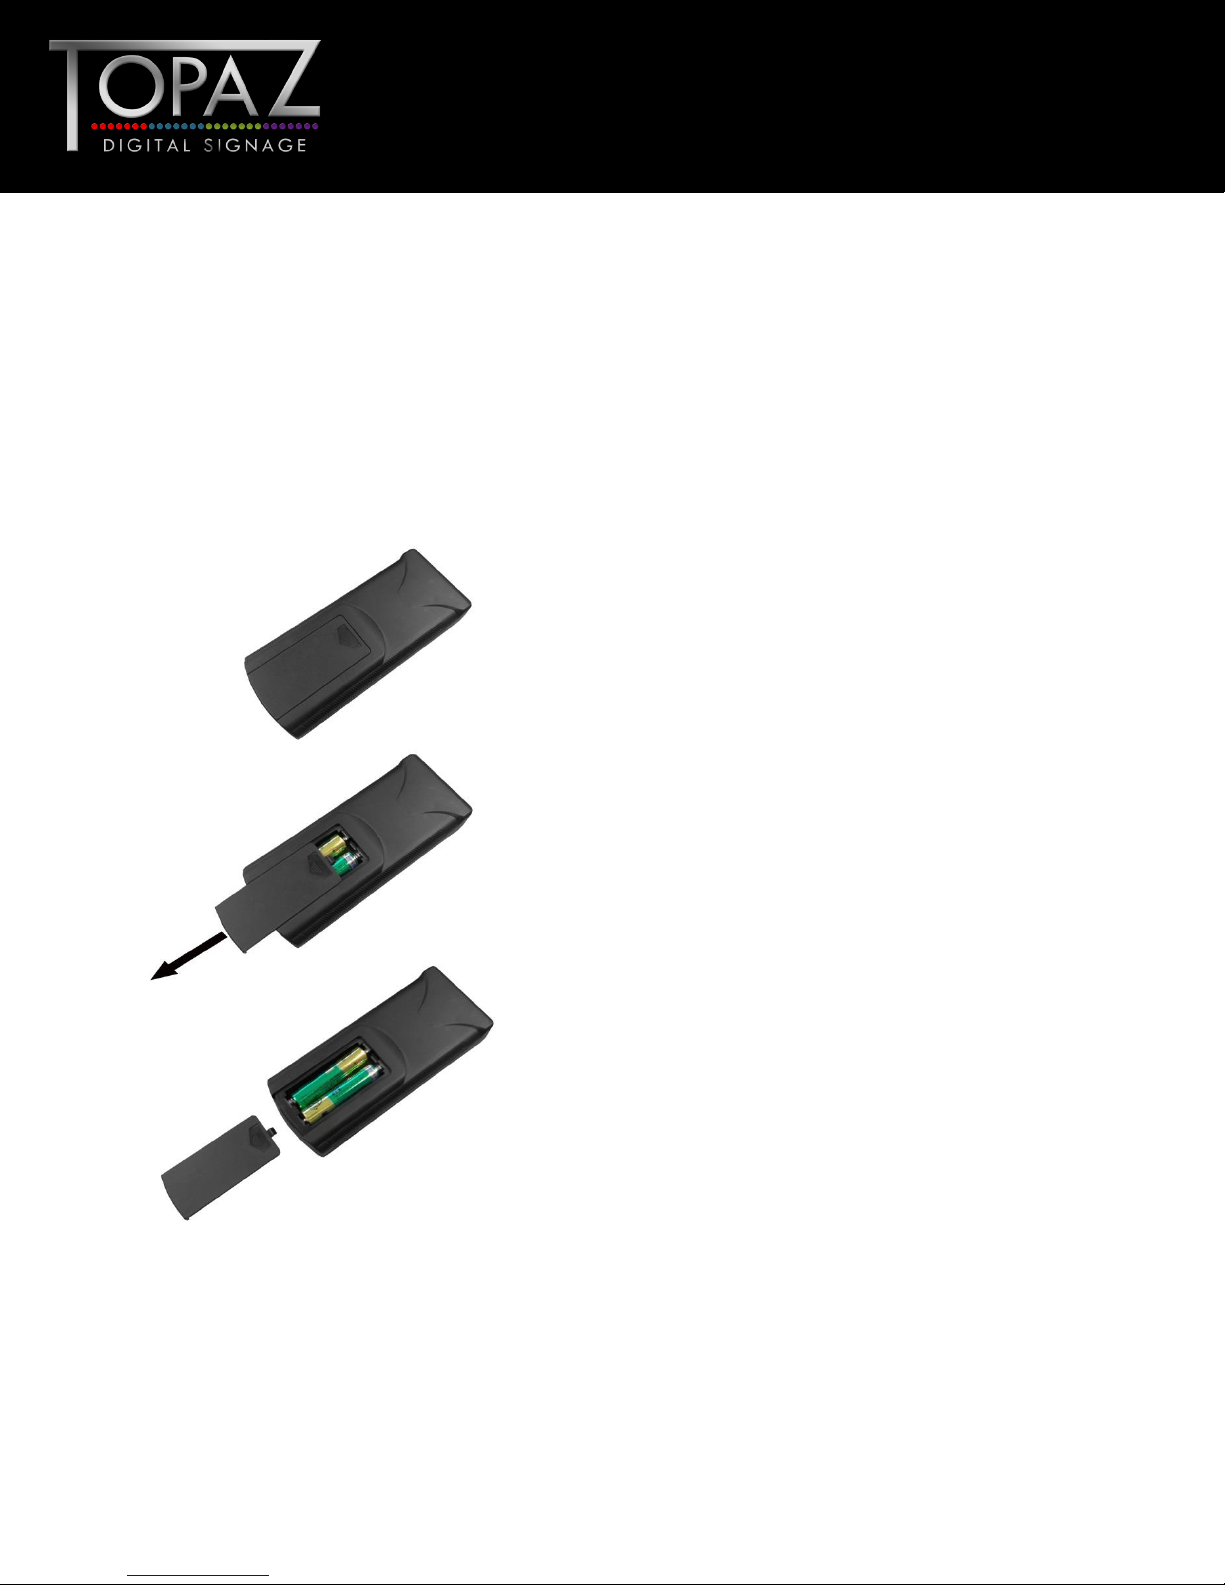
1.4 Replacing the Remote Control Battery
1. Slide the battery cover off, as shown below.
2. Remove the used batteries.
4. Insert the two new AAA batteries with their terminals corresponding to the indicators.
5. Put the cover back on.
7
Design Led – Solutions Driven
TOPAZ™ SL Display
Hardware User
Manual
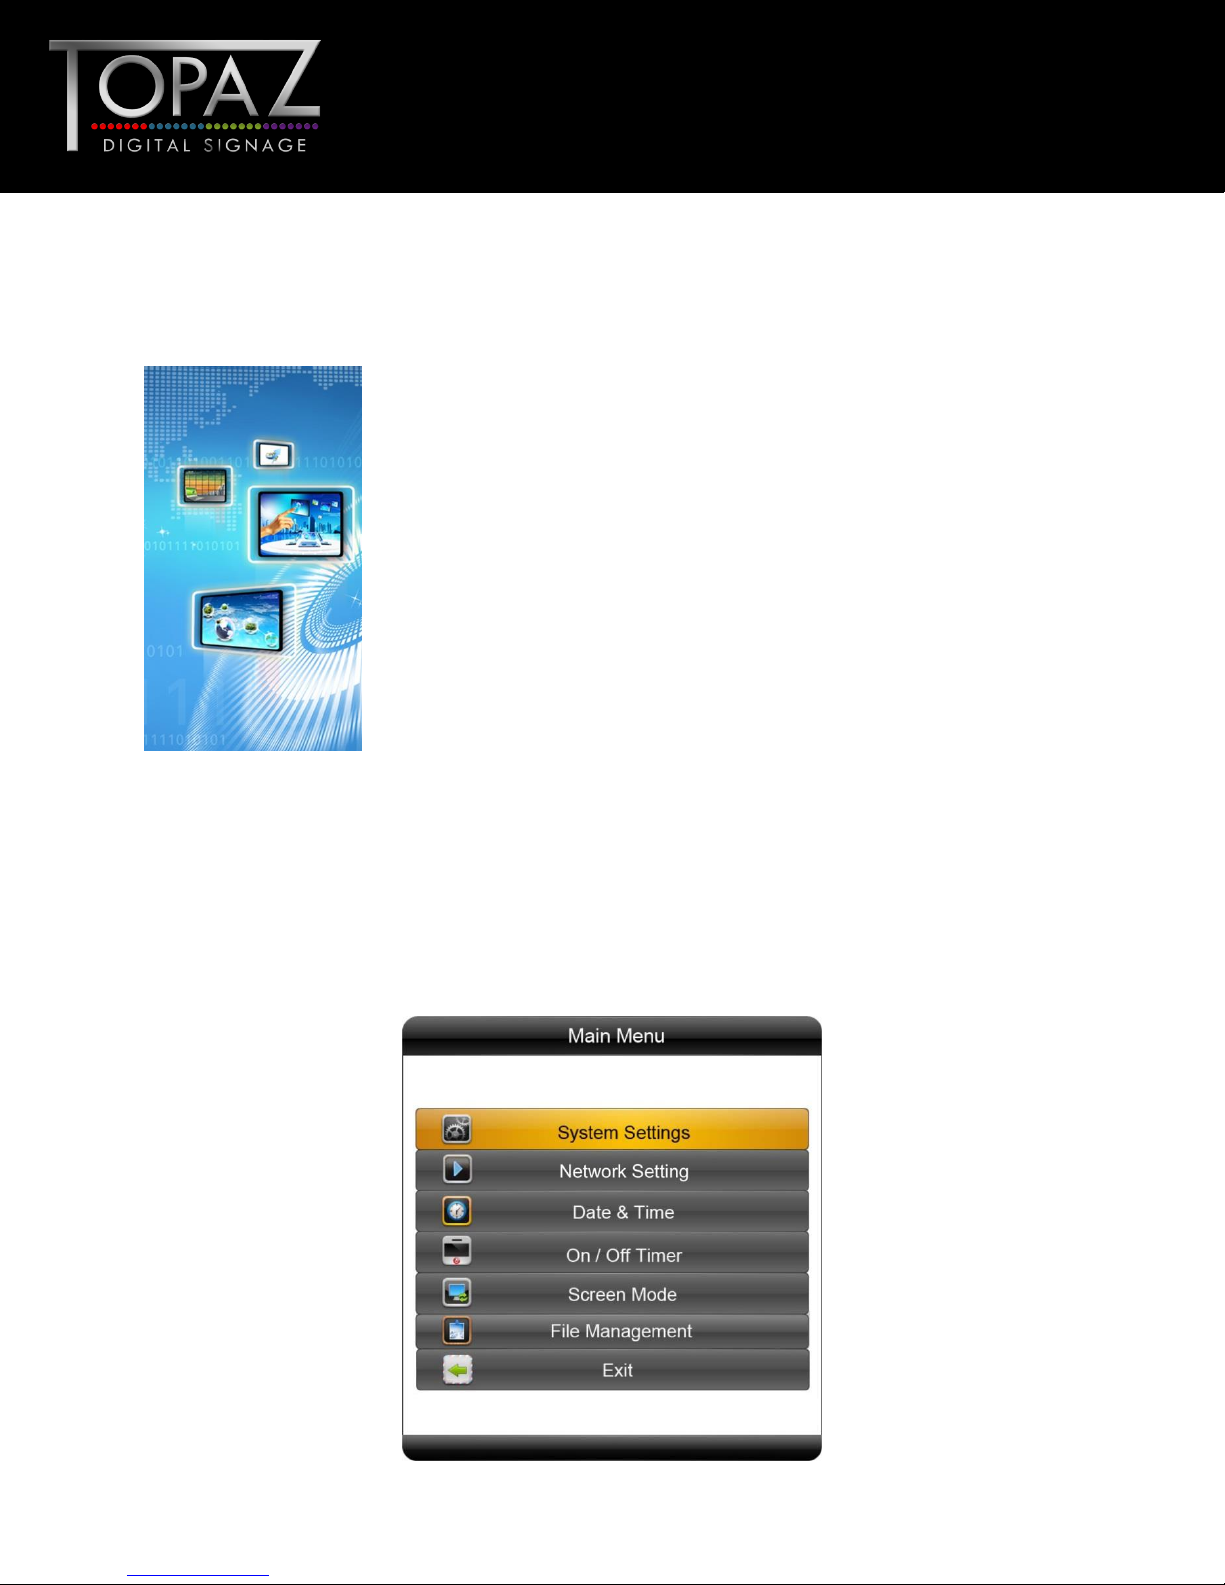
1.5 System Menu Operation
In order to access the Setup Menu you must first press “STOP” button to go back to the home screen
(pictured below). You can then bring up the Main Menu by pressing “SETUP”.
Figure 2 Home Screen
Main Menu includes following sub-menus: System Settings, Network Setting, Date & Time, ON/OFF
Timer, Screen Mode, File Management and Exit.
Press ↑ & ↓ to select the right item, press “PLAY” to confirm selection. Choose Exit to exit the Main
Menu.
8
Design Led – Solutions Driven
TOPAZ™ SL Display
Hardware User
Manual
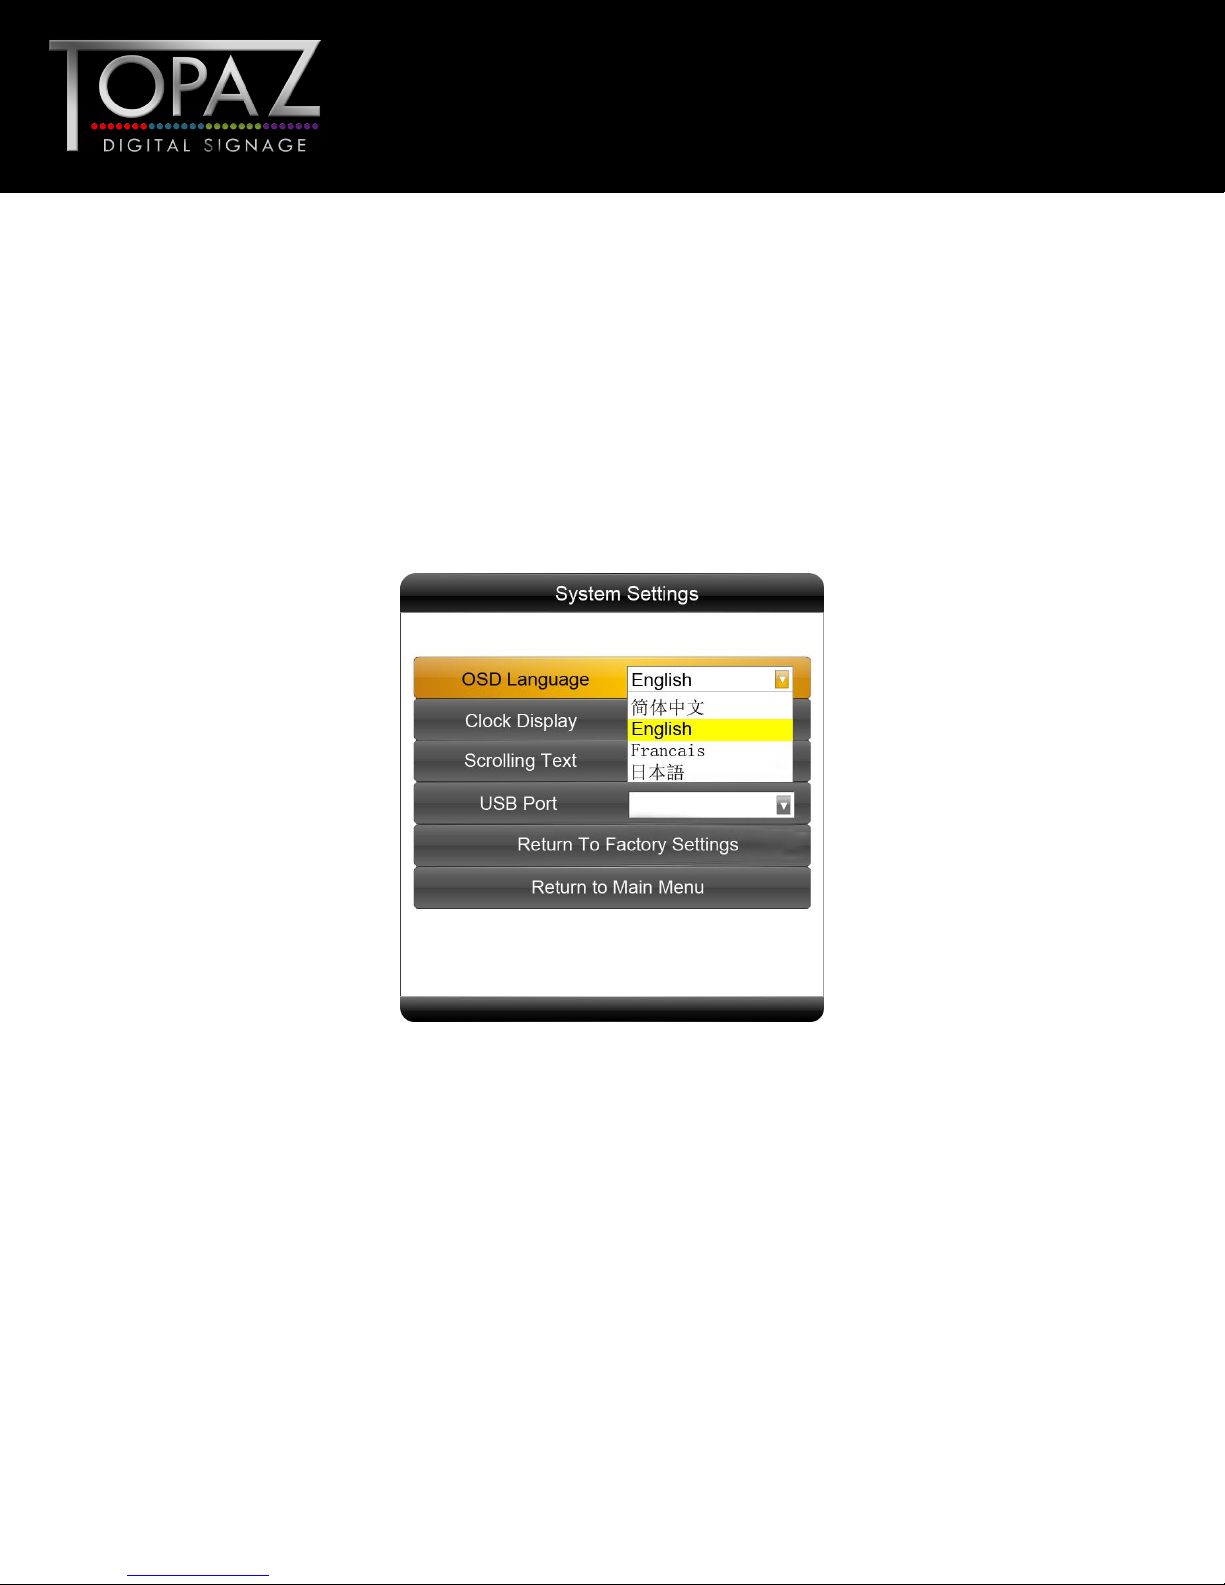
1.5.1 System Settings
The sub-menus within this section are OSD Language, Clock Display, Scrolling Text, USB Port as well as
Restore to Factory Settings and Return to Main Menu options.
OSD Language
The On Screen Display supports four languages – Chinese, English, French and Japanese. As with all
menu operation press ↑ & ↓ to select the right item, press “PLAY” to confirm selection.
Clock Display
There are 5 options as pictured below:
Top Left: The time will be displayed on top left of the screen.
Bottom Left: The time will be displayed on bottom left of the screen.
Top Right: The time will be displayed on top right of the screen.
Bottom Right: The time will be displayed on bottom right of the screen.
Off: The screen doesn’t display time.
Note: You should set this to “Off” if you wish to add a clock via the Content Management
System later.
9

Design Led – Solutions Driven
TOPAZ™ SL Display
Hardware User
Manual
Scrolling Text
This setting is irrelevant and is only significant if the screen is being used as a standalone display and is
not networked.
USB Port
This setting is irrelevant and is only significant if the screen is being used as a standalone display and is
not networked.
10

Design Led – Solutions Driven
TOPAZ™ SL Display
Hardware User
Manual
Restore To Factory Settings
Highlight “Yes” and press “PLAY” to restore factory settings; this will restore all system settings back
to default.
Play Log and Synchronous Set
Please do not alter these settings, doing so may affect the functionality of your screen.
11

Design Led – Solutions Driven
TOPAZ™ SL Display
Hardware User
Manual
1.5.2 Network Setting
All settings within this section will be pre-set before you receive your goods. Please do not change
any of these settings unless you have adequate technical support.
Server Setting
There are two options here, IP Mode and Domain Mode. This feature directs your screen to the server
it will be collection information from. By default your screen should already be set to “IP Mode” with
the IP address of: 185.17.196.194 - Port 80.
Local ID
This is your screen’s serial number. This is pre-set and cannot be changed.
MAC Address
This is your screen’s MAC Address. This is pre-set and cannot be changed.
IP Address
There are two options here, DHCP and Stable IP. By default your screen should already be set to
DHCP mode however if your internet connection is subject to strict security settings or a firewall that
only allows devises with authorised IP addresses to access the internet, you may need to input these
settings into the “Stable IP” section. Here you will be asked to input the following:
IP Address
Subnet Mask
Default Gateway
DNS Server
Network Type
There are three options here, 3G, WiFi and LAN. Please make sure your screen is set to “WiFi”.
12
 Loading...