

Page 1

Assembling the TOPAZ OCR
This procedure describes how to connect video and power cables, and attach the
touchscreen display to TOPAZ. Before you begin:
Read this procedure before you set up TOPAZ
Determine where you are going to set up and use TOPAZ
Make sure you have a clean, flat, sturdy surface to assemble TOPAZ
A fully assembled TOPAZ weighs approximately 46 lbs. / 21 kg. Use caution
when unpacking and lifting TOPAZ and the touchscreen. Get assistance if
you need help lifting and holding the display.
Familiarize yourself with the touchscreen video and power connectors
No tools are needed to assemble TOPAZ
Setting Up TOPAZ
CAUTION: The TOPAZ is heavy. Get assistance if you need help moving it.
Step 1. Unpack TOPAZ and place it on a flat, sturdy surface.
440944-001 – Revision A
Page 2
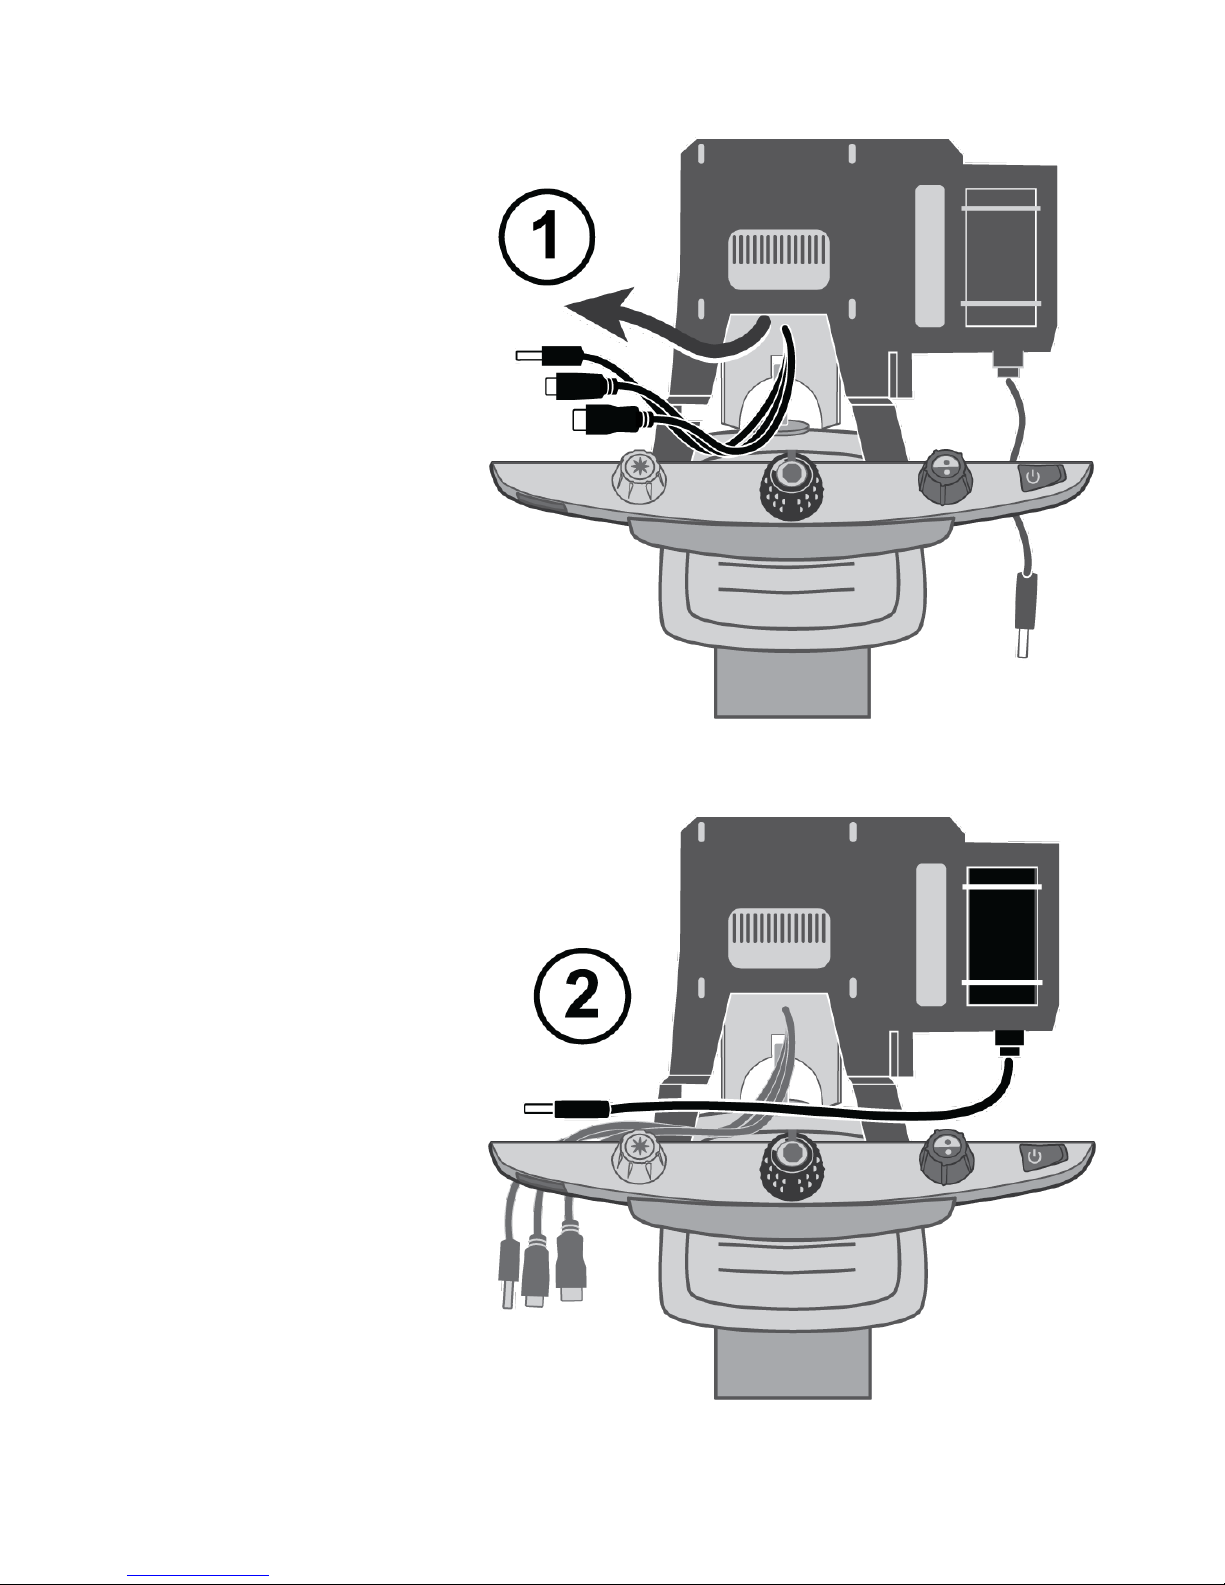
Step 2.
The monitor arm has
three cables: HDMI,
USB, and LED Flash.
Place the cables
through the large
opening in the monitor
bracket (1).
Step 3.
Place the 12V DC
power cable (2) across
TOPAZ so that it rests
between the control
panel and the monitor
bracket (with the other
cables).
2
Page 3

Setting Up the Touchscreen Display
CAUTION: The touchscreen display is heavy. Get assistance if you need help
moving it.
Step 1.
Unpack the display and place it face down on a clean flat, sturdy surface.
Step 2.
Remove the four thumbscrews from the back of the display, and set them on
the TOPAZ XY table.
3
Page 4
Step 3.
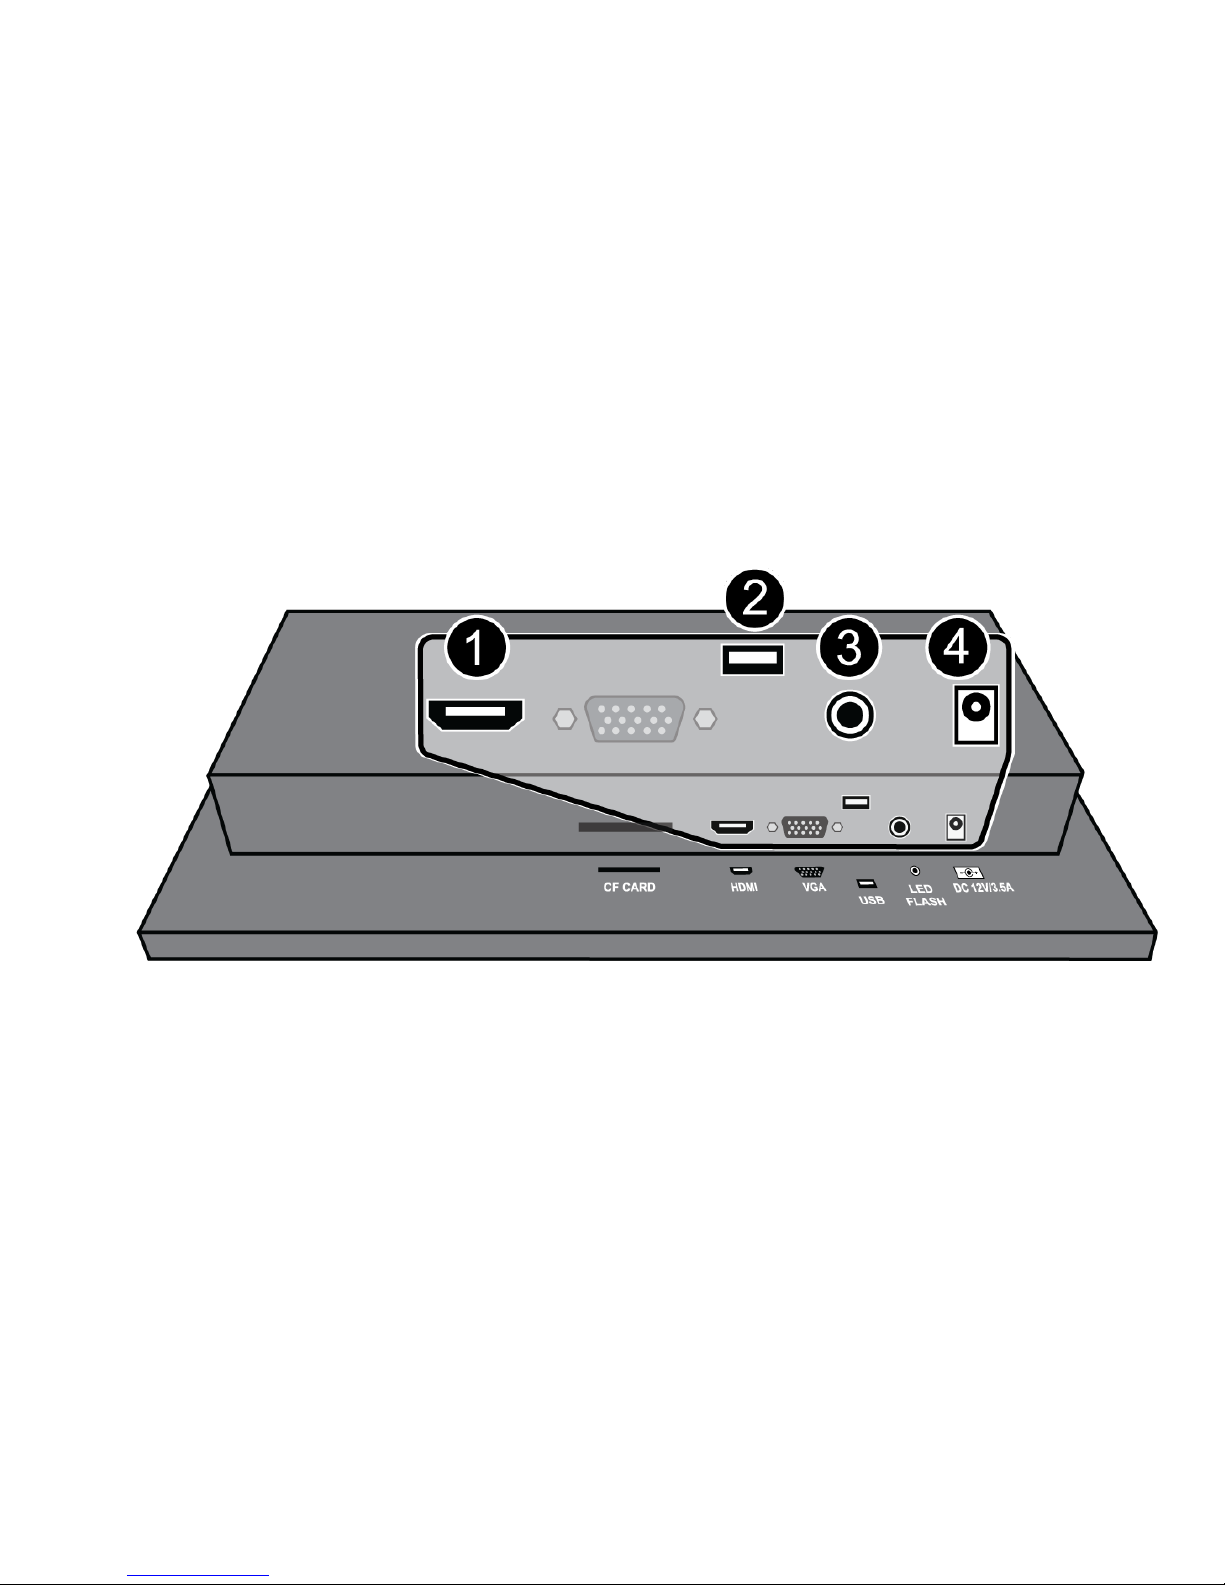
The display’s video and power connectors are on the bottom of the display.
Familiarize yourself with the location of these connectors. This will be helpful
when later connecting video and power cables.
HDMI connector (1)
USB connector (2)
LED Flash connector (3)
12V DC power connector (4)
4
Page 5
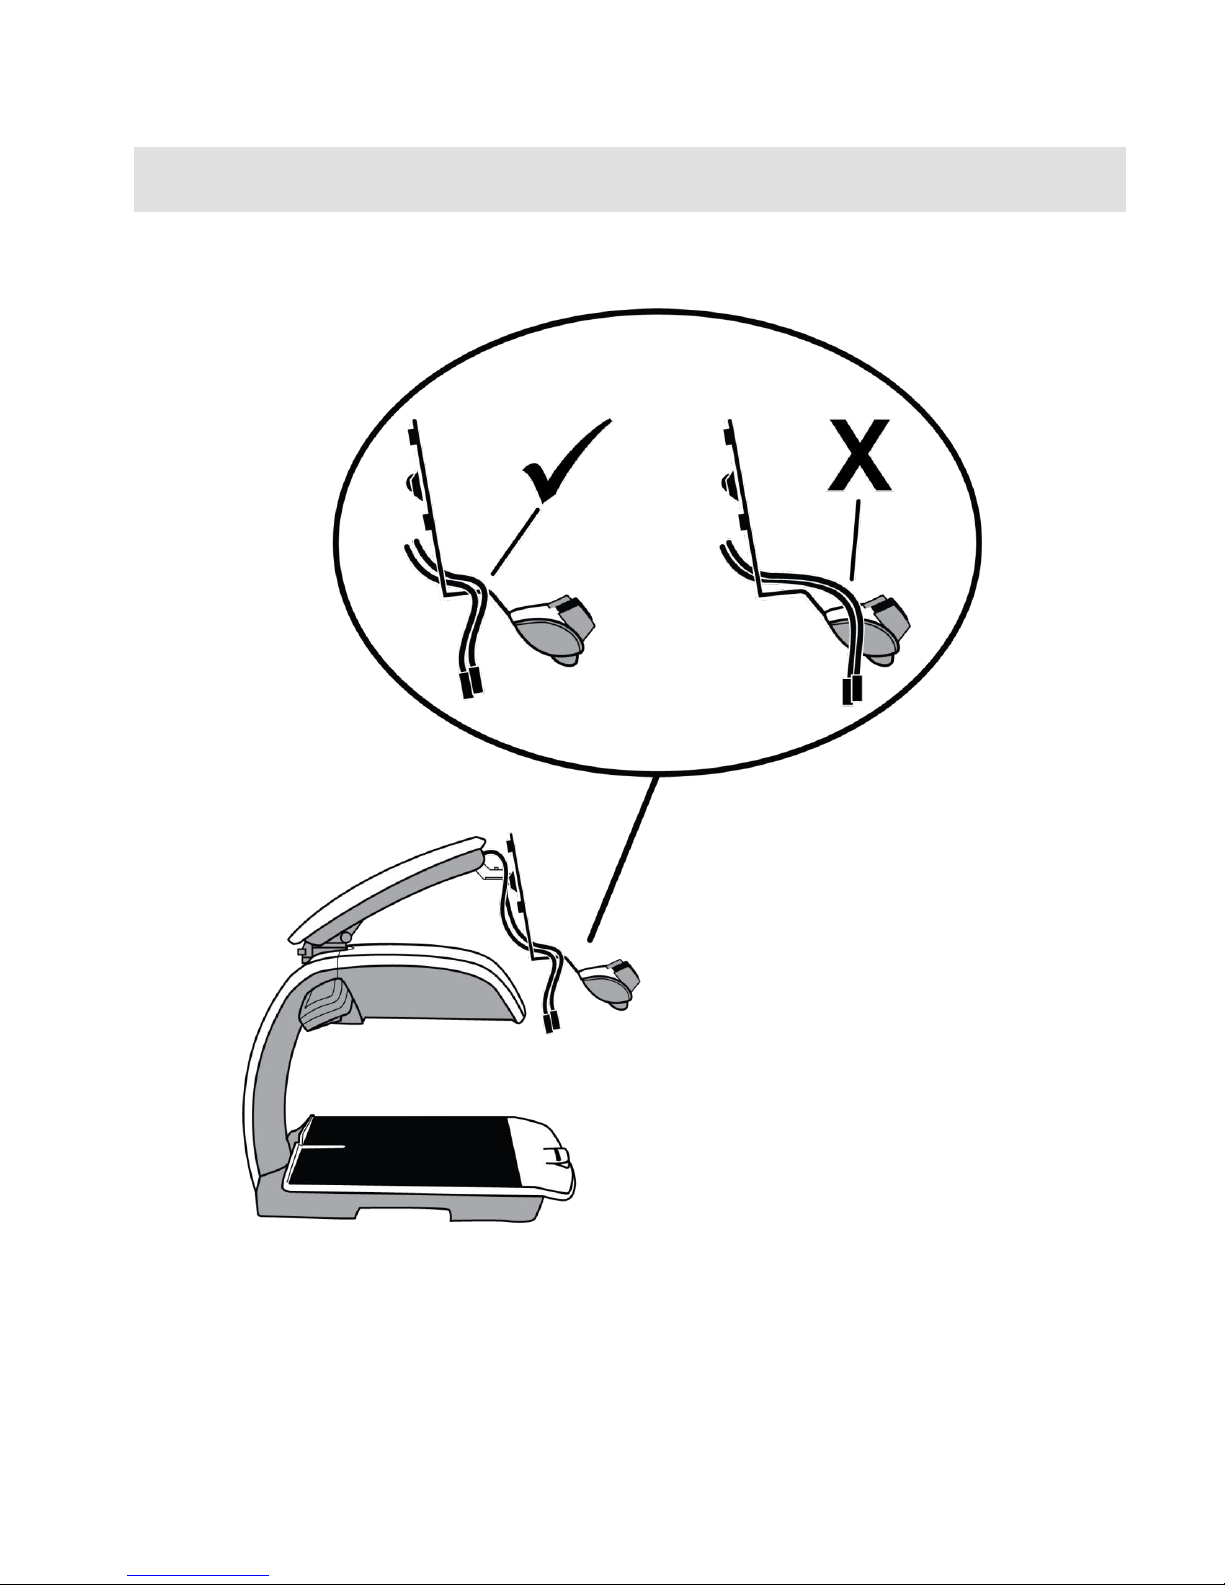
Connecting Cables and Securing the Touchscreen Display
Important: Make sure the video and power cables are out of the way before
placing the display on the control panel.
5
Page 6
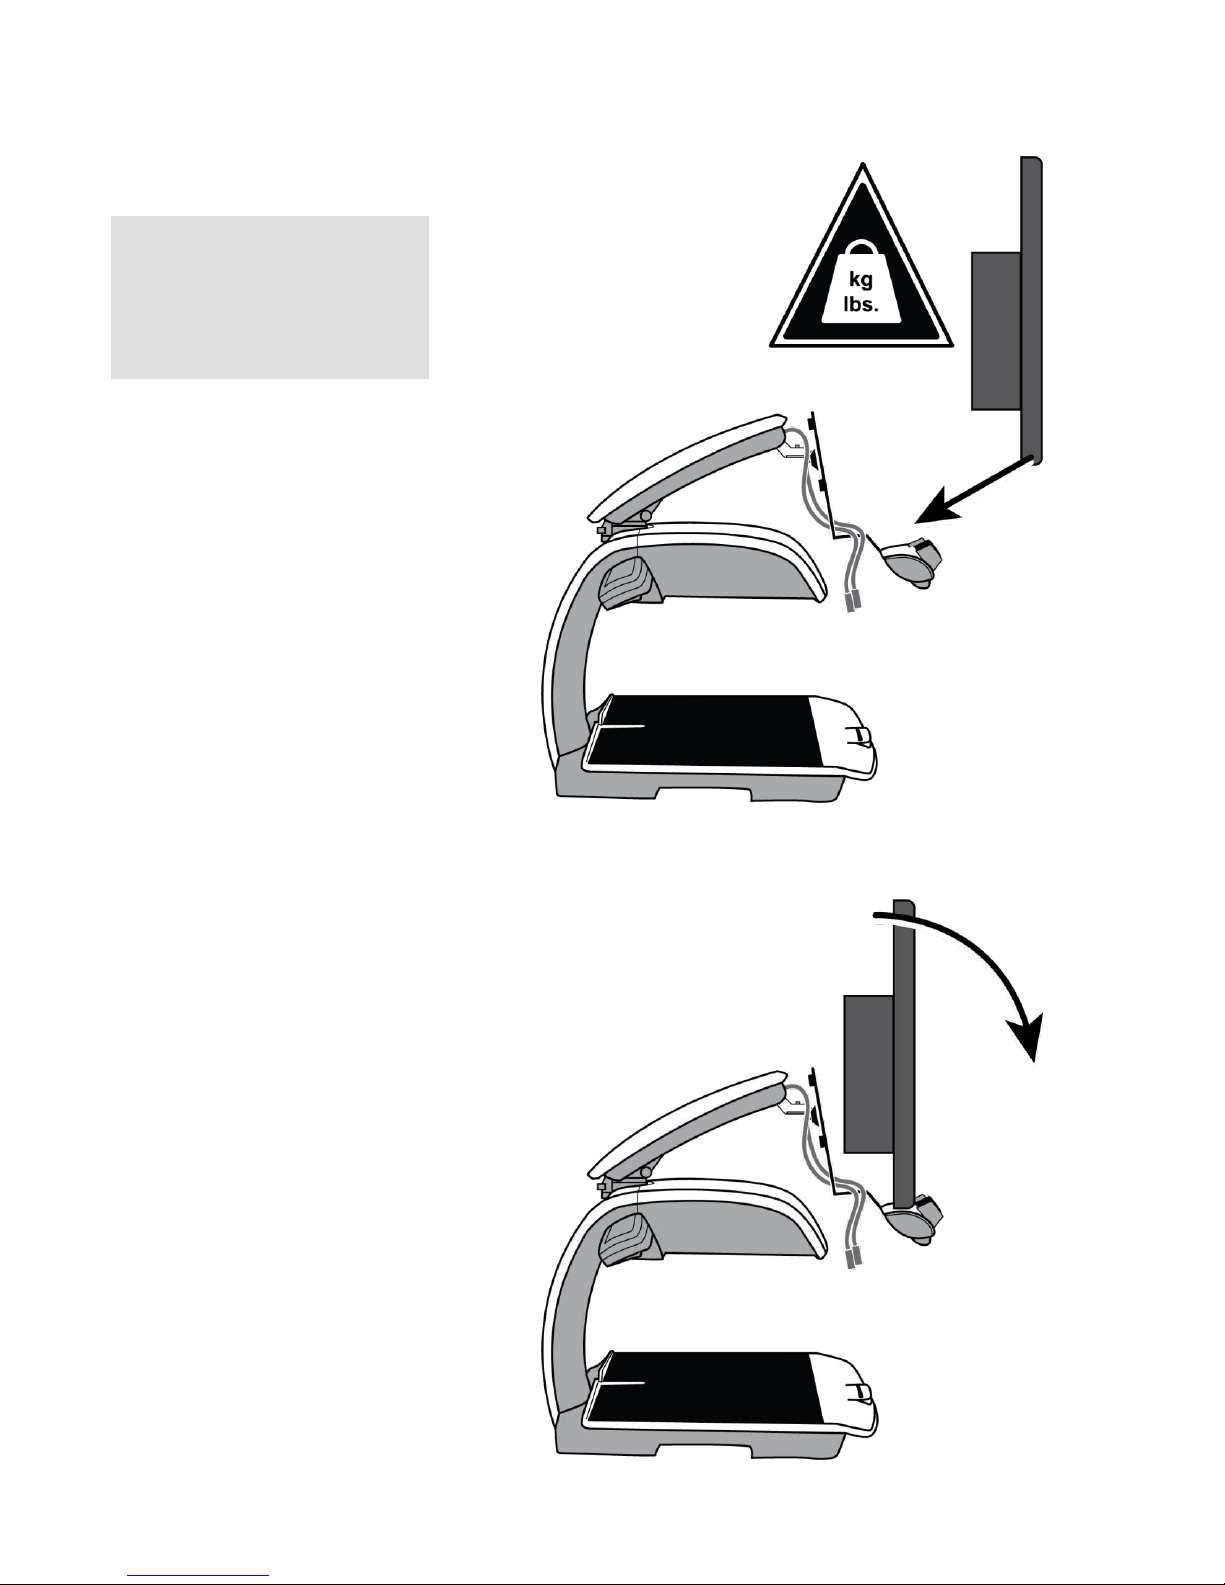
CAUTION:
The display is heavy.
Get assistance if you
need help lifting and
holding it in place.
Step 1.
Pick up the display so
that it is facing you, and
then place its bottom
edge on the top of the
control panel.
Step 2.
While holding the top of
the display, carefully
pivot it toward you so
that the screen is facing
down
6
Page 7
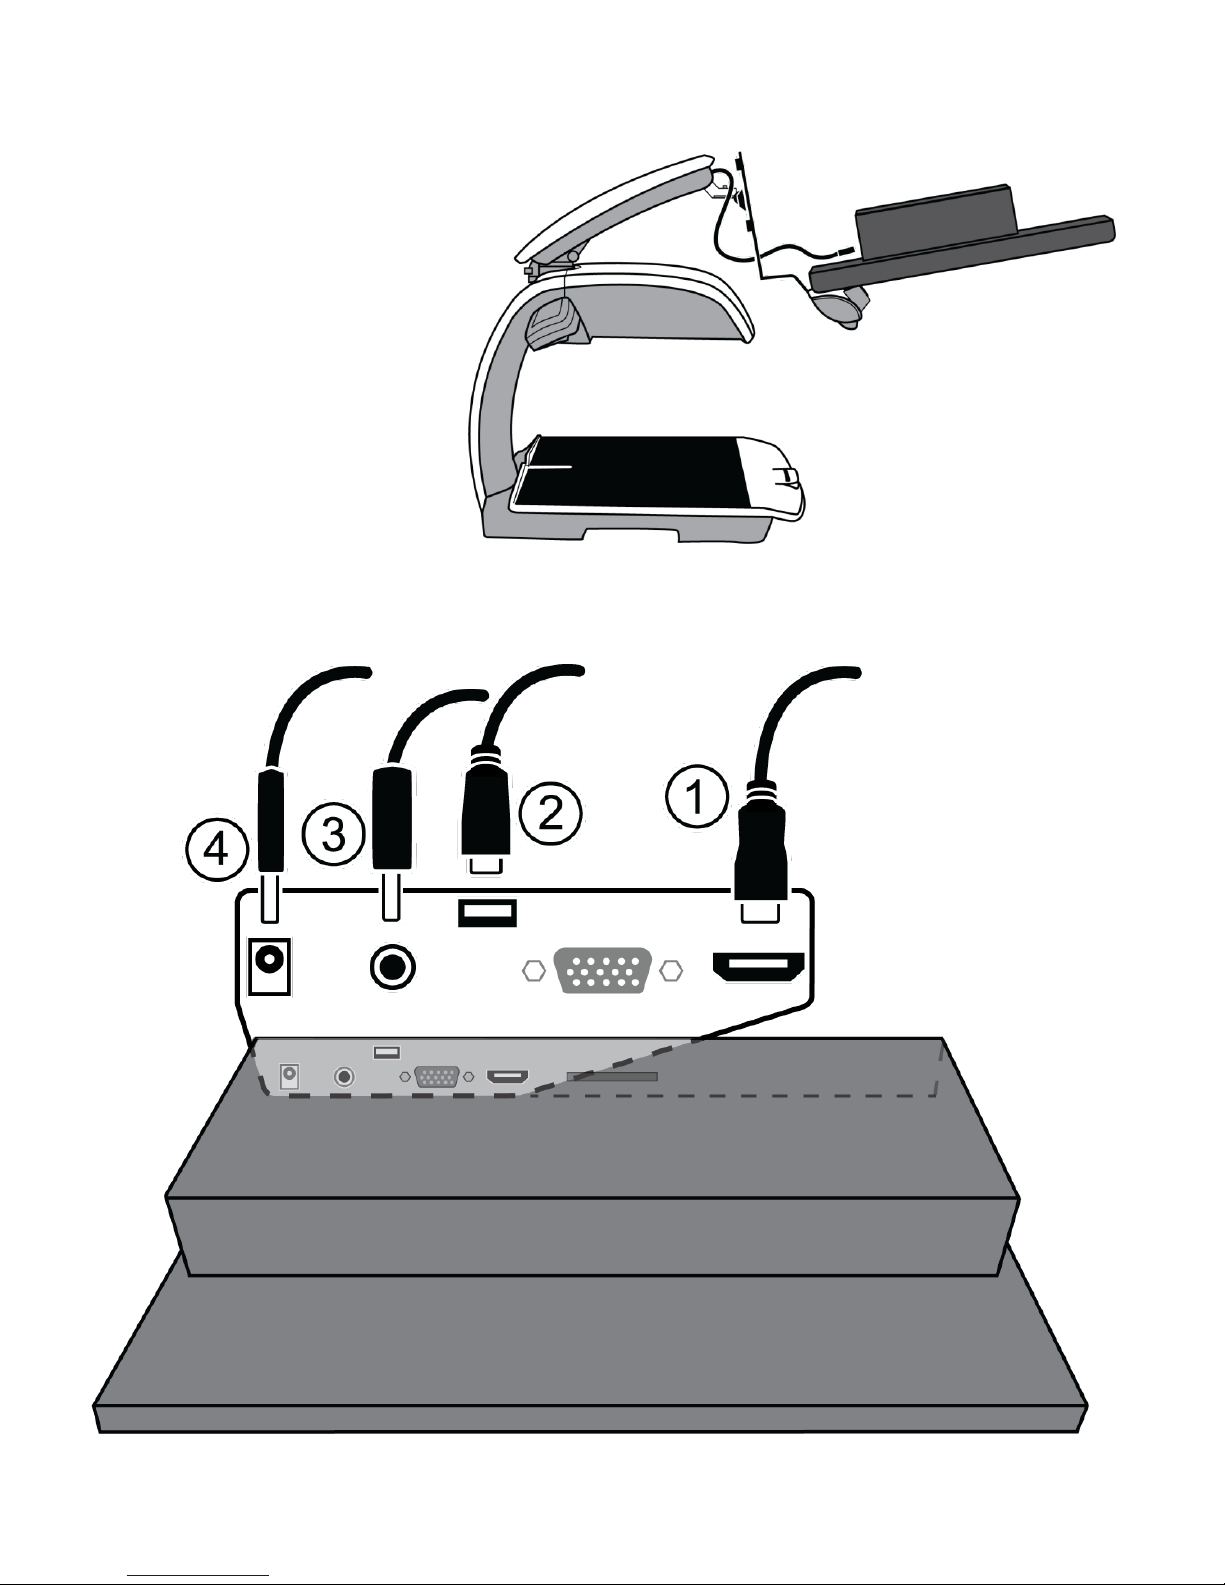
Step 3.
With the display resting
on the control panel,
connect the following
cables to the connectors
on the bottom of the
display:
HDMI cable (1)
USB cable (2)
LED Flash cable (3)
12V DC power
cable (4)
7
Page 8
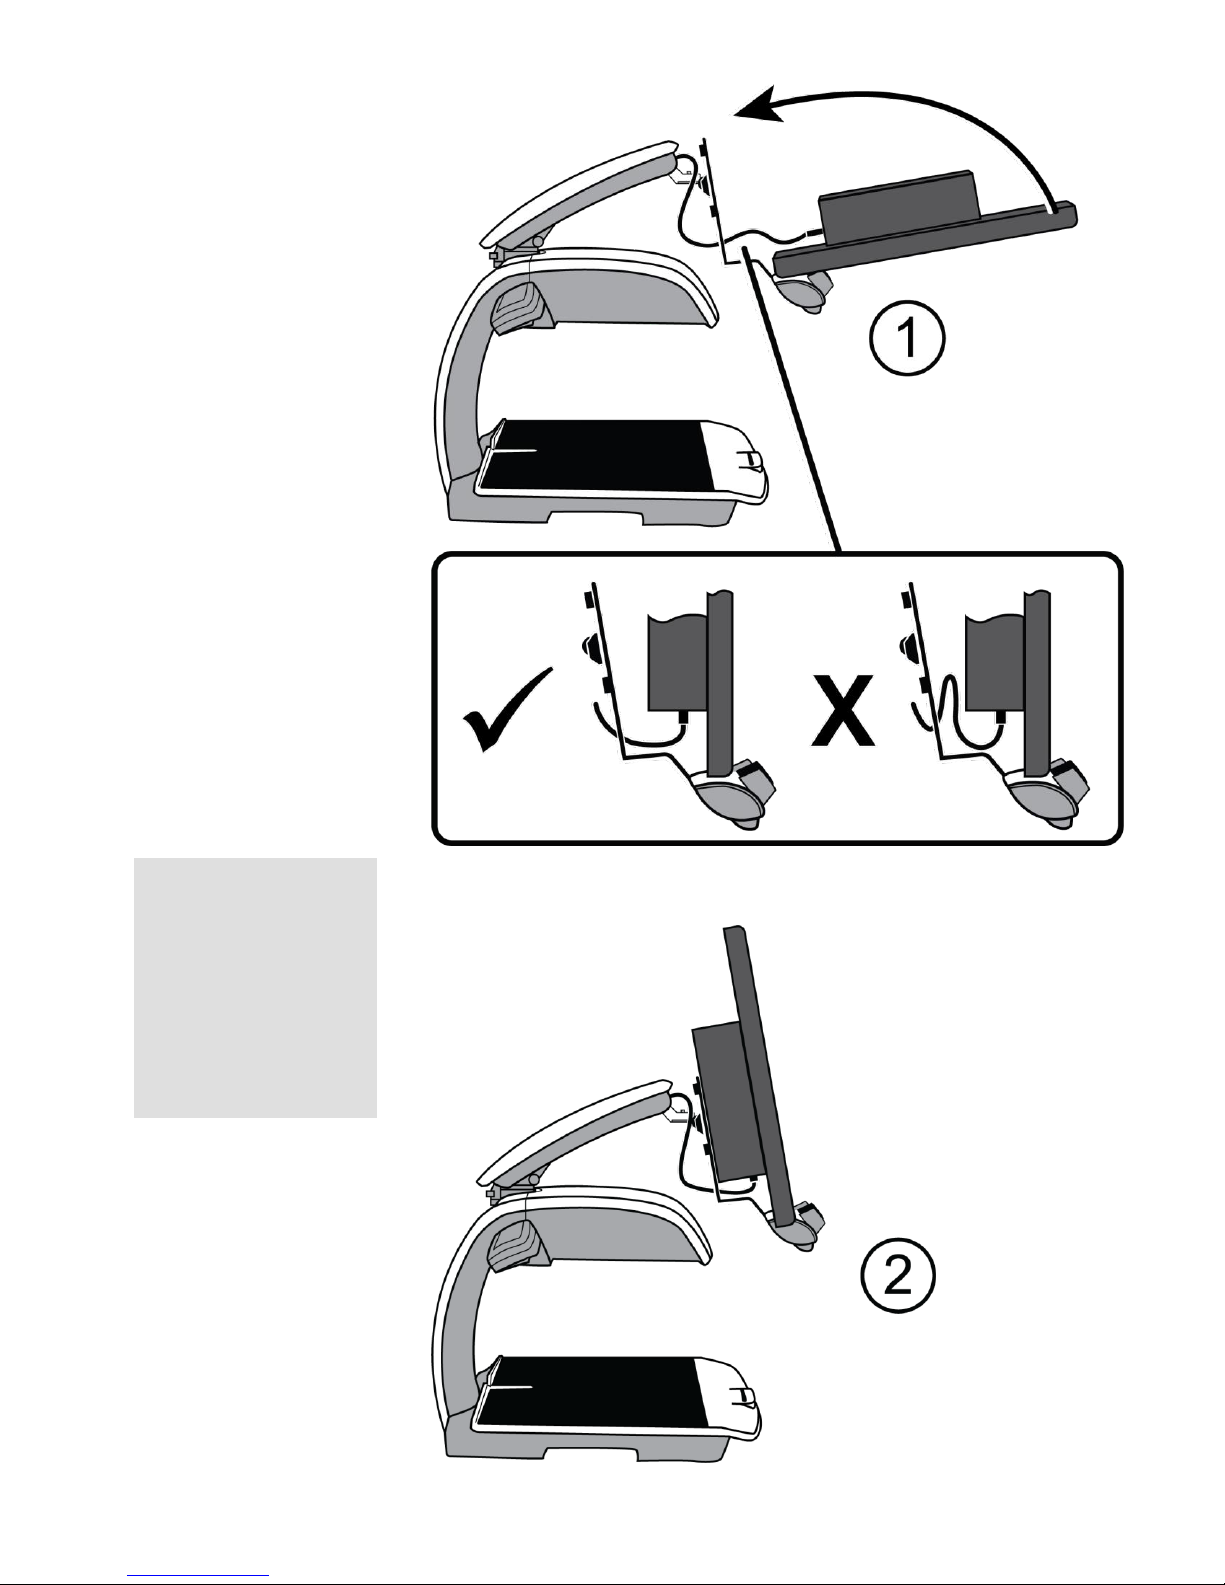
Step 4.
Carefully pivot and
raise the display
(1) so that its back
is resting against
the monitor
bracket and its
bottom is resting
on the control
panel (2).
Important: Make
sure the video and
power cables are
clear and not
squeezed between
the back of the
display and the
bracket.
8
Page 9
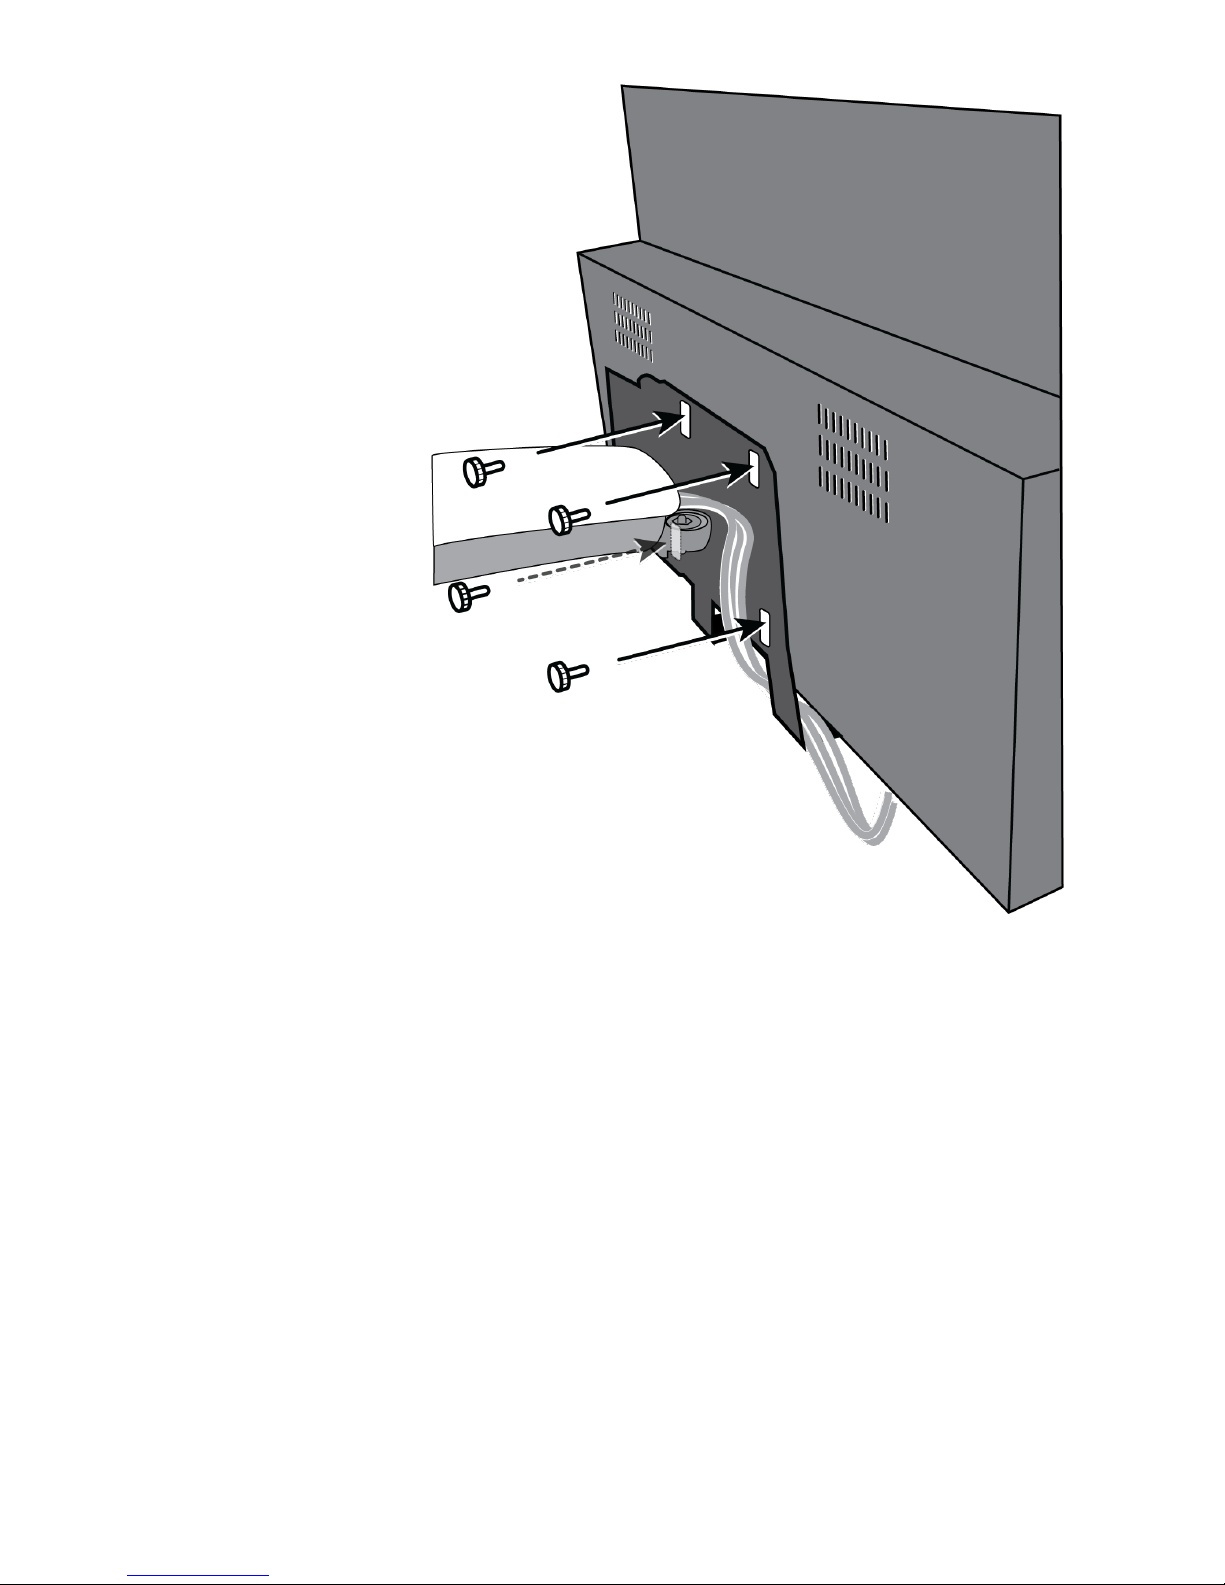
Step 5.
While bracing the
display, secure it
to the bracket
using the four
thumbscrews that
you removed and
placed on the XY
table.
Insert the four
thumbscrews
through the screw
slots on the
bracket and the
screw holes on the
back of the
display.
Tighten the four
thumbscrews.
This completes
assembly of the
TOPAZ OCR.
9
Page 10
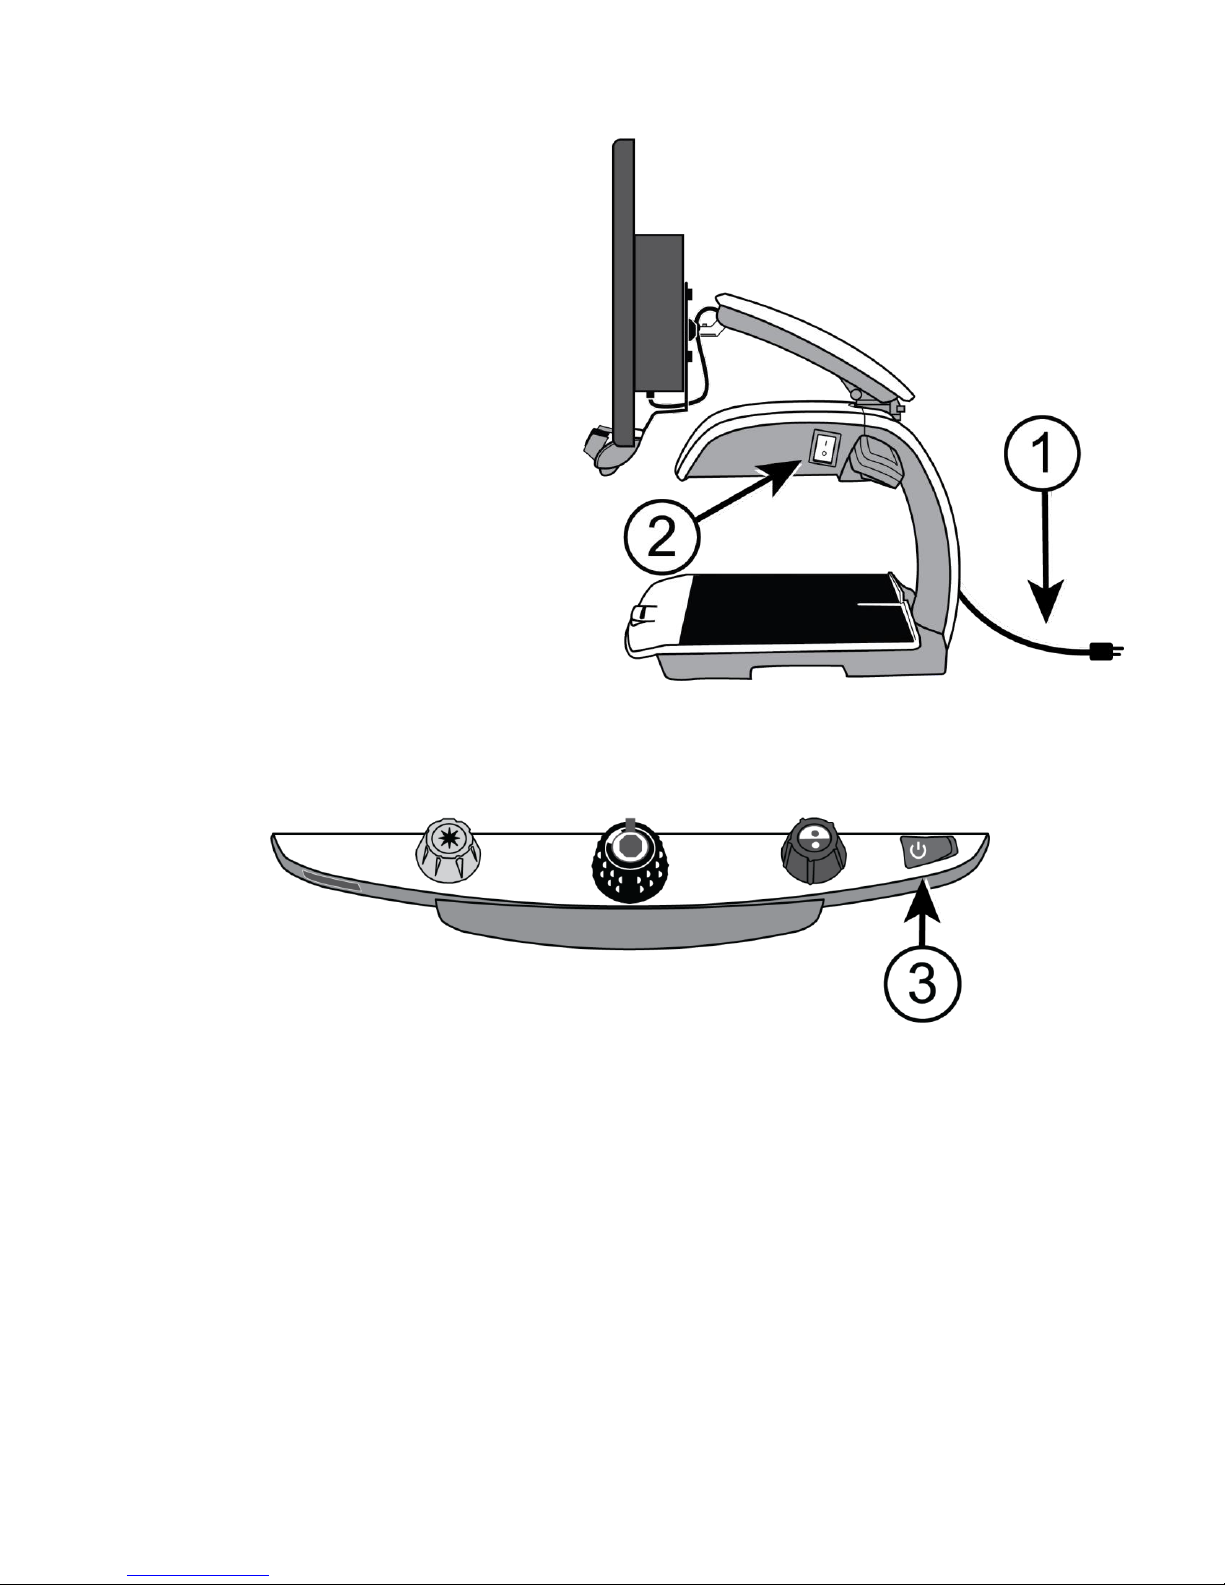
Turning On TOPAZ
Step 1.
Plug the power cord from the
middle power connector on the
rear of TOPAZ to an electrical
wall outlet.
Step 2.
Press the main power switch to
the ON position. It is located
near the LED reading light on
the right side of TOPAZ.
Step 3.
Press the green standby power switch on the right side of the control panel.
For more information about using TOPAZ, refer to the TOPAZ OCR User
Guide.
10
 Loading...