

Topaz F-ARL/150/50K/P3, F-ARL/150/40K/S3, F-ARL/300/40K/S3/480, F-ARL/150/50K/P3/M, F-ARL/150/50K/S3 Installation Instructions Manual
...
IN STALLATION INSTRUCTIONS FOR LED AREA L IG HT
F-ARL/150/40K/S3
F-ARL/150/40K/S3/480
F-ARL/300/40K/S3
F-ARL/300/40K/S3/480
Allen Hexagon Wr enc hes , Wir e Str ipp ers , Wir e Cut ter s, Sc rew dri ver
Wit h 120V th rough 2 77V or 48 0VAC, 5 0/60 Hz a nd conn ected
F-A RL/15 0/50 K/P 3
F-A RL/15 0/50 K/P 3/M
F-A RL/15 0/50 K/P 5
F-A RL/15 0/50 K/S 3
F-A RL/15 0/50 K/S 3/480
Tool s Req uir ed:
F-A RL/300/50K/P 3
F-A RL/300/50K/P 3/M
F-A RL/300/50K/P 5
F-A RL/300/50K/S3
F-A RL/300/50K/S3/480
IN STALLATION INSTRUCTIONS FOR LED AREA L IG HT
This product is equipped wit h standard 1-10V dimming
Instruction s:
Wiring Diag ram:
Black/Brown:ACL
Green/Yellow
White/Blue:ACN
Dim+(Purple)
Dim-(Gray)
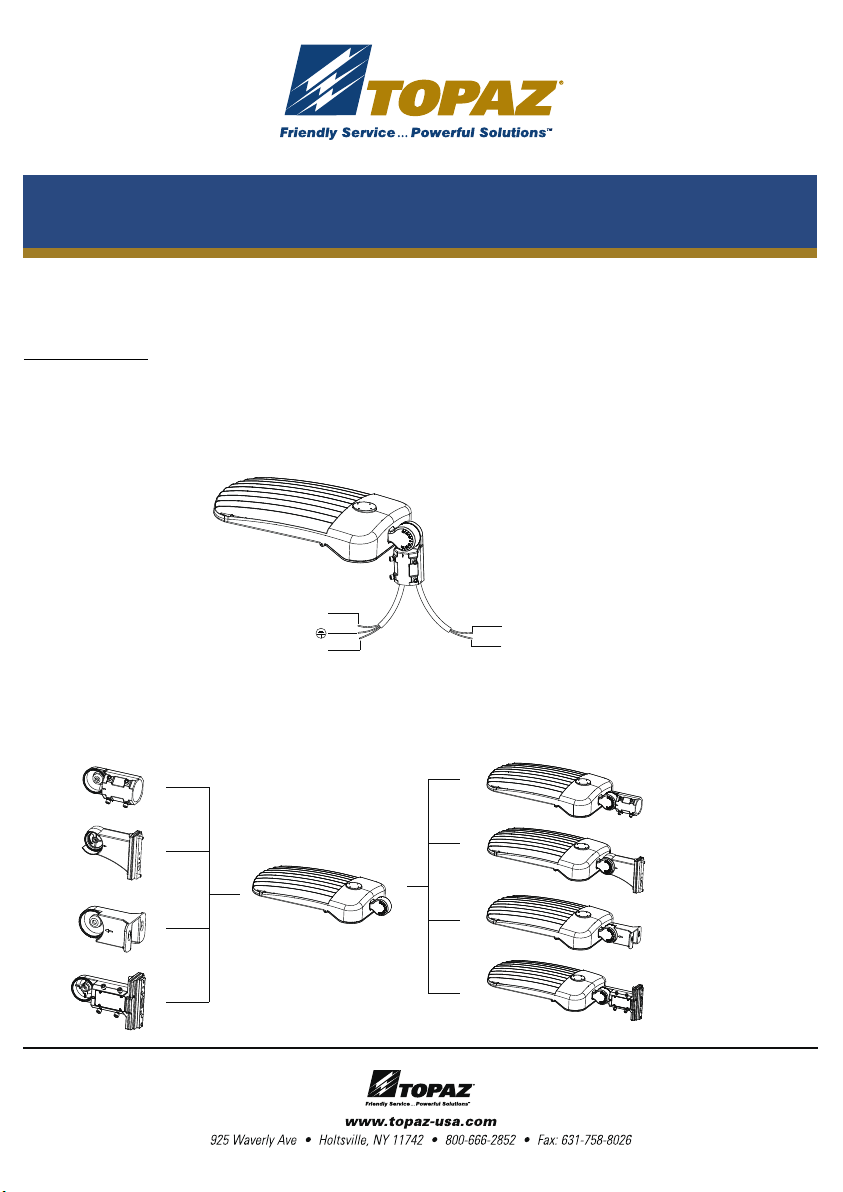
Optional Brac kets and Inst allation Inst ructions:
There are 4 option al brac kets fo r this fi xture . The followin g is shoe box fix tures w ith differen t
brackets
TYPE A
Slipfitter
TYPE B
Pole Mount
TYPE C
TYPE D
Yok e Mount
Uni versa l Slipf itter /
Pol e Mount
IN STALLATION INSTRUCTIONS FOR LED AREA L IG HT
Installatio n Instructi ons with differ ent brackets:
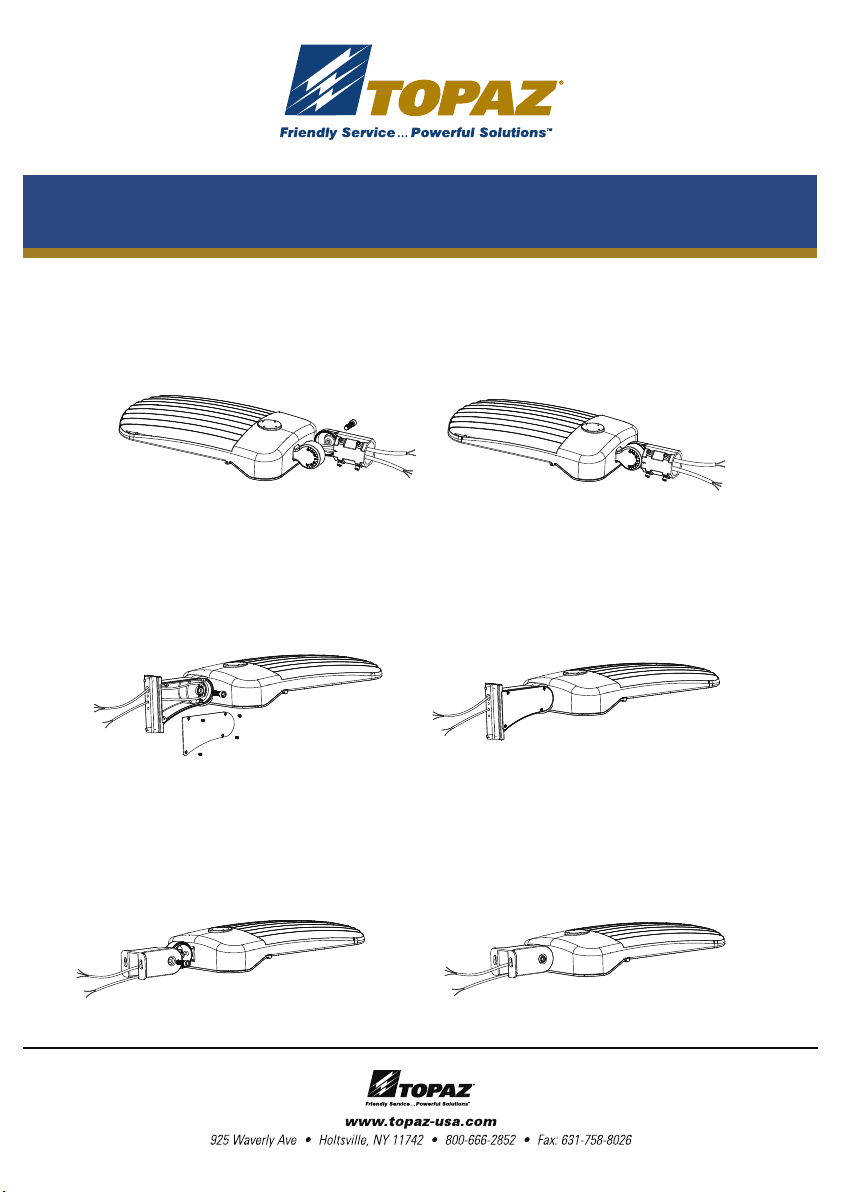
1. AD JUSTABLE FITTER MOUN TING (T YPE A)
Step 1: Remove the bracke t mount ing scr ews on th e fixtu re and run the wires through the
bracket. (Figure 1)
Step 2: Install the brack et on the f ixtur e. (Fig ure 2)
Figure 1
Figure 2
2. POLE MOUNTING (TYPE B)
Step 1: Remove the bracke t mount ing scr ews on th e fixtu re,open the side lid of bracket and run
the wires through the bra cket. ( Figur e 3)
Step 2: the side lid and tig hten it . ( Figur e 4) Install the bracket on the fixtu re, the n cover
Figure 3
Figure 4
3. YOKE MOU NTING (TYPE C)
Step 1: Remove the bracke t mount ing scr ews on th e fixtu re and ru n the wires through the
bracket. (Figure 5)
Step 2: Install the brack et on the f ixtur e. (Fig ure 6)
Figure 5 Figure 6
 Loading...