

TOORX TRX46S Instruction Manual
Ed : 03/17 Rev : 00
INSTRUCTION

1
CONTENT
CONTENT
--------------------------------------------------------------------------------------------------------------------------------
1
IMPORTANT SAFETY PRECAUTIONS
----------------------------------------------------------------------------------2-3
ASSEMBLY INSTRUCTIONS
-------------------------------------------------------------------------------------------------3-5
FOLDING & UNFOLDING INSTRUCTIONS
------------------------------------------------------------------------------6
GROUNDING METHODS
----------------------------------------------------------------------------------------------------------7
OPERATION GUIDE
-------------------------------------------------------------------------------------------------------------8-12
GETTING STARTED GUIDE
----------------------------------------------------------------------------------------------------13
SAFETY EXERCISES
--------------------------------------------------------------------------------------------------------------14
WARM-UP EXERCISES
-----------------------------------------------------------------------------------------------------------15
MAINTENANCE INSTRUCTIONS
--------------------------------------------------------------------------------------------16
BELT ADJUSTMENT
----------------------------------------------------------------------------------------------------------------17
EXPLODED DRAWING
-------------------------------------------------------------------------------------------------------------18
PARTS LIST
-------------------------------------------------------------------------------------------------------------------------19-20
ERROR CODE AND SIGNIFICANCE-----------------------------------------------------------------------------
21
3
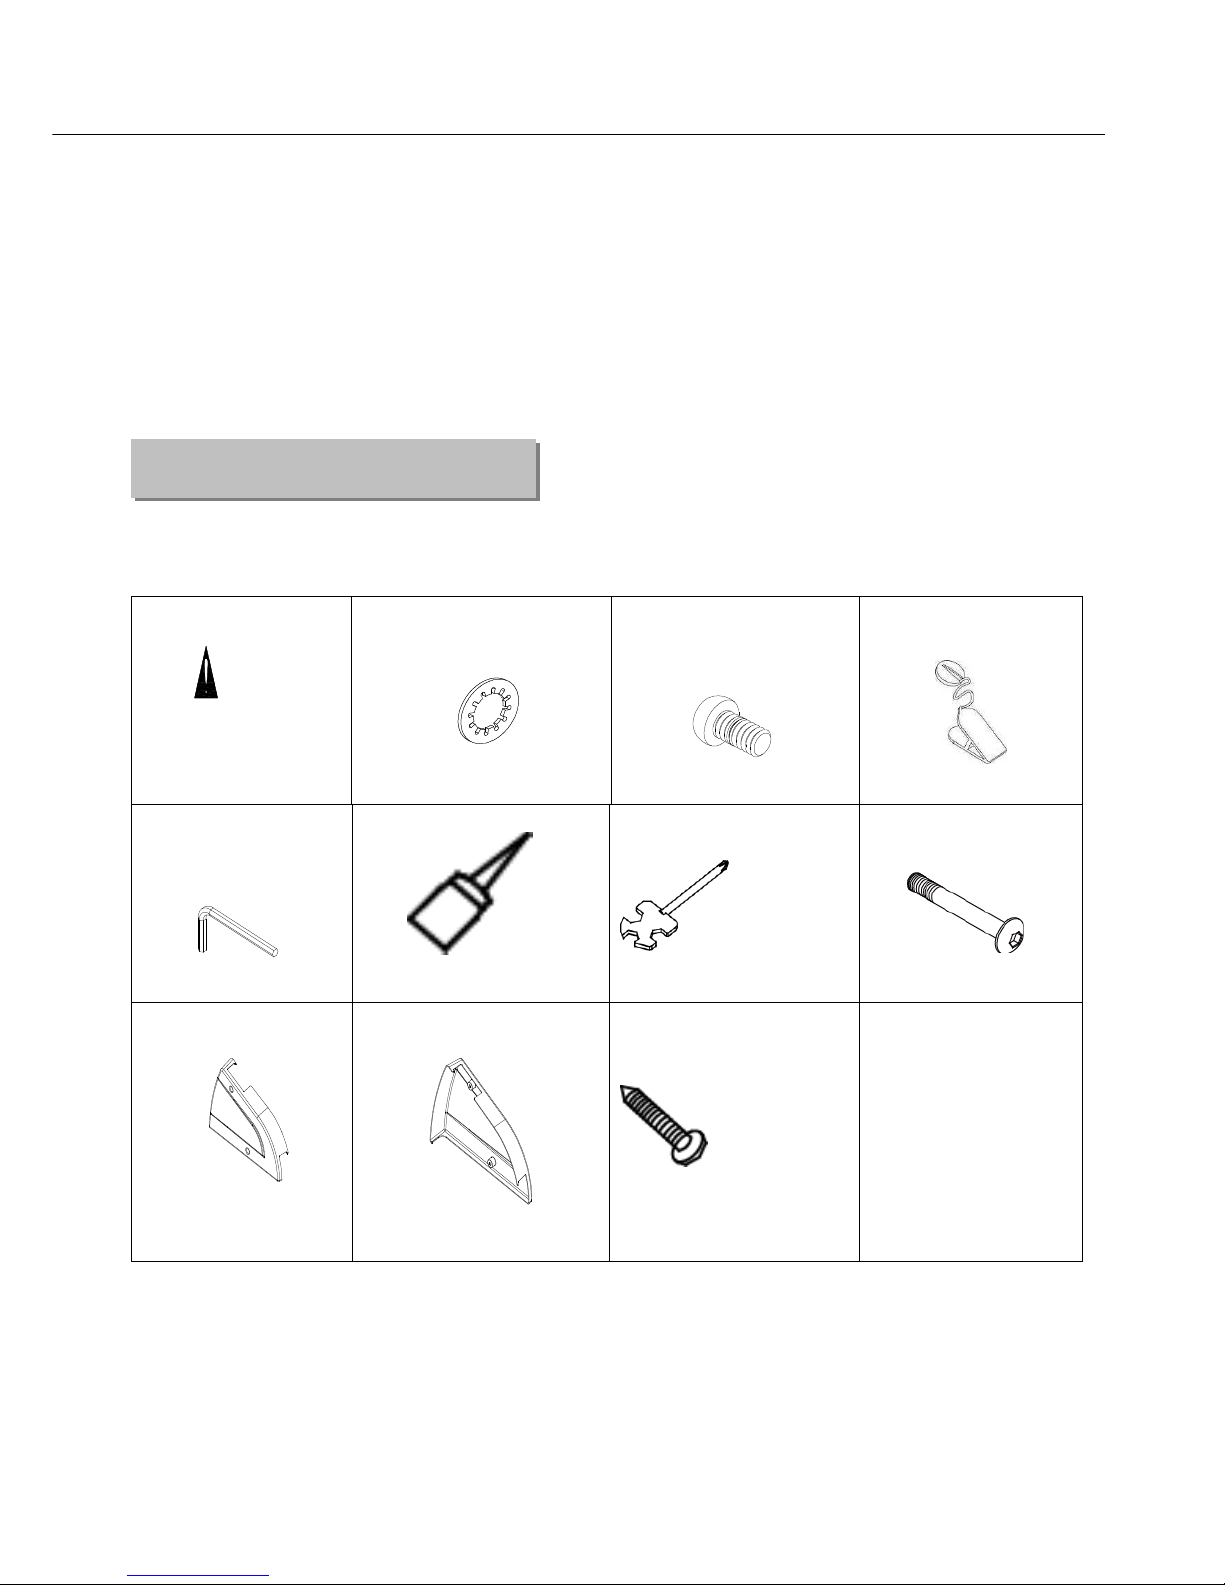
WHEN YOU OPEN THE CARTON, YOU WILL FIND THE BELOW SPARE PARTS:
Treadmill 1set D17 Washer M8 8PCS D13 Bolt M8*15 4PCS C13 Safety key 1pc
D3 Allen wrench
5MM, 1 PCS
B18 silicon oil 1 PC D
1 Screw driver 1 PCS
D
16 Bolt M8*45
4PCS
B11L Left front cover
1 PC
B11R Right front cover 1
PC
D49 Screw ST4.2*20 4
PCS
Assembly
instruction
4
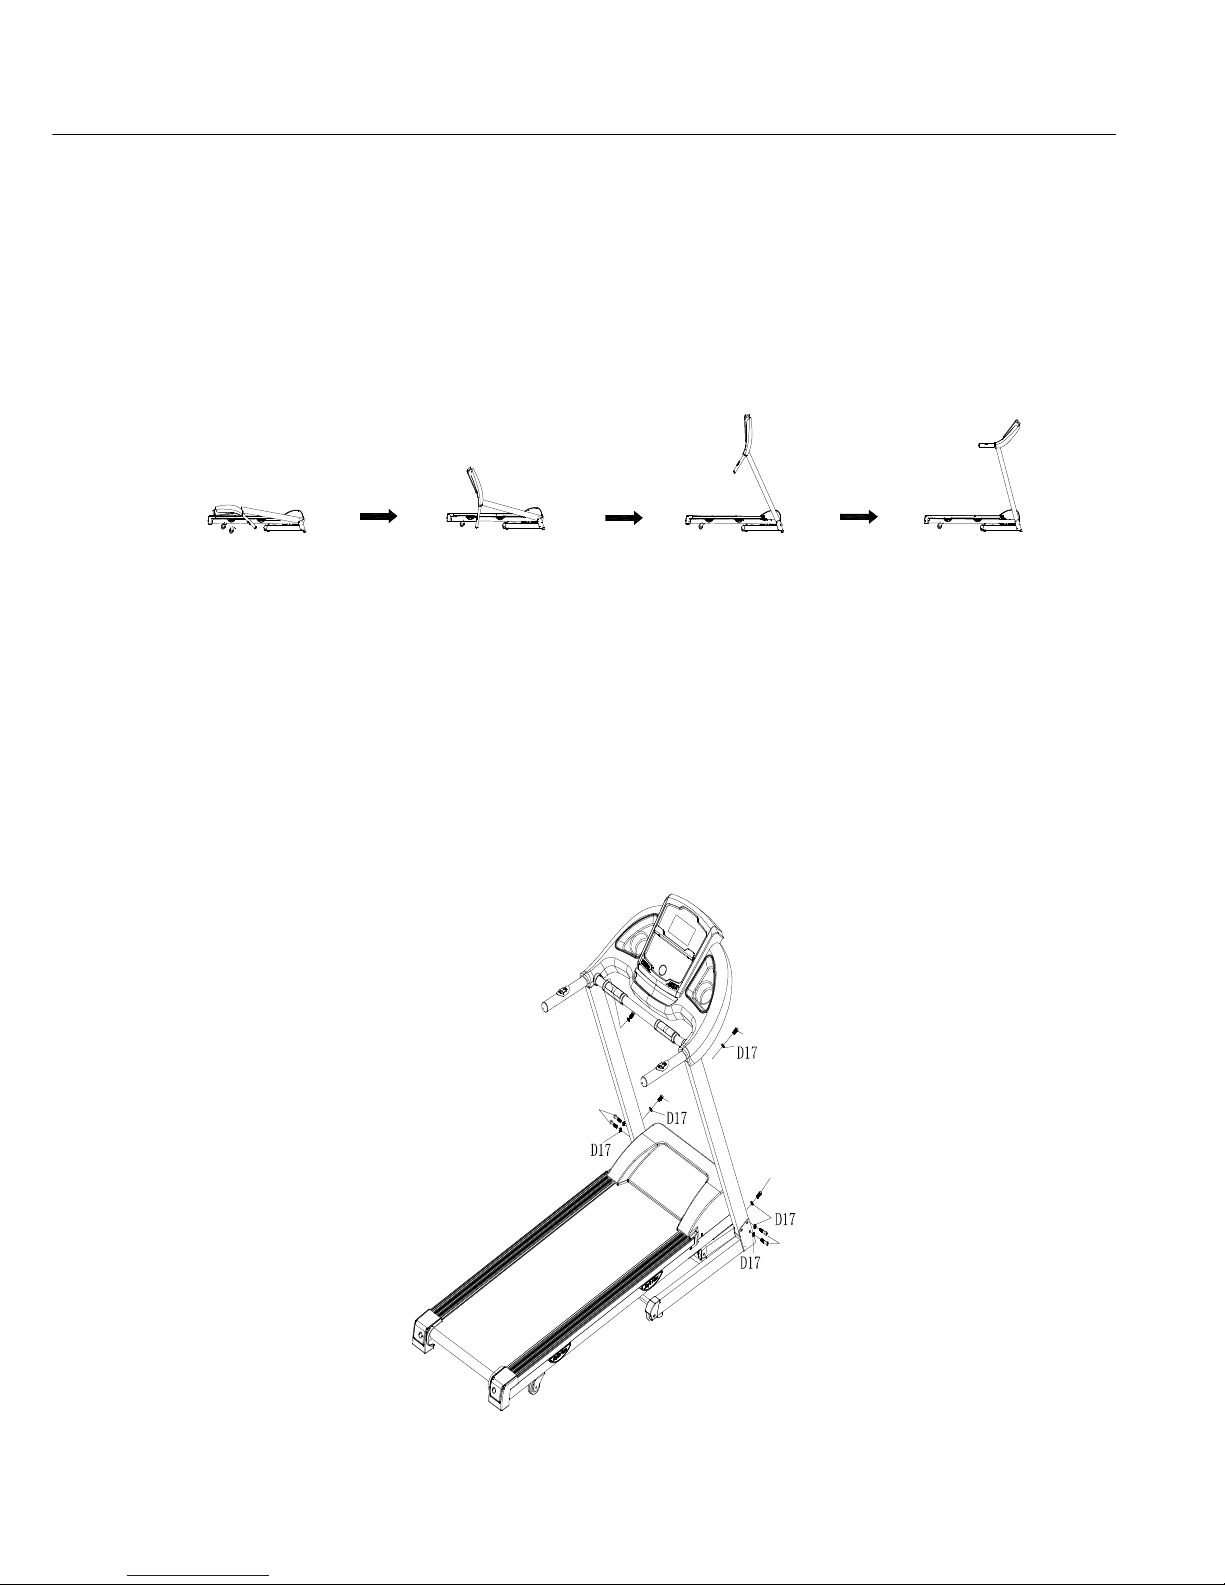
STEP 1:According to the following steps to lift up the computer bracket. Be careful not
press the line when folding
STEP 2:Lock the lower part of treadmill with Bolt M8*45 (D16), M8*15 (D13) and Washer (D17),
then lock the upper part of the treadmill with M8*15 (D13) and Washer (D17).
D13
D13
D13
D16
D16
5
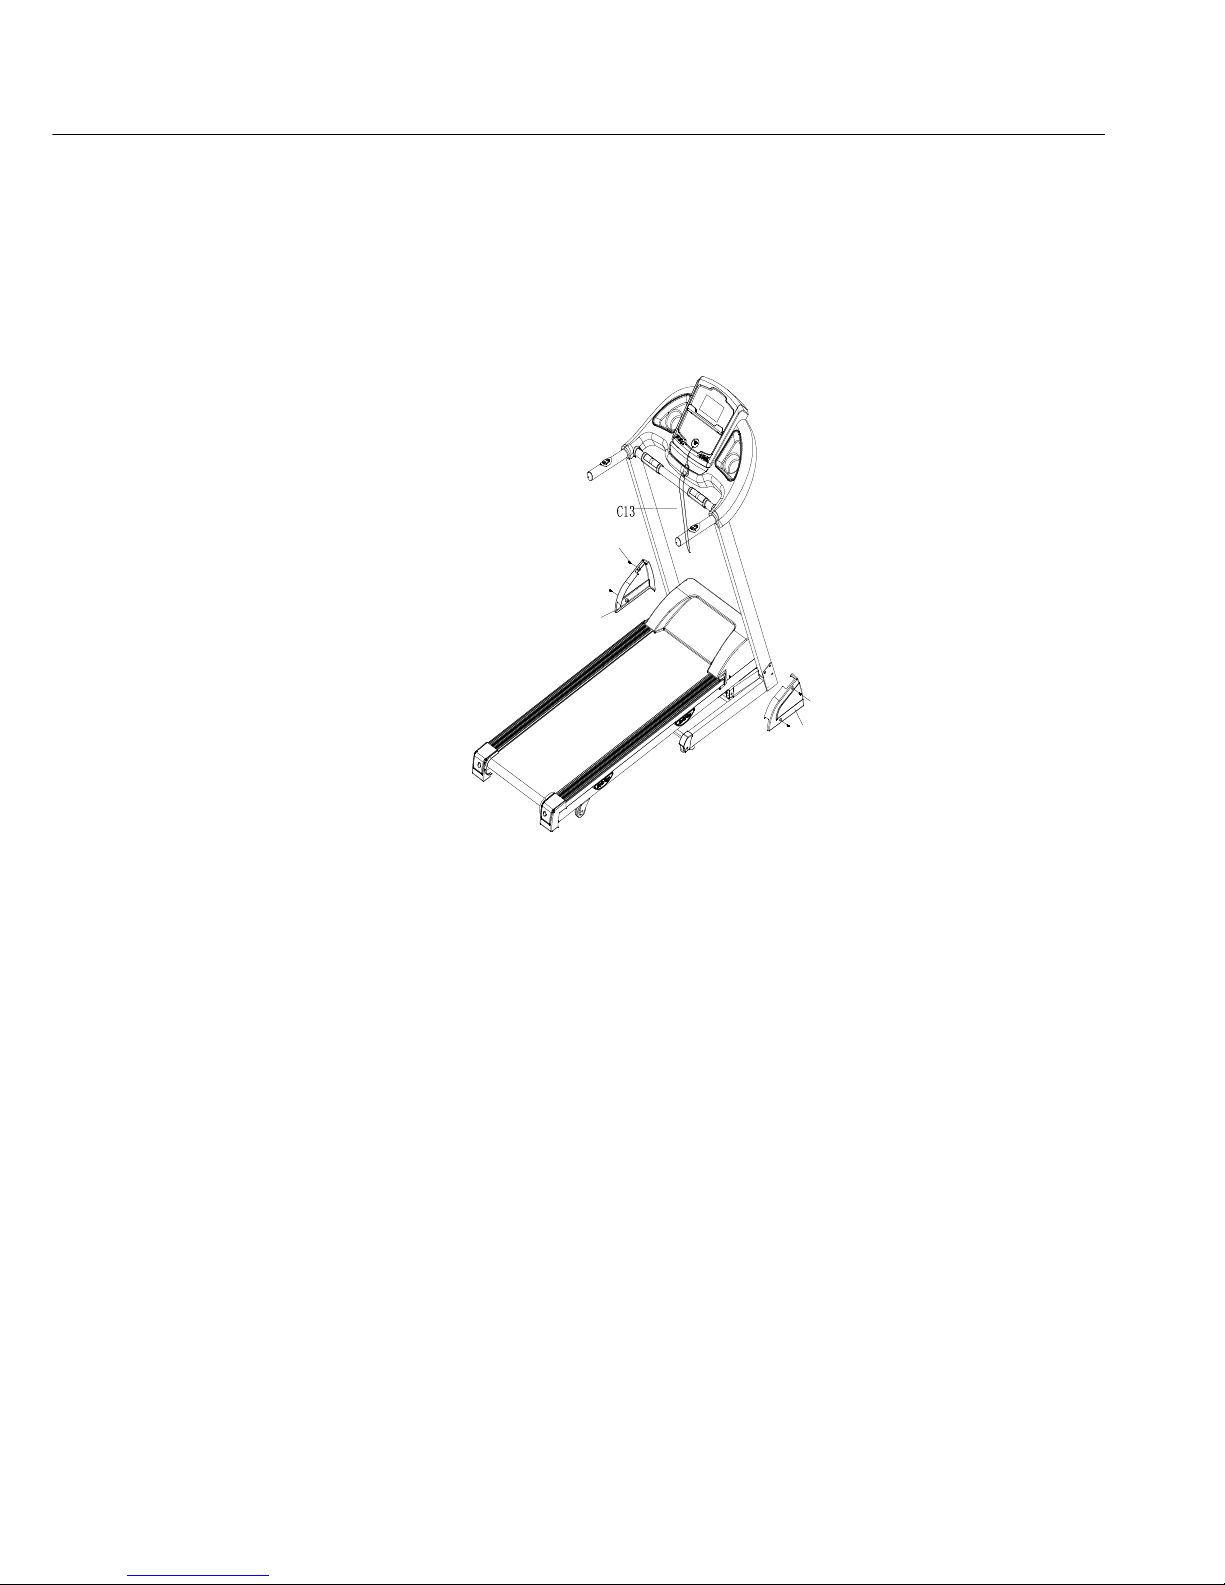
Step 3: Lock the Left front cover(B11L) and Right front cover (B11R) with Screw ST4.2*20 (D49),
then put on the Safety key (C13).
A
TTENTION: Must confirm complete assembly as the required above and lock all bolts. Do
the following operations after checking everything is OK. Before you use the treadmill,
please read the instructions carefully.
B11L
B11R
D49
D49
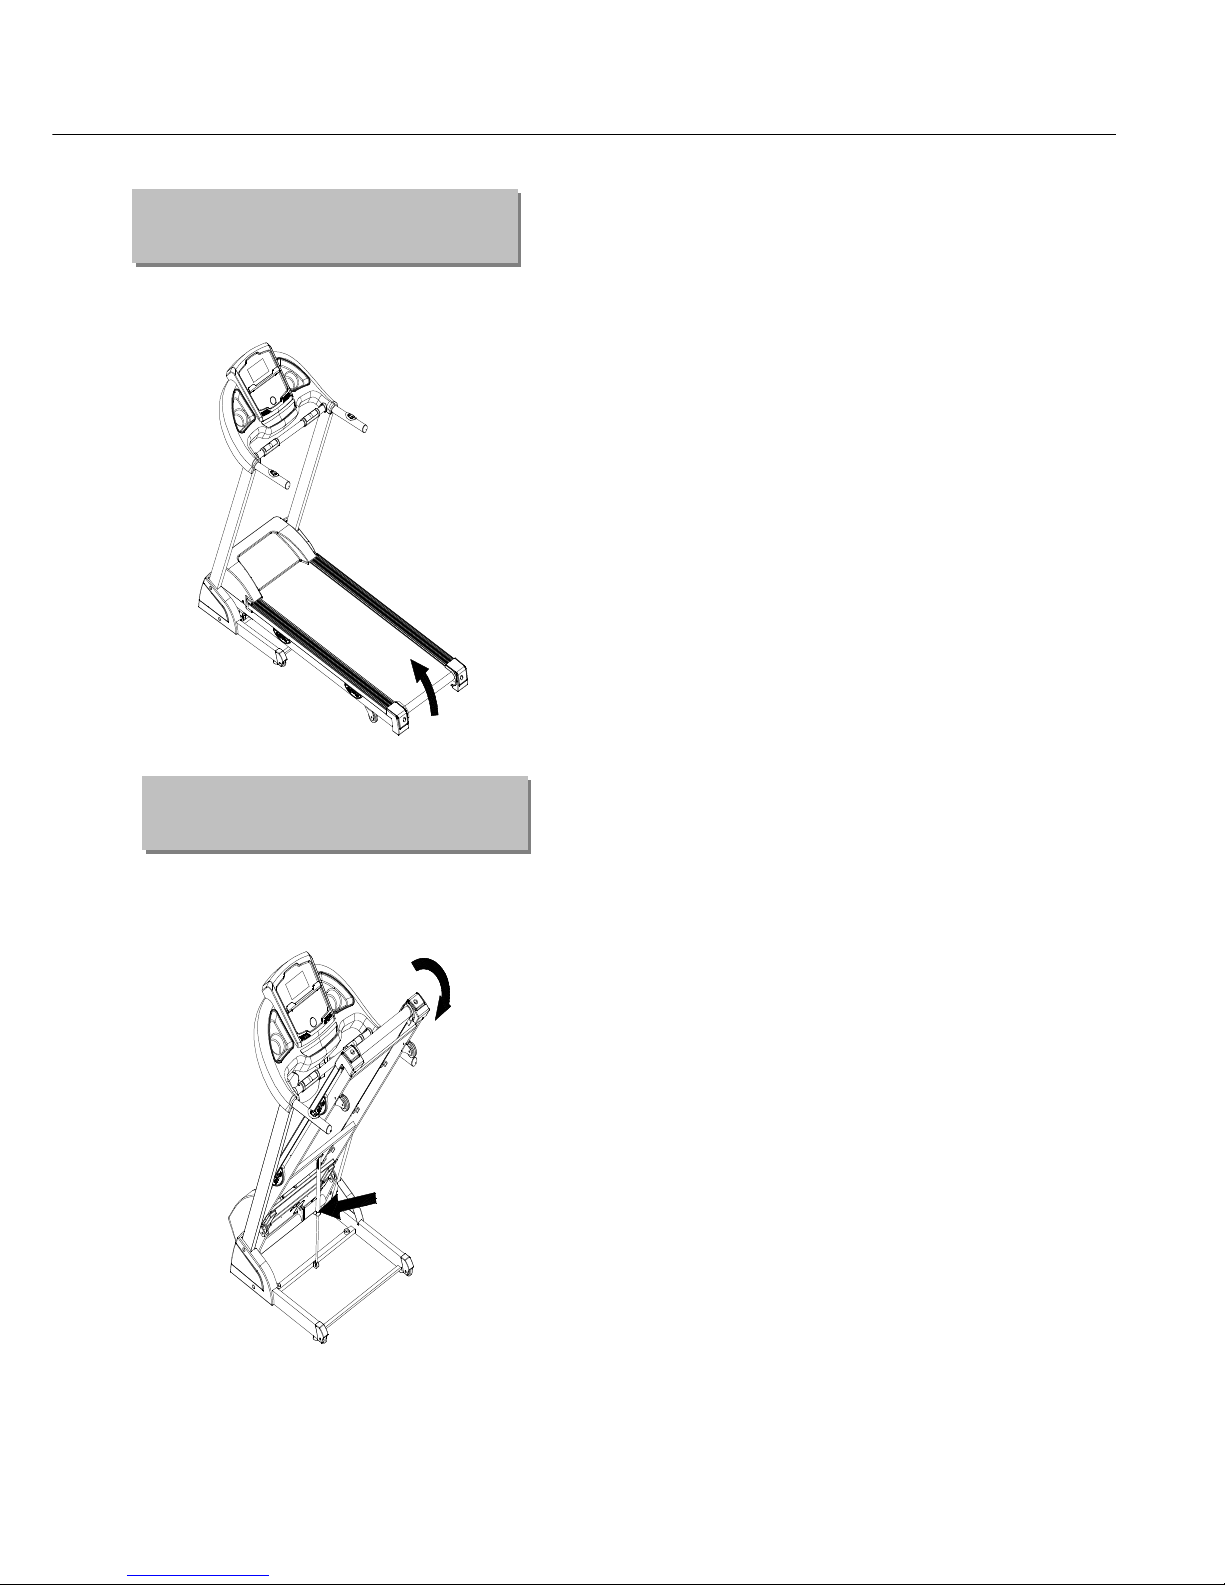
6
Lift up the machine and force to pull up until
you heard "click" that made by safety casing
stuck the pneumatic cylinder.
Kick the safety sleeve lightly and pull
down the machine at the same time as the
arrow direction. Then the machine will fall
down smoothly.
F
olding instruction
U
nfolding instruction
 Loading...