

Page 1
Industrial Series
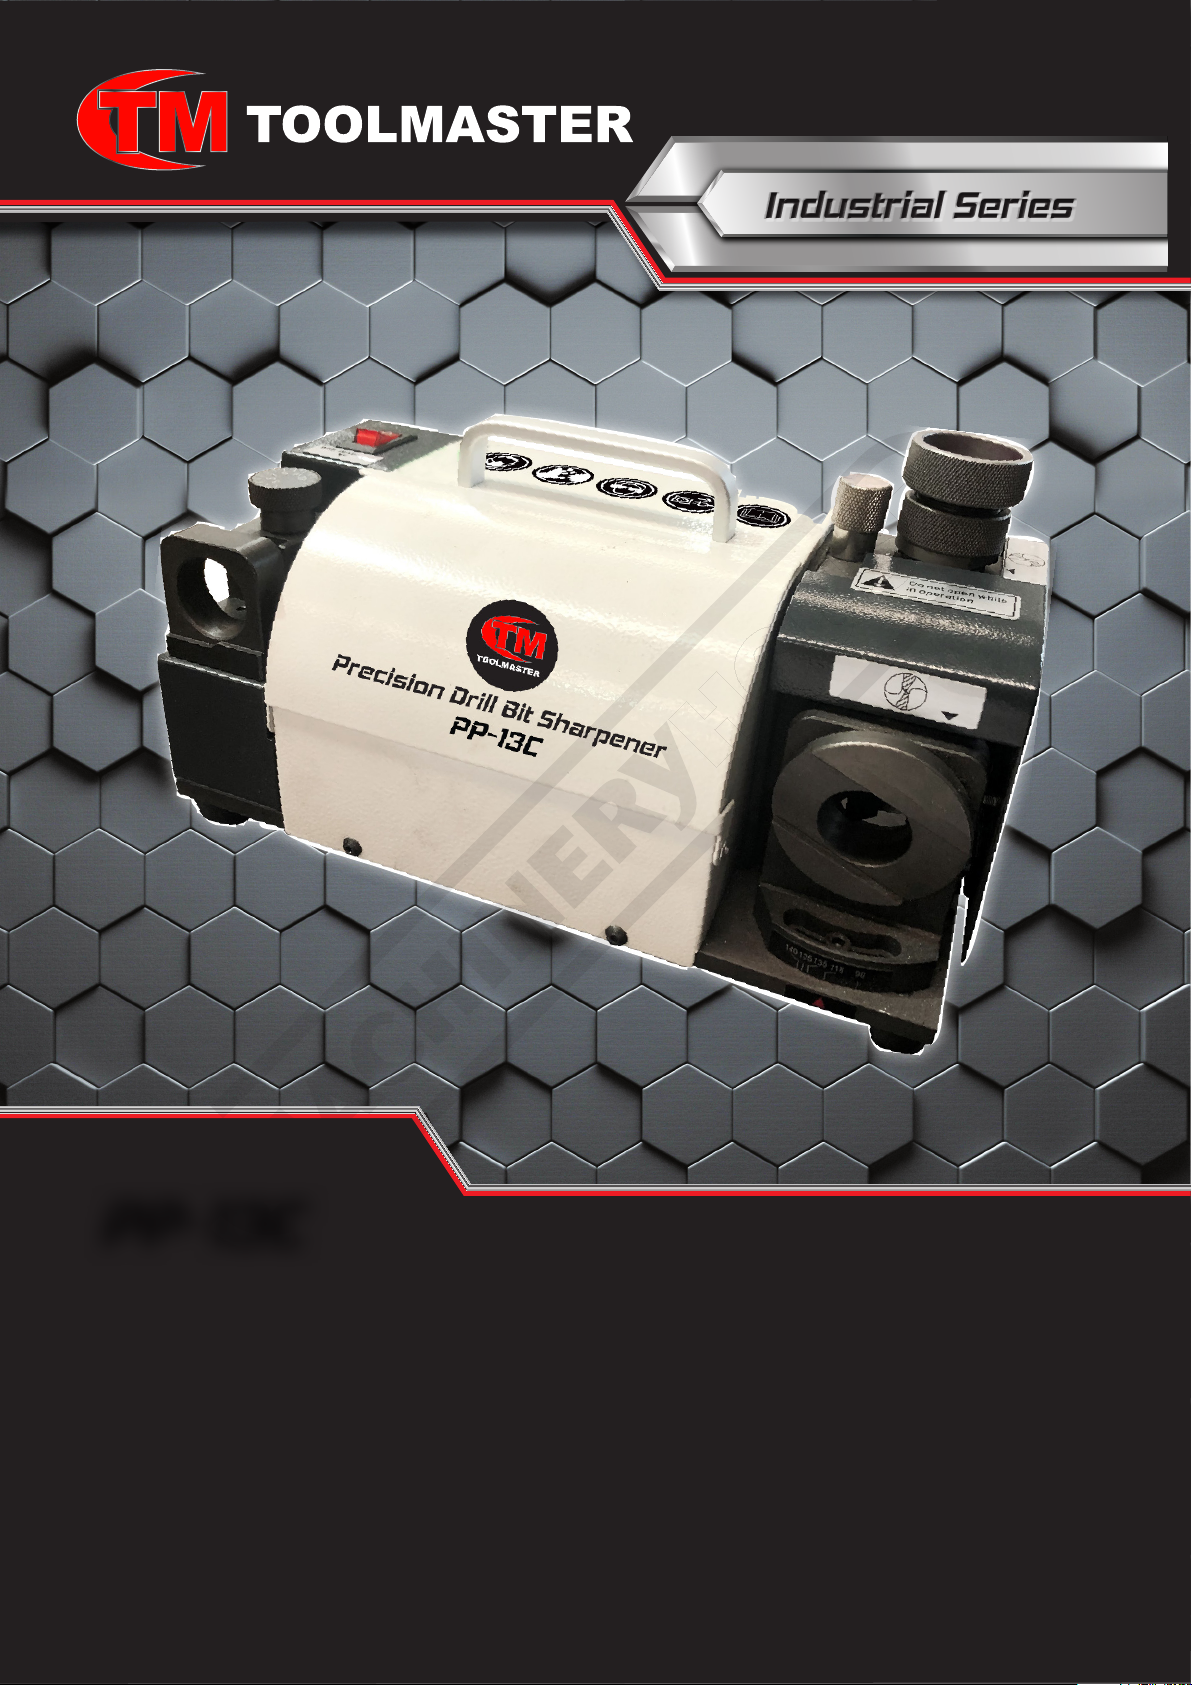
PP-13C
Drill Sharpener
INSTRUCTION MANUAL
Order Code: D111
www.machineryhouse.com.au www.machineryhouse.co.nz
Page 2
Safety Instructions
RESPONSIBILITIES
SUPERVISOR OR OWNER
¤
Ensure equipment is maintained in
accordance with the manufacturer’s
specications.
¤
Ensure compliance with Health and Safety
requirements.
¤
Ensure competency of operator.
OPERATOR
¤
Comply with Safety instructions of this
operators manual.
¤
Report & tag the machine. Do not operate if
the equipment is faulty.
Safety glasses
SAFETY
EYEWEAR
SAFETY
FOOTWEAR
SAFETY
EARWEAR
must be worn at
all times in work
areas
Safety footwear
must be worn
when operating
this equipment
Safety earwear
must be worn
when operating
this equipment
PRE-START
1. Complete pre-start check of equipment
including checking electrical cord and
grinder wheel for damage.
2. Ensure all guarding and attachments are
secure and tted correctly.
3. Identify ON/OFF and Emergency stop
buttons.
4. Keep bystanders clear and warn others of
your intention to use the equipment.
5. Check the electrical lead for a current
compliance tag.
6. Ensure no slip/trip hazards are present in
the workspace and work surface.
7. Keep this manual available to operators to
ensure the safe use of this equipment.
OPERATION
1. Wear the appropriate PPE equipment.
2. Use equipment only for its intended
purpose.
3. Keep loose hair and clothing clear of any
moving parts.
4. Follow the correct procedure as per manual
for sharpening the different size drill bits.
5. Ensure work area is dry and uncluttered.
END OPERATIONS & CLEANING UP
KNOWN HAZARDS
Entanglement
Cuts/abrasions
Eye injuries
Inhalation of grinding dust
Hot objects
Noise
When operating a grinder it is important to wear appropriate safety
gear to protect yourself from injury. This includes safety glasses or
goggles, or a face shield to protect your eyes from ying debris.
1. Turn off the machine.
2. Remove sharpened drill bit.
3. Clean up the work area and the machine.
4. Immediately report suspect equipment ad
place an “Out Of Service” tag on the front
of the machine.
WARNING.
2
www.machineryhouse.com.au
www.machineryhouse.co.nz
Page 3
Application
Specications
1. Grinding is accurate and rapid, an easy
operation with little skill required.
2. Economically priced which greatly reduces
the cost and improves effectiveness.
3. Fitted with a diamond grinding wheel, it can
produce a precision angle and has a long
service life.
4. The powerful electronically controlled DC
motor has stable frequency, strong
horsepower and provides long service life.
5. The machine is set up with the function
to relieve the lip angle (central point). This
relief area prevents contact with the metal
being cut as a hole is drilled. This reduces
drag and friction.
Identication
Order Code ............. D111
Model No.
Grinding Range
Power
Motor Watts
Motor Speed
Dimensions
Weight
Standard Equipment
............... PP-13C
...... 3 ~ 13mm
..................... 240V 50HZ
............ 120
.......... 1400rpm
............. 32 x 18 x 19cm
.................... 9kg
11 x ER20 Collets 3~13mm
1 x Collet Chuck
1 x Power Lead
1 x CBN Coated Grinding Wheel
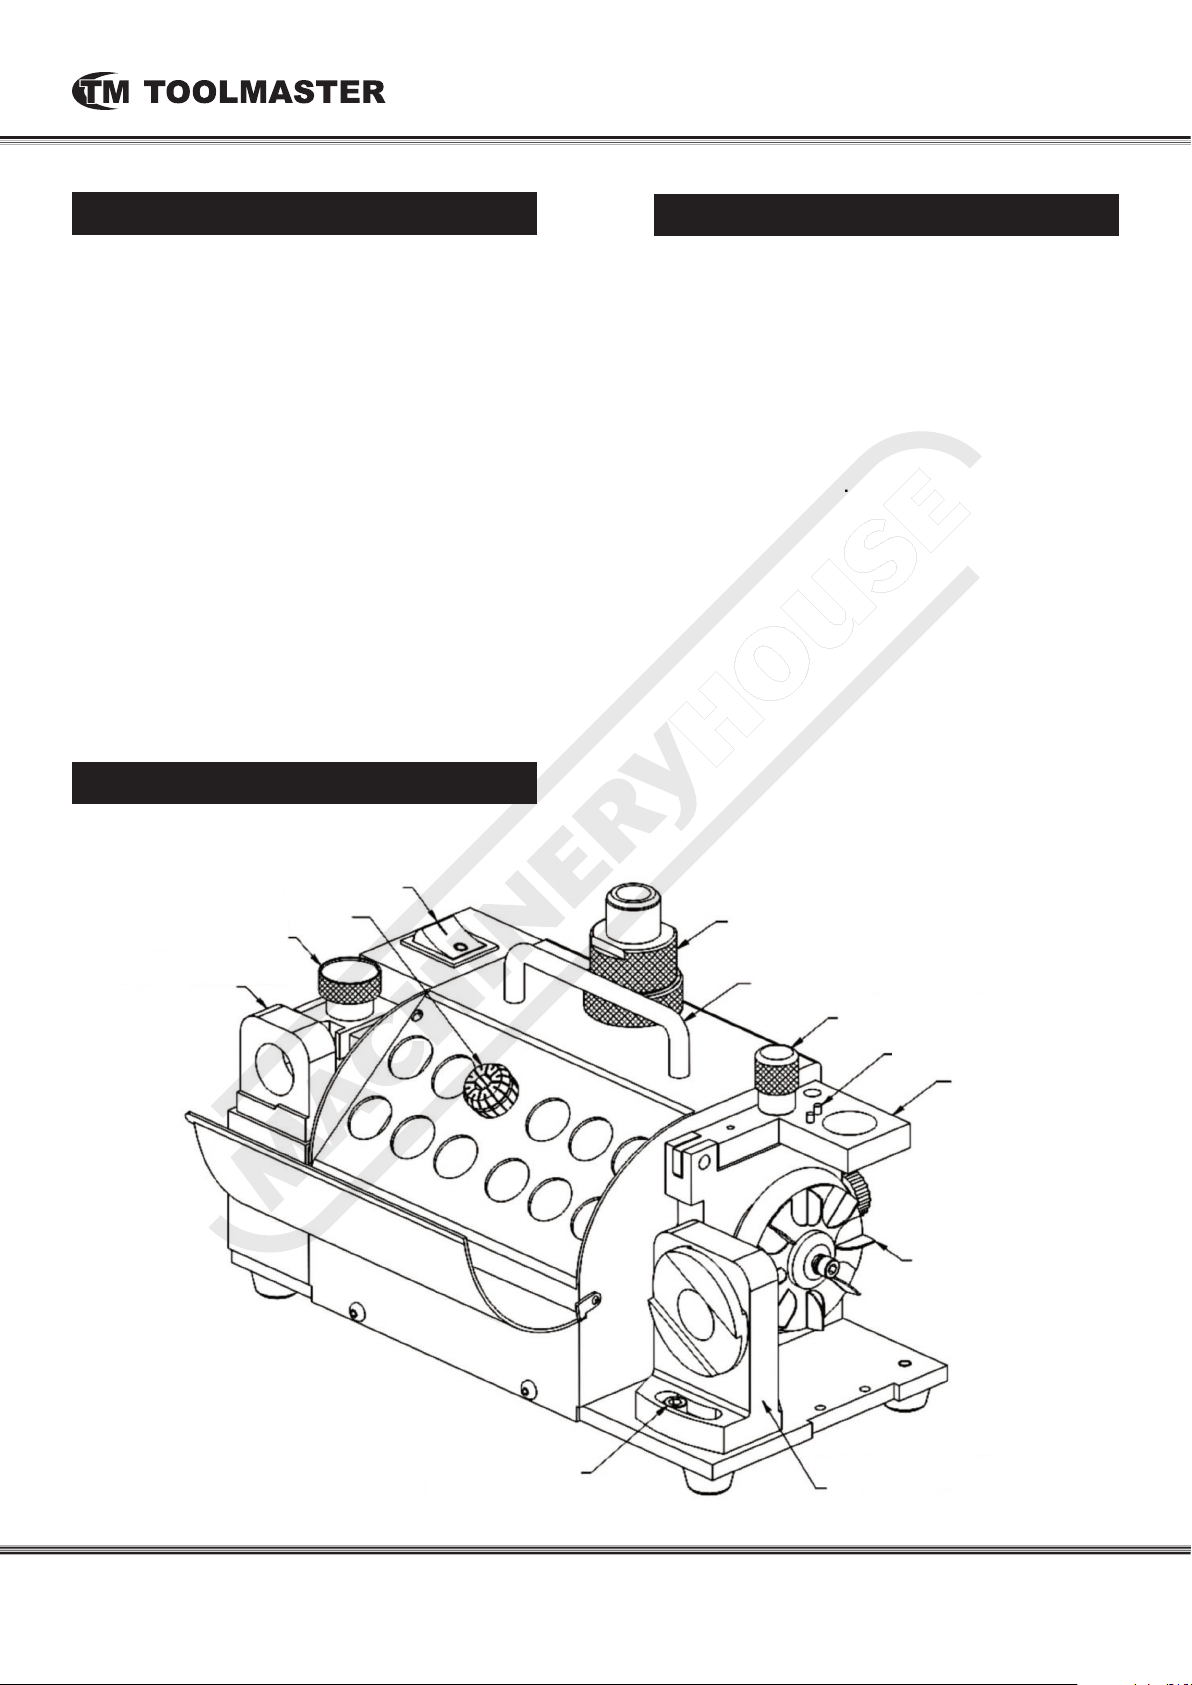
AdjuStment SCAle
AdjuStment BASe
on/off SwitCh
Collet
Collet ChuCk
hAndle
Centre AdjuStment
Pin
relief Angle mount
fAn BlAde
Point Angle AdjuStment
www.machineryhouse.com.au
www.machineryhouse.co.nz
Point Angle mount
3
Page 4
Operation
Grinding the Leading Edge
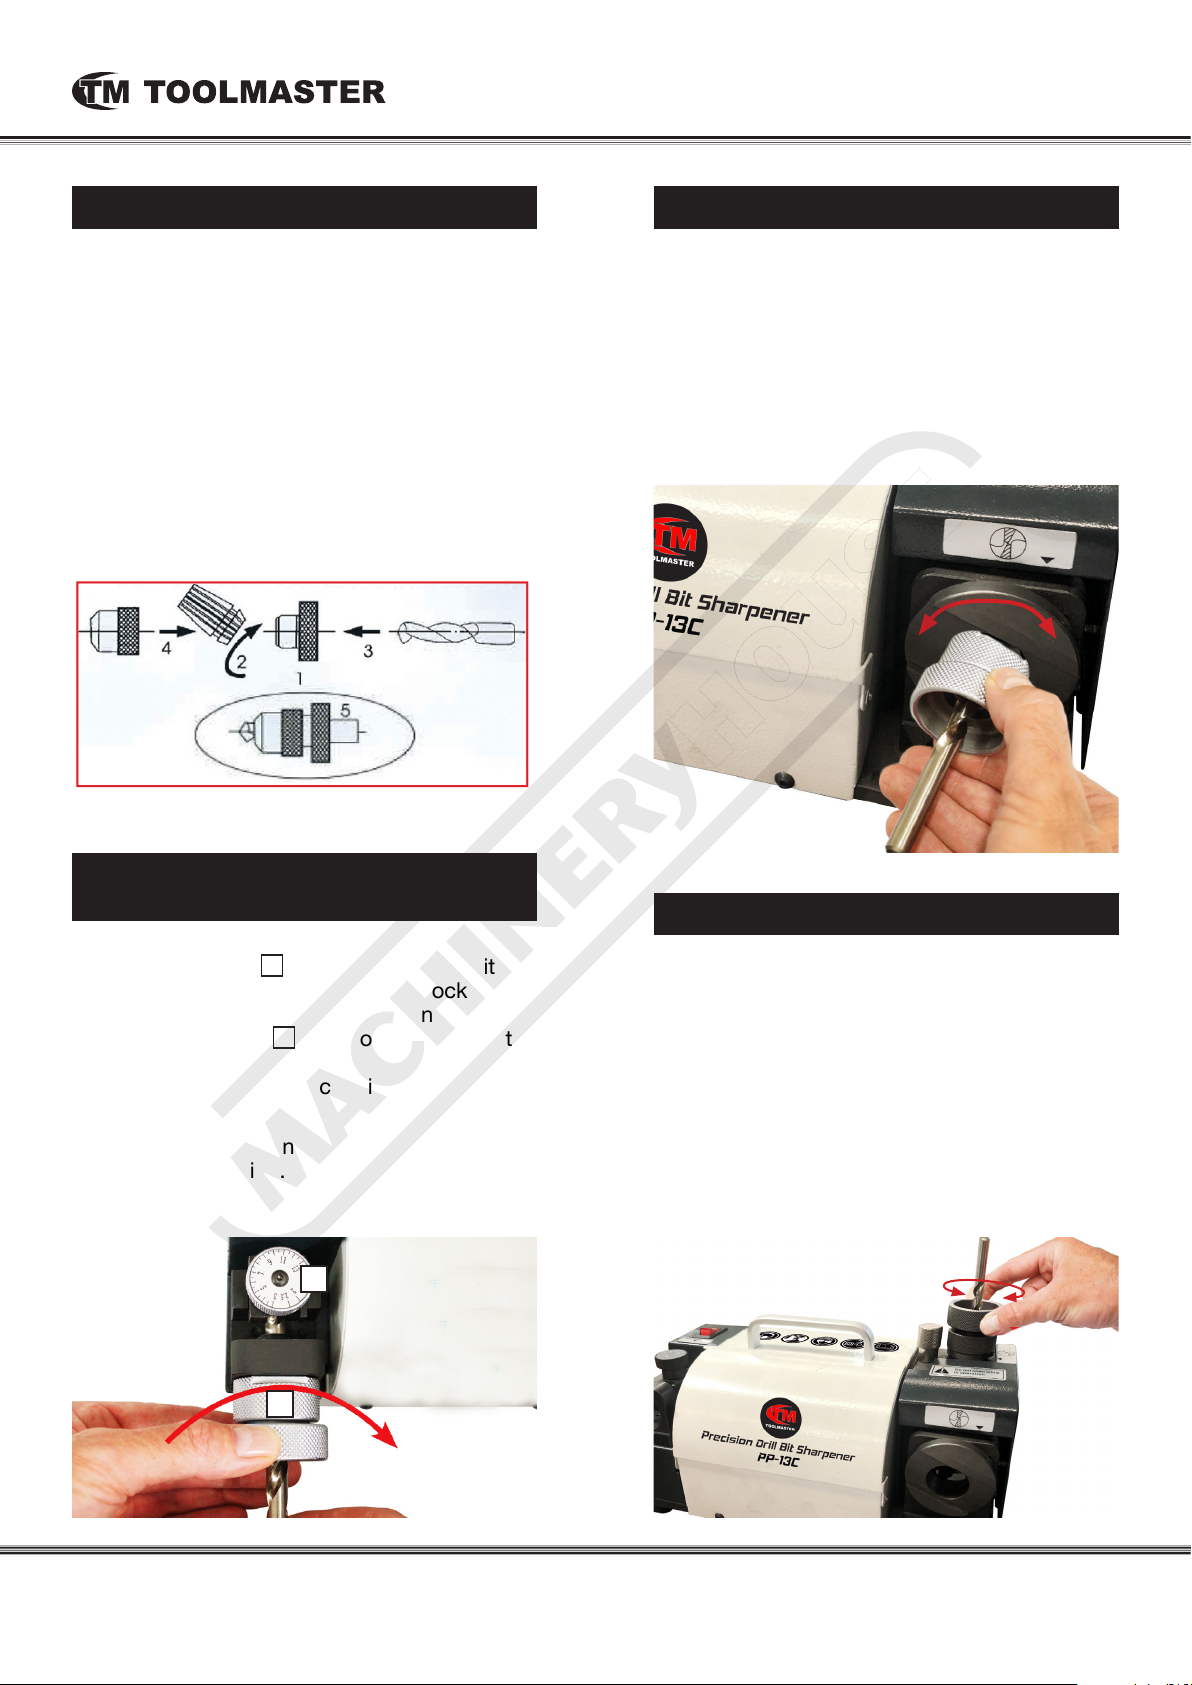
A. Setup The Drill In The Collet Chuck
Please follow steps 1,2 to set up the drill bit to
the chuck (without tightening)
1. Determine diameter of your drill bit, and
then select the appropriate size collet.
2. At a 45°angle, insert the collet into the
collet chuck and tighten the nut slightly.
3. Insert the drill bit into the collet chuck and
with the point protruding 35mm or so from
the collet chuck, but do not tighten the drill
too tight.
Turn on the drill sharpener and then place the
drill chuck in the sharpening xture in the base
of the machine and ensure that the chuck is in
the location slot. Move the chuck in slowly until
the grinding takes place and rotate the chuck
in a clockwise and anti clockwise direction until the drill chuck in completely home and the
grinding stops. Take out the chuck and rotate
the chuck 180 ° then repeat the operation.
Setup the Drill in the Collet ready
for Sharpening
First rotate the dial
no longer rotate. Wind the dial anti-clockwise to
dial up the size of the drill to be ground and then
place the drill chuck
the dial. Slide the drill into the chuck from the
rear and twist the drill clock-wise until it stops.
Now twist the drill chuck clock-wise until it
stops and then tighten the drill chuck using the
outer knurled section.
The drill is set now ready to grind.
A
fully clockwise until it can
B
in the opening in front of
A
B
Grinding Heel Clearance
Once the drill has been ground then place the
chuck in the top xture and locate the slot.
Rotate back and forth until all grinding stops.
Take out the chuck and rotate 180° and repeat
the operation.
The amount of grinding in this operation
determines the amount of split point and heel
relief.
It is advisable to remove the chuck often and
view the results.
www.machineryhouse.com.au
www.machineryhouse.co.nz
4
Page 5

General Machinery Safety Instructions
Machinery House
requires you to read this entire Manual before using this machine.
1. Read the entire Manual before starting
machinery.
not correctly used.
Machinery may cause serious injury if
2. Always use correct hearing protection when
operating machinery.
permanent hearing damage.
Machinery noise may cause
3. Machinery must never be used when tired, or
under the influence of drugs or alcohol.
running machinery you must be alert at all times.
When
4. Wear correct Clothing. At all times remove all loose
clothing, necklaces, rings, jewelry, etc. Long hair
must be contained in a hair net. Non-slip protective
footwear must be worn.
5. Always wear correct respirators around fumes
or dust when operating machinery.
fumes & dust can cause serious respiratory illness.
Dust extractors must be used where applicable.
Machinery
6. Always wear correct safety glasses. When
machining you must use the correct eye protection
to prevent injuring your eyes.
7. Keep work clean and make sure you have good
lighting.
accidents.
Cluttered and dark shadows may cause
8. Personnel must be properly trained or well
supervised when operating machinery.
sure you have clear and safe understanding of the
machine you are operating.
Make
9. Keep children and visitors away. Make sure
children and visitors are at a safe distance for you
work area.
10. Keep your workshop childproof. Use padlocks,
Turn off master power switches and remove start
switch keys.
14. Use correct amperage extension cords.
Undersized extension cords overheat and lose
power. Replace extension cords if they become
damaged.
15. Keep machine well maintained. Keep blades
sharp and clean for best and safest performance.
Follow instructions when lubricating and changing
accessories.
16. Keep machine well guarded. Make sure guards
on machine are in place and are all working
correctly.
17. Do not overreach. Keep proper footing and
balance at all times.
18. Secure workpiece. Use clamps or a vice to
hold the workpiece where practical. Keeping the
workpiece secure will free up your hand to operate
the machine and will protect hand from injury.
19. Check machine over before operating. Check
machine for damaged parts, loose bolts, Keys and
wrenches left on machine and any other conditions
that may effect the machines operation. Repair and
replace damaged parts.
20. Use recommended accessories. Refer to
instruction manual or ask correct service officer
when using accessories. The use of improper
accessories may cause the risk of injury.
21. Do not force machinery. Work at the speed and
capacity at which the machine or accessory was
designed.
22. Use correct lifting practice. Always use the
correct lifting methods when using machinery.
Incorrect lifting methods can cause serious injury.
23. Lock mobile bases. Make sure any mobile bases
are locked before using machine.
11. Never leave machine unattended. Turn power off
and wait till machine has come to a complete stop
before leaving the machine unattended.
12. Make a safe working environment. Do not use
machine in a damp, wet area, or where flammable
or noxious fumes may exist.
13. Disconnect main power before service
machine.
position before re-connecting.
Make sure power switch is in the off
24. Allergic reactions. Certain metal shavings and
cutting fluids may cause an ellergic reaction in
people and animals, especially when cutting as the
fumes can be inhaled. Make sure you know what
type of metal and cutting fluid you will be exposed
to and how to avoid contamination.
25. Call for help. If at any time you experience
difficulties, stop the machine and call you nearest
branch service department for help.
Page 6

Drill Sharpener Safety Instructions
Machinery House
requires you to read this entire Manual before using this machine.
1. Maintenance. Make sure the Drill Sharpener is
turned off and disconnect from the main power
supply and make sure all moving parts have come to
a complete stop before any inspection, adjustment
or maintenance is carried out.
2. Drill Sharpener Wheel Condition. Drill Sharpener
must be maintained for a proper working condition.
Never operate a Drill Sharpener with a damaged or
badly worn wheel. Replace if required. Scheduled
routine maintenance should performed on a
scheduled basis.
3. Secure your Drill Sharpener. Make sure you
firmly secure your Drill Sharpener to a stand or
workbench. An unsecure Drill Sharpener can become
dangerously out of control during operation.
4. Hand Hazard. Keep a firm grip of material and
position your hands a safe distance away when
grinding. Serious injury can occur if hand or finger
tips come in contact with grinding wheels, abrasives
or moving parts.
5. Leaving a Drill Sharpener Unattended. Always
turn the Drill Sharpener off and make sure all moving
parts have come to a complete stop before leaving
the Drill Sharpener. Do not leave Drill Sharpener
running unattended for any reason.
Sharpener when turning it on, allow it to gain full
speed and wait for 1 minute before standing in front
of Drill Sharpener.
11. Workpiece Handling. Never hold small workpieces
with your fingers during sharpening. Always support
the workpiece, with correct collets etc. Never use
excessive force when drill sharpening or serious
injury can occur.
12. Hearing protection and hazards. Always wear
hearing protection as noise generated from Drill
Sharpener and workpiece vibration can cause
permanent hearing loss over time.
13. Eye protection. Always wear safety glasses
when using this machine. Small particles become
airborne at high speed and can cause serious eye
injury. Use Grinding shields on machine at all times.
14. Use correct size collets for the job. Always use
the correct size collets when drill sharpening.
15. Starting position/speed. Never turn the Drill
Sharpener on when the workpiece is resting on
the grinding wheel. Allow wheel to reach full speed
before grinding.
16. Guards. Do not operate Drill Sharpener without the
correct guards in place.
6. Avoiding Entanglement. Drill Sharpener guards
must be used at all times. Remove loose clothing,
belts, or jewelry items. Tie up long hair and use the
correct hair nets to avoid any entanglement with the
Drill Sharpener moving parts.
7. Understand the machines controls. Make sure you
understand the use and operation of all controls.
8. Power outage. In the event of a power failure during
use of the machine, turn off all switches to avoid
possible sudden start up once power is restored.
9. Work area hazards. Keep the area around the Drill
Sharpener clean from oil, tools, chips. Pay attention
to other persons in the area and know what is going
on around the area to ensure unintended accidents.
10. Starting Drill Sharpener. If a wheel is damaged
it may fly apart shortly after start up. To avoid
any injury, always stand to the side of the Drill
17. Stopping the grinding wheel. Do not stop or slow
the wheel with your hand or workpiece. Allow the
machine to stop on its own.
18. Dust hazard. Grinding causes hazardous dust,
which may cause long term respiratory problems if
inhaled. Always wear an approved respirator when
grinding.
19. Call for help. If at any time you experience
difficulties, stop the machine and call you nearest
branch service department for help.
Page 7
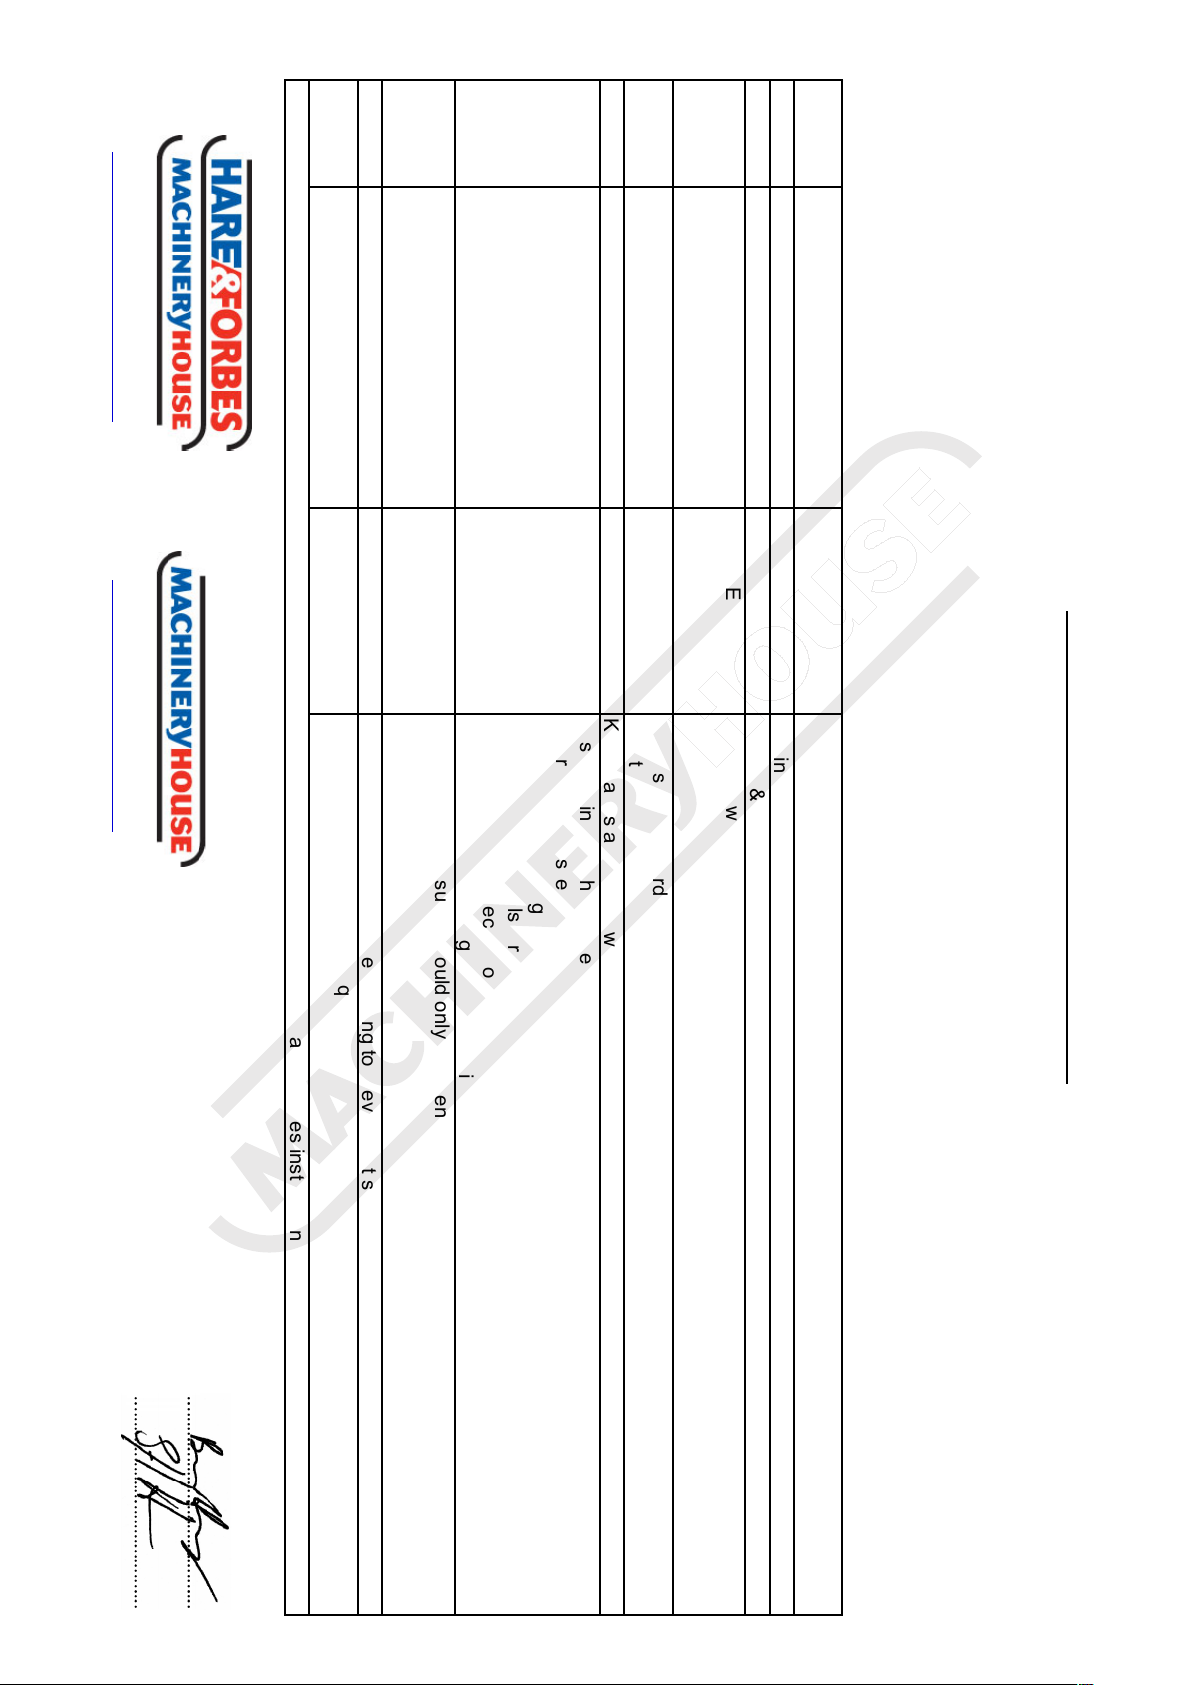
Revised Date:
www.machineryhouse.com.au
www.machineryhouse.co.nz
12th March 2012
D
SHEARING
MEDIUM
Make sure all guards are secured shut when machine is on.
Plant Safety Program to be read in conjunction with manufactures instructions
HIGH TEMPERATURE
LOW
All electrical enclosures should only be opened with a tool that is not to be kept with the machine.
Wear appropriate protective clothing to prevent hot sparks.
Ensure grinding wheels are tightly secured on spindle.
ELECTRICAL
Stand clear of moving parts on machine.
Keep hands and body away from grinding wheel.
Do not adjust or clean machine until the machine has fully stopped.
MEDIUM
Ensure jobs are locked tight when grinding.
Wear safety glasses.
Isolate power to machine prior to any checks or maintenance being carried out.
A
C
HIGH
Risk Control Strategies
(Recommended for Purchase / Buyer / User)
Secure & support work material when grinding.
Eliminate, avoid loose clothing / Long hair etc.
F
ENTANGLEMENT
CUTTING, STABBING,
H
PUNCTURING
MEDIUM
FRICTION
MEDIUM
MEDIUM
Assessment
STRIKING
E
B
PLANT SAFETY PROGRAM
No.
Hazard
Identification
Item
Hazard
Safety officer:
Remove all loose objects around moving parts.
Machine should be installed & checked by a Licensed Electrician.
Check grinding wheels for damage before use.
M
NEW MACHINERY HAZARD IDENTIFICATION, ASSESSMENT & CONTROL
Isolate power to machine prior to any checks or maintenance.
Authorised and signed by:
O
OTHER HAZARDS, NOISE.
LOW
Wear hearing protection as required.
LOW
CRUSHING
Developed in Co-operation Between A.W.I.S.A and Australia Chamber of Manufactures
This program is based upon the Safe Work Australia, Code of Practice - Managing Risks of Plant in the Workplace ( WHSA 2011 No10 )
Drill Sharpener
Manager:
Page 8
OIL
DAILY
ENVIRONMENT PROTECTION
Recycle unwanted materials instead of disposing of them as waste. All tools, accessories and packaging
should be sorted, taken to a recycling centre and disposed of in a manner which is compatible with the
environment. When the product becomes completely unserviceable and requires disposal, drain any uids
(if applicable) into approved containers and dispose of the product and uids according to local regulations.
Imported by
Australian Distributor
Hare & Forbes
Machineryhouse
Sydney - Melbourne
Adelaide - Brisbane - Perth
Ph: 1300 202 200
www.machineryhouse.com.au
New Zealand Distributor
Machineryhouse
Auckland
Christchurch
Ph: 0800 142 326
www.machineryhouse.co.nz
 Loading...