


Operating Instructions
Laser Rangender
Item No. 1600019 (LDM X100)
Item No. 1613600 (LDM X80)

Table of contents
1. Introduction ................................................................... 4
2. Explanation of symbols ................................................ 4
3. Intended use ................................................................. 5
4. Package contents ......................................................... 6
5. Features and functions ................................................. 6
6. Safety instructions ........................................................ 7
a) General information................................................. 7
b) Laser ....................................................................... 8
c) Batteries ................................................................ 10
7. Product overview .........................................................11
8. Display ........................................................................ 12
a) Measuring ............................................................. 12
b) Measurement reading ........................................... 13
9. Inserting (rechargeable) batteries .............................. 13
10. Charging the batteries ................................................ 15
11. Switch device/laser on/off ........................................... 16
12. Touchscreen operation ............................................... 16
13. Settings ...................................................................... 17
14. Distance measurement .............................................. 19
15. Continuous measurement .......................................... 19
16. Area measurement ..................................................... 20
17. Volume measurement ................................................ 20
18. Indirect measurement ................................................. 21
a) With two reference points...................................... 21
b) With three reference points - Variant A .................. 22
c) With three reference points - Variant B ................. 23
19. Automatic level calculation ......................................... 23
20. Automatic height calculation ....................................... 24
21. Distance between two points (P2P) ........................... 24
Page
2

22. Adding/subtracting ...................................................... 25
23. Camera (only LDM X100) ........................................... 26
24. Data export (only LDM X100) ..................................... 27
25. Tips and useful information ........................................ 28
26. Troubleshooting .......................................................... 28
27. Care and cleaning ...................................................... 29
28. Declaration of Conformity (DOC)................................ 30
29. Disposal ...................................................................... 30
a) Product .................................................................. 30
b) Batteries ................................................................ 31
30. Technical Data ............................................................ 31
3

1. Introduction
Dear customer,
Thank you for purchasing this product.
This product complies with statutory national and European
regulations.
To ensure that the product remains in this state and to
guarantee safe operation, always follow the instructions in
this manual.
These operating instructions are part of this
product. They contain important information on
setting up and using the product. Do not give
this product to a third party without the operating
instructions. Therefore, retain these operating
instructions for reference!
For technical queries, please contact:
International: www.conrad.com/contact
United Kingdom: www.conrad-electronic.co.uk/contact
2. Explanation of symbols
The symbol with the lightning in a triangle indicates
that there is a risk to your health, e.g. due to an
electric shock.
The symbol with an exclamation mark in a triangle
is used to highlight important information in these
operating instructions. Always read this information
carefully.
The arrow symbol alerts the user to the presence
of important tips and notes on using the device.
This symbol indicates the built-in laser.
4

3. Intended use
The product is used for the measurement of distances,
surfaces and volumes. Allows addition and subtraction of
readings. Calculates height based on the Pythagorean
Theorem.
The product can be connected via Bluetooth with a
smartphone app. The app allows you to edit and evaluate
the measured data. This product can also be controlled via
the app.
For safety and approval purposes, you must not rebuild and/
or modify this product. Using the product for purposes other
than those described above may damage the components.
In addition, improper use can cause hazards such as a
short circuit, re or electric shock. Read the instructions
carefully and store them in a safe place. Only make this
product available to third parties together with its operating
instructions.
All company and product names are trademarks of their
respective owners. All rights reserved.
5

4. Package contents
• Laser rangender
• USB charging cable
• Storage pouch
• Hand strap
• 3x rechargeable battery (NiMH, 900 mAh)
• Operating instructions
The manual for the app is available for download
as a separate document. Refer to the following
paragraph.
Up-to-date operating instructions
To download the latest operating instructions,
visit www.conrad.com/downloads or scan
the QR code on this page. Follow the
instructions on the website.
5. Features and functions
• Dust-proof and protected against water jets (IP65)
• Housing with impact protection (max. drop height 2 m)
• Area calculation
• Volume calculation
• Indirect measurement (Pythagoras)
• Continuous measurement with display of minimum/
maximum distance
• Addition/subtraction function
• Automatic level and height calculation
• Tripod socket 6.35 mm (1/4”)
• 3 measurement references (front face, tripod socket, back
face)
• Measured value memory
6

• Automatic shut-off after 3 minutes
• Digital water level
• Touchscreen
• Bluetooth function for connection to a smartphone app
• Camera for targeting (only LDM X100)
6. Safety instructions
Read the operating instructions and safety
information carefully. If you do not follow the
safety information and information on proper
handling in these operating instruction,
we will assume no liability for any resulting
personal injury or damage to property. Such
cases will invalidate the warranty/guarantee.
a) General information
• The device is not a toy. Keep it out of the reach
of children and pets.
• Do not leave packaging material lying around
carelessly. It may become a dangerous toy for
children.
• Protect the product from extreme
temperatures, impacts, ammable gases,
vapours and solvents.
• The product is only protected against water
jets if the charging connection and the battery
compartment are securely locked.
• Do not place the product under any mechanical
stress.
7

• If it is no longer possible to operate the product
safely, stop using it and prevent unauthorised
use. Safe operation can no longer be
guaranteed if the product:
- is visibly damaged,
- is no longer working properly,
- has been stored for extended periods in
poor ambient conditions or
- has been subjected to any serious
transport-related stress.
• Always observe the safety and operating
instructions of any other devices which are
connected to the product.
• Consult a technician if you are not sure how to
use or connect the product.
• Maintenance, modications and repairs must
be done by a technician or a specialist repair
centre.
• If you have questions which remain
unanswered by these operating instructions,
contact our technical support service or other
technical personnel.
b) Laser
• When operating the laser equipment, always
make sure that the laser beam is directed so
that no one is in the projection area and that
unintentionally reected beams (e.g. from
reective objects) cannot be directed into
areas where people are present.
• Laser radiation can be dangerous, if the laser
beam or its reection enters unprotected eyes.
Before using the thermometer, familiarise
yourself with the statutory regulations and
instructions for operating such a laser device.
8
• Never look into the laser beam and never point
it at people or animals. Laser radiation can
seriously damage your eyes.
• If laser radiation enters your eyes, close your
eyes immediately and move your head away
from the beam.
• If your eyes have been irritated by laser
radiation, do not continue to carry out tasks
with safety implications, such as working with
machines, working from great heights or close
to high voltage. Do not drive any vehicles until
the irritation has completely subsided.
• Do not point the laser beam at mirrors or other
reective surfaces. The uncontrolled, reected
beam may strike people or animals.
• Never open the device. Conguration or
maintenance tasks must only be completed
by a trained specialist who is familiar with
the potential hazards. Improperly executed
adjustments might result in dangerous laser
radiation.
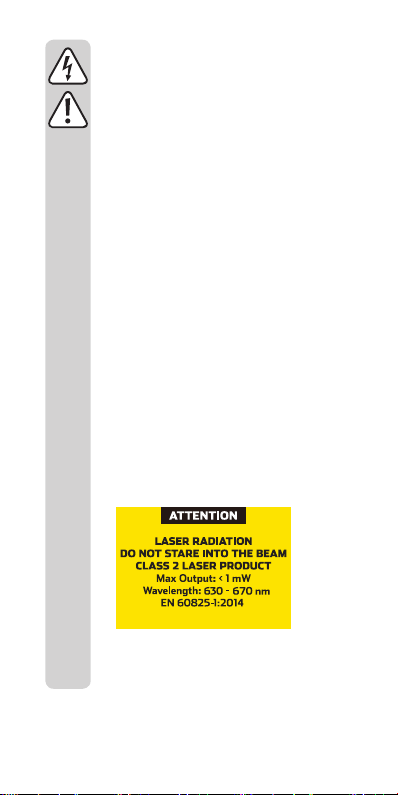
• The product is equipped with a class 2 laser.
Laser signs in different languages are included
in the package. If the sign on the laser is not
in your local language, attach the appropriate
sign to the laser.
• Caution: Using equipment or procedures other
than those described in these instructions
could lead to exposure to dangerous radiation.
9

c) Batteries
• Ensure that you insert the batteries in the
correct polarity.
• To prevent battery leakage, remove the
batteries when you do not plan to use the
product for an extended period. Leaking or
damaged batteries may cause acid burns if
they come into contact with your skin. Always
use suitable protective gloves when handling
damaged batteries.
• Batteries must be kept out of the reach of
children. Do not leave batteries lying around,
as there is a risk that children or pets may
swallow them.
• All batteries must be replaced at the same
time. Mixing old and new rechargeable
batteries can cause the batteries to leak and
damage the product.
• Batteries must not be dismantled, short-
circuited or thrown into ames. Never recharge
non-rechargeable batteries. Danger of
explosion!
10

7. Product overview
2
1
3
4
5
6
1 Measuring sensor
2 Laser aperture
3 Display
4 Camera button
(only LDM X100)
5 MEAS button
6 On/off switch
11

10
7 Battery compartment
cover
8 Tripod thread
8. Display
a) Measuring
A
B
C
12
7
8
9
9 Charging port
10 Eyelet for hand strap
D
E
F
G

Example: indirect measurement with two reference
points
A Measurement reference
B Bluetooth
C Digital water level
D Battery condition
E Angle
F Measurement mode
G Measurement reading
b) Measurement reading
H
I
J
K
L
Example: Volume measurement
H Measurement mode
I First line segment
J Second line segment
K Third line segment
L Volume
9. Inserting (rechargeable) batteries
Delivery includes 3 rechargeable batteries. The
product can also be operated with conventional
batteries.
Never use rechargeable batteries and conventional
batteries simultaneously.
Only use NiMH rechargeable batteries or alkaline
batteries.
13

• Slide the battery compartment cover down.
• Remove the battery compartment cover.
If you have difculty removing the battery
compartment cover, use a tool to help (e.g. slotted
screwdriver).
• Insert 3 AAA batteries or rechargeable batteries with
correct polarity. Pay attention to the polarity markings
inside the battery compartment.
• Make sure that the sealing ring on the inside of the battery
compartment cover is correctly installed.
• Replace the battery compartment cover.
• Slide the battery compartment cover upwards.
14

Replace batteries or recharge the rechargeable
batteries as soon as the battery status display
shows an empty battery.
10. Charging the batteries
Never attempt to recharge disposable batteries.
Danger of explosion!
Please fully charge the rechargeable batteries
before initial operation.
The USB power supply must be able to supply a
current of 500 mA.
• Turn the cover that covers the charging port 180° to the
side.
• Connect the product via the included cable with a USB
power supply or a computer.
The display shows a short reminder that conventional
batteries cannot be recharged. Then the charging process
starts.
• The rechargeable batteries are charged when the battery
state indicator is lit green.
• Only LDM X100: If you charge the product via a computer,
safely eject the product via the operating system.
15

• Disconnect the cable from the product and from the power
source as soon as the rechargeable batteries are charged.
11. Switch device/laser on/off
• Press and hold the on/off button approx. 1 second to turn
on the product.
• Briey press the MEAS button to activate the laser.
• Briey press the on/off button to deactivate the laser.
• Press and hold the on/off button for approx. 1 second to
turn the device off.
The product switches off automatically after
3 minutes of inactivity.
12. Touchscreen operation
• Swipe right to show the overview of the different
measuring modes.
Then swipe up or down and tap the desired measurement
mode.
• Swipe left to add/subtract measurements.
This is possible with simple distance measurement as well
as when measuring surface area and volume.
• Swipe down to access the setup menu.
Swipe up to close the setup menu again.
• Briey press the on/off button to return to the main screen.
16

13. Settings
Swipe down to access the setup menu.
1 Bluetooth
2 Unit
3 Measurement reference
1
4
2
3
5
6
4 Digital water level
5 Image rotation
6 Memory
Bluetooth
• To connect the device with the app, Bluetooth must be
enabled.
• Tap the icon to activate/deactivate Bluetooth.
• If the letter A appears next to the icon, the measured data
is automatically sent to the app.
• If the letter M appears next to the icon, the measured data
can manually be sent to the app.
In any measurement mode, swipe to the left and tap the
Bluetooth symbol to send the current measurement data
to the app.
• If the icon is highlighted in grey, Bluetooth is disabled.
The manual for the app is available for download
as a separate document. Refer to the information
in chapter 4.
17

Unit
The following units are available:
• m = meters
• ft = foot
• in = inch
• ---’--” = feet/inches
Measurement reference
The following measurement references are available:
Starting point: Back
The length of the device is
included in the measured
value.
Starting point: Tripod
thread
Starting point: Front
Digital water level
The water level helps you to precisely align the product.
18

Image rotation
• If the symbol is displayed on a white background, rotate
the display by turning the product.
• If the icon is displayed on a grey background, image
rotation is disabled.
Memory
• Press the MEAS button or swipe left/right to display the
stored measured values.
• Only LDM X100: To delete the displayed measured value,
press the camera button.
The last measurement results will be stored
automatically.
14. Distance measurement
• Press the MEAS button to activate the laser.
• Point the laser point at the target at a right angle and try to
hold the device as calm as possible
• Press the MEAS button. After a short time, a beep signal
sounds and the measured value is displayed on the
display.
15. Continuous measurement
• Press and hold the MEAS button for approx. one second
to switch to continuous measurement mode.
• The laser is activated. The distance is now measured
continuously.
19

• The display shows the maximum, minimum and the last
registered measured value of the measurement process.
• To exit continuous measurement mode, press the MEAS
or the on/off button.
• After 5 minutes of inactivity, this feature is automatically
deactivated.
16. Area measurement
• Swipe right and select the following function:
• Measure the two sides of the area.
• The device automatically multiplies the measured values.
17. Volume measurement
• Swipe right and select the following function:
20

• Measure the two sides and the height of the room.
• The device automatically multiplies the measured values.
18. Indirect measurement
The Pythagorean theorem (a2+b2=c2) can be used
to indirectly determine the height of an object.
Make sure that the starting point for the individual
measurements is exactly the same position.
a) With two reference points
• Swipe right and select the following function:
21

• Now measure the two required line segments. Please see
the previous gure for the right order.
• The height is calculated automatically and will appear in
the bottom row.
b) With three reference points - Variant A
• Swipe right and select the following function:
• Now measure the three required line segments. Please
see the previous gure for the right order.
• The height is calculated automatically and will appear in
the bottom row.
22

c) With three reference points - Variant B
• Swipe right and select the following function:
• Now measure the three required line segments. Please
see the previous gure for the right order.
• The partial height between points 1 + 2 is automatically
calculated and displayed in the bottom line.
19. Automatic level calculation
• Swipe right and select the following function:
23

• Now measure the necessary line segment (see the
previous gure).
• The result is calculated automatically.
20. Automatic height calculation
• Swipe right and select the following function:
• Now measure the two required line segments. Please see
the previous gure for the right order.
• The height is calculated automatically and will appear in
the bottom row.
21. Distance between two points
(P2P)
• Swipe right and select the following function:
24

• A warning message appears on the display. The device
calibrates. Do not move the device during this time. Wait
until the warning message disappears.
If self-calibration fails, the list of all measurement
modes is shown again. Repeat the procedure in
this case.
• Now measure the two required line segments. Please see
the previous gure for the right order.
• The distance is calculated automatically and will appear
in the bottom line.
22. Adding/subtracting
• Measure the rst segment.
• Swipe to the left.
25

• Tap + to add or – to subtract.
• Measure the next line segment.
• The sum or difference will be shown in the bottom row.
This process can be repeated as often as desired.
You can also add/subtract areas or volumes.
23. Camera (only LDM X100)
Instead of the target laser, you can use the built-in
camera to target the measuring point.
• Press the camera button if desired before a measurement.
The camera image and a crosshair appear on the display.
26

• Press the camera button again to switch between two-
and four-time magnication.
The magnication factor is shown in the top right of the
display.
• Once you have targeted the measuring point, make your
measurements as usual.
Any ongoing measurement (e.g. volume
measurement) is not affected. Previously
registered values are retained in the buffer.
24. Data export (only LDM X100)
As soon as the product is connected to a computer,
the charging process starts.
If you operate the product with conventional,
non-rechargeable batteries, remove them before
connecting the product to a computer.
• Connect the product with the included cable to your
computer.
The product is shown as a drive with the name “LaserMeter".
• On the drive, there is a le named “DISTANCE.CSV".
Copy the le in your desired directory.
• Safely eject the product via the operating system before
you disconnect the cable.
27

25. Tips and useful information
• Measuring errors may occur when operating the product
outdoors due to light refraction or sunlight. Perform
measurements in suitable light conditions.
• Due to their physical properties, the following surfaces
may falsify the measurements:
- Transparent surfaces (e.g. glass, water)
- Reective surfaces (e.g. glass, shiny metal)
- Porous surfaces (e.g. insulating materials)
- Structured surfaces (e.g. roughcast, natural stone)
• Use a tripod (not included) in order to achieve consistent
results.
26. Troubleshooting
Code Cause Solution
204 Calculation error Repeat the process.
208 Overcurrent Contact your retailer.
Weak batteries/
220
rechargeable
batteries
Temperature too
252
high
253 Temperature too low
Reected signal
too weak or
255
measurement takes
too long.
Reected signal too
256
strong
Replace or recharge
the batteries.
Observe the operating temperature
range.
Select a different
measurement
surface.
28

Code Cause Solution
Outside of the
261
measurement range
500 Hardware error
Observe the
measuring range.
Turn the device off
and then on again.
If after several
attempts the error
message still
appears, contact
your retailer.
27. Care and cleaning
Never use aggressive detergents, rubbing alcohol
or other chemical solutions, as these may damage
the casing or cause the product to malfunction.
Do not immerse the product in water or other
liquids.
• The product is maintenance-free. Only clean the exterior
with a soft, dry cloth or a brush.
In case of stronger soiling, you can use a damp cloth.
• Use a small brush or a cotton bud to clean the measuring
sensor.
• Store and transport the measuring device only in the
included pouch.
29

28. Declaration of Conformity (DOC)
Conrad Electronic SE, Klaus-Conrad-Straße 1, D-92240
Hirschau, hereby declares that this product conforms to
Directive 2014/53/EU.
Click on the following link to read the full text of the
EU Declaration of Conformity: www.conrad.com/
downloads
Select a language by clicking on the corresponding
ag symbol and then enter the product order
number in the search box. The EU Declaration
of Conformity is available for download in PDF
format.
29. Disposal
a) Product
Electronic devices are recyclable waste and must
not be disposed of in the household waste. Always
dispose of the product according to the relevant
statutory regulations.
Remove any inserted batteries and dispose of them
separately from the product.
30

b) Batteries
You are required by law (Battery Directive) to
return all used batteries. Batteries must not be
placed in household waste.
Batteries containing hazardous substances are labelled with
this symbol to indicate that disposal in household waste is
forbidden. The abbreviations for heavy metals in batteries
are: Cd = Cadmium, Hg = Mercury, Pb = Lead (indicated on
the battery, e.g. below the trash icon on the left).
Used batteries can be returned to local collection points, our
stores or battery retailers.
You thus full your statutory obligations and contribute to the
protection of the environment.
30. Technical Data
Power supply .................................. 3 x AAA battery/
rechargeable battery
Measuring range* ........................... 0.2 – 100.00 m
(LDM X100)
0.2 – 80.00 m
(LDM X80)
Basic accuracy** .............................±(2.0 + 5 x 10⁻⁵ D) mm
Accuracy (indirect measurement) ...±2 cm
Accuracy (P2P) ...............................±4 cm
Laser class .....................................2
Laser wavelength ...........................630 – 670 nm
Laser output power .........................<1 mW
Response time ................................<0.5 s
Charging time .................................4 – 4.5 h
Protection type ................................IP65
Tripod socket ..................................6.35 mm (1/4”)
Wireless frequency .........................2.4 GHz
Transmission power........................1 mW
31

Memory ........................................... 100 (LDM X100)
Operating conditions .......................-10 to +40 °C
Storage conditions ..........................-20 to +60 °C
Dimensions (L x W x H) ..................115 x 49 x 26 mm
Weight ............................................ 154 g (LDM X100)
*Measurement range and accuracy depend on how well
the laser light is reected from the surface of the object and
the brightness of the laser point compared to the ambient
brightness.
**In favourable conditions, the accuracy of measurements
<10 m is approximately ±2 mm. In case of measurements
>10 m, an inuence of ±0.1 mm/m can be expected
Under unfavourable conditions (e.g. strong sunlight or poorly
reective surface) the range is reduced and the result can
deviate from the correct result by up to 10 mm.
30 (LDM X80)
141 g (LDM X80)
32

This is a publication by Conrad Electronic SE, Klaus-ConradStr. 1, D-92240 Hirschau (www.conrad.com).
All rights including translation reserved. Reproduction by any
method, e.g. photocopy, microlming, or the capture in electronic
data processing systems require the prior written approval by
the editor. Reprinting, also in part, is prohibited. This publication
represent the technical status at the time of printing.
Copyright 2018 by Conrad Electronic SE.
1600019_1613600_v3_1018_02_IPL_m_en
 Loading...