

Page 1
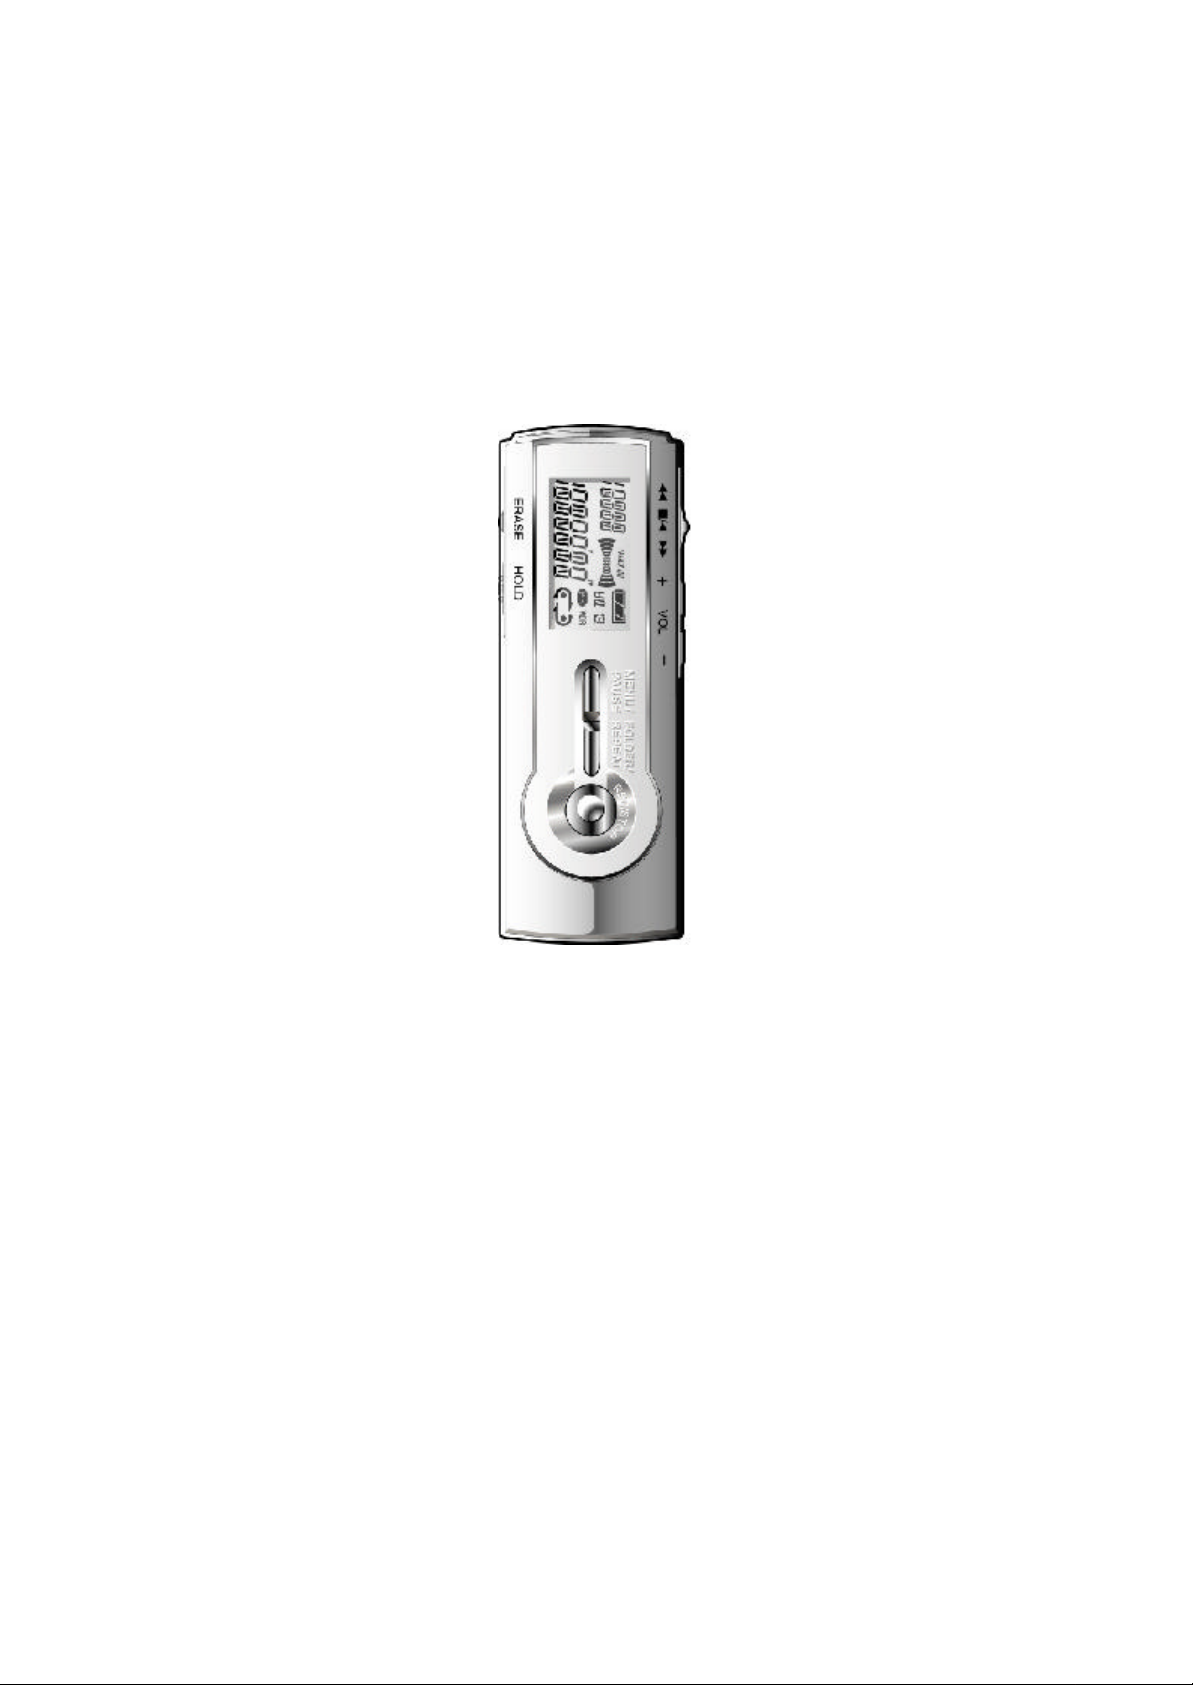
USER'S MANUAL
SMVR-64/128
Page 2

THIS DEVICE COMPLIES WITH PART 15 OF THE FCC RULES. OPERATION IS
SUBJECT TO THE FOLLOWING TWO CONDITIONS: (1) THIS DEVICES MAY NOT
CAUSE HARMFUL INTERFERENCE, AND (2) THIS DEVICE MUST ACCEPT ANY
INTERFERENCE, RECEIVED, INCLUDING INTERFERENCE THAT MAY CAUSE
UNDERSIRED OPERATION.
Note : This equipment has been tested and found to comply with the
limits for a Class B digital device, pursuant to part 15 of the FCC Rules.
These limits are designed to provide reasonable protection against
harmful interference in a residential installation. This equipment
generates, uses and can radiate radio frequency energy and, if not
installed and used in accordance with the instructions, may cause
harmful interference to radio communications. However, there is no
guarantee that interference will not occur in a particular installation. If
this equipment does cause harmful interference to radio or television
reception, which can be determined by turning the equipment off and
on, the user is encouraged to try to correct the interference by one or
more of the following measures :
- Reorient or relocate the receiving antenna.
- Increase the separation between the equipment and receiver.
- Connect the equipment into an outlet on a circuit different from that
to which the receiver is connected.
- Consult the dealer or an experienced radio/TV technician for help.
NOTE: THE MANUFACTURER IS NOT RESPONSIBLE FOR ANY RADIO OR TV
INTERFERENCE CAUSED BY UNAUTHORIZED MODIFICATIONS TO THIS EQUIPMENT.
SUCH MODIFICATIONS COULD VOID THE USER'S AUTHORITY TO OPERATE THE
EQUIPMENT.
Page 3
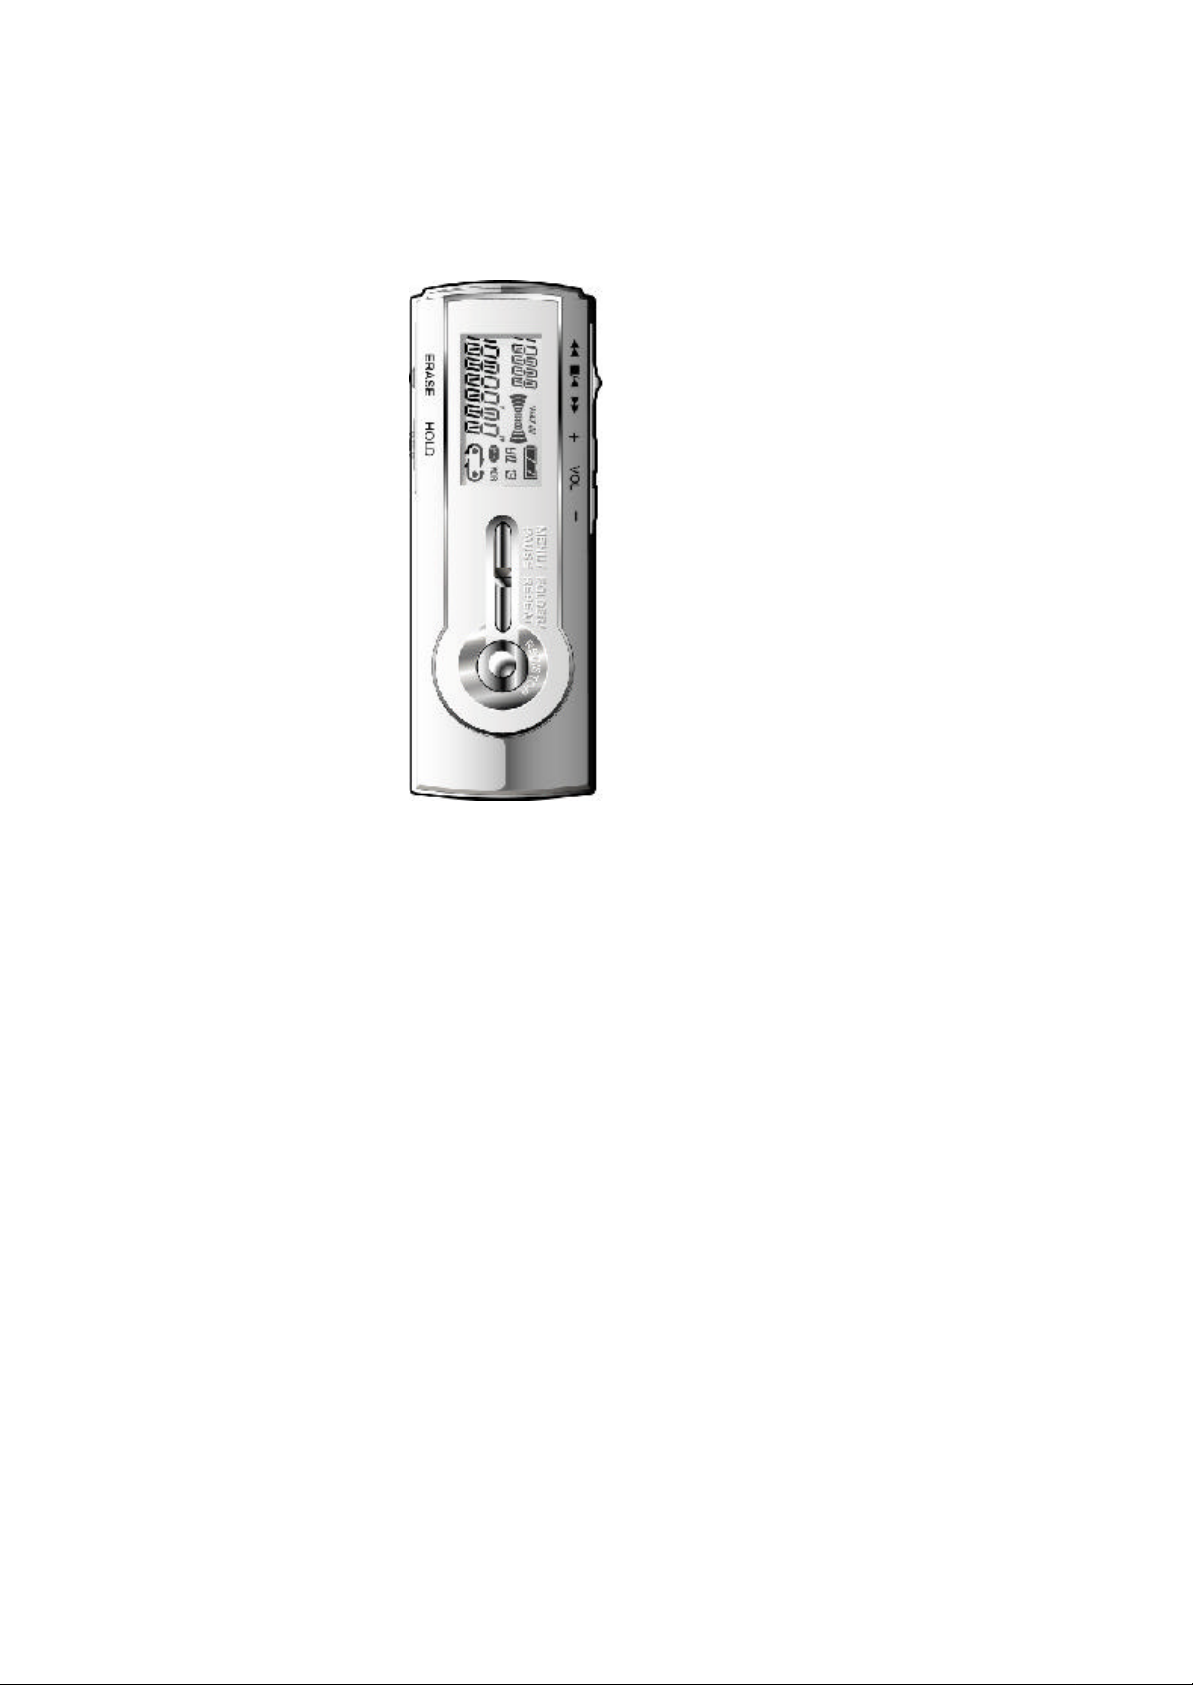
USER'S MANUAL
SMVR-64/128
Before the Main Operations
Features
▶ Long time recording function
Can be recorded Max',1090minutes(64MByte)/2180minutes(128Mbyte)
▶ Play- back of MP3 music files
Can be play- back for MP3 music files
▶ Timer recording function
Can be set timer recording function for Max' 255 minutes
▶ Alarming function
Can be adjusted alarming function for Max' 255 minutes
▶ File move function
Can be moved saved message to other folder
▶ File storage function
Messages can be stored in each files(A/B/C/D/L)
Max' 99 files in A/B/C/D folders each and 20 files in L folder
▶ Data storage function
Page 4

Can be down-loaded PC's data or files to your voice recorder and
also up-loaded data saved in your voice recorder to other PCs
Can be down-loaded data or files for Max' 64MB or 128 MB,
depending on capacity of Flash memory.
▶ MP3 files should be saved into MP3 folder
▶ File conversion function
File format can be converted by X-SHELL(voice & MP3 manager)
▶ Automatic program up- date function
Can be up- dated for X-SHELL.
▶ files protection function
Important files(messages) can be stored in L folder
(details refer to clause for storage of saved important messages)
(messages or files from L folder can not be erased )
▶ Selection of recording mode
You can choose 2 recording mode(HQ/LQ) when you record the message(s).
(HQ mode: good quality sound but recording time is shorter than LQ mode)
(LQ mode: Recording time is 4 times longer than HQ mode).
▶ Auto power off function
If the device is not in use more than 1 minute, power is automatically off.
▶ Recording Remaining time display
During recording message, you can check remaining recording time.
(During recording message, press "F OLDER/REPEAT button
to check recording remaining time)
▶ Repeat play- back function
During play- back, you can listen A↔B selected section repeatedly.
▶ Repeat play- back for MP3 music file
Playback of MP 3 player is set for all songs repeat- playback,
if a song is set for repeat- playback, only a selected song playbak repeatedly.
▶ Monitor Function
During recording, message can be monitored by earphone.
Recording message can be monitored by earphone during recording.
▶ connection to a exte rnal appliance(s)
By connecting whit supplied AUDIO CABLE between voice recorder
and external appliance(s), It's possible to record information
from external appliance(s) into voice recorder and to record them back
into those external appliance(s).
Page 5

▶ Level Display Function
Level for play- back and recording are displayed on LCD.
▶ Voice Operated Recording Function
If VOR is set during recording, the recording stops automatically
when there is no sound or voic
It make the recording time to the maximun.
▶ Scan Search Function
The unit can playback all files for first 5 sec' in existing folder.
▶ Pause Function
Can pause during playback or recording.
(Unit turns to power off mode automatoically on or before 15 minutes.)
▶ Set by MENU Mode
Additional function can be set by MENU mode.
▶ USB PC Interface Function
By connecting with USB cable, can be down-loaded or up-loaded
from PC easy and fast
▶ Hold Function
During play- back or recording, can be protected unwanted
operation of voice recorder.
▶ Ultra miniature sized Device
Smallest size in the world and easy to carry.
▶ EL BACK LIGHTING
EL back Lighting is equipped in voice recorder so that easy to check operation
status under dark place and in night
▶ Voice E -mailing Function
By using VOICE MANAGER PROGRAM, can be e- mailed recorded message.
▶ Equalizer Function
You can enjoy musics with different sound effects
(POP,CLASSIC,JAZZ,ROCK mode) when playback of MP3 music files
▶ When play- back of MP3 music files, you can adjust level of bass
& treble you desired.
▶ By using VOICE MANAGER PROGRAM, you can cut, paste,move,add
for the files.
Location of Controls
Page 6
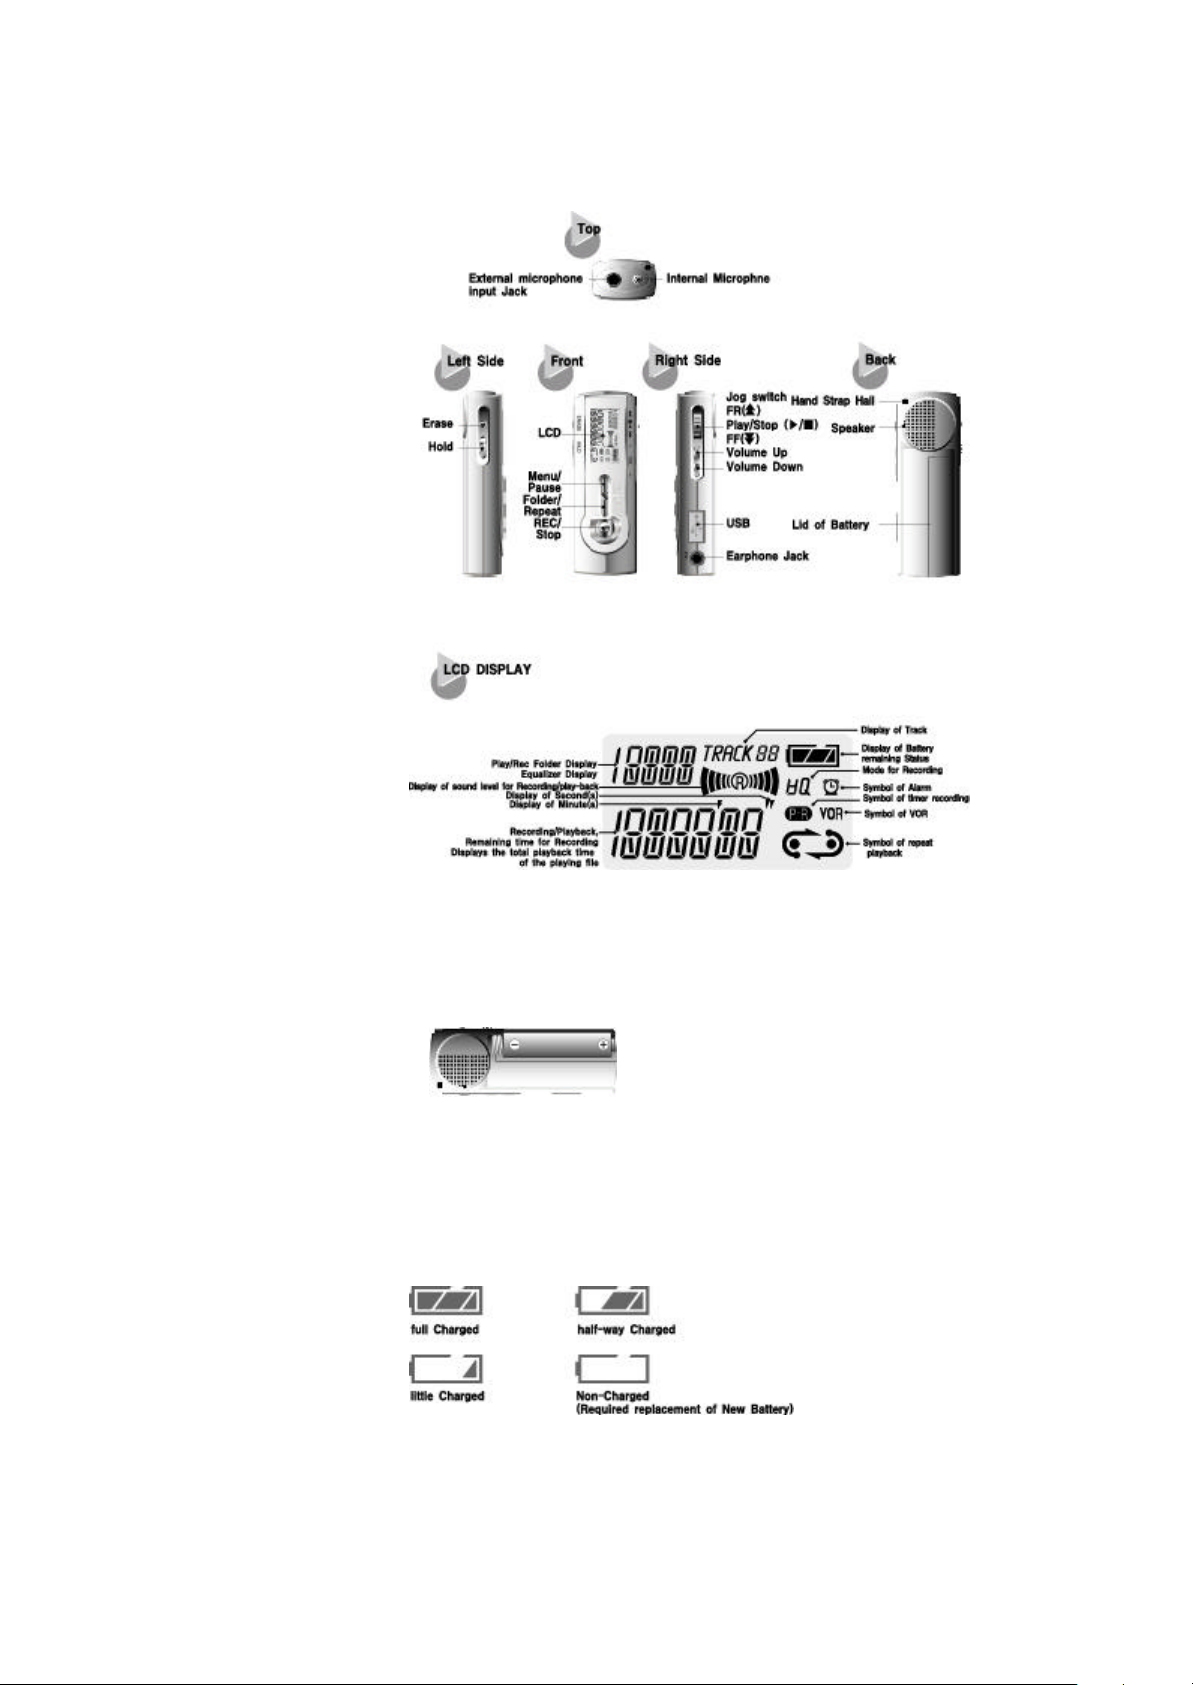
Inserting / Replacing the Batteries
It should be done in STOP position.
1. Open the battery cover in the direction of symbol of arrow by pushing downwards
2. Insert one "AAA" Battery(LR-03) into the battery compartment with correct polarity.
?? Power Requirements : Dry Cell LR03( size AAA or UM-4)
3. Press "REC/STOP" button to check the remaining battery capacity
Page 7
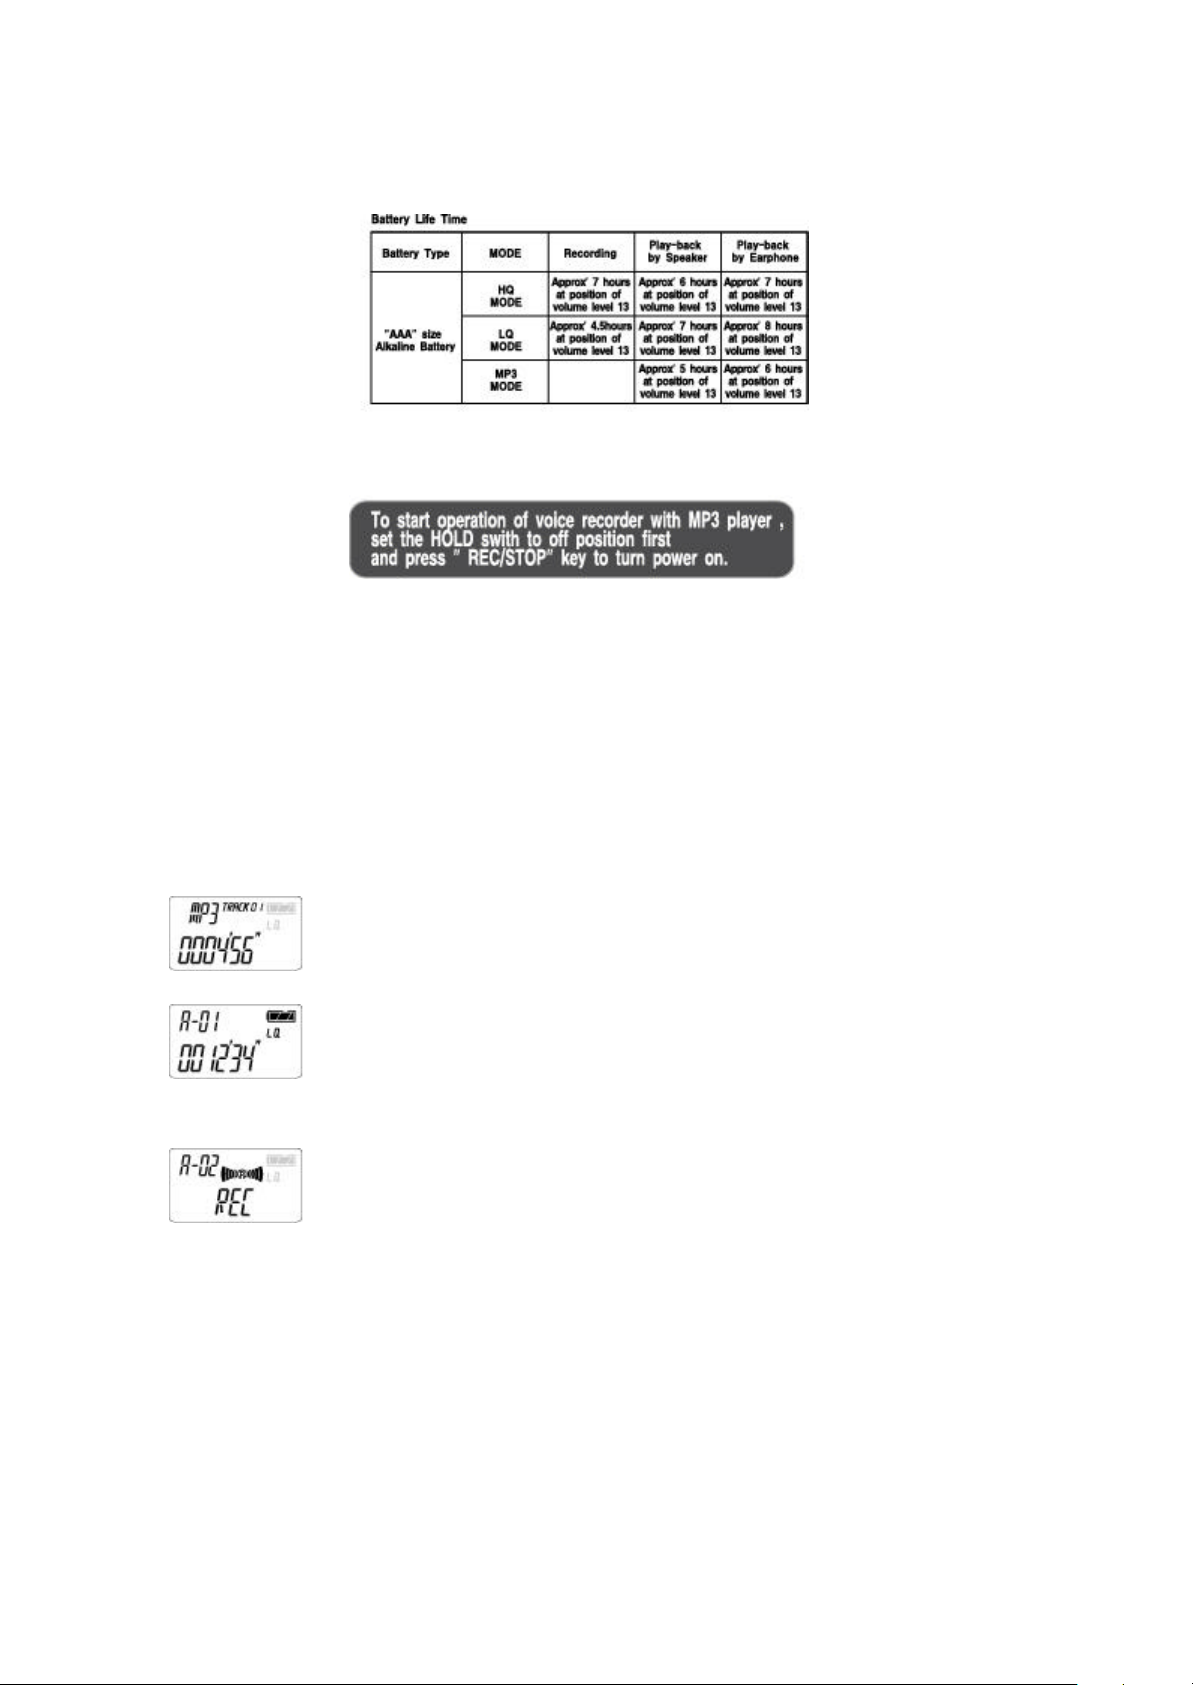
VOICE RECORDER OPERATION
Recording
▣ Recording the messages
▶ Press "REC/STOP" button once
▶ To stop recording, press " REC/STOP"button once again.
By pressing "REC/STOP" button and turn the the power on
Press " FOLDER/REPEAT" button to operate voice recorder mode from
MP3 player mode.
By pressing "REC/STOP" button, voice recorder start recording as
indicated figures
▣ Selecting folder and recording
You can select any folder(a folder among A/B/C/D) by pressing "FOLDER/REPEAT" key
and start recording
▶ Max' 99 files can be stored into each folder
▶ Recording can not be done in L folder
Page 8
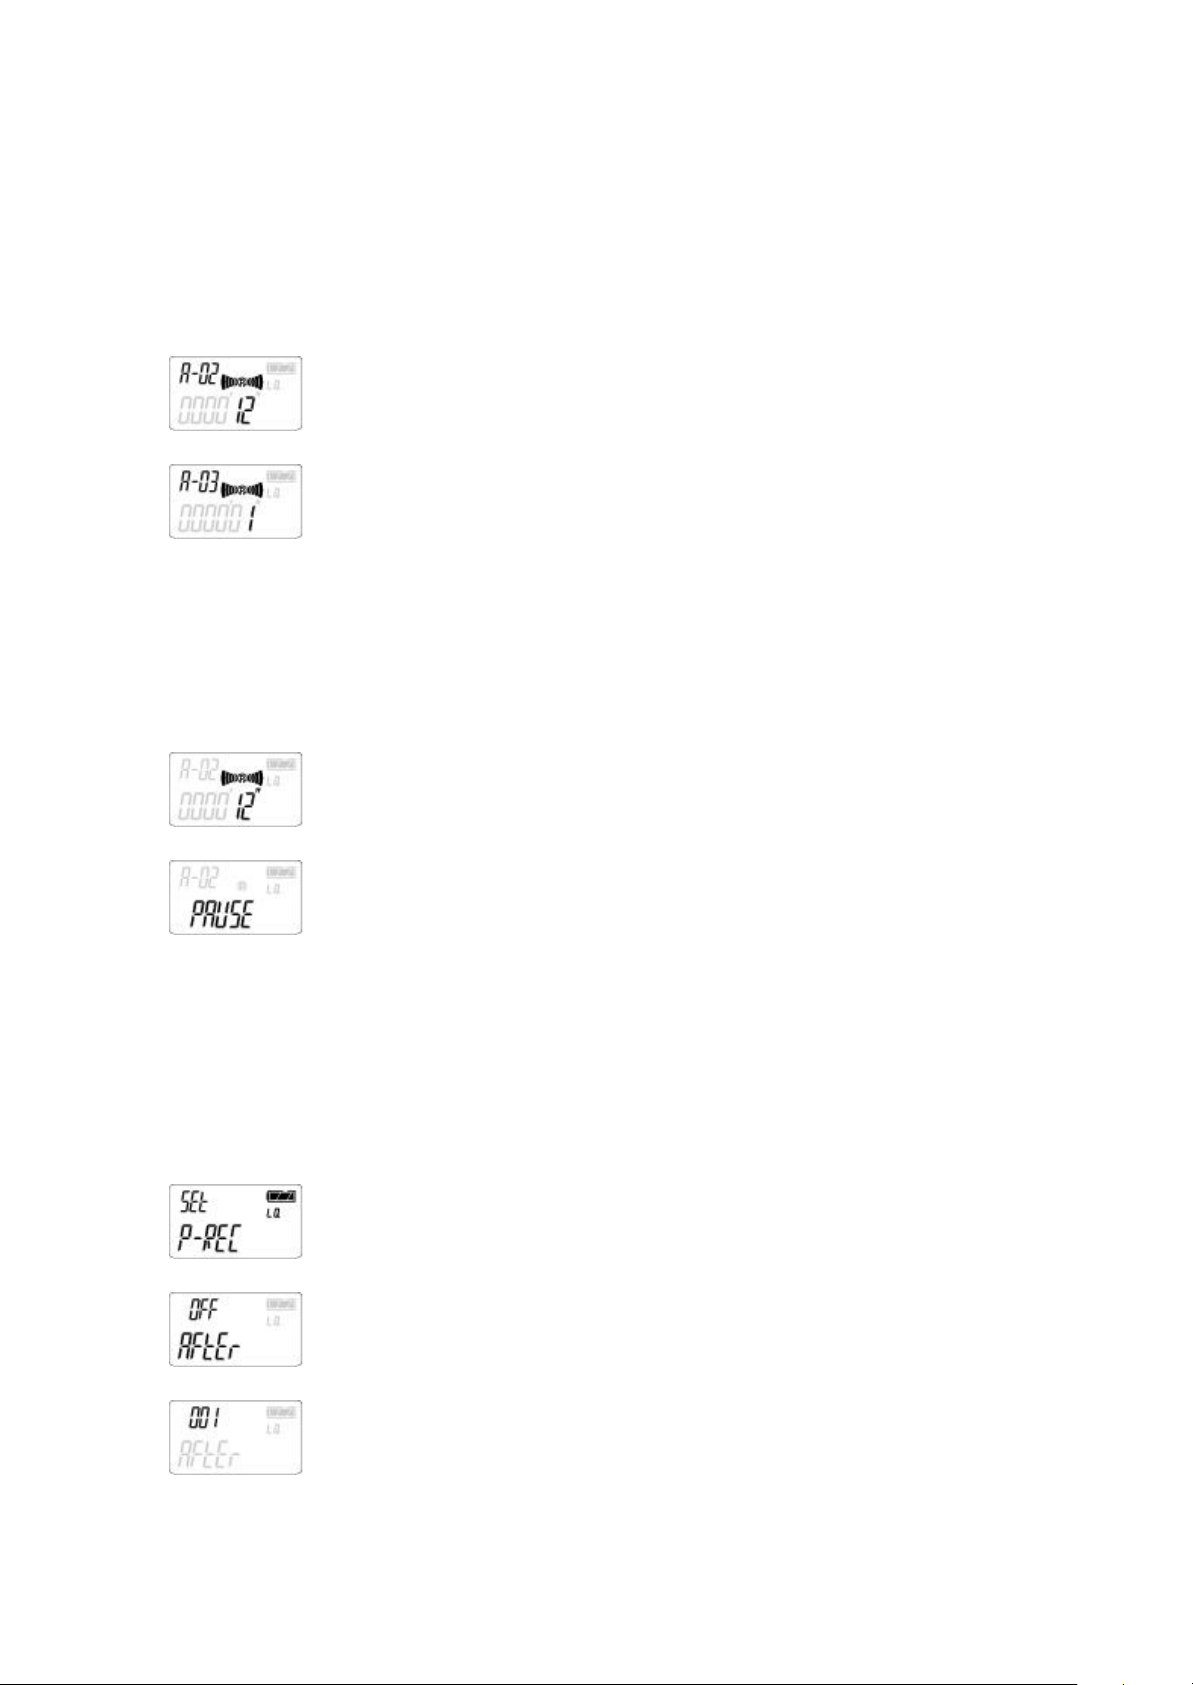
▶ After recording file in a folder, you can transfer file to a other folder by using MENU
mode.
▣ Recording the message to next file
If you want to record the message to next file No during recording, press "FF" key once.
If you press " FF" key during recording the message
Recording shall be continued in next file number.
▣ Monitoring message during recording
You can monitor message by using earphone during recording message.
▣ Pause during recording
To pause recording, press " MENU/PAUSE" for more than 1 second
To release pause, press " MENU/PAUSE" button for more than 1 second.
If you press "MENU/PAUSE" button during recording
PAUSE is displayed on LCD
▣ Timer Recording
Timer (preengaged) recording can be done through "SET P-REC" from MENU mode.
▶ Can be set Max' 255 minutes for timer recording(time adjust can be done by "FF/FR"
key)
▶ To cancel timer recording, follow same procedures for timer recording and choose
OFF
Press " MENU/PAUSE" button 4 times.
And press " PLAY/STOP" button.
Set the time you want to start recording by adjusting " FF or REW " button
Page 9
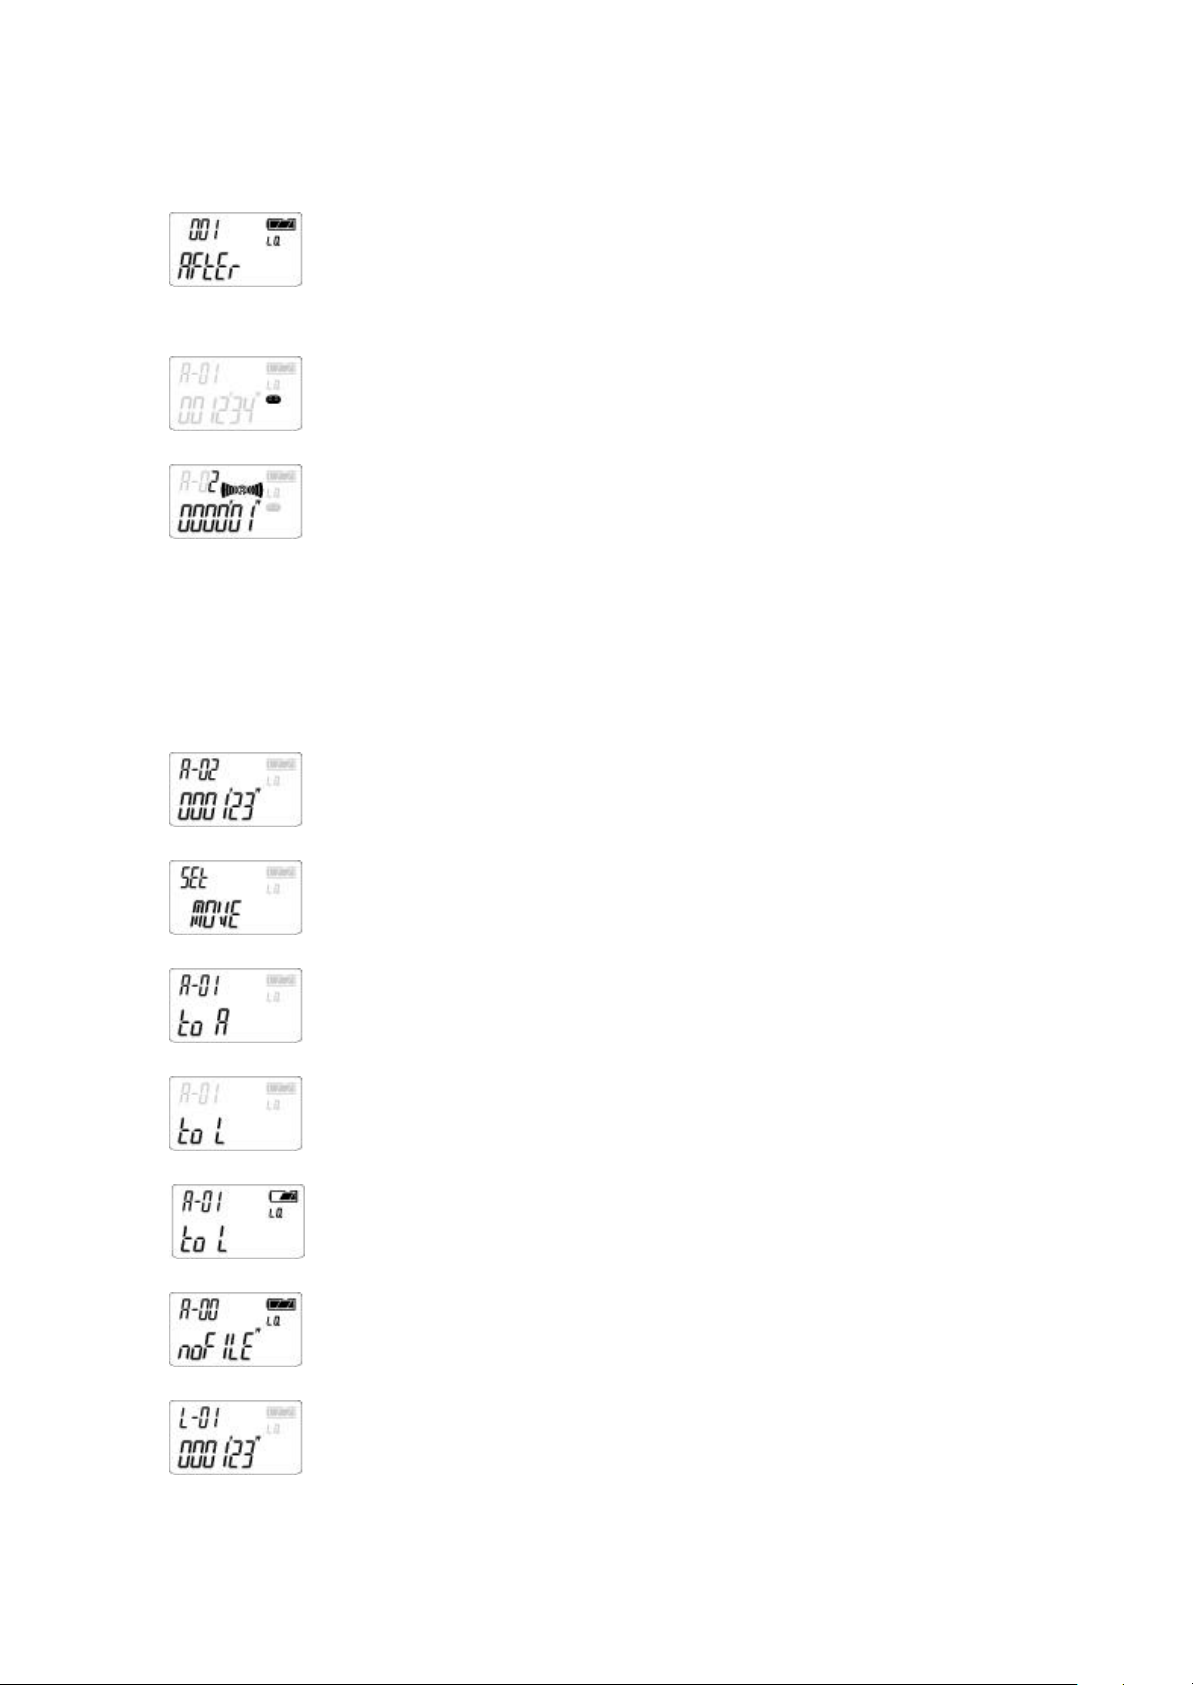
Press " PLAY/STOP" button.If you want to cancel timer recording, select
OFF and press "PLAY/STOP" key.
After above procedures, symbol for P-R appears on LCD
Timer recording shall be started in set time
▣ Storing Important Message(s)
If you want to store important file(s) among saved file(s) in A/B/C/D/ folder,
You can store import file(s) in L folder after recording file in A/B/C/D folder first.
▶ Files in L folder can not be erased
▶ Max' 20 files can b e stored in L folder.
By using "FF/REW" button,select the files you want to move to L folder.
After file(s) is selected,press"MENU/PAUSE"button 3 times.
Press "PLAY/STOP" button again.
By using "FF/REW" key,select L folder as shown figure.
Press"PLAY/STOP" button one more time.
Selected file(s) has moved into L folder
Since selected file(s) moved into L folder, there are( is ) no selected
Page 10
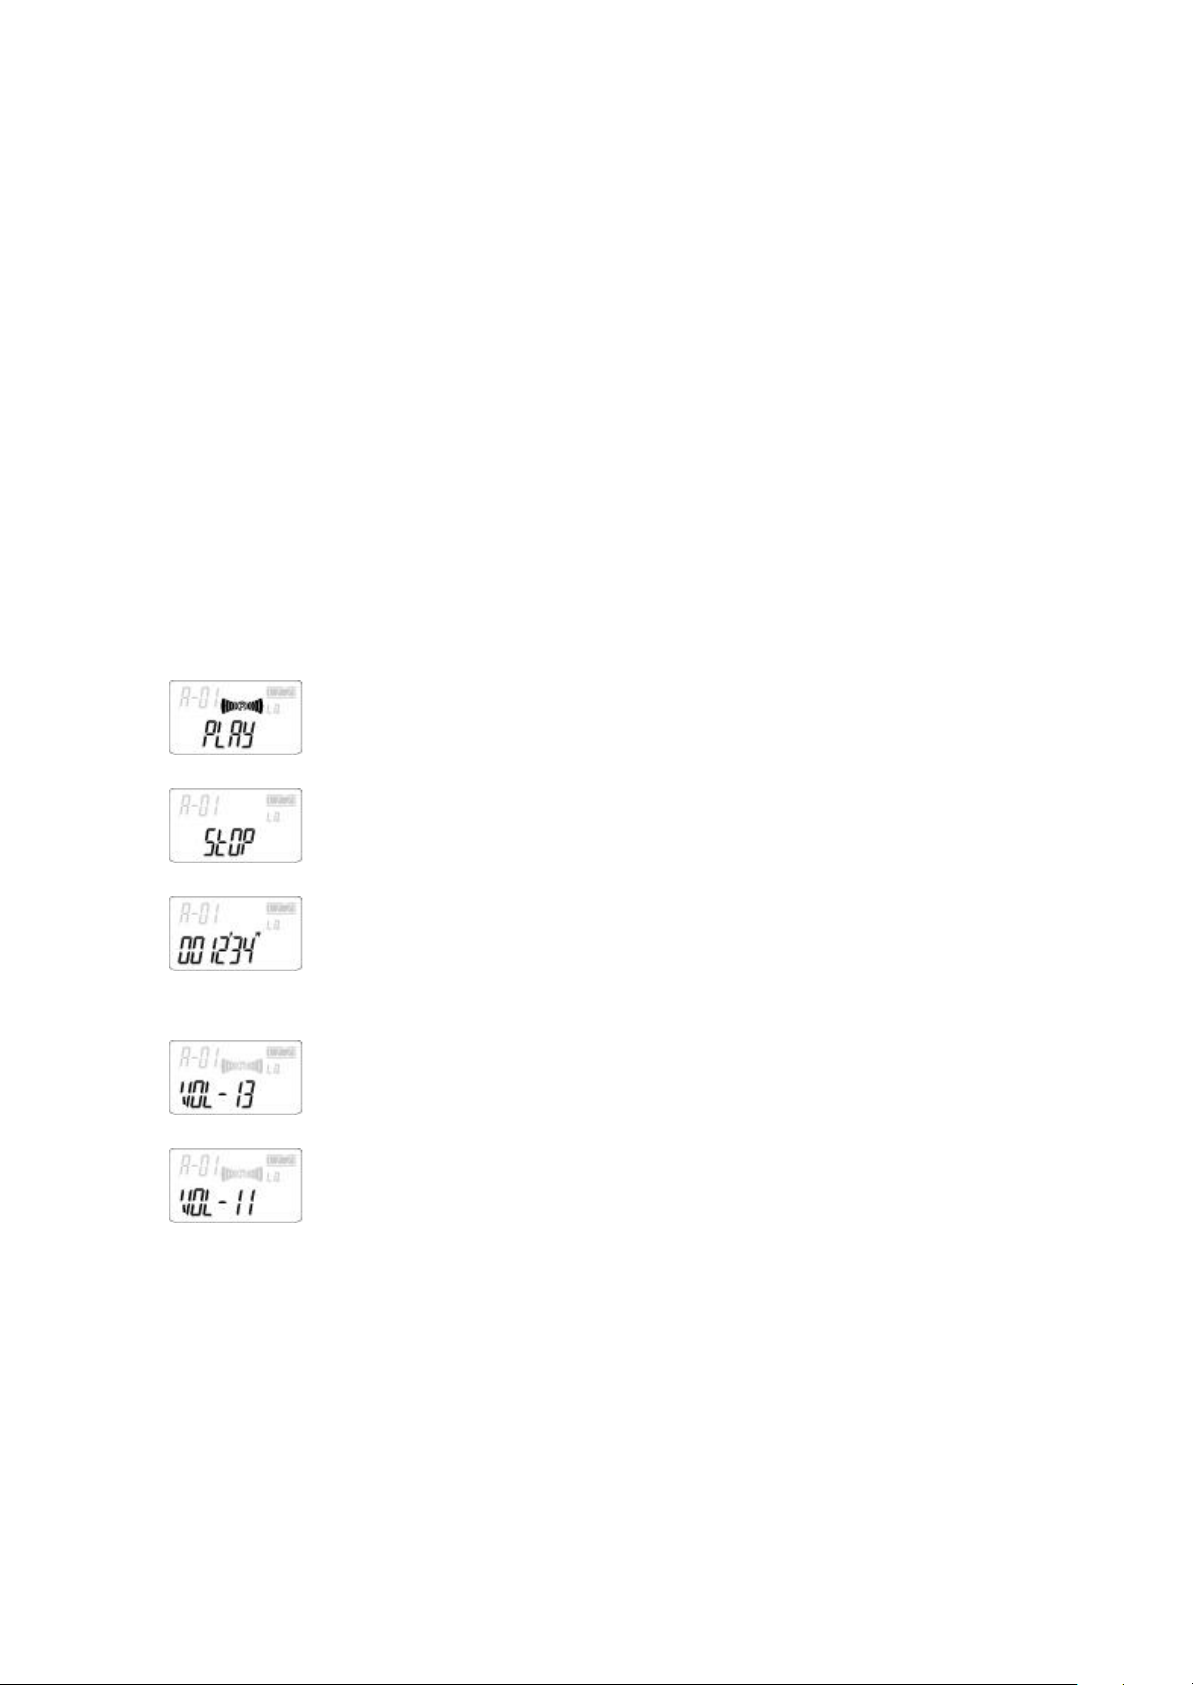
folder in ex-folder.
※ Since all folders (A/B/C/D) except L folder can be erased, it's recommended
that important message is stored in L folder and upload to PC.
it's possible to erase file by PC program( X-SHALL).
Playback
▣ Playback
▶Press " REC/STOP" button to turn power on and set the HOLD switch to off position
first.
Press " PLAY/STOP" key( ▶/■) once and file(message) number, play-back sign,
playback time is displayed on LCD.
Press " PLAY/STOP" key
If you press " PLAY/STOP" key again
The unit turns to STOP mode
▶Volume control is adjusted by VOLUME buttons
To turn the unit up, press VOL+ button.
To turn the unit down,press VOL – button
▶Press play/stop button(▶/■) to stop.
▣ Fast Forward and Rewinding during Playback
▶Fast Forward
During playback , press " FF" button to right position for more I second.
Page 11
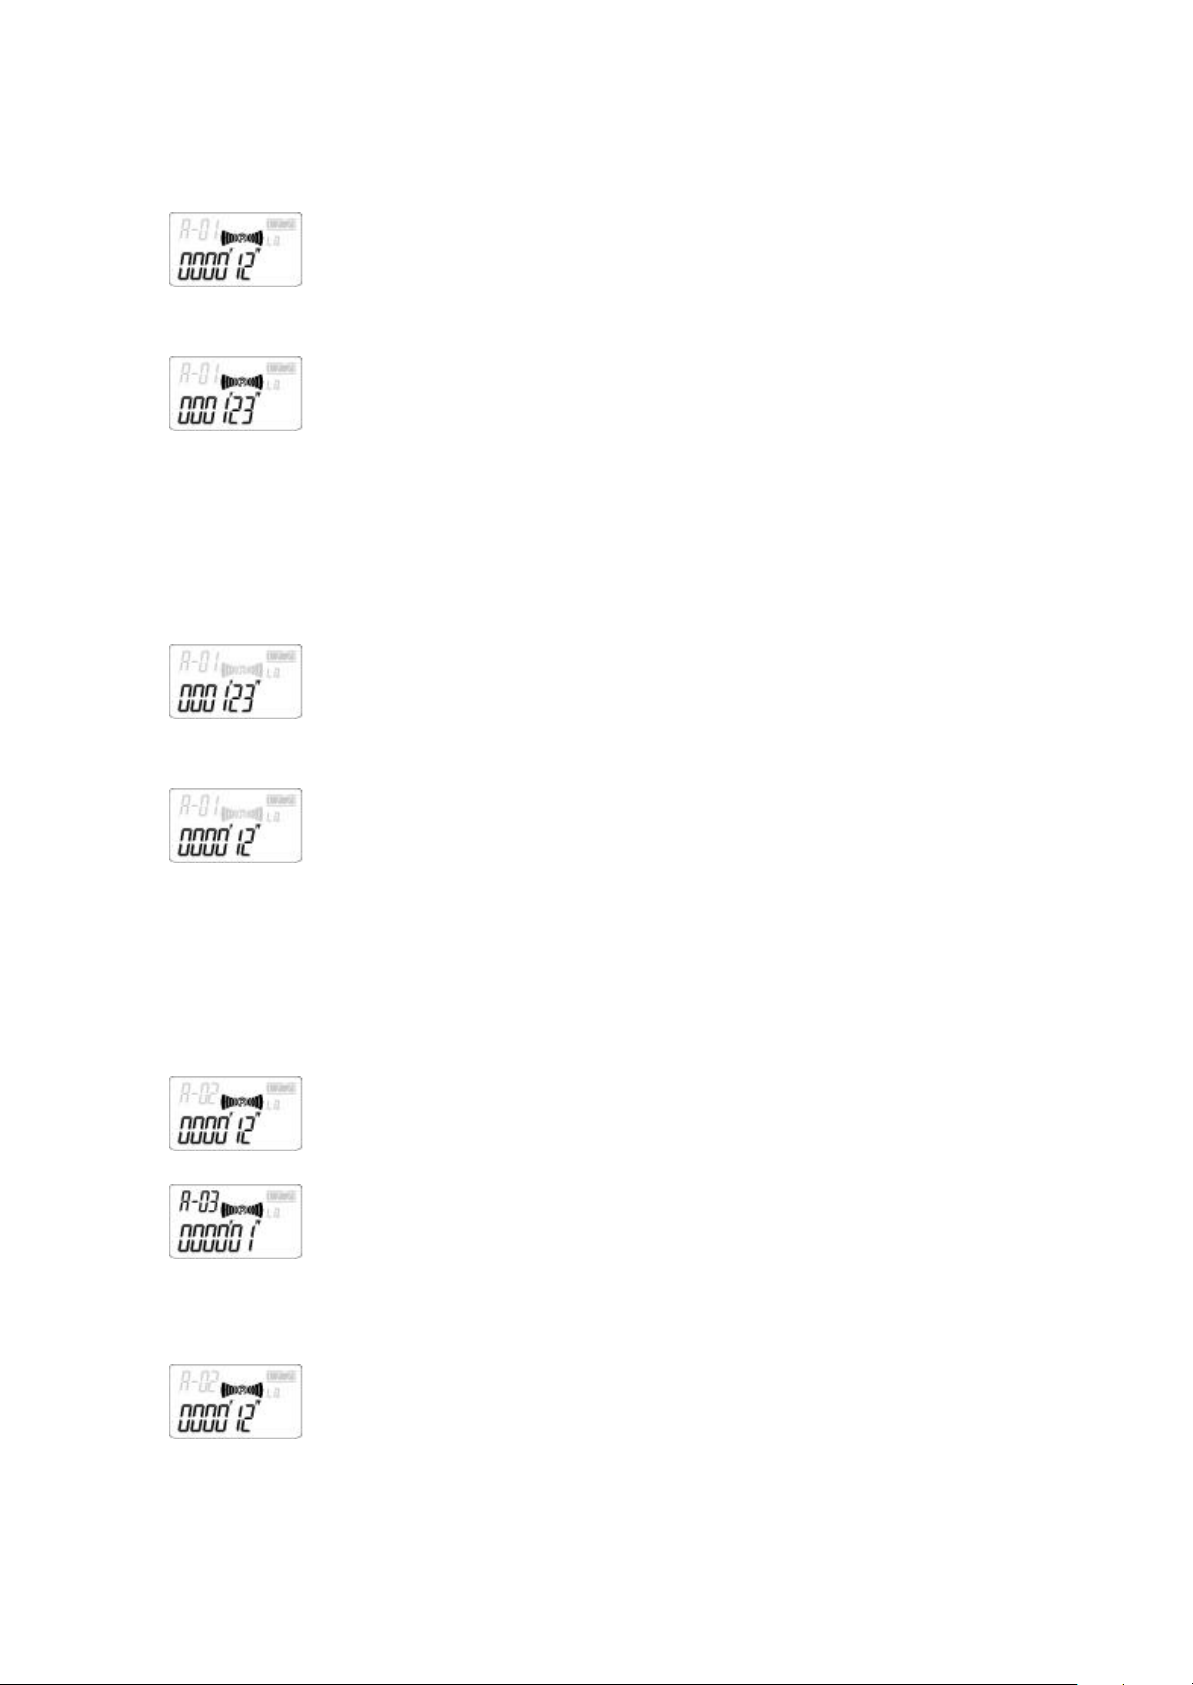
During playback , if you press and hold " FF" button to right position for
more 1 second,
Playing time is increasing and moving to front part of the existing file.
* If you stop holding from "FF" button,
playback will resume from the point you held "FF" button back.
▶ Fast Rewind
Press " REW" button to left position for more 1 second
During playback , if you press and hold " FR" button to left position for
more 1 second
Playing time is decreasing and moving to rear part of the existing file.
* If you stop holding from "FR" button,
playback will resume from the point you held "FR" button back.
▣ Playback of Next File
During playback, you can listen to next file by pressing "FF" key to right position.
If you press "FF" key to right during playback,
File number changes to next file number and next file will playback.
▣ Playback of previous File
During playback, you can listen to previous file by pressing "FR" key to left position
If you press "FR" key to left during playback
Page 12
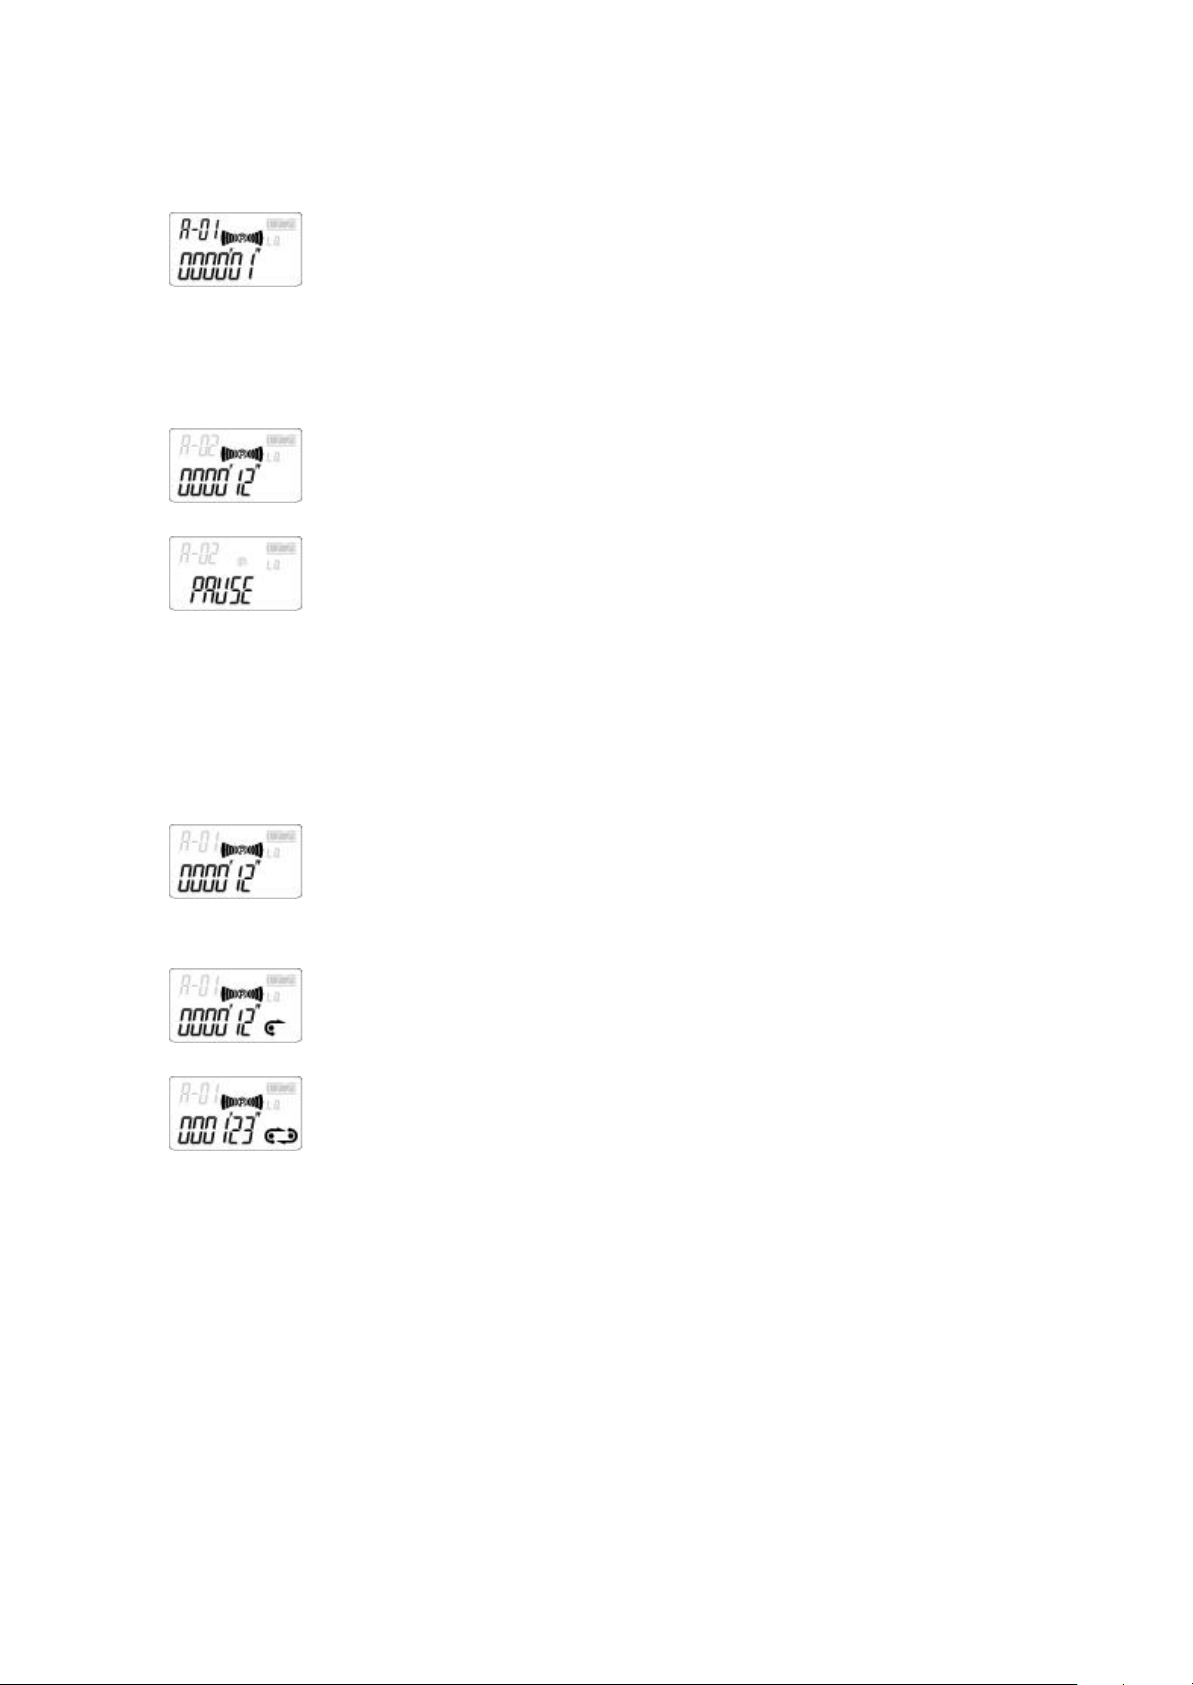
File number changes to ex-file number and previous file will playback
▣ Pause during Playback
To pause unit, press " MENU/PAUSE" button for more 1 second.
If you press " MENU/PAUSE" button for more 1 second,
"PAUSE" appears on LCD and the unit pauses.
To resume playback, press "MENU/PAUSE" button once again for more 1 second
▣ Repeat Function of Voice Recorder
During playback , press "FOLDER/REPEAT" key once where you want to start repeat
function
During playback, if you press " FOLDER/REPEAT" key at the point you
want to start repeat function.
Symbol " " appears on LCD and will continue playback
Press " FOLDER/REPEAT" key where the point you want to stop repeat
function." Symbol " " appears on LCD and playback repeatedly.
*Above figure on LCD indicates that during playback,
repeat function starts 12 sec' from playback of number 1 file
in A folder and ends 1 min' 23 sec' from playback .
▶ To release repeat function, press "FOLDER/REPEAT" key one more time.
( If you press "PLAY/STOP" key, unit stops playback function.)
Page 13
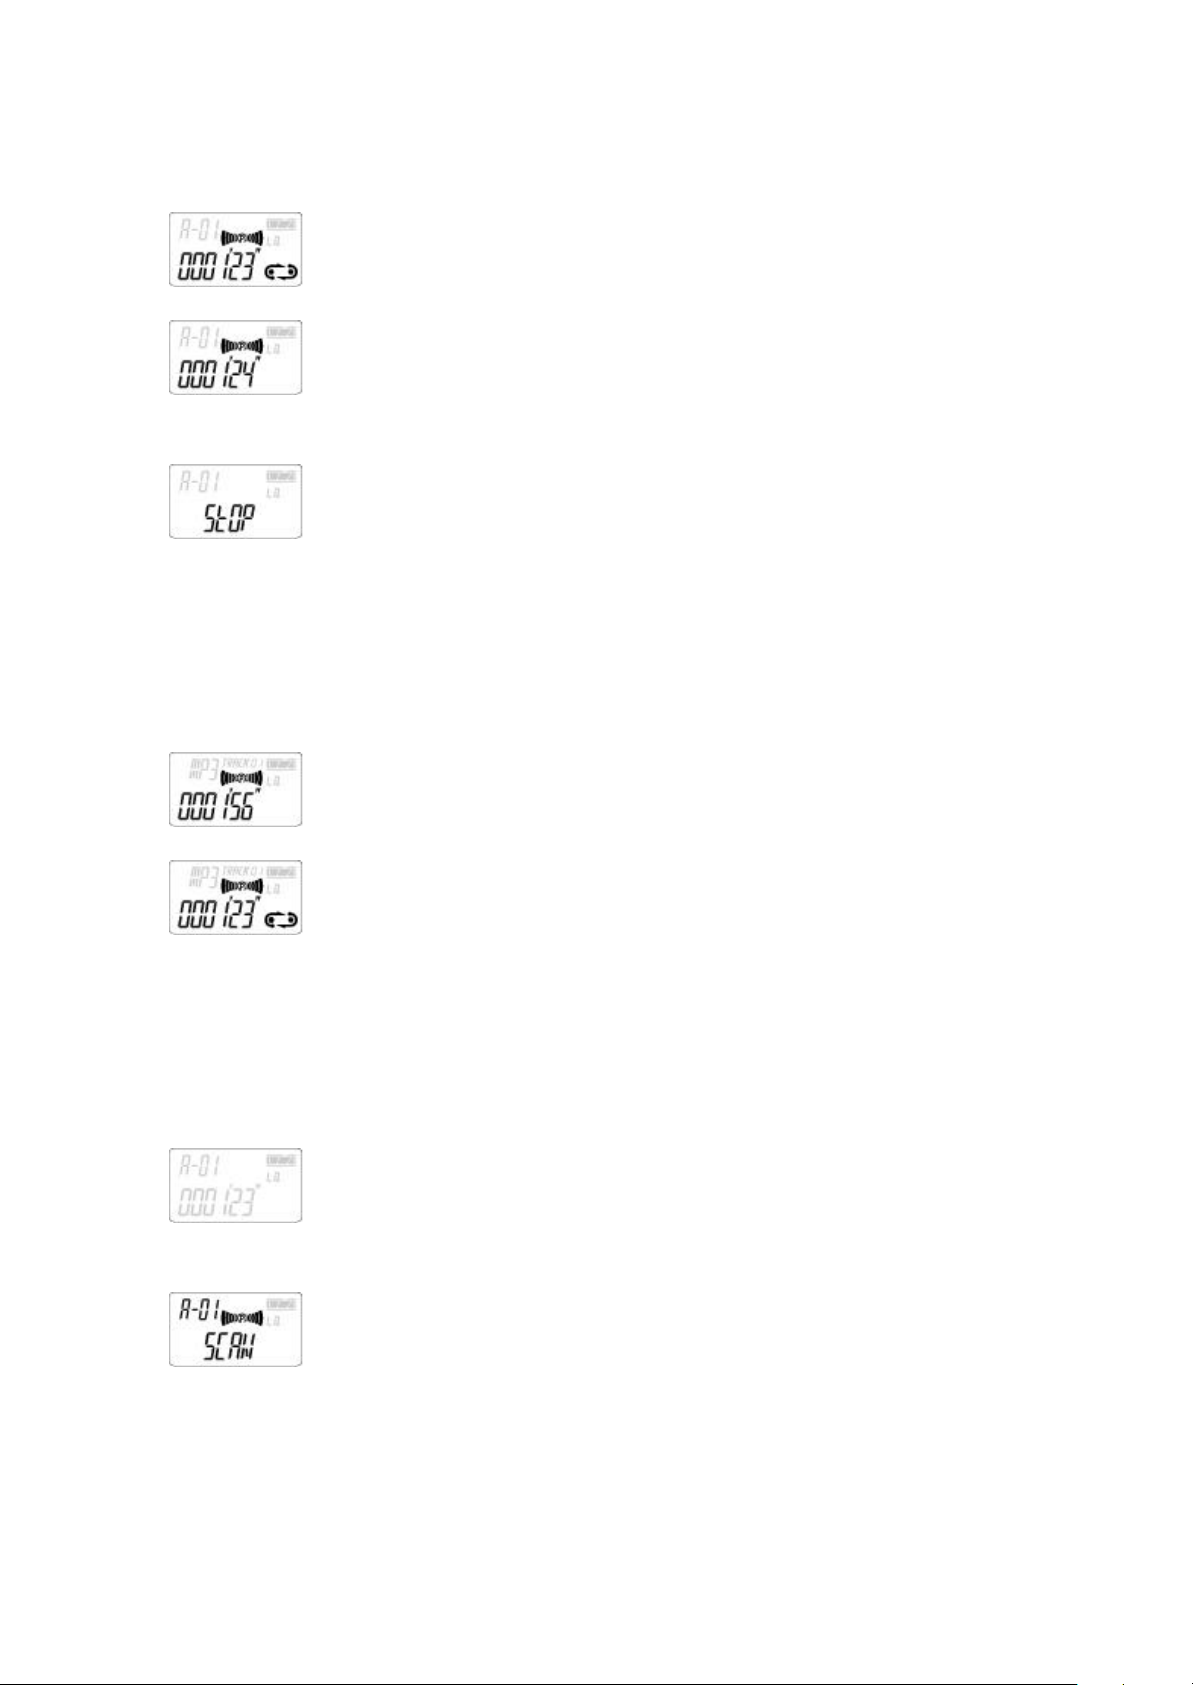
During repeat- playback
If you press " FOLDER/REPEAT" key , repeat- playback stops and resume
playback
If you press "PLAY/STOP" key , unit stops.
▣ Repeat Function of MP3 player
▶ MP3 player is programmed with all songs repeat playback.
▶ If "FOLDER/REPEAT" key is pressed, only a selected tune(song) playback
repeatedly.
During playback of MP3 player, if you press " FOLDER/REPEAT" key,
Symbol " " appears on LCD and only a selected tune(song) playback
repeatedly.
▣ Scan Playback
At a position of stop ,and if you press " PLAY/STOP" key for more 1 second,
unit will playback all files for first 5 sec' in existing folder.
At a position of stop ,and if you press " PLAY/STOP" key for more than 1
second,
unit will playback all files for first 5 sec' in existing folder
▶ During scan- playback, if you want to playback existing file,
press " FOLDER/REPEAT" key once
Page 14
During scan- playback, if you want to playback existing file,
Press " FOLDER/REPEAT" key.
▶ To stop scan- playback, press " PLAY/STOP" key.
To stop scan- playback,
Press " PLAY/STOP" key
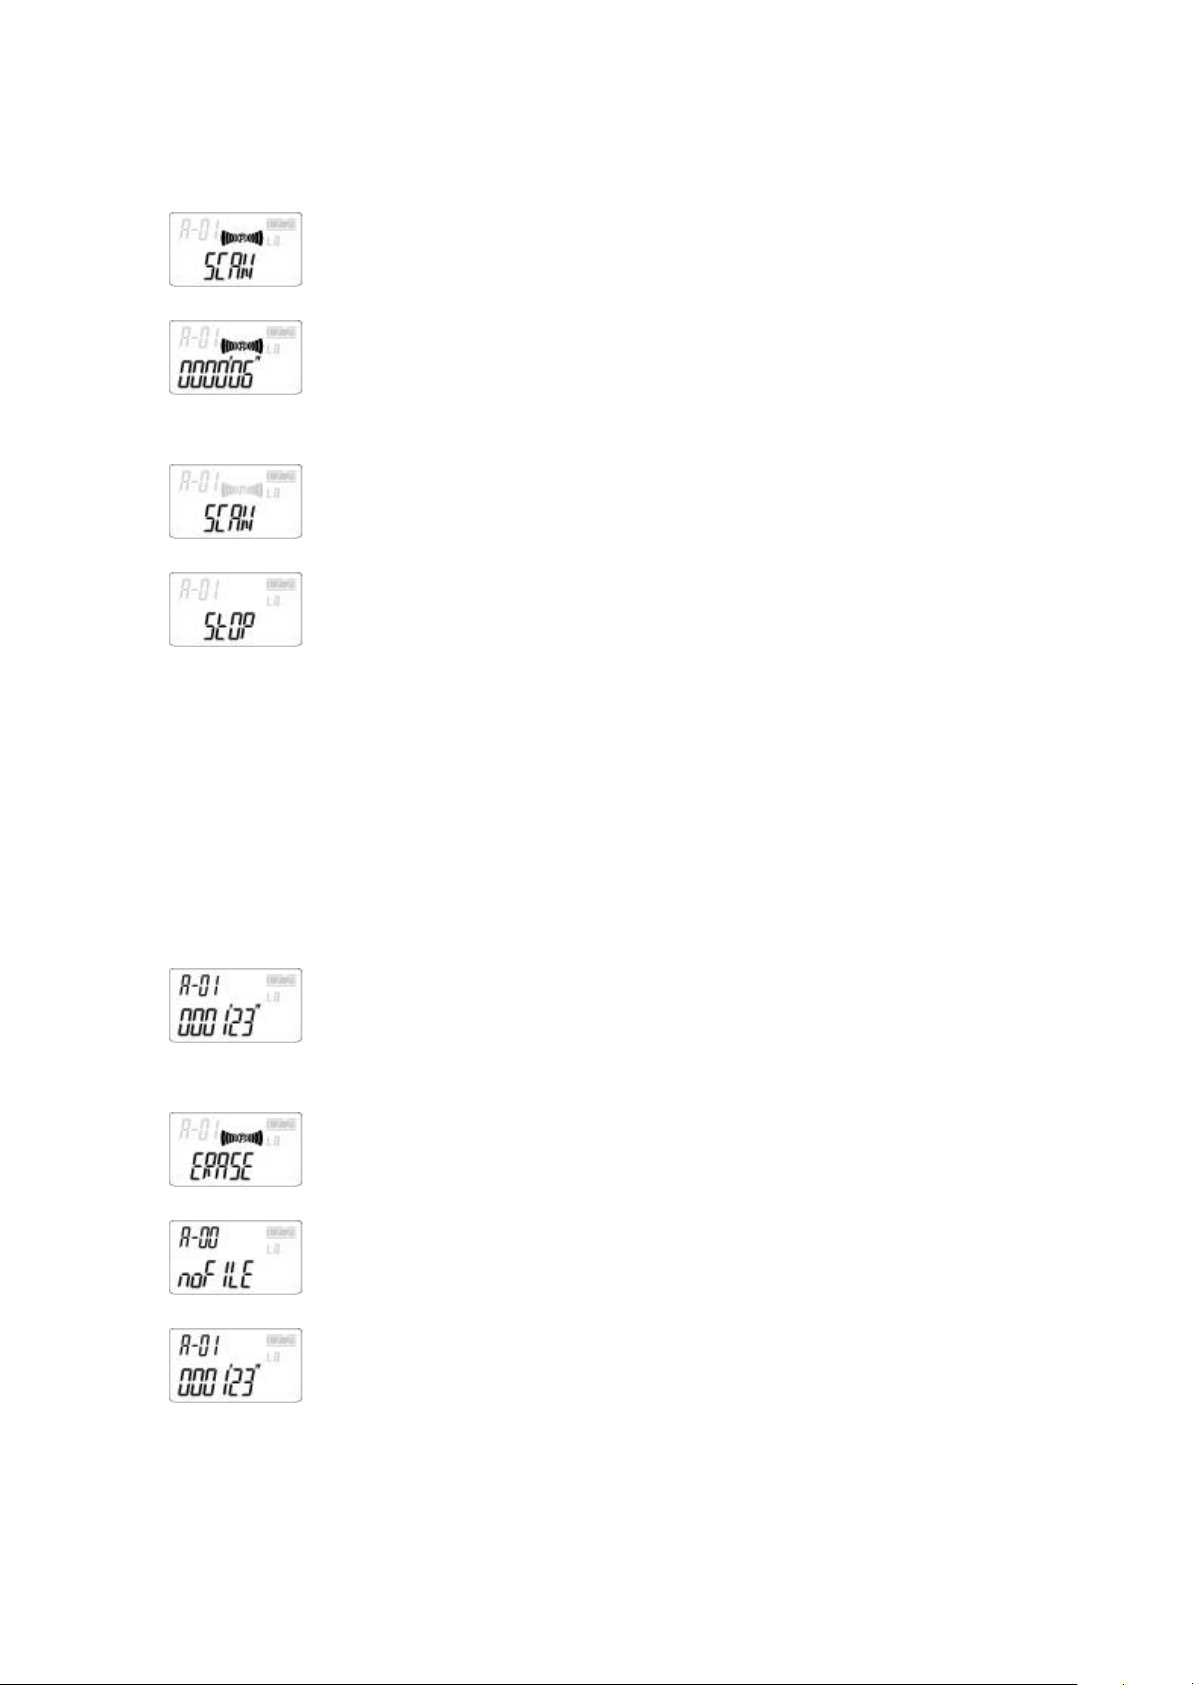
Erase
▣ Erasing a file
▶ Select a file you want to erase and press " ERASE" button for more than one
second.
Selected message will playback for first 5 seconds and "ERASE" flashs on LCD..
▶ By pressing " ERASE" button again, selected file will erase completely.
▶ If you want to cancel erase of file, press any buttons except " ERASE" button.
At a stop mode(position), select file you want to erase by using "FF/FR "
key.
Press " ERASE" key for more 1 second and "ERASE" will appear on LCD
If you want to erase a file, press " ERASE" key.
If you do not want to erase a file, pres s any buttons except " ERASE"
button.
▶ After a file is erased, file's number will change.
Page 15
Ex) If there are 9 files and will erase 5th file.
File No 1 to 4 are same as before ,but file No 6 to 9 shall be changed to file No 5 to 8.
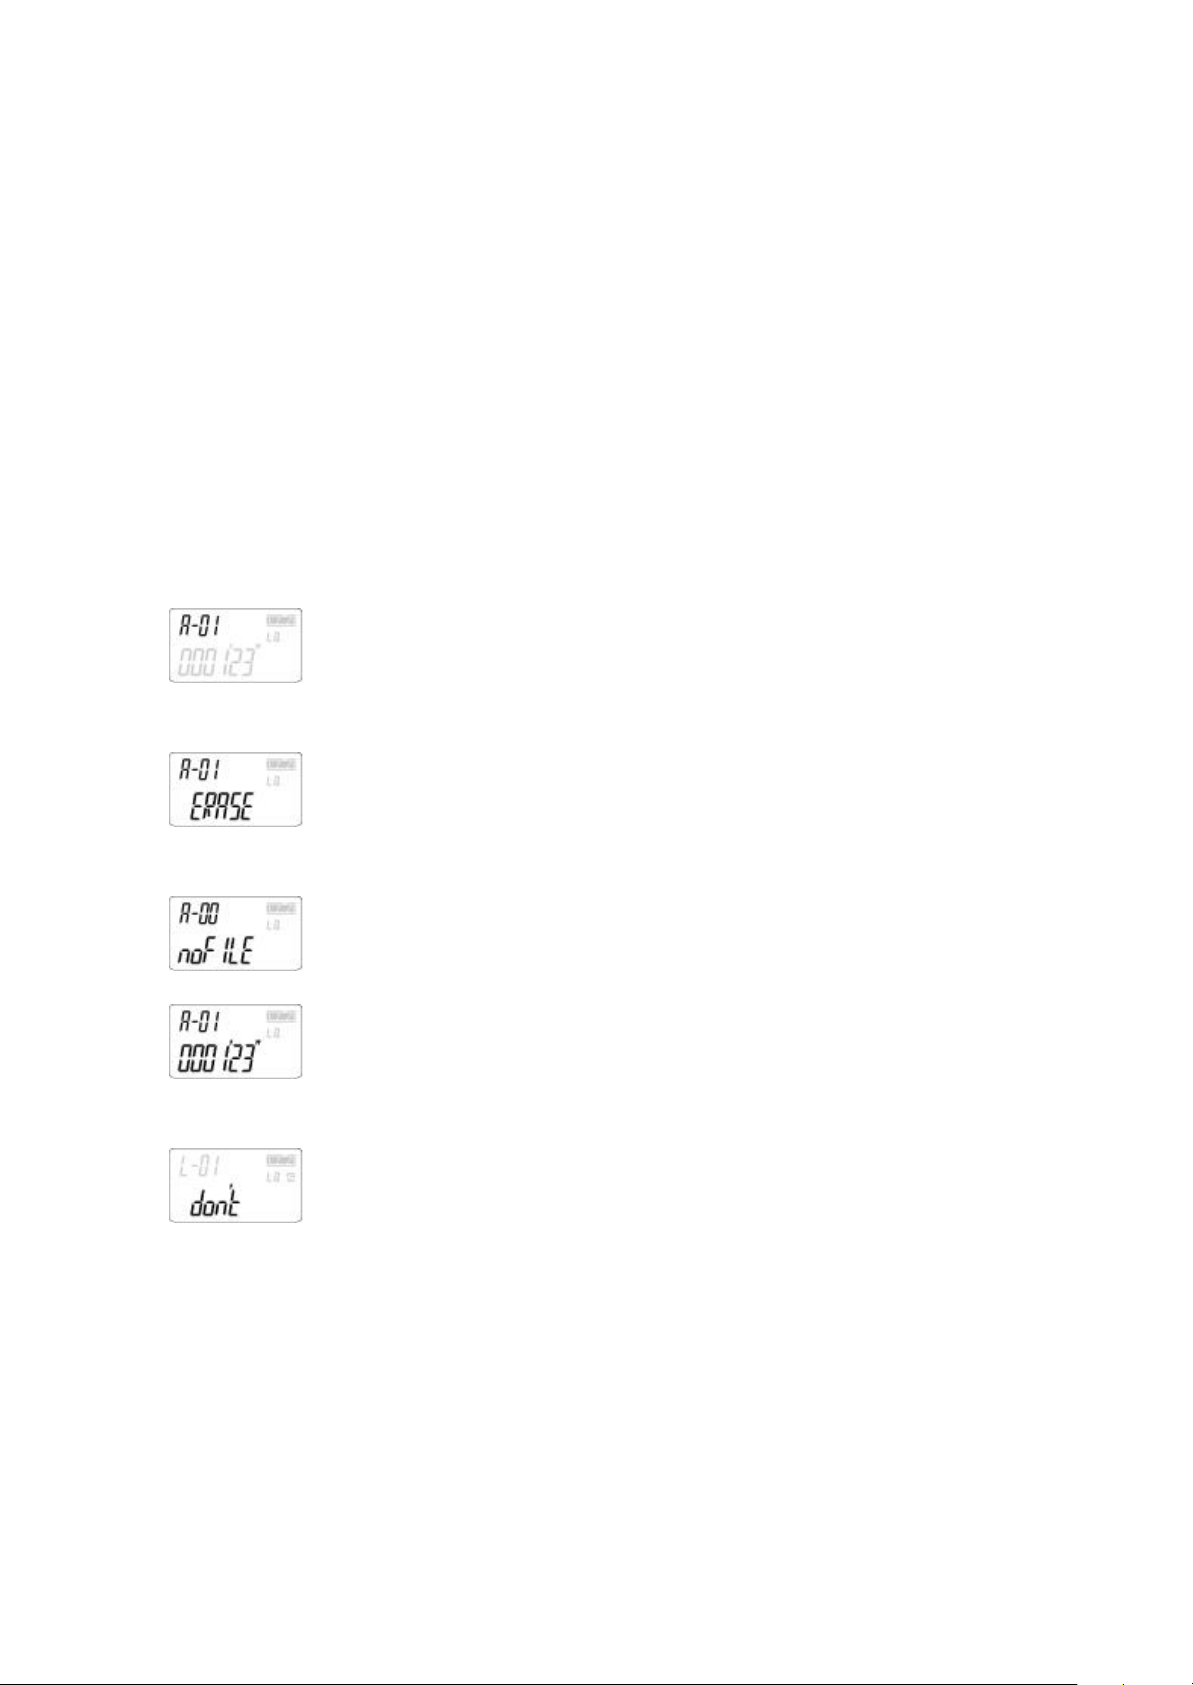
▣ Erase all file in a folder
▶ At a stop mode(position), select folder you want to erase by using
"FOLDER/REPEAT" key.
▶ Press " ERASE" button and " REC/STOP" simultaneously and "ERASE" and selected
folder
And folder will flash on LCD.
▶ By pressing " ERASE" button, all files in a selected folder will erase comple tely.
▶ To stop erasing selected folder, press any buttons except " ERASE" button.
At a stop mode(position), select folder you want to erase by using
"FOLDER/REPEAT" key.
Press " ERASE" button and " REC/STOP" simultaneously and "ERASE" and
selected folder will flash on LCD.
If you want to erase a selected folder, press " ERASE" button
To stop erasing selected folder, press any buttons except " ERASE"
button.
If you try to erase any files in L folder ,"don't” appears in LCD and It's
impossible to erase any files in L folder.
?? It's impossible to erase any files in L folder
▣ Erase a MP3 file
▶ Select a MP3 file you want to erase and press "ERASE" button for 1 second.
▶ Selected MP3 file will playback for first 5 seconds and "ERASE" will flash on LCD
Page 16
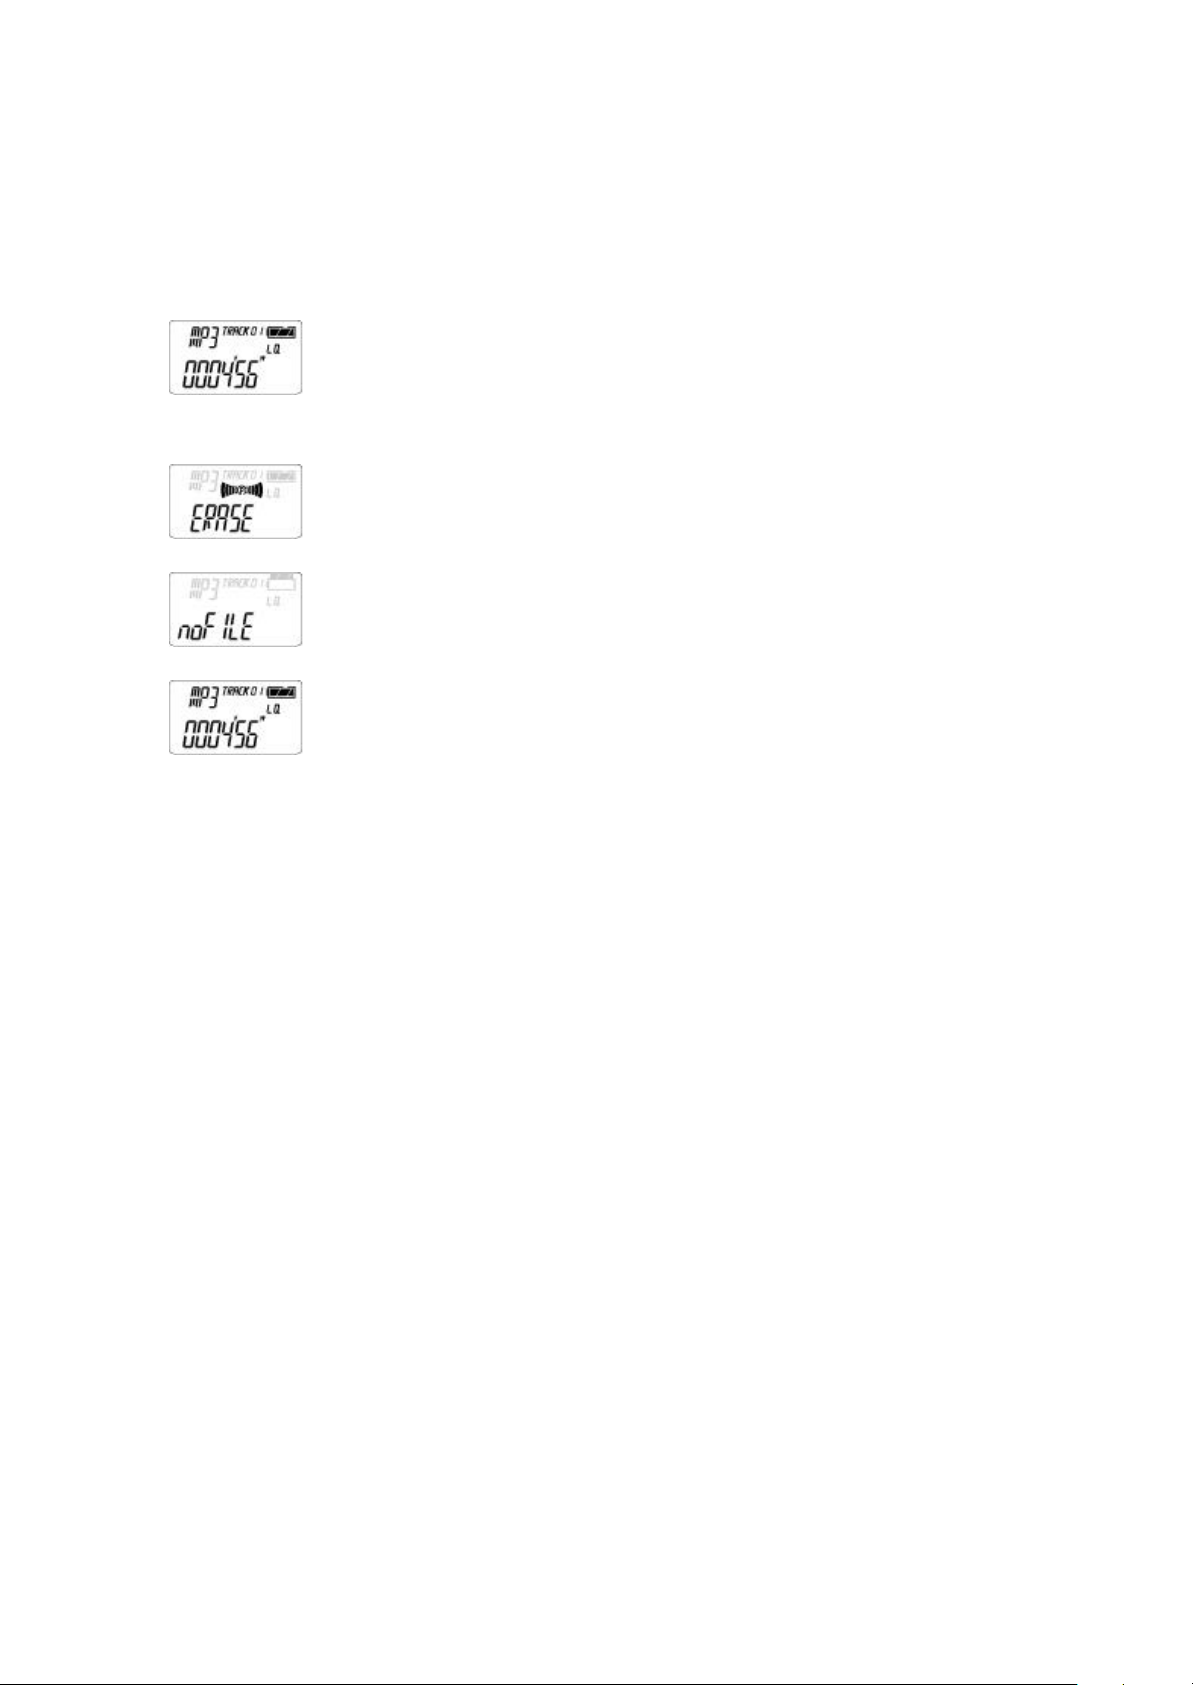
▶ To erase selected MP3 file, press "ERASE" button again.
▶ If you do not want to erase selected MP3 file, press any button except "ERASE"
button.
At a stop mode(position), select a file you want to erase by pressing "FF
FR" button
Press "ERASE" button for 1 second until "ERASE" appears on LCD.
If you want to erase a selected file, press "ERASE" button.
If you do not want to erase selected MP3 file, press any button except
"ERASE" button.
▶After a file is erased, file's number will be changed.
ex) If there are 9 files and will erase 5th file.
File No 1 to 4 are same as before ,but file No 6 to 9 shall be changed to file No 5 to 8
ADDITIONAL FUNCTIONS OPERATION
Setting Additional Functio ns
▣ Setting Alarm
▶ Press "MENU/PAUSE" button once and "SET ALARM " appears on LCD.
▶ Press " PLAY/STOP" button
▶ Press "FF" or "REW" button to set time you want to start alarm function
(Max' 255 minutes can be set ).
To stop alarm function, select OFF.
▶ To confirm, press " PLAY/STOP" button.
▶ Symbol of alarm appears on LCD and alarm function is memorized.
(Do not set alarm function and timer recording at the same time.
In this case, timer recording has priority over alarm function.)
Page 17
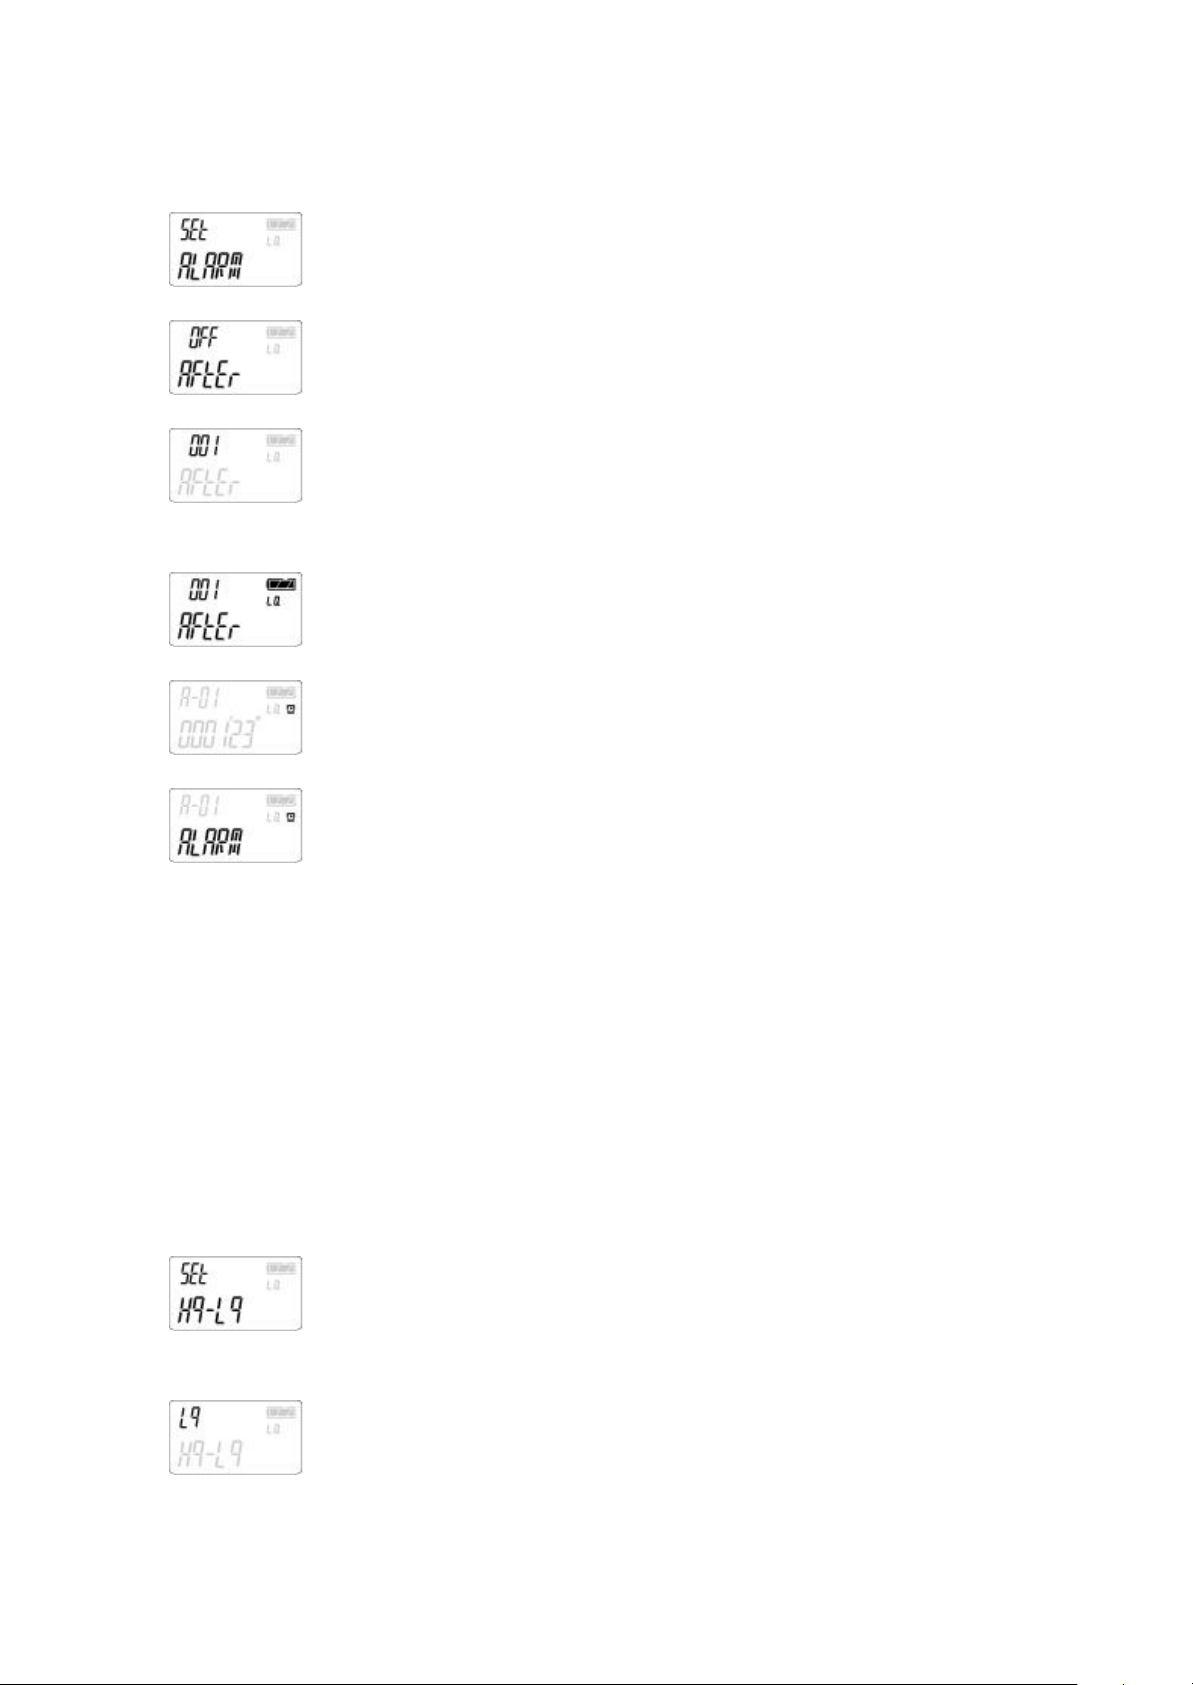
Press "MENU/PAUSE" button once and "SET ALARM " appears on LCD.
Press " PLAY/STOP" button
Press "FF"or"REW" button to set time you want to start alarm
function( Max' 255 minutes can be set ).
Press " PLAY/STOP" button. To stop alarm function, select OFF
Symbol of alarm appears on LCD and alarm function is memorized.
To stop alarming function in set time , press any buttons
▣ Setting Recording Mode
▶ Press " MENU/PAUSE" button twice and " SEt Hq-Lq " appears on LCD.
▶ press "PLAY/STOP" button.
▶ Select recording mode by pressing "FF" or "REW" button
(HQ mode : good quality sound but recording time is shorter than LQ mode
(LQ: recording time is 4 times longer than HQ mode )
▶ Press " PLAY/STOP" button again.
▶ Selected recording mode ( HQ or LQ ) is displayed on LCD
and recording mode is memorized.
Press "MENU/PAUSE" button twice to display "Hq-Lq" is displayed on
LCD.
Press "PLAT/STOP" button.
Page 18
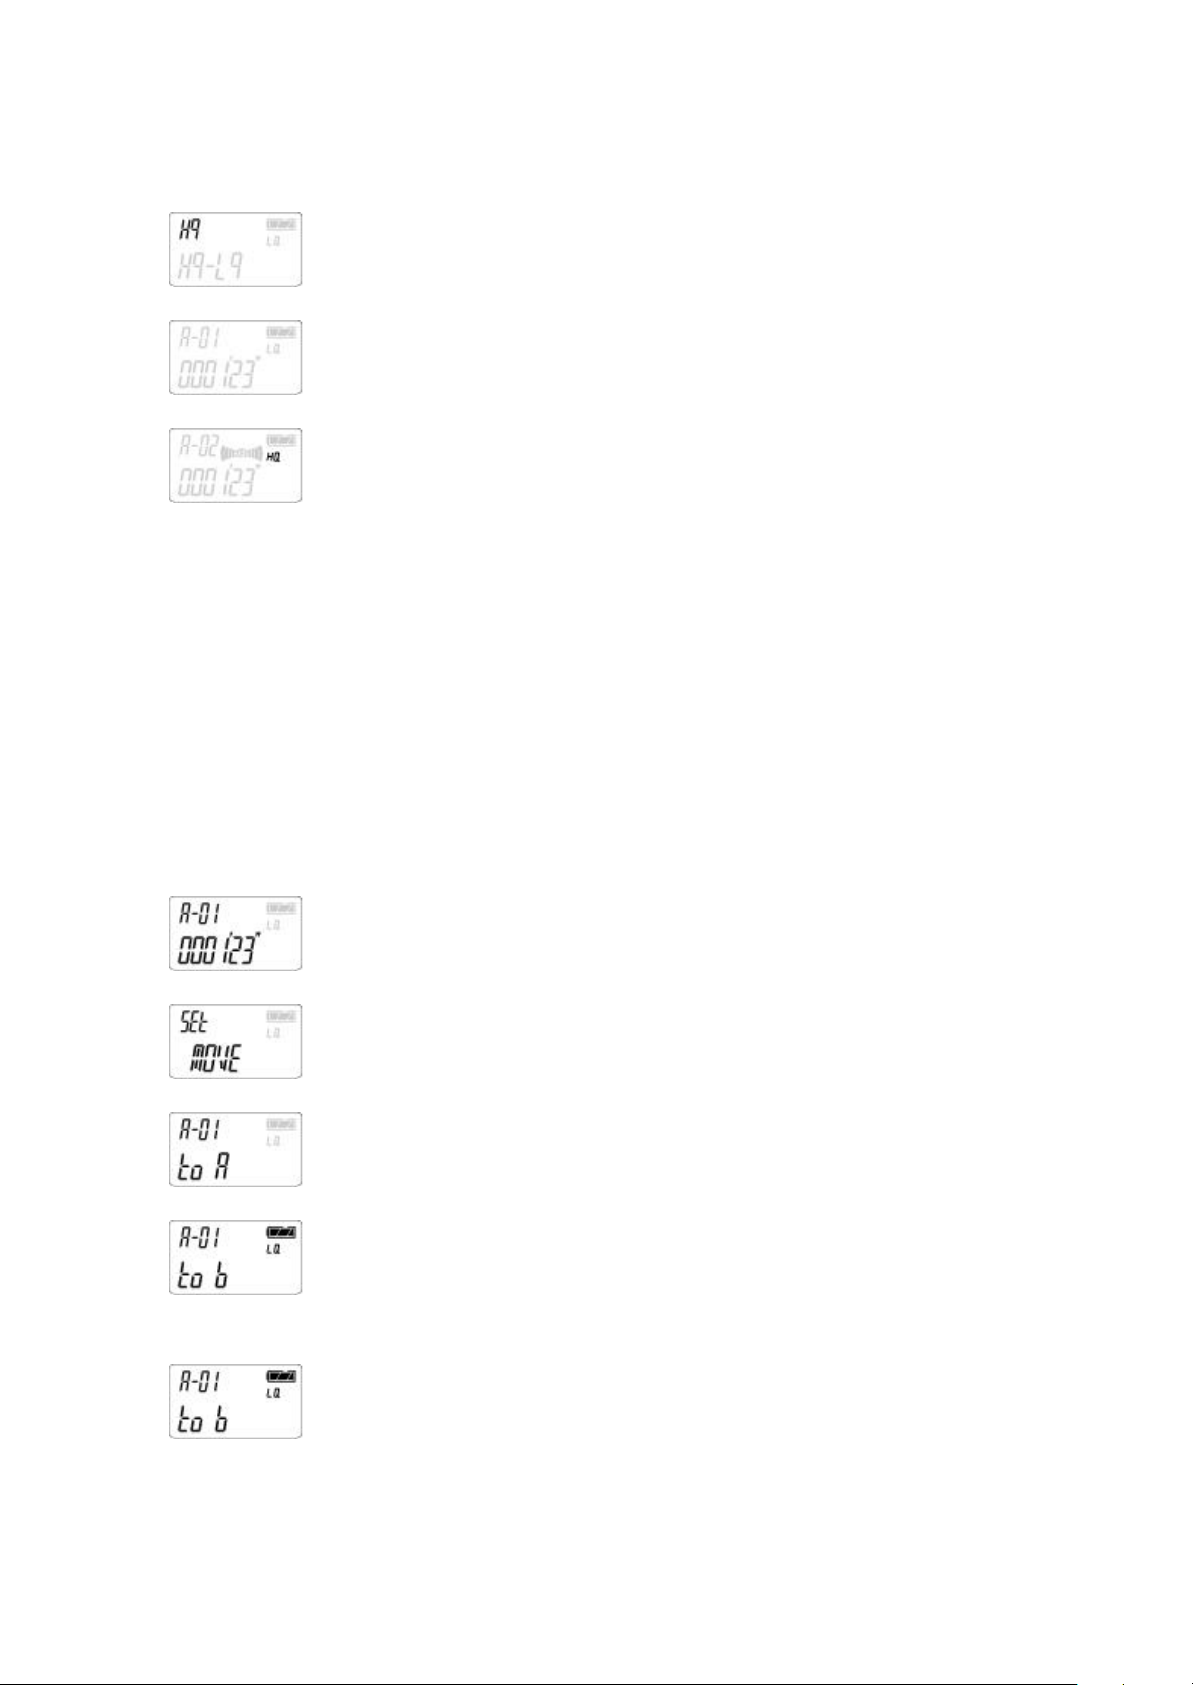
Designate recording mode(HQ orLQ) by using "FF" or "LQ" keys.
Select recording mode by pressing "PLAY/STOP" button
Press "PLAT/STOP" button.Selected recording mode ( HQ or LQ ) is
displayed on LCD and recording mode is memorized. When recording, the unit record by
selected recording mode.
▣ moving a file to a Different folder
▶ By pressing "FF" or "REW" key, select a file you want to move.
▶ Press " MENU/PAUSE" button 3 times and "SET MODE" appears on LCD.
▶ Press " PLAY/STOP" button.
▶ Designate desired folder for a selected file by pressing " FF" or "REW" key.
▶ Press "PLAY/STOP" button one more time.
▶ Selected a file has transferred to a new folder.
By pressing "FF" or "REW" key, to select a file you want to move.
Press "MENU/PAUSE" button 3 times and"SET MODE"appears on LCD
Press " PLAY/STOP" button.
Designate a desired folder for a selected file by pressing " FF" or "REW"
key.
Press " PLAY/STOP" button.
Page 19
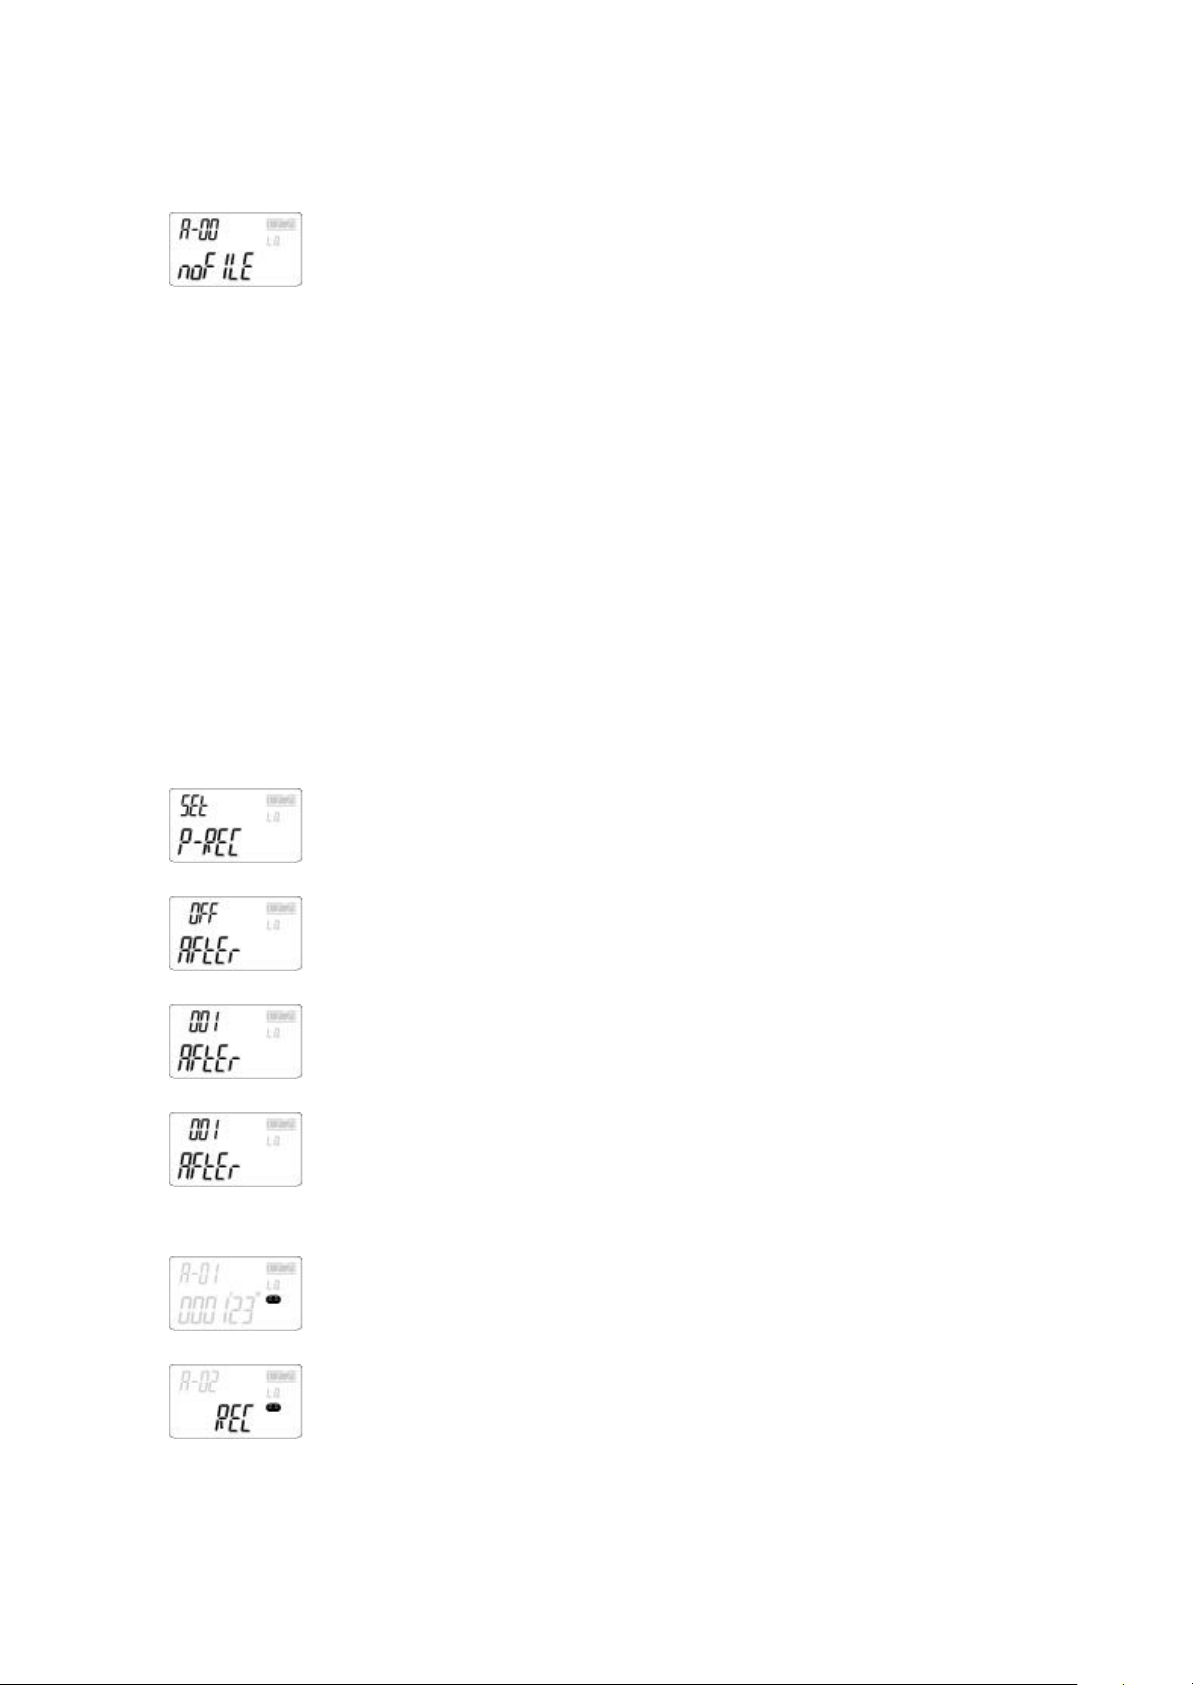
Selected a file has transferred to a new folder.
*For example, assuming that there is a file in a folder and file is transferred to a
different a folder.
After transferred a file, "no FILE" is displayed on LCD.
▣ Timer Recording
▶ Press " MENU/PAUSE" button 4 times and " SET P-REC" appears on LCD.
▶ Press "PLAY/STOP" button.
▶ Press "FF" or "REW" button to set time you want to start timer recording
(Max' 255 minutes can be set).
To stop timer recording, choose OFF mode.
▶ Press " PLAY/STOP" button one more time.
▶ Icon of timer recording appears on LCD and timer recording is memorized.
Do not set timer recording and alarm function at the same time.
Press " MENU/PAUSE" button 5 times and " SET P-REC" appears on LCD
OFF mode.
Press " PLAY/STOP" button.
Press "FF" or "REW" button to set time you wantto start timer recording.
Press " PLAY/STOP" button on more time.To stop timer recording, choose
Icon of timer recording on LCD and alarm function is memoriz ed.
Timer recording will be operated in set time.
Page 20
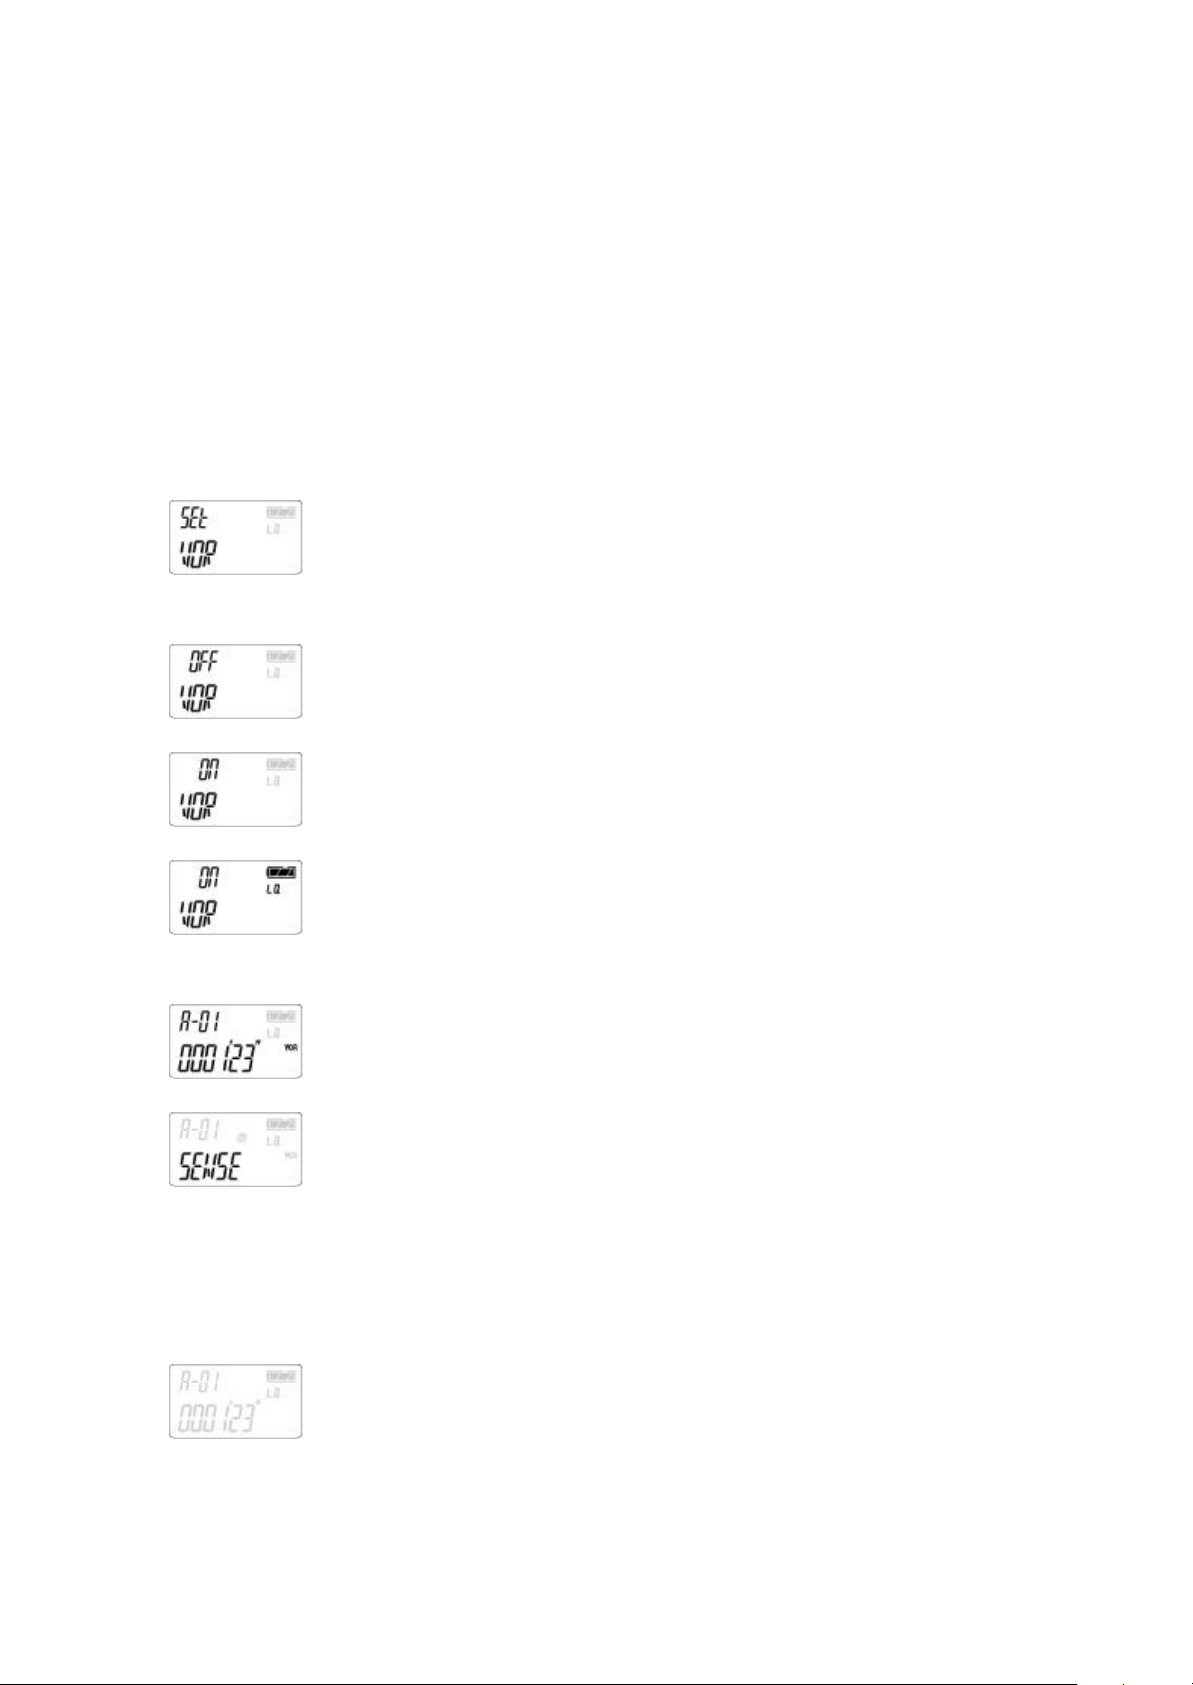
▣ Setting VOR
▶ Press " MENU/PAUSE" button 5 times and " SET VOR" appears on LCD.
▶ Press "PLAY/STOP" button.
▶ Designate ON mode by pressing " FF" or "REW".
When VOR- ON, no sound or level of sound is weak, unit will pause.
To stop setting for VOR fu nction, designate OFF mode.
▶ Press "PLAY/STOP" button one more time.
▶ " VOR " appears on LCD and VOR function is memorized.
At a stop mode(position), Press " MENU/PAUSE" button 5 times and "
SET VOR" appears on LCD.
Press "PLAY/STOP" button
Designate ON or OFF by pressing "FF" or "REW" key.
Press "PLAY/STOP" button one more time.To stop setting for VOR
function, designate OFF mode.
" VOR " appears on LCD and VOR function is memorized.
When VOR- ON, no sound or level of sound is weak, unit will pause.
▣ Selecting Voice recorder and MP3 player
▶ Select voice recorder or MP3 player by pressing "FOLDER/REPEAT" button.
▶ After replacement dry cell(battery), the unit will start MP3 mode
At a stop mode(position), press " FOLDER/REPEAT" button,
Page 21
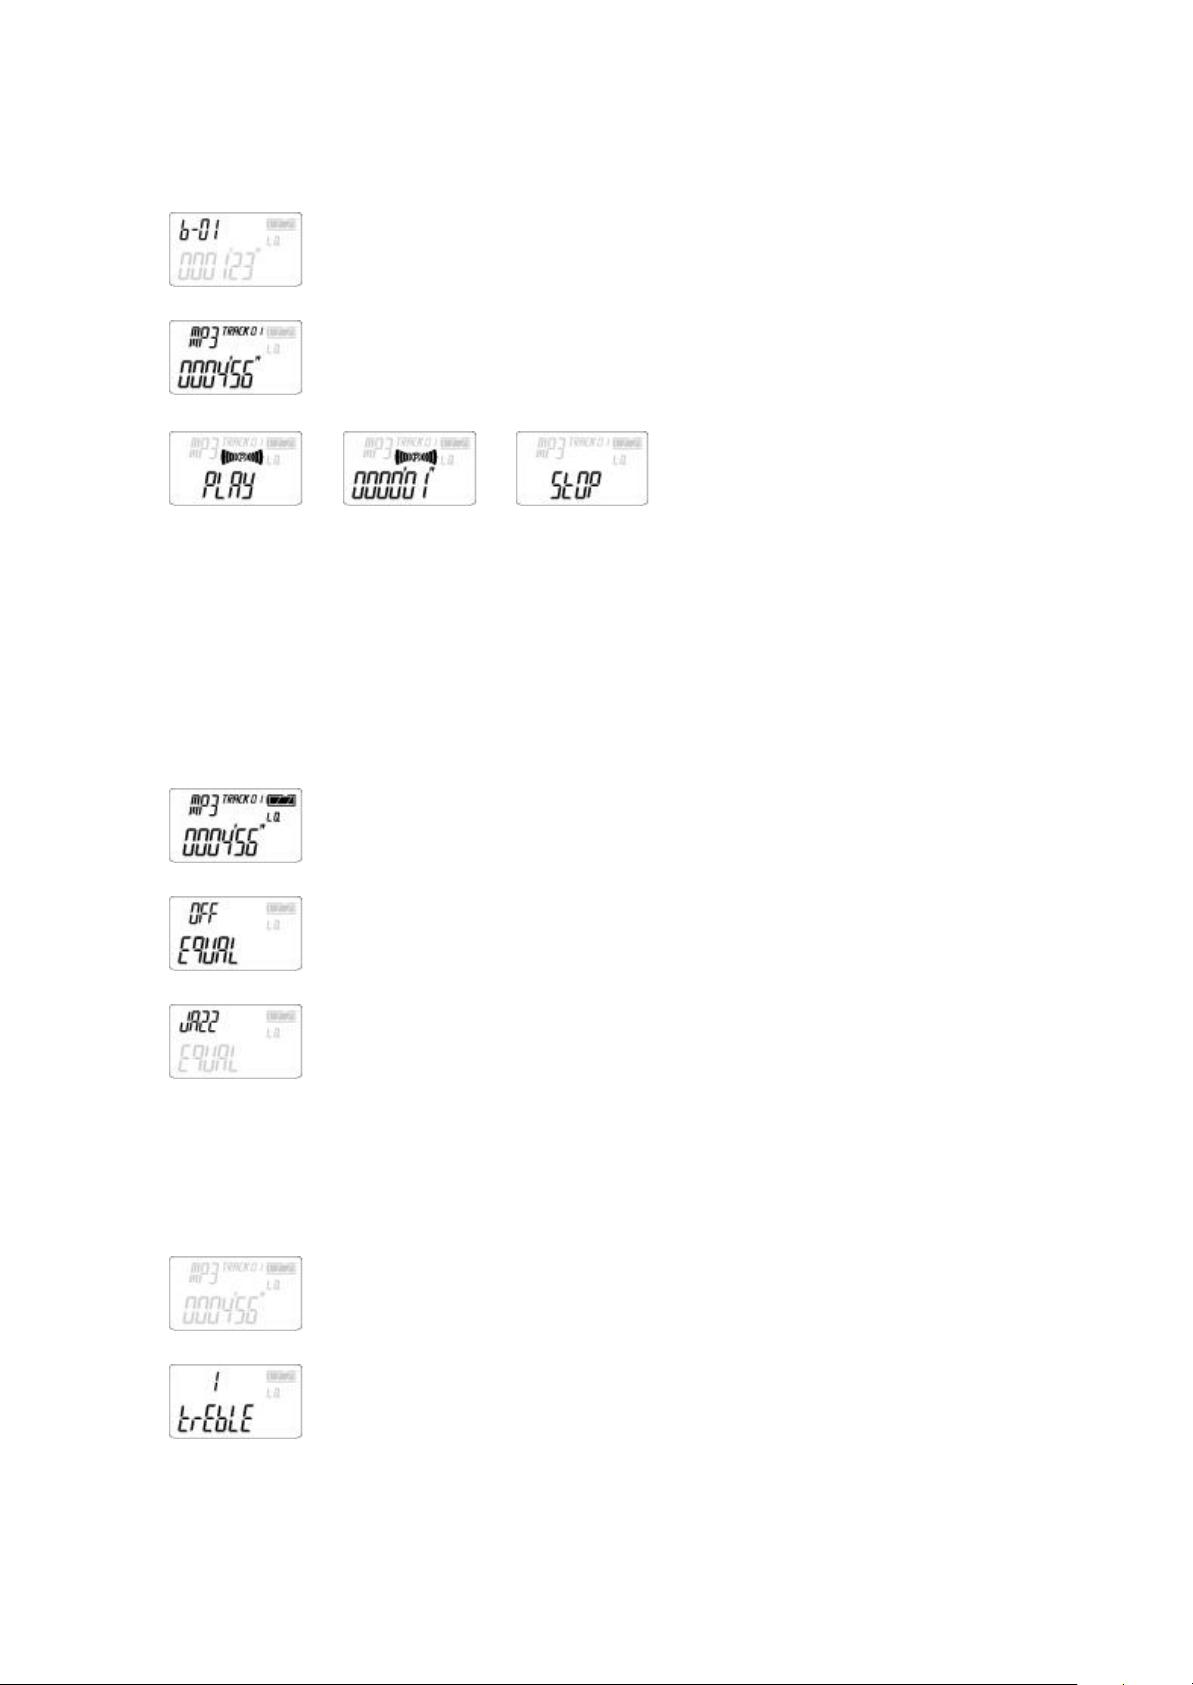
The unit can be moved into each folder(A/B/C/D/L/MP3 folders)
Press " FOLDER/REPEAT" button 5 times and " MP3" appears on LCD.
To playback MP3 music files, press " PLAY/STOP" button.
To stop MP3 music files, press " PLAY/STOP" button one more time.
To pausu, press " MENU/PAUSE" button for more than 1 sec'.
To resume playback, re- press " MENU/PAUSE" button for more than 1 sec'
▶ You can operate equalizer function(Digital Signal Processor) when you enjoy MP3
music.
At a position of MP3 player,
Press " MENU/PAUSE" button once.
Every time "FF/FR" is pressed, each DSP mode is changing to
CLASSIC/POP/ROCK/JAZZ/OFF mode. After des ignate a DSP mode, press "
PLAY.STOP" key and DSP mode is memorized.
▶ At a position of equalizer's OFF mode, level of treble and bass can be adjusted by
user.
At a position of MP3 player mode
To adjust TREBLE, press "MENU/PAUSE" button once and press
"PLAY/STOP" button
Page 22
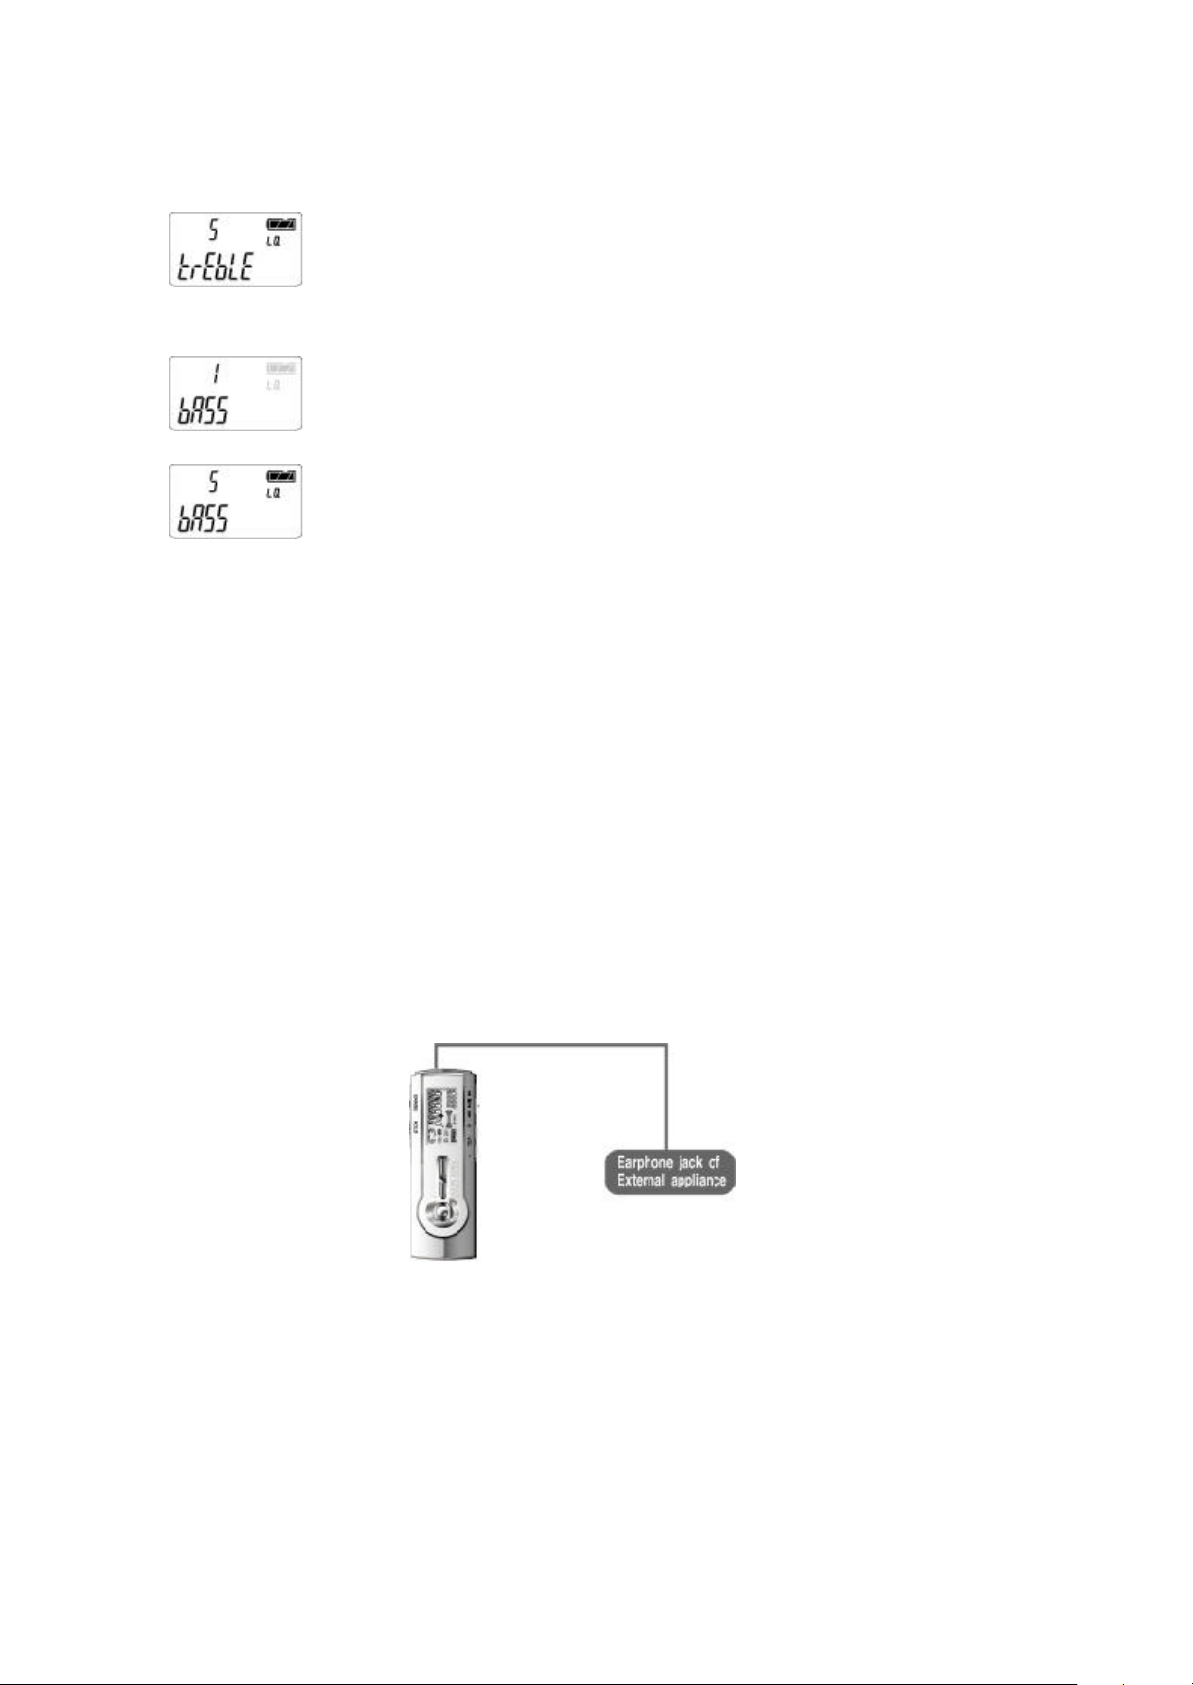
Level of TREBLE can be adjusted by "FF" or "ER" key .After adjusting
level of TREBLE, press " PLAY/STOP" button.
Press " MENU/PAUSE" 3 times and "bASS" appears on LCD.
Level of BASS can be adjusted by "FF" or "ER" key. After adjusting level
of BASS, press " PLAY/STOP" button
connecting the unit to an appliance
By connecting supplied AUDIO CABLE between voice recorder and external
appliance(s),
It's possible to record information from external appliance(s) into voice recorder and
to record them back into those external appliance(s).
▣ Recording message from external appliance to voice recorder
▶Connect supplied audio cable between Mic' input jack of voice recorder
and earphone jack of External appliance and start recording. ▶Connect supplied
audio cable between Mic' input jack of voice recorder
and earphone jack of External appliance and start recording.
▣ Recording message to external appliance
▶Connect supplied audio cable between earphone jack of voice recorder and
microphone jack or External input jack of external appliance and press " REC"
button
of external appliance and "PLAY/STOP" button of voice recorder, at the same time.
Page 23
* To prevent failure of recording, try test first.
* Adjust volume level of external appliance to prevent distorted recording
or poor recording level.
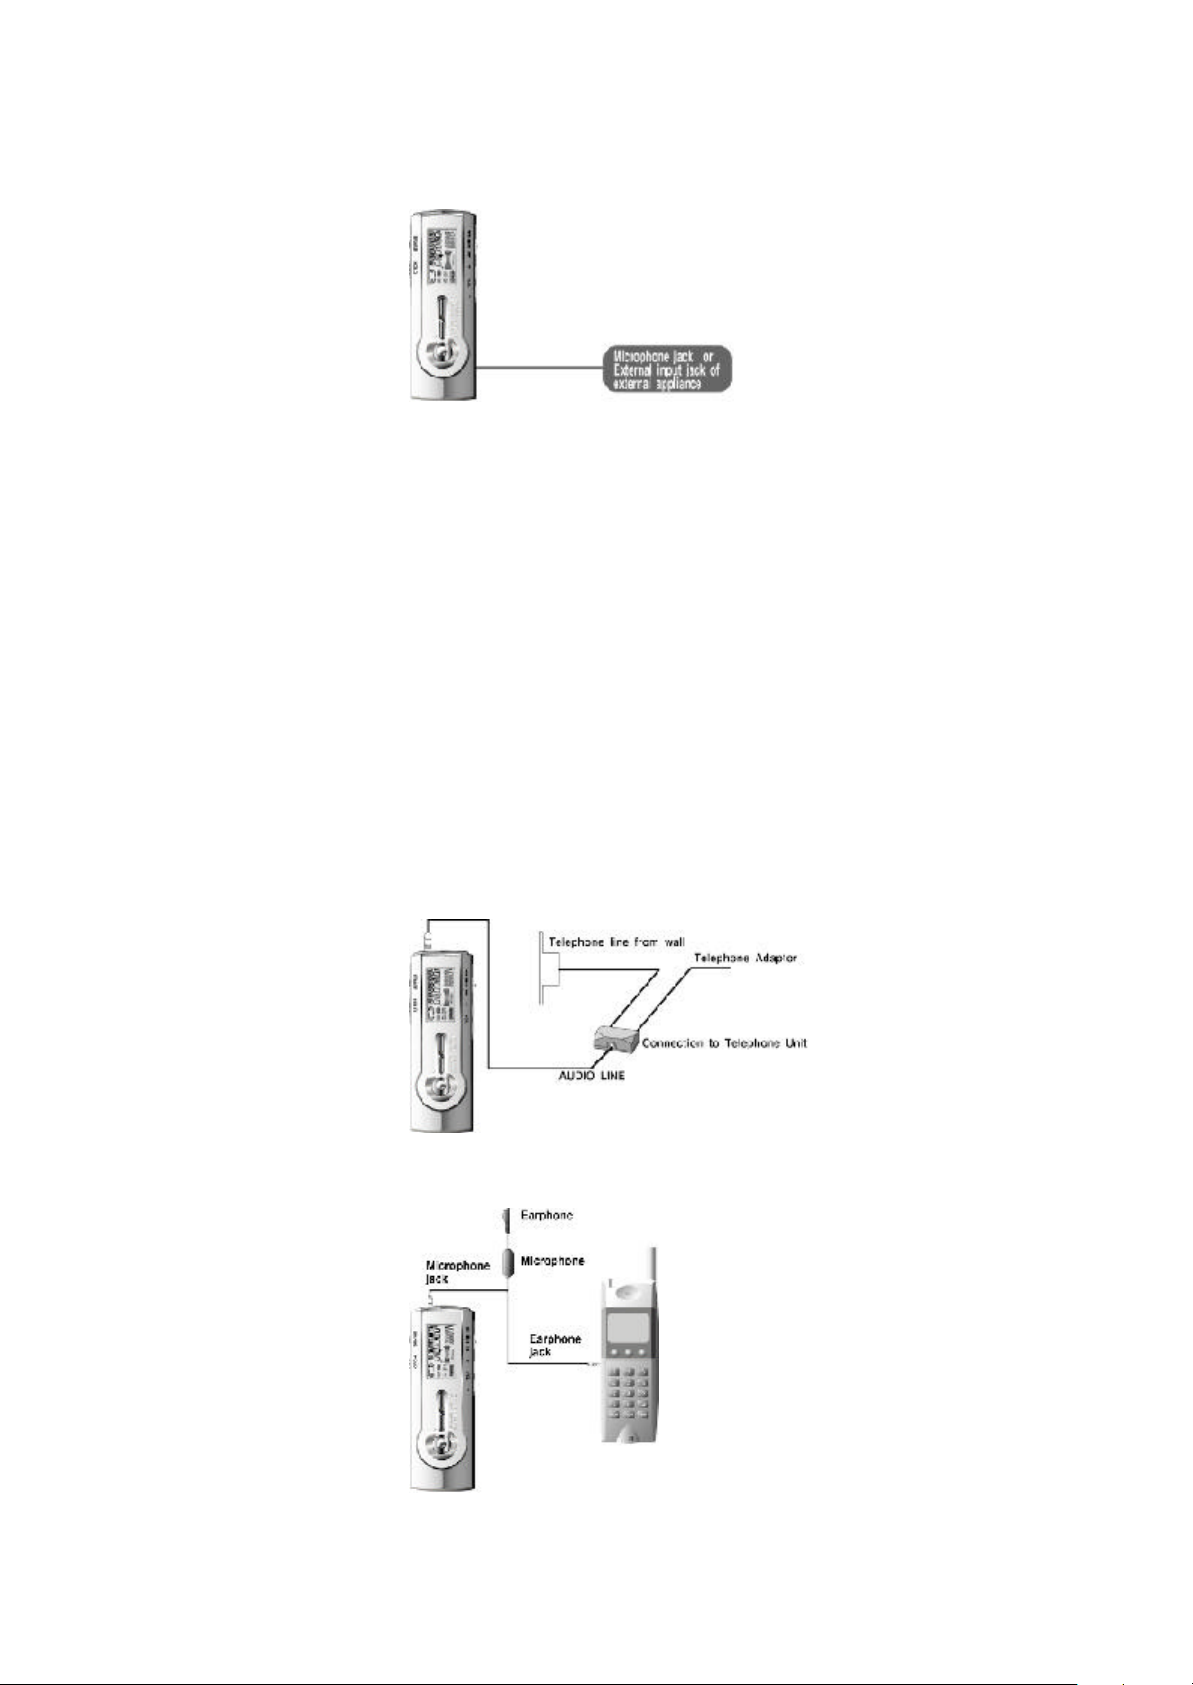
▣ Recording telephone conversation
Can be recorded telephone conversation after connection with supplied telephone
adaptor.
However digital telephone's recording is impossible.
▶ Connect supplied audio cable between Microphone input jack of voice recorder
and audio output jack of telephone adaptor.
▶ Connet supplied telephone cord( 30 Cm ) between telephone unit and telephone
adaptor.
▶ Connec telephone line from wall to telephone adaptor
▶ Press "REC/STOP" button for recording
▣ Recording Mobile- phone Conversation
Connect " cellular ear-mic" ( optional accessory) as figure below.
Page 24

*It's recommended that recording of telephone coversation should be done after
getting contents from the party.
TROUBLESHOOTING & CARE
TROUBLESHOOTING
▣ No display on LCD
▶ Dry battery is exhausted ? Replace with new dry battery
▶ Check the battery's polarity Place dry battery to battery compartment with
correct polarity
▣ Recoring function does not work
▶ Hold switch is on position ? Set the HOLD switch to off position
▶ Check the file number, existing file number is 99
or capacity of applied memory
is fully used (occupied ) ? Erase file(s) or transfer file(s) to other
folder.
▶ Dry battery is exhausted ? Replace with new dry battery
▣ Playback does not work
▶ Hold switch is on position ? Set the HOLD switch to off position
▶ No recorded message in a folder ? Check the recording file number
▶ Dry battery is exhausted ? Replace with new dry battery
▣ No sound from Speaker
▶ Volume level is nearly 0 position ? Adjust volume level
▶ Is earphone connected to earphone jack ? Disconnect earphone to earphone jack
▣ No sound from Earphone
▶ Volume level is nearly 0 position ? Adjust volume level
▶ Is earphone fully connected to earphone jack ? connect earphone to earphone jack fully
Cautions
▶ Do not drop the unit and give it a shock. It could cause troubles.
▶ Do not place the unit at the following condition and/or [laces ;
- . Where it is full or high temperature about 60 degrees (60 ℃)
Page 25

- . Near the heater, direct sunlight or from any type of heat sources.
- . In a car with windows closed, especially in summer.
- . At a heavy dump place like a bathroom.
- . At a dusty places
▶ Any excess force on LCD could cause damages to it and to overall LCD function.
▶ A magnetic card such as credit card or subway(MTR) communication ticket
May not be working any longer once it' placed on or close to the speaker.
▶ The seller holds no liability for any damages caused by misuse of the unit,
and any claims from the third party.
▶ Data from stored in the unit may erase resulting from unexpected cases.
▶ When connect the unit with computer, be careful to get electric shock.
▶ Pri nted letters on the unit may wear away resulting from pressure and frequent touchs.
▶ Wearing the unit on arm with supplied band( optional accessory)
may cause trouble for blood circulation.
▶ Wearing the unit with supplied neck lace may cause trouble by catching
on door or elevator.
* The seller holds no liability for any lost messages which are caused by repair
or any other troubles.
▣ Caution on Using Dry Battery
▶ Do not heat, disassemble or place it into fire.
▶ alkaline solvent may harm skin, eyes and cause a fever.
When above case, wash your skin or eyes with clean water and see a doctor immediately.
▶ Do not use different type of battery together
▶ Remove the battery when unit will not be used for a long time.
▶ Insert dry battery by matching the + and - on the battery to the diagram inside
the battery compartment.
inserting dry battery with wrong polarity may cause trouble to unit.
▣ Precaution for Safety
▶ Do not repair, open or remodel the unit.
▶ Remove dry battery when there is smoke in the unit.
▶ Do not use where electronic device's operation is prohibited ,especially in airplane.
▶ Do not remove screws to disassemble the unit and do not touch anything
inside the unit to avoid accidents.
Page 26

▶ Remove dry battery when there is smoke in the unit.
▶ Do not use the unit in airplane or restricted area.
▶ Keep away the unit from children for eating or
▶ If water gets inside the unit, remove the dry battery and consult your dealer.
▶ never place heavy objects on this unit.
USING THE RECORDER WITH A PC
How to PC connection
X-SHALL is a program that recorded file of unit can be up-loaded and classified and
etc⋯
After connection between USB jack of computer and USB jack of the unit
▣ Recommend System Requirements
▶OS : MS Windows 98/SE/ME/XP/2000
▶ More than x 4 Speed
▶ MEMORY: More than 64MB
▶ HDD: More than 4MB
▶ SOUND CARD: Compatible with Sound Blaster 16
▣ Key Functions
▶ The function of edit and save the messages of Voice Recorder into PC
▶ The function of edit the name of recorded messages in your PC
▶ The function of manage the sound files as the subject of categories
▶ The function of editing
▶ The function of sending the saved messages in PC by e- mail(Voice Mail)
▶ The playback function of the saved messages in your PC.
▶ The function of Downloading MP3 files.
▶ The function of converting SC4 to WAV and TVF to WAV.
X-SHELL MANAGER INSTALLATION
How to install X-SHELL
▶ Insert installation CD into CD-ROM drive in your PC.
▶ SETUP
Page 27
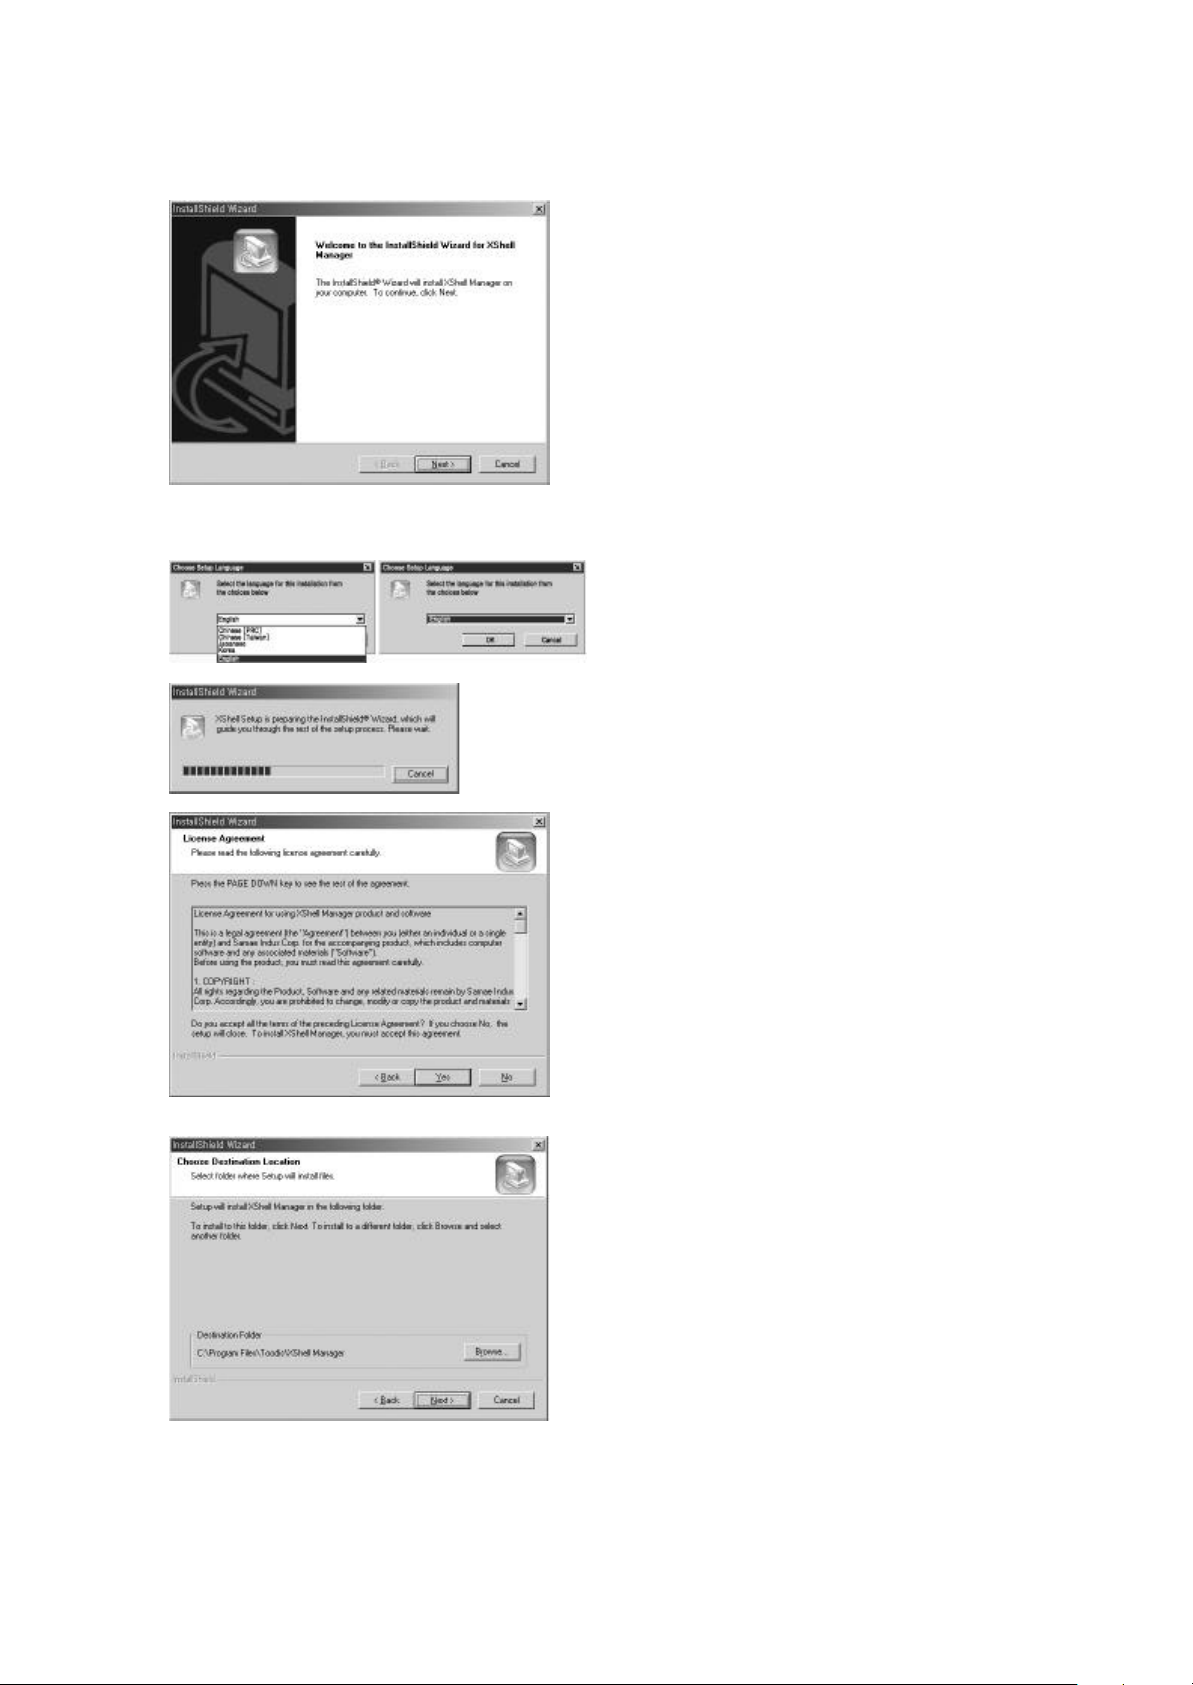
▶Click the "NEXT" button
▶ Selecting the install language
▶ License Agreement. Click "Yes" button.
▶ Select the specified destination directory, and click "NEXT" button.
Page 28
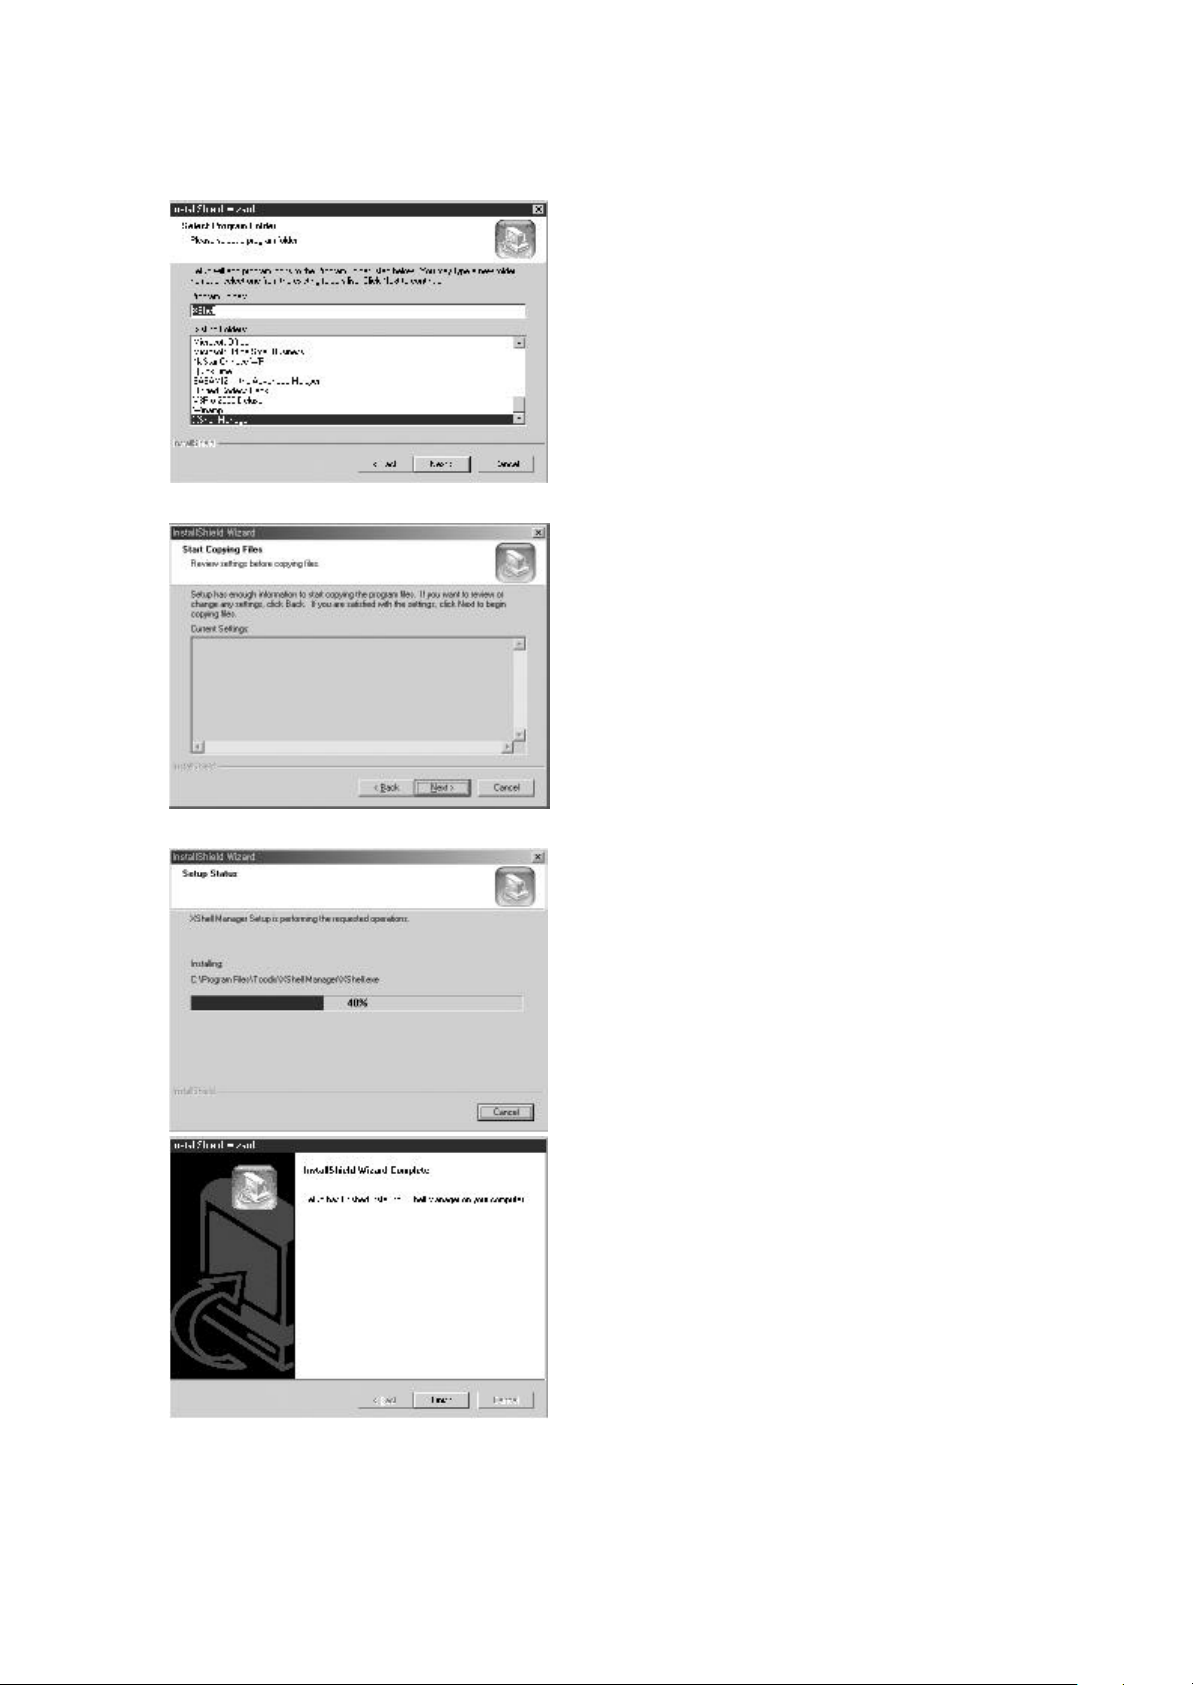
▶ Select the destination folder, and click "NEXT" button.
▶ To start copying files, Click "NEXT" button.
▶ Press "Finish" button to complete installation of Install Shield Wizard
Page 29
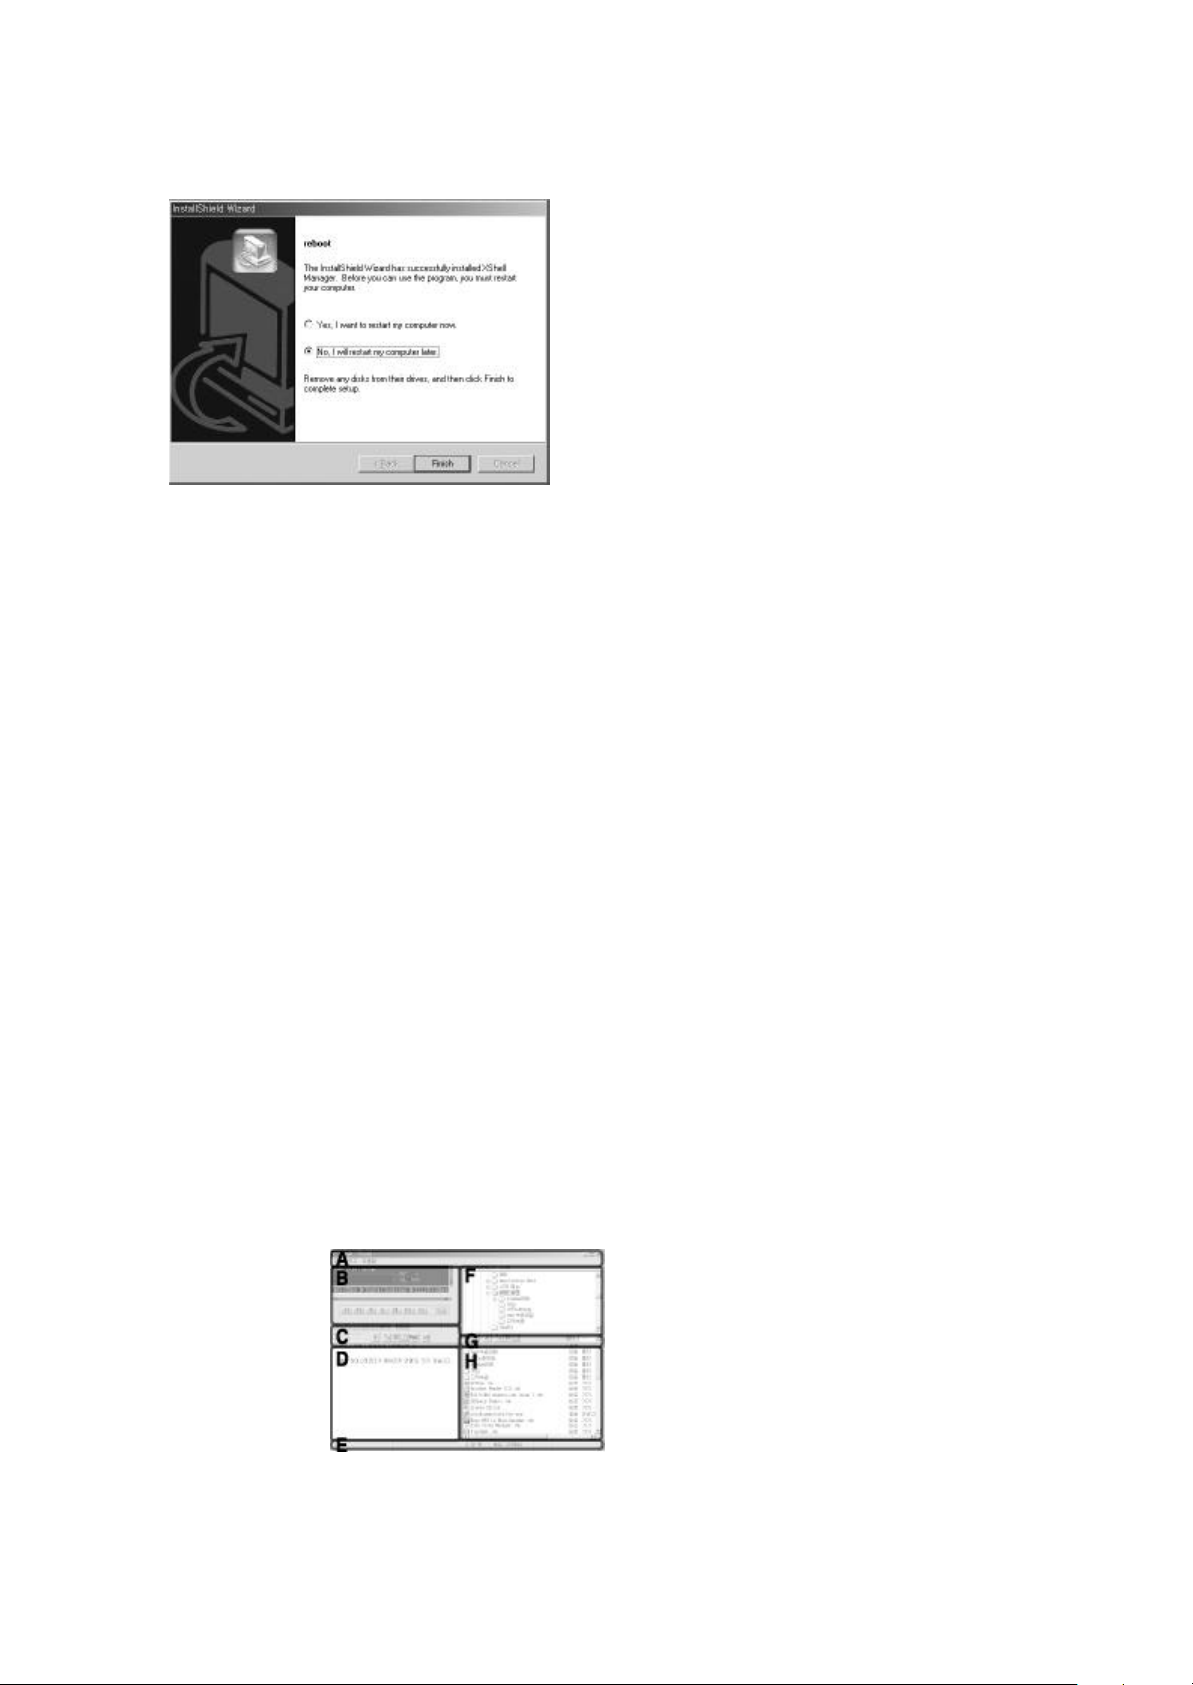
▶ To reboot, Select "Yes, I want restart computer now." And click "Finish" button.
▶ Complete Installation.
▶ After rebooting, connect Voice Recorder
with USB port of your PC. The drive will be installed automatically.
(only for the first time)
Note: When you connect Voice Recorder with USB port of your PC,
1. In case batteries are inserted, Make sure Voice Recorder should be turn on the
power,
then connect with USB port.
2. In case batteries are not inserted, Connect Voice Recorder with USB port directly.
3. In the state of Playback or Recording, You have to stop the playback or Recording.
Then connect Voice Recorder with USB port.
Be sure to follow above instructions. If not, Voice Recorder might be not operated
properly.
X-SHELL USER GUIDE WINDOWS & KEY
How to use X-SHELL
▣ X-SHELL MANAGER WINDOW
Page 30
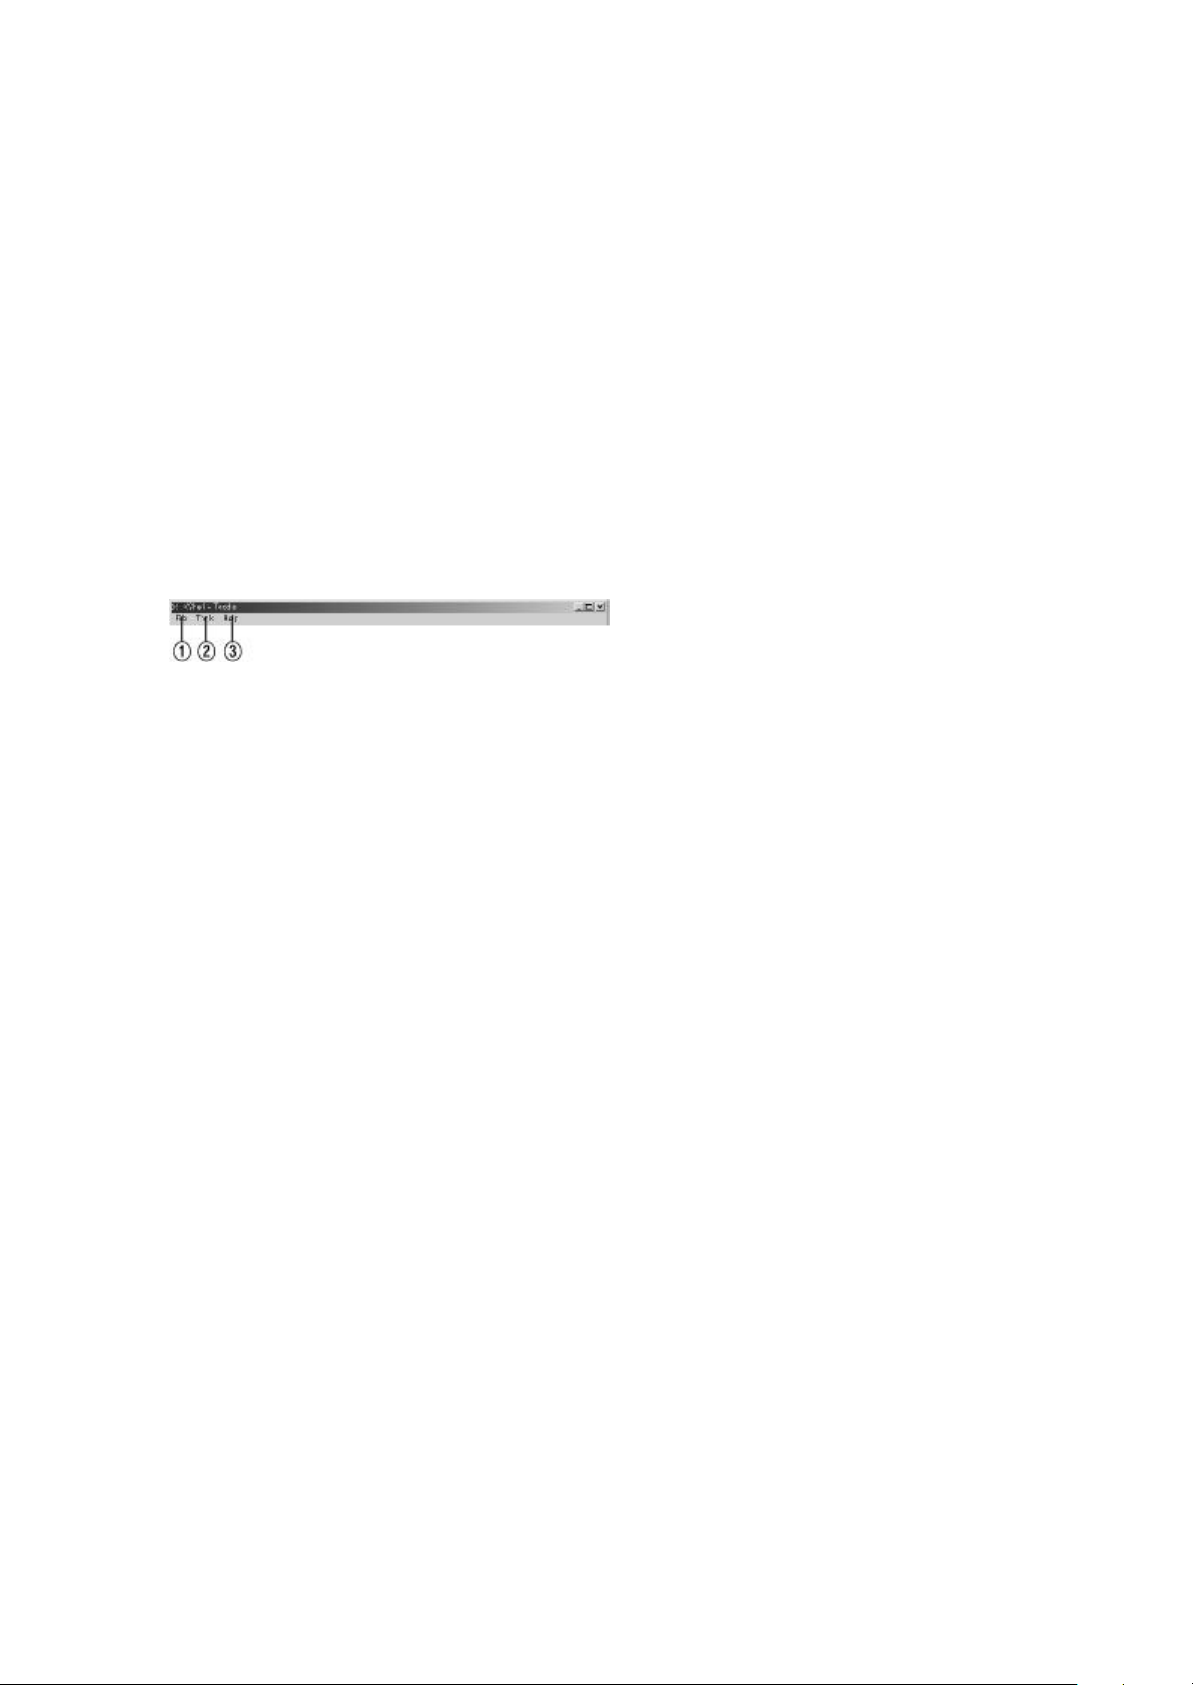
▣ The Name of each part of X-SHELL MANAGER WINDOW
▶ A : MAIN CONTROL WINDOW
▶ B : MP3 & VOICE RECORDER PLAYER
▶ C : MP3 & VOICE RECORDER CONTROL WINDOW
▶ D: MP3 & VOICE RECORDER SAVED FILE WINDOW
▶ E: MP3 & VOICE RECORDER FILE STATUS WINDOW
▶ F: The upper/higher FOLDERS of COMPUTER
▶ G : COMPUTER FOLDER CONTROL WINDOW
▶ H: The lower Folders of COMPUTER
▣ A : MAIN CONTROL WINDOW
▶ 1. FILE MENU
CHANGE LANGUAGE TO: It is possible to choose the language for X-SHELL
(ENGLISH, KOREAN).
EXIT: Exit X-SHELL
▶ 2. TOOLS MENU
FORMAT FLASH DISK: SMVR turn to be a pre- setting value(factory default
value).
SOUND EDIT: It is possible to edit the saved files.
SMAT UPDATE: X-SHELL is upgradeable.
CONFIG: Setting up the circumstances of X-SHELL.
▶ 3. HELP
ON-LINE HELP: Confirmation about the HELP file and upgrade(Version-up)
situation on line(on the web).
ABOUT X-SHELL: Display X-SHELL's current version.
▣ B : MP3 & VOICE RECORDER PLAYER
The each part of playing status: Display the playback status of TVF,SC4, MP3 and file
format.
Page 31
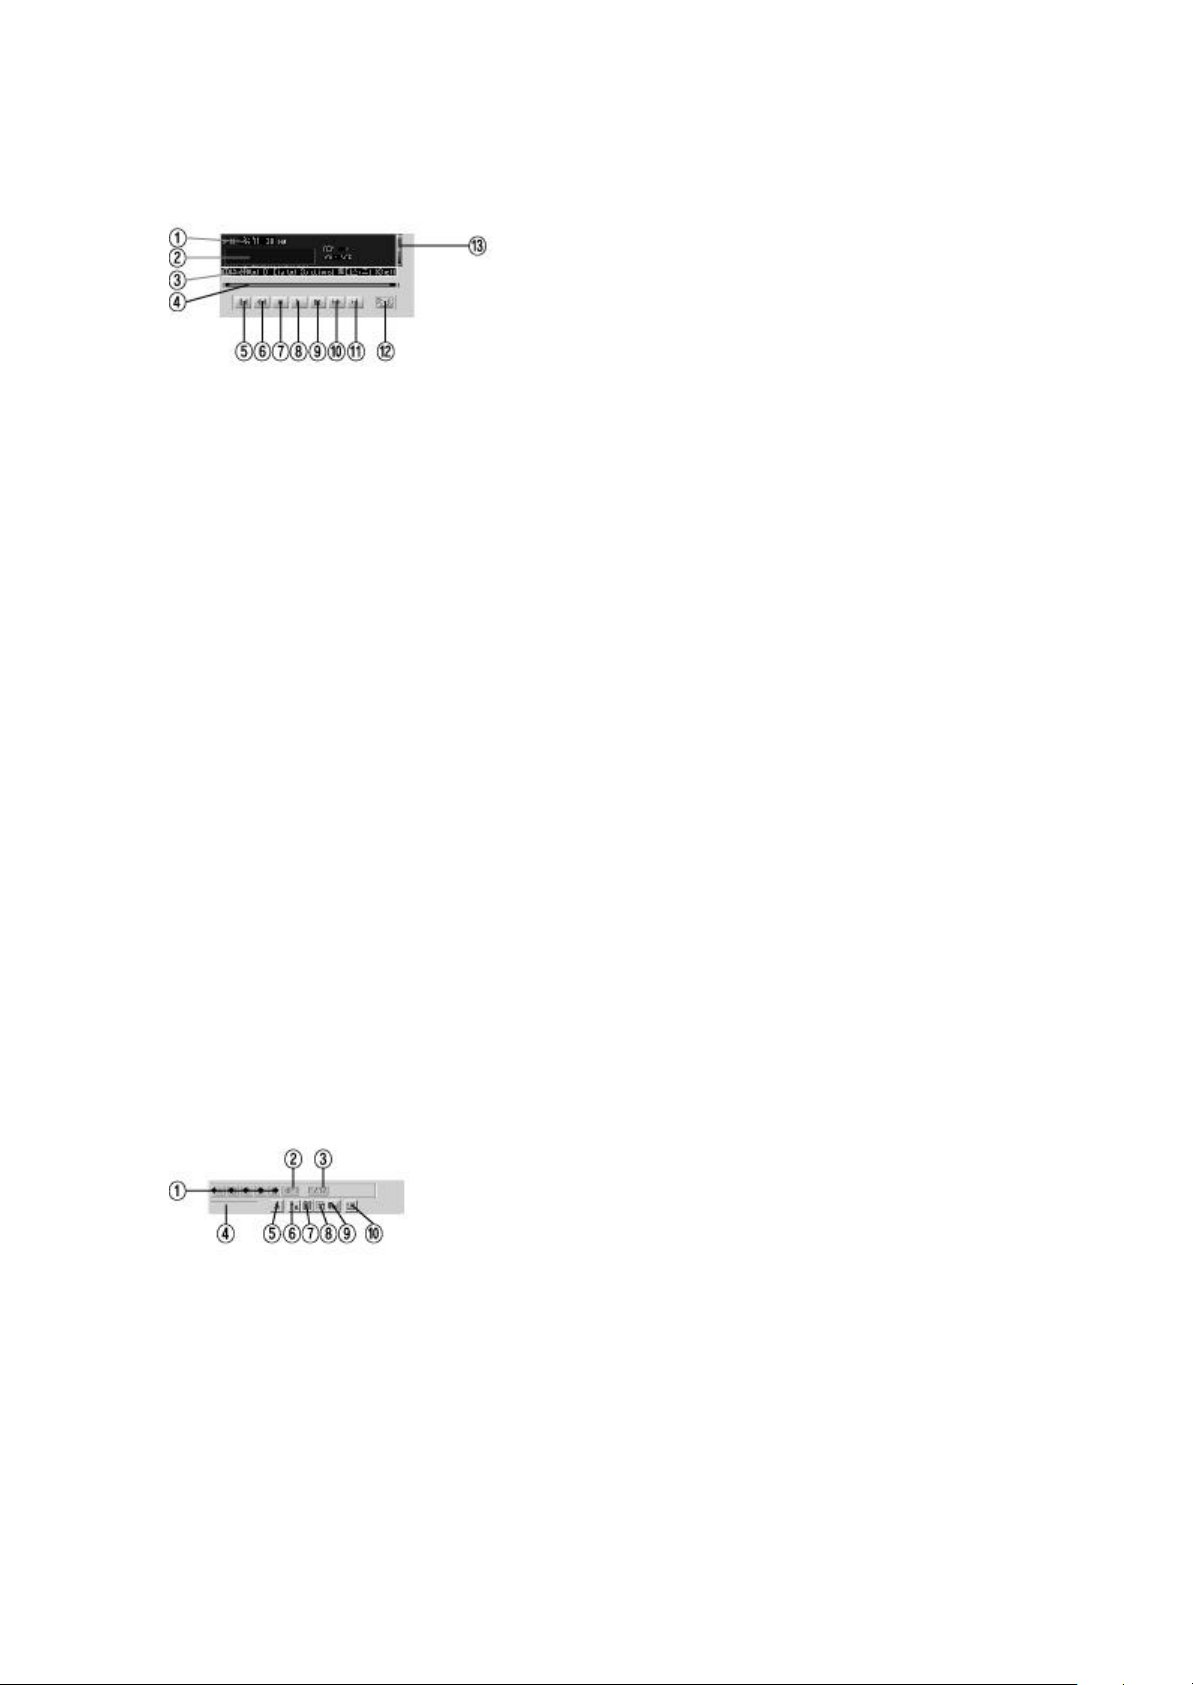
▶1. Dispalys the total playback time of the playing time.
▶2. Dispalys the audio spectrum of the playing file.
▶3. Displays the name of the playing file.
▶4. Displays the total playback time of playing time as the bar,
▶5. Move to previous message of the playing file.
▶6. Rewind/Backward the fore part of the playing file..
▶7. Stop the playing file.
▶8. Playback the file.
▶9. Pause the playing file temporarily.
▶10. Fast forward the rear part of the playing file.
▶11. Move to next file of the playing file.
▶12. File combination : combine two files into one file.
▶13. Control the volume.
▣ C : MP3 & VOICE RECORDER CONTROL WINDOW
▶1. MP3 & VOICE RECORDER TVF,SC4 FOLDER
▶2. MP3 & VOICE RECORDER MP3 FOLDER
▶3. MP3 & VOICE RECORDER DATA FOLDER
Page 32
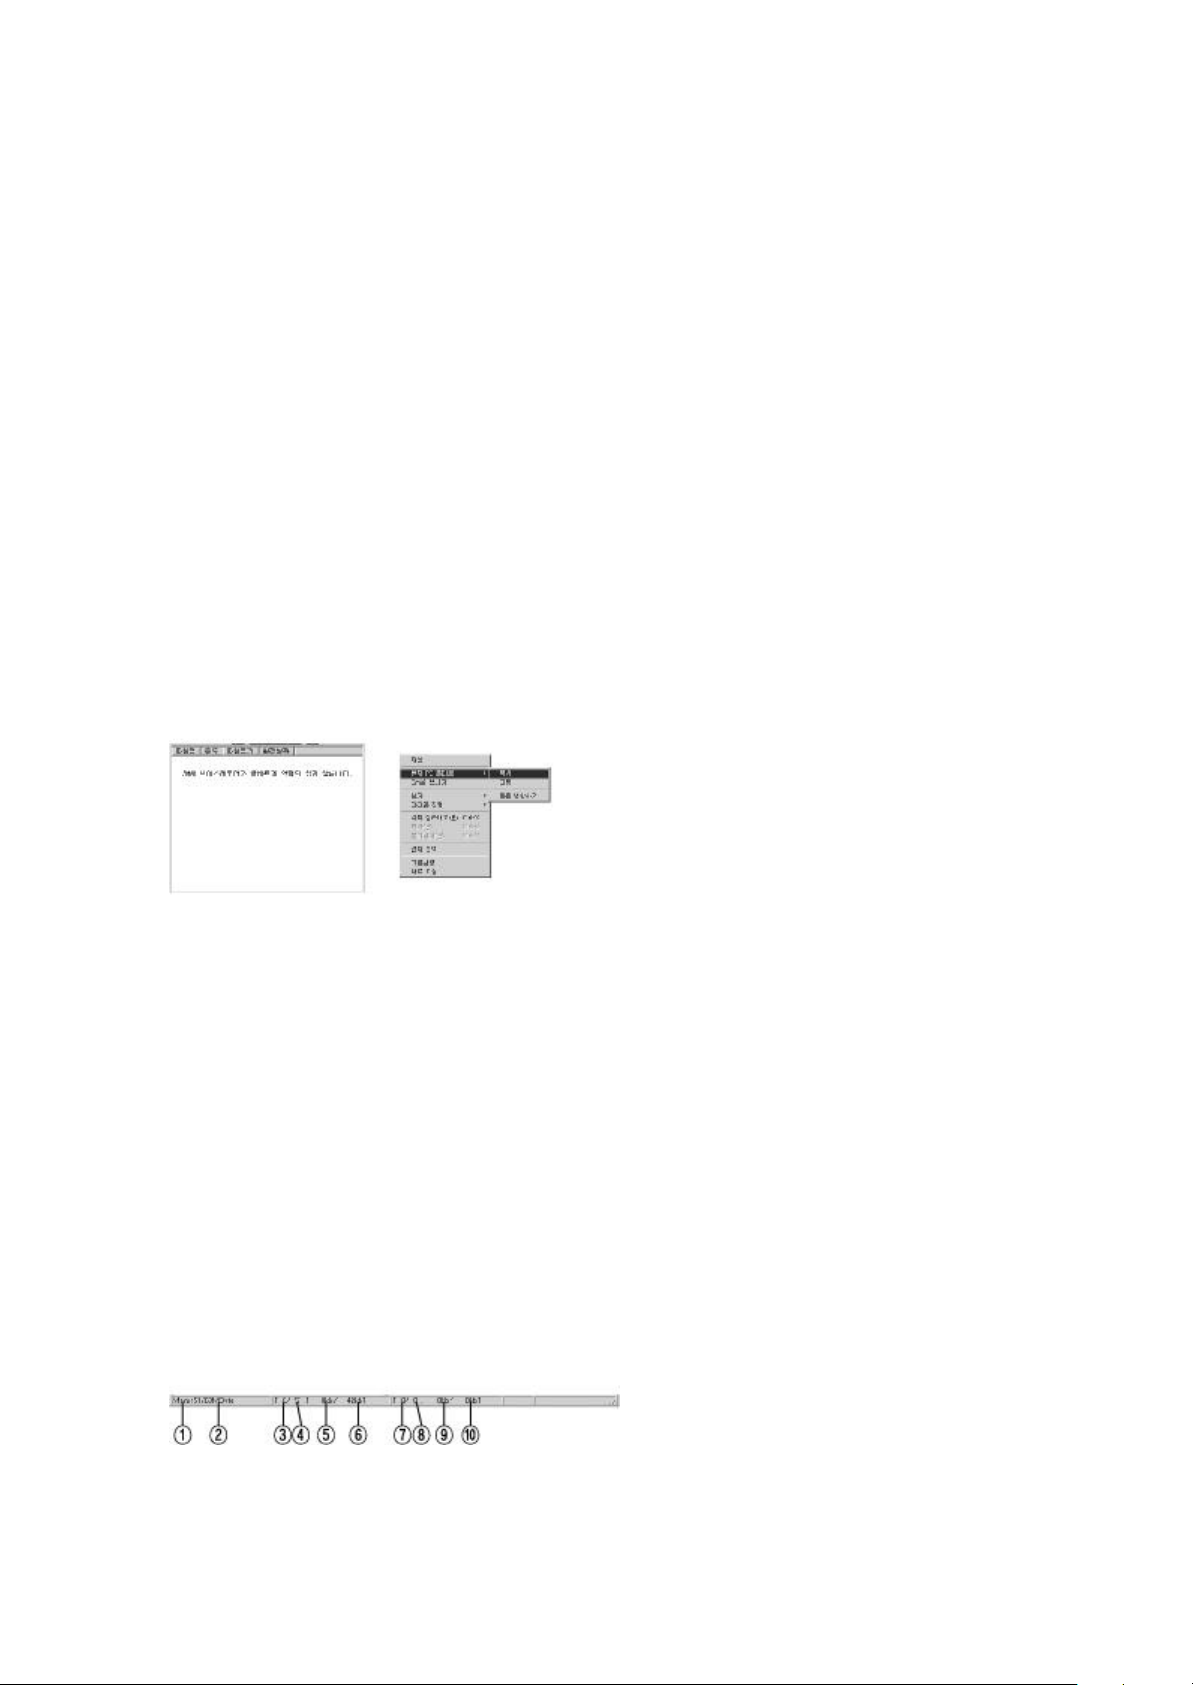
▶4. Selected MP3 & VOICE RECORDER FOLDER
▶5. Remove and cut the file.
▶6. View large icons
▶7. View Details
▶8. Refresh
▶9. Can adjust file's configuration at random.
▶10. Sending E- mail
▣ D: MP3 & VOICE RECORDER SAVED FILE WINDOW
▶ The selected folder's files will be displayed.
▶ It displays PLAY LIST
▶ To display POP-UP menu, select the file you want to copy and press right button
on the PC's mouse
At POP-UP menu, select copy menu by existing PC folder
▣ E: MP3 & VOICE RECORDER FILE STATUS WINDOW
▶1. Remaining Memory Capacity
Page 33
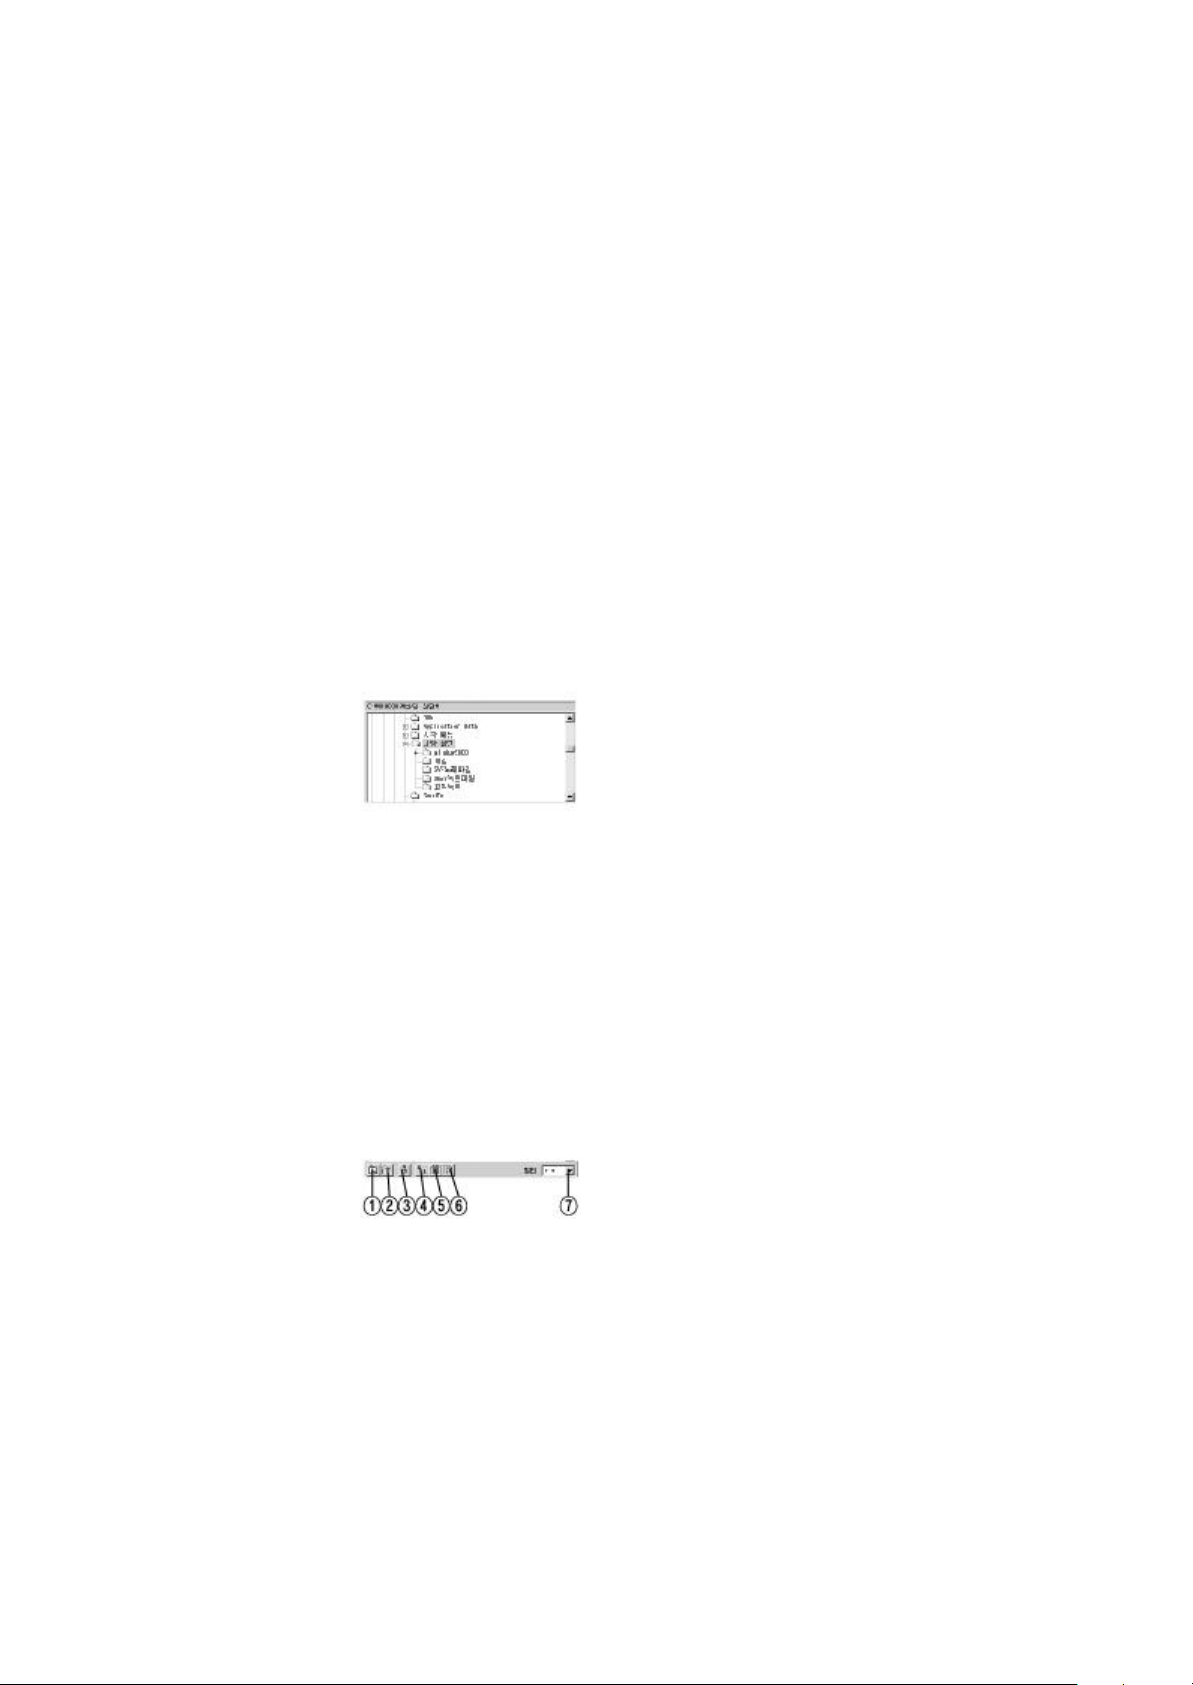
It displays the remaining memory capacity
▶2. Total Memory Capacity
It displays the total memory capacity.
▶3. The number of selected SMVR folder
▶4. The total number of selected SMVR folder
▶5. Capacity of selected SMVR folder
▶6. Total capacity of selected SMVR files.
▶7. Number of selected PC folder
▶8. Total Number of selected PC folder.
▶9. Capacity of selected file among selected PC folder
▶10. Total capacity of selected PC folder
▣ F : COMPUTER UPPER(HIGHER) FOLDER
▣ G : COMPUTER FOLDER CONTROL WINDOW
▶1. Move to higher Folder.
Move to higher(upper) folder of selected folder
▶2. Create new folder
▶3. Remove and cut the file
Page 34
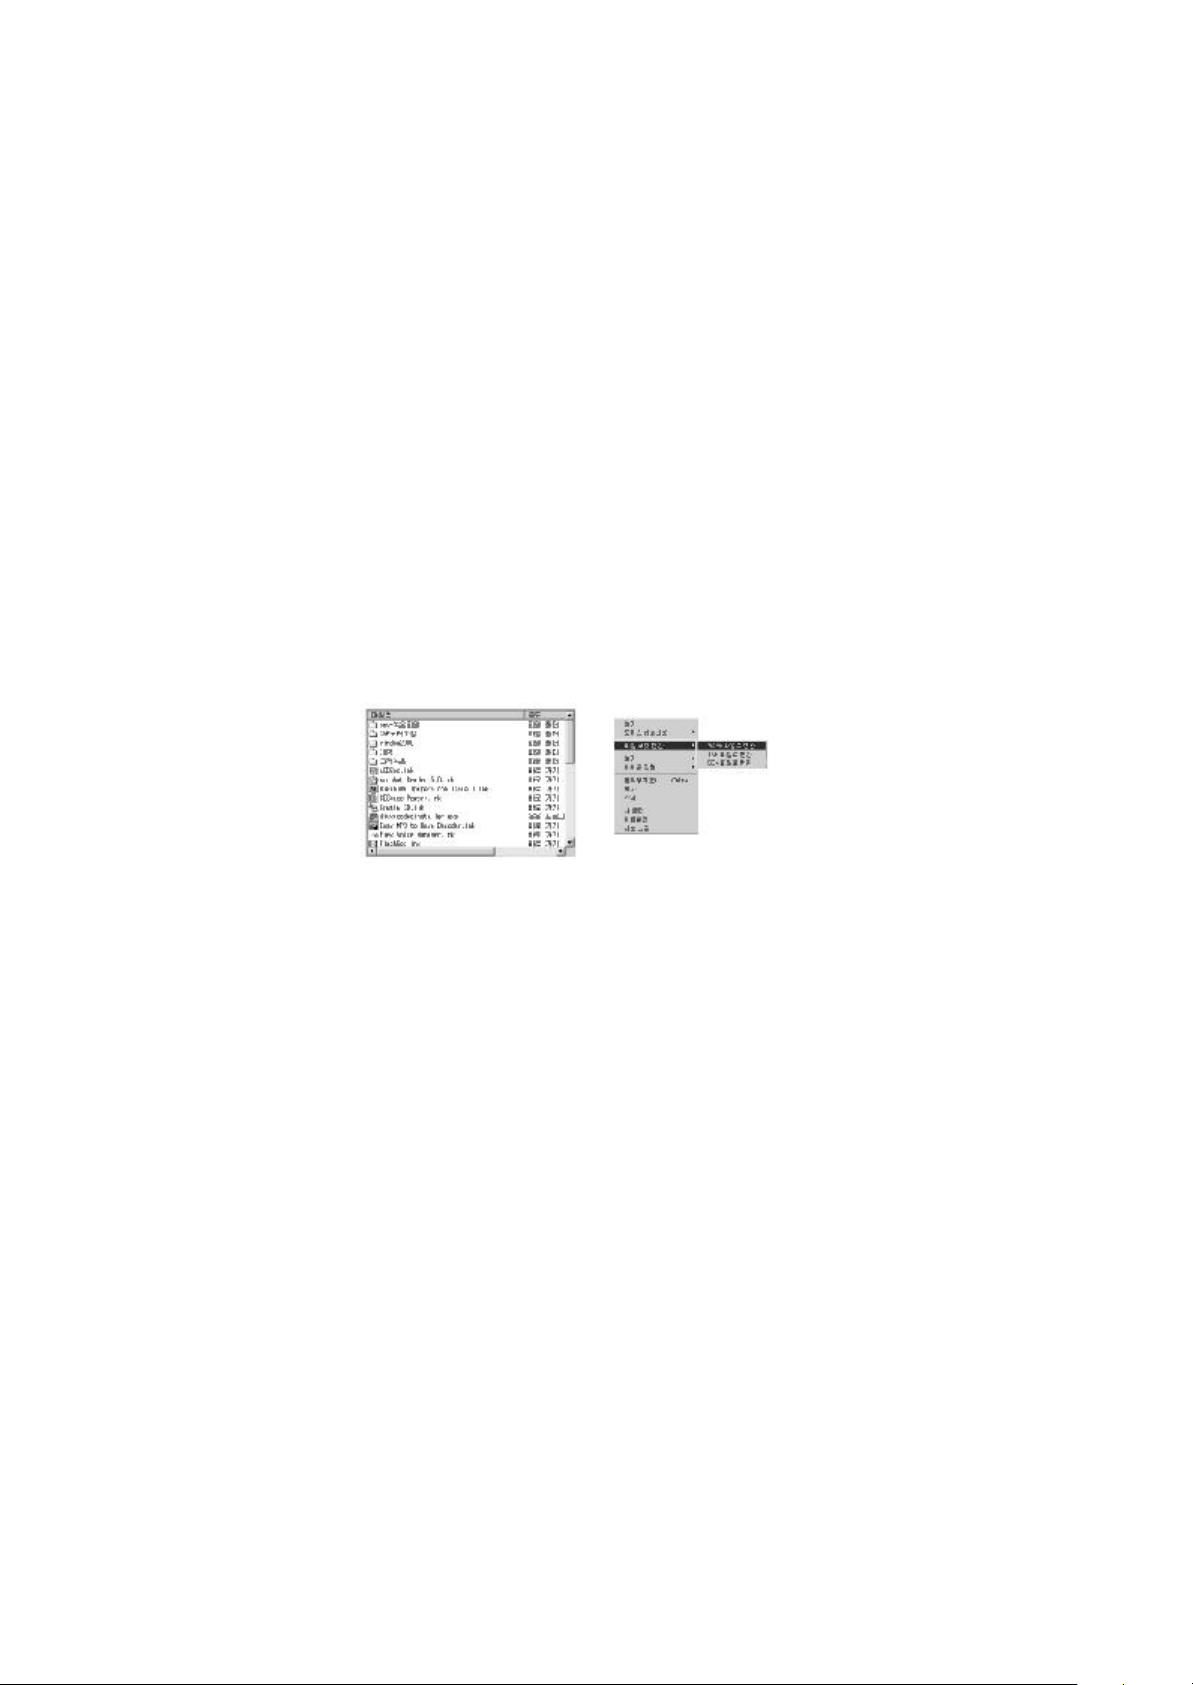
Remove the selected file.
▶4. View large Icons
It displays the selected folder's icons as large.
▶5. View details
It displays the selected folder's file name, file extension, file size, modifi
▶6. Refresh
▶7. Specify file filter.
You can select the file extension of what you want of selected folder.
▣ H: The Selected Higher Folder of COMPUTER
▶ To display POP-UP menu, select the file you want to copy and press right button
on the PC's mouse
At POP-UP menu, select copy menu by existing PC folder
▣ File uploading and downloading
*Can upload and download voice files, data files and MP3 files between PC and Voice
Recorder.
(But MP3 files only can be downloaded to Voice Recorder)
*LQ Voice file recorded for 1 hour can be transmirated at 1.5 second.
*The fastest transmissin rates(About 7Mbps)
Page 35
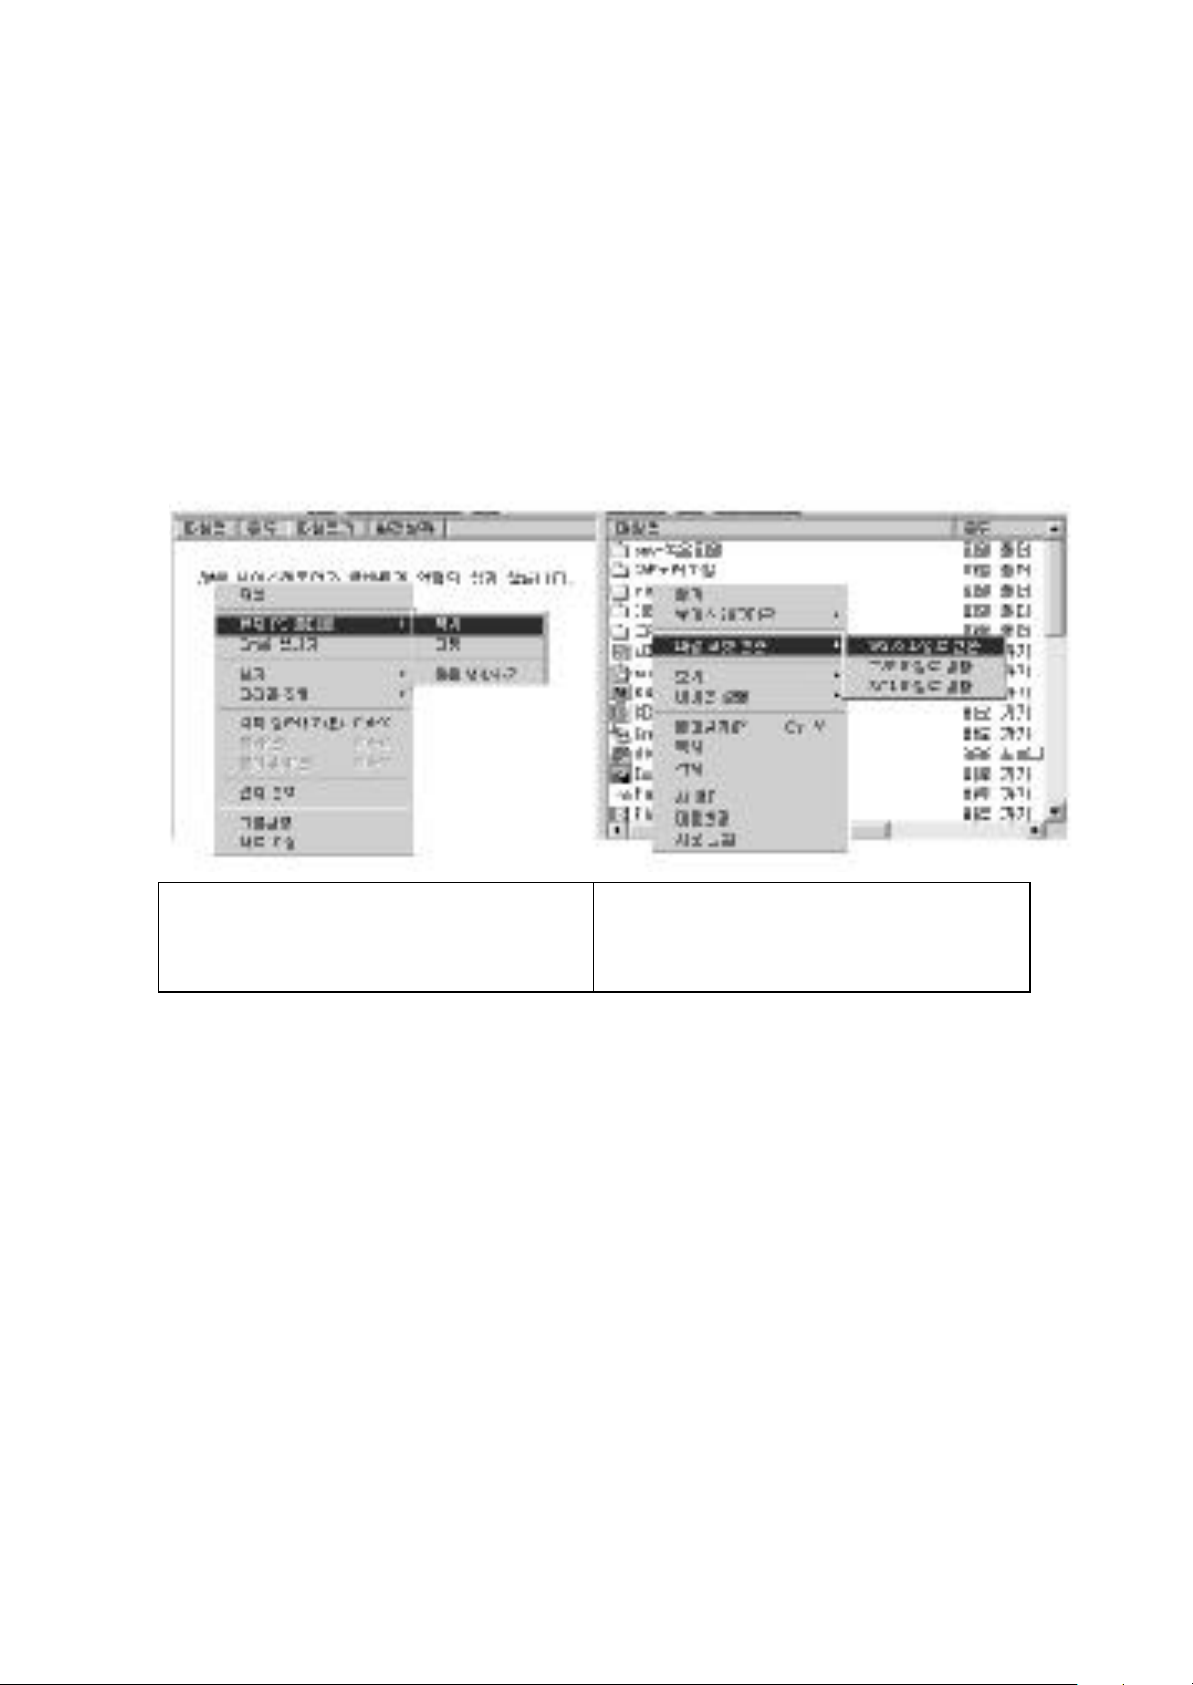
The selected folder's files will be copied to the
present folder on PC
(copied from Voice Recorder to PC)
The selected file will be changed to Wave file, TVF
files and SC4 files
(Changed file at the present folder on PC)
▣ Converting File Format
Voice Files recorded (* .SC4 ,* .TVF) and MP3 files can be Changed each other
TVF<->WAV , TVF<- >SC4 , SC4<->WAV , MP3<->TVF , MP3<->SC4 , MP3<->WAV
*Remarks
TVF files :1) Voice files on LQ mode, 8Kbps sampling rates,8Khz,16bit,mono voice file
2) Highest compression rates, voice for 1 hour can be recorded for
3.6MByte
SC4 files : 1) Voice files on HQ mode, 32Kbps sampling rates,8Khz,16bit,mono voice
files
2) Voice Quality is Better than TVF files
Page 36

▣ Data stora ge function
Any files on PC can be storaged to data folder on Voice Recorder
Must be storaged after pressing data folder
▣ Voice E -mailing
Sending Voice files to E- mail on XShell Manager Program directly.
Anybody can hear Voice files sended by XShell Manager Program as MS-ADPCM
Format
Page 37
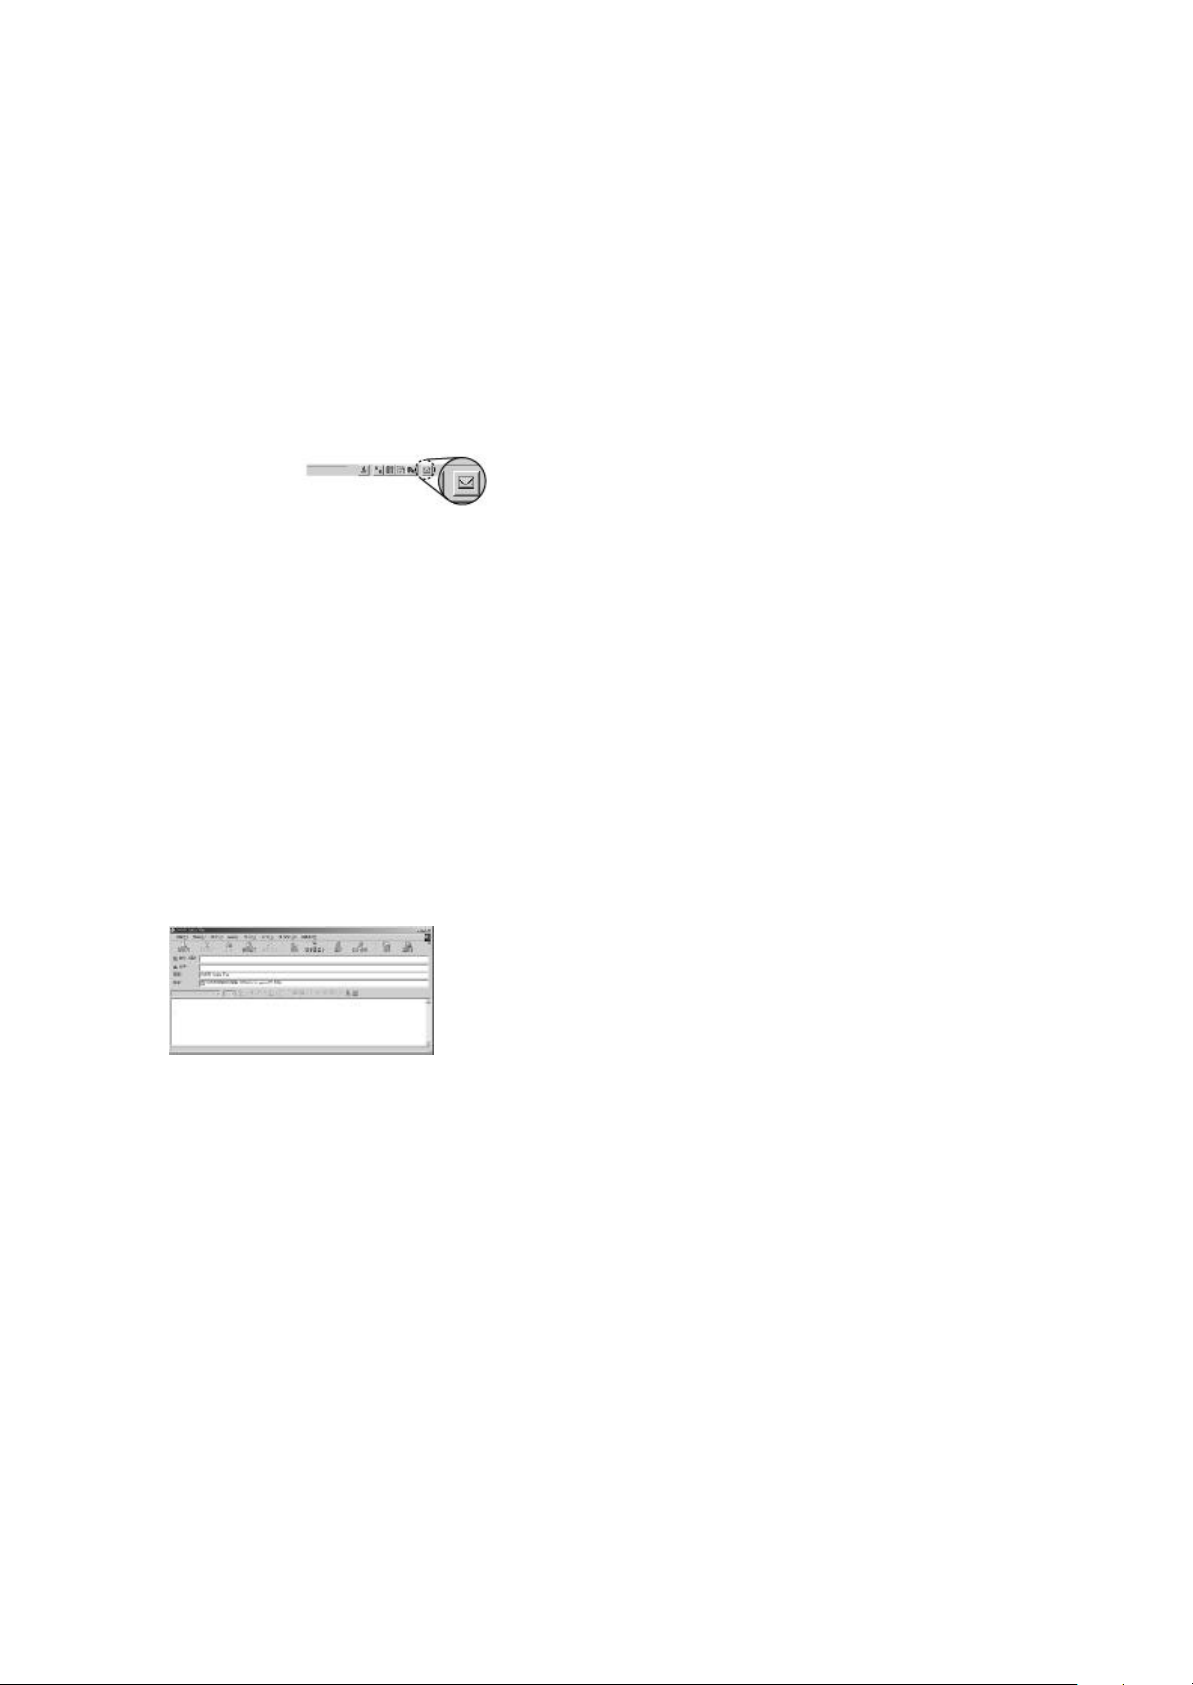
By pressing E- mailing Icon, Outlook Express Program will open and send the selected
file
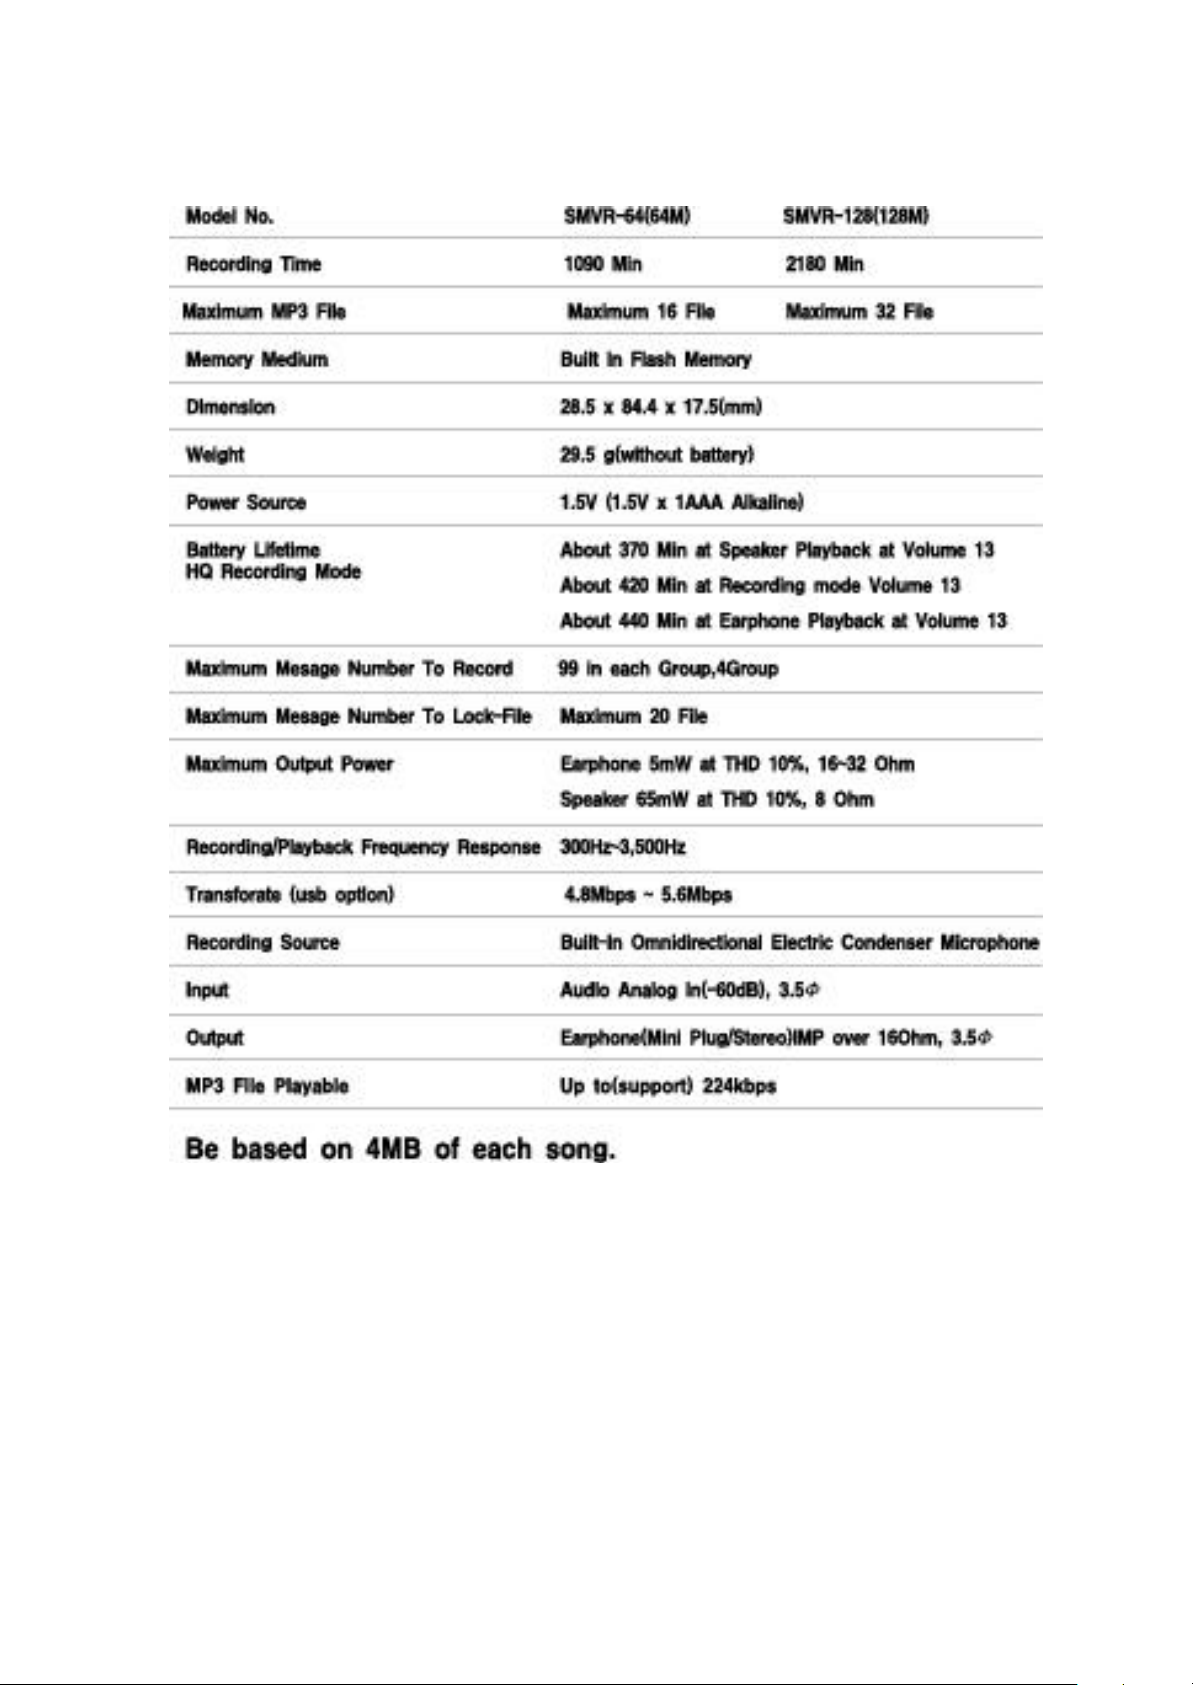
ITEM SPECIFICATION
SPECIFICATIONS
Warranty Information
Page 38
1. This product have been carefully tested and passed our strict inspection
and quality control(QC).
2. If this product fails to operate properly within the specified warranty period,
we will repair it at free of charge.
3. Due to abnormal use, misuse and accident, it should be charged of actual expense.
Even if within the specified warranty perod.
Page 39

4. This warranty has validity only in domestic.
5. This warranty is effective 6months from the purchasing date.
6. Please fill out this form and pay special attention to don't lose.
7. If this product fails to operated properly,
please contact the after- sale service center or store where
Manufacture : TooDis. Co.Ltd.,
#212-22, MEATAN-DONG, PALDAL -GU, SUWON-CITY, KYUNGKI-DO, KOREA
TEL. 82-31-212-4031~2 FAX. 82-31-212-4148
HOMEPAGE http://toodis.com
customer purchased.
▶ Below cases should be charged of actual expense.
▶ The damage or break down due to misuse, improper operations.
▶ The damage or break down due to unauthorized repairs or reconstruction.
▶ The damage or break down due to accident, fire, flood and or other acts of God.
 Loading...