

Tone King “Metropolitan”
Tone King “Metropolitan”
Tone King “Metropolitan”Tone King “Metropolitan”
User’s Manual
User’s Manual
User’s ManualUser’s Manual
R1.1 4/26/2010
Tone King Amplifier Company, Inc.
4401 Eastern Avenue, Bldg 45-2A, Box 38
Baltimore, Maryland 2122
www.toneking.com
mail@toneking.com

Note from the Builder
Note from the Builder
Note from the BuilderNote from the Builder
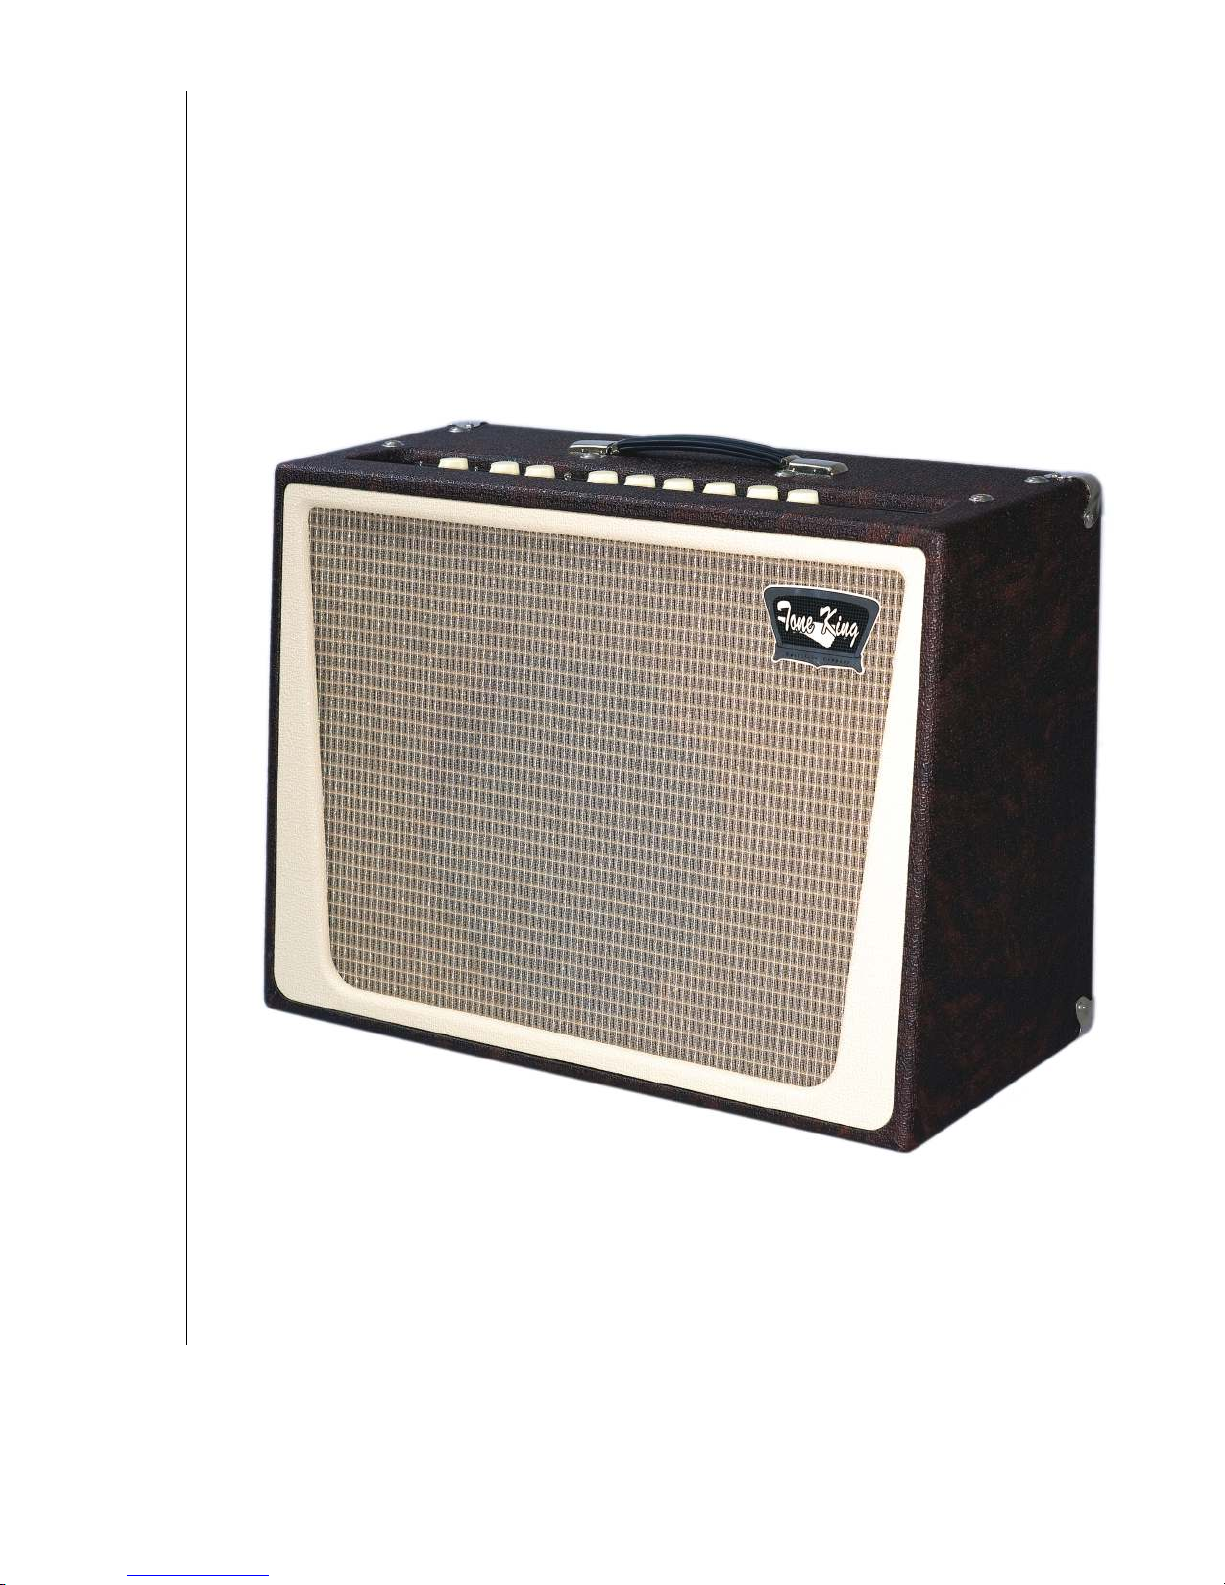
Thank you for choosing this Tone King Metropolitan guitar amplifier. The Metropolitan
is the latest in a long line of fine handbuilt guitar amplifiers which began in 1993 with
the Imperial model. The Metropolitan is my finest creation yet, as it is the culmination
of decades of hard work in circuit design, chassis design, cabinet design, upholstering
techniques, and woodworking techniques. It’s also the first Tone King model to include
the new breakthrough Phase-4 Power Control circuitry.
I build each Metropolitan amp myself, one at a time, in my craft shop in Baltimore, MD.
I perform all critical chassis assembly and wiring tasks myself, as well as all cabinet
work and upholstery. I work to the highest standards of quality, and personally ensure
that every construction detail of each amp is performed expertly and perfectly.
I’ve composed this User’s Manual as a means of describing the features and operation
of the Metropolitan. If you have any questions which are not covered here, please feel
free to contact me personally at mail@toneking.com.
Best Regards,
Mark Bartel
President, Tone King Amplifier Company, Inc.
Contents
Contents
ContentsContents
1. Front Panel Controls 2
Gain Switch 2
Rhythm Channel 2
Lead Channel 3
Channel Switching 4
Reverb 5
Output Power Controls 5
2. Back Panel Controls 7
AC Power 7
Fuse 7
Power Switch, Standby Switch 7
Footswitch 7
Speaker Jacks, Impedance Switch 8
3. Tube Installation and Replacement 9
Installing Tubes 9
Choice of Tube Types and Brands 9
Tube Quality 11
4. Warranty 12
1
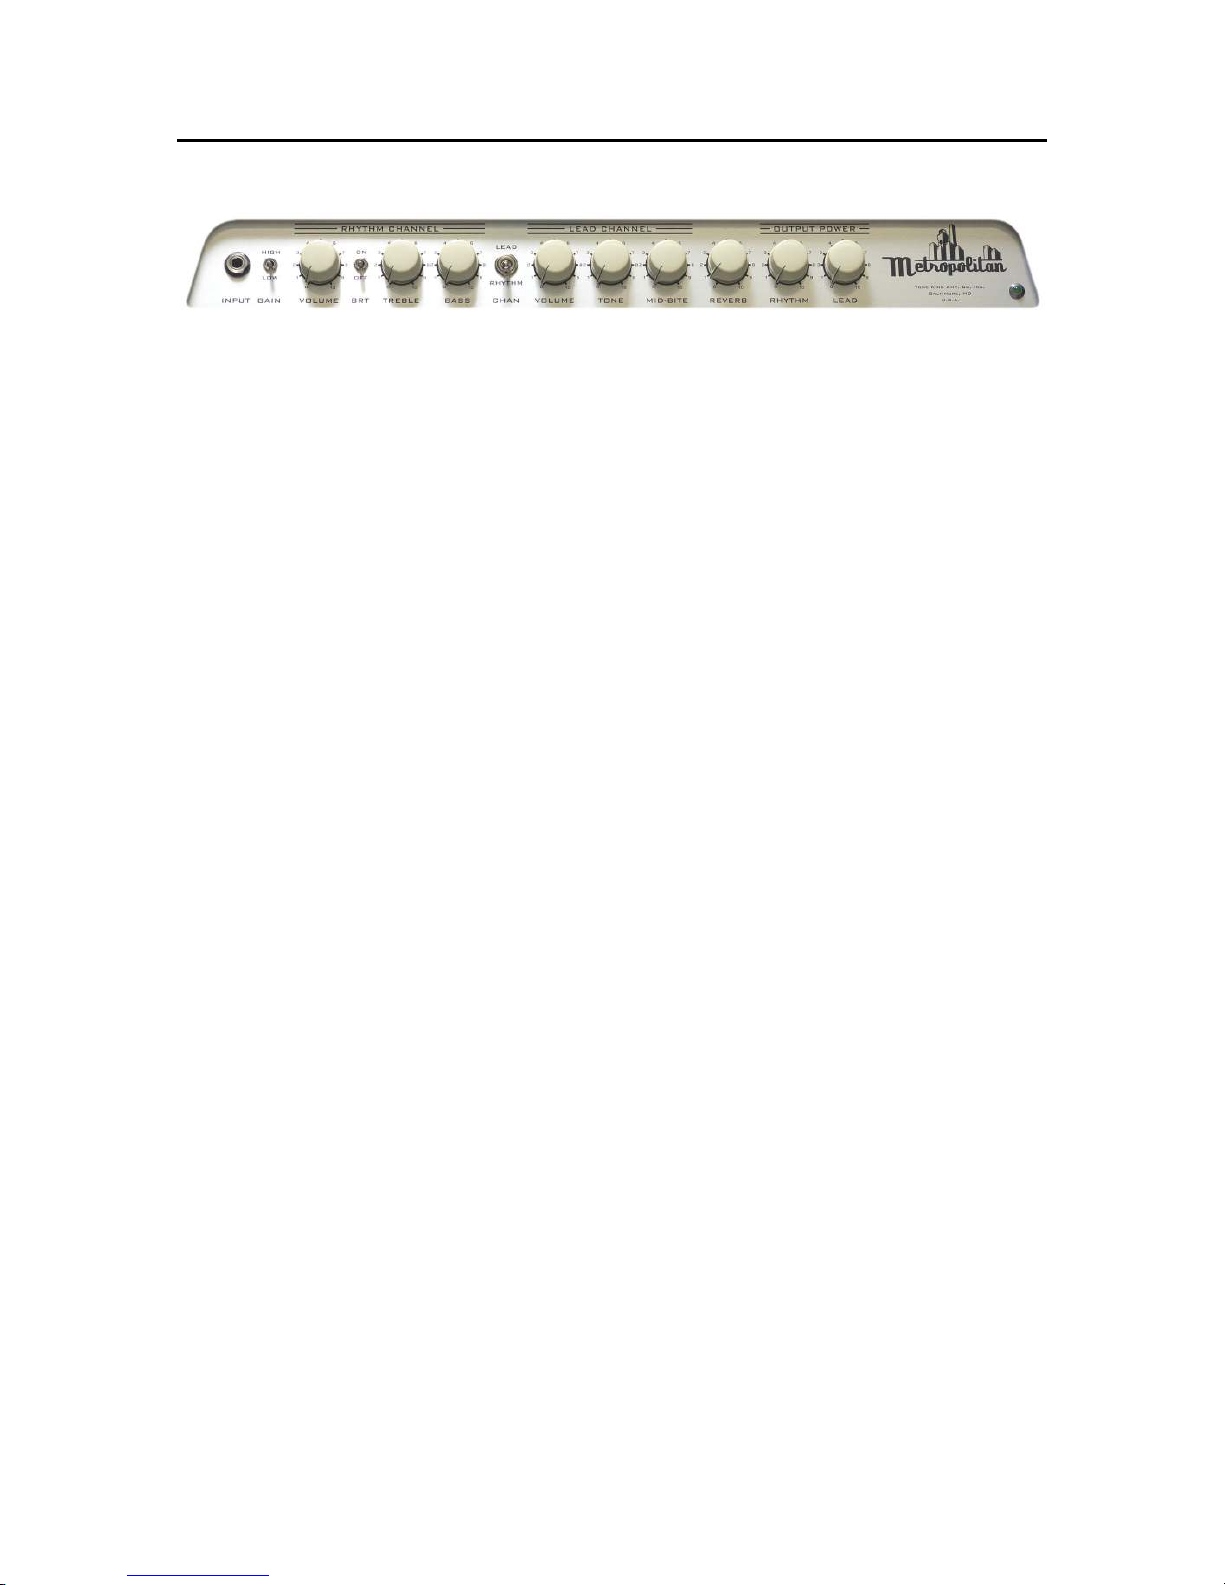
1. Front Panel Controls
1. Front Panel Controls
1. Front Panel Controls1. Front Panel Controls
Gain Switch
Gain Switch
Gain SwitchGain Switch
The Gain switch controls the gain of the first stage of the preamp, which is shared
between the Rhythm and Lead channels. Thus, it acts as a global gain control which
helps match the overall gain level to the output level of your guitar’s pickups.
I almost always suggest using the high gain setting, unless you have particularly high
output pickups, or you want a lot of headroom. The higher gain setting seems to give
the amp more punch, a faster attack, and more clarity.
Note that you will hear an audible “thump” when you switch between the two gain
settings. This thump is a result of the switch acting on a very sensitive part of the
circuit. Any means of reducing the thump would degrade the purity of the signal path,
so it was decided that it was best to allow the thump, and maintain the pure signal
path. This is generally not a problem, as you will typically find that you’ll use one
setting or the other with a given guitar, no matter how the two channels are dialed in.
You may want to turn the volume control down all the way (on the selected channel)
when switching between gain settings, to eliminate the “thump”.
Rhythm Channel
Rhythm Channel
Rhythm ChannelRhythm Channel
The Rhythm channel includes controls for Volume, Treble, and Bass, as well as a
“Bright” switch. This channel is voiced somewhere between a typical “blackface”
preamp and a typical “tweed” preamp, and has a wider range of tones than either of
those preamp types.
A typical “blackface” preamp can be quite lean in the midrange, which can give you a
deep, lush sound when playing in isolation, but this type of voicing can get drowned out
and sound thin when played in a band situation.
A typical “Tweed” preamp has a sweet and vocal midrange, but can tend to sound boxy
on clean tones.
The Metropolitan’s Rhythm channel preamp straddles the line between these two
preamp types. With the bass and treble controls set to their nominal values, you’ll get
a clean tone that combines a prominent and present midrange with a lush and
shimmering overall response.
2
Rhythm Channel (Cont’d)
Rhythm Channel (Cont’d)
Rhythm Channel (Cont’d)Rhythm Channel (Cont’d)
Getting to Know the Bass and Treble Controls
You’ll notice that the Bass and Treble controls affect the tone quite differently than the
Bass and Treble controls of a conventional “blackface” style preamp. With a typical
“blackface” preamp, the Bass and Treble controls simply give you a different flavor of
the same basic tone.
The Metropolitan’s Bass and Treble controls have a more prominent effect - they alter
the actual voicing and character of the tone. Because of this, you should experiment
with them fully to understand their effect on the Rhythm’s channel’s overall voicing.
Although the Rhythm channel has no midrange control, it offers more flexibility than
most similar preamps, even those which include a midrange control, because of the way
the Bass and Treble controls transform the overall character and voicing.
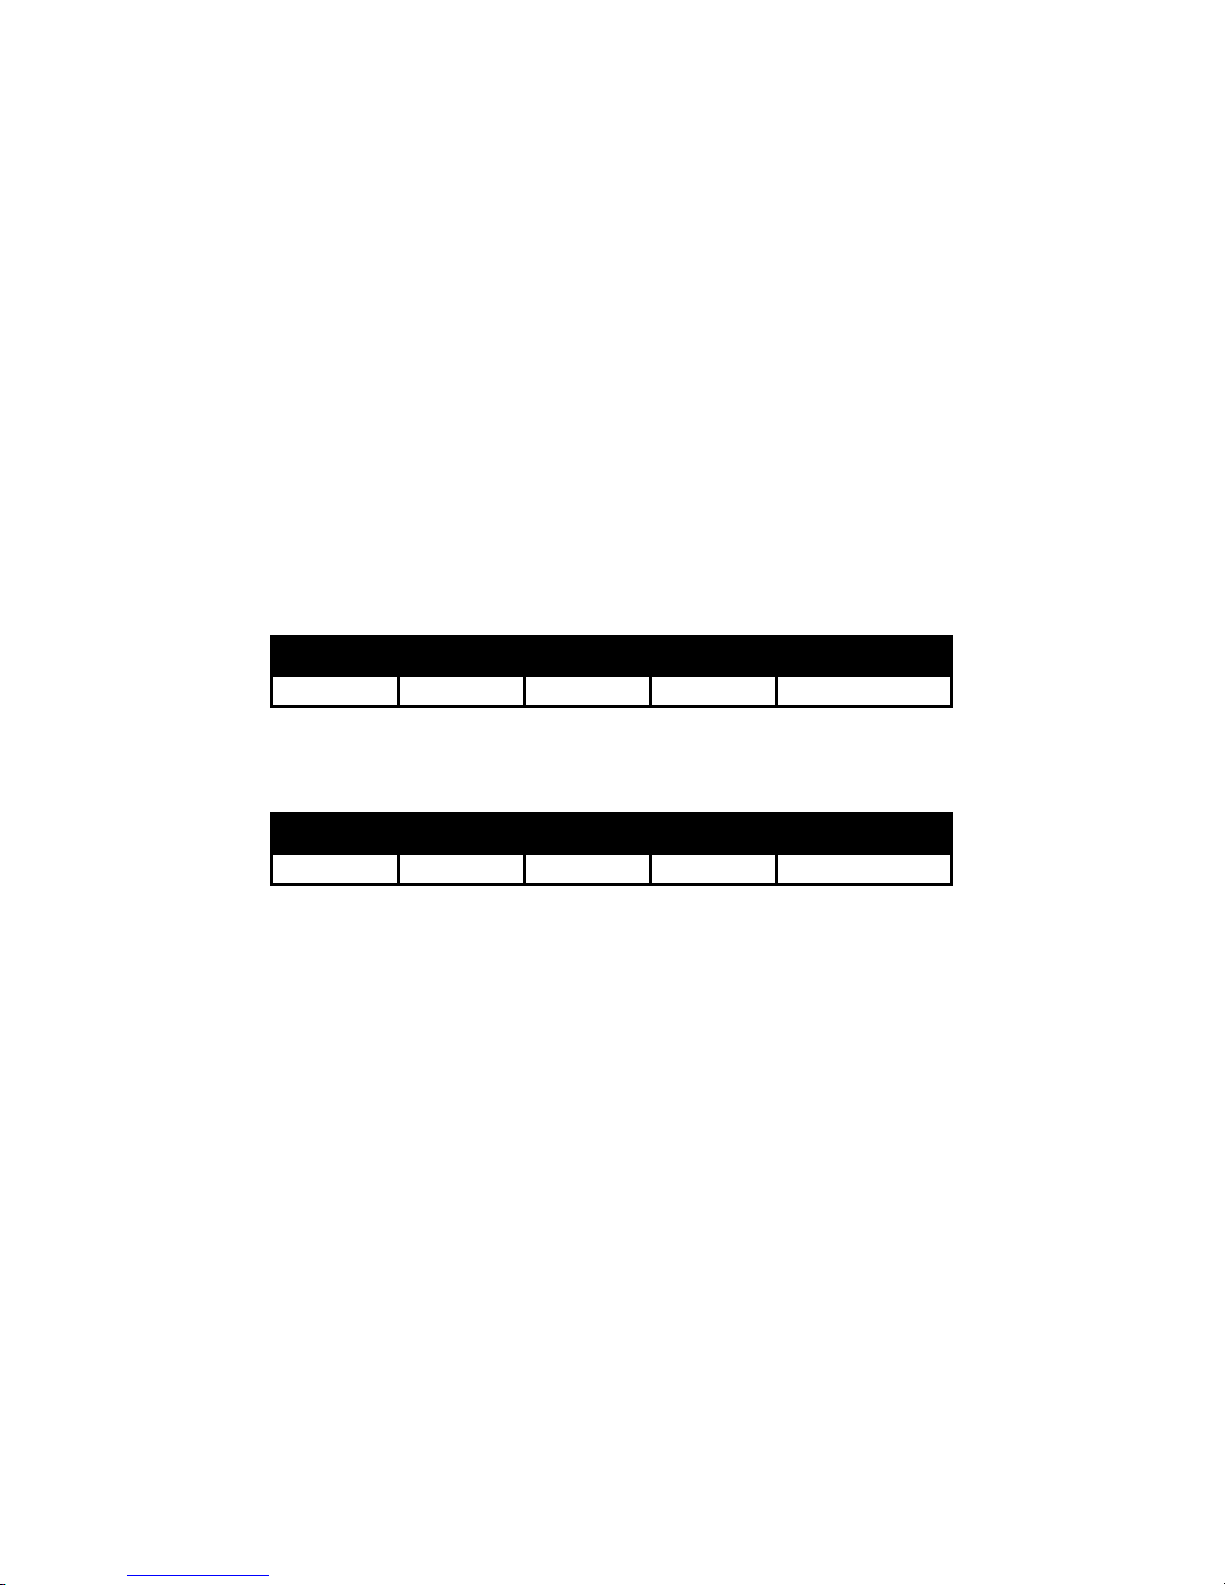
Here are a few sample settings. You may want to start with these settings and tweak
the bass and treble controls to taste.
Blackface Clean with Tweed Mids
Blackface Clean with Tweed Mids
Blackface Clean with Tweed MidsBlackface Clean with Tweed Mids
Gain Volume Bright Treble Bass
High 1.5 Off 5
Traditiona
Traditional Blackface Clean with Scooped Mids
TraditionaTraditiona
Gain Volume Bright Treble Bass
High 1.5 On 4
Lead Channel
Lead Channel
Lead ChannelLead Channel
The Lead channel starts out with a Tweed style preamp, which drives a proprietary
tone-shaping circuit built around the Mid-Bite control, a unique Tone King feature.
This proprietary circuit transforms the basic tweed tone to more of a crunchy rock tone
as you turn up the mid-bite control. This is accomplished by simultaneously tightening
up the bass, rolling off the very high frequencies, increasing the gain, and developing a
pronounced upper midrange peak. The Mid-Bite control is the key to dialing in your
own particular sound on the lead channel, so you may want to experiment and observe
its effect as you rotate it from 0 to 10.
l Blackface Clean with Scooped Mids
l Blackface Clean with Scooped Midsl Blackface Clean with Scooped Mids
6
8
3
Lead
Lead Channel (Cont’d)
Lead Lead
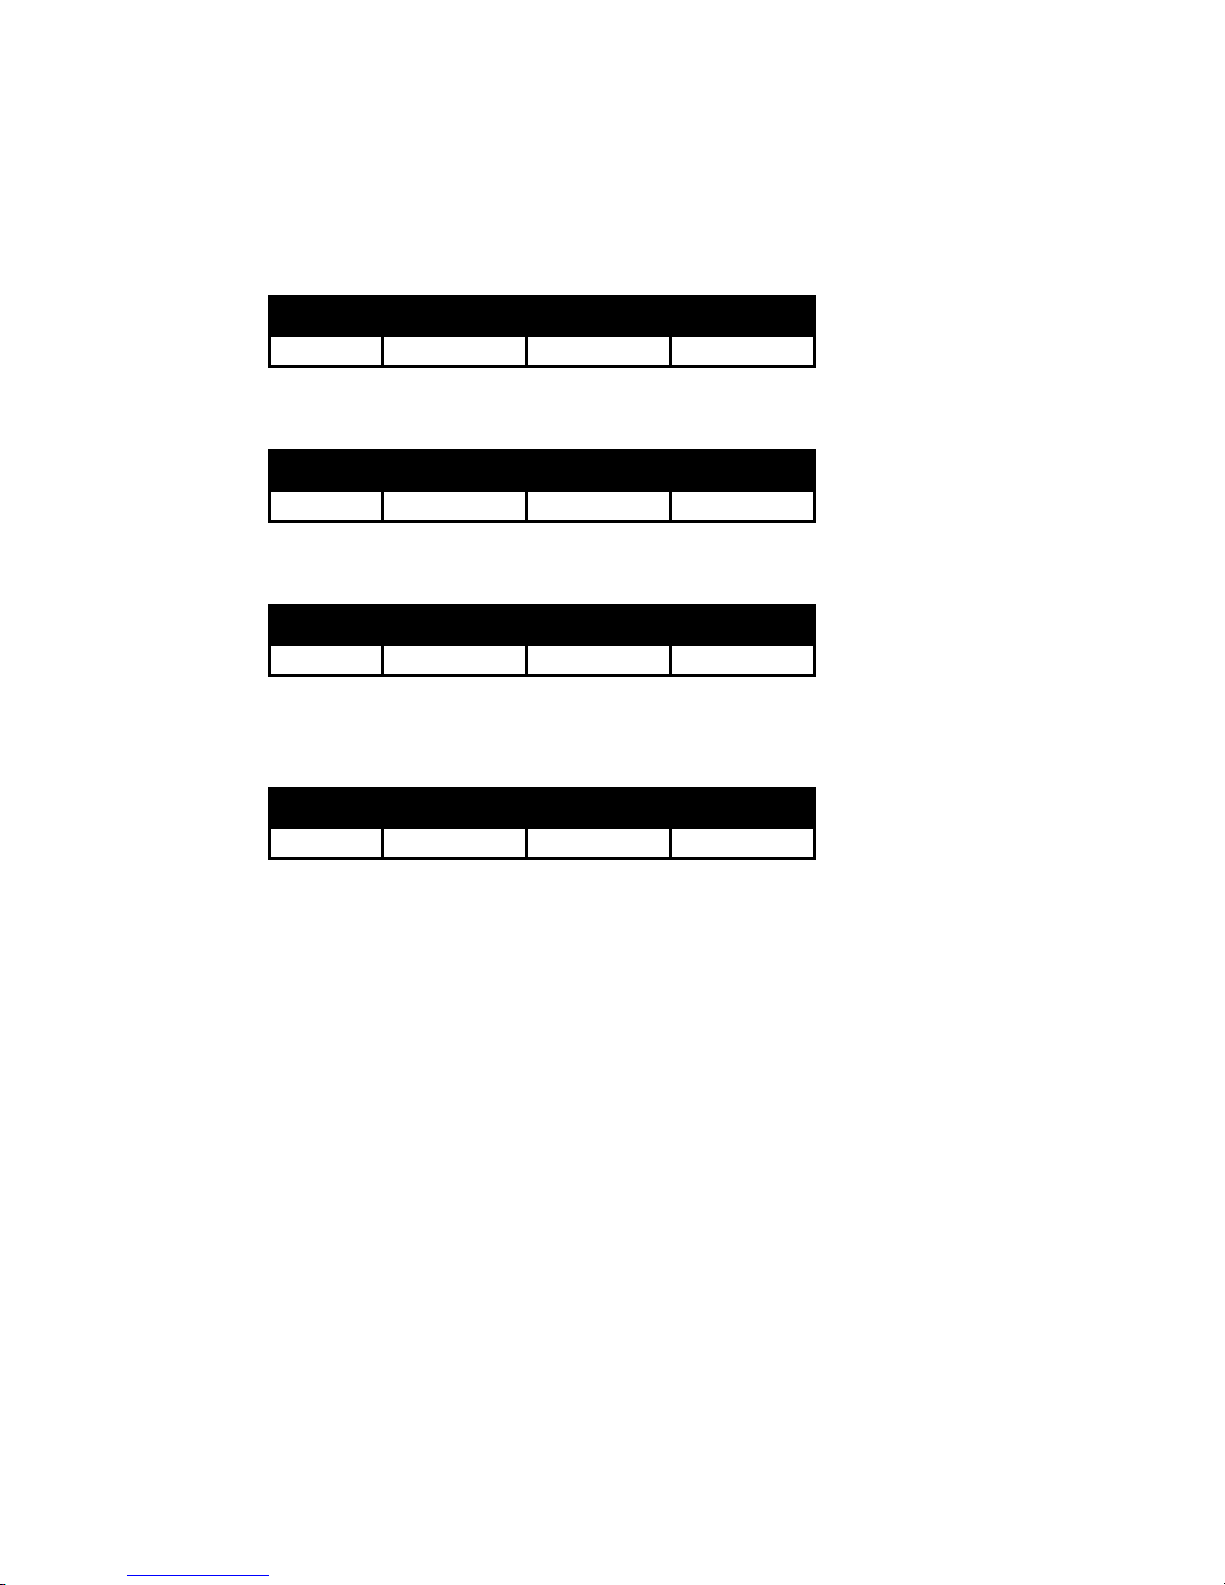
Here are a few sample settings which demonstrate just a few of the tones available on
the lead channel:
Channel (Cont’d)
Channel (Cont’d)Channel (Cont’d)
Tweed Edge of Breakup
Tweed Edge of Breakup
Tweed Edge of BreakupTweed Edge of Breakup
Gain Volume Tone Mid-Bite
Low 4 7 0.5
Cranked Tweed
Cranked Tweed
Cranked TweedCranked Tweed
Gain Volume Tone Mid-Bite
High 4 5 3
Rock Grind
Rock Grind
Rock GrindRock Grind
Gain Volume Tone Mid-Bite
High 2 6 9
Hard Rock Gainy Grind
Hard Rock Gainy Grind
Hard Rock Gainy GrindHard Rock Gainy Grind
Gain Volume Tone Mid-Bite
High 4 7 10
Channel Switching
Channel Switching
Channel SwitchingChannel Switching
You can switch between the two preamp channels with either the front panel Channel
switch, or by using the footswitch.
When using the footswitch, make sure that the front panel Channel switch is in the
Rhythm position.
When using the footswitch, you’ll notice that the LED on the footswitch indicates the
channel selected. When the LED is lit, the Lead channel is selected. When the LED is
not lit, the Rhythm channel is selected.
4

Reverb
Reverb
ReverbReverb
The Metropolitan includes a built in 3-spring, tube-driven reverb circuit. Reverb is
applied to both the Rhythm and Lead channels. In order to compensate for the higher
gain of the Lead channel, the reverb drive is reduced slightly on the Lead channel. This
reduction helps to match the reverb level when switching between preamp channels,
with just slightly more reverb on the Rhythm channel.
The reverb level is controlled by the front panel Reverb control, which adjusts the
amount of the reverb signal, from the reverb receiver, which is mixed into the signal
path.
The footswitch provides the ability to turn the reverb drive on and off. An LED on the
footswitch indicates whether the reverb drive is on (LED on) or off (LED off).
When the footswitch is not plugged into the amp, the reverb circuit is always active. In
this case, if you don’t want to use the reverb effect, then you should turn the reverb
control down to 0.
Output Power Controls
Output Power Controls
Output Power ControlsOutput Power Controls
The Output Power controls give you unparalleled control over the tone and volume of
your amp. These controls determine the actual output power produced by the power
tubes of your amp, via Tone King’s proprietary Phase-4 Power Control circuitry.
Separate Output Power controls are provided for the Rhythm and Lead channels. The
following diagram shows the approximate output power at various settings of the
Output Power controls:
Output Power on the Rhythm Channel
On the Rhythm channel, I suggest always using full power (Output Power = 10) for
clean tones, regardless of how loud you are playing. It’s always best to have the
most possible headroom for a good clean tone, even if you are only playing at very low
volume. For clean tones at low volume, you may find it necessary to use the low gain
preamp setting, and to set the volume control down quite low, but you should use the
full output power setting for maximum clarity and dynamics.
5

Output Power Controls (Cont’d)
Output Power Controls (Cont’d)
Output Power Controls (Cont’d)Output Power Controls (Cont’d)
The only case in which I suggest using a lower power setting on the Rhythm channel is
that in which you are pushing the Rhythm channel harder, for some edge and breakup.
Naturally, the only way to control the volume in this situation is to turn down the
Output Power control.
Output Power on the Lead Channel
The Lead channel is primarily designed for overdriven and distorted sounds, and this is
where the Output Power controls become essential for controlling the volume of your
amp. In general, it’s best to use the highest output power setting possible for your
playing situation, because of the factors mentioned below.
General Notes on Using the Output Power Controls
Although the Phase-4 Power Control circuitry does the best possible job of reducing
output power without changing the tone of the amp’s circuitry, there are other variables
in play at lower volume which do result in some apparent tone change. Here are a few
factors that you should be aware of -
Speaker breakup and compression is a big part of the tone and feel of the amp when
played at high volume. At low power settings, the speaker responds differently, and
does not break up and compress as it does at high power.
The ear’s natural response curve varies at different volume levels, which changes the
way you perceive sounds at different volume levels. Quieter sounds tend to give the
impression of having less bass content.
One way to help compensate for the above two factors is to intentionally mismatch the
speaker impedance, via the impedance switch on the back panel. At low power settings
(1W or below), you might try switching the impedance switch to the 4-ohm position (it
should normally be set to 8-ohms). Doing this will give you a fatter, thicker, slightly
more elastic tone. The downside is that it also tends to roll off the high frequencies a
bit as well.
At lower volume, there is a tendency to hit the guitar strings harder and play more
aggressively than you would if the amp were tuned up very loud. It may take some time
to get used to maintaining your playing style at reduced volume.
6

2. Back Panel Controls
2. Back Panel Controls
2. Back Panel Controls2. Back Panel Controls
AC Power
AC Power
AC PowerAC Power
Always use a grounded AC cord, and make sure that a proper ground connection is
supplied to the amp. Never attempt to lift or defeat the ground connection to the amp.
Fuse
Fuse
FuseFuse
A standard 2A fuse (style 3AG) should be used.
Power Switch, Standby Switch
Power Switch, Standby Switch
Power Switch, Standby SwitchPower Switch, Standby Switch
When powering up the amp, you should start with both the Power and Standby
switches in the "off" position.
First, turn on the Power switch. This will apply power only to the tube filaments and
the low-voltage circuitry (e.g. the fan).
After turning on the Power switch, allow the tubes to warm up for about 1 minute, then
turn on the Standby switch.
The power-down sequence is not as important as the power-up sequence. When
turning the amp off, you may turn Power off before Standby, or turn Standby off before
Power, or turn them both off at the same time.
Footswitch
Footswitch
FootswitchFootswitch
Connect the footswitch to the amp with the supplied cable, or with any standard ¼”
TRS -to- ¼” TRS cable.
The footwitch allows you to control both the preamp channel selection and the reverb
drive on/off. LEDs indicate the current switching status, as follows:
Channel switch: LED on = Lead channel
Reverb switch: LED on = Reverb on
When using the footswitch, make sure to set the front panel Channel switch to the
Rhythm position.
7

Speaker Jacks, Impedance Switch
Speaker Jacks, Impedance Switch
Speaker Jacks, Impedance SwitchSpeaker Jacks, Impedance Switch
When only one speaker is being used (e.g. the internal speaker), it must be plugged into
the “Main” speaker jack.
The Extension speaker jack may only be used if there is also a speaker plugged into the
Main speaker jack. Inside the amp, the Extension speaker jack is wired in parallel with
the Main speaker jack.
The Impedance switch allows you to match the output impedance of the amp to the
combined impedance of the speaker(s) used, or to intentionally mismatch the
impedance if desired, to change the tone.
The internal speaker supplied with the amp is rated at 8 ohms impedance, so you
should normally use the 8-ohm impedance selection if you are using only the internal
speaker.
You may safely mismatch the impedance by as much as doubling or halving the
selected impedance. Mismatching beyond this is not recommended. For example, if the
Impedance switch is set to 8 ohms, you may use a combined speaker load as low as 4
ohms or as high as 16 ohms.
When using two or more speakers, keep in mind the way in which the combined
impedance is computed from the individual speaker impedances. When using two or
more speakers with the Metropolitan, they will always be effectively wired in parallel, so
the effective combined impedance will be ½ of the impedance of the individual speakers.
For example, if you are using both the internal 8-ohm speaker connected to the Main
speaker jack, and an additional 8-ohm extension speaker connected to the Extension
speaker jack, then the total combined impedance will be 4-ohms, so you should set the
Impedance switch to the 4-ohm position.
8
3. Tube In
3. Tube Installation and Replacement
3. Tube In3. Tube In
stallation and Replacement
stallation and Replacementstallation and Replacement
Installing Tubes
Installing Tubes
Installing Tubes Installing Tubes
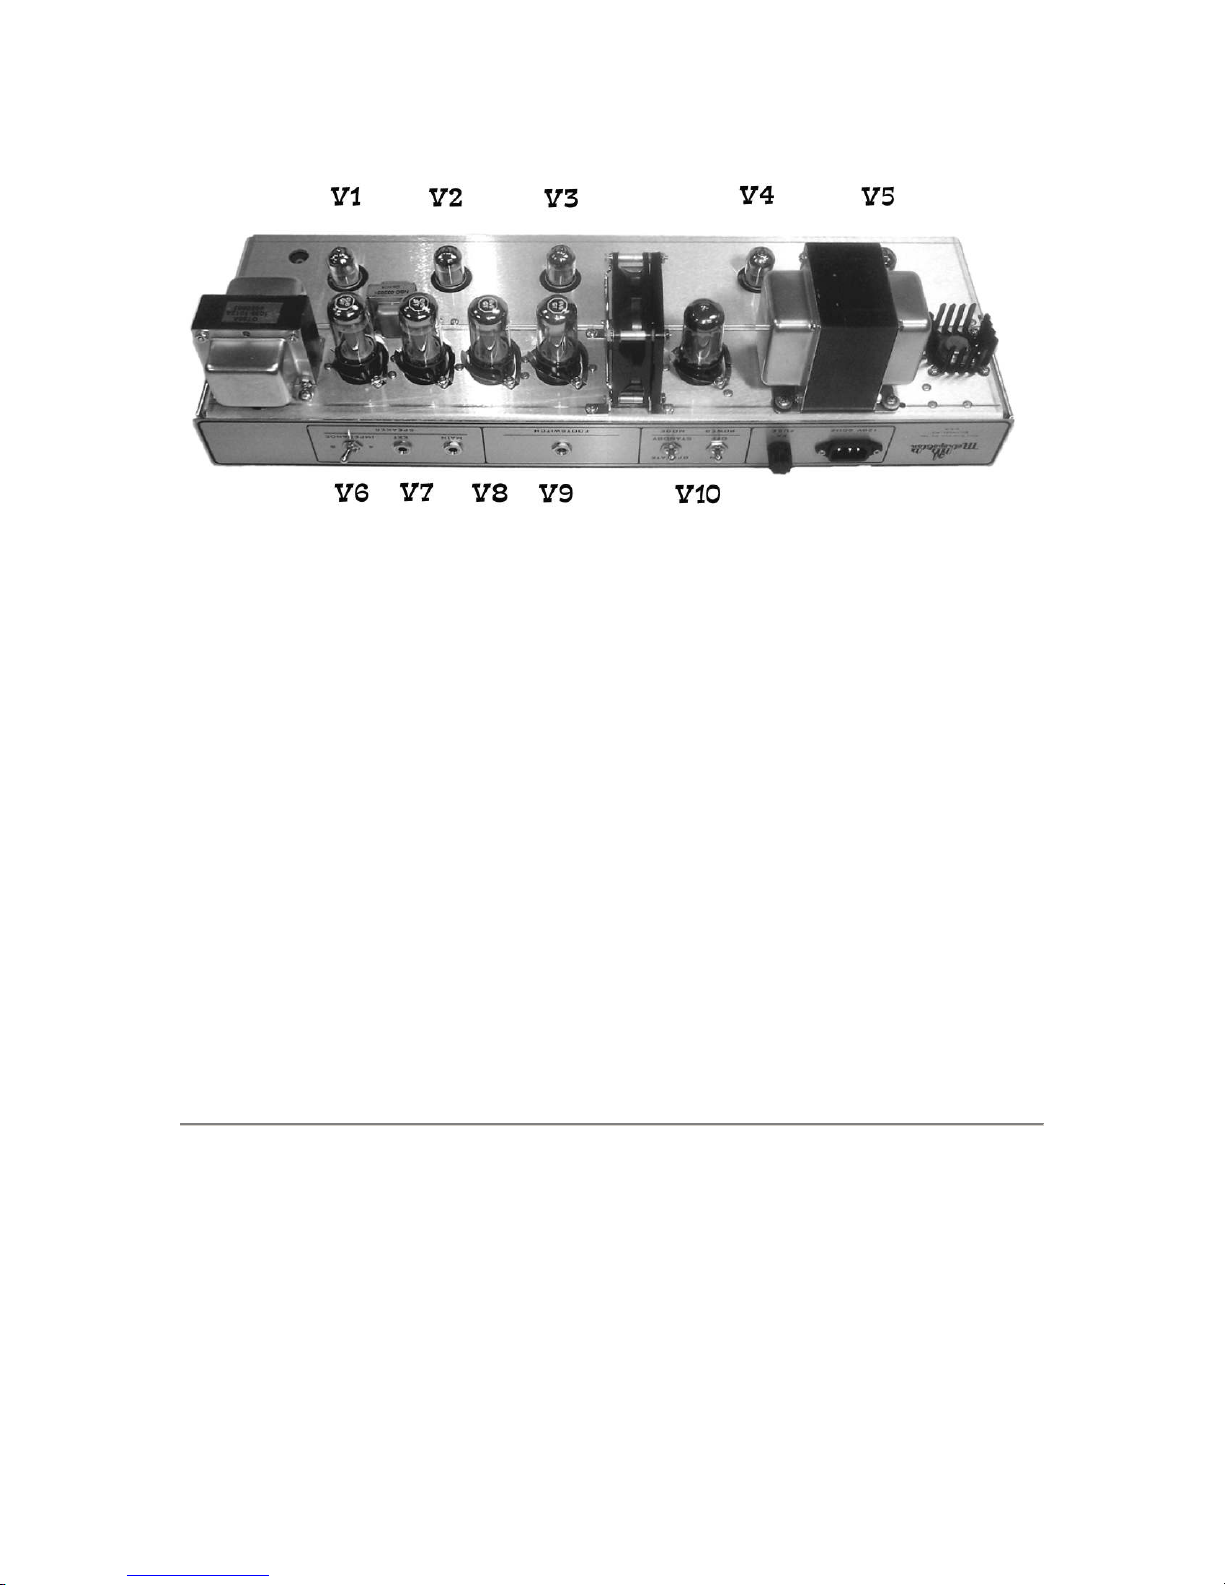
Your amp has been shipped with the tubes removed from the chassis, to protect them
from being damaged in shipping. They have been boxed, packed separately, and
numbered to indicate their proper position in the amp chassis. The diagram above
shows the proper location of all tubes.
You may find it helpful to lay the amp on its side, on a table, and shine a light directly
into the back of the amp, to aid in locating the position of each tube. Tubes must be
installed in the correct orientation. The smaller, all-glass tubes have a blank space in
the ring of pins which must line up with the blank space in the ring of tube pins in the
tube socket, located on the chassis. The larger, bakelite-base tubes have a small
cylinder with an indexing key in the center of the ring of tube pins, and this indexing
key must match up with the corresponding slot in the socket on the chassis.
Choice of Tube Types and Brands
Choice of Tube Types and Brands
Choice of Tube Types and Brands Choice of Tube Types and Brands
I currently suggest the following tube types:
No. Type and Brand Function
V1 Electro-Harmonix 12AX7 Stage 1 (Rhythm+Lead), Stage 2 (Rhythm)
V2 Electro-Harmonix 12AT7 Reverb Driver
V3 Sovtek 12AX7LPS Stage 2 (Lead], Stage 3 (Lead)
V4 Electro-Harmonix 12AX7 Reverb Receiver
V5 Electro-Harmonix 12AX7 Phase Inverter
V6-V9 Electro-Harmonix 6V6GT Output Tubes
V10 Sovtek 5AR4 Rectifier
9

Choice of Tube Types and Brands (Cont’d)
Choice of Tube Types and Brands (Cont’d)
Choice of Tube Types and Brands (Cont’d) Choice of Tube Types and Brands (Cont’d)
At this point in time, I believe that genuine vintage tones can only be obtained by the
use of vacuum tubes. Although tubes sound great, there are very valid reasons why
they were abandoned by the electronics industry over 40 years ago. Tubes are fragile,
generate a lot of heat, are sensitive to mechanical vibration, and subject to
manufacturing defects.
I have selected the particular tube types and brands in the Metropolitan because of
their particular tonal qualities. I feel that they provide the most well-balanced tone
which works well with all guitars and all settings. However, some customers find that
they wish to tailor the tone of their amp to their particular tastes by using different
brands of tubes, so I’ll offer some comments on my experience with various tube types.
General Notes on Preamp Tube Selection
Here are a few general notes regarding tube selection that you may find useful:
The Electro-Harmonix 12AT7 is a good quality tube, but is a bit bright sounding. If you
prefer a darker reverb sound, you may want to use a Chinese 12AT7, or perhaps a NOS
RCA 12AT7.
The tube choices shown above are the best combination of current production tubes
that I have found. In general, I’ve found that long-plate 12AX7s, like the Sovtek
12AX7LPS, have a bigger, fatter sound, more natural dynamics, and a more threedimensional character. However, they can be quite microphonic (and are therefore not
usable in the 1st gain stage), and don’t quite have the detail and clarity of short-plate
tubes, like the EH 12AX7. Short-plate 12AX7s don’t have the big sound of the longplate varieties, but excel in their clarity and shimmering high frequencies. I’ve
combined both types in the Metropolitan, in order to gain both the big, powerful sound
of the long plate 12AX7s with the intense clarity and detail of the short-plate 12AX7s.
Here are a few impressions of how some other tube brands sound in the Metropolitan:
The JJ 12AX7 is a short-plate design. It has a rather bland tonal palette, and an oddly
nasal quality to the upper midrange.
The EI 12AX7, a long-plate tube, is a very warm, huge sounding tube, with a very NOS
character. However, it is extremely microphonic, and can therefore be difficult to use.
The Svetlana 12AX7, a short-plate tube, has nearly the clarity of the 12AX7EH, and
slightly more bottom end, but is a bit congested in the midrange. Years ago, I had
selected this brand as the brand of choice for the Meteor/II amp, but later changed to a
combination of the 12AX7EH and the 12AX7LPS.
The Tesla 12AX7 appears physically very similar to the Svetlana 12AX7, and sounds
quite similar too. It’s a bit brighter and thinner than the Svetlana, with perhaps a bit
more clarity in the top end, but it has the same midrange congestion as the Svetlana.
10

Replacing Output Tubes
The output stage of the Metropolitan is fully cathode biased, and no bias adjustment is
necessary when changing output tubes. The design of the Metropolitan’s output stage
allows for a fairly wide variation in tube characteristics, so any known brand of 6V6 can
be installed, and will work properly and be appropriately self-biased.
General Notes on Output Tube Selection
There are a few different brands of 6V6s available today. I’ve chosen the EH 6V6
because of its wonderful combination of bottom-end warmth, lively dynamics, and topend smoothness and clarity. Other types I tried are as follows:
The JJ 6V6 has a big, beefy sound which is more reminiscent of a 6L6 than a 6V6. The
reason I didn’t choose this tube is that it doesn’t have the lively dynamics and sparkle
of the EH 6V6.
The Tesla 6V6 is a nice tube which has a very NOS vibe. The only characteristic that I
felt it fell short on was that it was a bit too lean in the midbass. It sounds thinner and
less warm than the EH 6V6.
Tube Quality
Tube Quality
Tube Quality Tube Quality
Currently available tubes are not of the same quality level as in the 1950's. Recently
manufactured tubes are built in China, Russia, or the Czech Republic, and are not built
to the same quality standards that, say, RCA used to manufacture tubes in the U.S., in
the 1950s. It would seem that the obvious solution would be to use new-old-stock
tubes from these older periods. However, I've found that many of these new-old-stock
tubes have gone gassy or developed other problems.
As a result, we musicians must recognize that, while we prefer to use vacuum tubes
because of their tone, they can be imperfect devices, and are most certainly the least
reliable component in the entire amplifier.
Tube problems generally reveal themselves as a crackling noise which can occur
continuously, sporadically, in response to mechanical vibration, or in response to your
playing (e.g. a crackling or other type of noise which occurs only when you hit a note).
I subject all tubes to a thorough burn-in and test procedure to ensure that they are
fully up to spec and operating perfectly. However, you must be aware that the majority
of tube failures occur early in their life, and may come about as a result of the jostling
and jarring that an amp can receive in shipping. In spite of the exhaustive testing I
perform at the shop, early-life tube problems cannot always be found in such testing.
The first two months or so are the most tenuous period for any set of tubes. Most
manufacturing defects will be revealed in the first two months of their life, but many are
not detectable in initial testing, even after a burn-in period.
If you notice any noises, cracking, or any other odd behavior of your amplifier in this
period, note that it is most likely to be the result of a defective tube, and should be
debugged as such.
11

Premier Builders Guild LLC
Limited Warranty
Premier Builders Guild – Tone King Amplifiers Division
201 S. Highland Avenue, Box 204
Pittsburgh, PA 15206
This warranty gives you specific legal rights; you may also have other rights which vary from state to state. There are
no express warranties except those listed below.
Length of Warranty
This warranty shall remain in effect for five years from the date of sale of the product as shown on the original bill of
sale.
What is Covered
This warranty covers all defects in material and workmanship in this product, with the following exceptions:
1. Damage or deterioration of the cabinet, or any other cosmetic damage which occurs after delivery is not
covered by this warranty.
2. Damage after initial delivery resulting from accident, unreasonable use, or neglect, is not covered by this
warranty.
3. Damage resulting from the performance of repairs by someone other than the Tone King Amplifier
Company is not covered by this warranty.
4. Damage occurring during shipment or delivery of this product to the Tone King Amplifier Company
after initial delivery of the product is not covered by this warranty.
5. Vacuum tubes are considered a user-replaceable item, as they are expected to wear out and require
replacement over a reasonable period of time. Tubes are warranted to be serviceable for a period of 90
days from the date of sale.
6. The speaker(s) in this amplifier has(have) been selected for use only with this amplifier. If the
speaker(s) of this amplifier is(are) connected to an amplifier other than the intended amplifier, any
warranty of this speaker shall be deemed void.
What We Will Pay For
The Tone King Amplifier Company will pay for all labor and material expenses to fix or replace all items covered
under this warranty. The customer will pay shipping charges to return the product to the Tone King Amplifier
Company. If the necessary repairs are covered under this warranty, the Tone King Amplifier Company will pay any
shipping charges required to return the product to the customer.
Limitation of Implied Warranties
All express or implied warranties of merchantability and fitness for a particular purpose are limited in duration to the
length of this warranty, unless otherwise provided by state law.
Exclusion of Certain Damages
The Tone King Amplifier Company’s liability is limited to the repair or replacement, at our option, of any defective
product, and shall in no event include incidental or consequential damages of any kind. Some states do not allow
limitations on the length of an implied warranty and/or do not allow the exclusion of incidental or consequential
damages, so the above limitations and exclusions may not apply to you.
Obtaining Warranty Service
If your unit requires service, it should be returned to the Tone King Amplifier Company at the address listed above.
Before returning the unit, you must contact the Tone King Amplifier Company and obtain return authorization.
12

CE Declaration
CE Declaration
CE DeclarationCE Declaration
13
 Loading...