

Tonebone VT R800 7040 00, SS R800 7084 00, Radial Headbone VT, Radial Headbone SS Owner's Manual
Radial
Headbone VT & SS
www.tonebone.com
Owner’s Manual
Radial Engineering
1638 Kebet Way, Port Coquitlam BC V3C 5W9
tel: 604-942-1001 • fax: 604-942-1010
email: info@radialeng.com • web: www.radialeng.com
Radial Engineering is a division of C • TEC (JP CableTek Electronics Ltd.)
™
Part # VT R800 7040 00
SS R800 7084 00

>>> IMPORTANT SAFETY AND LIABILITY NOTICE <<<
Radial Engineering (JP Cabletek Electronics Ltd.) manufactures
products that are safe for use when connected as per the instructions in our owner’s manuals. Manuals are freely available for
download on our web sites. As it is impossible for Radial to ensure
the user is following these instructions, the user must take full
responsibility in the suitability of purchasing a Radial product for
his or her use.
For safe operation, the Headbone MUST be properly grounded, not
only to provide shielding from hum and noise, but also to prevent
any SHOCK HAZARD. The Headbone is connected to the earth
ground (AC-3rd ground pin) via its connection to Amp-1. You must
make sure that both amplifiers being connected to the Headbone
are properly grounded and equipped with a 3rd safety pin on the
AC plug. It may be unsafe to use the Headbone with vintage amplifiers equipped with a 2-prong plug or amplifiers whose 3rd pin
has been removed or lifted. For safety, always consult a qualified
technician on making proper connections to the equipment that
you wish to connect.
It is important to note that all Radial products that function using
AC or DC electrical current, are sold with a government agency
approved power supply for use around the world (i.e. UL, CSA etc.).
We insist that Radial products be used with equipment that carries
the same or similar safety government approvals. If you plan to use
equipment that has not been approved by a government-approved
electrical safety body, you are doing so at your own risk.
By purchasing this product, you clearly understand that you are taking full responsibility for the use of this product. If, after purchasing
this product from your dealer, you are not comfortable in accepting
this responsibility, we ask that you return the product within 7 days
to the dealer for refund, credit or exchange. Consult your dealer on
their policy regarding this matter.
Radial Engineering accepts no responsibility (consequential or
inconsequential) for damage or injury caused by improper connections, user error, using improperly grounded amplifiers, or injury
caused by failure of the Headbone or any component inside. The
use of the Headbone implies that the user/owner agrees to all of
the terms stated within this document, and has made the decision
to keep the Headbone under these terms, and waives his/her
rights to a liability claim against Radial Engineering (or associated
companies or directors) for any damage or injury caused while
using the Headbone. Please read the Headbone warranty for
further details.

True to the Music
Radial Engineering Headbone Owner’s Manual
Congratulations on your purchase of a Radial Headbone!
As part of the growing family of Tonebone products, the Headbone is designed to open doors to creative new sounds and provides the discerning
guitarist with greater options on stage and in the studio with a simple, yet
extremely versatile interface.
The Headbone is designed to connect two amplifier heads to one speaker
cabinet and switch between amplifiers with a footswitch. The Headbone
uses pure Class-A electronics under digital control for the hi-impedance
guitar signals and hi-power speaker signals. Add Slingshot™ remote
control and you get a true marvel whose time has come! Best of all, the
Headbone is engineered to ensure the safe operation of either tube (VT)
or transistor (SS) amps.
To take advantage of all of the wonderful features that have been incorporated into the Headbone, please take the time to read through
this manual before you use it. This will give you a broader sense of the
Headbone’s capabilities and ensure its safe and proper operation. If you
have questions that are not covered here, please visit the FAQ section
on our web site. This is where we post answers from questions that come
from users. If you have a question that is not covered there, please feel
free to send us an email at info@tonebone.com and we will do our very
best to respond as quickly as possible.
Start your engines!
RADIAL HEADBONE™ OWNER’S MANUAL
Table Of Contents Page
Caution Statement & Legal Disclaimer ..............................Inside cover
Introduction ................................................................................1
Feature Set ................................................................................3
Quick Start .................................................................................5
Getting To Know Your Headbone ..............................................7
FAQ ...........................................................................................11
Warranty ............................................................................Back cover
Radial Engineering is a division of JP CableTek Electronics Ltd.
Radial Headbone Owner’s Manual - Part # R800 9680 00 • V1.0 06-20-04
Specifications and appearance are subject to change without notice.
INTRODUCTION
Whether you have a Headbone VT or a Headbone SS, the
setups and connections are identical. For simplicity, this
manual will discuss the Headbone VT. It is important to note
that because of the very different nature of solid-state amps
and valve-tube amps, each Headbone’s internal circuit is
different. The Headbone VT is exclusively designed for
valve-tube amps; the Headbone SS is exclusively designed
for solid-state amps. As such the SS and VT are not interchangeable. Attempting to use a solid-state amp with the
Headbone VT (or vice versa) could damage your amp and/or
the Headbone. This would void your warranty. Please consult
your dealer and make sure you fully understand the ownership disclaimer before using the Headbone.
When developing the Headbone, we asked guitarists: “What would be
the ultimate guitar setup?” Ask 10 guitarists this question and you will
likely get 10 different answers. The reason for this is simple: There are
no right answers as the possibilities are endless. So where do you start?
You need a concept. The following is a setup concept that will help get
those creative juices flowing. It combines simplicity with awesome stage
performance.
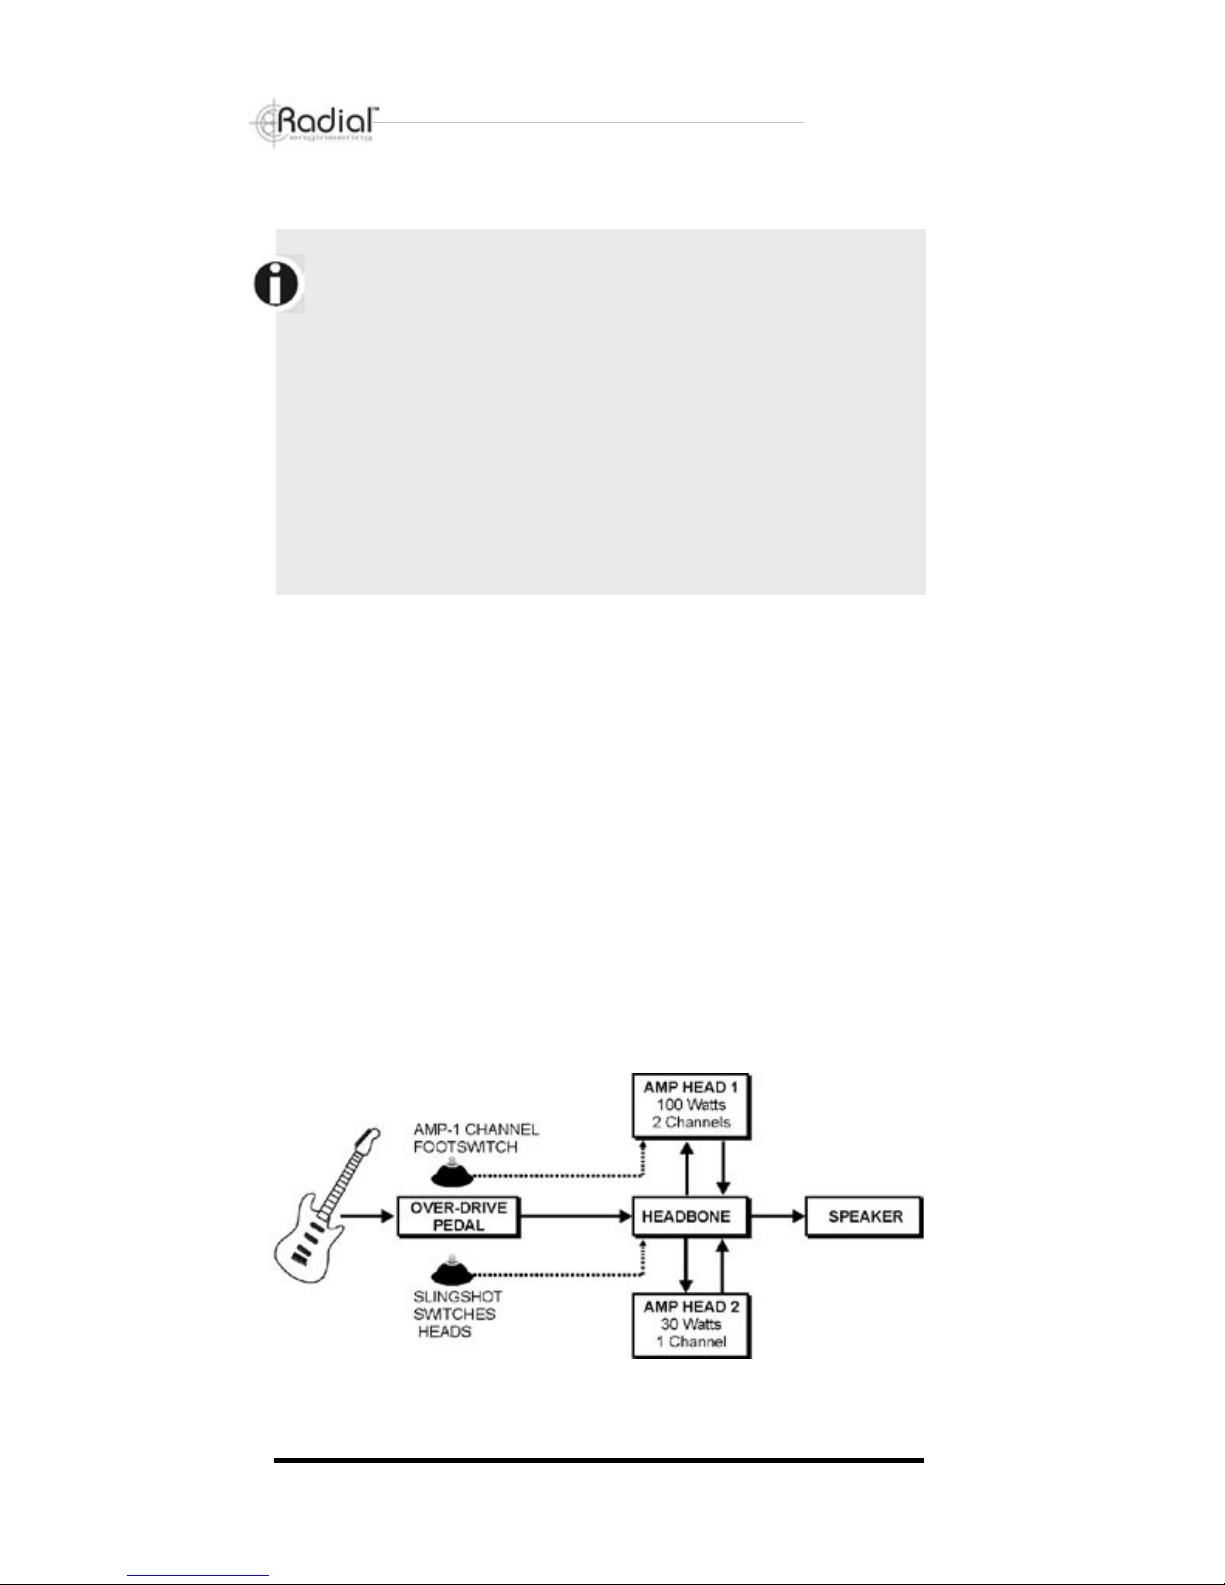
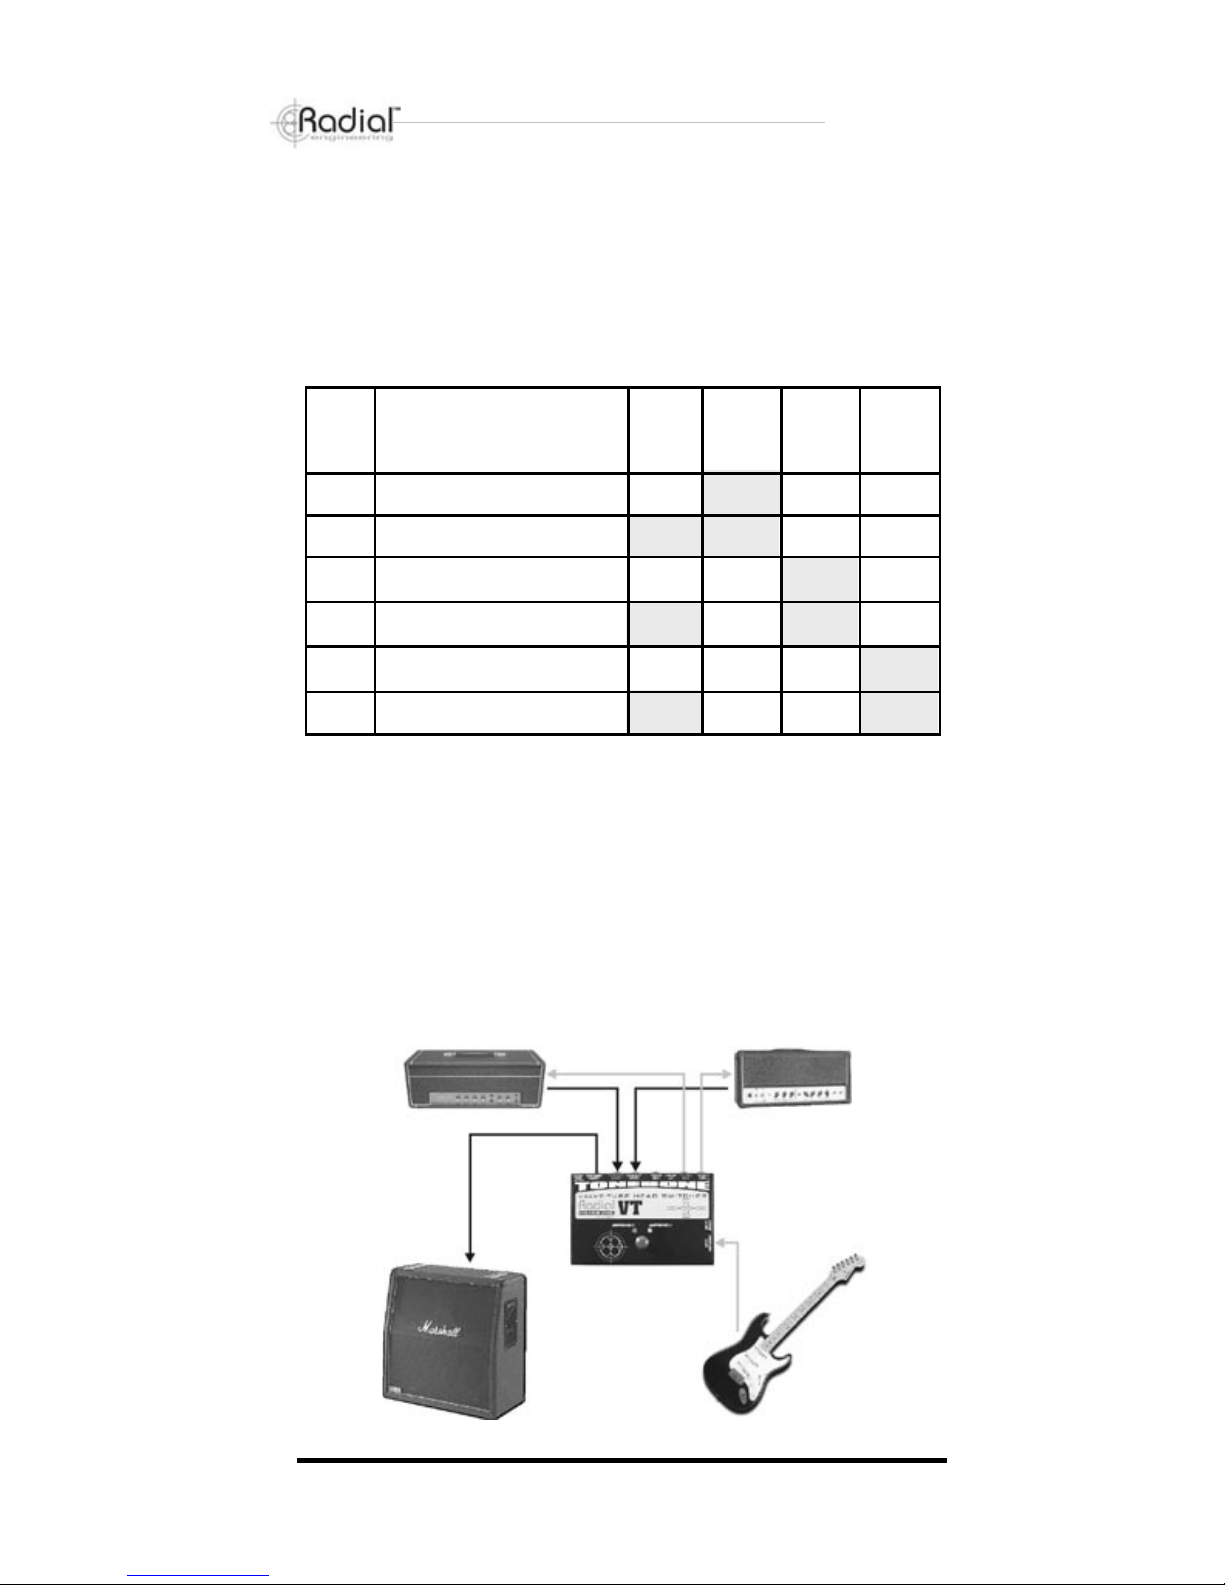
The guitar connects to the effects on the pedalboard. The pedalboard is
connected to the Headbone input. The Headbone connects to the inputs
of the two amplifier heads. The amplifer outputs are brought back to the
Headbone which, in turn, connects to the speaker cabinet. In the example
below, amp head-1 is a 100-Watt 2-channel amp with one channel set to
clean and the other set to saturated overdrive distortion. Amp head-2 is
a low power 30-Watt amp that would be driven ‘hard’ for natural output
tube overdrive. Add a good distortion pedal and all of a sudden your setup
becomes a tone monster.
True to the Music
Radial Engineering Headbone Owner’s Manual
1
Typical Headbone setup with a channel
switching head and a single channel head.
True to the Music
Radial Engineering Headbone Owner’s Manual
Why is this setup so cool? Because it truly covers all of the bases: the
powerful clean sound from a 100-Watt amp is radically different than an
all-tube 30-Watt amp cranked to 10. Not just as far as loudness goes,
but also as far as tone. Being able to use that reserve power for blistering solos can make a huge difference. Best of all, you only have to carry
around a single speaker cabinet - a luxury that is best appreciated at two
in the morning after the gig!
Tone chart: two amp heads, one distortion pedal, one speaker cabinet,
six distinct amp tones.
Tone-1
Tone-2
Tone-3
Tone-4
Tone-5
Tone-6
TYPE OF SOUND
Clean Rhythm
Solo Distortion
Crunch Rhythm (change amp ch.)
Saturated Solo
Overdrive Rhythm (change heads)
Saturated Rhythm
OVERDRIVE
PED-
AL
X
X
HEAD-1
CLEAN
CH. 1
X
X
HEAD-1
CRUNCH
CH. 2
X
X
HEAD-2
OVERDRIVE
X
X
2
This is the point: with the Headbone in your rig, you are now able to specify
which amplifier you will use for a particular song or passage. You do not
have to compromise. And you do not have to carry around two amp-stacks
to get there. Yes, finally a device that adds tonal flexibility while reducing
the amount of equipment you bring to the gig!
AMP HEAD-2
AMP HEAD-1
 Loading...