

Tomraffield Loer Pendant Installation Manual
Loer Pendant Installation Instructions
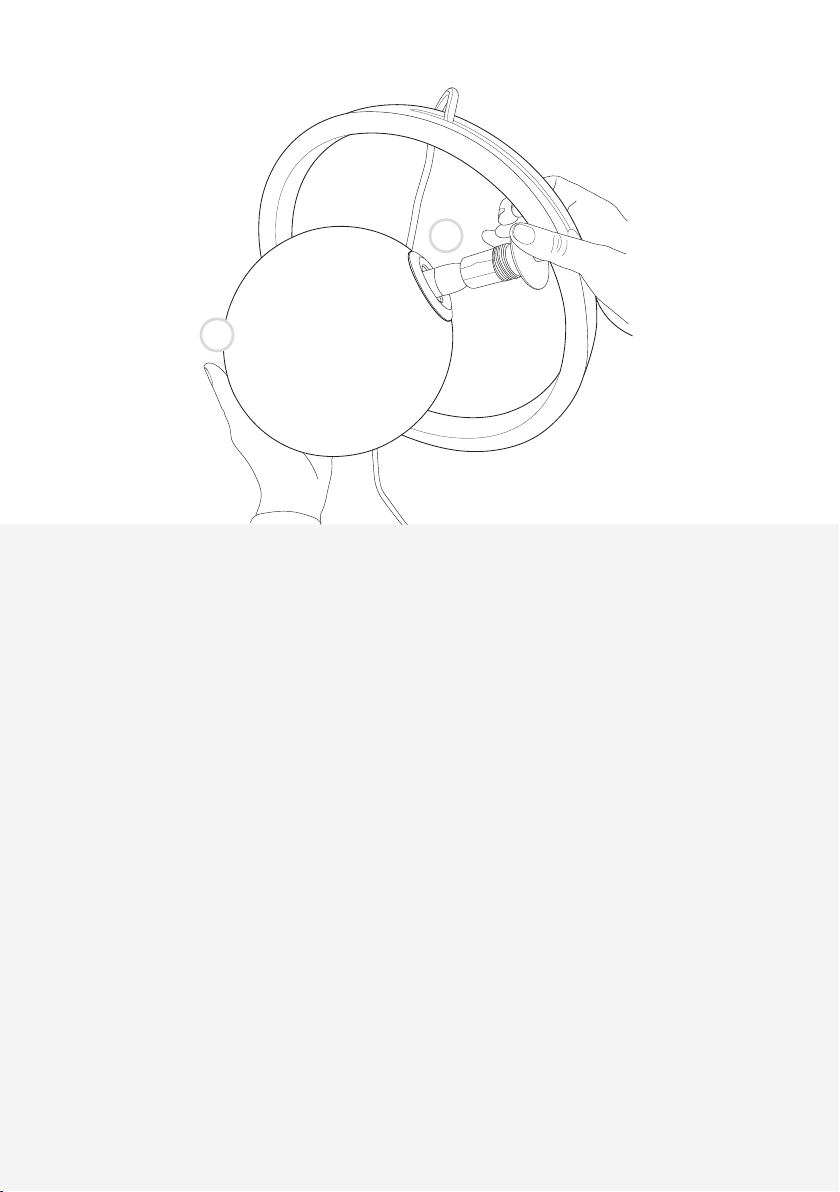
A
B
Only qualied persons should assemble the luminaire. If in doubt, consult a suitably qualied electrician.
Installation MUST be carried out in accordance and compliance with current building regulations.
Ensure the electrical supply is turned OFF at the fuse board.
Before installing the pendant, carefully unscrew the glass sphere diffuser and set to one side for later.
The Loer Pendant has been designed to t the E27/ES (Edison Screw) tting ceiling kit provided. After
adjusting the ex length to suit your space if needed, connect the ceiling rose (A) to the electricity
supply (220-240V AC 50-60Hz). This must be installed by a qualied electrician before following the
instructions below. The Loer pendant should be connected to the electricity supply and xed to the
ceiling before tting the bulb and glass sphere diffuser due to the fragility of the glass.
1. Once the ceiling kit has been connected to the electricity supply and the pendant securely attached
to the ceiling, screw in the light bulb supplied (A). The lampshade has been designed to work with an
LED bulb, up to a maximum of 9.5 Watts.
2. Carefully thread glass sphere over the light bulb (B) and locate onto the brass thread of the bulb holder.
Gently tighten the sphere onto the bulb holder securely connecting the two parts. Due to the fragility of
the glass sphere diffuser, this step should be carried out with great care to avoid breakage.
3. Turn the power supply on to complete installation.
*** If the external exible cable or cord of this luminaire is damaged, it shall be exclusively replaced by the manufacturer or his service agent
For more information on the installation of your product: contact@tomrafeld.com +44 (0)1326 722725
or a similar qualied person in order to avoid a hazard. For indoor use only. ***
 Loading...