

Tomra Orwak 3300 Operating Instructions Manual
Edition 5, From serial no. 106000-
Publ. no 4869014-00
OM3300, 2012-02
Orwak 3300
OPERATING INSTRUCTIONS (IN THE ORIGINAL)

English
CONTENTS
Safety ...................................8
Waste matrix .........................8
Operating instructions...........9
Technical specications ......10
Dimensional sketch ............10
Transport ............................10
Installation ..........................11
Language selection ............11
Weekly inspection and
maintenance .......................12
CE.......................................13
SAFETY
2
Please read the operating instructions BEFORE operating the machine.
2
Our warranty/product responsibility requires that:
3
• instructions are followed, and that no conversion or modication is carried out.
• original spare parts, and hydraulic oils and lubricants recommended by the
4
4
4
5
5
6
7
machine manufacturer are used.
• at least one annual service is carried out.
The user of the machine is responsible for the safety checks, and for ensuring that daily
maintenance of the machine is carried out. The user is responsible for seeing to it that
defects are rectied, and that neither the user nor other persons are subjected to danger.
The owner is responsible for ensuring that all laws and instructions are complied with
when using the machine.
This symbol means WARNING or DANGER - personal safety instruction!
This machine is designed for ONE MAN OPERATION. Only the operator is allowed in
the machine’s working area.
The machine must not be used if the safety functions (e.g. switches and protections)
have been deactivated, damaged or removed.
Lost or damaged parts must be replaced with original spare parts.
The machine has a high centre of gravity. If the machine needs to be moved, the press
plate must be lowered fully before moving.
Installation, repair and service work may only be performed by qualied and compe-
tent staff and in accordance with the installation and service instructions.
WASTE MATRIX
HP LP
Cardboard
Shrink lm
Shredded
paper
Plastic
bags
Paper bags
Errors and omissions excepted.
x
x
x
LP
x x
x x
The machine must not be used by minors.
Never climb on the machine.
The machine may only be operated by a person who has received training and
has experience of the machine.
SAFETY FEATURES
The machine is equipped with the following safety features:
Upper and lower door switches, which prevent compacting with the doors open. When
the upper door is closed, the lower door is mechanically interlocked below the upper door.
Covers and protections conceal hydraulic lines and movable machine parts. When the
lower door is opened, the door pressure is relieved. Baling is performed from the side of the
machine to keep the operator away from the baling area. Installation dimensions must be
observed!
The machine is also equipped with an emergency stop, as well as a main switch that can
be locked to prevent unauthorised use, for example during service and maintenance or when
removing any waste that has become trapped.
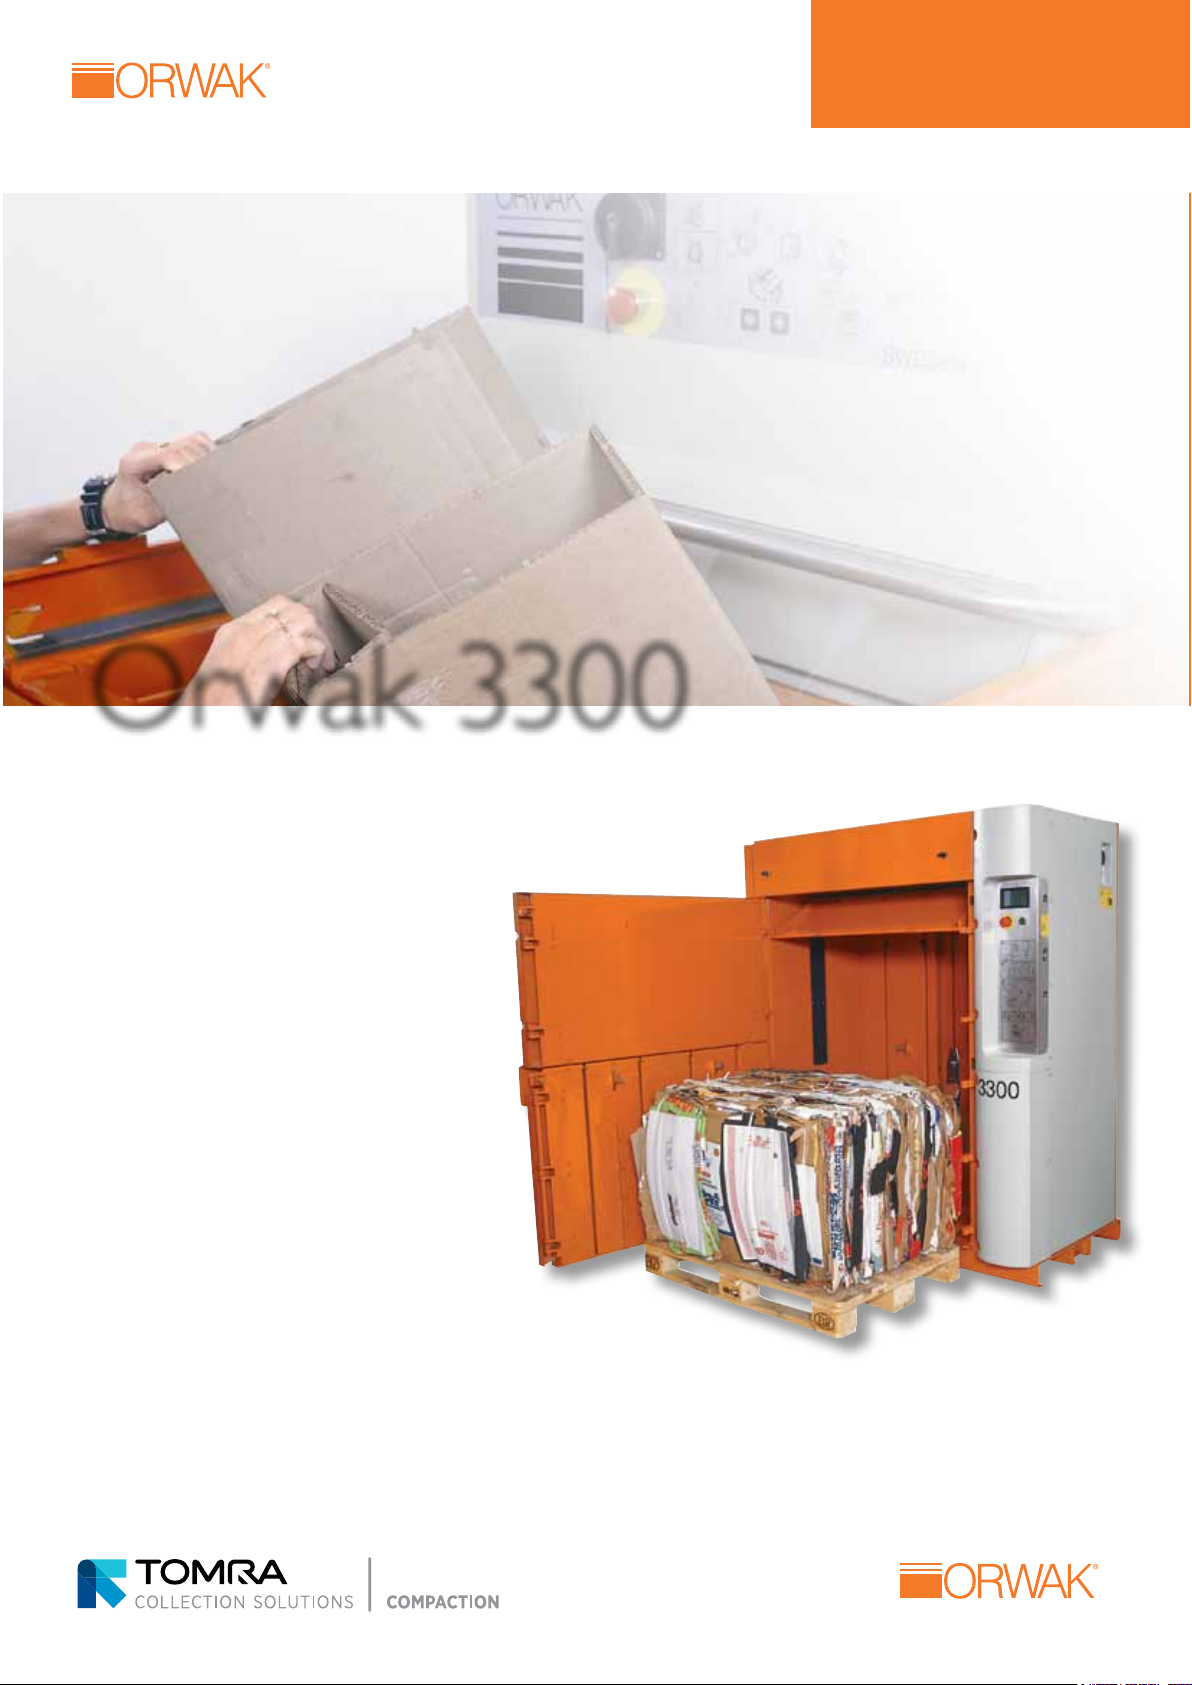
RANGE OF APPLICATION
The machine is a hydraulically operated baler intended for compacting bulky materials such
as cardboard, paper and plastic. There are three compaction modes: HP (high-pressure
compaction) for cardboard and paper, LP (low-pressure compaction) for plastic and LP with
hour-glass symbol (low-pressure compaction with delay, the press plate stops in the lowered
position for a few minutes) for plastic that springs back strongly. This mode makes it possible
to compact large plastic volumes and increases the degree of compression. NOTE! After the
press plate has been lowered and has been stationary in the lowered position for a few minutes, it is automatically raised again! If you want to raise the press plate earlier, this can be done
by pressing the up button. See the waste matrix to the left for an overview of suitable pressing
modes and waste that is suitable to be compacted in the machine. For all other materials, contact your dealer for information. The material being compacted must be evenly distributed in
the chamber. Only use straps recommended by the machine manufacturer. The machine
may only be used in areas that have a roof, protection against wind and normal lighting. The
machine has a display that is sensitive to temperatures below 0°C. When positioning where
lower temperatures can occur - contact your dealer for information about alternative solutions.
The machine is intended for use within the temperature range -10°C to +40°C. A low-temperature oil
and/or heater should be used at temperatures lower than +5°C.
Materials that are ammable or of an explosive nature, such as pressurised contai-
ners or equivalent which, when exposed to pressure or sparks, could cause damage,
re or an explosion, must not be compacted in the machine.
2
8

HP
LP
LP
English
OPERATING INSTRUCTIONS
Mounting the strap
3
2
2
Compaction
9
11
4
4
10
1
5
3
4872248-00 (VG13)
=
4872305-00 (VG13HD)
=
4865269-00 (MW)
=
WARNING!
Only the operator is
allowed in the machine’s
working area!
Mounting the strap
1 Make sure that the press plate
is lowered.
6
7
8
Compaction
9 Open the upper door.
10 Place the waste evenly distributed in the con-
12
13
tainer.
11 Close the shutter - the start button lights green.
12 Select compaction alternative:
LP = Low-pressure
HP = High-pressure
LP
13 Press the green start button for an automatic
=Low pressure with 5 min. delay. For further information, see under the heading RANGE
OF APPLICATION on the previous page.
press cycle.
2 Open the upper and lower doors
fully. Turn back the handle to
release the lower door.
3 Place the strap reels in the
mounts on the strap shelf, pull
the straps through the shelf and
behind the pin on the back of
the container, then pull them
under the press plate
4 Close the upper and lower
doors.
5 Raise the press plate with ”ar-
row up”.
6 Open the upper door.
7 Thread the straps through the
slots in the lower door and
secure the straps with a loop on
the front
8 Place the straps in the slots with
the bale tool. It is important that
the straps are in the strap slots!
Baling
14
20
21
19
15
Baling
17
16
18
23
26
21
22
23
27
25
14 The display ashes for ready
bale - the machine is ready for
baling.
15 Open the upper door.
16 Pull forward the strap using the
bale tool.
17 Cut the straps with the knife.
18 Thread the straps through the
gap in the lower door.
19 Close the upper door.
20 Lower the press plate towards
the waste with “down arrow”.
The press plate automatically
stops in the down position and
keeps the bale under pressure.
21 Tie the straps.
22 Run up the press plate using the
“up arrow”.
23 Open the upper and lower doors
fully. Turn back the handle to
release the lower door.
24 The operator stands at the SIDE
24
of the machine, outside the risk
area.
25 Make sure that NOBODY is in
the risk area!
26 Remove the bale by pressing
the two buttons on the side of
the machine at the same time.
27 Close the lower door.
Fit straps in accordance with
points 7 and 8.
3
9
 Loading...