

Page 1
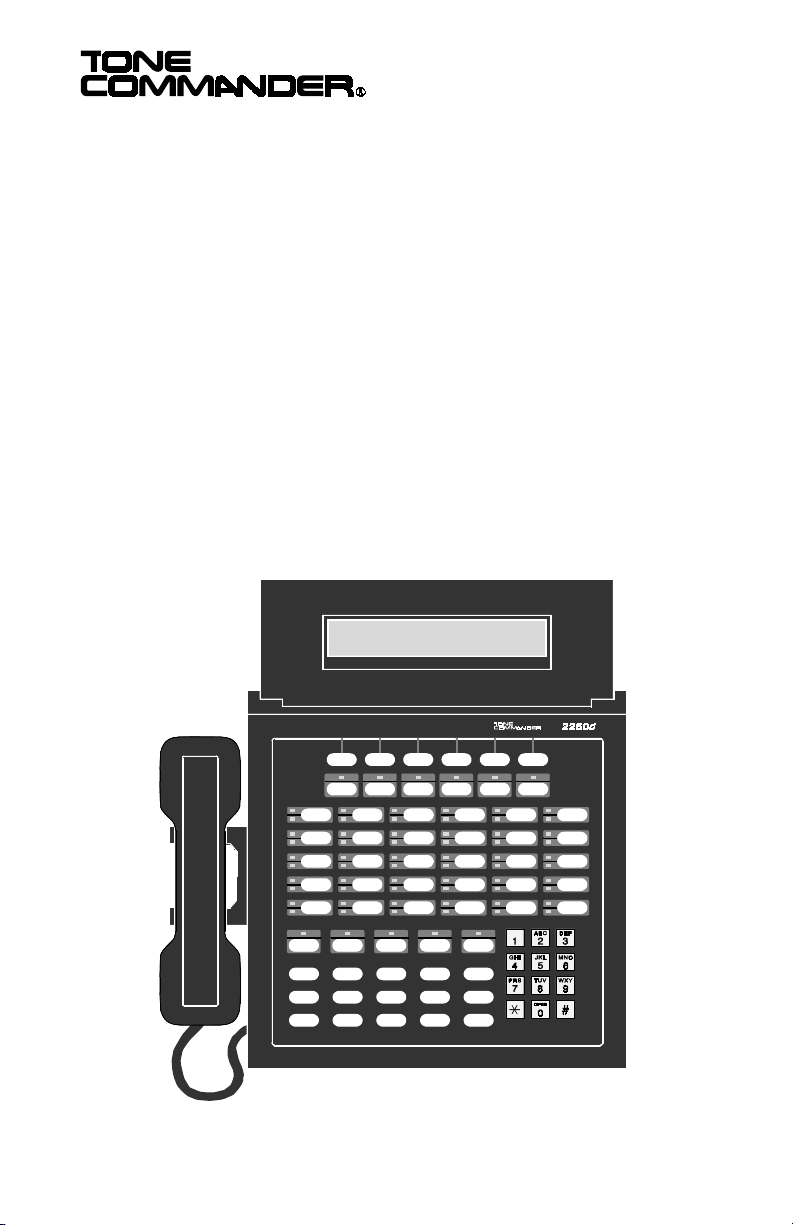
2260d
Atte ndant’ s Guid e
®
Page 2

Introduction . . . . . . . . . . . . . . . . . . . . . . . . . . . 1
Buttons, Display, Indicators . . . . . . . . . . . . . . . . 2
2260d Console . . . . . . . . . . . . . . . . . . . . 2
Call Processing Buttons . . . . . . . . . . . . . . . 3
Hold Loop Buttons . . . . . . . . . . . . . . . . . . 5
Shift Button . . . . . . . . . . . . . . . . . . . . . . 5
DSS (Direct Station Select) Buttons . . . . . . . . . 5
Display . . . . . . . . . . . . . . . . . . . . . . . . 6
Operation . . . . . . . . . . . . . . . . . . . . . . . . . . . . 9
Call Answering . . . . . . . . . . . . . . . . . . . . . . . 9
Transferring Calls . . . . . . . . . . . . . . . . . . . . . 10
Call Hold . . . . . . . . . . . . . . . . . . . . . . . . . . 11
Call Park . . . . . . . . . . . . . . . . . . . . . . . . . . 13
Call Pickup . . . . . . . . . . . . . . . . . . . . . . . . . 14
Automatic Callback . . . . . . . . . . . . . . . . . . . . 14
Announcing Calls . . . . . . . . . . . . . . . . . . . . . 15
Voice Mail . . . . . . . . . . . . . . . . . . . . . . . . . 15
Call Release . . . . . . . . . . . . . . . . . . . . . . . . 16
Call Originating . . . . . . . . . . . . . . . . . . . . . . 16
Priority Calls . . . . . . . . . . . . . . . . . . . . . . . . 17
Conference Calls . . . . . . . . . . . . . . . . . . . . . 18
Ring Delays . . . . . . . . . . . . . . . . . . . . . . . . 19
Adjusting the Ringer Volume . . . . . . . . . . . . . . . 20
Adjusting the Handset Volume . . . . . . . . . . . . . . . 20
Using a Headset . . . . . . . . . . . . . . . . . . . . . . 20
Console Setup . . . . . . . . . . . . . . . . . . . . . . . . . 21
Name Database . . . . . . . . . . . . . . . . . . . . . . 22
Setting the Clock . . . . . . . . . . . . . . . . . . . . . . 25
Console Care . . . . . . . . . . . . . . . . . . . . . . . . . . 27
Content s
Tone Commander 2260d Attendant’s Guide i
Page 3

ii Tone Commander 2260d Attendant’s Guide
Page 4

The Tone Commander 2260d console is an easy to use
attendant console utilizing ISDN technology. All calls are handled
over a single attendant loop.
The console includes autodialing and station status display for up
to 60 stations.
The features of the Tone Commander 2260d include:
ENHANCED
INCOMING CALL
IDENTIFICATION
FLEXIBLE
BUTTON
ASSIGNMENTS
CALL QUEUING – Ringing calls are presented to the console
SINGLE BUTTON
ANSWERING
DSS (Direct
Station Select)
HOLD LOOPS – Held calls are individually assigned to a
HOLD RECALL – Calls left on hold longer than the time
– Calling and called party identification, call
type, hold status, and other useful
information is shown on a large, easy to
read display.
– Console button layout may be customized
by your installer for your installation.
in the order received, prioritized by call
type or directory number.
– Ringing calls can be answered by pressing
a single button.
– Autodials a station’s number with a single
button.
buttons used for call information or
retrieval.
selected by the installer will recall the
attendant.
Introduction
Buttons and indicators on the 2260d console are described on the
following page.
Tone Commander 2260d Attendant’s Guide 1
Page 5
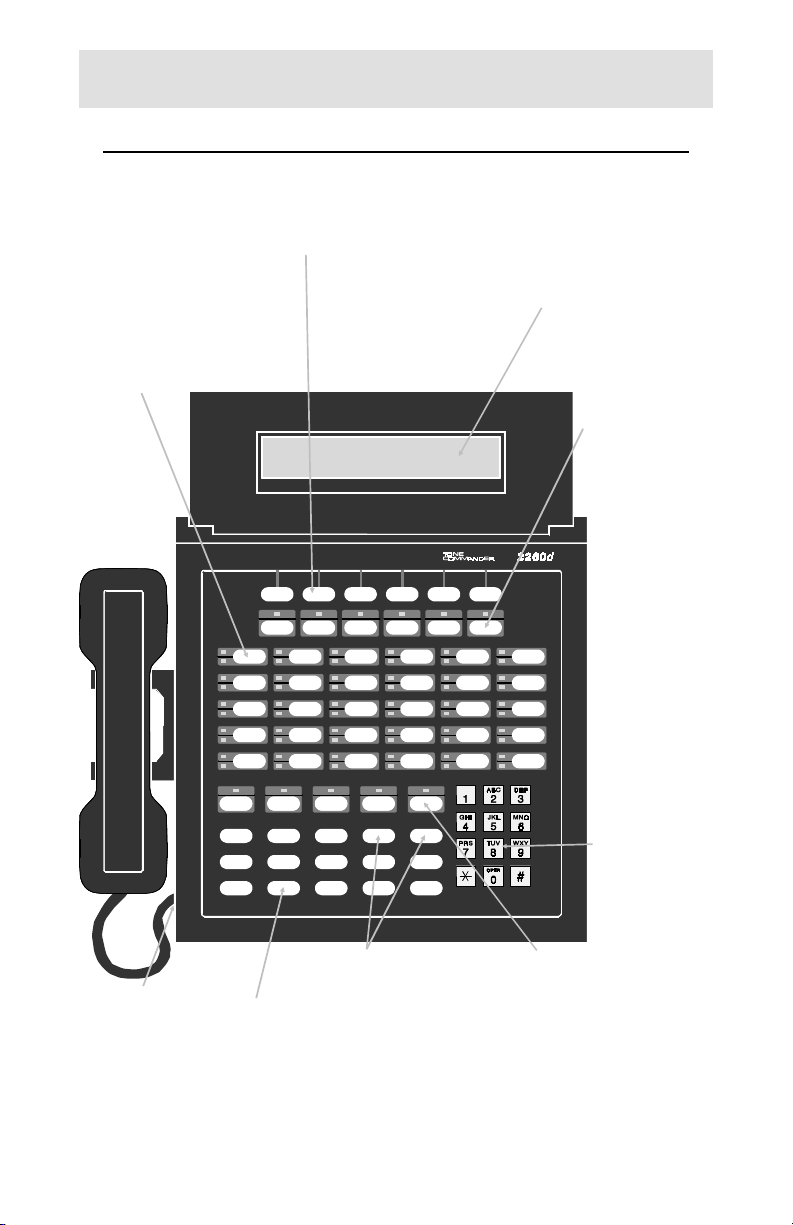
Buttons, Display, Indicators
2260d Console
Hold Loop Buttons
retrieve calls on hold,
and display held call
information.
(see page 5)
DSS Buttons and
Line Status Lights
(see page 5)
Display
provides the attendant with diverse
information during operation of the
console, including calling and called
party identification, call type, hold
status, and the time of day.
(see page 6)
MAINT
Button
enters/exits
Maintenance
Mode
(see page 21)
®
VOL Buttons
Handset/
Headset
Jack
(see page 20)
Call
Processing
Buttons
(see page 3)
adjust the volume
of the handset and
the console’s ringer.
(see page 20)
2 Tone Commander 2260d Attendant’s Guide
Dial Pad
used for dialing
and accessing
system features.
SHIFT Button
accesses the stations
represented by the
lower lights next to the
DSS buttons.
(see page 5)
Page 6

Call Processing Buttons
Most call handling operations can be initiated by pressing a single
button. Your console button configuration has been customized
by the installer for your installation.
All buttons except the MAINT, VOL, SHIFT, and Hold Loop
buttons are configurable. Some buttons have an associated light
to indicate an active feature.
Button assignments may include the following:
ANSWER – answers a ringing call.
CALLBACK – after originating a call to a busy station,
automatically calls back the console when the
called line is idle.
CALL FWD – forwards primary directory number calls to a
designated station or destination.
CANCEL – aborts most operations. Reverts to the previous
call state when conditions permit.
CONF – places conference calls.
CONNECT – connects a transferred call to a station.
DROP – removes the last-added party from a conference
call.
HOLD – places a call on hold. The call hold time will be
shown in the first available hold loop on the
bottom line of the display.
INTERCOM
INTCOM 1-4
ORIGINATE – originates an outgoing call.
PAGE – connects to a dial access paging unit.
PARK – parks a call at a directory number. The user can
PICKUP – picks up a call ringing at a station.
POLL – allows visual scanning of held call information.
PRIORITY – originates a call-waiting call.
RELEASE – disconnects a call.
RING DLY – delays ringing for a backup answering console
– originates an outgoing intercom call.
dial a code to retrieve the call.
Tone Commander 2260d Attendant’s Guide 3
Page 7

SPLIT – toggles between the calling and called parties
during call transfer.
TIME – displays the current network time and date.
UNPARK – retrieves a call that has been parked.
V MAIL
– accesses a voice mail system.
V MAIL 1-2
Some features may not be available from your telco central office.
Contact your service provider or installer for more information.
4 Tone Commander 2260d Attendant’s Guide
Page 8
Hold Loop Buttons
After the HOLD button is pressed, the active call is placed in the
first available hold loop. The hold type (Hold, Page, etc.) and the
time the call has been on hold (in 10 second increments) is
shown on the bottom line of the display.
The Hold Loop (numbered) button directly beneath the call’s hold
display will connect the held call to the handset.
Press the POLL button, then any Hold Loop button to display call
information for a held call.
Shift Button
Some stations or autodial numbers are represented by the lower
lights next to the DSS buttons. Dialing is initiated by first pressing
and releasing the SHIFT button, then pressing the DSS button.
The console will automatically switch back to the upper stations
after completing an operation, or you can manually select the
upper stations by pressing the SHIFT button again. The light
above the button will be on when the lower group of stations is
currently selected.
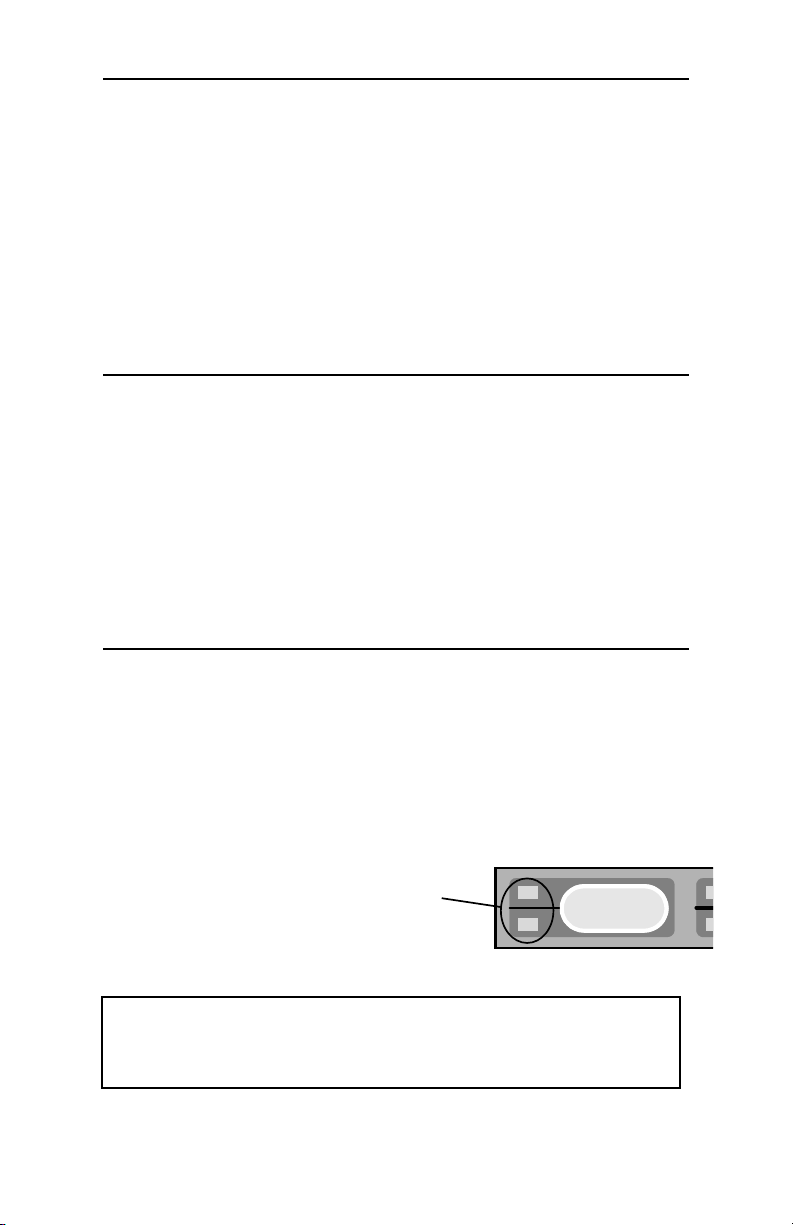
DSS (Direct Station Select) Buttons
DSS buttons originate calls with a single button.
Each button can accommodate two stations. The station
represented by the lower status light is accessed by first pressing
the SHIFT button.
Spare DSS buttons may be used for autodialing (speed dialing)
frequently-dialed numbers.
Line Status Lights
off – the directory number is idle.
flashing – the directory number is ringing.
on steady – the directory number has an
Note: For key telephones with multiple lines (directory number call
appearances), the Line Status Light indicates the state of the first line.
The station may be able to accept calls on other lines when busy is
indicated.
active call.
Tone Commander 2260d Attendant’s Guide 5
Page 9
Display
The status of all calls being processed at the console is shown in
the display.
During normal console operation, the first two lines show
information pertaining to the currently active call. Line 3 shows
ringing call information. Hold type and time on hold for up to 6
calls is shown in line 4.
Line 1 – Talk/Dial
Information about the line or party you are currently connected to
is displayed on line 1.
TALK will be shown at the left of the display when your handset is
connected to a calling or called party.
The type of call or call progress information follows the call state.
Call information displays are described on page 7.
Caller identification is displayed next. A name will be shown if one
is sent from the central office or matched to the calling number in
the console’s internal database. If no name is found, the calling
number will be displayed when available from the central office.
The time of day in 12 hour hh:mm format is shown at the right of
the display.
Call
State
Call
Information Name / Number Time
TALK Internal Bob Smith 12:32
RING Internal Barney Jones
HLD 2 HLD 3 PAG 2
6 Tone Commander 2260d Attendant’s Guide
Page 10
Line 2 – 2nd Party
Information about the second party (not connected to the
handset) is shown on line 2. This is usually the party waiting to be
transferred or conferenced.
In the example below, the caller info has moved to the second
line while the party being transferred to is dialed. The caller is on
hold.
Call
State
Call
Information Name / Number
DIAL Enter# 555-1234 12:32
HOLD Internal Bob Smith
RING External Barney Jones
HLD 2 HLD 3 PAG 2
Lines 1 and 2 will exchange positions when the SPLIT button is
pressed. The party you are connected to always appears on the
top line.
Line 3 – Ringing Calls
The next ringing call is shown in line 3. At the right side of the
display is the number of additional calls waiting to be answered.
Call
Ringing
Call
Information Name / Number
Calls
Waiting
DIAL Enter# 555-1234 12:32
HOLD Internal Bob Smith
RING External Barney Jones CW=3
HLD 2 HLD 3 PAG 2
Tone Commander 2260d Attendant’s Guide 7
Page 11

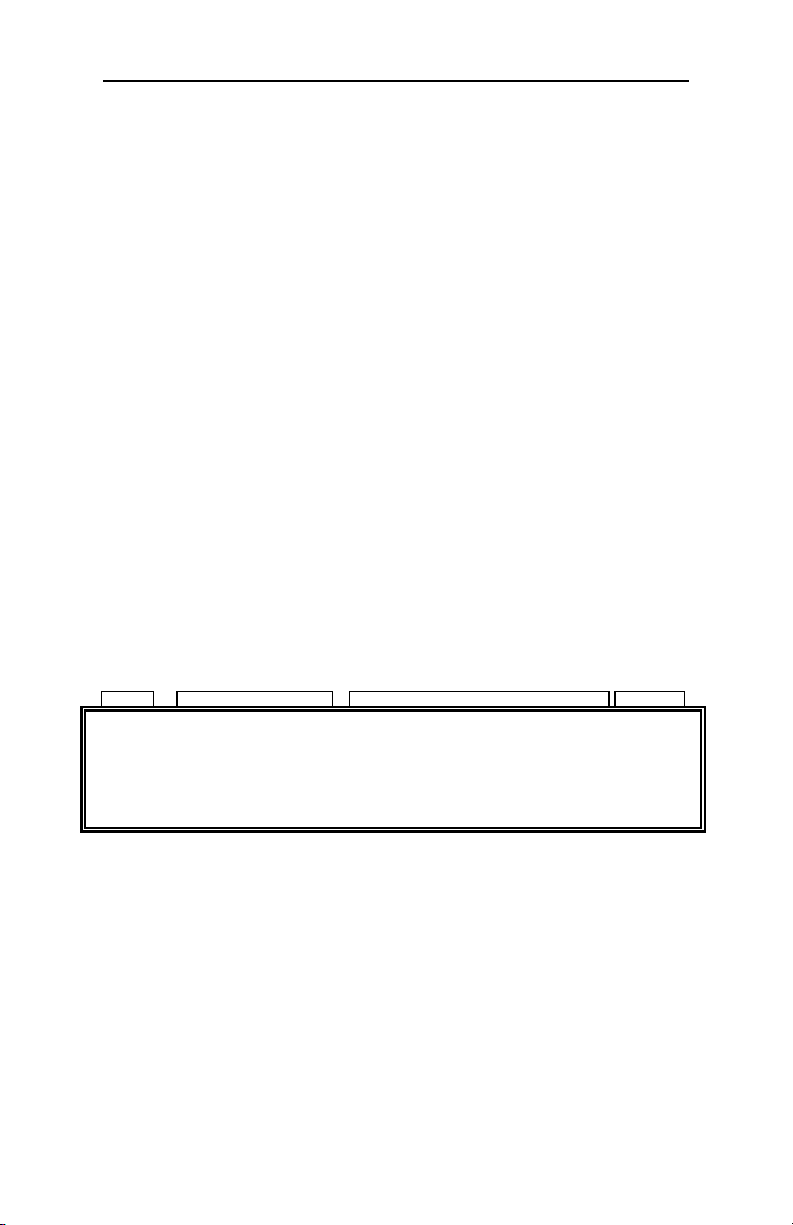
Line 4 – Hold Status
Hold loop status is shown on line 4. Displays correspond to hold
loop keys. Held calls can be retrieved by pressing their hold loop
button. More information about a call is displayed if the POLL
button is pressed before the hold loop button. Hold type can be
one of the following:
– call placed on manual hold
HLD
– call placed on hold during a paging operation.
PAG
– call placed on hold due to an aborted transfer operation.
NXF
– call placed on hold during a callback operation
CBK
The time that the call has been on hold, in 10 second increments,
is displayed after the hold type.
In the display below, call #1 has been on hold for 20 seconds, call
#2 for 30 seconds, and call #3 on hold during a paging operation
for 20 seconds.
TALK External Barney Jones 12:33
HLD 2 HLD 3 PAG 2
Call Information
The type of call is shown in the call information field on lines 1-3.
Possible displays include:
Internal Page Recall All from
External NXF Recall Busy from
Hold Recall CBK Recall No Ans from
During dialing, call progress is displayed.
Enter#
Call Setup
– dial tone has been received, ready to dial
– dialing completed, waiting for the network
to connect to called party
Ringing
User Busy
No Answer
Rejected
Not Avail
Congestion
Waiting for
Response
– dialed call is ringing
– called line is busy
– called line did not answer
– remote end rejected the call
– service or feature is not available
– network indicates congestion
– the central office has not yet responded;
the call cannot proceed until it does
(call fwd, all calls)
(call fwd, busy)
(call fwd,
no answer)
8 Tone Commander 2260d Attendant’s Guide
Page 12

Operation
Call Answering
Ringing calls are prioritized according to the call type queues that
have been set up by your installer. The next call waiting to be
answered is shown on line 3 of the display – see page 7.
To answer the ringing call shown in the display:
Press the ANSWER button.
a
If you were connected to a call (call was
displayed on line 1, with
call will be placed on hold.
After answering, you may:
•
transfer the call to a station or voice mail system
•
place the call on hold
•
announce the call over a paging system
•
release (disconnect/hang up) the call
no call on line 2), that
Tone Commander 2260d Attendant’s Guide 9
Page 13

Transferring Calls
To transfer a call to a station:
Press the DSS button for the desired station.
a
a
If the called station is busy, you can:
•
Press the CANCEL button to return to the caller.
or
•
Press the RELEASE button to cancel transfer; the caller
remains on hold and moves to a hold loop with an NXF
(incomplete transfer) indication. The console is now free to
answer another call.
or
•
Page the called party after pressing the CANCEL button
(see page 15).
or
Press the ORIGINATE button. When “Enter #”
is displayed, dial the station number with the
dial pad. The entered digits will be displayed.
The caller will be placed on hold, and will
move to line 2 of the display. The party being
transferred to will be displayed on line 1.
(If the wrong DSS button was selected, press
the CANCEL button to cancel dialing. Select
another DSS button.)
“Ringing” will be displayed when the called station begins to ring. You will hear ringback in
the handset.
10 Tone Commander 2260d Attendant’s Guide
Page 14

Press the CONNECT button to immediately
a
transfer the call without talking to the called
party (unscreened transfer).
a
or
Wait for the called party to answer, then ask
them if they will accept the transferred call.
(At this time you can use the SPLIT button to
switch the handset between the calling and
called parties. The party you are connected to
is displayed on the top line, and the party on
hold is displayed on line 2.)
If the caller will accept the call, press the
a
CONNECT button. The calling party will be
connected to the called party.
If the caller will not accept the call, press the
a
CANCEL button to return to the caller.
a
or
Press the RELEASE button to disconnect the
called party and move the calling party (on
hold) to a hold loop.
Call Hold
To place a call on hold:
Press the HOLD button.
a
The call will be placed in the first available
hold loop. The display will show “HLD” and
the time, in 10 second increments, that the
call has been on hold (see page 8).
Calls that are on hold longer than a preset recall time will ring at
the console.
Tone Commander 2260d Attendant’s Guide 11
Page 15

To reconnect to a call on hold:
Press the Hold Loop button for the held call.
a
To check the status of held calls:
Press the POLL button.
a
Press the Hold Loop button for the call to be
a
checked.
Information about the calling party will be
displayed.
Press other Hold Loop buttons if you want to
a
check the status of other held calls.
Press the POLL button when finished. The
a
console will return to normal operation.
To connect the call displayed on line 1 to a call on hold:
Press the Hold Loop button for the held call.
a
The call on line 1 will be put on hold and will
move to line 2 of the display.
Press the CONNECT button.
a
The calls will be connected together, and
removed from the console.
If the wrong hold loop button is inadvertently selected, press the
HOLD button to place the call back on hold.
12 Tone Commander 2260d Attendant’s Guide
Page 16

Call Park
The Call Park feature parks a call at a directory number. Another
party can pick up the call by dialing a park retrieve code or
pressing a feature key on an ISDN set.
To park a call:
Press the PARK button.
a
Press a DSS button or dial the directory
a
number where the call is to be parked.
Page the requested party, and inform them
a
that a call is parked at the directory number
(see page 15).
To retrieve a parked call:
Press the UNPARK button.
a
Press a DSS button or dial the directory
a
number where the call is parked.
You will be reconnected to the caller.
If the parked call has been retrieved or
abandoned, you will hear reorder (fast busy)
tone.
Note: This feature requires proper configuration of the 2260d ISDN line
in the telco central office to support Directed Call Park. This feature is
not supported on Nortel DMS-100 central offices.
Tone Commander 2260d Attendant’s Guide 13
Page 17

Call Pickup
To pick up a call ringing at a station:
Press the PICKUP button.
a
Press the ringing station’s DSS button.
a
You will be connected to the call.
Note: This feature requires proper configuration of the 2260d ISDN line
in the telco central office to support Directed Call Pickup.
Automatic Callback
The system can alert the console when a busy station becomes
idle.
To initiate an automatic callback:
Dial the busy station.
a
Press the CALLBACK button.
a
If a call waiting to be transferred is displayed
on line 2, that call will be placed in a hold
loop. The display above the Hold Loop button
will show “CBK”.
When the busy station becomes idle, the console will ring. Line 3 will show a ring callback
with the party’s identification.
Press the ANSWER button. The station will
a
be dialed.
If the callback was set up for a held party,
a
press CONNECT to transfer the call.
Note: This feature requires proper configuration of the 2260d ISDN line
in the telco central office to support Automatic Callback. This feature is
only supported with Lucent 5ESS Custom ISDN.
14 Tone Commander 2260d Attendant’s Guide
Page 18

Announcing Calls
To announce a call over an in-house paging system:
Press the PAGE button. If you were
a
connected to a call, the caller is placed in a
hold loop with “PAG” displayed.
After the paging system answers, announce
a
the call.
Press the RELEASE button to disconnect
a
from the page. The caller will remain on hold.
The paged party must dial the console to
retrieve an announced call. When you answer
their call, press the Hold Loop button for the
calling party, then press the CONNECT button
to transfer the call.
Voice Mail
To transfer a call to a voice mail system:
Press the VOICE MAIL button.
a
Press the DSS button for the requested voice
a
mailbox (optional, if you want to connect to a
specific mailbox).
Press the CONNECT button to transfer the
a
call.
Tone Commander 2260d Attendant’s Guide 15
Page 19

Call Release
To release (disconnect, or hang up) a call:
The call to be released must be active on line
1 of the display.
Press the RELEASE button.
a
If there is a second party active on line 2 of
the display, they will remain on hold and move
to a Hold Loop button with “NXF” displayed.
Call Originating
To place an outside call:
Press the ORIGINATE button, then dial the
a
number with the dial pad. The digits entered
will appear in the display.
a
To call a station:
a
a
16 Tone Commander 2260d Attendant’s Guide
or
Press an autodial button (a spare DSS button
that has been programmed with the desired
number).
Press the DSS button for the desired station.
or
Press the ORIGINATE button, then dial the
station number with the dial pad.
Page 20

To place an intercom call:
Press the INTERCOM button if your system
a
has a single intercom group, or press the
INTCOM button for the desired intercom
group.
Dial the number of the station you want to call
with the dial pad.
Priority Calls
The priority feature originates a call-waiting call to a station. If the
station is busy, the user will hear a call waiting tone. They can
then hookflash to answer your call.
To initiate a priority call:
Press the PRIORITY button
a
(instead of the ORIGINATE button).
You will hear a confirm tone.
If you were connected to a call, it will move to
line 2 of the display.
Press the called party’s DSS button, or dial
a
the call with the dial pad.
You will hear ringback; the called party will
hear a call waiting tone. You may press the
CONNECT button at this time for an unscreened transfer.
If screening the transfer, you will be
connected to the called party when they flash
their hookswitch to accept the call.
Proceed with transferring the call as explained
a
on page 11.
Note: Both the 2260d and called station lines must be properly
configured in the telco central office for this feature to operate. This
feature is only supported with Lucent 5ESS Custom ISDN.
Tone Commander 2260d Attendant’s Guide 17
Page 21

Conference Calls
To set up a conference call:
Press the ORIGINATE button and establish
a
the first call (or answer a ringing call). It will be
shown on line 1 of the display.
Press the CONF* button and establish the
a
second call. The first call will move to line 2 of
the display.
After the second called party answers, press
a
the CONF button again to join all parties in a
conference call.
To add an additional party to the conference,
a
press the CONF* button, then dial. After the
party answers, press the CONF button again
to join all parties.
If you need to remove the last party added,
a
press the DROP button.
Press the RELEASE button to remove the
console from the conference. The parties will
remain connected.
* Lucent 5ESS Custom ISDN: Press the
ORIGINATE button instead of the CONF
button before adding parties to the
conference call.
Note: The 2260d must be properly configured for multiparty conference
in the telco central office for this feature to operate. Conferencing more
than three parties is not available on some central offices.
18 Tone Commander 2260d Attendant’s Guide
Page 22

Ring Delays
A backup console may be installed with a delayed ringing option.
When this feature is enabled, the backup console will not respond
to a ringing call until that call has been ringing at the primary
console for a preset time. Use ring delays when you want the
backup console to ring only when calls have not been answered
at the primary console.
To enable ring delays:
Press the RING DLY button.
a
The light above the button will turn on, indicating that ring delays are enabled.
To disable ring delays:
Press the RING DLY button again.
a
The light above the button will turn off.
All calls will now ring immediately.
Tone Commander 2260d Attendant’s Guide 19
Page 23

Adjusting the Ringer Volume
To adjust the volume of the console ringer:
While
a
not connected to a call, press the VOL
or VOL button. The console will beep with
the new ringer volume setting.
Adjusting the Handset Volume
To adjust the volume of the handset or headset:
While connected to a call, press the VOL or
a
VOL button.
Volume levels are not reset after each call.
Using a Headset
A headset may be used in place of the handset. Unplug the
handset cord from the jack on the left side of the console, and
plug the headset into the jack. Some headsets have a jack for the
handset, allowing you to switch between the two devices without
unplugging.
The 2260d console is compatible with amplified electronic
headsets only. Contact your system vendor, headset
manufacturer, or Tone Commander if you have any questions
regarding headset compatibility.
20 Tone Commander 2260d Attendant’s Guide
Page 24

Use Maintenance Mode to make changes to the name database
or to set the clock. See your installer or system administrator for
other Maintenance Mode options.
To enter Maintenance Mode:
Press the MAINT button.
a
The main Maintenance Mode screen will be
displayed.
All menus other than the Maintenance Main
Menu are identified in the upper right corner.
If the screen below is not shown, press the
EXIT button (Hold Loop button 6) until you
see the Maintenance Main Menu screen.
Console Setup
MAINTENANCE MAIN MENU
NAMES TIME STATS SETUP DIAG EXIT
A menu is shown on the bottom line of the display. Press the Hold
Loop button directly below a menu option to select the option.
Names and numbers are entered with the dial pad.
To exit Maintenance Mode:
Select EXIT from the menu until the console
a
returns to normal call processing mode.
or
Press the MAINT button to temporarily exit
Maintenance Mode. Press the MAINT button
again to return to the same Maintenance
Mode screen. This allows you to answer a
call, then resume console programming where
you left off.
Tone Commander 2260d Attendant’s Guide 21
Page 25

Name Database
Your console can store up to 1000 name/telephone number
entries. The name database will identify callers by name based
on the number sent from the central office. A DSS button may be
associated with a name/number entry to simplify dialing.
Initial database entry and any extensive changes are most easily
accomplished with the 2260d Setup Utility. Please see your
system administrator for details.
The console’s built-in editing capability provides a convenient
method for making a few quick changes.
To view the name database:
MAINTENANCE MAIN MENU
NAMES TIME STATS SETUP DIAG EXIT
Select NAMES from the Maintenance Main
a
Menu. NAMES programming may be password protected – see your system administrator.
A name/number entry screen will be displayed.
NAME: Bill Jones [NAMES]
DN:4253351234 DSS#:1234
DSS KEY: 27 VM#:1017 SPID: CA:027
NEXT LAST EDIT ADD RESET EXIT
NEXT
LAST
EDIT
ADD
RESET
EXIT
22 Tone Commander 2260d Attendant’s Guide
– move to the next name/number entry
– move to the previous name/number entry
You can also press a DSS button to select its associated
name/number entry, if the button has already been
assigned to an entry.
– make changes to the displayed name/number entry
– add a new name/number entry
– resets all line status lights to the default locations;
for use only by your system administrator
– return to the Maintenance Main Menu
Page 26

To edit or add a name/number entry:
Select EDIT to change the currently displayed
a
entry.
A name/number editing screen will be
displayed.
NAME: [EDIT]
DN: DSS#:
DSS KEY: VM#: SPID: CA:
NEXT <-- --> DELETE ABORT DONE
NEXT
<--
-->
DELETE
ABORT
DONE
Use the dial pad to enter characters in the NAME and DSS#
fields. When editing the NAME field, each dial pad button selects
several characters, corresponding to the letters and numbers
printed on the button when possible. Press the button repeatedly
until the desired character appears under the cursor, then press
the --> button to move to the next character position.
– moves to the next field
– moves to the previous character in the current field
(or use the VOL button)
– moves to the next character in the current field
(or use the VOL button)
– select CHAR. to delete the character under the cursor,
FIELD to delete all characters in the field, ENTRY to
delete the entire name/number entry, or ABORT to
cancel the delete operation
– cancel any changes made to the name entry and return
to the main NAMES menu
– save changes made to the name entry and return
to the main NAMES menu
Tone Commander 2260d Attendant’s Guide 23
Page 27

Characters available with each dial pad key are shown below.
Enter up to 18 characters in the NAME field; use the --> button
to advance to the next character position. This field entry will be
displayed during call processing operations.
Enter up to 18 digits (numbers only) in the DSS# field; the
character position will advance automatically. Enter all digits as
they should be dialed (e.g. 9+1+area code+number for long
distance calls, station number only for internal calls). This
telephone number is dialed when the DSS button is pressed for
call origination or call transfer.
A DSS button on a 120d console may be assigned to this
name/number entry. Press the desired DSS button when the
cursor is in the DSS KEY field. Press the SHIFT button first to
select the lower entry for a DSS button. The DSS button number
may also be entered with the dial pad.
The DN, VM#, SPID, and CA fields are for use only by your
system administrator. DO NOT change the entries in these
fields.
The console will display a “DELETE OLD ENTRY?” warning if you
attempt to enter a number or DSS button that has already been used
in another entry. Select YES to delete the old entry, or ABORT to
return to the editing screen and change the new entry.
24 Tone Commander 2260d Attendant’s Guide
Page 28

Se tting the Clock
To set the time of day clock:
MAINTENANCE MAIN MENU
NAMES TIME STATS SETUP DIAG EXIT
Select TIME from the Maintenance Main
a
Menu.
The time display screen will be displayed.
TIME: 2:31 [TIME]
EDIT EXIT
Select EDIT to change the time.
a
The time editing screen will be displayed.
Note: The clock will be automatically synchronized with network time
if time information is available (Lucent 5ESS Custom ISDN only).
Tone Commander 2260d Attendant’s Guide 25
Page 29

TIME: 2:31 [EDIT]
<-- --> DELETE ABORT DONE
<--
-->
DELETE
ABORT
DONE
Enter the time with the dial pad.
The cursor will advance to the next character position
automatically. You can manually select the character position
with the arrow buttons.
– moves to the previous character (or use the VOL button)
– moves to the next character (or use the VOL button)
– select CHAR. to delete the character under the cursor,
FIELD to delete the entire time field (all characters),
or ABORT to cancel the delete operation
– cancel any changes made to the time setting and return
to the main TIME display menu
– save changes made to the time setting and return
to the main TIME display menu
26 Tone Commander 2260d Attendant’s Guide
Page 30

Your Tone Commander console is easy to care for. There are no
specific maintenance requirements.
Never attempt to clean a console by spraying it with cleaners. Do
not use solvents or abrasive substances – harm to the console
finish may result.
A mild glass cleaner sprayed on a soft cloth is sufficient to clean a
console. Wipe the console face gently to remove fingerprints and
surface dirt.
Although your console is not fragile, it is a precision instrument
and should be treated as such. Spilling liquids on it may
adversely affect internal electronics and void your warranty.
Console Care
Tone Commander 2260d Attendant’s Guide 27
Page 31

28 Tone Commander 2260d Attendant’s Guide
Page 32

14-280180 Rev. C
©2000
11609 49th Place West
Mukilteo, WA 98275-4255
(800) 524-0024 (425) 349-1000
Fax: (425) 349-1010
 Loading...