

Page 1
1560
Attendant’ s G uide
Page 2

Introduction . . . . . . . . . . . . . . . . . . . . . . . . . . . 1
Buttons and Indicators . . . . . . . . . . . . . . . . . . . 2
1560 Console . . . . . . . . . . . . . . . . . . . . . 2
Line Buttons . . . . . . . . . . . . . . . . . . . . . 3
DSS (Direct Station Select) Buttons . . . . . . . . . 3
Indicator Light Flash Rates . . . . . . . . . . . . . . 4
Call Processing Buttons . . . . . . . . . . . . . . . 5
Shift Button . . . . . . . . . . . . . . . . . . . . . . 5
Console Ringing . . . . . . . . . . . . . . . . . . . 6
Incoming Call Indications . . . . . . . . . . . . . . . 6
Operation . . . . . . . . . . . . . . . . . . . . . . . . . . . . 8
Call Answering . . . . . . . . . . . . . . . . . . . . . . . 8
Transferring Calls . . . . . . . . . . . . . . . . . . . . . 9
Call Hold . . . . . . . . . . . . . . . . . . . . . . . . . . 12
Announcing Calls . . . . . . . . . . . . . . . . . . . . . 13
Message Waiting . . . . . . . . . . . . . . . . . . . . . 13
Call Release . . . . . . . . . . . . . . . . . . . . . . . . 14
Call Originating . . . . . . . . . . . . . . . . . . . . . . 14
Night Service . . . . . . . . . . . . . . . . . . . . . . . 15
Quick Mode . . . . . . . . . . . . . . . . . . . . . . . . 16
Adjusting the Handset Volume . . . . . . . . . . . . . . 17
Adjusting the Ringer Volume . . . . . . . . . . . . . . . 17
Setting The Clock . . . . . . . . . . . . . . . . . . . . . 18
Ring Delays . . . . . . . . . . . . . . . . . . . . . . . . 19
DSS/Autodial Setup . . . . . . . . . . . . . . . . . . . . 21
Name Display Setup . . . . . . . . . . . . . . . . . . . . 23
Using a Headset . . . . . . . . . . . . . . . . . . . . . . 25
Console Care . . . . . . . . . . . . . . . . . . . . . . . . . . 25
Contents
Tone Commander 1560 Attendant’s Guide i
Page 3

FCC Warning
This equipment has been tested and found to comply with
the limits for a Class A digital device, pursuant to Part 15 of
the FCC Rules. These limits are designed to provide
reasonable protection against harmful interference when the
equipment is operated in a commercial environment. This
equipment generates, uses, and can radiate radio frequency
energy and, if not installed and used in accordance with the
instruction manual, may cause harmful interference to radio
communications. Operation of this equipment in a residential
area is likely to cause harmful interference in which case the
user will be required to correct the interference at his own
expense.
ii Tone Commander 1560 Attendant’s Guide
Page 4

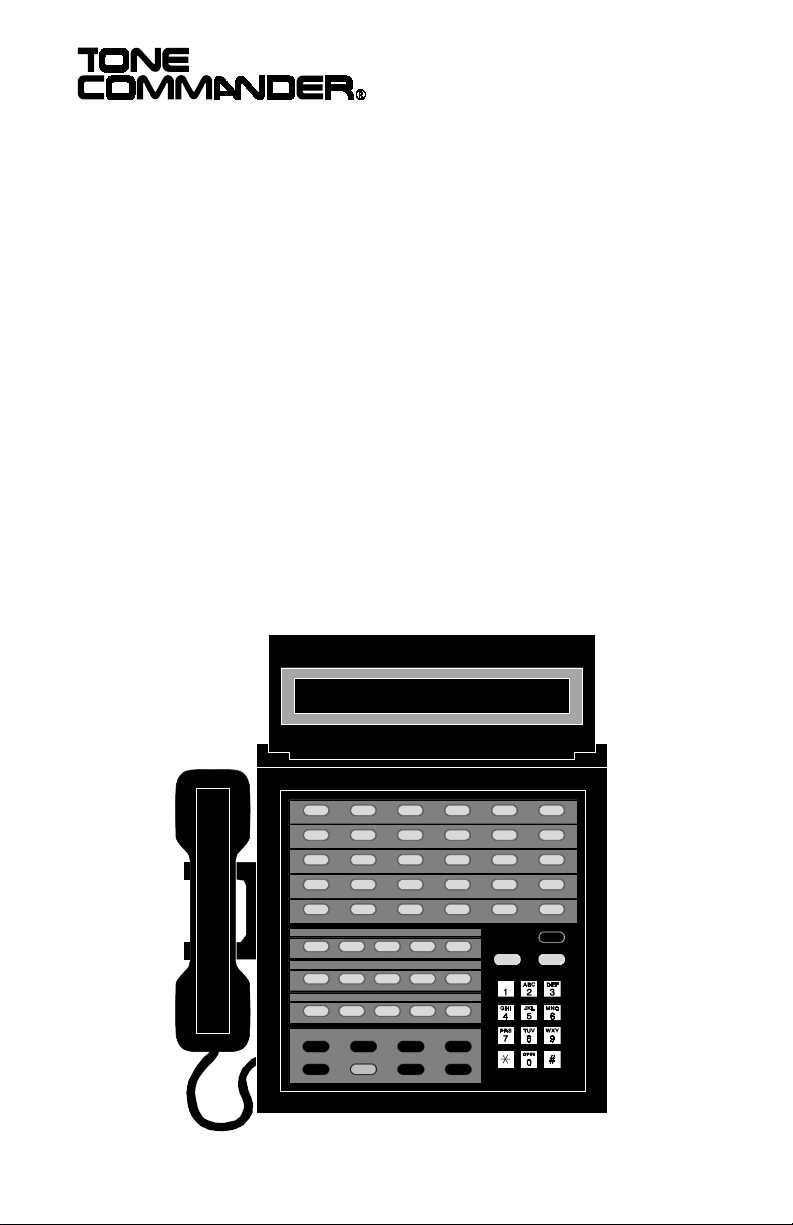
The Tone Commander 1560 console provides an easy to use
answering position for Centrex or PABX lines. Calls may be put
on hold or transferred from the console. Autodialing, message
waiting light control, and station status display is provided for up
to 60 stations. Your system may have one or two attendant
positions.
The features of the Tone Commander 1560 include:
Introduction
PERSONALIZED
STATION
IDENTIFICATION
DSS (Direct
Station Select)
INDICATOR
LIGHTS
RECALL – an unanswered call extended via a DSS
HOLD RECALL – calls left on hold longer than the time
AUTOMATIC
HOLD
RING DELAY – the attendant can program the console to
Buttons and indicators on the 1560 console are described on the
following pages.
– each station may be optionally displayed
with the user’s or department name.
– autodials a station’s number with a single
button.
– show the status of each line or station by
various flash rates.
button will recall the console after a
number of rings set by the installer.
selected by the installer will recall the
attendant.
– the previous call is automatically placed on
hold when the ANSWER button or another
line button is pressed.
begin ringing after the line or station has
rung from 1 to 9 times.
Tone Commander 1560 Attendant’s Guide 1
Page 5
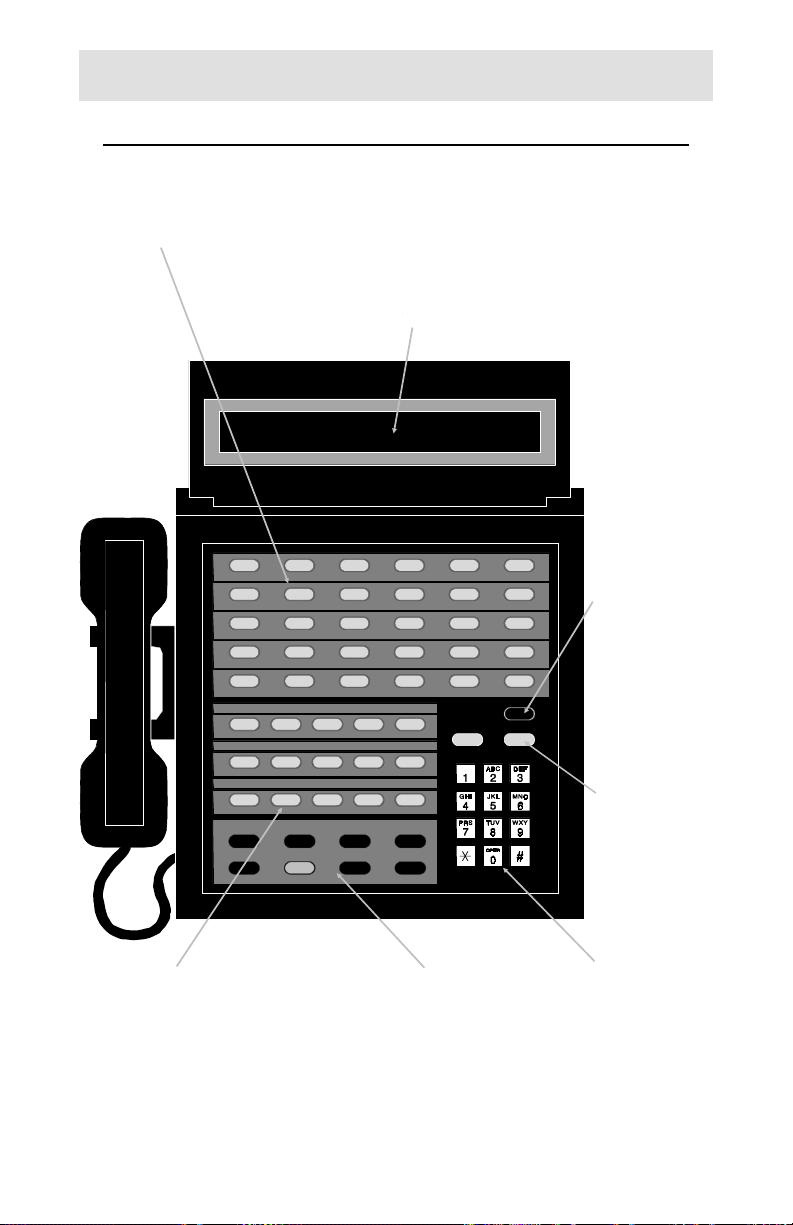
Buttons and Indicators
1560 Console
DSS BUTTONS
(see page 3)
DISPLAY
a 20 character display gives the attendant
diverse information during operation of the
console, including a ringing station’s number
or user name. A time of day clock is displayed
when the console is idle. (see page 6)
SHIFT
BUTTON
accesses the
stations
represented
by the lower
lights next to
the DSS
buttons.
(see page 5)
VOLUME
BUTTONS
adjust the
volume of
the console’s
ringer and
handset
receiver.
(see page 17)
LINE BUTTONS
select individual telephone lines for
calling or answering, and access
special features of your system such
as paging.
(see page 3)
CALL
PROCESSING
BUTTONS
(see page 5)
2 Tone Commander 1560 Attendant’s Guide
DIAL PAD
used for dialing
and accessing
system features.
Page 6
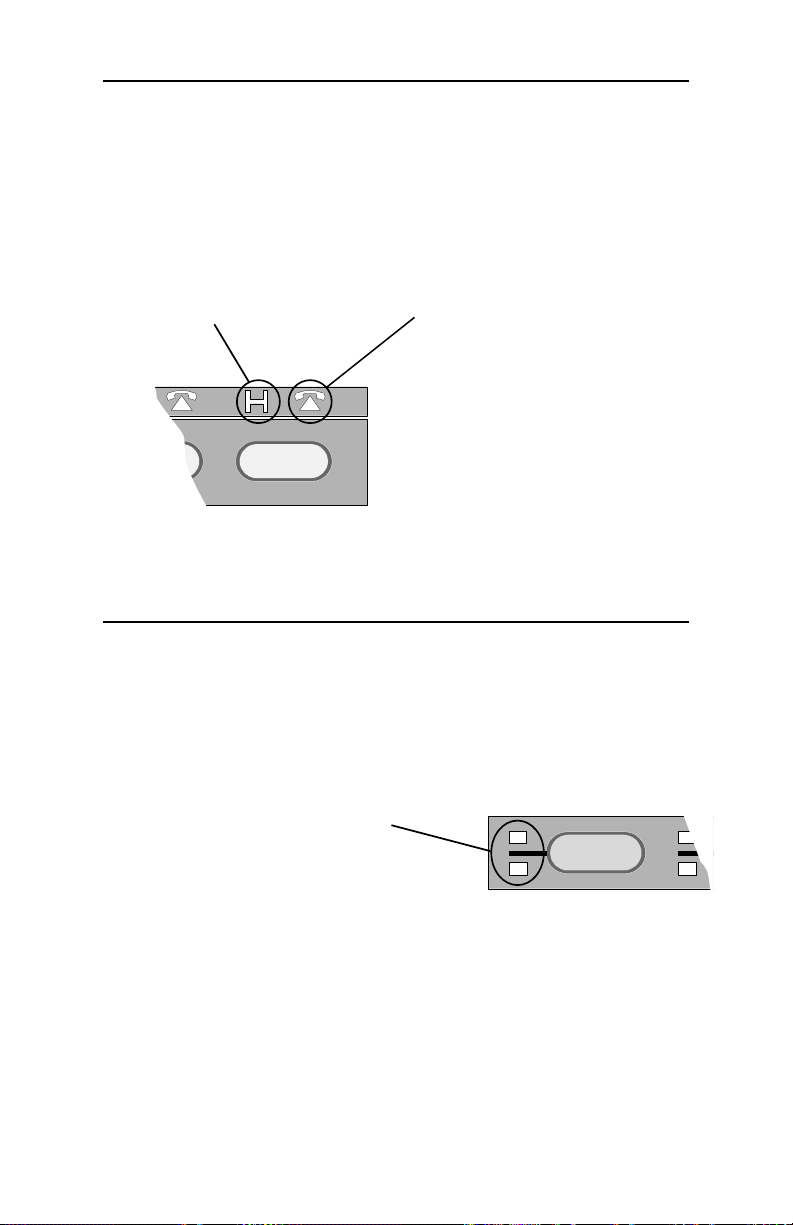
Line Buttons
Line buttons connect telephone lines to the handset, for incoming
or outgoing calls. Some special features of your telephone
system such as paging are accessed via line buttons.
HOLD LIGHTS
winking – line is on hold
flashing – line that has
been on hold for too long
is ringing at the console
LINE STATUS LIGHTS
off – line is idle, or special feature
is inactive
slow blinking – line is ringing,
but not yet at the console
(delayed ringing)
flashing – line is ringing at the
console, or special feature is
active
flickering – line is currently in
use at the console (I-Use line).
on steady – line is in use at
another console, or special
feature is active
DSS (Direct Station Select) Buttons
DSS buttons originate and transfer calls to stations. Each button
can accommodate two stations. The station represented by the
lower light is accessed by first pressing the SHIFT button.
Spare DSS buttons may be used for autodialing (speed dialing)
frequently-dialed numbers.
STATION STATUS LIGHTS
off – station is idle
slow blinking – call is ringing at the
station, but not at the console
(delayed ringing)
flashing – call is ringing at both the
station and the console
on steady – station is busy; also
indicates a waiting message after
the MESSAGE button has been
pressed
flickering – station has been
selected for DSS dialing
Tone Commander 1560 Attendant’s Guide 3
Page 7
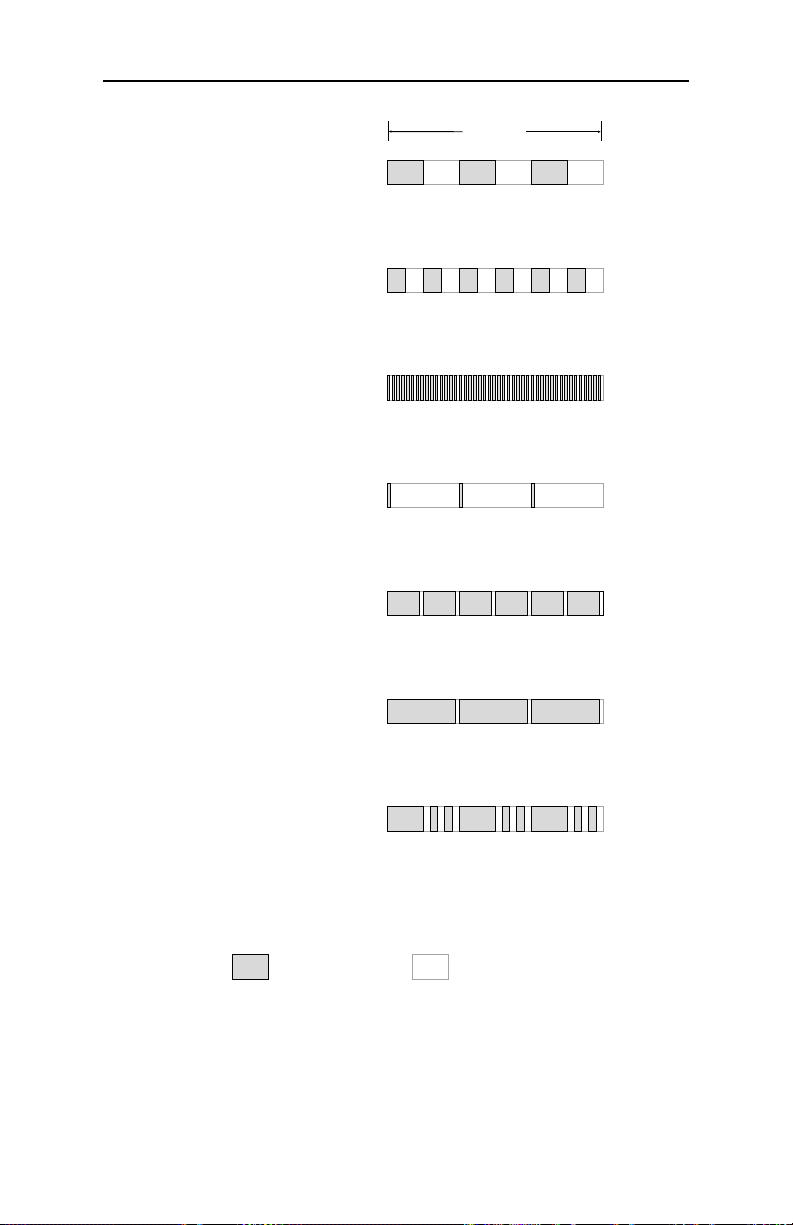
Indicator Light Flash Rates
flashing
50% on, 50% off; slow rate
fast flashing
50% on, 50% off; fast rate
flickering
50% on, 50% off; very fast rate
slow blinking
mostly off, with brief on flashes
winking
mostly on, with brief off flashes; fast rate
3 seconds
slow winking
mostly on, with brief off flashes; slow rate
night
steady on, followed by two quick flashes
= light on = light off
4 Tone Commander 1560 Attendant’s Guide
Page 8

Call Processing Buttons
MESSAGE
turns station
message
waiting lights
on or off
(optional)
ANSWER
answers the
ringing call
(line or
station) that
is shown in
the display
Shift Button
PICK UP
answers ringing
station calls not
shown in the
display (used
with DSS)
HOLD
puts the
selected line
on hold
RING DELAY
programs or
reads ring
delay values
for lines and
stations
TRANSFER
used to
manually
transfer calls
or cancel a
DSS selection
CONNECT
connects
calls to
stations
RELEASE
disconnects
the attendant
from a call
Some stations or autodial numbers are represented by the lower
lights next to the DSS buttons. Dialing is initiated by first pressing
and releasing the SHIFT button, then pressing the DSS button.
The console will automatically switch back to the upper stations
after completing an operation, or you can manually select the
upper stations by pressing the SHIFT button again. The lights
beside the button indicate which group of stations is currently
selected.
Tone Commander 1560 Attendant’s Guide 5
Page 9
Console Ringing
Lines
1 or 2 warble tones every 4 seconds indicates a ringing
incoming call on any line.
Incoming call ringing rate is determined by the source of the call, and
depends upon the type of telephone system the 1560 console is
connected to. Consult with the installer for your system’s ringing rates.
Stations
1 (or 3) steady tones every 4 seconds indicates unanswered
station ringing or recall.
The number of tones heard during ringing station calls is selectable
by the installer.
When a line is accessed and another line rings, the ringing tone is
shortened. This feature allows attendants to process calls with less
background ringing at the console.
Incoming Call Indications
Ringing calls are queued for answering in the order received.
The display will show the source of the oldest ringing call. The
number of additional calls waiting to be answered is shown on the
right side of the display.
RNG LIZ BARRETT 3
an unanswered call ringing at a station,
with three additional ringing calls
6 Tone Commander 1560 Attendant’s Guide
Page 10

The abbreviation for the type of call will be followed by a name if
the line or station has been programmed with a name display.
Otherwise, the line or station number will be displayed.
INC
RNG
RCL
NXF
call that failed to properly transfer to a station
HLD
line # or name
incoming attendant call
station # or name
unanswered station call
station # or name
unanswered station call previously
transferred by the attendant
station # or name
line # or name
call that has been left on hold too long
CMP
line # or name
call that has been camped on
to a station too long
Tone Commander 1560 Attendant’s Guide 7
Page 11

Operation
Call Answering
The source of the oldest call waiting to be answered is shown in
the display – see page 6.
To answer the call shown in the display:
Press the ANSWER button.
a
To answer a ringing line not shown in the display:
Press the line button for the ringing line.
a
To answer (pick up) a ringing station call not shown in
the display:
Press PICK UP.
a
Press the DSS button for the ringing station.
a
8 Tone Commander 1560 Attendant’s Guide
Page 12

After answering, you may:
•
transfer the call to a station
•
transfer the call to a voice mail system
•
put on the call hold
•
announce the call over a paging system
•
turn on a message waiting light at the station
•
release (disconnect/hang up) the call
Transferring Calls
Calls may be transferred by several methods.
When a call is screened, the caller is put on hold while you speak
privately with the called party and ask them if they will accept the
call. You can then return to the caller, transfer the call, or
terminate the call.
Unscreened calls are transferred without any screening of the
called party.
If the called party is busy, the call can be camped on to the busy
station. The call will be on hold until the busy station hangs up,
then it will ring at the station. Calls that have been camped on too
long will ring at the console. Some systems may not have the
camp-on feature.
Stations may be dialed by pressing the appropriate DSS button,
or manually with the dial pad if the you have no DSS button
programmed for the desired station.
The various call transfer procedures differ slightly, and are
described below.
Tone Commander 1560 Attendant’s Guide 9
Page 13

To transfer a call to a station
(unscreened by the attendant):
Press the DSS button for the desired station.
a
One of the following three displays will be
shown:
DIL JIM HUTCHINS
– ready to dial an idle station
Press the CONNECT button to transfer the
a
call.
or
If the wrong DSS button was selected, press
the TRANSFER button to cancel dialing.
CMP JIM HUTCHINS
– station busy, ready to camp on
Press the CONNECT button to camp on the
a
call. The call will be transferred when the
station hangs up. The station message lamp,
if provided, will flash while the call is camped
on.
or
Press the TRANSFER button to cancel dialing.
BUSY
– station is busy, dialing not allowed
Dialing is automatically canceled. You will
remain connected to the caller.
10 Tone Commander 1560 Attendant’s Guide
Page 14

To transfer a call to a station
(screened by the attendant):
Press the DSS button for the desired station.
a
One of the following three displays will be
shown:
DIL MARY OAKLAND
– ready to dial an idle station
Press the DSS button again. “DIL” in the
a
display will change to “SCN”.
Wait for the called party to answer, then ask
a
them if they will accept the transferred call.
If
yes, press the RELEASE button. The calling
a
party will be connected to the called party.
or
no, press the TRANSFER button, wait to be
If
reconnected to the calling party, then press
the TRANSFER button again to disconnect
the called station.
The call may now be released, put on hold, or
transferred to another station.
CMP MARY OAKLAND 2
– ready to camp on to a busy station
Press the TRANSFER button to cancel dialing
a
and return to the calling party.
BUSY
– station is busy, dialing not allowed
Dialing is automatically canceled. You will
remain connected to the caller.
Tone Commander 1560 Attendant’s Guide 11
Page 15

To transfer a call manually, using the dial pad:
Press the TRANSFER button, then wait for
a
dial tone.
Dial the station number.
a
Wait for the called party to answer, then ask
a
them if they will accept the transferred call.
If
yes, press the RELEASE button.
a
or
If
no, press the TRANSFER button, wait to be
reconnected to the calling party, then press
the TRANSFER button again to disconnect
the called station.
Call Hold
To place a call on hold:
Press the HOLD button.
a
or
Answer or place another call. The first call is
automatically placed on hold.
Calls that are on hold longer than a preset time will ring at the
console.
12 Tone Commander 1560 Attendant’s Guide
Page 16

Announcing Calls
To announce a call over an in-house paging system:
Press the PAGE button. The outside line is
a
put on hold.
PAGE 3:18
Announce the call.
a
Press the RELEASE button to disconnect
a
from the page. The outside line will remain on
hold.
Message Waiting
(optional)
To set or reset message waiting lights:
Press the MESSAGE button.
a
“MESSAGE” and the current time will be
displayed. The station status lights will show
the current message waiting status for all
stations.
MESSAGE 10:47
To change the on/off state of any console
a
message waiting light, press the associated
DSS button. If the station is equipped with a
message light, it will be in the same state as
the console message light.
Press the MESSAGE button to return to
a
normal console operation (the console will
automatically exit five seconds after the last
keypress).
Tone Commander 1560 Attendant’s Guide 13
Page 17
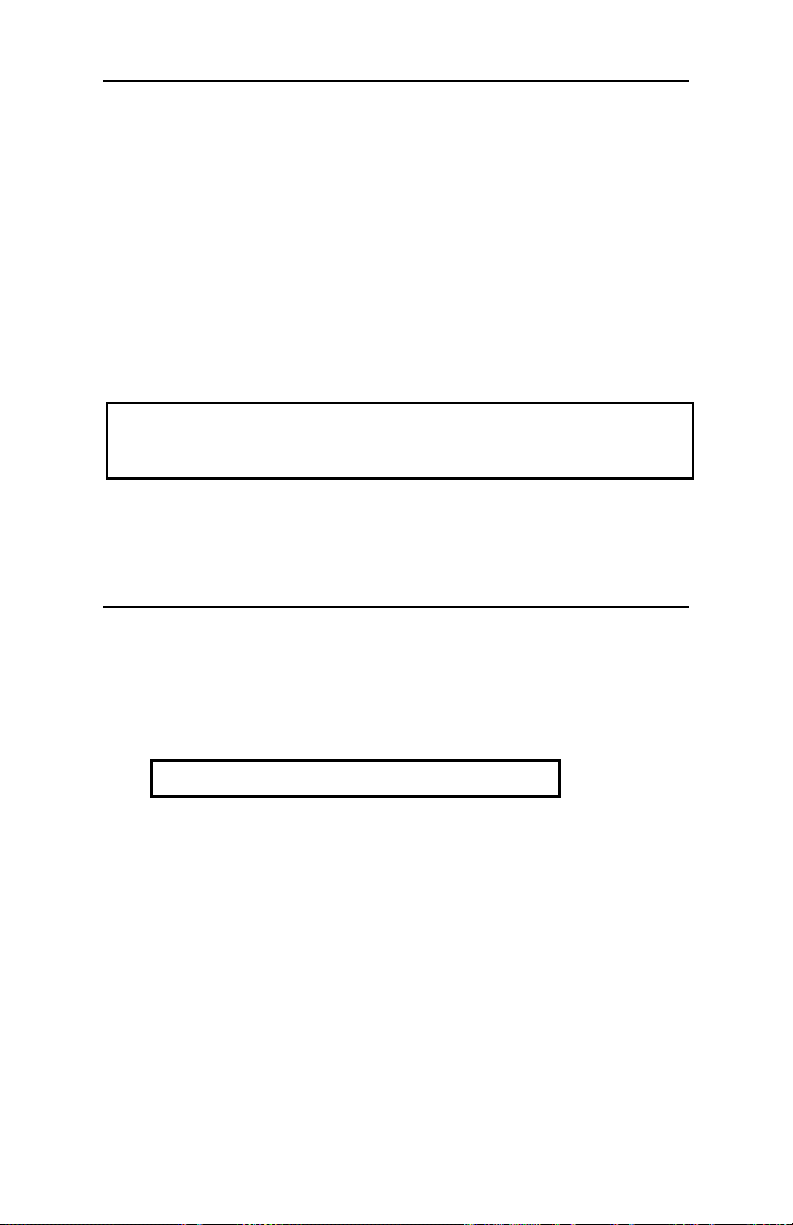
Call Release
To release (disconnect, or hang up) a call:
Press the RELEASE button.
a
Placing the handset on its cradle will not release a line.
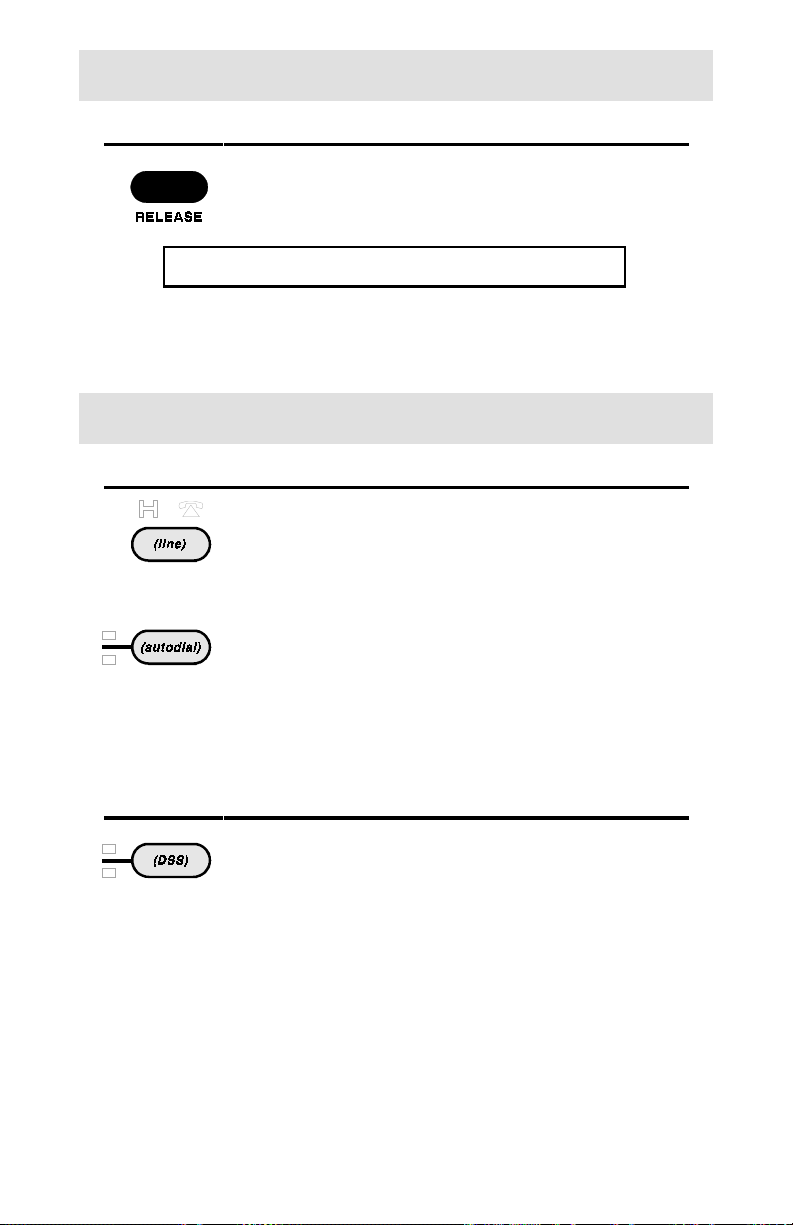
Call Originating
To place an outside call:
Press an idle line button.
a
Dial the number with the dial pad.
a
or
Press an autodial button (a spare DSS button
that has been programmed with the desired
number).
To call a station:
Press the DSS button for the desired station.
a
or
Press an idle line button, then dial the station
number with the dial pad.
14 Tone Commander 1560 Attendant’s Guide
Page 18

Night Service
The line status light above the NIGHT button will be on if Night
Service is in effect.
To activate optional night transfer or night bells:
Press the NIGHT button. The light above the
a
button will turn on.
NIGHT SERVICE 7:02
Incoming calls will ring over the night bell
system after the console begins to ring; or
calls will ring at a night answer station
(determined by the installer).
To resume normal daytime operation:
NIGHT
Press the NIGHT button. The light above the
a
button will turn off.
6:30
Night Service can be turned off with the QUICK button.
Daytime operation will resume with Quick Mode activated.
Tone Commander 1560 Attendant’s Guide 15
Page 19

Quick Mode
This feature is used in single console installations to reduce the
amount of time it takes to answer calls ringing at unattended
telephones. This feature
console is left unattended.
To activate Quick Mode:
a
To deactivate Quick Mode:
a
The NIGHT button will deactivate Quick Mode
when activating night bells or night transfer.
must be deactivated whenever the
Press the QUICK MODE button. The lights
above the button will alternately flash.
Press the QUICK MODE button. The lights
above the button will turn off.
16 Tone Commander 1560 Attendant’s Guide
Page 20

Adjusting the Handset Volume
To adjust the receive volume of the handset or headset:
VOL lll
VOL kkk
l
k
While connected to a call, press the VOL
a
k
VOL
button.
Volume is reset to the default setting after
each call.
Adjusting the Ringer Volume
To adjust the volume of the console ringer:
VOL lll
VOL
l
kkkk
While not connected to a call, press the
a
l
VOL
or VOLk button.
The console will beep with the new ringer
volume setting, and the display will show the
relative volume level.
{{{}___ VOLUME
l
or
Tone Commander 1560 Attendant’s Guide 17
Page 21

Setting the Clock
When the console is idle, press the HOLD
a
button, then the TRANSFER button, then the
RELEASE button, then T (8) on the dial pad.
The current time will be displayed.
SET TIME 11:23
Press RELEASE now if you do not wish to
a
change the time setting.
Enter the time in 12-hour format using the dial
a
pad. The display will show the time entered.
The console has no AM/PM indication.
(Hour values less than 10 must be preceded
by a “0” digit.)
The time set mode will be exited automatically.
18 Tone Commander 1560 Attendant’s Guide
Page 22

Ring Delays
The console can be set to ring after a station or line has rung from
1 to 9 times. The delay affects only console ringing. The station
will always ring without a delay, and continue to ring when the
console is ringing.
Station ring delays are used for stations that can receive outside
calls directly (Direct Inward Dialing). Unanswered calls will ring at
the console after ringing at the station several times.
Line ring delays are intended for systems with multiple
answering positions. A backup console can have some or all lines
set to begin ringing a selected time after the main console begins
ringing.
Each line must be set to ring at one or more consoles with no delay.
Otherwise, the caller may hear several rings before any console begins
ringing.
To check ring delay settings:
Press the RING DELAY button twice. The
a
light above the button will flash.
RING DELAY CHECK
Press all DSS or line button(s) to be checked.
a
The display will show the ring delay setting for
each DSS or line button pressed.
STATION 23-5
To exit ring delay check mode, press the
a
RING DELAY button again (the console will
automatically exit one minute after the last
keypress).
Tone Commander 1560 Attendant’s Guide 19
Page 23

To set ring delays:
a
a
a
Press the RING DELAY button once. The light
above the button will turn on.
RING DELAY PROG
Using the dial pad, enter the number of rings
to delay before ringing at the console begins
(1-9 rings, 0 for no delay, or w for no ringing
at the console).
RING DELAY - 4
Press all DSS or line buttons to be set to the
chosen ring delay value.
The display will show each DSS or line button
number and the ring delay value.
STATION 15 - 4
or
To set all stations (not lines) to the same
value, press # on the dial pad instead of a
DSS button.
ALL DELAY - 4
To exit ring delay set mode, press the RING
a
DELAY button again (the console will
automatically exit one minute after the last
keypress).
20 Tone Commander 1560 Attendant’s Guide
Page 24

DSS/Autodial Setup
Each DSS button may be programmed to autodial up to 24 digits
or functions, including 0-9, *, #, dial tone detect, a hookflash
(transfer signal), and a pause. Digits are entered with the dial
pad. Other console buttons are used to enter the functions –
these functions are printed below the buttons on the console front
panel.
DIAL TONE delays dialing until steady dial tone is present.
FLASH is used to transfer calls or access special features of
the telephone system.
PAUSE is used if a delay is required during dialing.
IMPORTANT – The first entry of a dialing routine for any button
used for DSS operation
This entry will determine whether features
associated with DSS operation will apply (Station
Recall, Line Release with Supervision, Station
Camp-on, etc.
Example: FD4710
Dialing routines, where the first entry is
will operate as Autodialing buttons.
Example: D9D5551982
must be a FLASH (F).
not a FLASH,
A switch inside the Central Processing Unit may be set
to prevent autodial programming changes. Consult with
your installer if you cannot program autodial numbers.
Tone Commander 1560 Attendant’s Guide 21
Page 25

To program DSS buttons:
Press HOLD, then TRANSFER, then
HOLD
TRANSFER
a
RELEASE, then P (7) on the dial pad to enter
autodial programming mode.
The display will show:
RELEASE
PRS
7
PROGRAM AUTODIAL
Press the DSS button to be programmed.
a
Press SHIFT first if programming the station
on the lower half of the button.
The station status light will turn on.
The display will show the number currently
programmed, or “NOT PROGRAMMED”.
Using the dial pad and the labeled DSS
a
buttons, enter the sequence to be dialed, or
press RELEASE to exit autodial programming
mode without changing the programmed
number.
The display will show the number being
entered.
Press HOLD to store the number, then select
a
another DSS button to be programmed.
or
Press RELEASE to exit autodial programming
mode
without storing the number (or wait for
automatic exit).
NOTE – Systems with multiple attendant positions have a single
set of DSS/Autodial numbers shared by all consoles.
Numbers may be programmed from any attendant
position.
22 Tone Commander 1560 Attendant’s Guide
Page 26

Name Display Setup
Any DSS or line button may have an associated name entry
which is shown in the display in place of the station or line
number. Console buttons are used to enter the names –
characters are printed below the buttons on the console front
panel.
DSS buttons must first be programmed with DSS or autodial
numbers before name entries are assigned.
A switch inside the Central Processing Unit may be set to
prevent name display programming changes. Consult with
your installer if you cannot enter or change names.
To program name displays:
Press HOLD, then TRANSFER, then
HOLD
TRANSFER
a
RELEASE, then N (6) on the dial pad to enter
name programming mode.
The display will show:
RELEASE
MNO
6
NAME ASSIGN
- this will be followed by a help display.
Press the DSS or line button to be
a
programmed.
Press SHIFT first if programming the station
on the lower half of a DSS button.
The station or line status light will turn on.
If the selected button is currently
a
programmed, the name will be displayed.
If you do not want to change the currently
programmed name, press HOLD, then select
another DSS or line button.
Tone Commander 1560 Attendant’s Guide 23
Page 27

Enter the name using the labeled console
a
buttons; letters are printed on the console
front panel beneath the buttons. Any existing
name entry will be overwritten. Do not exceed
14 characters, including spaces.
BKSPACE deletes the last character entered.
CLEAR deletes the entire entry.
Press HOLD to store the new name.
a
Select another DSS or line button to be
a
programmed.
or
Press RELEASE to exit autodial programming
mode (or wait for automatic exit).
NOTE – Systems with multiple attendant positions have a single
set of names shared by all consoles. Name displays
may be programmed from any attendant position.
24 Tone Commander 1560 Attendant’s Guide
Page 28

Using a Headset
A headset may be used in place of the handset. Unplug the
handset cord from the jack on the left side of the console, and
plug the headset into the jack. Some headsets have a jack for the
handset, allowing you to switch between the two devices without
unplugging.
The 1560 console is compatible with amplified electronic
headsets only. Contact your system vendor, headset
manufacturer, or Tone Commander if you have any questions
regarding headset compatibility.
Console Care
Your Tone Commander console is easy to care for. There are no
specific maintenance requirements.
Never attempt to clean the console by spraying it with cleaners.
Do not use solvents or abrasive substances – harm to the
console finish may result.
A mild glass cleaner sprayed on a soft cloth is sufficient to clean
the console. Wipe the console face gently to remove fingerprints
and surface dirt.
Although your console is not fragile, it is a precision instrument
and should be treated as such. Spilling liquids on it may adversely
affect internal electronics and void your warranty.
Tone Commander 1560 Attendant’s Guide 25
Page 29

26 Tone Commander 1560 Attendant’s Guide
Page 30

14-280158 Rev. F
©2000
11609 49th Place West
Mukilteo, WA 98275-4255
(800) 524-0024 (425) 349-1000
Fax: (425) 349-1010
www.tonecommander.com
 Loading...