

Instruction manual
- English -
V 1.1-170703
www.tobyrich.com
SPFP01-017
SmartPlane Pro
FPV
app controlled VR plane

1. User Information
Note: All instructions, warranties and other related documents are subject to change. For current product
literature see www.tobyrich.com/support.
In various countries, there is a compulsory insurance requirement, also for model and toy airplanes. In any
case, please inquire with your liability insurance and, in case of doubt, ensure that you are insured for the
operation of such planes.
1.1. Data protection
The SmartPlane Pro App does not store any personal data, without express permission.
1.2. Denition of Terms
The following terms are used throughout the product literature to determine the hazard levels in dealing
with the product:
NOTE: Refers to useful information.
CAUTION: Indicates a potentially hazardous situation, which, if not avoided, may result in minor or
moderate injury.
WARNING: Indicates a potentially hazardous situation, which, in case of non-compliance with the
instructions, may result in severe injury.
WARNING: Read the ENTIRE instructions manual to familiarize yourself with the functions of the product before
commissioning. Incorrect handling can damage the product and personal property and cause serious injury.
This is a technically demanding product for hobby use. It must be handled with caution and prudence and
requires some basic manual skills. Failure to use the product in a safe and circumspect manner could result
in injury or damage to the product or other property. Do not attempt to disassemble the product without the
consent of the manufacturer, to use it with incompatible components, or to modify it at will. This manual
contains safety instructions as well as operating and maintenance instructions. To ensure correct operation
and to avoid damage or serious injury, it is imperative that you read all the instructions and warnings in this
manual before commissioning and follow them.
1.3. Warnings and safety instructions
» Always keep a safety distance on all sides
around the model to avoid collisions or injuries.
This model is controlled by a radio signal, which
can be disturbed. These disturbances can lead
to loss of control.
» Always keep a safety distance to public roads
and high voltage cables.
» Always operate your model on open terrain, far
from automobiles, trafc and people.
» Keep a distance to airports of at least 1 mile.
» Always pay attention to the wind, the weather
and obstacles.
» Always follow the instructions and warnings
for this model and all related accessories

(rechargeable batteries etc.).
» Avoid any water contact. Humidity damages the
electronics.
» Never put parts of your model in the mouth as
this will cause serious injury, even death.
» Never operate your model with a non-charged
smartphone or tablet.
» Keep your model always in sight and under
control.
» Observe the legal requirements for maximum
altitude.
» Always use fully charged batteries.
» Always keep all parts clean.
» Never operate the airplane with damaged wiring.
» Never touch moving parts.
» Caution: Long hair can catch in the SmartPlane
Pro
FPV
Propeller.
» Take out liability insurance before use.
» You will take part in the general air transport
with your aircraft. .If you want to use your aircraft
commercially, you need an ascension permit.
» The remote control (e.g., smartphone, tablet)
must always be switched on while the aircraft
is connected.
» Never touch the rotating propeller.
Be sure to check the drones regulations applicable to your country for specic national rules and
regulations regarding the operation of unmanned aerial vehicles.
2. Checklists: Flight preparation and follow-up
2.1. Preparation of the rst ight
Remove the contents of the package and check
it thoroughly for damage and functional integrity.
Read these instructions thoroughly.
Charge the battery (s. chapter 3.1.).
Download and install the App from the App Store
or Google Play Store (search term "SmartPlane
Pro TobyRich").
Search for a large open space for your rst ights,
and choose a windstill day to check the ight
behavior of the SmartPlane Pro
FPV
.
Perform the Preight Check (s. chapter 2.2.).
Switch on the aircraft and connect it to the app
(s. chapter 3.3.).
2.2. Preight Check
(to be carried out before each ight)
Check whether the propeller can rotate freely.
Check the rudder for free movement.
Align the antenna vertically.
Use a fully charged battery.
Use a fully charged Smartphone.
Turn your smartphone on loud to get acoustic
warnings and tips.
Caution: Turn your smartphone on in ight
mode. Otherwise, the connection will interrupt
for incoming calls.
2.3. Maintenance after the ight
Remove the battery from the aircraft
Charge the battery (at least every 3 months).
Repair or replace any damaged parts.
Keep battery and SmartPlane Pro
FPV
separate
from each other.
Store and transport the SmartPlane Pro
FPV
exclusively in its packaging, in order
to prevent damage.
2.4. SmartPlane Pro
FPV
speci cations
Flight time Weight Charging time
12 min 1.2 oz 20 min
Length Wingspan Battery
13 in 11.8 in LiPo 185 mAh
3. Operation
This product is a stunt and racing plane. It has highly developed sensors inside the aircraft, which enable active
position control and ight stabilization. This results in smoother ying, allows beginner-friendly ying as well
as automatic stunts at the push of a button. Throughout the ight, the sensors inside the aircraft permanently
analyse the position in the airspace and calculate necessary compensatory movements of the rudders. The
positioning system is already active before takeoff.
3.1. Charging the battery
To charge the supplied battery pack, insert it into the USB charger device and plug it into a USB port, such
as a computer, laptop or via a USB wall plug adapter. If you use the USB port of your computer for charging,
make sure that the computer is turned on. At least 5V
at 250 mA is required. You can also use a 5V 1A output.
The battery is fully charged as soon as the red LED
ceases to light up.
Important: Charge the battery at least every 3 months.
3.2. Download the SmartPlane Pro App
Seach for the terms "TobyRich SmartPlane Pro" in the App Store or on Google Play and
download the app to your smartphone or tablet.

3.3. Switch on the SmartPlane Pro
FPV
1. To connect the SmartPlane Pro
FPV
, plug the charged battery
into the battery bay of the
aircraft up to the limit stop.
The LED on the plane ashes
blue now.
2. Enable Bluetooth in the
smartphone settings and start
up the SmartPlane Pro App.
3. Keep your smartphone close to the antenna in the front of the aircraft. With existing Bluetooth
connection, the LED is now permanently blue.
3.4. Control
3.4.1. Tilt mode
With two simple hand movements, the App allows for comfortable and easy control of the SmartPlane Pro
FPV
.
Only one hand is needed for this. The smartphone needs to be held at and horizontal for takeoff.
» Speed / ight altitude: The thumb control is used
to move the thrust regulator on the display of your
smartphone. If this is pulled up, the plane gains speed.
A downward movement reduces this. The altitude of the
Smart Pro plane can be adjusted via the speed.
» Spiralling: Through a slight tilting of the smartphone
(See picture) to the left or right, the SmartPlane
Pro will start spiralling.
See also the explanations in the videos at www.tobyrich.com/support.
3.4.2. Joystick-Mode
Position the joystick over the right circle. Press the two
suction cups on rmly to secure the position. Use your
left thumb to operate the thrust controller. Use the
Joystick to steer left and right.
IMPORTANT: Before installing the joystick, clean the smartphone screen with a suitable cleaning cloth, e.g.
a micro ber cloth.
For more tips and tricks, check out the tutorial in the SmartPlane Pro app.

3.4.3. Stunts
Through the use of control gestures, you can have your SmartPlane Pro
FPV
run various stunts and aerobatic
maneuvers. Part of the aerobatic maneuvers ends automatically after activation
. Other aerobatic maneuvers,
on the other hand, must be terminated by repeating the control gesture
. Under settings › Stunt-Editor you can
assign an aerobatic maneuver to each gesture. The SmartPlane Pro App is available at the time of launch with the
following control gestures and aerobatic maneuvers (TobyRich is constantly working on further stunts):
control gestures
Upick Downick Double Tap
Flick the smartphone abruptly
toward your body
Move the smartphone abruptly
toward the ground
Touch the screen twice in rapid
succession
Standard setting:
Change between
Helicopter and Hover Mode
Standard setting:
Boost
Standard setting:
Change between
Airplane and Helicopter Mode
aerobatic maneuvers
Airplane Mode
Helicopter Mode Hover Mode
The SmartPlane Pro
FPV
ies forward
horizontally with normal speed.
This mode is recommended for
the outdoor ight.
The SmartPlane Pro
FPV
ies
forward horizontally with normal
speed at a 45 ° angle. This mode
is recommended for the indoor
ight.
The SmartPlane Pro
FPV
ies vertically
on the spot and rotates around its
own axis.
Boost Circle Mode
Looping
The SmartPlane Pro
FPV
gets a
speed boost for a couple of
seconds. This is e.g. useful to y
against the wind.
The SmartPlane Pro
FPV
ies circles
autonomously.
The SmartPlane Pro
FPV
makes a
Looping.
IMPORTANT: Fly at a sufcient
altitude!

3.4.4. Start
Hold the aircraft in one hand and the
smartphone in the other hand. To start the
aircraft, tap the start button, and gently push
the airplane forward at the start signal of the
app. In buildings, you should start in helicopter
mode and throw the aircraft forward very gently
/ slowly at a 45 ° angle. Make sure in any case
that there is enough space available for your
rst takeoffs!
3.5. Flight
Always choose a wide open area for the ight with your SmartPlane Pro
FPV
. Ideal would be to y on a
designated air eld. If this is not the case, do not allow the aircraft to y near houses, trees, pipes, waterways
and building structures. Flights should also be avoided in areas where many people are present, e.g. in busy
parks, on school yards or football pitches. Find out about local laws and regulations before you choose a place
for your ight.
If there is a problem in ight, or if you are unsure about the ight, just use your nger to turn off the engine
completely. Also, tilt the smartphone all the way to the right or left to get a sharp curve in the respective
direction Through these measures, the SmartPlane Pro
FPV
will begin to drop at maximum speed in a spiral.
3.6. Switch off
To turn off the airplane, remove the battery from the aircraft.
3.7. Replace propeller
To change the propeller, insert the supplied propeller exchange tool into the gap between the propeller and
the aircraft body and push it down rmly with the thumb. Embrace the aircraft while doing this so that the
propeller is free to rotate. To release it, turn it counter - clockwise until it has come off the plane. Then insert the
replacement propeller onto the engine-axis and turn it clockwise until it presses the replacement tool slightly
against the aircraft body. Then remove the replacement tool again. It is important to slightly clamp the plate
of the replacement tool. The gap between the propeller and the aircraft must be set exactly to ensure proper
functioning and durability. A video tutorial is available at: www.tobyrich.com/support.

1. Install the propeller exchange tool
2. Dismantling the propeller
3. Installation of the propeller
3.8. Bluetooth connection
Note: The Bluetooth connection can be interrupted outside a distance of 100 meters. Avoid this condition.
The app warns you acoustically before reaching the maximum range. Turn around no later than at this time.
In the case of loss of connection, an emergency stop of the aircraft is carried out and it glides to the ground.
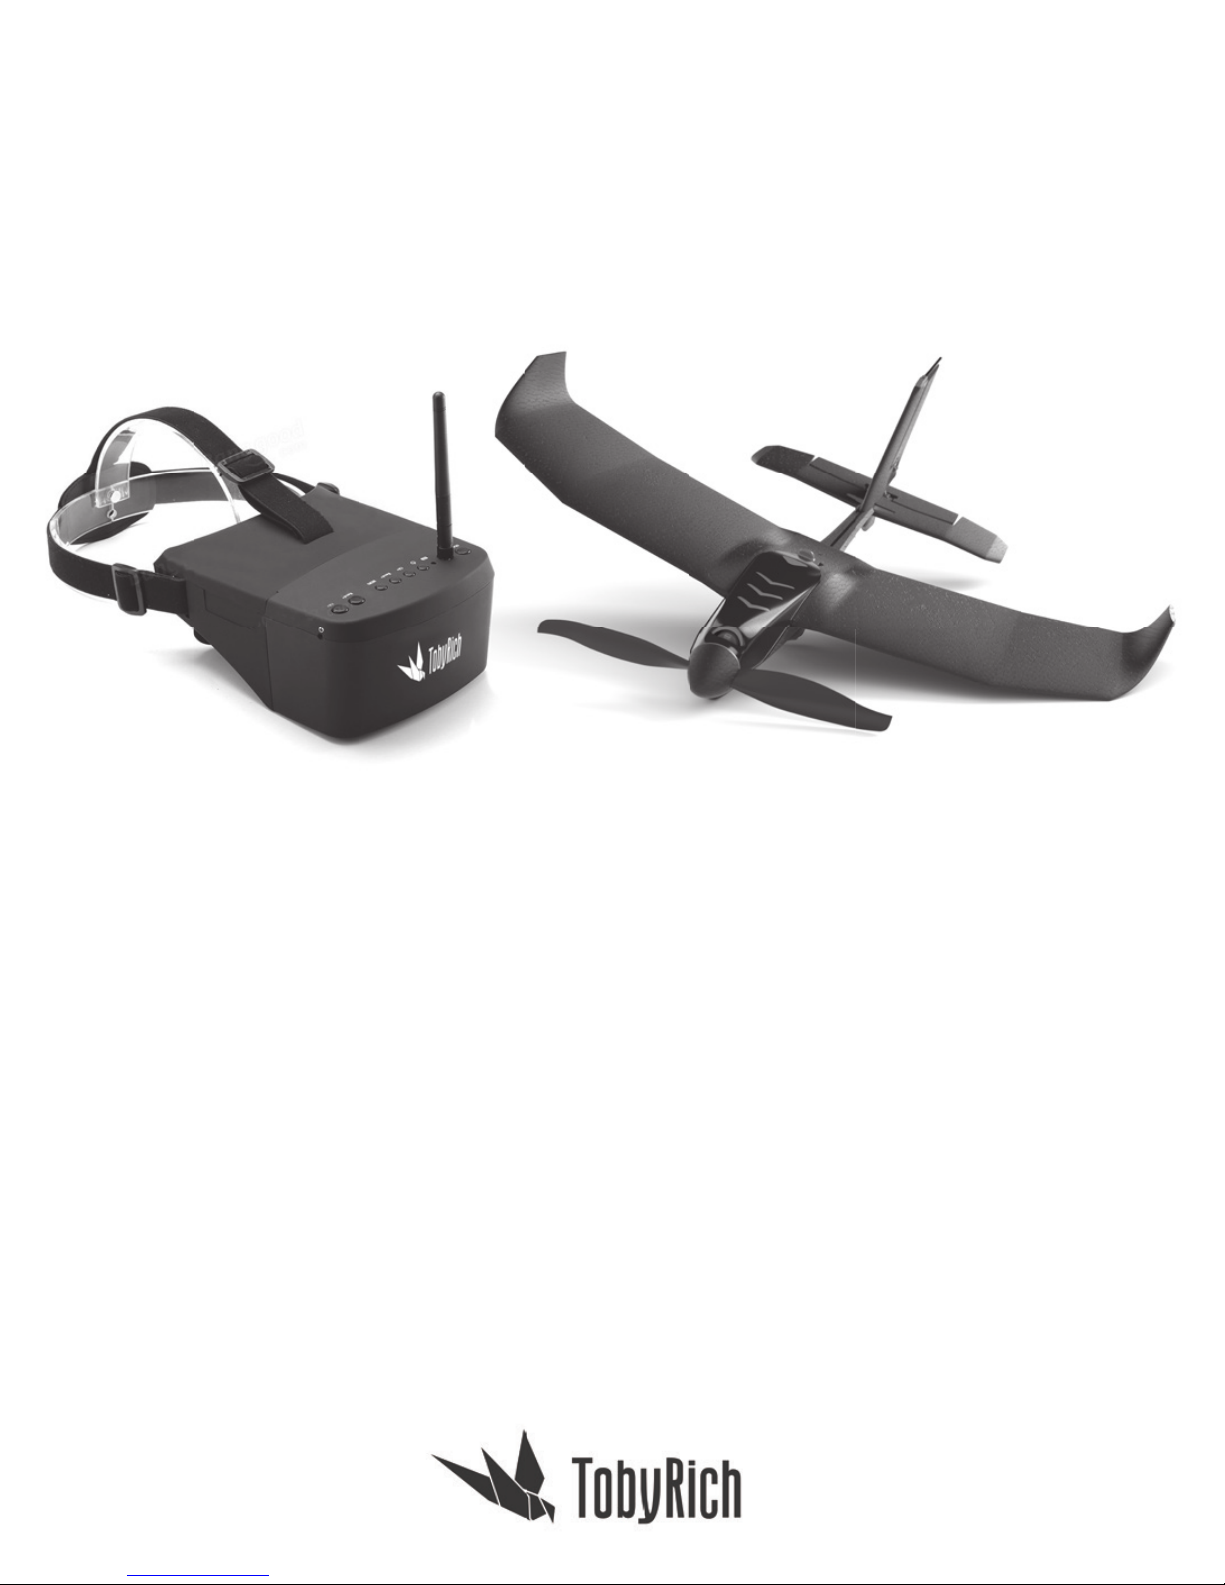
4. Usage of live video transmission (FPV)
1
2
3
4
5
6
8
7
9
10
1. Set the reception channel +
2. Set the reception channel -
3. Change monitor settings (short
actuation), Change input source (long
actuation)
4. Menu navigation +
5. Menu navigation -
6. On / off switch
7. Battery indicator
8. Antenna thread
9. Automatic station search
10. Charging socket

4.1. Preparing the video goggles
The SmartPlane Pro
FPV
comes with video goggles with built-in
display and video receiver. The unit can be worn as goggles on
your head, or be used as a simple monitor. The optics must be
mounted on the monitor for use as video goggles.
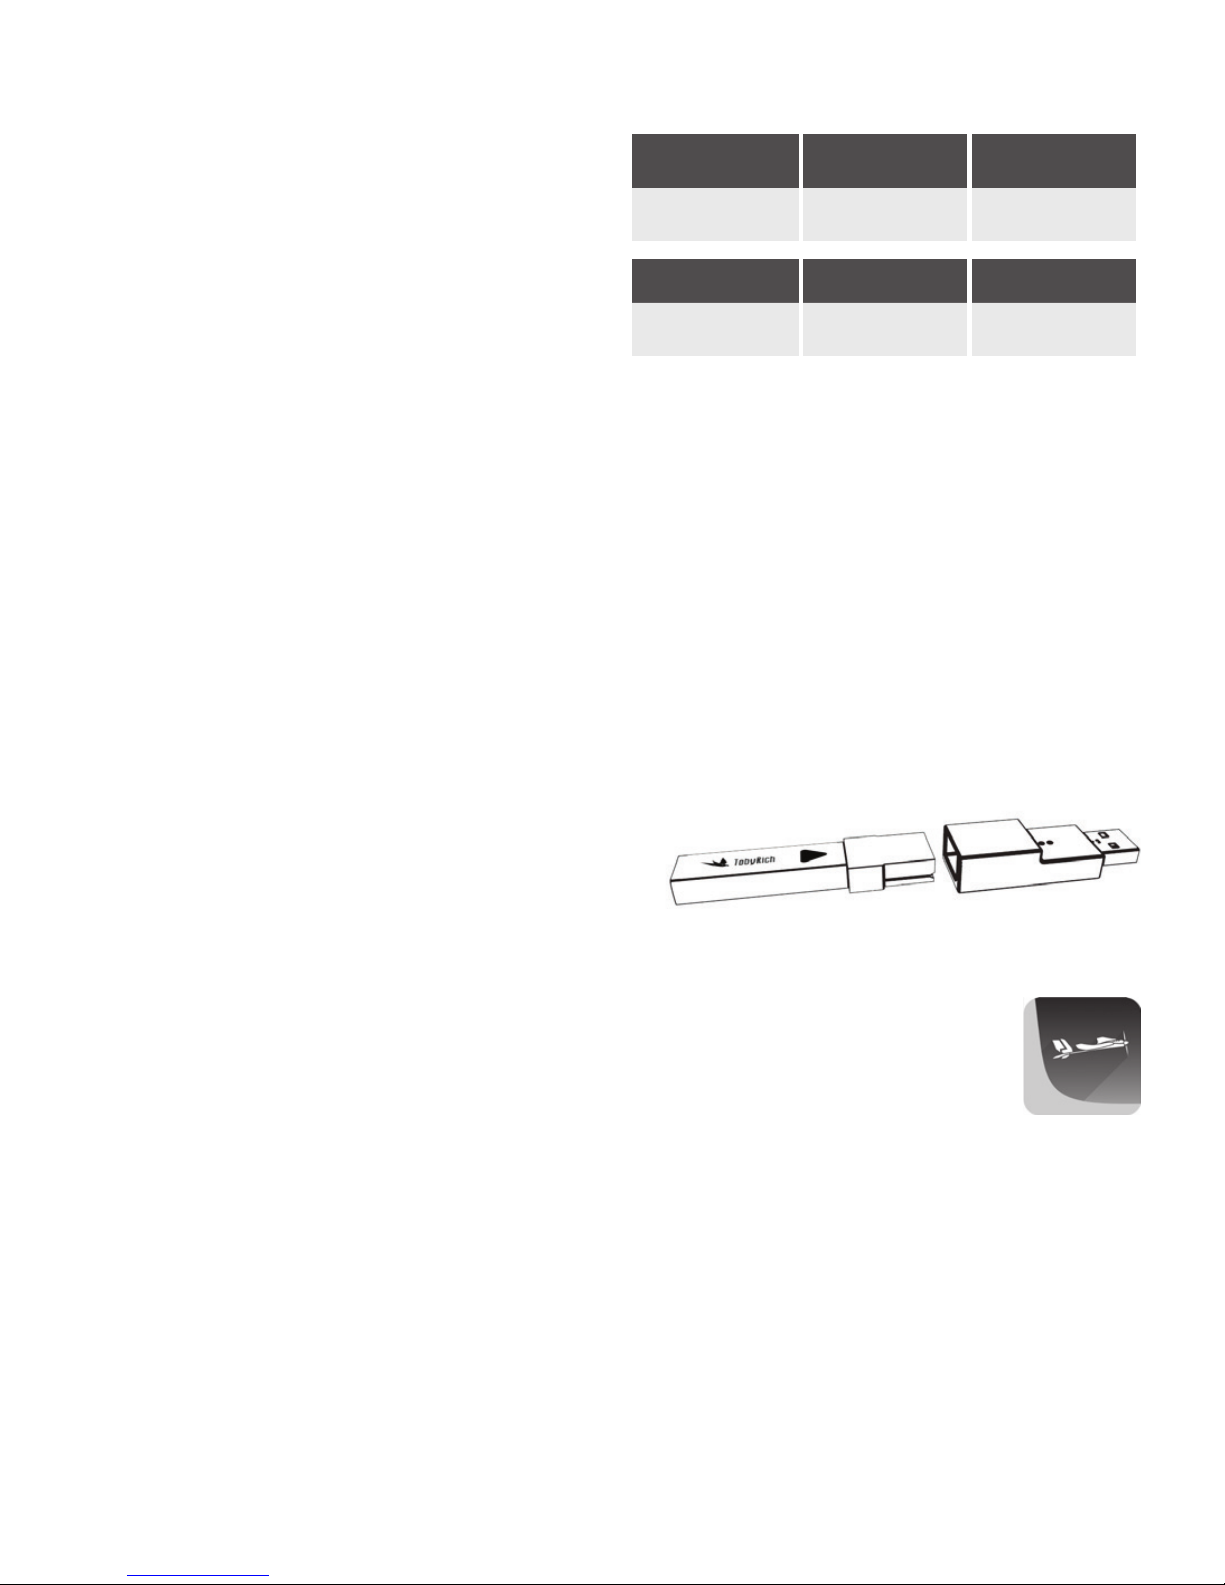
Before use, the battery in the goggles must be fully charged with
the included USB cable (10). The LED (7) on the front of the goggles
is lit up red during the charging process. When the battery is full,
the LED turns green. The rod antenna must always be attached to the
goggles (8). Switch the goggles on and off by pressing and holding
down (for 3 seconds) (6) the power button. The reception channel buttons (1 & 2) can be used to switch
between the channels (Raceband channel 1 to 8, channel 3 is the default).
4.2. Preparing the video camera in the SmartPlane Pro
FPV
The video function must be activated in the SmartPlane Pro
FPV
before the rst commissioning! To do so, start
the SmartPlane app and plug the battery into the aircraft. When you rst connect Smartphone and SmartPlane
Pro
FPV
you can agree to the terms of use and thus enable video transmission.
The camera in the SmartPlane Pro
FPV
transmits an analogue video signal without sound on one of four
raceband channels (Raceband 3, 4, 5, 6; Frequency 5732 MHz, 5769 MHz, 5806 MHz, 5843 MHz). By default,
channel 3 (5732 MHz) is set in the SmartPlane Pro
FPV
and in the video goggles. Up to four SmartPlane Pro
FPV
can be used simultaneously. The channels cannot be used
in double occupancy. The channel is changed by brie y
pressing the channel button on the bottom of the airplane.
In the process, the video transmitter changes through the
four available channels. Correspondingly, the channel
must also be selected in the video goggles by actuating
the reception channel buttons (1 & 2) .
4.3. General notes on the use of FPV
The video signal is transmitted analogously on the 5.8 GHz band. Therefore, the transmission does not
abruptly reach the range limit, but gets poorer continuously. If you see increasing noise in the image, y
back to yourself to prevent a complete failure. The overall transmission quality is strongly dependent on the
environment (e.g., disturbing re ections on walls and inside buildings, in uence of WLAN routers, etc.).
Never aim at the model with the antenna, because the reception performance of the antenna is worst in this
orientation! The best reception is with parallel oriented antennas.
channel button

5. Warnings and speci cations for the battery
The SmartPlane Pro
FPV
is equipped with a lithium polymer battery (LiPo).
Caution: All instructions and warnings must be followed strictly. Failure to handle LiPo batteries correctly can
result in re, personal injury and / or property damage.
» Do not modify the battery.
» Do not use or store the SmartPlane Pro
FPV
or the battery near a source of heat, such as a re or heating.
» Do not throw or hit the SmartPlane Pro
FPV
or the battery against a hard surface.
» Use only the included charger to recharge the battery.
Important: Charge the battery at least every 3 months.
6. Disposal of waste electrical and electronic equipment in the
European Union
Disposal of electrical and electronic equipment and components
This product contains rechargeable batteries. In the interest of protecting the environment,
please do not dispose of the product with its battery in the household waste at the end of its
useful life. Disposal can take place at approved recycling or disposing locations in accordance
with the local regulation.
weak Signal
strong Signal
weak Signal
Receiving
antenna
Transmitting antenna

7. CE-Information
Hereby, TobyRich GmbH, D-28217 Bremen declares that the device SmartPlane Pro
FPV
(SPFP01-
017) when used as intended, is in compliance with the basic requirements and other relevant
provisions of Radio Equipment Directive (RED) 2014/53/EU. The declaration of conformity can be
found on the Internet at www.tobyrich.com/en/support/doc.
Not suitable for children under 14 years of age. This is not a toy. Please read the operating
instructions before use. As a Class 1 device, sales and operation are permitted in all countries
of the EU.
8. Troubleshooting
The LED lights up red.
The aircraft has detected a problem. Check the error message in the app and x the error if necessary.
The propeller is blocked.
1. Make sure that no bers (hair, grass, etc.) are wrapped around the shaft.
2. If the propeller rubs against the nose of the aircraft, loosen it with the propeller-exchange tool (s. chapter
3.7.)
The rudder is blocked.
If the rudder cannot be moved, it has probably jumped out and must
be hooked up again carefully:
1. Insert the top hinge rst.
2. Then, snap in the lower part of the hinge.
The app crashes.
1. Verify that you have uploaded the latest version of your Android or iOS operating system.
2. Delete the SmartPlane Pro app and download the app again.
3. Restart your smartphone.
4. Turn Bluetooth off once and then on again. Turn off the wireless LAN, too.
The battery does not charge.
1. Always ensure that the battery is fully charged at least every 3 months. Failure to do so may result in
permanent damage to the battery. In this case, it must be replaced. You can get a replacement battery
at www.tobyrich.com
2. Plug the battery charger into another USB port. Some computers turn off the USB ports when they are
inactive. Also ensure that the socket adapter is functional.
3. Check whether the LiPo battery is correctly inserted into the battery charger. In case of doubt, check out our
tutorials at www.tobyrich.com/support an.

Questions? Assistance? Problems?
Under
www.tobyrich.com/en/support you can get assistance!
support@tobyrich.com
www.tobyrich.com
TobyRich GmbH | Konsul-Smidt-Str. 8d | 28217 Bremen | Germany
Something is broken.
1. Parts of the fuselage, wing and tailplane can be repaired using commercially available EPP adhesives.
Follow the instructions given by the adhesive manufacturers when doing so.
2. Parts made of hard plastic can usually be repaired with superglue.
Caution: Never glue parts of the propeller! Replace the propeller immediately in case of a defect!
(See chapter 3.7).
Note: Also be careful with the use of glue near the rudder hinges. These must not be glued, since in this case
the aircraft is no longer airworthy.
For additional troubleshooting information, please visit www. tobyrich.com/support
9. Warranty
For information about warranty conditions, refer to the general terms and conditions of the retailer where you
purchased the SmartPlane Pro
FPV
.
Keep the receipt safe as a purchase receipt! The warranty for all products is limited to the countries in
which the product was originally offered. You can nd the conditions of the worldwide warranty under
www.tobyrich.com/en/support/warranty.
Keep these instructions in a safe place as they contain important information.
 Loading...