

Page 1
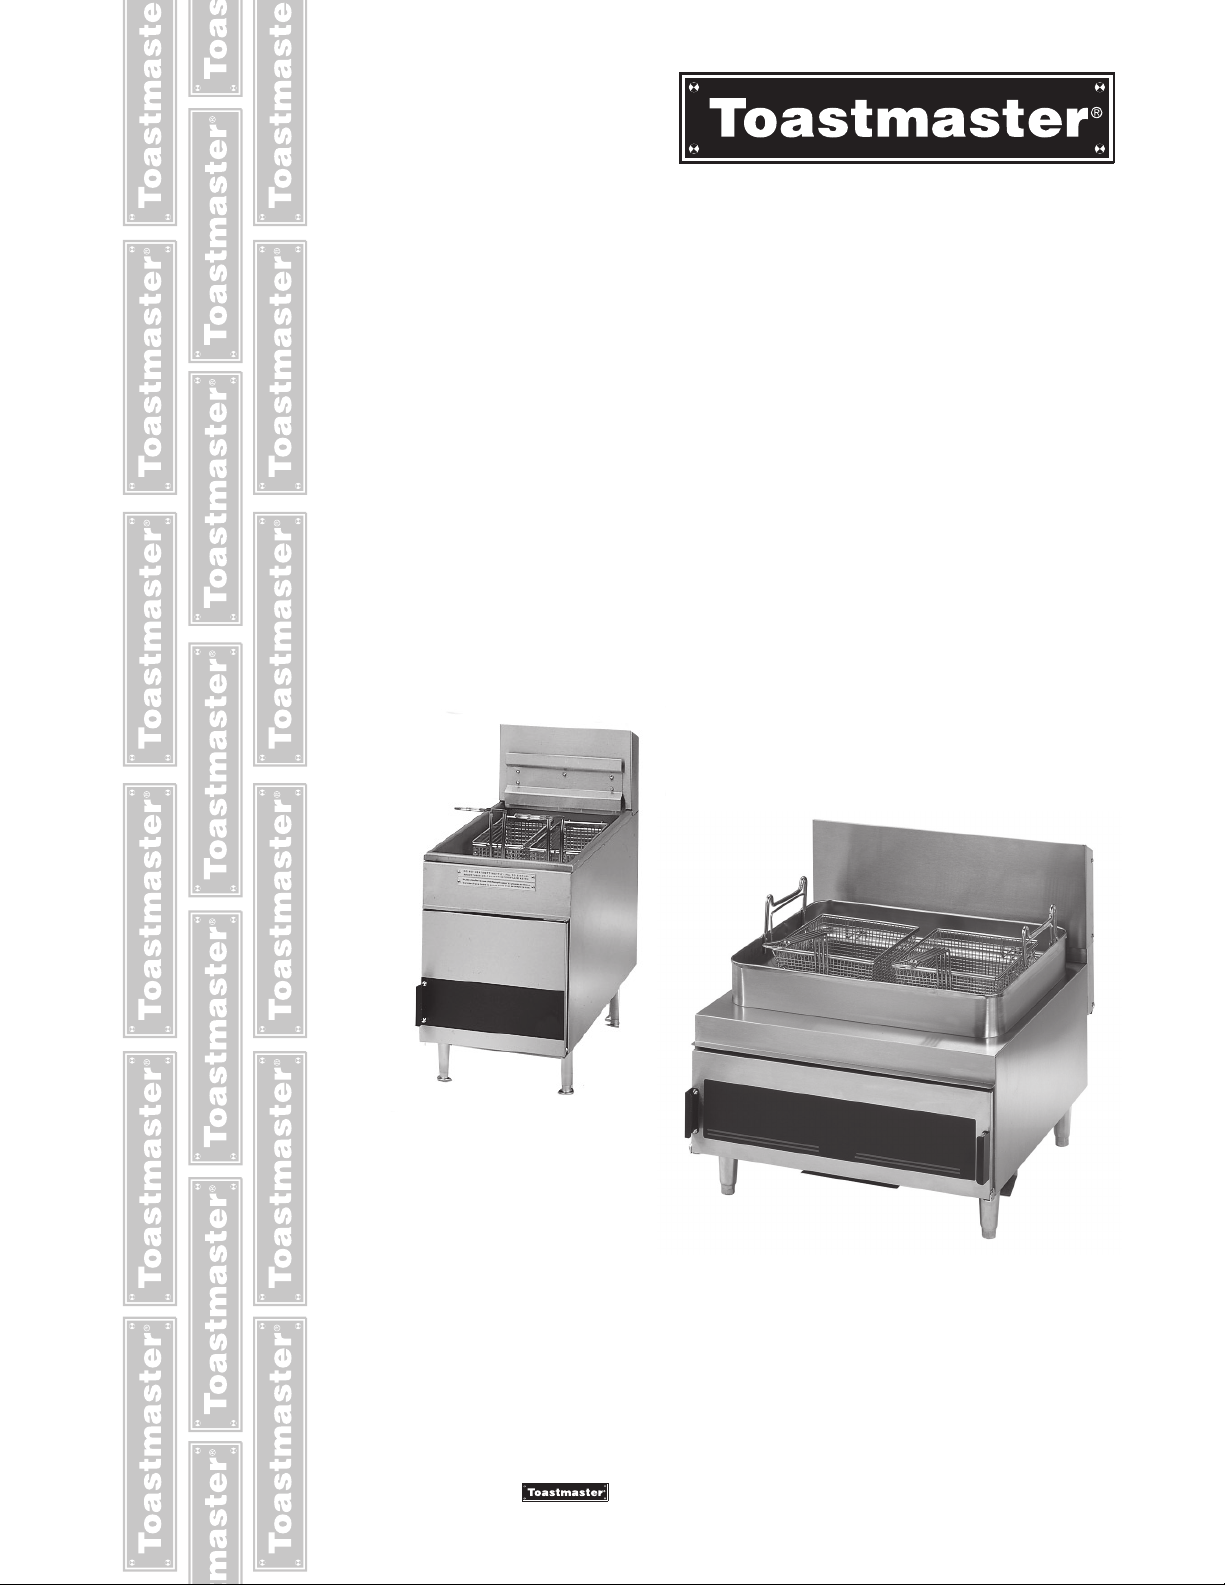
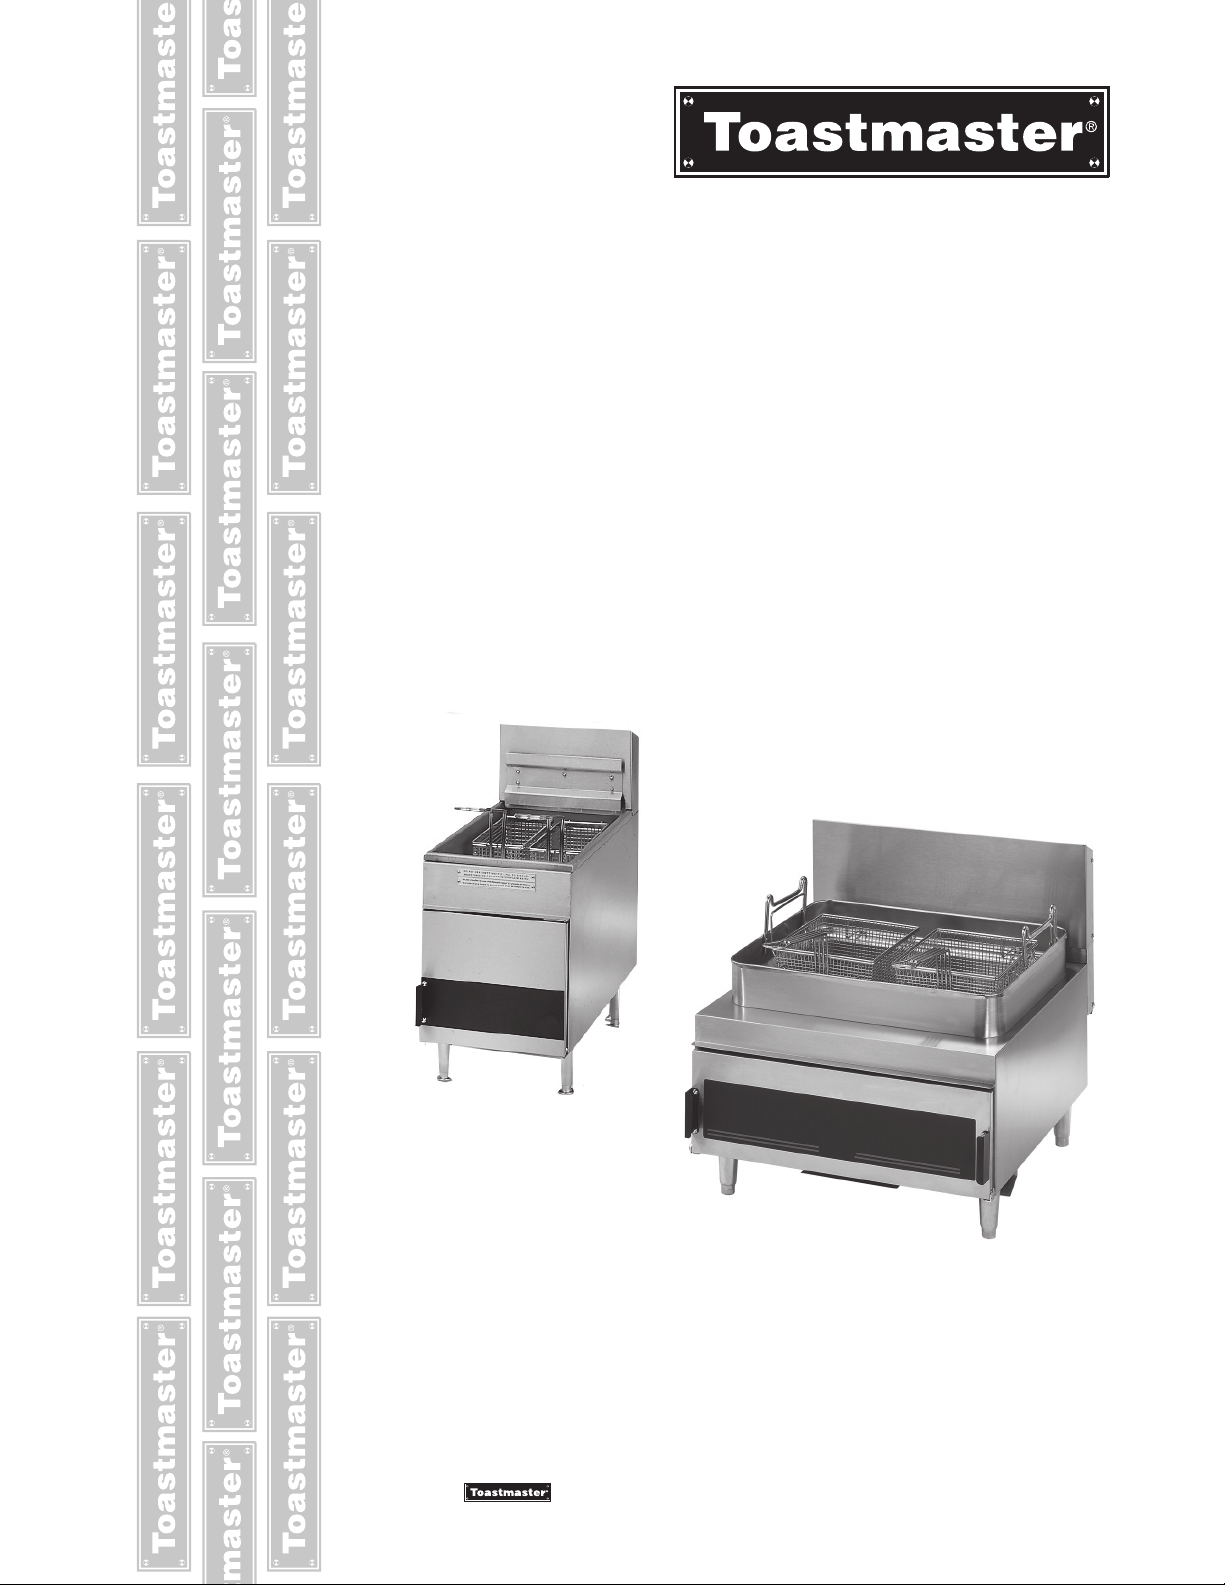
GAS FRYERS
MODEL
TMFG18-NAT, TMFG18-LP
TMFG30-NAT, TMFG30-LP
Installation and
Operation
Instructions
2M-Z13008 Rev. - Oct. 1, 2009
TMFG18
TMFG30
is a registerd trademark of Toastmaster, A Middleby Company. All rights reserved.
1
Page 2

2
These symbols are intended to alert the user to the presence of
important operating and maintenance instructions in the manual
accompanying the appliance.
RETAIN THIS MANUAL FOR FUTURE REFERENCE
NOTICE
Using any part other than genuineToastmaster factory supplied parts relieves the
manufacturer of all liability.
Toastmaster reserves the right to change specications and product design
without notice. Such revisions do not entitle the buyer to corresponding changes,
improvements, additions or replacements for previously purchased
equipment.
Due to periodic changes in designs, methods, procedures, policies and
regulations, the specications contained in this sheet are subject to change
without notice. While Toastmaster exercises good faith efforts to provide
information that is accurate, we are not responsible for errors or omissions
in information provided or conclusions reached as a result of using the
specications. By using the information provided, the user assumes all risks in
connection with such use.
MAINTENANCE AND REPAIRS
Contact your local authorized service agent for service or required maintenance.
Please record the model number, serial number, voltage and purchase date in the area below and have it
ready when you call to ensure a faster service.
SAFETY SYMBOLS
Model No.
Serial No.
Voltage
Purchase Date
Business 8:00 am to 4:30 p.m. Central Standard Time
Hours:
Telephone: (800) 264-7827 Local (314) 678-6347
Fax: (800) 396-2677 Local (314) 781-2714
E-mail Parts@star-mfg.com
Service@star-mfg.com
Warranty@star-mfg.com
Website: www.star-mfg.com
The Service Help Desk
Authorized Service Agent Listing
Reference the listing provided with the unit
or
for an updated listing go to:
Website: www.star-mfg.com
E-mail Service@star-mfg.com
Telephone: (800) 264-7827 Local (314) 678-6347
Mailing Address: Toastmaster
10 Sunnen Drive
St. Louis, MO 63143
U.S.A
CAUTION
WARNING
2
Page 3
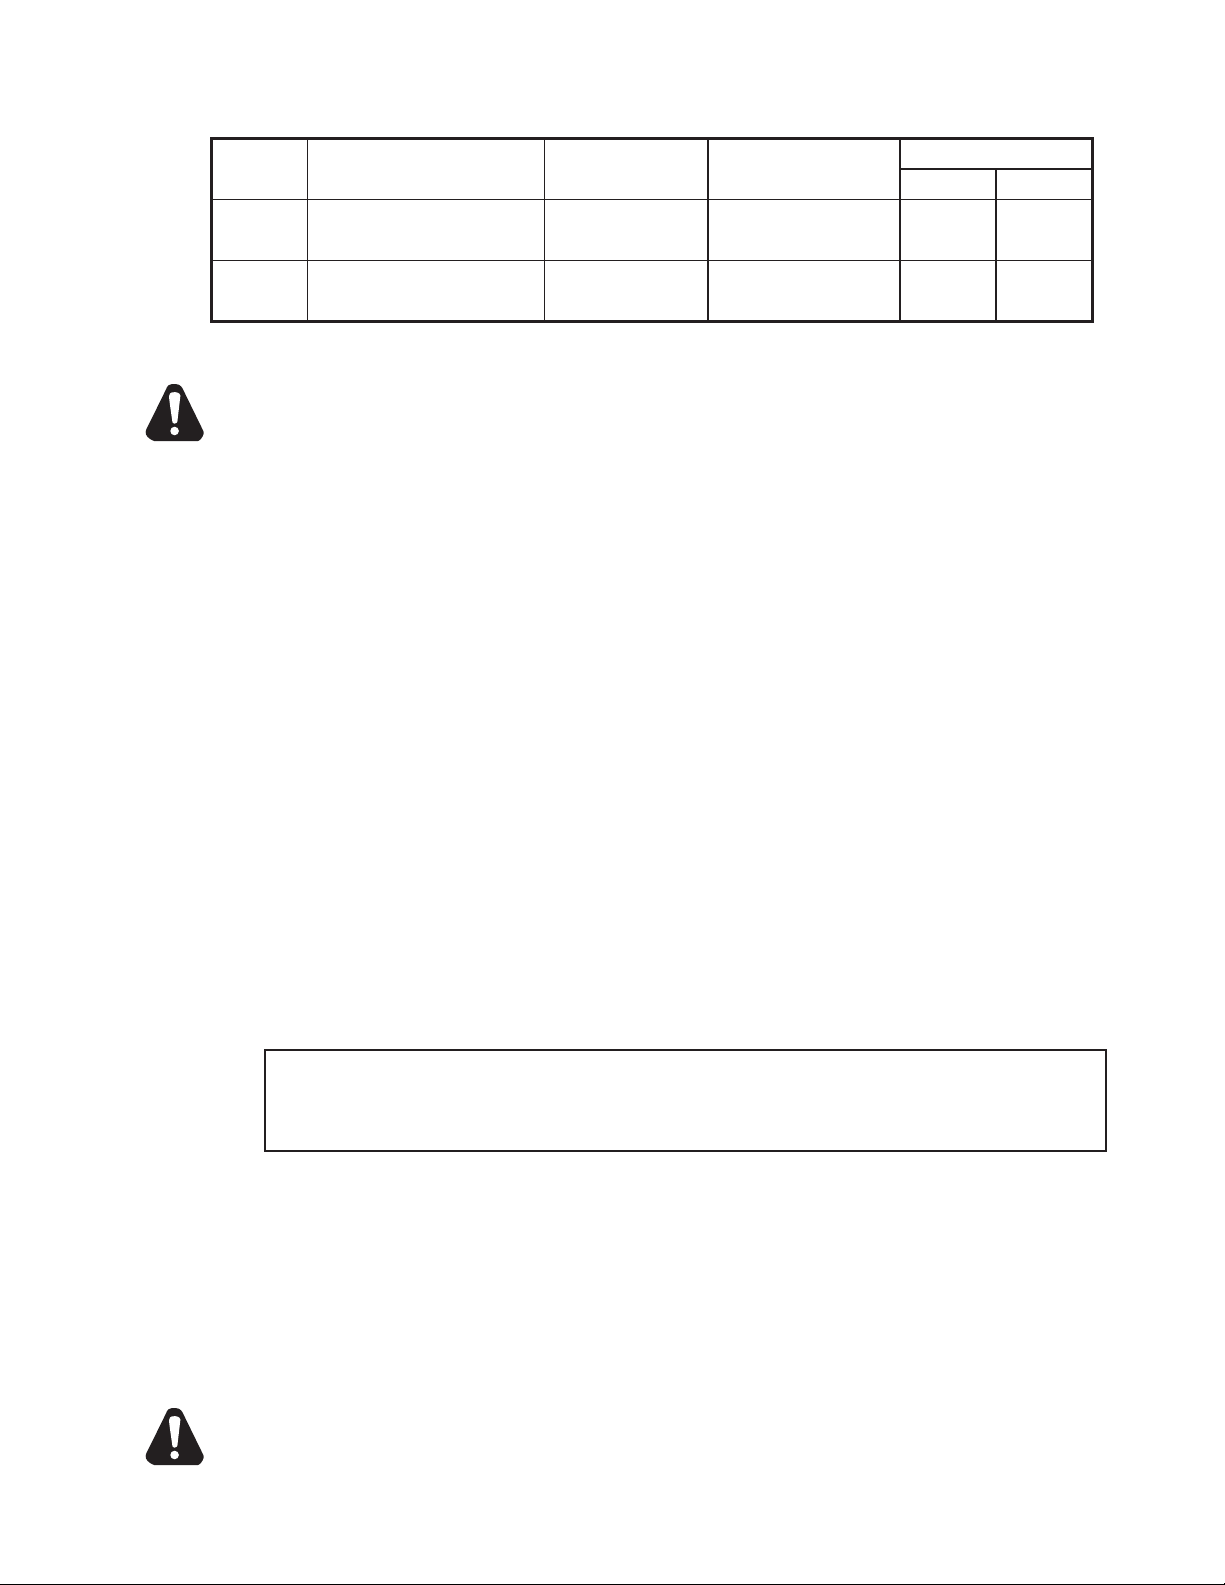
SPECIFICATIONS
CAUTION
Model Height x Width x Depth Gas Connection NAT / LP
TMFG18
TMFG30
25.625” x 12” x 25” 3/8” NPT
62.6cm x 30.5cm x 61cm 1cm NPT 29 kg 33.1 kg
23.375” x 24” x 25.125” 1/2” NPT Female NAT:70,000 BTU/HR 110 lbs 118 lbs
59cm x 61cm x 64cm 2cm NPT Female LP:65,000 BTU/HR 50 kg 54 kg
24,000 BTU/HR
Weight
Installed Shipped
64 lbs 73 lbs
GENERAL INSTALLATION DATA
PLACE THE LAMINATED WARNING SIGN SUPPLIED WITH THE FRYER IN AN AREA
VISIBLE TO THE FRYER OPERATOR.
This equipment is designed and sold for commercial use only by personnel trained and
experienced in its operation and is not sold for consumer use in and around the home nor for use
directly by the general public in food service locations.
Before using your new equipment, read and understand all the instructions & labels associated
with the unit prior to putting it into operation. Make sure all people associated with its use
understand the units operation & safety before they use the unit.
All shipping containers should be checked for freight damage both visible and concealed. This
unit has been tested and carefully packaged to insure delivery of your unit in perfect condition. If
equipment is received in damaged condition, either apparent or concealed, a claim must be made
with the delivering carrier.
Concealed damage or loss - if damage or loss is not apparent until after equipment is unpacked,
a request for inspection of concealed damage must be made with carrier within 15 days. Be
certain to retain all contents plus external and internal packaging materials for inspection. The
carrier will make an inspection and will supply necessary claim forms.
CAUTION
The installation of the Appliance should conform to the NATIONAL FUEL GAS CODE
"ANSI Z223.1 - LATEST EDITION" AND ALL LOCAL GAS COMPANY RULES AND
REGULATIONS.
IN CANADA INSTALLATION SHALL BE IN ACCORDANCE WITH THE CURRENT CAN/
CGA-B149.1 NATURAL GAS INSTALLATION CODE OR CAN/CGA-B149.2 PROPANE
INSTALLATION CODE AND LOCAL CODES WHERE APPLICABLE.
WARNING: Improper installation, adjustment, alteration, service or maintenance
can cause property damage, injury or death. Read the installation, operating and
maintenance instructions thoroughly before installing or servicing the equipment.
This appliance and control valve must be disconnected from the gas supply piping system during
any pressure testing of that system at test pressures in excess of 1/2 PSIG (1.034 ATM). This
appliance must be isolated from the gas supply piping system by closing its individual manual
shutoff valve during any pressure testing of the gas supply piping system at test pressures equal
to or less than 1/2 PSIG (1.034 ATM). For your protection, we recommend a qualied installing
agency install this appliance. They should be familiar with gas installations and your local gas
requirements. In any case, your gas company should be called to approve the nal installation.
In addition, there should be posted, in a prominent location, detailed instructions to be followed in
the event the operator smells gas. Obtain the instructions from the local gas supplier.
FRYER SHOULD BE RESTRAINED TO PREVENT TIPPING WHEN INSTALLED TO
AVOID SPLASHING OF HOT LIQUID. USE ADEQUATE TIES WHEN INSTALLING
THE FRYER.
3
Page 4
FOR YOUR SAFETY
DO NOT STORE OR USE GASOLINE OR OTHER FLAMMABLE VAPORS AND
LIQUIDS IN THE VICINITY OF THIS OR ANY OTHER APPLIANCE. KEEP THE
APPLIANCE AREA CLEAR AND FREE FROM COMBUSTIBLES.
AIR SUPPLY
Provisions for adequate air supply must be provided.
AIR INTAKES IN BOTTOM
Make certain that the air intake opening in the bottom of the appliance is not obstructed.
It is essential for proper combustion and operation of the appliance.
CAUTION
DO NOT USE SPACE UNDER FRYER FOR STORAGE
CAUTION
CAUTION
LEVELING UNIT
Level unit by adjusting the (4) feet.
CAUTION
DO NOT INSTALL WITHOUT FEET PROVIDED.
CLEARANCE
Clearances from combustible and non-combustible material must be a minimum of 48" from the
top of the appliance and 6" from the sides and back. Adequate clearance should also be provided
for proper operation and servicing.
EXHAUST CANOPY
It is essential that facilities be provided over the fryer to carry off fumes and gases.
This unit is not to be connected to a ue or stack for exhaust purposes.
GAS PIPING
Gas piping shall be new, clean and of such size and so installed as to provide a supply of gas
sufcient to meet the full gas input of the appliance. If the appliance is to be connected to existing
piping, it shall be checked to determine if it has adequate capacity. Joint compound (pipe dope)
shall be used sparingly and only on the male threads of the pipe joints. Such compounds shall be
resistant to the action of L.P. gases.
WARNING: Any loose dirt or metal particles which are allowed to enter the gas lines
on the appliance will damage the automatic valve and affect its operation. When
installing this appliance, all pipe and ttings must be free from all internal loose dirt.
Do not remove the seal until actual connection is made to the gas supply line.
CONNECTING GAS SUPPLY LINE
The gas inlet on this appliance is sealed at the factory to prevent entry of dirt. Do not remove
this seal until actual connection is made to the gas supply line. Each unit is supplied with a
gas pressure regulator adjusted for use with the gas specied on the nameplate. To connect
gas supply, attach pipe nipple provided with unit. For pressure requirements and adjustment of
regulator, see GAS PRESSURE REGULATOR.
MANUAL SHUT OFF VALVE
A manual shut off valve should be installed upstream from the union and within six feet of the
appliance.
CHECKING FOR GAS LEAKS
Soap and water solution or other material acceptable for the purpose of locating gas leaks shall
be used. MATCHES, CANDLES, FLAME OR OTHER SOURCES OF IGNITION SHALL NOT BE
USED FOR THIS PURPOSE.
4
Page 5

GAS PRESSURE REGULATOR
The regulator is factory set as specied on the rating plate. If it should be necessary to check the
manifold pressure, remove the 1/8" pipe plug from the top part of the burner manifold and attach
a pressure gauge. To adjust gas pressure, unscrew cap from pressure regulator on control valve
and turn screw to the right to increase and left to decrease the gas pressure to its proper setting.
Replace cap. Manifold Pressure should be no more than 6" water column for LP gas or 3 1/2" for
natural gas.
LIGHTING INSTRUCTIONS
1. Wait 5 minutes before relighting pilot.
2. Open front door.
3. Turn thermostat to "OFF" position.
4. Turn valve knob to "PILOT." Push knob in completely. Light pilot through opening on front of
unit. Hold button in for sixty seconds or until pilot remains lit.
5. Check if drain valve is in closed position.
6. Add liquid fat as required.
7. Turn valve knob to "ON." Set thermostat to desired temperature.
8. To turn all gas off to valve control and to pilot, turn valve knob to "OFF" position
(complete shutdown).
TO ADJUST PILOT
1. Open the front door panel.
2. Remove slotted screw cap adjacent to pilot gas outlet of the control gas valve.
3. Turn inne r screw to the right or left to decrease or increase pi lo t flame.
(Flame must surround thermocouple tips by approximately 1/2" (1.2cm).)
4. Replace slotted screw cap tightly to prevent gas leakage.
THERMOSTAT RECALIBRATION
1. To determine whether or not the thermostat should be recalibrated, use an accurate thermometer
located approximately in the center of the kettle with the bulb 1" (2.4cm) below the top of the
fat.
2. Set thermostat to 350°F (177° C) and check the thermometer reading when burner ame goes
off. Temperature should be approximately 5°F (3°C) less than the thermostat dial setting.
3. If not:
a. Without disturbing thermostat, pull knob forward and remove from shaft.
b. Turn screw in center of shaft clockwise to decrease temperature or counterclockwise
to increase temperature. NOTE: 1/4 turn of this screw will result in a change of
approximately 30°F (17°C).
c. Replace knob.
4. Repeat steps 1, 2 and 3 until correct.
HIGH LIMIT THERMOSTAT
These units are equipped with a manual reset high temperature limit type thermostat.
This thermostat will shut off the electric current to the magnetic gas valve, which shuts off the gas
if the fat temperature reaches 450°F (232°C). The fryer will not operate until the red reset button
is pushed in.
Should the high temperature limit thermostat operate, the temperature regulating thermostat
should be checked for malfunctions. The high limit thermostat is located inside the fryer to your
right and can be reached when the door is open.
5
Page 6

CAUTION
DO NOT REMOVE FEET!
DO NOT HEAT AN EMPTY KETTLE.
HOT FAT IS POTENTIALLY DANGEROUS. DO NOT COME IN DIRECT CONTACT WITH
HOT FAT.
OPERATING INSTRUCTIONS
1. CLEAN KETTLE thoroughly before using. Remove baskets and crumb tray. Clean protective
oil from interior of kettle with warm water & mild detergent. Drain through valve in bottom and
rinse thoroughly with clear water and dry completely before lling with oil.
2.
DRAIN VALVE - Make certain it is closed before adding fat.
3. ADD FAT -
Model TMFG30 - A fat level line on the rear of the kettle will guide you in determining the
minimum fat level (12" fryers have a 15 lb. (6.8kg) fat capacity, 24" fryers have a 30 lb. (13.6kg)
fat capacity). If solid fat is used, pack the solid fat carefully to the sides and bottom of the
kettle before turning the temperature control knob to the "ON" position.
Model TMFG18 - Keep level of fat 2" (5cm) above tubes. Kettle holds approximately
18 lbs. (8.2kg) of fat. If solid fat is used, melt the solid fat before lling the fryer. Never attempt
to use solid shortening to ll kettle.
A higher fat level can be used when frying bulky foods, such as chicken or sh cakes.
The level should be chosen carefully so that the foaming action does not spill out of the
kettle.
4. Turn the valve knob to "ON" position.
5.
TEMPERATURE CONTROL - The thermostat is a combination switch and heat control. The
"OFF" position will turn off the electric current which closes the gas valve. With the fat in the
kettle (Note: On models: TMFG30, solid fat must be carefully packed to the sides and bottom
of the kettle) turn the thermostat knob to 200°F (93°C).
6.
CRUMB TRAY Model TMFG30 - Place the crumb tray in the kettle when the fat has
melted.
BASKET RACK Model TMFG18 - Place the rack before adding fat.
7. Turn the thermostat knob to the desired frying temperature. DO NOT FRY MORE FOOD PER
BATCH THAN YOU CAN FRY EFFICIENTLY - Too much food per batch causes excessive
temperature drop, wastes fat, and nothing is gained in capacity.
8.
LOWERING BASKET - When the fat has reached the proper temperature, lower the basket
and food slowly into the fat. When moist food is lowered too quickly into hot fat, the fat will
foam and spatter excessively.
9.
DRAIN - After the food has nished frying, raise the baskets and hang them on the handles
of the kettle. Allow excess fat to drain back into the kettle.
10.
IDLING - During idle periods, lower the temperature setting of the thermostat to approximately
200° F (93°C). It is not necessary to maintain full cooking temperature during idle periods, for
the fat can be reheated quickly to the desired temperature. This procedure will result in longer
fat life and less gas consumption.
NOTE:
See the Handy Frying Chart for recommended temperature and time required to properly
fry various foods as well as procedures and coating suggestions.
11.
TO TURN THE FRYER OFF - Turn the thermostat dial knob counterclockwise to the "OFF"
position. The pilot will remain lit.
12.
STRAINING FAT - Wait until fat is warm before straining fat. Slip lter bag over end of
drain valve nipple and tie in place with a bow knot so it will not slide off. Place a receptacle
under bag and slowly open drain valve. When the kettle is empty, use a small pot to pour hot
oil vigorously around sides, tubes and bottom of kettle to wash out crumbs, etc. Continue to
pour until all crumbs, etc. are washed into lter bag. Remove lter bag and wash for next use.
Close drain valve, and pour fat back into kettle.
6
Page 7
CAUTION
13. TO DRAIN KETTLE - Turn thermostat dial to the "OFF" position. Remove baskets. Drain
fat from kettle only when fat is warm and liquid. A cold fryer heated up will not drain properly.
Use a stick, if necessary, to stir up cold fat in bottom of kettle. Remove crumb tray.
14.
CLEANING THE EXTERIOR - The exterior surfaces can be kept clean and attractive by
regularly wiping with a clean soft cloth. Any discoloration can be removed with a non-abrasive
cleaner.
15.
REASSEMBLING - After the kettle has been cleaned and the fryer body wiped off, replace
crumb tray.
16.
OVERNIGHT SHUTDOWN - Turn knob on combination control to the "PILOT" position. This
will maintain the safety pilot and also prevent any gas from reaching the main burner. To
activate unit, turn the combination control knob to the "ON" position.
17.
COMPLETE SHUTDOWN - Turn valve knob to "OFF" position.
DO NOT ATTEMPT TO FORCE THE RESET BUTTON OR KNOB ON THE VALVE
CONTROL UNDER ANY CIRCUMSTANCES.
GENERAL MAINTENANCE TIPS
1. DO NOT re empty kettle or with fat or oil beneath the minimum level indicator.
2. DO NOT fry foods in excess of 385°F (196°C).
3. DO NOT overll your fry kettle.
4. DO NOT allow burned crumbs to accumulate.
5. DO melt solid fat or shortening before lling fryer.
6. DO keep kettle lled to capacity at all time.
7. DO use correct fry fats and shortening, and follow temperature recommendations.
8. DO lter fat and clean fry kettle daily.
CAUTION
CAUTION
PROPER CLEANING OF KETTLE
DO NOT ALLOW WATER TO GET IN HOT FAT. IT CAN EXPLODE.
1. Drain fat from fryer while the fat is warm, not hot.
2. Rinse to remove all loose residue and crumbs.
3. Fill with water. Bring to a boil and add a fryer cleaner. Boiling time will depend on condition of
the fryer (30 minutes to 2 hours or until clean).
4. Turn heat off, drain and rinse with water until clean.
5. Use a vinegar rinse (2 to 3 cups) to stir, drain and rinse thoroughly with clear water.
6. Wipe kettle with a soft cloth and allow to thoroughly dry.
7. Add fat. Melt solid fat or shortening before lling fryer. Never attempt to use solid shortening
to ll kettle. The shortening Must Be Liquid.
REPAIRS AND SERVICE
This appliance should only be repaired or serviced by the factory or factory authorized personnel.
Moving this fryer with hot liquid is extremely hazardous and can cause serious burns.
Before moving fryer, drain oil.
7
Page 8
CAUTIONS FOR ALL DEEP FAT FRYERS
NEVER LEAVE AN OPERATING FRYER UNATTENDED
REMEMBER HOT OIL IS DANGEROUS – RESPECT IT!
WARNING – INSTALLATION
• Locate your fryer in a protected place so
that it cannot be tipped over or knocked
off its support. A mechanical restraint
should be installed to prohibit the fryer
from tipping or moving. Consult your local
codes for allowable methods of restraint.
• Install an automatic re extinguisher over
the fryer and in the exhaust duct.
• Be sure your power supply is installed
properly and in accordance with the local
and national codes.
• Install a shut-off switch or gas valve close
to the fryer. It must turn off the fryer
immediately.
• Failure to add a mechanical restraint can
result in oil splashing out and contacting
the skin, leading to serious injury or death!
WARNING – HOT OIL
• Hot oil is dangerous – Severe burns can
result when hot oil contacts the skin.
• Hot oil is ammable – Keep open ames
away from hot oil and its vapors.
• Never allow water or ice to get in hot oil.
IT CAN EXPLODE!
WARNING - ENVIRONMENT
• Keep your oors clean and free of grease
and all other substances so no one slips
accidentally and contacts the hot fryer.
• Keep areas and lters clean above your
fryers – Oil soiled lint or dust can ignite
easily and ames will spread rapidly.
WARNING – MAINTENANCE
• Have your equipment checked regularly to
insure its safe and properly functioning.
• If your fryer starts to smoke or boil
abnormally, cut off the power supply
immediately and determine the reason for
the smoking or boiling before attempting
to use it again.
WARNING – TRAINING
• Train all personnel to understand the
hazards of hot oil. Instruct them on the
proper action to take if something does
not seem to be acting properly.
• Instruct your personnel on what to do if
there is an oil re. Do not use water on
an oil re! Use only re extinguishers of
the approved type and never direct such
extinguishers so as to blow the oil out of
the oil container.
• Inappropriate use due to a lack of
common sense may result in product
damage or personal injury.
8
Page 9

CARE OF FAT
In three to six months you may spend as much for fat
as you paid for your kettle. So fat is an item you want
to know all about; how to select it; how to manage it.
The more production you can get from each pound of
fat, the more protable your frying operation will be.
To get a high rate of production per pound of fat you
have to avoid two things. One is early breakdown
and spoilage of the compound so that you have to
throw it away before it does enough work to "earn its
keep." The other is excessive sponging up of fat by
the food being fried.
The main cause of fat breakdown is excessive heat.
On the other hand abnormal absorption is caused by
frying too long at too low temperatures. One answer
to both problems is exact control of heat — so that
fat neither smokes up nor soaks up.
Of course, no fat "keeps" forever. Not only heat, but air
and moisture, salt particles and crumbs of food work to
break it down. But you can slow up fat deterioration by
maintaining proper temperatures and by draining your
kettle, ltering or straining the fat once or twice a day
and by keeping the kettle itself absolutely clean.
A number of commercial devices and materials are
available to aid in eliminating fat impurities. There are
several excellent models of pressure lters as well
as strainer-type lters, which, if used regularly, will
prolong life of fat.
However, no purication device will renew broken
down or rancid fat or put new life into it. Once you
have allowed fat to break down it becomes unsuitable
for frying — in fact browning is impossible.
In addition to ltration, you can prolong the usefulness
of fat by sweetening it with fresh compound every day
- replacing about 15% of the bulk you started with. If
you do enough frying so that normal absorption of fat
in food amounts to 15% to 20% of the capacity of your
kettle every day - then you can call that your turn-over
food. It means you can add the recommended 15%
of fresh fat without discarding any of the old.
10 POINT PROGRAM
TO PRESERVE FAT AND PRODUCE THE FINEST FRIED FOODS
1. Choose a fat that does not break down quickly.
Hydrogenated shortening, corn, and peanut
oils are less likely to break down under high
temperatures.
2. Do not fry foods at temperatures above those
recommended. The higher the fat temperature,
the more rapid the rate of fat deterioration. Above
400°F fats quickly deteriorate.
3. During short intervals between frying, turn the
heat down. Do not keep heat on for long
periods between batches.
4. Keep fat clean. Strain or lter daily or at end of
each shift. Add at least 15% fresh fat to your
kettle daily.
5. At least once a day, cool a small amount of fat and
taste it to see if it has picked up foreign avors.
6. Discard fat that tends to bubble excessively before
food is added.
7. Do not overload baskets-pieces should not touch
when frying. Shake baskets to prevent food from
sticking together. Fry similar sizes together.
8. Never salt foods directly over fat, salt in fat reduces
its life.
9. Raw, wet foods, such as potatoes and oysters,
should be drained or wiped dry before frying to
extend the life of the frying fat. Have foods to be
fried at room temperature.
10. Keep fat temperatures below smoking point to
minimize frying odors.
9
Page 10

HANDY FRYING CHART
TIME IN
FOOD COATING PROCEDURE TEMP MINUTES
POTATOES
Standard French Fries Cut in uniform pieces 1/2” 350° 5-7
Blanch Only square the long way 350° 3-1/2
Brown Only 350° 3-1/2
Long Branch Cut in uniform pieces 3/4”
square the long way 350° 7-10
Julienne (shoe string) Cut in uniform pieces 1/8”
to 1/4” square the long way 350° 3-6
Chips Soak in cold running water
until water does not run milky 350° 2-3
CHICKEN
Large Pieces Batter or Some prefer rolling in 325° 9-1l
Small Pieces Breading seasoned our, dipping in egg 340° 7-10
Pre-cooked wash, and frying 350° 3-4
FISH
Fillets (Large) Breading Select llets of uniform 350° 4
Fillets (Small) or Batter size, skin out and dry. 350° 3
Oysters Breading Use Oyster liquor in batter
or Batter or breading 350° 5
Clams Batter 350° 1
Scallops Breading 350° 4
Shrimp Batter Some prefer soaking 1/2 hour
in cold seasoned milk 350° 3
Smelts Breading Cut spinal cord several 350° 4
places to prevent curling
MEATS
Chicken Fried Steak Breading Sever all connecting membranes
at one inch intervals to prevent
curling 360° 3-4
Cutlets Breading 350° 3-4
Chops Breading 340° 3-4
Meat Balls Breading or
rolled in our 340° 4-6
Brains Breading 340° 3-5
VEGETABLES
Asparagus Batter or crumbs Pre-cook in salted water 350° 3
Cauliower Batter or crumbs Pre-cook and separate owers 350° 3
Egg Plant Crumb Breading Peel, cut cross-wise into 1/4”
slices 350° 3
Onions Light batter Slice thin, soak in milk for
two hours 350° 3
FRITTERS
Fruit (bananas, pineapples, apricots, berries) Serve with fruit juice 350° 3-5
Corn Batter Serve with syrup or jelly 350° 3-5
Vegetable (peas, green beans) Serve with tomato cheese sauce 350° 5-8
MISCELLANEOUS
Croquettes Breading 360° 3
Chinese Noodles 375° 1-2
French Toast 375° 1
DOUGHNUTS
Cake 375° 1-1/2 - 2
Yeast, raised 375° 1
10
Page 11
Warranty Statement
This warranty is effective on all Toastmaster equipment sold on or after July 1, 2006, and supersedes all
previous warranties.
Toastmaster warrants equipment that it manufactures to be free from defects in material and
workmanship. Toastmaster’s obligation is limited to repairing or replacing, at Toastmaster’s option, without
cost to the customer, any part found to be defective, as well as any labor or material expense required to
replace the part.
Length of Warranty
This warranty is effective for a period of 18 months from the date of shipment from Toastmaster,
or 12 months from the date of purchase by the end user, whichever is earlier.
Exceptions
• This warranty is valid only for the original end user owner/operator of the equipment.
• This warranty does not apply to normal maintenance functions, including (but not limited to)
improper operation, installation or the use of an improper utility supply.
• This warranty is valid only if the equipment is used in a commercial setting. The equipment
is designed and constructed for commercial use by trained professionals only. Any use of the
equipment in private or domestic applications immediately voids this warranty.
• This warranty does not apply to any parts, labor and material expenses for service that is not
pre-approved and performed by a Toastmaster authorized service agent. Any such service
immediately voids this warranty.
• This warranty does not apply to any parts, labor and material expenses associated with the
installation of parts that are not factory-approved for use in the equipment. Any use of such
parts immediately voids this warranty.
• This warranty is not valid if terms of payment have not been met.
• For warranty service on Pop-up toasters and light countertop equipment, an exchange program
would supersede a service call. Please nd Warranty Exchange Program’ authorization to
follow. (http://www.toastmastercorp.com/lespdfcat/warranty_exchange_2008.pdf)
Toastmaster reserves the right to change the design and specications of this equipment or any related
documentation at any time. The end user is not entitled to upgrades resulting from these changes.
This warranty is exclusive and supersedes all other warranties for the equipment, both expressed and
implied. There are no implied warranties of merchantability or of tness for a particular purpose.
The foregoing is Toastmaster’s sole and exclusive obligation and the end user sole and exclusive remedy
for any action including breach of contract or negligence. In no event shall Toastmaster be liable for a sum
in excess of the purchase price of the equipment, or for any prospective or lost prots of the end user.
is a registerd trademark of Toastmaster, A Middleby Company. All rights reserved.
11
Page 12

MATERIAL
DR.
DATE
FINISH
MODEL NO.
TITLE
PART NO.
TOLERANCES UNLESS OTHERWISE NOTED
FRACTIONS ± 1/64 DECIMALS ± .005
REVISIONS
~
~
SK1758-1
WIRING DIAGRAM
M.P.
03-02-2000
CK.
LTR DATE DESCRIPTION OF CHANGE DR
THIS DRAWING CONTAINS INFORMATION CONFIDENTIAL TO STAR MFG. INT'L. INC.
NO REPRODUCTION OR DISCLOSURE OF ITS CONTENTS IS PERMITTED.
#10 SUNNEN DRIVE, ST. LOUIS, MO. 63143, USA
A
3/25/03
ADDED WIRE ASSY. NO
FOR 404D,D-NAT ONLY
PMR
THERMOSTAT
HIGH LIMIT
VALVE - GAS CONTROL
THERMOPILE
WIRE "C"
(E6-615013, EXCEPT AS FOLLOWS.
E4-404049, USED ON
TMFG18-NAT ONLY)
WIRE "A"
(E6-615011)
WIRE "B"
(E6-615012)
A
TMFG18, TMFG30
12
Page 13

Page 14

MODEL: TMFG18
Gas Fryer
SK2435 REV - 9/02/09
7.4242
6.9370
23
24
22
16
27
26
28
17
15
14
13
12
10
9
25
1
8
7
6
5
4
3
2
3938
37
36
35
34
3332
31
30
11
29
40
20 181921
41
42
43
44
13
Page 15

PARTS LIST October 1, 2009, Rev. -
MODEL
TMFG18-NAT, TMFG18-LP GAS FRYER
Fig No Part No Qty Description Application
1
2 2T-Z6007 1 THERMOSTAT
3 2R-Z6003 1 KNOB
4 E4-404033 1 DRAIN FITTING
5 2V-Z0112 1 TUBE, PILOT
6 2T-Y9266 1 SAFETY THERMOSTAT
7 2J-Y9270 1 THERMOPILE
8
9 E4-404036 2 BURNER
10
11 E4-404040 1 MANIFOLD ASSY
12 E4-404034 1 RETAINER HINGE
13 E4-404051 1 BASIC ASSY TMFG18
14 E4-Z0086 1 PANEL RIGHT
15 E4-404032 1 TRIM-FRONT ASSY
16 2B-404022 2 BASKET ASSY
17 E4-401043 1 BASKET RACK ASSY
18 2C-2555 5 ACORN NUT #8-32
19 2C-H8670 5 WASHER #8 INT. TOOTH
20 E4-Z0446 1 HANGER-BASKET
21 E4-404043 1 COVER FLUE ASSY
22 E4-Z0562 1 BAFFLE-FLUE
23 E4-Z0048 1 FLUE-BACK
24 E4-Z0049 1 PANEL-BACK
25 F2-9173 4 SPACER-THERMOSTAT-BULB
26 E4-9074 4 CLAMP-THERMOSTAT BULB
27 E4-404042 2 RADIANT ASSY
28 2K-Y9975 1 PIPE 3/8 NPT 21” LONG
29 2V-Z0312 1 VALVE-DRAIN 3/4 NPT
30 2A-Z5942 4 LEG-4”
31 E4-Z0085 1 PANEL-LEFT
32 2C-9788 1 CATCH-MAGNETIC
33 E4-404046 1 BOTTOM FRONT ASSY
34 E4-Z0037 1 LINER-DOOR
35 2C-Z0096 1 CLIP-TUBE
36 E4-Z0041 1 PANEL-DOOR
37 E6-Z1441 1 HANDLE
38 2G-5886 1 BAG-FILTER
39 2J-7961 1 E-Z LIGHTER ROD
2J-Y9268
2J-Z6452 VALVE, 71-502, NAT NAT
2A-Y5470
2A-Z0296 ORIFICE #60 LP
2J-Z0555
E4-Z0556 PILOT, PROP (.026 ORIFICE) LP
VALVE-7000, PROP LP
1
ORIFICE #51 NAT
2
PILOT, NAT (.016 ORIFICE) NAT
1
IMPORTANT: WHEN ORDERING, SPECIFY VOLTAGE OR TYPE GAS DESIRED PAGE 1
INCLUDE MODEL AND SERIAL NUMBER OF 2
Some items are included for illustrative purposes only and in certain instances may not be available.
is a registerd trademark of Toastmaster, A Middleby Company. All rights reserved.
14
Page 16

PARTS LIST October 1, 2009, Rev. -
MODEL
TMFG18-NAT, TMFG18-LP GAS FRYER
Fig. No Part No Qty Description Application
40 2J-Y9977 1 LPT PRESSURE REGULATOR (OPTIONAL FOR PROPANE)
41 E4-Z0554 1 BRACKET-PILOT
42 2C-2559 2 NUT ACORN 10-24
43 2A-Y9925 2 SCREW - DOOR
44 2M-Z12993 1 FACEPLATE, FRYER SMALL
NI 2M-Z8942 1 LABEL-FRYER BURN WARNING
NI 2M-Z8943 1 SIGN-FRYER WARNINGS
NI PS-401058 1 BULB CLAMP KIT
IMPORTANT: WHEN ORDERING, SPECIFY VOLTAGE OR TYPE GAS DESIRED PAGE 2
INCLUDE MODEL AND SERIAL NUMBER OF 2
Some items are included for illustrative purposes only and in certain instances may not be available.
is a registerd trademark of Toastmaster, A Middleby Company. All rights reserved.
15
Page 17

Page 18

MODEL: TMFG30
Gas Fryer
SK2436 REV - 9/02/09
7.5”
10”
1
2
3
4
5
6
7
8
9
10
11
12
13
14
15
16
17
18
19
20
21
22
23
24
25
26
27
28
29
30
31
32
33
34
35
36
37
38
39
40
41
42
43
44 45
BODY
ASSY
COMBUSTION
CHAMBER
46
47
48
16
Page 19

PARTS LIST October 1, 2009, Rev. -
MODEL
TMFG18-NAT, TMFG18-LP GAS FRYER
Fig No Part No Qty Description Application
1
2 E6-Y9752 2 SUPPORT MANIFOLD
3 E6-Y9803 1 SUPPORT BURNER
4 2J-Y9270 1 THERMOPILE
5 2R-Z6003 1 KNOB
6 E6-Y9953 1 BRACKET-THERMOSTAT
7 E6-630010 1 MANIFOLD ASSEMBLY
8 E6-Y9726 1 PIPE-PILOT
9 2T-Z6007 1 THERMOSTAT
10 2J-Y9690 1 PILOT, NATURAL GAS
10 E6-Y9691 1 PILOT, PROPANE
11 2T-Y9266 1 SAFETY THERMOSTAT
13 E6-Z1441 2 HANDLE
14 E6-Y9879 1 DOOR PANEL
15 2A-9368 6 ORIFICE, LP (#61)
15 E6-Y9943 6 ORIFICE, NAT (#50)
16 E2-215024 6 BURNER
17 E6-Y9880 1 DOOR LINER
18 2A-Y9925 4 SCREW
19 2C-Z3658 1 CLIP-TUBE
20 E4-404033 1 DRAIN FITTING
21
22 E6-630014 1 CRUMB TRAY ASSY
24 2C-9788 2 CATCH-MAGNET
25 2V-Z0312 1 VALVE DRAIN
26 E6-630015 1 KETTLE ASSY
27 2A-Y9751 2 HOOK-KETTLE
28 E6-Y9874 1 FLUE-COVER FRONT
29 E6-Y9873 1 FLUE-REAR
30 E6-Y9875 1 FLUE-COVER REAR
31 E6-Y9872 1 FLUE-FRONT
32 E6-Y9820 1 BACK COMBUSTION
33 E6-Y9924 1 INLET PIPE SUPPORT
34 2K-Y9976 1 PIPE 1/2 NPT 21”
35 E6-630011 1 BRACKET LEFT
36 E6-630012 1 BRACKET RIGHT
37 E6-630020 1 BOTTOM ASSY
38 2C-Y7565 4 NUT 3/8-16
39 2A-Z5942 4 LEG-4”
40 E6-630019 1 BOTTOM FRONT ASSY
41 2G-5886 1 BAG-FILTER
2J-Z6452
E6-Z0602 VALVE-7000, PROP LP
2B-Y8846
2B-Y8847 BASKET LEFT
1
1
VALVE, 71-502, NAT NAT
BASKET RIGHT
IMPORTANT: WHEN ORDERING, SPECIFY VOLTAGE OR TYPE GAS DESIRED PAGE 1
INCLUDE MODEL AND SERIAL NUMBER OF 2
Some items are included for illustrative purposes only and in certain instances may not be available.
is a registerd trademark of Toastmaster, A Middleby Company. All rights reserved.
17
Page 20

PARTS LIST October 1, 2009, Rev. -
MODEL
TMFG30-NAT, TMFG30-LP GAS FRYER
Fig No Part No Qty Description Application
42 E6-Y9951 1 SHIELD-VALVE
43 2J-7961 1 E-Z LIGHTER ROD
44 2J-Y9977 1 LPT PRESSURE REGULATOR (optional for LP)
45 E6-Y9878 1 BAFFLE-BOTTOM
46 E6-Y9043 1 DEFLECTOR-FLAME
47 2C-2559 4 NUT ACORN 10-24
48 2M-Z12992 1 FACEPLATE, FRYER 30LB
NI 2M-Z8942 1 LABEL-FRYER BURN WARNING
NI 2M-Z8943 1 SIGN-FRYER WARNINGS
NI E3-Y3646 4 SPACER-THERMOSTAT BULB
IMPORTANT: WHEN ORDERING, SPECIFY VOLTAGE OR TYPE GAS DESIRED PAGE 1
INCLUDE MODEL AND SERIAL NUMBER OF 2
Some items are included for illustrative purposes only and in certain instances may not be available.
is a registerd trademark of Toastmaster, A Middleby Company. All rights reserved.
18
Page 21

MISE EN GARDE
NE TENTER EN AUCUN CAS DE FORCER LE BOUTON DE RÉENCLENCHEMENT NI LE
BOUTON DE LA COMMANDE DE SOUPAPE.
CONSEILS GÉNÉRAUX D’ENTRETIEN
1. NE PAS allumer la marmite vide ou si la quantité de matière grasse ou d’huile n’atteint pas
la marque du niveau minimum.
2. NE PAS faire frire les aliments à une température de plus de 196
3. NE PAS remplir excessivement la marmite à frire.
4. NE PAS laisser les miettes brûlées s’accumuler.
5. Faire fondre la matière grasse ou le shortening solide avant de remplir la friteuse.
6. Garder constamment la marmite remplie à capacité.
7. Utiliser du shortening et des matières grasses appropriés pour la friture, et suivre les
recommandations de température.
8. Filtrer la matière grasse et nettoyer la marmite tous les jours.
o
C.
NETTOYAGE APPROPRIÉ DE LA MARMITE
MISE EN GARDE
NE PAS LAISSER D’EAU VENIR EN CONTACT AVEC LA MATIÈRE GRASSE CHAUDE,
CE QUI PEUT PROVOQUER UNE EXPLOSION.
1. Vider la matière grasse de la friteuse pendant que la matière grasse est tiède, et non
chaude.
2. Rincer pour faire disparaître les miettes et tous les résidus qui n’adhérent pas.
3. Remplir d’eau. Porter à ébullition et ajouter un nettoyant de friteuse. Le temps d’ébullition
dépendra de l’état de la friteuse (de 30 minutes à
2 heures ou jusqu’à ce que la friteuse soit propre).
4. Fermer le chauffage, vider et rincer à l’eau jusqu’à ce que la marmite soit propre.
5. Utiliser une solution de rinçage à base de vinaigre (2 à 3 tasses) pour remuer, vider et
rincer soigneusement à l’eau claire.
6. Essuyer la marmite avec un chiffon doux et laisser sécher complètement.
7. Ajouter la matière grasse. Faire fondre la matière grasse ou le shortening solide avant de
remplir la friteuse. Ne jamais tenter d’utiliser un shortening solide pour remplir la marmite.
Le shortening doit être liquide.
RÉPARATIONS ET SERVICE
Cet appareil ne doit être réparé que par l’usine ou le personnel autorisé par l’usine.
MISE EN GARDE
Il est extrêmement dangereux de déplacer cette friteuse lorsqu'elle contient du liquide
chaud, car cela peut causer des brûlures graves. Vider l’huile avant de déplacer la
friteuse.
7
19
Page 22

10. REPOS - Durant les périodes de repos, baisser le réglage de température du thermostat à
environ 93oC. Il n’est pas nécessaire de maintenir la pleine température de cuisson durant
les périodes de repos, car la matière grasse peut être réchauffée rapidement jusqu’à la
température désirée. Cette méthode prolonge la durée d’utilisation de la matière grasse
tout en réduisant la consommation de gaz.
REMARQUE : Se reporter au tableau commode de friture pour connaître la température
recommandée et le temps requis pour faire frire adéquatement différents aliments, ainsi
que les méthodes et les suggestions de panure.
11. POUR METTRE LA FRITEUSE À L’ARRÊT - Tourner le bouton du cadran du thermostat en
sens anti-horaire pour l’amener à la position d’arrêt. La veilleuse demeure allumée.
12. FILTRAGE DE LA MATIÈRE GRASSE - Attendre que la matière grasse soit tiède avant
de la ltrer. Faire glisser le sac-ltre par-dessus l’extrémité du raccord de la soupape
d’évacuation et l’attacher en place en faisant un noeud de manière à ce qu’il ne glisse pas.
Placer un réceptacle sous le sac et ouvrir lentement la soupape d’évacuation. Lorsque
la marmite est vide, utiliser un petit pot pour verser l’huile chaude énergiquement sur des
côtés, les tubes et le fond de la marmite pour éliminer les miettes, etc. Continuer à verser
jusqu’à ce que toutes les miettes, etc. soient entraînés dans le sac-ltre. Retirer le sac-ltre
et le laver pour le prochain usage. Fermer la soupape d’évacuation et reverser la matière
grasse dans la marmite.
13. POUR VIDER LA MARMITE - Tourner le cadran du thermostat pour l’amener à la
position d’arrêt. Retirer les paniers. Vider la matière grasse de la marmite uniquement
lorsque la matière grasse est tiède et liquide. Une friteuse froide chauffée ne se vide pas
adéquatement. Au besoin, utiliser un bâton pour remuer la matière grasse froide au fond de
la marmite. Retirer le plateau à miettes.
14. NETTOYAGE DE L’EXTÉRIEUR - Les surfaces extérieures peuvent être maintenues
propres et attrayantes en essuyant régulièrement à l’aide
d’un chiffon doux propre. On peut enlever toute décoloration à l’aide d’un nettoyant non
abrasif.
15. RÉASSEMBLAGE - Une fois la marmite nettoyée et le corps de la friteuse essuyé, remettre
le plateau à miettes en place.
16. ARRÊT POUR LA NUIT - Tourner le bouton de
la commande combinée à la position veilleuse (« PILOT »). Ceci maintiendra la veilleuse
de sécurité et empêchera également le gaz d’atteindre le brûleur principal. Pour actionner
l’appareil, tourner le bouton de la commande combinée pour l’amener à la position de
marche.
17. ARRÊT COMPLET - Tourner le bouton de la soupape pour l’amener à la position d’arrêt.
6
20
Page 23

MISE EN GARDE
NE PAS RETIRER LES PIEDS.
NE PAS FAIRE CHAUFFER UNE MARMITE VIDE.
MISE EN GARDE
LA MATIÈRE GRASSE CHAUDE EST EVENTUELLEMENT DANGEREUSE. ÉVITER
TOUT CONTACT DIRECT AVEC LA MATIÈRE GRASSE CHAUDE.
CONSIGNES DE FONCTIONNEMENT
1. NETTOYER LA MARMITE soigneusement avant usage. Retirer les paniers et le plateau
à miettes. Enlever l’huile protectrice appliquée à l’intérieur de la bouilloire à l’aide d’une
solution de soude ménagère ou d’un produit équivalent. Vider par
le robinet au fond et rincer soigneusement à l’eau claire, puis sécher complètement avant
de remplir d’huile.
2. ROBINET D’ÉVACUATION - S’assurer qu’il est fermé avant d’ajouter la matière grasse.
3. AJOUTER LA MATIÈRE GRASSE -
Modèle
aidera à déterminer le niveau minimum de matière grasse (les friteuses de 30 cm ont une
capacité de matière grasse de 6,8 kg, les friteuses de 60 cm ont une capacité de matière
grasse de 13,6 kg). Si un corps gras solide est utilisé, compacter le corps gras solide
soigneusement sur les côtés et le fond de la marmite avant de mettre le bouton de contrôle
de la température à la position de marche.
Modèle TMFG18 - Tenir le niveau de matière grasse 5 cm en haut de tubes. Marmite cales
approximativement 8.2 kg de matière grasse. Si un corps gras solide est utilisé; fondre le
corps gras solide avant farce la marmite: Jamais employer le corps gras solide en raison
de farce la marmite.
On peut utiliser un niveau plus élevé de matière grasse pour faire frire des aliments
volumineux tels que des croquettes de poisson ou de poulet. Le niveau doit être choisi
soigneusement de manière à ce que l’action moussante ne déborde pas de la marmite.
4. Mettre le bouton de la soupape à la position de marche.
5. CONTRÔLE DE LA TEMPÉRATURE - Le thermostat consiste en un interrupteur combiné
à une commande de chaleur. La position d’arrêt coupera le courant électrique qui ferme
le robinet de gaz. La matière grasse étant dans la marmite (remarque : Modèle TMFG30
- la matière grasse solide doit être compactée soigneusement sur les côtés et le fond de la
marmite), tourner le bouton du thermostat à 93°C.
6. PLATEAU À MIETTES - Modèle TMFG30 -Placer le plateau à miettes dans la marmite
lorsque la matière grasse est fondue.
Panier crèmaillère Modèle TMFG18 - Placer le panier crèmaillèr avant farce la marmite.
7. Tourner le bouton du thermostat pour l’amener à la température de friture désirée. NE
PAS FAIRE FRIRE PLUS D’ALIMENTS PAR LOT QU’ON NE PEUT FAIRE FRIRE
EFFICACEMENT - Une trop grande quantité d’aliments par lot cause une baisse excessive
de température et un gaspillage de matière grasse, sans le moindre gain de capacité.
8. ABBAISSEMENT DU PANIER - Lorsque la matière grasse a atteint la température qui
convient, abaisser le panier et les aliments lentement dans la matière grasse. Lorsque des
aliments humides sont abaissés trop rapidement dans la matière grasse chaude, celle-ci
écume et éclabousse excessivement.
9. ÉGOUTTAGE - Lorsque les aliments ont ni de frire, lever les paniers et les accrocher aux
poignées de la marmite. Laisser l’excédent de graisse revenir dans la marmite.
TMFG30 - Une marque de niveau de matière grasse à l’arrière de la marmite vous
5
21
Page 24

CONSIGNES D’ALLUMAGE
1. Attendre cinq minutes avant de réallumer la veilleuse.
2. Ouvrir la porte avant.
3. Amener le thermostat à la position d’arrêt
(« OFF »).
4. Amener le bouton de la soupape à la position
le bouton. Allumer la veilleuse à travers l’ouverture pratiquée à l’avant de l’appareil. Tenir le
bouton enfoncé pendant 60 secondes
5. S’assurer que la soupape d’évacuation est en position fermée.
6. Ajouter, au besoin, du gras liquide.
7. Amener le bouton de la soupape à la position de marche (« ON »). Mettre le thermostat à
la température désirée.
8. Pour couper toute amenée de gaz à la commande de la soupape et à la veilleuse, mettre le
bouton de la soupape à la position d’arrêt (fermeture complète).
veilleuse (« PILOT »). Enfoncer complètement
ou jusqu’à ce que la veilleuse demeure allumée.
RÉGLAGE DE LA VEILLEUSE
1. Ouvrir le panneau de la porte avant.
2. Retirer le bouchon à vis fendue à côté de la sortie de gaz de la veilleuse de la soupape de
commande.
3. Tourner la vis intérieure vers la droite ou la gauche pour diminuer ou augmenter la amme
de la veilleuse. (La amme doit entourer les extrémités du thermocouple d’environ 1,2 cm.)
4. Remettre le bouchon à vis fendue fermement en place pour prévenir les fuites de gaz.
RÉÉTALONNAGE DU THERMOSTAT
1. Pour déterminer si le thermostat doit ou non
être réétalonné, utiliser un thermomètre exact situé environ au centre de la marmite avec le
bulbe placé à 2,4 cm sous le dessus du gras.
2. Mettre le thermostat à 177
brûleur s’éteint. La température doit être d’environ 3oC de moins que le réglage au cadran du
thermostat.
3. Si ce n’est pas le cas:
a. Sans déranger le thermostat, tirer le bouton vers l’avant et le retirer de l’arbre.
b. Tourner la vis au centre de l’arbre en sens horaire pour diminuer la température ou
en sens anti-horaire pour augmenter la température. REMARQUE: un quart de
tour de cette vis provoquera un changement d’environ 17oC.
c. Remettre le bouton en place.
4. Répéter les étapes 1, 2 et 3 jusqu’à ce que le thermostat soit juste.
o
C et vérier le relevé du thermomètre lorsque la amme du
THERMOSTAT DE LIMITE SUPÉRIEURE
Ces appareils sont pourvus d’un thermostat de type limite de haute température à
réenclenchement manuel. Ce thermostat coupe le courant électrique au robinet de gaz
magnétique qui coupe le gaz si la température de la matière grasse atteint 232oC. La friteuse ne
fonctionnera pas tant que le bouton rouge de réenclenchement n’aura pas été enfoncé.
Si le thermostat de limite de haute température se déclenche, il faut vérier le thermostat de
régulation de température pour y relever tout défaut de fonctionnement. Le thermostat haute
limite est situé à l’intérieur de la friteuse à votre droite, on peut l’atteindre lorsque la porte est
ouverte.
4
22
Page 25

MISE EN GARDE
NE RIEN STOCKER DANS L’ESPACE SOUS LA FRITEUSE.
MISE À NIVEAU DE L’APPAREIL
Mettre l’appareil à niveau en ajustant les quatre (4) pieds.
MISE EN GARDE
NE PAS INSTALLER SANS LES PIEDS.
DÉGAGEMENT
Il faut laisser un espacement d’au moins 122 cm entre tout matériau combustible ou non
combustible et le dessus de l’appareil et de 15 cm autour des cotés et à l’arrière. Un dégagement
adéquat est également nécessaire pour assurer un fonctionnement et un entretien satisfaisants.
HOTTE D’ÉCHAPPEMENT
Il est essentiel de prévoir l’évacuation des fumées et des gaz au-dessus de l’appareil. Cet
appareil ne doit pas être raccordé à un conduit ou à une cheminée aux ns d’échappement.
CONDUITES DE GAZ
Les conduites de gaz devront être neuves, propres leur taille et leur installation doivent permettre
un approvisionnement en gaz sufsant pour satisfaire pleinement les besoins en gaz de l’appareil.
Si l’appareil doit être raccordé à des conduites existantes, vérier celles-ci pour s’assurer qu’elles
sont de capacité adéquate. La pâte à joints doit être utilisée modérément et seulement sur les lets
mâles des joints de conduite. Ces pâtes doivent résister à l’action des gaz de pétrole liquéé.
AVERTISSEMENT : Toute saleté non adhérente ou particule métallique qui pénètre dans
les conduites de gaz de l’appareil abîme la soupape
fonctionnement.
raccords sont exempts
le raccordement effectif aux conduites d’approvisionnement en gaz.
En installant cet appareil, s’assurer que toutes les conduites et tous les
de saleté interne non adhérente. Ne pas enlever
automatique et affecteront à son
le scellement avant
RACCORDEMENT À LA CONDUITE D’APPROVISIONNEMENT EN GAZ
L’admission de gaz de cet appareil est scellée en usine pour prévenir l’entrée de saleté. Ne pas
enlever ce scellement avant le raccordement effectif à la conduite d’approvisionnement en gaz.
Chaque appareil est pourvu d’un régulateur de pression de gaz réglé pour usage avec le gaz
précisé sur la plaque signalétique. Pour raccordement à l’approvisionnement en gaz, poser le
raccord de tuyau fourni avec l’appareil. Se reporter à la section RÉGULATEUR DE PRESSION
DE GAZ pour les exigences de pression et le réglage du régulateur.
SOUPAPE DE FERMETURE MANUELLE
Une soupape de fermeture manuelle doit être posée en amont du raccord et à moins de 1,8
mètre de l’appareil.
RECHERCHE DE FUITES DE GAZ
Utiliser une solution d’eau savonneuse ou autre matière acceptable aux ns de repérer les
fuites de gaz. ON NE DOIT UTILISER À CETTE FIN AUCUNE ALLUMETTE, CHANDELLE,
FLAMME OU AUTRE SOURCE D’INFLAMMATION.
RÉGULATEUR DE PRESSION DE GAZ
Le régulateur est réglé en usine, comme spécié sur la plaque signalétique. S’il devient
nécessaire de vérier la pression au niveau du collecteur, retirer le bouchon de tuyau de 3
mm depuis la partie supérieure du collecteur du brûleur et poser un manomètre. Pour régler la
pression du gaz, dévisser le bouchon du régulateur de pression sur la soupape de commande et
tourner la vis vers la droite pour augmenter et vers la gauche pour diminuer la pression du gaz et
l’amener à son réglage approprié. Remettre le bouchon en place.
23
Page 26

DONNÉES GÉNÉRALES D’INSTALLATION
PLACER LE SIGNE ANNONCIATEUR LAMINE A FOURNI AVEC LA FRITEUSE DANS UN
SECTEUR VISIBLE A L’OPERATEUR DE FRITEUSE.
MISE EN GARDE
Cet appareil est conçu et vendu pour usage commercial seulement par des employés formés et en
connaissant bien le fonctionnement. Il n’est pas vendu pour une utilisation par des particuliers
dans une maison ou dans ses alentours, ni pour usage directement par le grand public dans des
établissements de service alimentaire. Prière de contacter l’usine quant aux appareils destinés à
être utilisés par le grand public.
L’installation de l’appareil doit être conforme au CODE NATIONAL DE GAZ COMBUSTIBLE
« ANSI Z223.1 - DERNIÈRE ÉDITION » AINSI QU’À TOUTES LES RÈGLES ET
RÉGLEMEN-TATIONS DE LA COMPAGNIE DE GAZ LOCALE.
AU CANADA, L’INSTALLATION DOIT SE FAIRE CONFORMÉMENT AU CODE
COURANT CAN/CGA-B149.1 POUR INSTALLATION DE GAZ NATUREL OU AU
CODE CAN/CGA-B149.2 POUR INSTALLATION DE PROPANE ET AUX CODES
LOCAUX, LE CAS ÉCHÉANT.
AVERTISSEMENT: L'installation, le réglage, la modication, la réparation ou l'entretien
incorrect de cet appareil peut causer des dommages matérials, des blessures ou la
mort. Lire attentivement les instructions d'installation, de fonctionnement et d'entretien
avant de procéder à son installation ou entretien.
Cet appareil et cette soupape de commande doivent être détachés du système
d’approvisionnement en gaz durant tout essai de pression de ce système à des pressions d’essai
de plus de 1/2 PSIG (1,034 ATM). Cet appareil doit être isolé du système d’approvisionnement en
gaz en fermant sa soupape individuelle de fermeture manuelle durant tout essai de pression du
système d’approvisionnement en gaz à des pressions d’essai égales ou inférieures à 1/2 PSIG
(1,034 ATM). Pour la protection de l’utilisateur, nous recommandons de coner l’installation de cet
appareil à une agence d’installation qualiée. Cette agence doit bien connaître les installations
de gaz et les exigences locales relatives au gaz. Il faut, dans tous les cas, appeler la compagnie
de gaz locale pour approuver l’installation dénitive. En outre, des instructions détaillées à
suivre dans l’hypothèse où l’opérateur sentirait une odeur de gaz doivent être afchées bien en
évidence. On peut se procurer ces instructions auprès de son fournisseur de gaz local.
MISE EN GARDE
IL FAUT ASSUJETTIR LA FRITEUSE LORS DE L’INSTALLATION POUR L’EMPÊCHER
DE BASCULER ET AINSI ÉVITER LES ÉCLABOUSSURES DE LIQUIDE CHAUD.
UTILISER DES ATTACHES ADÉQUATES EN INSTALLANT LA FRITEUSE.
ESURE DE SÉCURITÉ
NE PAS ENTREPOSER NI UTILISER DE’ESSENCE NI AUTRES VAPEURS OU
LIQUIDES INFLAMMABLES À PROXIMTÉ DE CET APPAREIL OU DE TOUT
AUTRE APPAREIL.
L’APPAREIL.
TENIR TOUT COMBUSTIBLE
HORS DU VOISINAGE DE
APPROVISIONNEMENT EN AIR
Un approvisionnement en air adéquat doit être assuré.
PRISES D’AIR AU FOND
S’assurer que les prises d’air au fond de l’appareil ne sont pas obstruées. Ceci est essentiel à
une bonne combustion et au bon fonctionnement de l’appareil.
24
3
Page 27

2
Ces symboles sont utilisés pour souligner à l’utilisateur les
instructions d’utilisation ou d’entretien importantes contenues
dans le manuel qui accompagne l’appareil.
CONSERVEZ CE MANUEL POUR RÉFÉRENCE FUTURE
AVIS
L’utilisationde toute pièceautre que lespièces d’origineSTARdégage le fabricant
de toute responsabilité.
Toastmaster se réserve le droit de changer les spécications et la conception
du produit sans préavis. Ces changements ne donnent pas le droit à
l’acheteur d’obtenir les changements, améliorations, ajouts ou remplacements
correspondants pour l’équipement acheté préalablement.
Dû aux modications périodiques de dessins, méthodes, procédures, règles
et régulations, les spécications contenues dans ce manuel sont susceptibles
de changer sans préavis. Quoique Toastmaster exerce la bonne foi de fournir
le renseignement correct, Toastmaster n’est pas responsable pour les erreurs
ou les omissions dans le renseignement pourvu ou les conclusions tirées à la
suite de l’utilisation des spécications. En utilisant le renseignement pourvu,
l’utilisateur assume tous les risques en relation avec telle utilisation.
ENTRETIEN ET RÉPARATIONS
Contactez votre détaillent local pour les réparations ou l’entretien requis. Assurez-vous d’avoir le numéro de
modèle, le numéro de série, le voltage et la date d’achat pour un service plus rapide. Entrez l’information
requise ci-dessous pour référence rapide.
SYMBOLE DE SÉCURITÉ
N° de modèle
N° de série
Voltage
Date d’achat
Agent de service autorisé
Voir la liste pourvue avec l’appareil
Ou
Pour une liste mise à jour voir :
Site web : www.star-mfg.com
Courriel : Service@star-mfg.com
25 2
Page 28
FRITEUSES A GAZ
DE COMPTOIR
Models
TMFG18-NAT, TMFG18-LP
TMFG30-NAT, TMFG30-LP
Instructions
d’installation
et d’opération
2M-Z13008 Rev. - Oct. 1, 2009
TMFG18
TMFG30
est une marque de Registerd Toastmaster, la Compagnie A Middleby. Tous droits réservés.
26
 Loading...