

Page 1
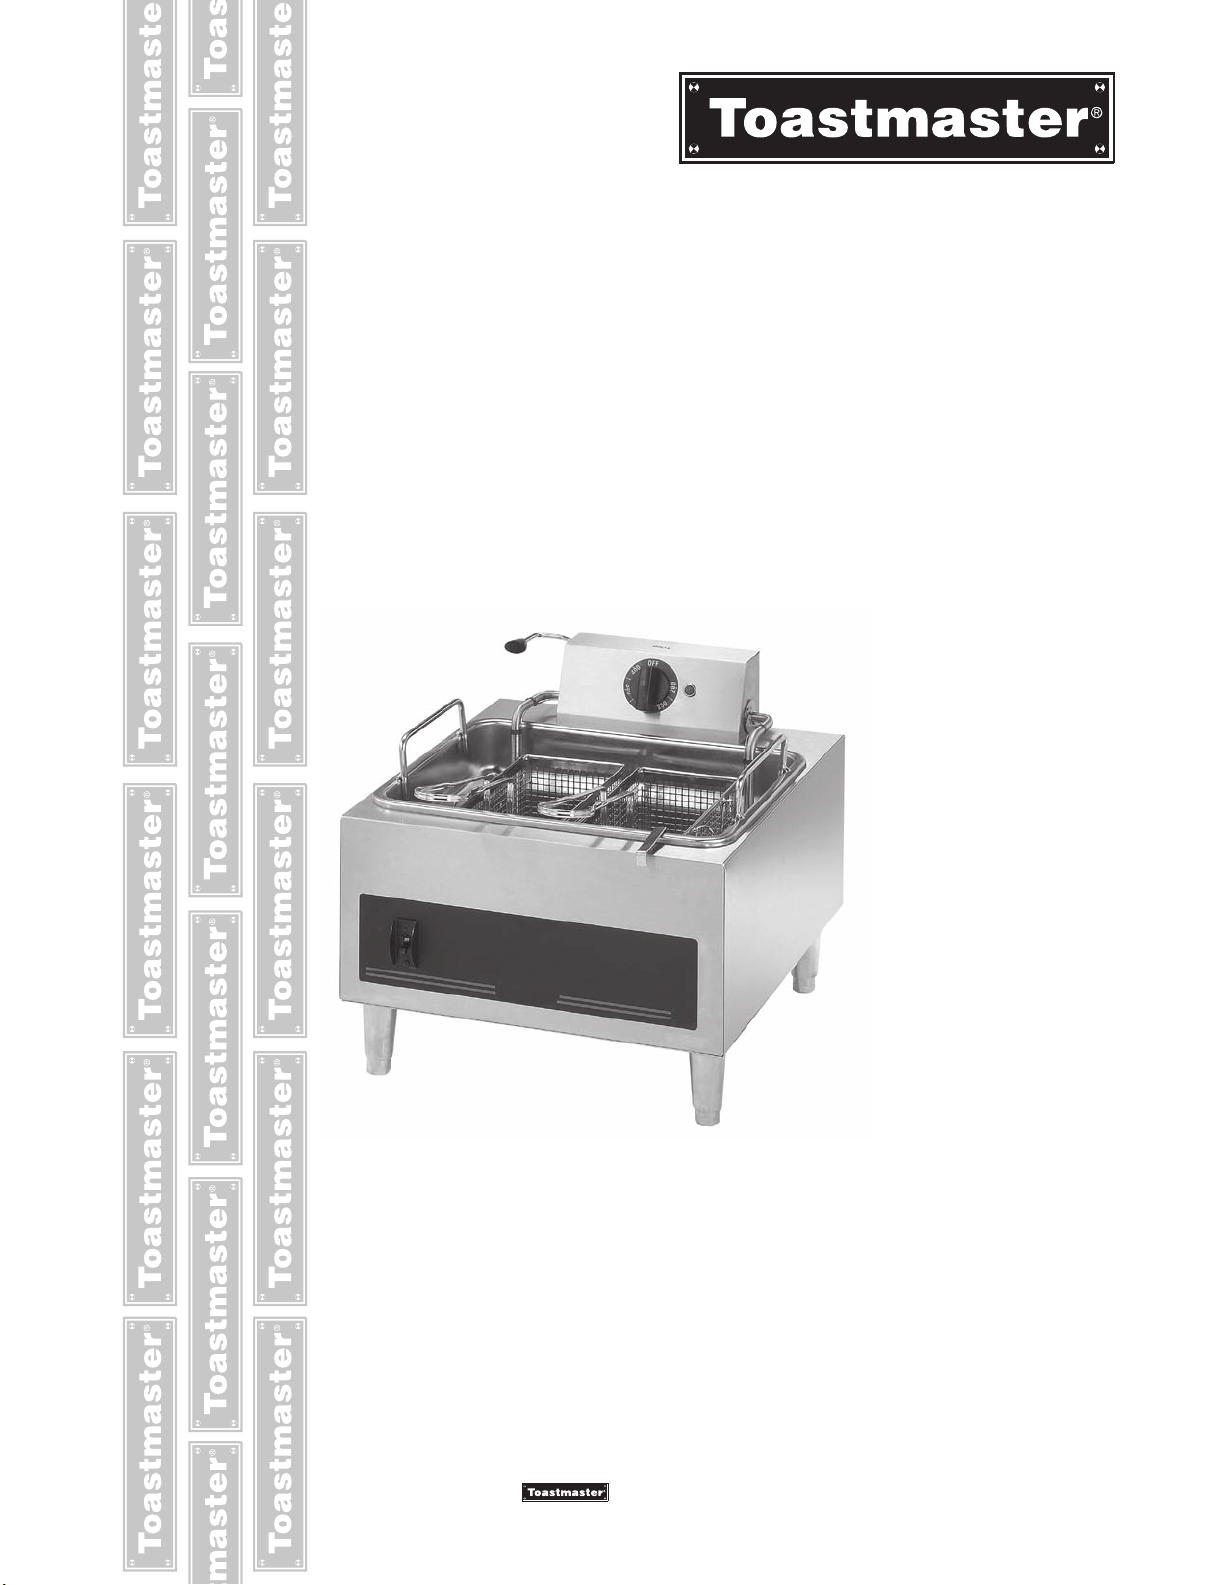
DEEP FAT FRYER
MODEL
TMFE15, TMFE30
Installation and
Operation
Instructions
2M-Z13007 Rev. A March 15, 2012
is a registerd trademark of Toastmaster, A Middleby Company. All rights reserved.
1
Page 2

2
These symbols are intended to alert the user to the presence of
important operating and maintenance instructions in the manual
accompanying the appliance.
RETAIN THIS MANUAL FOR FUTURE REFERENCE
NOTICE
UsinganypartotherthangenuineToastmasterfactorysuppliedpartsrelievesthe
manufacturer of all liability.
Toastmaster reserves the right to change specications and product design
withoutnotice. Suchrevisionsdonotentitlethebuyertocorrespondingchanges,
improvements, additions or replacements for previously purchased
equipment.
Due to periodic changes in designs, methods, procedures, policies and
regulations, the specications contained in this sheet are subject to change
without notice. While Toastmaster exercises good faith efforts to provide
information that is accurate, we are not responsible for errors or omissions
in information provided or conclusions reached as a result of using the
specications. By using the information provided, the user assumes all risks in
connection with such use.
MAINTENANCE AND REPAIRS
Contact your local authorized service agent for service or required maintenance.
Please record the model number, serial number, voltage and purchase date in the area below and have it
ready when you call to ensure a faster service.
SAFETY SYMBOLS
Model No.
Serial No.
Voltage
Purchase Date
Business 8:00 am to 4:30 p.m. Central Standard Time
Hours:
Telephone: (800) 264-7827 Local (314) 678-6347
Fax: (800) 396-2677 Local (314) 781-2714
E-mail Parts@star-mfg.com
Service@star-mfg.com
Warranty@star-mfg.com
Website: www.star-mfg.com
The Service Help Desk
Authorized Service Agent Listing
Reference the listing provided with the unit
or
for an updated listing go to:
Website: www.toastmastercorp.com
E-mail Service@star-mfg.com
Telephone: (314) 678-6347
Mailing Address: Toastmaster
10 Sunnen Drive
St. Louis, MO 63143
U.S.A
CAUTION
WARNING
2
Page 3

GENERAL INSTALLATION DATA
CAUTION
WARNING
CAUTION
This equipment is designed and sold for commercial use only by personnel trained and
experienced in its operation and is not sold for consumer use in and around the home nor for use
directly by the general public in food service locations.
Before using your new equipment, read and understand all the instructions & labels associated
with the unit prior to putting it into operation. Make sure all people associated with its use
understand the units operation & safety before they use the unit.
All shipping containers should be checked for freight damage both visible and concealed. This
unit has been tested and carefully packaged to insure delivery of your unit in perfect condition. If
equipment is received in damaged condition, either apparent or concealed, a claim must be made
with the delivering carrier.
Concealed damage or loss - if damage or loss is not apparent until after equipment is unpacked,
a request for inspection of concealed damage must be made with carrier within 15 days.
Be certain to retain all contents plus external and internal packaging materials for inspection.
The carrier will make an inspection and will supply necessary claim forms.
WARNING: Improper installation, adjustment, alteration, service or
maintenance can cause property damage, injury or death. Read the
installation, operating and maintenance instructions thoroughly before
installing or servicing the equipment.
This fryer is equipped for the voltage and wattage indicated on the nameplate mounted
on the underside of the front edge. It is designed for use on alternating current (AC)
only. It is intended for use by properly trained personnel only.
DO NOT CONNECT TO DIRECT CURRENT (DC)
The installation of the appliance should conform to:
NATIONAL ELECTRIC CODE AND ALL LOCAL ELECTRIC CODES AND
ORDINANCES AND THE LOCAL ELECTRIC COMPANY RULES AND
REGULATIONS
MODEL: TMFE15
Proper connections and power supply are essential for efcient performance. Connect six foot
lead in cord to a suitable grounded outlet of the correct voltage. Be sure the switch is in the off
position. The receptacle should match the plug (NEMA conguration of receptacle is: 6-30R).
MODEL: TMFE30
For your protection we recommend that a qualied electrician install this appliance. They should
be familiar with electrical installations and all electrical codes. Proper connections and power
supply are essential for efcient performance. The external wiring should be in conduit of an
approved type of exible cable suitable for operation at 194°F (90°C) and of a proper size to carry
the load.
Four legs are provided and should be installed for ease of cleaning. Level unit by adjusting the
(4) feet which have an adjustment of 1-3/8" (35 mm) for accurate leveling and perfect line-up with
other units.
POWER SUPPLY
The Model TMFE15 & TMFE30 is wired at the factory for operation on a single phase power
supply 208/240V, 60 Hz.
DO NOT INSTALL WITHOUT FEET.
PLACE THE LAMINATED WARNING SIGN SUPPLIED WITH THE FRYER IN AN
AREA VISIBLE TO THE FRYER OPERATOR.
3
Page 4

OPERATING INSTRUCTIONS
CAUTION
CLEAN KETTLE BEFORE USING
Take out baskets, push down and hold element catch, located on left side of element housing. Lift up
on element lift handle until elements lock in a vertical position, and remove kettle. The kettle can be
cleaned in a sink like any other pot or container.
ADDING FAT
Replace kettle and swing the element down by holding element lift handle and pushing release catch
down and holding it there. Lower element. Fryer is now ready for use. Add fat. A fat level line on the
rear of the kettle will guide you in determining the minimum cold fat level. A higher fat level can be
used when frying bulky foods, such as chicken or sh cakes. The fat level should be chosen carefully
so that the foaming action of the fat does not spill out of the kettle. If solid shortening is used, pack
carefully around the elements. TMFE15 has one single 15lbs capacity kettle, TMFE30 has two.
CONTROLS
1. ON/OFF TWO-POLE SWITCH - Located on the front panel is a two-pole switch which turns
power on or off.
2. THERMOSTAT CONTROL - Located on the Control Housing, this control allows you to select
the desired frying temperature. A signal light indicates when the element is on. When the light
goes off, the desired temperature has been reached.
3. HI-LIMIT THERMOSTAT - Should fat temperatures reach 450°F (230°C), this control will shut
off the power. The light on the control panel will go out. The fat temperature must cool to
400°F (202.4°C) and the manual reset button located on the back panel of the control housing
must be pressed to restore operation. Should the hi-limit control activate twice in succession,
the primary thermostat should be checked for malfunction by a qualied service technician.
FRYING
After fat has been added, turn the switch on and set the thermostat at 200°F (92.4°C). After the fat
has melted, turn the thermostat to the desired setting. Included in this instruction booklet is a frying
chart and some helpful hints on fat use. After the selected fat temperature has been reached, the
signal light goes out. Slowly lower half lled baskets into the fat. Do not overload baskets as this
causes foods to be improperly fried. When moist food is lowered too quickly into hot fat, the fat will
foam and spatter excessively.
NOTE: Baskets should be allowed to drain after frying cycle. The kettle handles serve as
basket hangers.
IDLING
During idle periods turn thermostat control to approximately 200°F (92.4°C). The fast recovery fryers
can be brought up to frying temperature in a matter of minutes. Lowering the temperature during idle
periods saves energy costs and prolongs fat life. To turn off fryer turn the on/off switch to the "off"
position.
DRAINING KETTLE
Turn switch to "OFF". Remove baskets. Raise element to the rst stop and allow to drain. Raise the
element to the vertical position and siphon the oil out of the kettle.
DO NOT ATTEMPT TO REMOVE THE KETTLE FILLED WITH HOT OIL. CONTACTING HOT
OIL CAN RESULT IN SEVERE INJURIES OR DEATH.
If you do not have a siphon, order one from your dealer or dip the oil out and strain into a
container. After oil has been removed, remove the kettle and clean.
CLEANING THE EXTERIOR
The exterior surfaces can be cleaned by regularly wiping with a soft cloth. Any discoloration can be
removed with a non-abrasive cleaner.
MAINTENANCE AND REPAIRS
Contact the factory or one of its representatives or a local service company for service or
maintenance if required.
4
Page 5
6
CAUTIONS FOR ALL DEEP FAT FRYERS
NEVER LEAVE AN OPERATING FRYER UNATTENDED
REMEMBER HOT OIL IS DANGEROUS –
RESPECT IT!
WARNING – INSTALLATION
• Locate your fryer in a protected place so
that it cannot be tipped over or knocked
off its support. A mechanical restraint
should be installed to prohibit the fryer
from tipping or moving. Consult your local
codes for allowable methods of restraint.
• Install an automatic re extinguisher over
the fryer and in the exhaust duct.
• Be sure your power supply is installed
properly and in accordance with the local
and national codes.
• Install a shut-off switch or gas valve close
to the fryer. It must turn off the fryer
immediately.
• Failure to add a mechanical restraint can
result in oil splashing out and contacting
the skin, leading to serious injury or death!
WARNING – HOT OIL
• Hot oil is dangerous – Severe burns can
result when hot oil contacts the skin.
• Hot oil is ammable – Keep open ames
away from hot oil and its vapors.
• Never allow water or ice to get in hot oil.
IT CAN EXPLODE!
WARNING - ENVIRONMENT
• Keep your oors clean and free of grease
and all other substances so no one slips
accidentally and contacts the hot fryer.
• Keep areas and lters clean above your
fryers – Oil soiled lint or dust can ignite
easily and ames will spread rapidly.
WARNING – MAINTENANCE
• Have your equipment checked regularly to
insure its safe and properly functioning.
• If your fryer starts to smoke or boil
abnormally, cut off the power supply
immediately and determine the reason for
the smoking or boiling before attempting
to use it again.
WARNING – TRAINING
• Train all personnel to understand the
hazards of hot oil. Instruct them on the
proper action to take if something does
not seem to be acting properly.
• Instruct your personnel on what to do if
there is an oil re. Do not use water on
an oil re! Use only re extinguishers of
the approved type and never direct such
extinguishers so as to blow the oil out of
the oil container.
• Inappropriate use due to a lack of
common sense may result in product
damage or personal injury.
5
Page 6

CARE OF FAT
In three to six months you may spend as much
for fat as you paid for your kettle. So fat is an item
you want to know all about; how to select it; how to
manage it. The more production you can get from
each pound of fat, the more protable your frying
operation will be.
To get a high rate of production per pound of fat you
have to avoid two things. One is early breakdown
and spoilage of the compound so that you have to
throw it away before it does enough work to "earn
its keep." The other is excessive sponging up of fat
by the food being fried.
The main cause of fat breakdown is excessive heat.
On the other hand abnormal absorption is caused by
frying too long at too low temperatures. One answer
to both problems is exact control of heat — so that
fat neither smokes up nor soaks up.
Of course, no fat "keeps" forever. Not only heat,
but air and moisture, salt particles and crumbs of
food work to break it down. But you can slow up fat
deterioration by maintaining proper temperatures and
by draining your kettle, ltering or straining the fat
once or twice a day and by keeping the kettle itself
absolutely clean.
10 POINT PROGRAM
TO PRESERVE FAT AND PRODUCE THE FINEST FRIED FOODS
A number of commercial devices and materials are
available to aid in eliminating fat impurities. There
are several excellent models of pressure lters as
well as strainer-type lters, which, if used regularly,
will prolong life of fat.
However, no purication device will renew broken
down or rancid fat or put new life into it. Once you
have allowed fat to break down it becomes unsuitable
for frying — in fact browning is impossible.
In addition to ltration, you can prolong the usefulness
of fat by sweetening it with fresh compound every day
- replacing about 15% of the bulk you started with. If
you do enough frying so that normal absorption of fat
in food amounts to 15% to 20% of the capacity of your
kettle every day - then you can call that your turn-over
food. It means you can add the recommended 15%
of fresh fat without discarding any of the old.
1. Choose a fat that does not break down quickly.
Hydrogenated shortening, corn, and peanut
oils are less likely to break down under high
temperatures.
2. Do not fry foods at temperatures above those
recommended. The higher the fat temperature,
the more rapid the rate of fat deterioration. Above
400°F fats quickly deteriorate.
3. During short intervals between frying, turn the
heat down. Do not keep heat on for long periods
between batches.
4. Keep fat clean. Strain or lter daily or at end of
each shift. Add at least 15% fresh fat to your
kettle daily.
5. At least once a day, cool a small amount of fat
and taste it to see if it has picked up foreign
avors.
6. Discard fat that tends to bubble excessively
before food is added.
7. Do not overload baskets-pieces should not touch
when frying. Shake baskets to prevent food from
sticking together. Fry similar sizes together.
8. Never salt foods directly over fat, salt in fat
reduces its life.
9. Raw, wet foods, such as potatoes and oysters,
should be drained or wiped dry before frying to
extend the life of the frying fat. Have foods to
be fried at room temperature.
10. Keep fat temperatures below smoking point to
minimize frying odors.
6
Page 7

HANDY FRYING CHART
TIME IN
FOOD COATING PROCEDURE TEMP MINUTES
POTATOES
Standard French Fries Cut in uniform pieces 1/2” 350° 5-7
Blanch Only square the long way 350° 3-1/2
Brown Only 350° 3-1/2
Long Branch Cut in uniform pieces 3/4”
square the long way 350° 7-10
Julienne (shoe string) Cut in uniform pieces 1/8”
to 1/4” square the long way 350° 3-6
Chips Soak in cold running water
until water does not run milky 350° 2-3
CHICKEN
Large Pieces Batter or Some prefer rolling in 325° 9-1l
Small Pieces Breading seasoned our, dipping in egg 340° 7-10
Pre-cooked wash, and frying 350° 3-4
FISH
Fillets (Large) Breading Select llets of uniform 350° 4
Fillets (Small) or Batter size, skin out and dry. 350° 3
Oysters Breading Use Oyster liquor in batter
or Batter or breading 350° 5
Clams Batter 350° 1
Scallops Breading 350° 4
Shrimp Batter Some prefer soaking 1/2 hour
in cold seasoned milk 350° 3
Smelts Breading Cut spinal cord several 350° 4
places to prevent curling
MEATS
Chicken Fried Steak Breading Sever all connecting membranes
at one inch intervals to prevent
curling 360° 3-4
Cutlets Breading 350° 3-4
Chops Breading 340° 3-4
Meat Balls Breading or
rolled in our 340° 4-6
Brains Breading 340° 3-5
VEGETABLES
Asparagus Batter or crumbs Pre-cook in salted water 350° 3
Cauliower Batter or crumbs Pre-cook and separate owers 350° 3
Egg Plant Crumb Breading Peel, cut cross-wise into 1/4”
slices 350° 3
Onions Light batter Slice thin, soak in milk for
two hours 350° 3
FRITTERS
Fruit (bananas, pineapples, apricots, berries) Serve with fruit juice 350° 3-5
Corn Batter Serve with syrup or jelly 350° 3-5
Vegetable (peas, green beans) Serve with tomato cheese sauce 350° 5-8
MISCELLANEOUS
Croquettes Breading 360° 3
Chinese Noodles 375° 1-2
French Toast 375° 1
DOUGHNUTS
Cake 375° 1-1/2 - 2
Yeast, raised 375° 1
7
Page 8

MODEL: TMFE15
Electric Fryer
SK2434 Rev. A 3/15/12
1
2
3
39
4
5
6
7
8
10
9
11
12
13
15
16
17
18
19
20
21
22
23
37
36
35
34
33
32
31
30
27
28
29
26
25
24
38
THIS DRAWING CONTAINS INFORMATION CONFIDENTIAL TO TOASTMASTER.
NO REPRODUCTION OR DISCLOSURE OF ITS CONTENTS IS PERMITTED.
14
40
8
Page 9

PARTS LIST March 15, 2012, Rev. A
Model: TMFE15, Electric Fryers
Fig No Part No Qty Description
1 2R-Y5092 4 BLACK PLASTIC LEG
2 2M-Z13007 1 FACEPLATE TMFE15
3 2E-Y5166 1 CIRCUIT BREAKER
4 2D-301007 1 KETTLE ASSEMBLY
5 E3-Y7254 1 PANEL-BACK
6 2C-2555 8 NUT-ACORN
7 E3-Y5940 2 LOWER ELEMENT CLAMP
8 E3-301043 1 HANDLE-CLAMP ASSEMBLY
9 2C-H1578 8 SCREW-8-32X1
10 E3-9280 1 CLAMP-ELEMENT
11 2N-Z2920 1 ELEMENT 5500 WATT
12 E3-9288 2 BUSHING-SPLIT
13 2R-Z13078 1 KNOB-ELEC FRYER
14 E1-Z1390 1 SWITCH GUARD
15 E3-Y7359 1 BRACKET-THERMO
16 2R-9572 1 KNOB-HARRY DAVIE
17 E3-301060-PS 1 RELEASE ROD/PAWL KIT
18 2P-9274 1 SPRING-RELEASE
19 2A-Y1105 2 PIN ROLL
20 2T-Z7268 1 THERMOSTAT
21 E1-7363 4 CLAMP-THERMOSTAT
22 E3-301059 1 PILOT-LIGHT ASSEMBLY
23 2T-Z3209 1 THERMOSTAT-SAFETY
24 2K-Y6764 1 BUSHING-STRAIN
25 E3-301044 1 CORD-ASSEMBLY NEMA 6-30P
26 E3-9262 1 BACK-ELEMENT HOUSING
27 E3-Y1621 1 CLIP-GROUND
28 E3-9270 3 PLATE-ELEMENT SUPPORT
29 E3-9269 4 BEARING, PIVOT
30 E3-7674 2 ANGLE-CAPILLARY
31 2I-9277 1 GASKET
32 E3-9276 1 ARM-PAWL
33
34 2P-5737 6 CLIP-CAPILLARY
35 2B-301042 1 BASKET, RIGHT
36 2B-301041 1 BASKET, LEFT
37 E3-301046 1 BOTTOM ASSEMBLY
38 2M-Z7219 1 SIGN-STICKER
39 2M-Z8942 1 LABEL-FRYER BURN WARNING
40 2C-Z4341 2 SCREW, #6-32 X 1/4 RHPH
NI 2M-Z8943 1 WALL SIGN-FRYER WARNINGS
2P-Y3453 4 WIRE-SPACER
IMPORTANT: WHEN ORDERING, SPECIFY VOLTAGE OR TYPE GAS DESIRED PAGE 1
INCLUDE MODEL AND SERIAL NUMBER OF 1
Some items are included for illustrative purposes only and in certain instances may not be available.
is a registerd trademark of Toastmaster, A Middleby Company. All rights reserved.
9
Page 10

MODEL: TMFE30
Electric Fryer
SK2442 Rev. A 3/15/12
1
2
4
9
10
14
24
25
17
18
21
22
27
29
3
20
5
15
23
28
32
31
30
33
38
34
37
19
12
11
13
16
6
40
41
36
35
39
26
8
7
10
Page 11

PARTS LIST March 15, 2012, Rev. A
Model: TMFE30, Electric Fryers
Fig No Part No Qty Description
1 2R-Y5092 4 BLACK PLASTIC LEG
2 E1-Y5083 1 PANEL, INSPECTION, SMALL
3 E8-Z13102 1 BOTTOM ASSEMBLY
4 2M-Z13098 1 FACEPLATE
5 2E-Y5166 2 SWITCH - 2 POLE 30 AMP
6 E1-115714 2 KETTLE ASSEMBLY, COMPLETE
7 2B-115774 2 BASKET - TWIN, LEFT HANGER (OPTIONAL)
8 2B-115775 2 BASKET - TWIN, RIGHT HANGER (OPTIONAL)
9 2B-Y8847 1 BASKET - HANGER LT
10 2B-Y8846 1 BASKET - HANGER RT
11 2E-Y2849 1 TERMINAL BLOCK
12 E1-Y5084 1 PANEL, INSPECTION
13 E1-115719 2 ELEMENT HANDLE ASSEMBLY
14 E1-Y1669 2 UPPER ELEMENT CLAMP
15 2P-5737 12 CLIP - CAPILLARY TUBE
16 2N-Y5168 2 ELEMENT 240V, 5750W
17 E1-Y1889 2 BRACE - ELEMENT (LONG)
18 E1-Y1890 2 BRACE - ELEMENT (SHORT)
19 E1-7363 2 CLAMP - THERMOSTAT BULB
20 2I-5659 4 GROMMET - CAPILLARY TUBE
21 2R-Z13100 2 KNOB - THERMOSTAT
22 E1-116314 2 SIGNAL LIGHT - POWER ON (WHITE)
23 E1-116313 2 SIGNAL LIGHT - HEATING (AMBER)
24 2A-5401 2 PIN - COTTER (3/4”)
25 E1-Y5108 2 ROD - CATCH RELEASE
26 2T-Z7208 2 THERMOSTAT
27 2T-Y1668 2 SAFETY THERMOSTAT
28 2A-7435 2 PIN - COTTER (3/8”)
29 2I-Y5097 2 GASKET - ELEMENT HOUSING
30 E1-Y5286 2 BACK - ELEMENT HOUSING
31 E1-Y5109 2 ROD - CATCH
32 2P-7969 2 SPRING
33
34 2I-Y5088 2 GASKET - PIVOT
35 2K-Y5093 1 BUSHING - 1”
36 E1-515005 1 WIRE HOUSING ASSEMBLY
37 2I-Y5095 1 GASKET - WIRE HOUSING
38 E1-Y5086 1 BACK - WIRE HOUSING
39 2M-Z7219 2 SIGN - LABEL, TEMP SETTINGS
40 E1-Z1390 1 SWITCH GUARD
41 2C-Z4341 2 SCREW, #6-32 X 1/4 RHPH
NI 2M-Z8942 1 LABEL-FRYER BURN WARNING
NI 2M-Z8943 1 SIGN-FRYER WARNINGS
NI 2M-Y2089 1 LABEL-RESET
NI 2M-Y5135 1 LABEL WIRING DIAGRAM
NI 2P-Y3406 2 WIRE SPACER,THERMOSTAT BULB - .302 DIA.
NI 2P-Y3453 2 WIRE SPACER, SAFTEY THERMO BULB - .350 DIA.
E1-Y5090 2 PIVOT BUSHING
is a registerd trademark of Toastmaster, A Middleby Company. All rights reserved.
11
Page 12

SK1724-1 Rev C
9/1/2009
MODEL:
TMFE15
THIS DRAWING CONTAINS INFORMATION CONFIDENTIAL TO STAR MFG. INT'L. INC.
NO REPRODUCTION OR DISCLOSURE OF ITS CONTENTS IS PERMITTED.
NOTES:
1. LOOKING TOWARDS REAR
OF ELEMENT CONTROL ASSEMBLY.
2. LOOKING TOWARDS REAR
OF THE SWITCH.
NOTE 1
THERMOSTAT
PILOT LIGHT
HEATING ELEMENT
WIRE NUT (2)
HIGH LIMIT THERMOSTAT
ON-OFF SWITCH (2 POLE)
A
A
E
F
D
C
B
NOTE 2
NOTE: ALL POWER WIRES ARE #12 GAUGE
BLK
WHT
GRN
RATED
WATTAGE
4130
5500 240V
208V
PHASE
SINGLE
22.9
19.9
AMPS
NOMINAL
NEMA PLUG NUMBER 6-30P
CORD:12AWG/3,SJTO 105 C,250V
CORDSET ASSY# E3-301044
ELEMENT HOUSING ASSEMBLY
B
C
D
E
F
1 BLACK
2 WHITE
4 BLACK
3 WHITE
5 BLACK
6 BLACK
C
B
E
A
D
F
10
9
5
7 8
6
9
F
D
A
E
B
C
1
2
3
4
THERMOSTAT
HIGH LIMIT
HEATING LIGHT
POWER ON LIGHT
HEATING ELEMENT
2-POLE SWITCH
A
B
C
D
E
F
RIGHT HAND CONTROL
HOUSING ASSEMBLY
530015
LEFT HAND CONTROL
HOUSING ASSEMBLY
530016
MODEL 530TE
MODEL 530T / TMFE30
208V 1 PH.
240V 1 PH.
208V 1 PH.
240V 1 PH.
6910
33.2
#8
9200
38.3
#8
8638
41.5
#8
11500
47.9
#6
WATTS
AMPS
SUPPLY MIN AWG
FOR SUPPLY CONNECTION USE COPPER WIRE RATED AT LEAST 90°C.
10
G
G
POWER SUPPLY BLOCK
2M-Y5135, Rev D
MODEL: TMFE30
12
Page 13

Page 14

Page 15

Page 16

Warranty Statement
This warranty is effective on all Toastmaster equipment sold on or after July 1, 2006, and supersedes all
previous warranties.
Toastmaster warrants equipment that it manufactures to be free from defects in material and
workmanship. Toastmaster’s obligation is limited to repairing or replacing, at Toastmaster’s option, without
cost to the customer, any part found to be defective, as well as any labor or material expense required to
replace the part.
Length of Warranty
This warranty is effective for a period of 12 months from the date the equipment is placed in service.
Models that are considered portable should be taken to the closest Toastmaster service agency,
transportation prepaid.
Exceptions
• This warranty is valid only for the original end user owner/operator of the equipment.
• This warranty does not apply to normal maintenance functions, including (but not limited to)
improper operation, installation or the use of an improper utility supply.
• This warranty is valid only if the equipment is used in a commercial setting. The equipment
is designed and constructed for commercial use by trained professionals only. Any use of the
equipment in private or domestic applications immediately voids this warranty.
• This warranty does not apply to any parts, labor and material expenses for service that is not
pre-approved and performed by a Toastmaster authorized service agent. Any such service
immediately voids this warranty.
• This warranty does not apply to any parts, labor and material expenses associated with the
installation of parts that are not factory-approved for use in the equipment. Any use of such
parts immediately voids this warranty.
• This warranty is not valid if terms of payment have not been met.
• Portable units is a unit thats designed to sit on a countertop, has a powercord & is less than
50lbs installed.
Toastmaster reserves the right to change the design and specications of this equipment or any related
documentation at any time. The end user is not entitled to upgrades resulting from these changes.
This warranty is exclusive and supersedes all other warranties for the equipment, both expressed and
implied. There are no implied warranties of merchantability or of tness for a particular purpose.
The foregoing is Toastmaster’s sole and exclusive obligation and the end user sole and exclusive remedy
for any action including breach of contract or negligence. In no event shall Toastmaster be liable for a sum
in excess of the purchase price of the equipment, or for any prospective or lost prots of the end user.
is a registerd trademark of Toastmaster, A Middleby Company. All rights reserved.
13
 Loading...