

Page 1
GRIDDLES
GRIDDLES
FREE STANDING MODELS:
TA710/TA710S, 7224, 7236, 7324, 7336,7348
INSTALLATION - OPERATION - MAINTENANCE
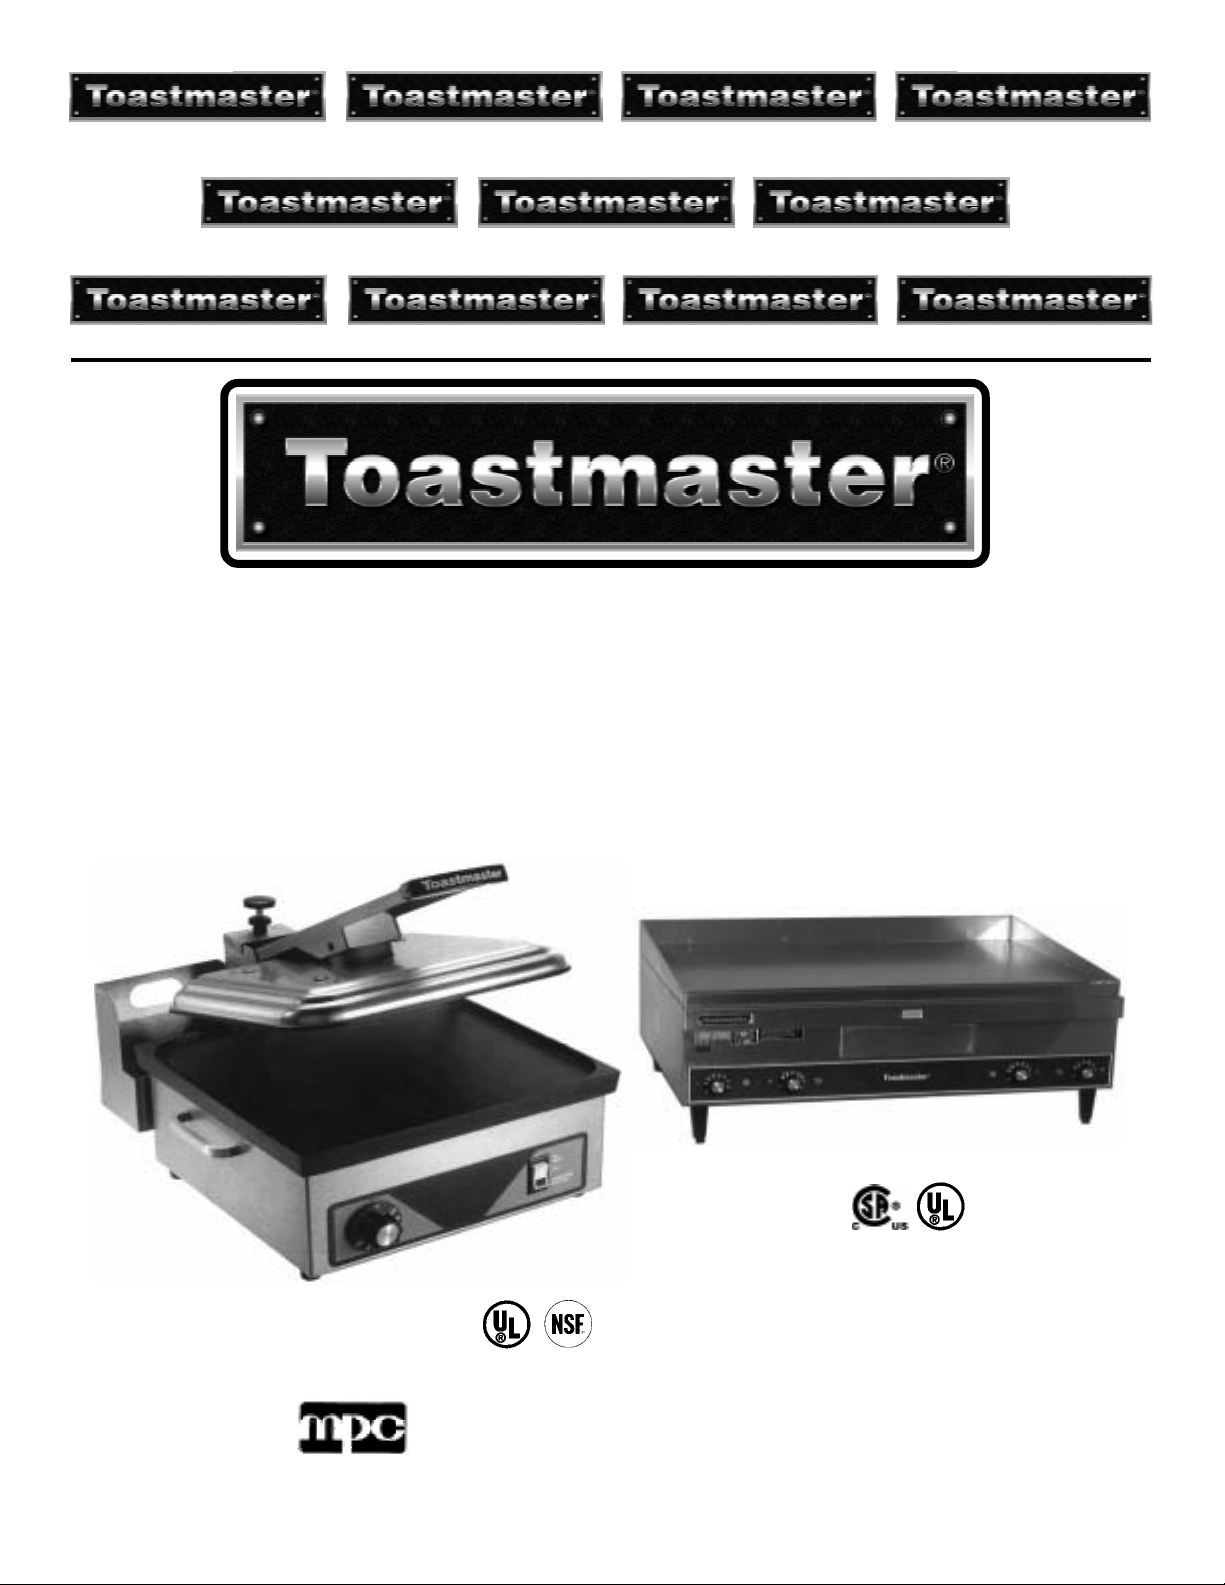
Model - 7336 Counter Top Griddle
Model - TA710 Sandwich Grill
Middleby Philippines Corporation
113 Technology Ave., Laguna Technopark Inc., Binan, Laguna, Philippines 4024
Phone (632) 5208170 - Fax (632) 5208191 - www.middleby.com
~
MANUAL GRDL0804A710-7348
PAGE 25
Page 2

GRIDDLES
SECTION I GENERAL INFORMATION
Toastmaster manufactures a variety of
heavy duty electric griddles for use in
the commercial kitchen. Free standing
models are available. Free standing
models are available. Toasmaster’s
many years of experience in manufacturing commercial cooking equipment
has provide the expertise necessary to
furnish the best electric griddle on the
market. Toastmaster provides quality
products through precise engineering
and production methods as well as the
use of the best materials available. The
extra features provided on Toastmaster griddles helps to create what is often referred to as “The Toastmaster Difference.”
Toastmaster counter top or free standing griddles are furnished with stainless
steel front and sides for easy cleaning
and care as well as a gleaming appearance. All thermostat controls are recessed in a stainless steel mounting cup
for protection. Thermostats have a
range of 150°to 450°F. This low range
temperature setting will allow the griddle
to be used for holding of foods. This
feature is especially helpful on larger
griddles where part of the griddle can
be used for cooking while another part
is used for holding. The larger griddles
also have the heating elements spaced
so that one element and its control covers only 9” of griddle area for greater
versatility, and for more even heat distribution.
All Toastmaster griddles are furnished
with 1/2” thick, one piece hot rolled steel
plate cooking surface. The free standing models are supplied with splash
guards on both sides and rear. All
grease troughs are made of stainless
steel, again for ease in cleaning and for
durability. Even the bottom of the cabinet is enclosed.
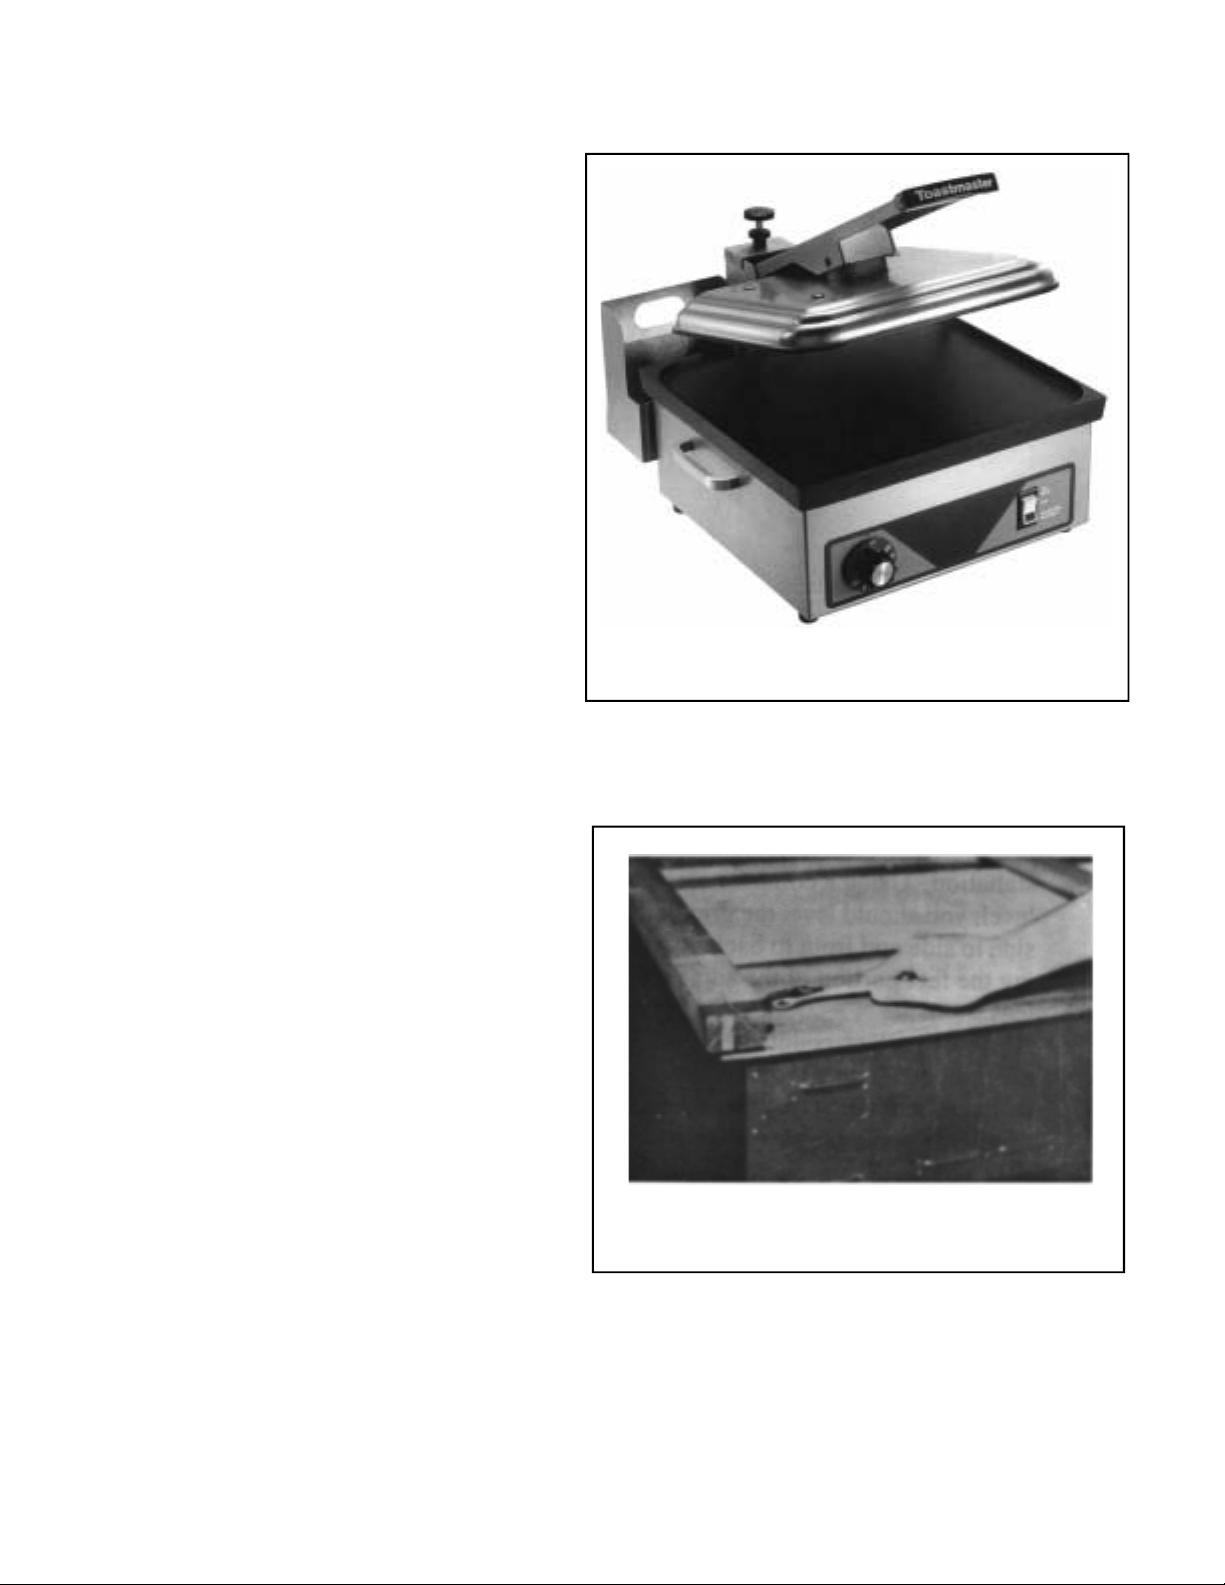
The models A710 and A710S are referred to as sandwich grills. These models have both top and bottom grill surfaces that may be ordered as cast aluminum with an aluminum oxide vapor
blast finish (A710) or with a
“Silverstone”* finish (A710S). This top
and bottom grill feature allows for the
grilling of food products, such as grilled
cheese sandwiches, without turning the
sandwich over.
*”Silverstone” is a trademark of the
Dupont Company.
Following the information in this manual
will assist you in making a proper installation. Suggestions for the proper
use and care of your Toastmaster
griddle are also provided.
Following is a description of the various
models of Toastmaster griddles:
Toastmaster
®
PAGE 1
Page 3

A. Description of Models
1. A710 and A710S Sandwich grill
a. 120 volt, 208 volt or 240 volt
b. Grills both sides of sandwich
without turning
c. Grills 9 cheese sandwiches at one
time
d. Factory installed 36” cord and
plug
e. Operate top and bottom grills at
the same time or use bottom grill
only
GRIDDLES
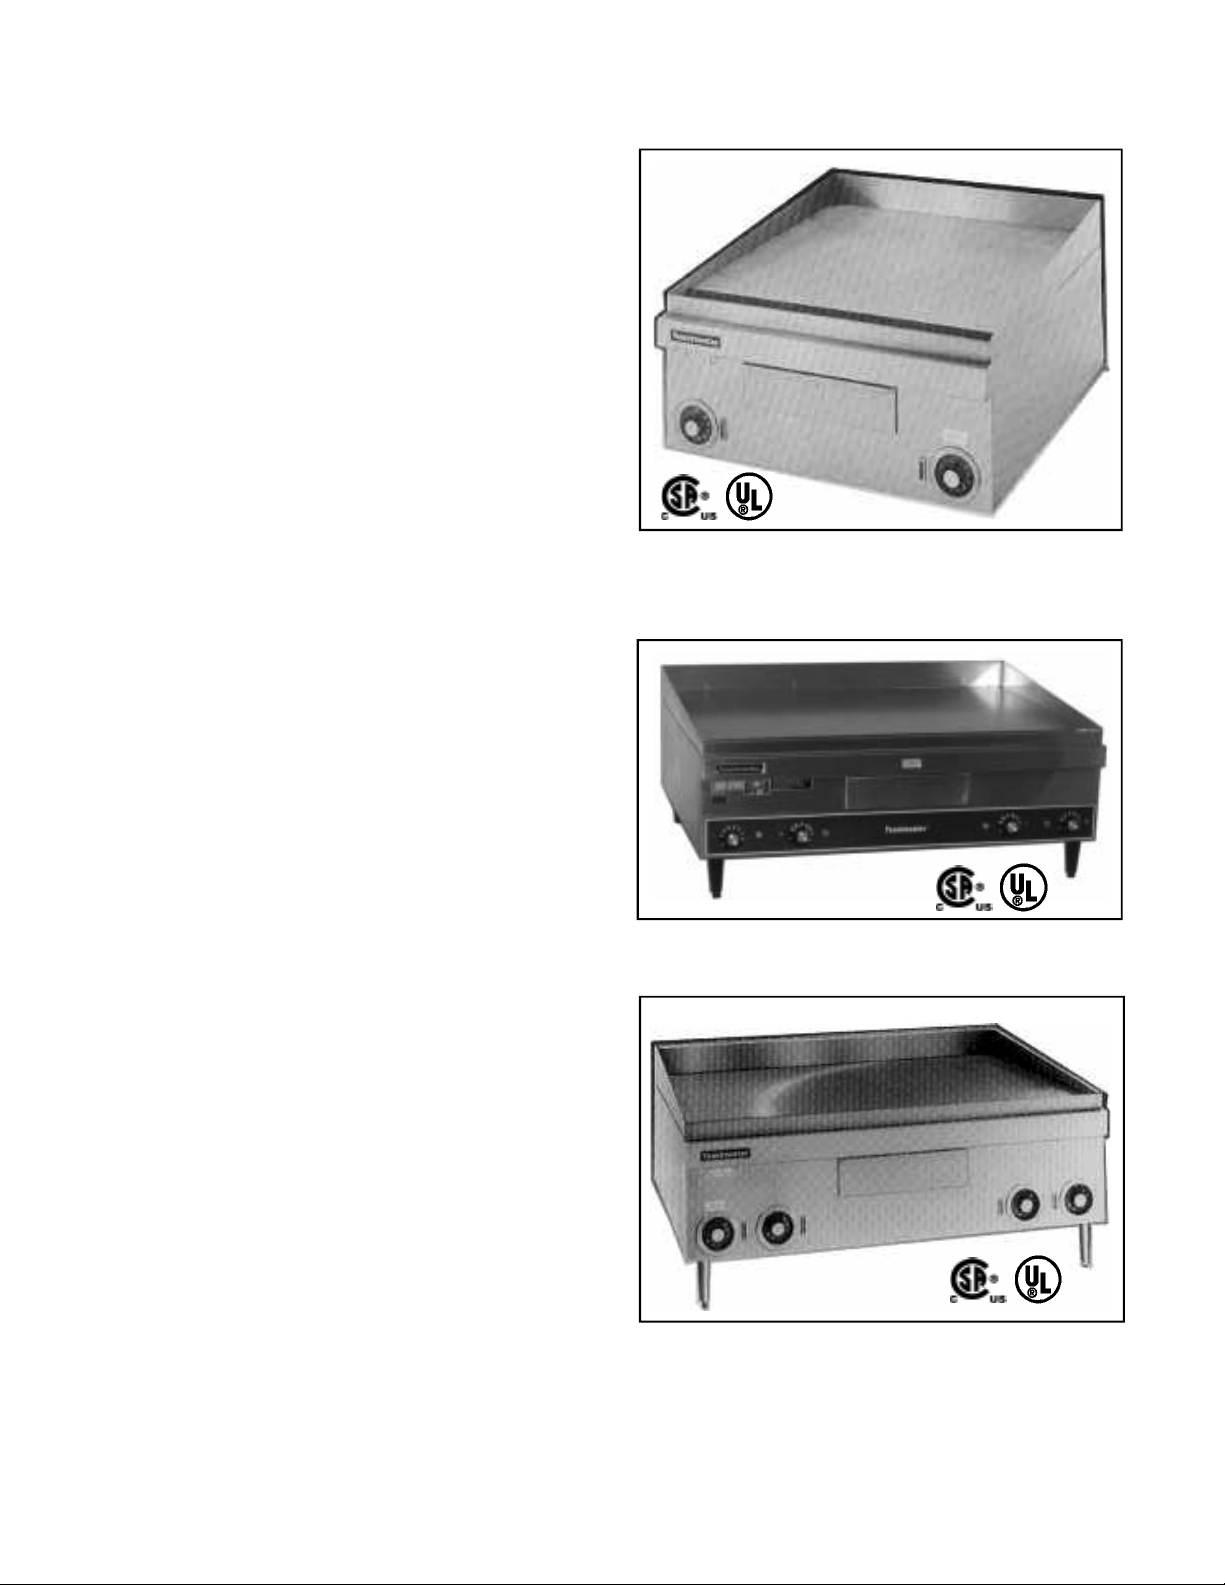
2. 7224 Counter top griddle
a. Combination voltage 208/240V
b. 23 13/16” wide x 18” deep griddle
surface
c. Preheats to 400°F in 12 minutes
d. Stainless steel splash guards
e. Accessory stand available
3. 7236 Counter top griddle
a. 208 volt or 240 volt
b. 35 13/16” wide x 18” deep griddle
surface
c. Preheats to 400° F in 12 minutes
d. Stainless steel splash guards
e. Accessory stand available
PAGE 2
Toastmaster
®
Page 4
GRIDDLES
4. 7324 Counter Top available
a. 208, 240, or 480VAC, 3 or 1-phase
b. Total kw 10.4
c. Griddle surface 24” wide x 24”
deep
d. Preheats to 400° F within 12
minutes
e. Stainless steel splasher on sides
and back
f. Grease trough & chute at front
g. (2) thermostatically controlled heat
zones
5. 7336 Counter top griddle
a. 208 volt or 240 volt
b. 35 7/8” wide x 24” deep griddle
surface
c. Preheats to 400° F in 12 minutes
d. Stainless steel splash guards
e. Accessory stand available
6. 7348 Counter top griddle
a. 208 volt or 240 volt
b. 47 3/4” wide x 24” deep griddle
surface
c. Preheats to 400 F in 12 minutes
d. Stainless steel splash guards
e. Accessory stand available
Toastmaster
®
PAGE 3
Page 5
SECTION II INSTALLATION AND TESTING
A. Unpacking
Models A710 and A710S are packed in
foam-in-place material. All other
griddles (both drop-in models and
counter top models) are mounted on a
wood pallet, or shipping platform.
1. Models A710 and A710S :
remove staples from top of carton
and discard.
2. Remove top portion of foam packing and discard.
GRIDDLES
3. Lift unit out of carton.
4. A710/A710S are shipped with
legs already installed.
5. All other models are uncrated by
cutting the banding straps that hold
the carton in place with the shipping
pallet.
6. Lift the carton up and off the griddle
and shipping pallet.
7. Carefully turn the griddle upside
down and remove the bolts that
secure the pallet to the griddle.
8. Remove the shipping pallet and
discard.
Model A710S with 1 1/2” legs.
Remove the shipping pallet.
9. Your griddle is now ready for
installation. Refer to paragraph B.
PAGE 4
Toastmaster
®
Page 6
GRIDDLES
B. Installation and Electrical Connections
1. Free standing or counter top models
a. CAUTION: Be sure to follow all state
and local electrical codes when installing
the Toastmaster griddle.
b. Pull out the grease drawer and locate the
bag containing the 4” NSF approved,
adjustable legs. Models 7224, 7236 and
7324 are all furnished with 6 steel legs.
Model A710/A710S has 1 1/4” legs already
attached at factory.
c. Turn griddle on its back.
d. Thread each of the legs into the weldnuts
or leg mounting plates provided on the
bottom of the griddle. Tighten securely.
e. Place the griddle in position on the
counter where you have chosen for
installation. Using a common carpenters
level, you should level the griddle from side
to side and front to back by adjusting the
feet portion of the adjustable legs.
f. All Toastmaster counter top griddles
are provided with a terminal block in a
compartment at rear for electrical conne-
ction. Knockouts are also provided in
case bottom. See dimensional drawings
on pages 15-20 for knockout positions.
No internal wiring is necessary.
g. No internal fusing is provided on
Toastmaster counter top griddles. There-
fore, the installing contractor must provide
the proper disconnect as may be required
by state and local codes.
h. The Model A710 and A710S sandwich
grill comes standard with 36” cord and
plug.
i. Be sure the main power disconnect switch
is in the “OFF” position before attem-
pting to make any electrical connections.
Install legs with griddle on its back.
Adjust the leveling legs.
Toastmaster
®
PAGE 5
Page 7
GRIDDLES
j. Be sure your electrician provides the
proper wire capable of carrying the volt
age required as shown on the serial
number plate of the Toastmaster
griddle. Failure to do so may void your
warranty.
NOTE: See electrical data chart on page
17 for KW rating and amperage drawer.
k. Be sure all electrical connections are
tight and are positioned so that they will
not short out when the electrical power
is applied by turning the main power
disconnect switch “ON.”
l. After all electrical connections have
been made refer to the section on
“Testing the Installation.”
NOTE: 1. All Toastmaster counter top
griddles and the A710/A710S sandwich grills
meet the standards of the National Sanitation
Foundation and are listed by Underwriters’
Laboratories Inc.
NOTE: 2. All Toastmaster counter top
griddles, except 7336 and 7348, can be
ordered to be furnished with a cord and plug.
See accessories listed on page 16.
c. Stands may be supplied with 6” legs or
with a set of casters as indicated in the
accessories listed on page 16.
d. Install the legs or casters in the weld nuts
or mounting plates of the stand prior to
installation of the griddle.
e. After the legs casters have been installed
on the stand, place the griddle on the
stand. Secure the griddle to the stand
with the bolts provided. (CAUTION:
Do not use the bolts that were used to
secure the stand to the shipping crate as
they may be too long.)
NOTE: Because of available counter space
it is common to use an accessory stand
(usually furnished with 6” legs) for a
permanent griddle installation. However,
the use of a griddle stand, especially one
supplied with casters, is commonly considered not to be a permanent installation
and it is advised that a griddle installed
in this manner should be supplied with
an accessory cord and plug.
2. Model 7324:
a. For supply connections use copper
wire, sized LAW the National Electrical Code be suitable for 90 C (min).
b. Spacing from a wall:
• Sides - 1” (min)
• Back - 1/2” (min)
3. Use of Accessory Stand
a. Models 7336 and 7348 may be ordered
with accessory stand.
b.When mounting any of the above
models on the accessory stand do not
install the 4” legs as indicated in 2.c,
2.d. and 2.e above.
PAGE 6
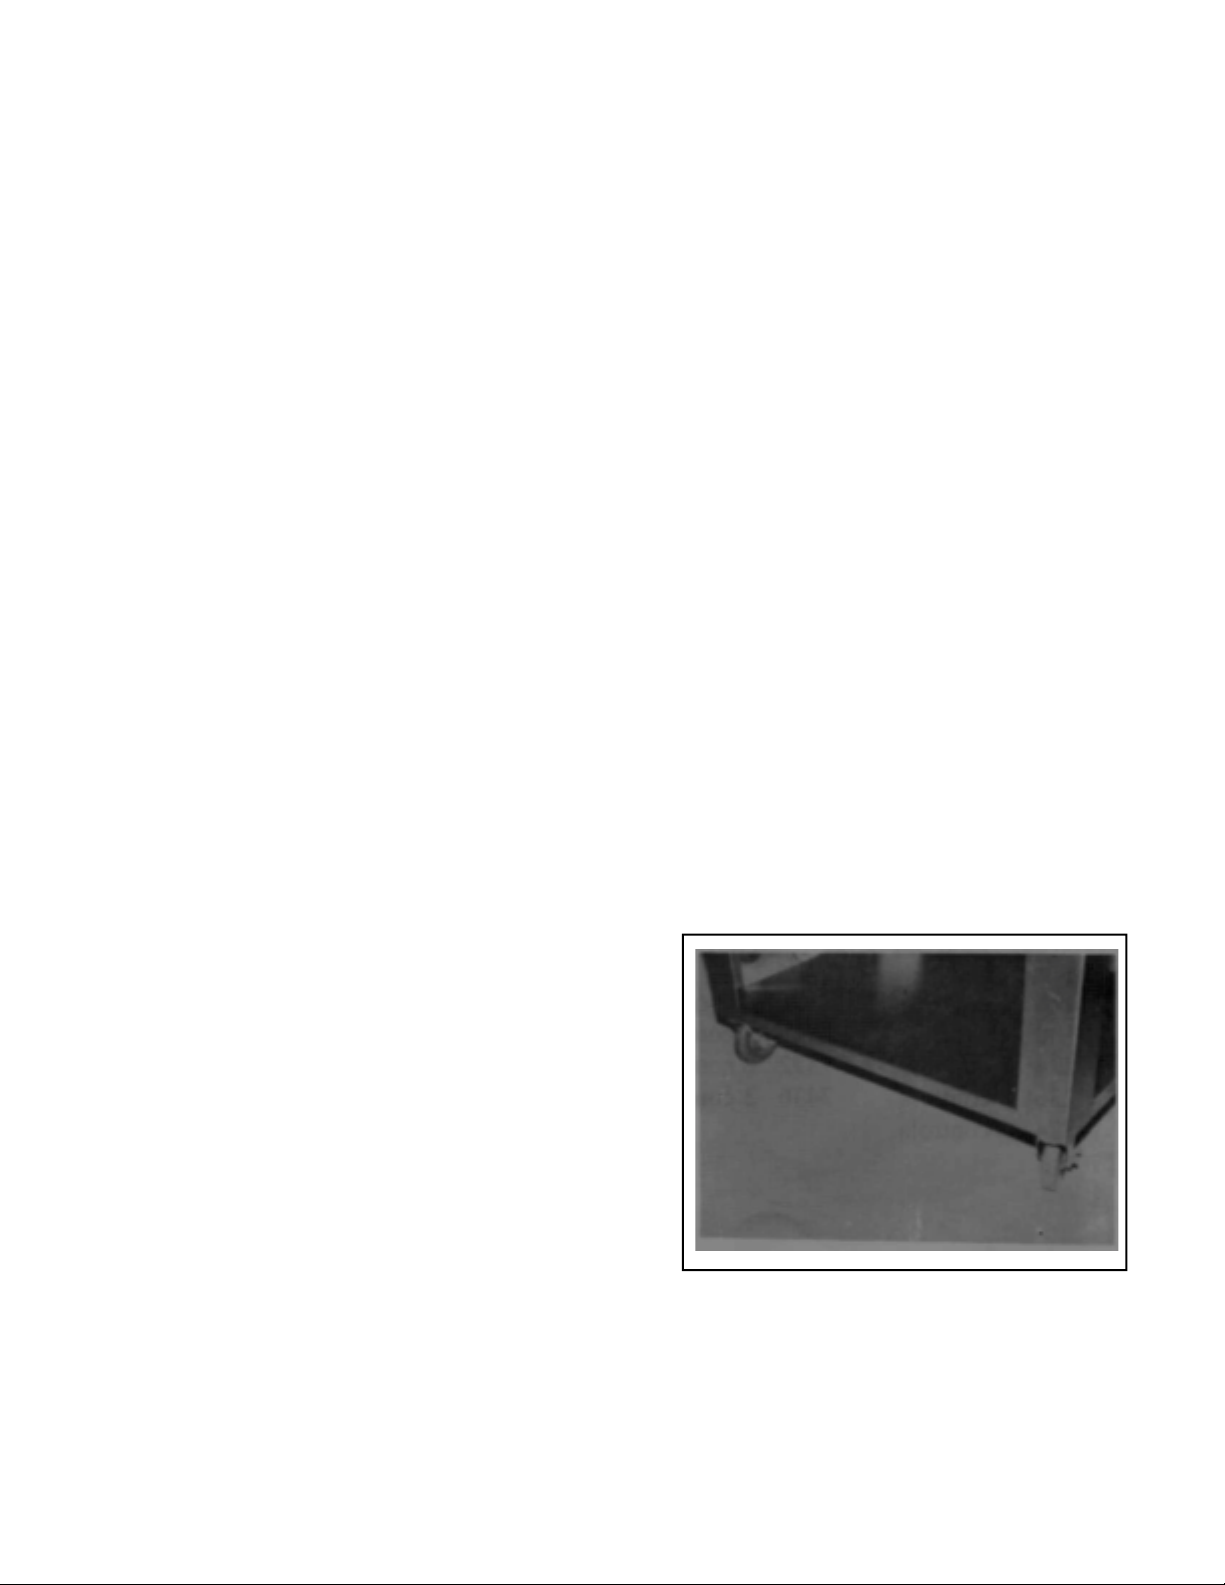
Caster shown on griddle stand.
Toastmaster
®
Page 8
GRIDDLES
C. TESTING THE INSTALLATION
Now that the griddle has been installed and the
proper electrical connectors have been made,
clean the rust preventive material from the griddle surface with a nonflammable grease
solvent. Then wash with warm water and a
mild detergent. Rinse with a clean damp cloth
and wipe dry. It is now time to test the installation.
1. Turn all control knobs to the “OFF” position
2. Turn the main power disconnect switch “ON”
3. Starting on the left, (for griddles with more
than one control) turn one control knob at a
time to 200° F. Wait a few minutes and check
to see if that section of the griddle has started.
SECTION III OPERATION
to heat. Turn that control knob “OFF” and
move to the next control and repeat.
Continue until the entire griddle has been
tested.
The A710/A710S is controlled by a rocker
switch that operates bottom grill only or both
top and bottom. To test turn the thermostat
dial to 200° F and set the rocker switch to heat
both top and bottom grills. Again wait a few
minutes and check to see if both grills are
beginning to heat. Return the rocker switch
to the “OFF” position.
A. Controls
1. All Toastmaster counter top griddle are
controlled by a thermostat control knob
adjustable from 150° to 450° F with positive
“OFF” position. The following list shows
how many thermostat control knobs are on
each of the various models:
7224 - 2 controls
7236 - 3 controls
7324 - 2 controls
7336 - 4 controls
7348 - 5 controls
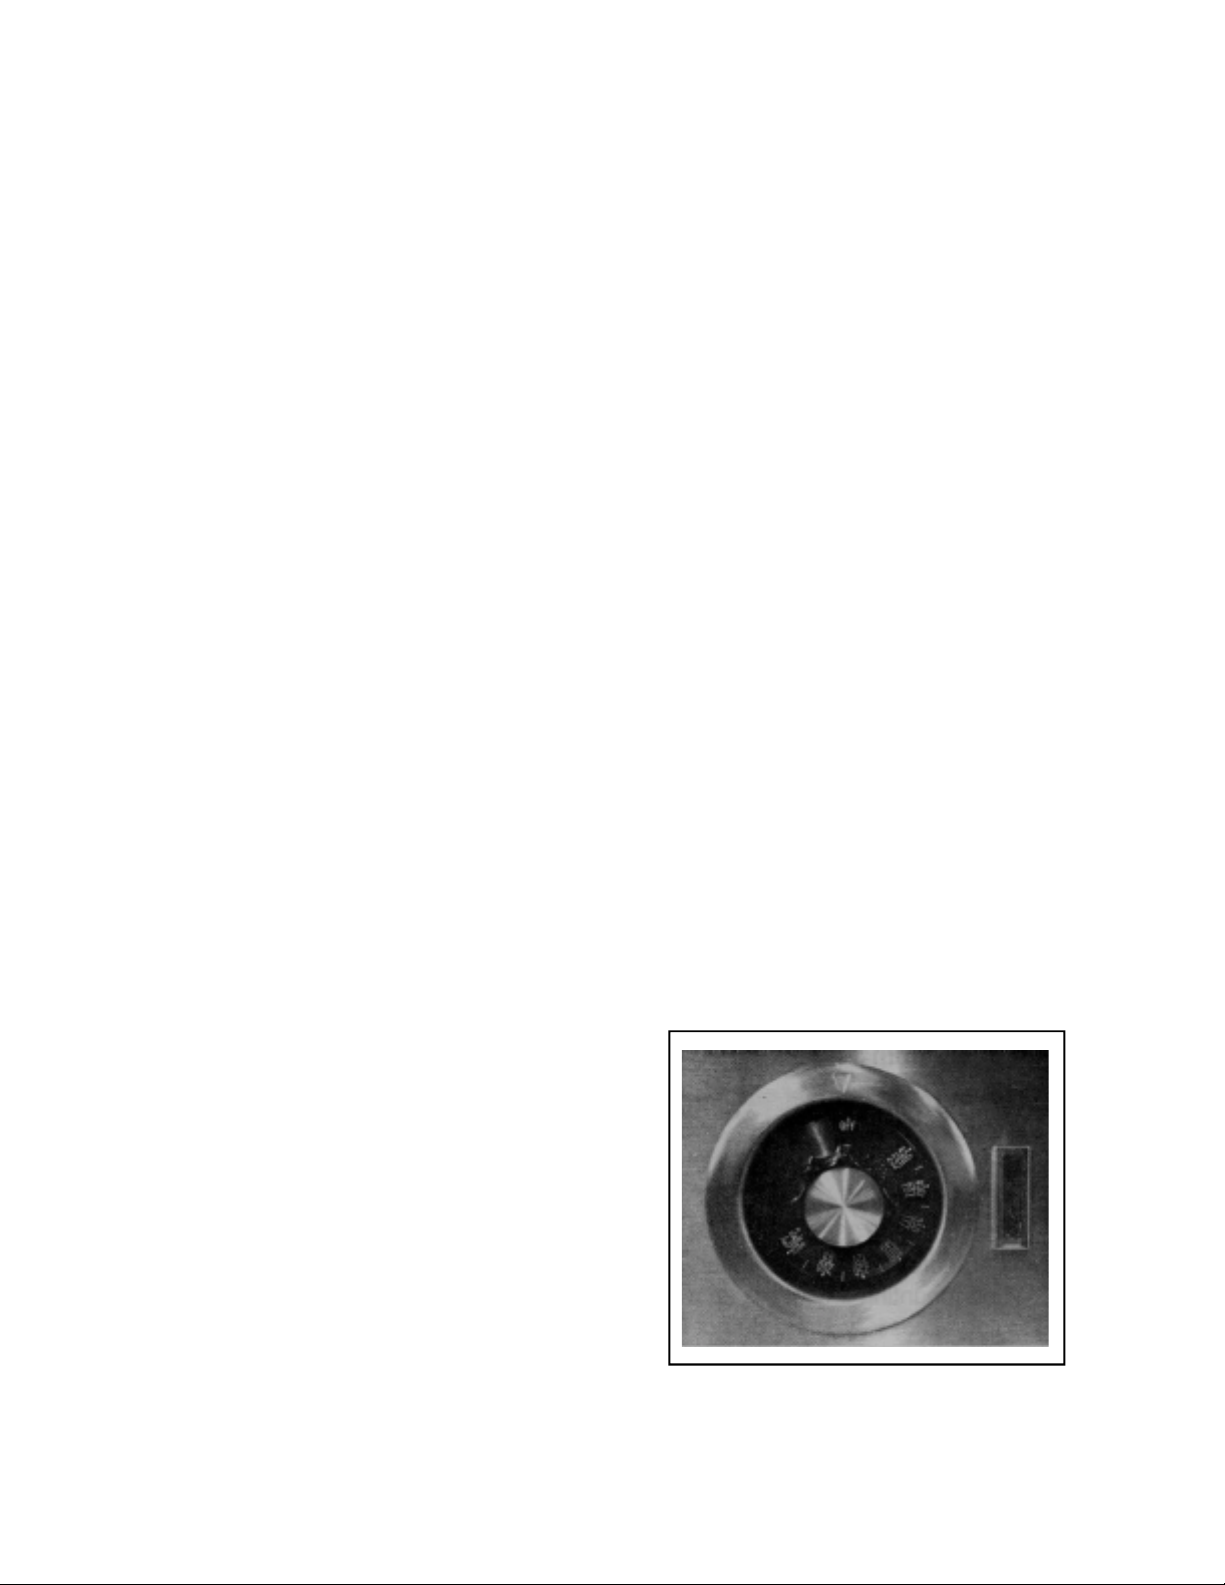
2. Each thermostat control knob is furnished
with adjacent signal light that cycles on and
off as the thermostat calls for heat to maintain the temperature setting you have
selected.
Toastmaster
Thermostat control knob and signal light.
®
PAGE 7
Page 9

3. The Models A710/A710S thermostat control
knob is adjustable from 150° to 450° F with a
positive “OFF” position. These models are
also equipped with a three position rocker
switch. This rocker switch allows for the use
of the bottom grill only or for top and bottom
grills to work simultaneously. The third (center
position) is “OFF”. These units are equipped
with two signal lights. The green light is constantly on when the unit is in one of the operating
positions. The red signal light cycles off and on
as the thermostat cycles off and on to maintain
the temperature setting you have selected with
the thermostat control knob. Another control is
used to adjust the closure height of the top grill.
This control is a knob adjustment screw
mounted to the rear of the top grill assembly.
GRIDDLES
A710 controls.
B. Seasoning the Griddle
1. Preheat the griddle to 300° F, and spread a
light film of unsalted cooking oil or fat over
the surface with a soft cloth.
2. Allow griddle to stand this way for two
minutes to give the oil an opportunity to
work into the pores of the metal and to form
a smooth coating over the outside.
3. Wipe off excess oil and repeat steps 1 and
2 at 350° F.
4. After the second step is completed wipe
off excess cooking oil, set thermostat for
desired temperature and the griddle is now
ready for use.
NOTE: The A710 and A710S grills need no
seasoning, however you may desire to use a
very light coating of oil spray on the
Model A710.
PAGE 8
Toastmaster
®
Page 10

GRIDDLES
C. Operating Hints and Safety
Although the finest materials, engineering planning, and manufacturing facilities have provided
for safety and trouble free operation, only proper
use and maintenance will assure personnel
safety and long life of the equipment. The following are a few precautions and operating suggestions for use of the griddle equipment.
1. De-energize griddle at the disconnect switch
at end of each day’s operation.
2. Do not leave griddle in operation without an
attendant.
3. Turn thermostat dials down to 200° F during
idle periods. It takes only a few minutes to
regain operating temperatures.
NOTE: It is not necessary to heat the entire
surface when small amounts of food are to
be cooked. Each section may be set at different temperatures for griddling various kinds
of food.
4. Keep all areas around the griddle free of
splashed grease.
6. Do not leave griddle at high temperature
when not in use so remaining food particles and grease film will not carbonize.
7. Never attempt to service griddle before
turning main disconnect switch “OFF.”
8. Empty grease drawer receptacle as often
as possible. Always empty and clean
grease drawer receptacle at the end of
each day’s operation or the end of each
shift. An overflow eyelet is located in the
front of the grease drawer to indicate
when it is full.
9. Before operation each day, season griddle
as described above. Always allow 15
minutes preheat time before loading
griddle with food to give griddle surface
time to saturate with heat. Failure to allow preheat time will result in unsatisfactory griddling of the first load. The chart
on page 14 shows cooking time and
temperatures for various kinds of food.
5. Use a spatula to push excess grease into
grease trough after each load of food is
cooked. This will reduce smoking of hot
grease and carbonizing.
Toastmaster
®
PAGE 9
Page 11

Cooking Guide For Toastmaster Griddles
GRIDDLES
FOOD
CONTROL TIME IN ADVANCE PREPARATIONS
SETTING MINUTES
Canadian Bacon 350° F 3 to 4 Slice (not too far in advance as meat
will darken)
Split edges to prevent curling.
Hamburgers 350° F 3 to 4 Prepare recipe - Form patties -
Seperate with waxed paper.
Cheeseburger 350° F 3 to 4 Use hamburger patty with a slice
of cheese.
Corned Beef Patties 375° F 3 to 4 Remove from can - Cut into 3/8”
slices.
Sausage Patties 350° F 3 to 4 Form patties - Separate with wax
paper. - Refrigirate
Potato Patties 375° F 3 to 4 Cook - Mash - Season - Form
patties using 1/4 cup measure
Sausage Links 350° F 3 Refrigerate for best results.
American Fried 375° F 3 to 4 Cook - Season - Slice
Potatoes
French Toast 400° F 4 to 5 Prepare egg batter.
Scrambled Eggs 300° F 3 to 4 Prepare recipe.
Pancakes 375° F 2 Prepare recipe.
Frankfurters 375° F 2 to 5
Minute Steaks 400° F 3 to 4
Club Steaks 400° F 3 to 5
Ham Steaks 400° F 10
Beef Tenderloin 400° F 5 to 7
Boiled Ham 375° F 2
Bacon 350° F 6
Hard Fried Eggs 300° F 3
Soft Fried Eggs 300° F 3
Sunny-Side-Up Eggs 300° F 3
PAGE 10
Toastmaster
®
Page 12

GRIDDLES
SECTION IV Cleaning
A. Cleaning the Griddle
Surface
1. Good griddling requires clean equipment.
To provide evenly cooked and perfectly
browned foods, keep the griddle surface free
of carbonized grease. Carbonized grease
on griddle surface hinders the transfer of
heat from the griddle surface to the food,
resulting in spotty browning, loss of cooking efficiency, and worst of all, carbonized
grease tends to cling to the griddled foods
giving them a highly unsatisfactory and
unappetizing appearance.
2. At the end of each day’s operation, thoroughly clean the grease trough and spout
into grease drawer.
3. Clean the griddle surface with a pumice or
griddle stone rubbing with the grain of the
metal while the griddle surface is still warm.
C. In Case of Fire
1. De-energize griddle at disconnect switch.
This will cut off power to the heating
elements allowing griddle to cool thus
reducing the flash point temperature
making it easier to stop the fire.
2. Cover the affected area with a heavy
blanket or canvas. Play the fire extinguisher
nozzle over the blanket or cover to seal off
air thus smothering the fire.
CAUTION: Do not attempt to fight a grease
fire by playing the nozzle of the fire extin
guisher directly on the burning grease.
The force will cause the burning grease to
be sprayed to adjoining equipment making
it difficult to contain the fires. Only use a f
ire extinguisher filled with CO2for liquids
and oils and suitable for electric powered
equipment.
4. Wipe griddle clean of residue from the
griddle stone.
5. Empty and wash out grease drawer with hot
water and a mild detergent. Wipe dry and
replace in griddle.
NOTE: Refere to Paragraph 3 to reseason
griddle before reuse.
B. Cleaning the Exterior
1. Clean all surrounding surfaces of the griddle
with warm water and a mild detergent daily.
2. Rinse and wipe off excess water.
3. Polish with a dry soft cloth.
NOTE: This simple treatment not only keeps
the equipment dirt free and sparkling, it also
eliminates the danger of grease accumulation
forming hard to remove stains if left too long.
Toastmaster
®
PAGE 11
Page 13

Griddle Accessories
GRIDDLES
4L4
7236ES
7336ES
7348ES
ACLG06E
ACCS06J
Cord Sets
C550
C630
C650
C1550
ACCESSORY LEGS, 4” Steel, Set of Four, NSF Approved.
STAND for 7236 GRIDDLES. Welded heavy gauge stainless steel bottom shelf.
Four mounting on 6” legs or casters (not included).
STAND for 7336 GRIDDLES. Welded heavy gauge stainless steel bottom shelf.
For mounting on 6” legs or caster (not included).
STAND for 7348 GRIDDLES. Welded heavy gauge stainless steel bottom shelf.
For mounting on 6” legs or casters (not included).
LEGS, Set of four, 6”, NSF approved, satin nickel finish (for griddle stands only).
CASTERS, Set of four, non-marring, 5” high, NSF approved, 2-swive/lock, 2
fixed Aluminum bronze finished assembly adds 6 1/4” to height of unit (for griddle
stands only).
- See chart below to determine which cord set is needed.
36” CORD, 3-wire with NEMA 5-50P plug for 120V units, 1PH.
36” CORD, 3-wire with NEMA 6-30P plug for 208/240V units, 1PH.
36” CORD, 3-wire with NEMA 6-50P plug for 208/240V units, 1PH.
36” CORD, 3-wire with NEMA 15-50P plug for 208/240V units, 1PH.
Griddle Voltage&Phase *Cord&Cap
7224 208/240
1Ø
C650
Cooking Capacities
LOAD CAPACITY
MODEL
7224
7236
7324
7336
7348
HAMBURGERS
30
45
40
60
80
EGGS
28
42
37
56
75
PANCAKES
25
38
33
48
66
Griddle Voltage&Phase *Cord&Cap
7224
7324
7324
7236
208/240
208/240
208/240
208/240
3Ø
3
1
3Ø
C1550
C1550
C650
C1150
* See plug diagrams on page 17.
CAPACITY PER HOUR
HAMBURGERS EGGS PANCAKES
510
765
680
1020
1360
560
840
750
1120
1500
375
570
495
720
990
PAGE 12
Toastmaster
®
Page 14

GRIDDLES
ELECTRICAL DATA
STYLE VOLTAGE
7224
208
240
480
7324
208
240
480
7236
208
240
480
7336
208
240
480
7348
208
240
480
*7372
208
TOTAL
KW
6.0
8.0
8.0
10.4
10.4
10.4
12.0
12.0
12.0
16.4
16.4
16.4
21.5
21.5
21.5
16.4
3-PHASE LOADING
KW PER PHASE
X-Y
3.0
4.0
4.0
5.2
5.2
5.2
4.0
4.0
4.0
4.1
4.1
4.1
8.6
8.6
8.6
4.1
Y- Z
3.0
4.0
4.0
5.2
5.2
5.2
4.0
4.0
4.0
8.2
8.2
8.2
8.6
8.6
8.6
8.2
X-Z
4.0
4.0
4.0
4.1
4.1
4.1
4.3
4.3
4.3
4.1
NOMINAL AMPS, PER LIVE WIRE
3-PHASE
X
-
-
-
-
-
-
14.42
16.68
8.33
25.0
21.7
10.8
33.30
28.87
14.43
34.14
29.59
14.79
54.70
47.40
23.70
34.14
Y
25.00
28.82
14.43
43.4
37.5
18.8
33.30
28.87
14.43
52.15
45.20
22.60
76.62
62.06
31.04
52.15
Z
14.42
16.68
8.33
25.0
21.7
10.8
33.30
28.87
14.43
51.70
45.20
22.60
54.70
47.40
23.70
52.15
1-PHASE
TOTAL
28.85
33.30
16.67
50.0
43.30
21.7
57.70
50.00
25.00
78.85
68.46
34.17
103.37
89.58
44.79
78.85
AMPS
TOP
KW
A710/A710S
120
208
240
*NOTE: Models 7072 and 7372 have two seperate circuits. Values in the above table are for one circuit (half of griddle) only.
.65
.65
.65
G
BOTTOM
KW
1.0
1.0
1.0
G
W
TOTAL
KW
1.65
1.65
1.65
SINGLE
PHASE
13.8
7.9
6.9
G
G
X
Z
Toastmaster
C550
®
C630
C650
Y
C1550
PAGE 13
Page 15

Models A710
A710S
18 7/16”
13 5/16”
2 1/8”
10 1/4”
GRIDDLES
TOP VIEW
21 7/16”
5 1/8”
Model 7224
1 7/16”
5/8”
12”
12 3/8”
15 1/2”
FRONT VIEW
TOP VIEW
24”
FRONT VIEW
9/16”
1
1 3/8” ‘ 1 3/4” & 2”
KNOCKOUTS IN
CASE BOTTOM
25”
SIDE VIEW
25 3/8”
11 3/8”
16 3/4”
SIDE VIEW
3 3/8”
PAGE 14
9 3/16”
4”
21”
14 7/16”
1 1/2”
13 29/32”
21”
16 11/16”
1 1/2”
Toastmaster
®
Page 16

GRIDDLES
Model 7236
1 7/16”
18”
TOP VIEW
1 3/8” ‘ 1 3/4” & 2”
KNOCKOUTS IN
CASE BOTTOM
25”
FRONT VIEW
36”
33”
1 1/2”
14 7/16”
13 29/32”
9 3/16”
4”
SIDE VIEW
25 3/8”
16 1/6”
21”
1 1/2”
Toastmaster
®
PAGE 15
Page 17

Model 7336
1.438
18.000
36.00
1.375 , 1.750 & 2.000
KNOCKOUTS IN
CASE BOTTOM
28.125
GRIDDLES
28.500
Model 7348
9.188
4.000
KNOCKOUTS IN
CASE BOTTOM
TOP VIEW
1.375 , 1.750 & 2.000
FRONT VIEW
47.938
33.000
12.000
1.500
14.438
28.125
1.438
13.906
24.125
27.125
7348 ON 7348ES STAND
WITH 6” LEGS
DIMENSION GIVEN
SIDE VIEW
28.500
MILLIMETERS
INCHES
16.688
1.500
PAGE 16
14.438
44.938
13.906
1.500
9.188
24.125
27.125
16.688
4.00
Toastmaster
®
Page 18

GRIDDLES
Model 7324
11.91
1.44
28.50” O/A
TOP VIEWFRONT VIEWRIGHT SIDE VIEW
28.13
1.38, 1.75 & 2.00
KNOCKOUTS IN CASE BOTTOM
24.00
SPECIFICATION
NAMEPLATE
9.19
13.84
14.44
4.00
1.50
1.50
OFF
ADJUSTABLE FOOT
4 PLACES
21.00
24.13
OFF
1.50
16.69” O/A
1.50
Toastmaster
®
PAGE 17
Page 19

GRIDDLES
PARTS IDENTIFICATION AND FUNCTIONS - GRIDDLE ELECTRIC 72 SERIES
1
2
3
5
8
6
9
4
7
PAGE 18
Toastmaster
®
Page 20

GRIDDLES
PARTS IDENTIFICATION AND FUNCTIONS - GRIDDLE ELECTRIC 72 SERIES
QUANTITY
Key Part Number 24 36 Description
1 T7236B8714 2 3 HEATER 240V 4000W
2 T3004257 2 3 THERM GRIDDLE 150-450F
3 TA710E8751 2 3 KNOB TSTAT 150/450F
4 1800217 1 POLYPANEL 7224
1800218 1 POLYPANEL 7236
5 1000705 1 1 BLOCK,TERM BLK-RAW
6 1000729 1 WIRE SET 7224
1000728 1 WIRE SET 7236
7 1000106 2 3 LIGHT PILOT 1/3 250 AMBER
8 1850152 2 3 KNOB GUARD 130X68X8DIA
9 S1172857 1 1 LEGS SET OF 4/CMS,2001
Toastmaster
®
PAGE 19
Page 21

GRIDDLES
PARTS IDENTIFICATION AND FUNCTIONS - GRIDDLE ELECTRIC 73 SERIES
1
2
3
5
8
6
9
4
7
PAGE 20
Toastmaster
®
Page 22

GRIDDLES
PARTS IDENTIFICATION AND FUNCTIONS - GRIDDLE ELECTRIC 73 SERIES
QUANTITY
Key Part Number 24 36 48 Description
1 T3001872 2 HEATER 240V 5200W
T7336B8714 4 HEATER 240V 4100W
T7348B8714 5 HEATER 240V 4300W
2 T3004257 2 4 5 THERM GRIDDLE 150-450F
3 TA710E8751 2 4 5 KNOB TSTAT 150/450F
4 1800210 1 POLYPANEL 7324
1800211 1 POLYPANEL 7336
1800212 1 POLYPANEL 7348
5 1000705 1 1 1 BLOCK,TERM BLK-RAW
6 T8001051 1 WIRE SET 7324
1000727 1 WIRE SET 7336
T7338B0909 1 WIRE SET 7348
7 1000106 2 4 5 LIGHT PILOT 1/3 250 AMBER
8 1850152 2 4 5 KNOB GUARD 130X68X8DIA
9 S1172857 1 1 1 LEGS SET OF 4/CMS,2001
Toastmaster
®
PAGE 21
Page 23

GRIDDLES
By:
MIDDLEBY PHILIPPINES CORPORATION
WARRANTY
All equipment manufactured by Toastmasster Commercial which is sold under the “Toastmaster” trademark and used for commercial purposes is warranted against defects in materials and workmanship. The
warranty runs for one year** (see exception) from the date of the original purchaser only. ALL OTHER WARRANTIES, EXPRESS OR IMPLIED, STATUTORY OR OTHERWISE, INCLUDING WITHOUT LIMITATION
ANY IMPLIED WARRANTY OR MERCHANT ABILITY OR FITNESS FOR PURPOSE ARE EXCLUDED. Seller
shall in no event be liable for direct, indirect or consequential damages in connection with Toastmaster Commercial products.
Seller’s obligation under this warranty is limited to the repair of defects without charge, by a factory authorized service agency or one of its sub-service agencies. Such repair service will be provided on customer’s
premises except in the case of portable products.
Models that are considered portable (devices with cord and plugs) must be taken or shipped to the closes
authorized service agency, transportation chrages prepaid.
This warranty is not effective if damage occurs because of accident, carelessness, improper installation,
lack of proper set-up supervision when required or because equipment is installed on a different voltage,
steam or gas service then designated on the equipment nameplate, or if the equipment is installed or operated
in any manner contrary to the installation and operation instructions. In these cases, repair will be made at a
reasonable cost. Work performed by unauthorized personnel or service agencies voids this warranty.
Authorized service agencies are located in principal cities throughout the United States. This warranty is
valid in the 50 United States and is void elsewhere. Please consult your classified telephone directory, your
food service equipment distributor, or write the Factory Service Department, Toastmaster, 1400 Toastmaster
Drive, Elgin, Illinois 60120, for information and other details concerning service of this warranty.
* “Toastmaster” is a registered trademark.
** Exceptions: Model SS2, Sink Sanitizer warranty runs 90 days.
PAGE 22
Page 24

GRIDDLES
Section I
Section II
INDEX
Page
General Information .................................................................................. 1
A. Description of Models .............................................................. 2-4
Installation & Testing
A. Unpacking ................................................................................ 5
B. Installation & Electrical Connection .......................................... 6-7
1. Free Standing or Counter Top Models
2. Model 7324
3. Use of accessory stand
Section III
Operation
Section IV
Cleaning ................................................................................................... 12
Accessories .............................................................................................. 13
Capacity ................................................................................................... 13
Electrical Data .......................................................................................... 14
C. Testing the Installation .............................................................. 8
A. Controls ..................................................................................... 8
B. Seasoning the griddle ................................................................ 9
C. Operating hints .......................................................................... 10
1. Cooking guide ................................................................. 11
Toastmaster
Dimentional Data and Diagrams .............................................................. 15-17
Parts List .................................................................................................. 18-21
®
PAGE 23
Page 25

GRIDDLES
GRIDDLES
A product with the Toastmaster name incorporates the best in durability and low maintenance. We
all recognize, however, that replacement parts and occasional professional service may be necessary to extend the useful life of this unit. When service is needed, contact a Toastmaster Authorized Service Agency, or your dealer. To avoid confusion, always refer to the model number. Serial
number, and type of your unit.
Philippine Factory : 113 Technology Ave., Laguna Technopark, Binan
Laguna, Philippines, 4024 * Tel. Nos. (632) 520-8170 to 79 Fax No.: (632) 520-8191
USA Factory : 1400 Toastmaster Drive, Elgin, IL 60120 Tel. (847) 741-3300
~
Toastmaster
PAGE 24
® MANUAL GRDL0804A710-7348
 Loading...