

Page 1

Instruction Manual
HORN MOUNTING BRACKET
HY-940
General Description
The HY-940 horn mounting bracket is designed exclusively for mounting the TOA LE-940 constant
directivity horn onto the SB-38W low frequency, vented (bass-reflex) enclosure when the standard speaker
system (GS-3806W) is configured.
Parts List
Bracket No. 1 1
Bracket No. 2 1
Bracket No. 3 1
Bracket No. 4 1
Bracket No. 5 1
Supplied Accessories :
1. Hex. bolt (M8 x 20) 4
2. Hex. bolt (M8 x 30) 9
3.
Hex.
nut
(M8)
2
4. Flat washer (W8) 15
5. Spring lock washer (SW8) 13
Figure 1
Handling Precautions
The HY-940 is designed exclusively for system configuration of the standard speaker system GS-3806W,
and do not use for other than this application.
TOA takes no responsibility for accidents or injuries caused by faulty mounting methods or poorly selected
mounting locations.
Page 2
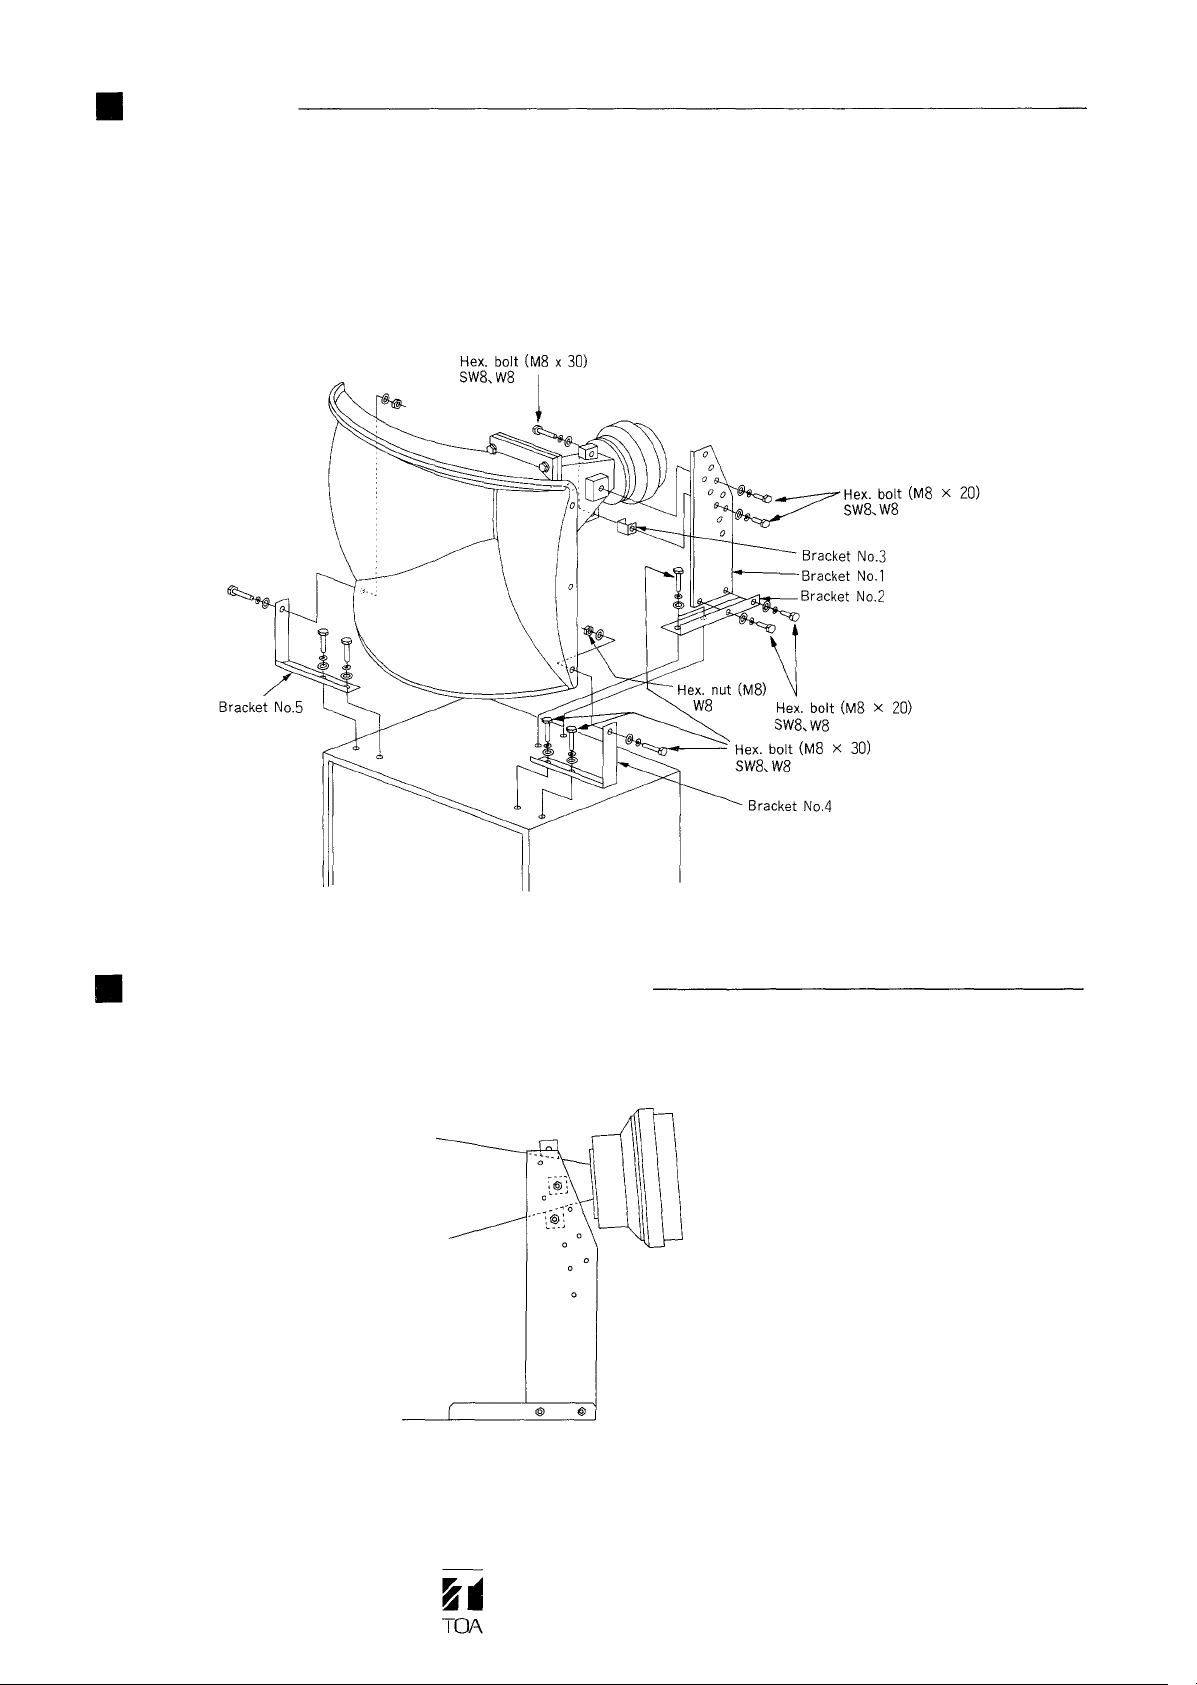
Installation
1. Referring to Figure 2, securely mount the horn using the parts supplied with the bracket set.
2. Anchor nuts have been pre-installed in the enclosure's mounting holes to permit attachment from the
outside.
Note: When mounting the horn using the bracket No.1, mount it with the hexagon bolts (M8x20) at two
points as shown in Figure 2.
First point : mount the horn using the bracket No.1 directly.
2nd point : mount it using the bracket No.3 together with the bracket No.1.
Figure 2
Horn Mounting Angle Adjustment
As shown in Figure 3, the horn mounting angle can be adjusted 10° up or down from horizontal in 5° steps.
This mounting example shows that the horn mounting angle is adjusted 5° down from horizontal.
Figure 3
TOA Corporation
KOBE, JA PAN
133-01-336-60
Page 3

* Please see the reverse side for English manual.
HY-940
Page 4

 Loading...