

Page 1
Please follow the instructions in this manual to obtain the optimum results from this unit.
We also recommend that you keep this manual handy for future reference.
HY-0421WL
SPEAKER MOUNTING BRACKET
INSTRUCTION MANUAL
GENERAL DESCRIPTION
The HY-0421 bracket is used to mount the speaker systems ES-0422, ES-0424, and ES-0426 on the wall.
The maximum speaker weight that can be connected to this bracket is 18 kg.
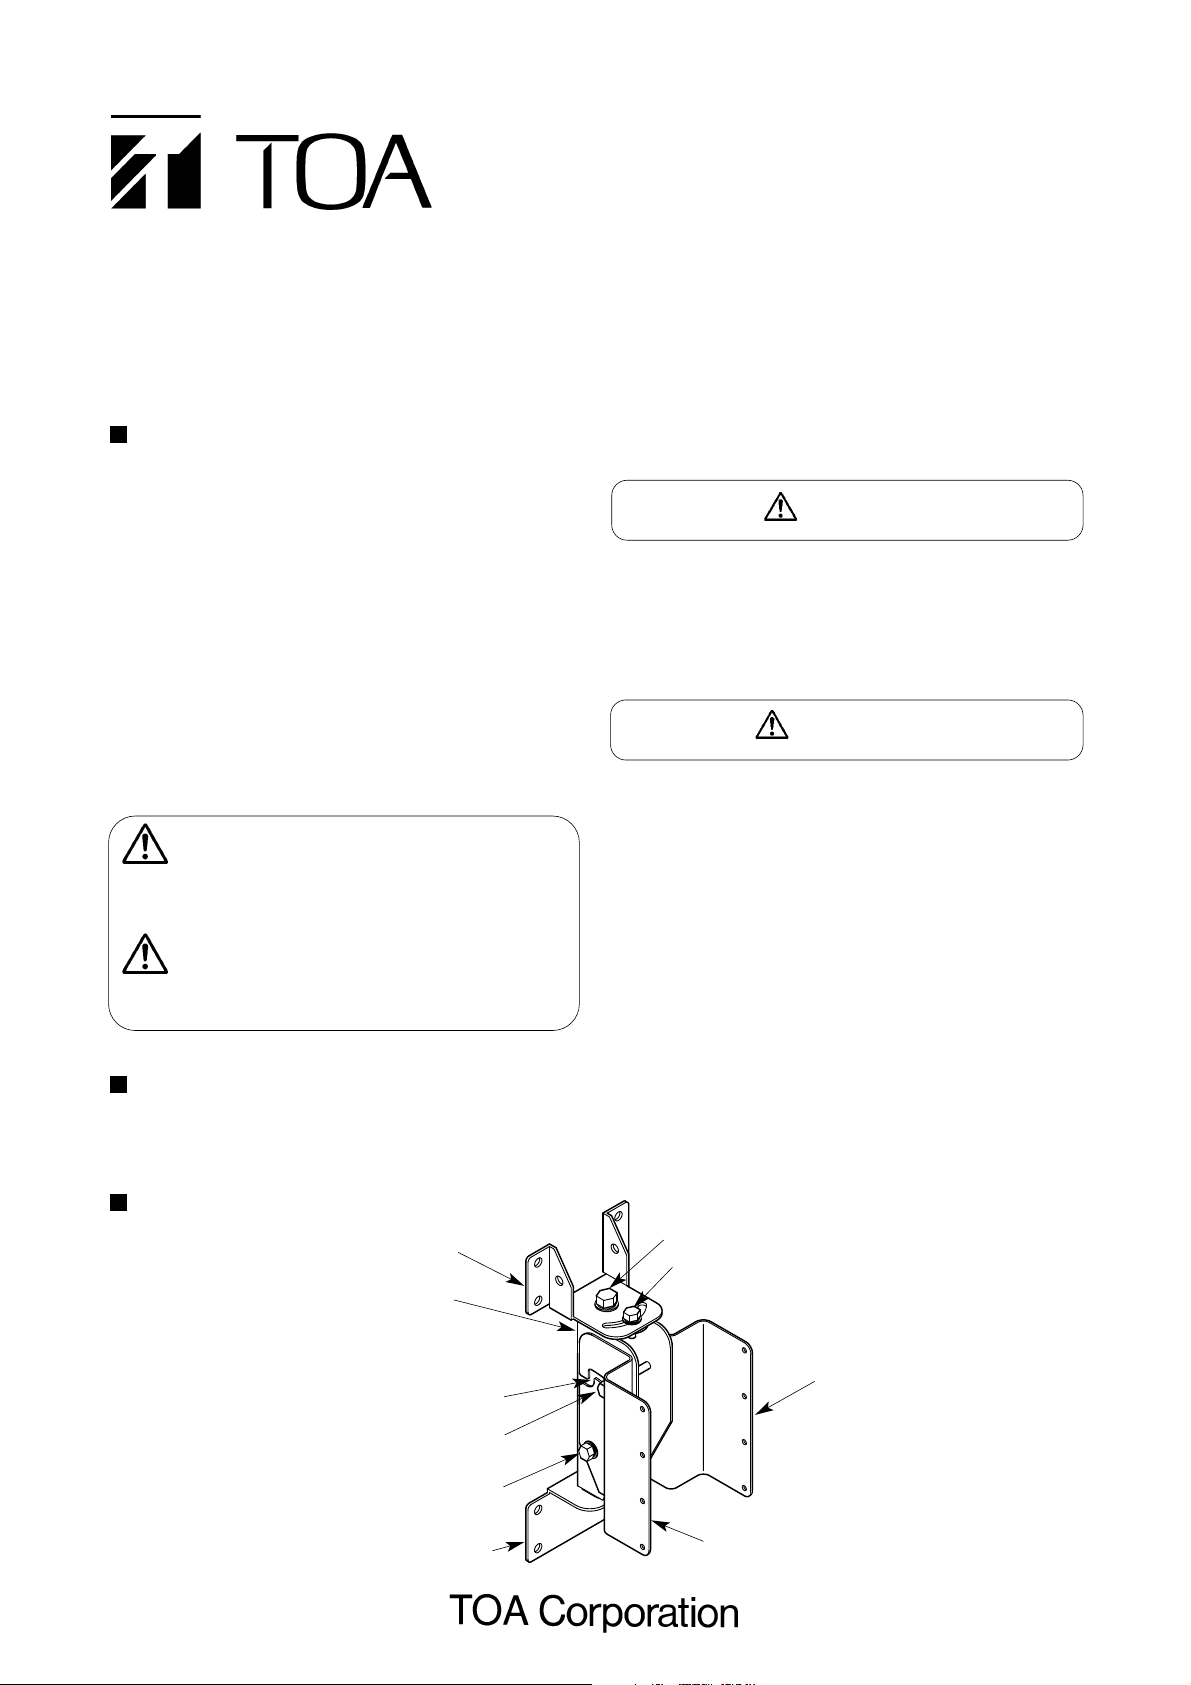
PART NAMES
Upper Wall Bracket
Lower Wall Bracket
Junction Frame
Vertical Angle Adjustment Slot
Angle Adjustment Bolt A (2 M8 sems)
Axis Bolt A (2 M8 sems)
Axis Bolt B (M10 sems, 1 each on top/bottom)
Angle Adjustment Bolt B (1 M8 sems)
Speaker Bracket L
Speaker Bracket R
SAFETY PRECAUTIONS
• Be sure to read the instructions in this section carefully
before use.
• Make sure to observe the instructions in this manual as
the conventions of safety symbols and messages
regarded as very important precautions are included.
• We also recommend you keep this instruction manual
handy for future reference.
Safety Symbol and Message Conventions
Safety symbols and messages described below are used
in this manual to prevent bodily injury and property
damage which could result from mishandling. Before
operating your product, read this manual first so you are
thoroughly aware of the potential safety hazards as well as
understand the safety symbols and messages.
WARNING Indicates a potentially hazardous
situation which, if mishandled, could result in death or
serious personal injury.
CAUTION Indicates a potentially hazardous
situation which, if mishandled, could result in moderate
or minor personal injury, and/or property damage.
• Install the unit only in a location that can structurally
support the weight of the unit and the speaker.
Doing otherwise may result in the speaker falling down
and causing personal injury and/or property damage.
• Do not hang from the speaker. It could detach and fall,
causing personal injuries.
WARNING
CAUTION
Page 2
133-05-301-00
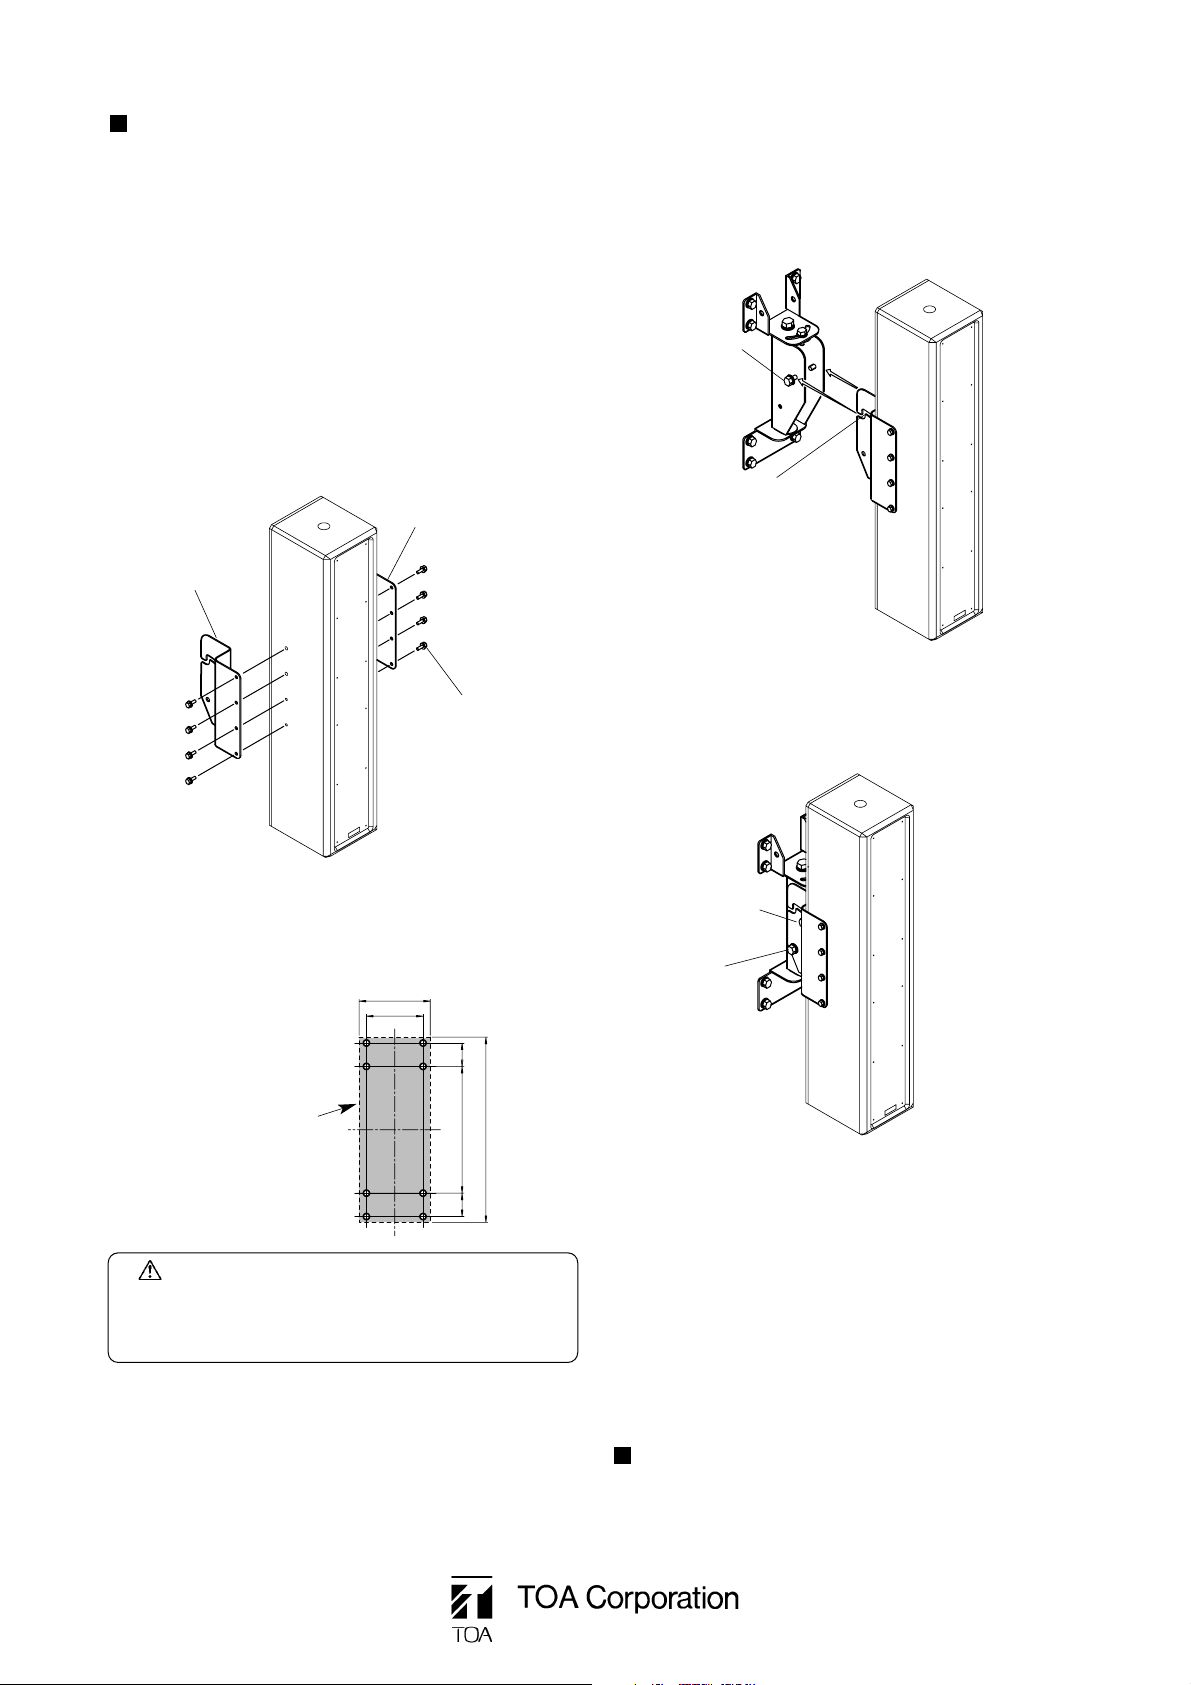
MOUNTING THE SPEAKER
1. Remove two axis bolts A, then loosen two angle
adjustment bolts A (for vertical angle adjustment) to
detach Speaker Brackets L and R from the junction
frame. (Loose the angle adjustment bolts A with their
heads enough sticking out to grasp the bracket between
the junction frame and sems* washer.)
WARNING
Check to ensure that the mounting surface is strong
enough to withstand the weight of a load before
beginning installation.
Note
Take care not to loosen the speaker bracket fixing bolts
extremely.
2. Remove eight M5 screws located on the sides (four on
each side) of the speaker, then secure Speaker
Brackets L and R to the sides of the speaker using the
supplied speaker mounting bolts (8 M5 sems).
Notes
• The nuts and bolts required to mount the speaker to the
ceiling or wall are not supplied with the unit. Use nuts
and bolts suited to the materials and structure of the
wall.
• Be sure to secure the junction frame assembly at eight
places.
3. Secure the junction frame assembly (consisting of the
junction frame and Upper and Lower Wall Brackets) to
the wall by attaching the two Wall Brackets to the wall
using eight bolts.
4. Fit the vertical angle adjustment slots in Speaker
Brackets L and R attached to the sides of the speaker
onto two angle adjustment bolts A inserted into the
junction frame, then secure the speaker temporarily.
ACCESSORIES
Speaker mounting bolt (M5 sems) ..................... 8
5. Lightly turn clockwise two axis bolts A to secure
Speaker Brackets L and R. Set the speaker's vertical
angle, and tighten the adjustment bolts A and axis bolts
A.
6. Adjust the speaker's horizontal angle by slightly
loosening both the axis bolts B and angle adjustment
bolt B (for horizontal angle adjustment). Then, retighten
all bolts after adjustment.
7. To ensure safety, retighten all the bolts after speaker
angle adjustment completion.
152
121
50
271
396
50
Dimensions for mounting
Mounting surface
* Preassembled bolt and washer
Angle Adjustment
Bolt A
Speaker Bracket L
Speaker Bracket R
Speaker mounting bolt :
Sems (preassembled bolt
and washer)
unit : mm
Vertical Angle Adjustment Slot
Angle Adjustment
Bolt A
Axis Bolt A
 Loading...