

Page 1
C-DR091D
C-DR161D
HARD DISK DRIVE
INSTALLATION PROCEDURE MANUAL
1. RECOMMENDED HARD DISK DRIVE
Made by Hitachi Global Storage Technologies
Note
Be sure to use the recommended hard disk drive. Failure to do so could cause a recognition failure or data
reading/writing errors.
2. HARD DISK DRIVE (HDD)INSTALLATION PROCEDURE
Notes
• Be careful when handling a HDD.
• The HDD is a very precise device and can be damaged by static electricity, shocks, and vibrations.
2.1. Settings
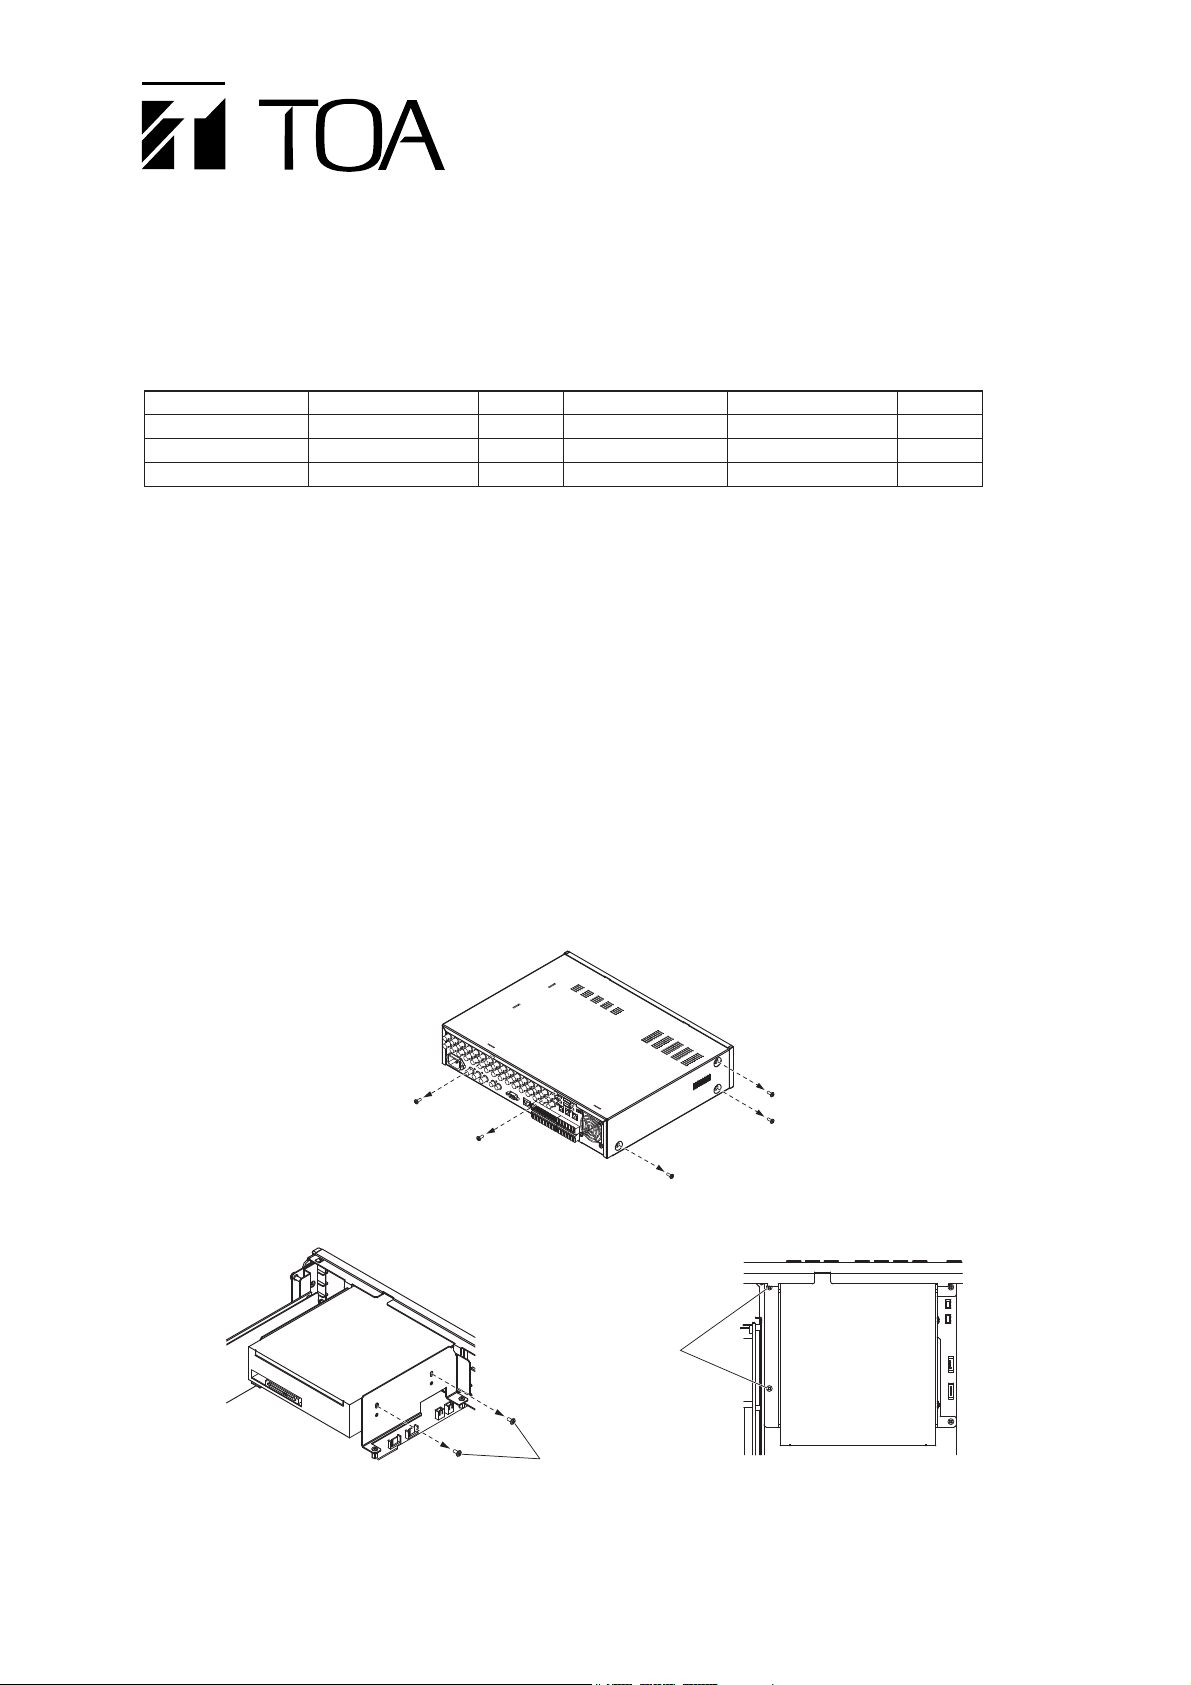
DIP switch setting and cable connection must be changed when installing only a single HDD. Detach the DVD
drive with the following procedures, then change the setting.
1. Remove 8 screws on the rear and both sides of the case, then detach the case.
Replace the removed case after all work is complete.
2. Remove the screws, then detach the DVD drive.
Series
Deskstar 7K1000.B
Deskstar 7K1000.B
Deskstar 7K1000.B
Model Number
HDT721025SLA380
HDT721050SLA360
HDT721010SLA360
Capacity
250 GB
500 GB
1 TB
Series
Deskstar 7K1000.C
Deskstar 7K1000.C
Deskstar 7K1000.C
Model Number
HDS721025CLA382
HDS721050CLA362
HDS721010CLA332
Capacity
250 GB
500 GB
1 TB
DVD drive
Remove.
Remove.
DVD drive
Page 2
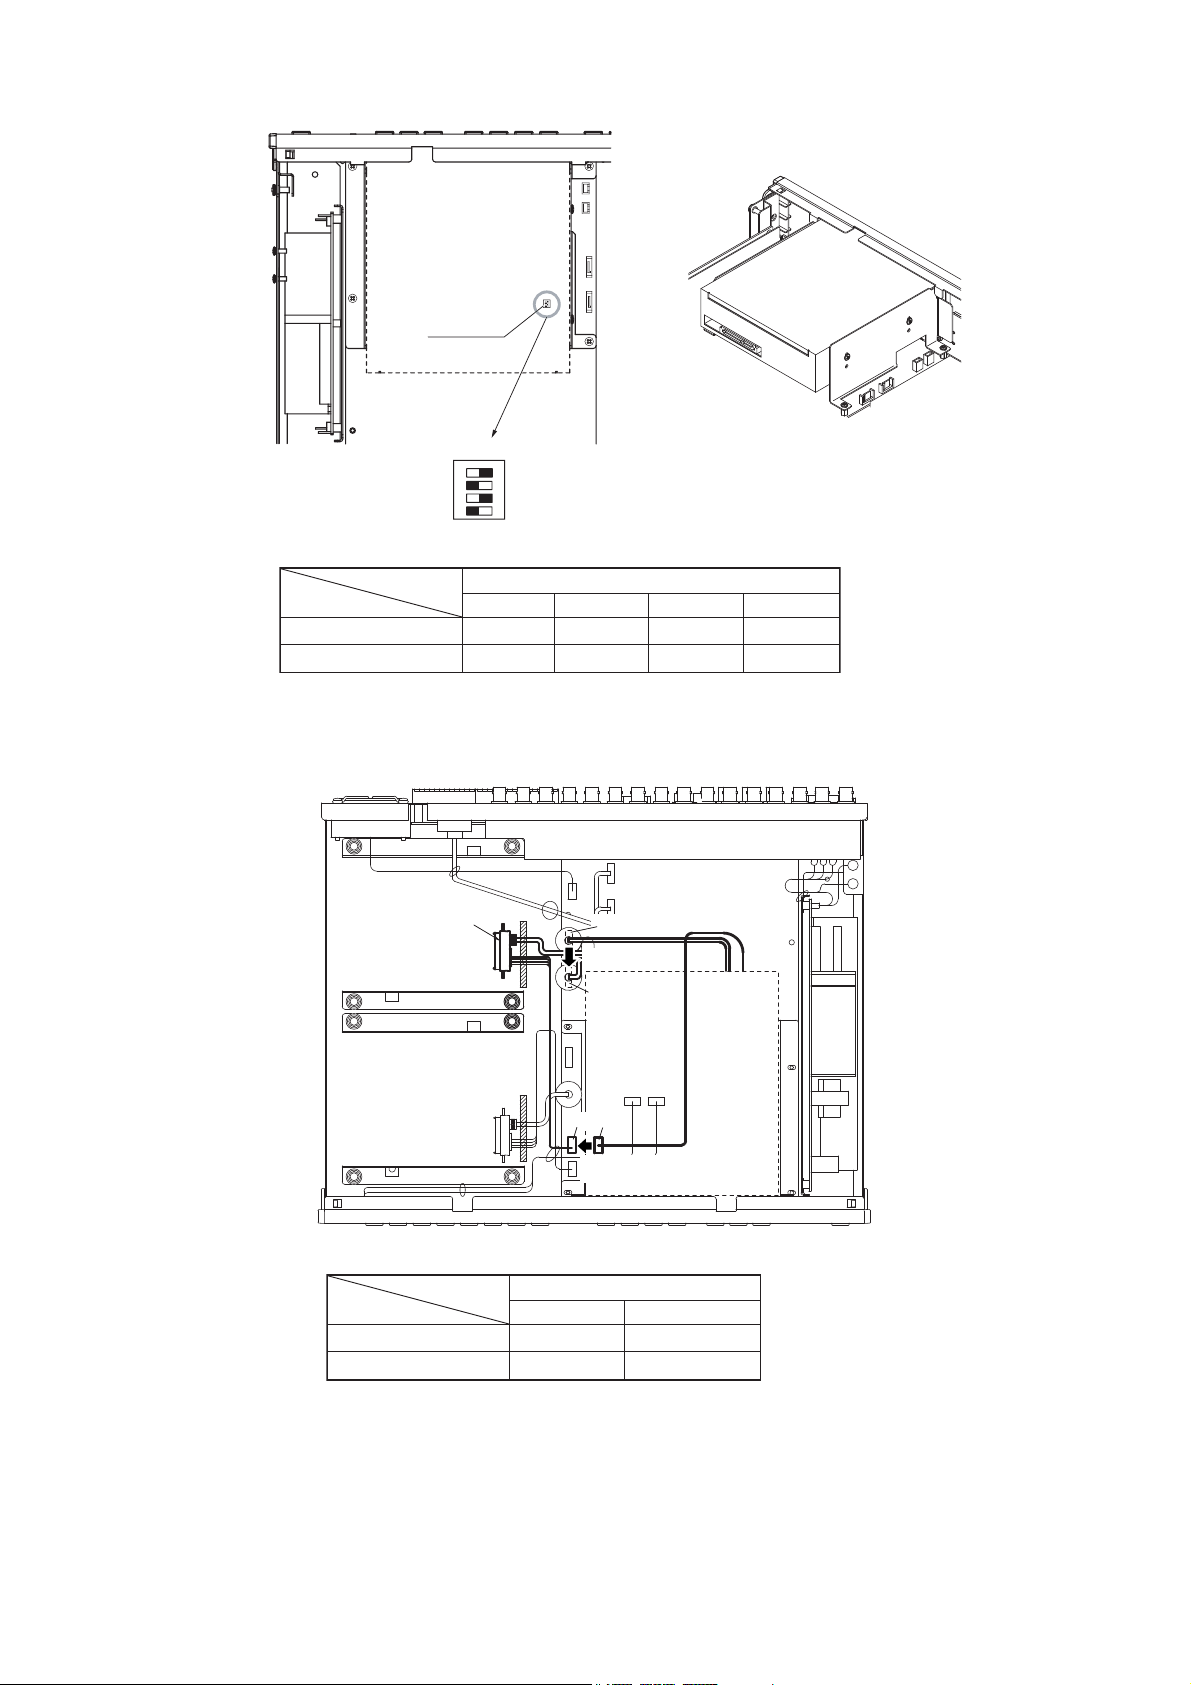
3. Change the DIP switch setting as shown in the table below.
5. Replace the DVD drive removed in Step 2.
4. Change the cable connection as shown in the below.
(
DVD drive
DIP switch
Factory default setting
Factory default setting
Setting after change
DSW 1
1 2 3 4
)
ON
1 2 3 4
ON
DIP switch setting (DSW 1
1
ON
OFF
2
OFF
ON
)
3
ON
Unchanged
DVD drive
4
OFF
Unchanged
Remove.
DVD drive connection
signal
Factory default setting
Setting after change
CN2004
CN2003
CN2004
Change.
CN2003
CN4 CN5
Change.
(
DVD drive
power supply
CN5
CN4
)
Page 3

Note: When installing 2 HDDs, be sure to install the ones with the same capacity.
2.2. HDD Installation
1. Remove the mounting brackets attached inside of the Digital Video Recorder (DVR), then attach them to
the HDD. Secure the HDD to the chassis.
2. Connect both the signal cable and power supply cable to the HDD.
HDD
HDD
[
HDD
In case of a single HDD
]
Page 4

6. Move the cursor with the and keys to select "EXECUTE," then press the MENU key.
"YES" and "CANCEL" indications are displayed. "DISK MODE" is factory-preset to "NORMAL."
7. Move the cursor with the and keys to select "YES," then press the MENU key.
The confirmation message is displayed after hard disk initialization completion.
8. Select "OK," then press the MENU key.
The display returns to the hard disk initialization screen.
9. Press the key several times to exit the Menu screen.
The display returns to the normal screen.
10. Turn off the DVR power.
Place the DVR in standby mode by pressing the power key for 2 seconds or more, then disconnect the
power supply plug from the wall outlet.
133-41-006-2A
URL: http://www.toa.jp/
3. HDD INITIALIZATION PROCEDURE
Initialization is required after installing a new HDD.
Unless initialization is executed, hard disk error occurs, and the DVR cannot be used.
Note
Do not disconnect the power supply plug while the power key is lighting. Be sure to place the DVR in standby
mode before removing the power supply plug.
1. Connect the power supply plug to the AC wall outlet.
The DVR is placed in standby mode, and the power key flashes at about 5-second intervals.
2. Press the power key in standby mode.
The screen is displayed and automatically changes as shown below.
The power key flashes green during system check.
Note: The DVD cannot be switched on for about 20 seconds after it has been placed in standby mode.
The power key changes from flashing to steady ON after system check completion. In this event, the
buzzer sounds and the failure indicator flashes. To stop the buzzer, press the ALARM RESET key.
3. Hold down the MENU key for 2 seconds or more.
The Main menu screen is displayed.
4. Move the cursor with the and keys to select "MAINTENANCE," then press the MENU key.
The Maintenance screen is displayed.
5. Select "HD INITIALIZE," then press the MENU key.
The hard disk initialization setting screen is displayed.
Ver .
SYSTEM CHECK IN PROGRESS .
PLEASE WAI T.
 Loading...