

Page 1
Thank you for purchasing TOA’s Flush Ceiling Mounting Bracket. Please carefully follow the instructions
in this manual to ensure long, trouble-free use of your equipment.
FLUSH CEILING
MOUNTING BRACKET
C-BC704U
INSTRUCTION MANUAL
1. SAFETY PRECAUTIONS .......................... 2
2. GENERAL DESCRIPTION ........................ 3
3. HANDLING PRECAUTIONS ..................... 3
4. INSTALLATION ......................................... 4
5. SPECIFICATIONS ..................................... 8
Accessories ................................................ 8
TABLE OF CONTENTS
Page 2
2
Indicates a potentially hazardous situation which, if mishandled, could
result in death or serious personal injury.
WARNING
When Installing the Unit
• Avoid installing or mounting the unit in unstable locations, such as on a rickety table or a slanted surface.
Doing so may result in the unit falling down and causing personal injury and/or property damage.
• Install the unit only in a location that can structurally support the weight of the unit and the mounting bracket.
Doing otherwise may result in the unit falling down and causing personal injury and/or property damage.
• Do not use the bracket for mounting any camera other than the combination camera. Failure to follow this
instruction could cause the camera to fall and result in personal injury.
• Ensure that all screws and fixing mechanism are securely tightened. If they are not tightened or firmly
secured after installation, the unit could fall down, possibly resulting in personal injury.
• Do not use other methods than specified to mount the bracket. Extreme force is applied to the unit and the
unit could fall off, possibly resulting in personal injuries.
• Attach the safety wire to the unit. If not attached, the unit could fall off, resulting in personal injury.
• Use nuts and bolts that are appropriate for the ceiling's or wall's structure and composition. Failure to do so
may cause the unit to fall, resulting in material damage and possible personal injury.
• Tighten each nut and bolt securely. Ensure that the bracket has no loose joints after installation to prevent
accidents that could result in personal injury.
• Avoid installing the unit in locations exposed to sea breeze or corrosive gas. The unit or its mounts may be
subject to corrosion, that might cause it to fall or result in other accidents.
• Do not mount the unit in locations exposed to constant vibration. The mounting screws and/or bolts may be
loosened by excessive vibration, potentially causing the unit to fall, which could result in personal injury.
1. SAFETY PRECAUTIONS
• Before installation or use, be sure to carefully read all the instructions in this section for correct and safe
operation.
• Make sure to observe the instructions in this manual as the conventions of safety symbols and messages
regarded as very important precautions are included.
• We also recommend you keep this instruction manual handy for future reference.
Safety Symbol and Message Conventions
Safety symbols and messages described below are used in this manual to prevent bodily injury and property
damage which could result from mishandling. Before operating your product, read this manual first and
understand the safety symbols and messages so you are thoroughly aware of the potential safety hazards.
Page 3

3
Indicates a potentially hazardous situation which, if mishandled, could
result in moderate or minor personal injury, and/or property damage.
CAUTION
When Installing the Unit
• To avoid electric shock, be sure to switch off the power before power supply wiring work.
• Leave the installation of the unit to your TOA dealer because the installation requires expert experience and
skills. The unit may fall off if incorrectly installed, resulting in possible personal injury.
• Avoid touching the unit's sharp metal edge to prevent injury.
When the Unit is in Use
• Do not stand or sit on, nor hang down from the unit as this may cause it to fall down or drop, resulting in
personal injury and/or property damage.
• Have the unit checked periodically by the shop from where it was purchased. Failure to do so may result in
corrosion or damage to the unit or its mounting bracket that could cause the unit to fall, possibly causing
personal injury.
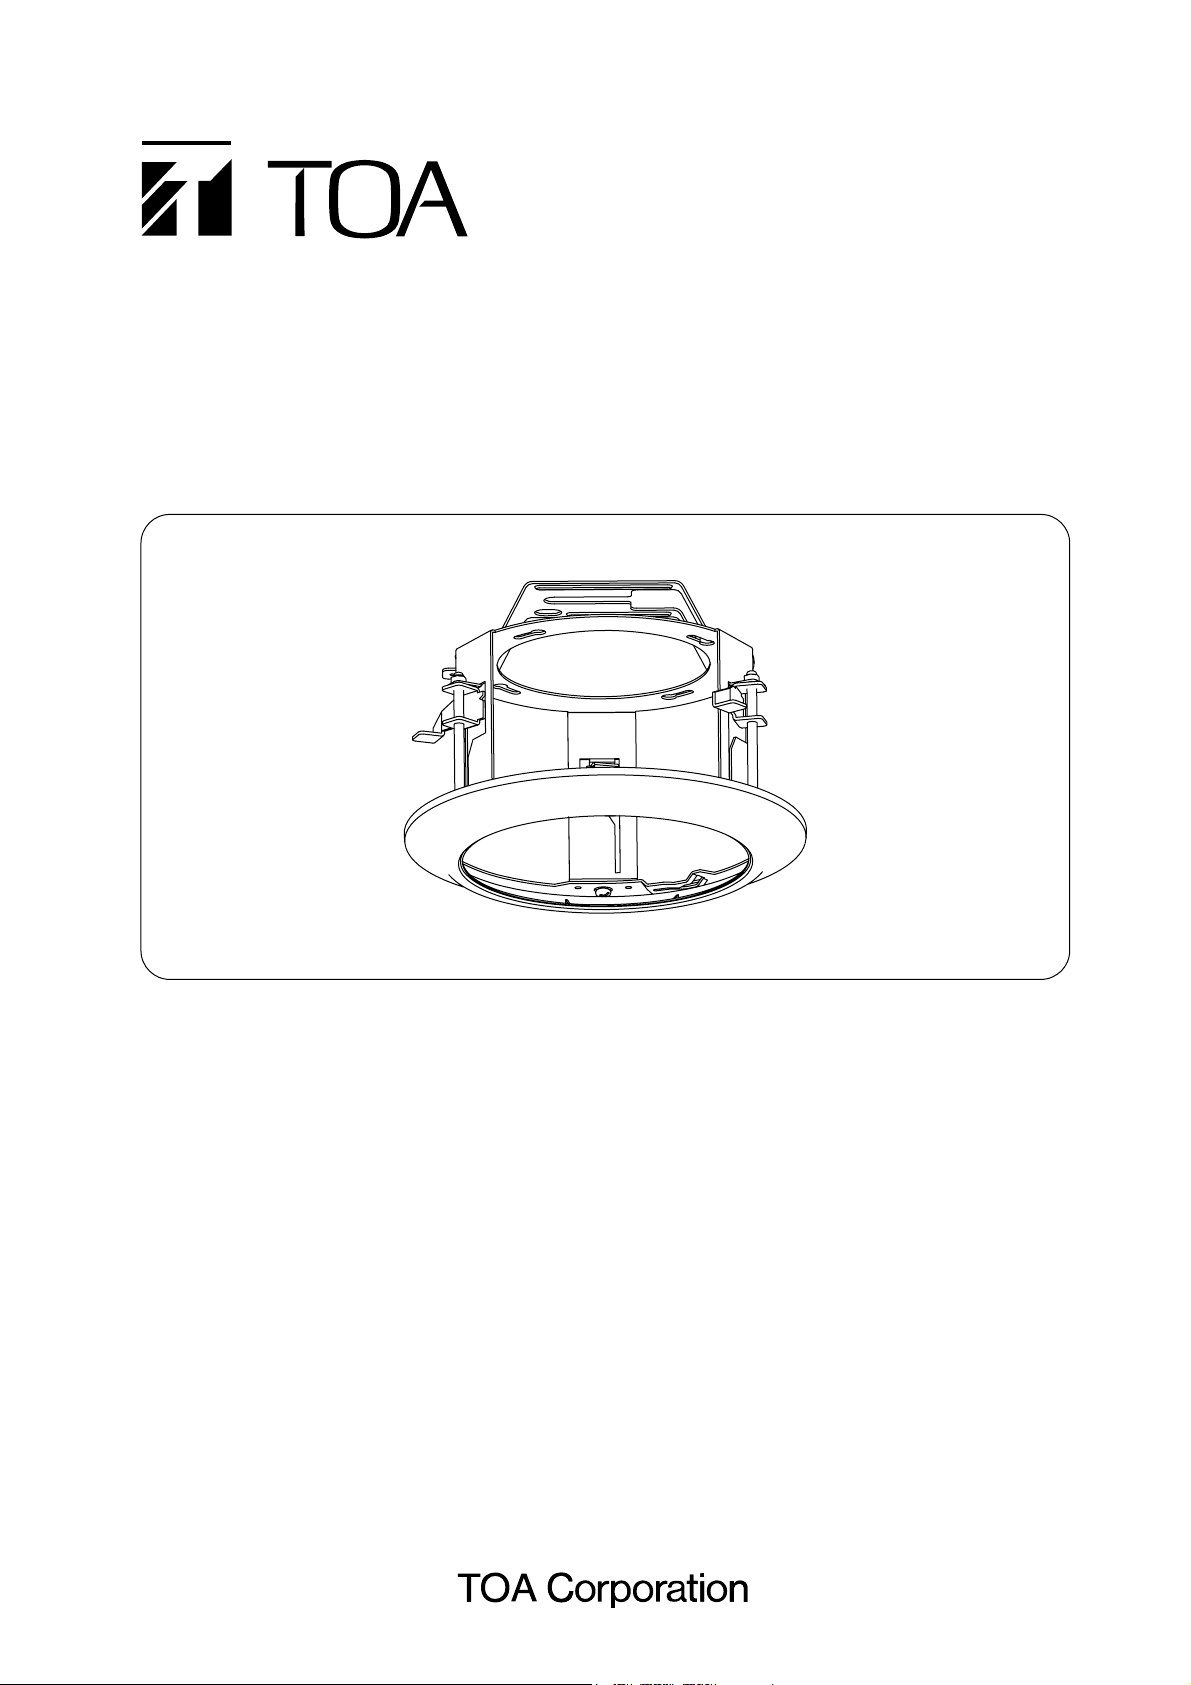
2. GENERAL DESCRIPTION
The TOA C-BC704U Flush Ceiling Mounting Bracket is designed to mount the C-CC704 Combination
Cameras in a double-layer gypsum board ceiling that is not tough enough for mounting screws to be securely
inserted in. The C-BC704U also allows the camera's exposed portion to be reduced.
3. HANDLING PRECAUTIONS
• Do not install the unit in locations exposed to constant vibration. Do not install the unit in a vehicle nor ship.
• Be sure to use the safety wire when mounting the unit.
• Do not give the unit a great shock or vibration, as this will cause the unit to fail or break.
• The Combination Camera is solely designed for suspended installation. The dome of the mounting bracket
must be mounted facing down and perpendicular to a horizontal ceiling surface. Take special care not to
install the dome at a tilted angle.
• Be sure to use the specified screws to mount the combination camera and Flush ceiling mounting bracket,
and ensure that they have no loose joints after installation.
• Use the unit in the attic that is at least 150 mm (5.91") in height.
• The ceiling board to which the unit can be mounted is 30 mm (1.18") or less in thickness.
Page 4

4
4. INSTALLATION
1. Make a 188 -192 mm (7.4" -7.56") diameter hole in the ceiling board.
2. Install 2 anchor bolts: one for fixing the Flush ceiling mounting bracket and another for connecting the
safety wire in the attic.
Notes
• Install the anchor bolt for fixing the Flush ceiling mounting bracket in the center of the 188 -192 mm
(7.4" -7.56") diameter hole.
• An existing anchor bolt, if near the mounting position, may also be used for connecting the safety wire.
3. Connect the supplied safety wire to the anchor bolt for mounting the safety wire.
4. Connect the other end of the safety wire to the Flush ceiling mounting bracket.
Anchor bolt for fixing the
Anchor bolt for connecting
the safety wire
Flush ceiling mounting bracket
Attic
Ceiling board
Anchor bolt for connecting
the safety wire
ø188 – 192 mm
(7.4" – 7.56")
150 mm (5.91") or more
30 mm (1.18") or less
Attic
3
Safety wire
4
Flush ceiling
mounting bracket
Page 5

5
5. Passing the Flush ceiling mounting bracket through the mounting hole, place it in the attic, then secure it
with 3 ceiling board mounting screws.
Turning the ceiling board mounting screws clockwise lowers the ceiling holder, which clamps the ceiling
board. Fix the Flush ceiling mounting bracket to the anchor bolt in the attic.
6. Pull out the cables through the ceiling hole, then connect them to the composite cable supplied with the
C-CC704.
Note: Be sure to seal and insulate each connection of the cable with waterproof tape.
7. Remove the buffer material for transportation from the C-CC704's camera unit.
Flush ceiling
mounting bracket
Ceiling holder
Ceiling board
Turn clockwise.
Ceiling board
mounting screw
Buffer material
C-CC704's camera unit
Page 6

6
8. Secure the dome cover to the camera unit.
9. Attach the decorative frame and camera mounting bracket supplied with the unit to the camera section
(camera unit + dome cover).
Dome cover fixing screw
(supplied with the C-CC704)
C-CC704's camera unit
Dome cover
Camera fixing screw (accessory)
Camera mounting bracket
(accessory)
Decorative frame
C-CC704's camera section
(camera unit + dome cover)
Page 7

7
10. Connect the safety wire secured to the camera unit to the Flush ceiling mounting bracket.
11. Connect the composite cable (connected in Step 6) from the ceiling to the camera unit.
Safety wire
Composite cable
Page 8

Ver.1.00
Main body: Surface-treated steel plate
Decorative frame: ABS resin, light gray, paint
ø
207x 144 (H)mm
(
ø8.15" x 5.67" (H
))
450 g (0.99 lb
)
Finish
Dimensions
Weight
• Accessories
5. SPECIFICATIONS
Note: The design and specifications are subject to change without notice for improvement.
URL: http://www.toa.jp/
12. Insert the tabs of the camera mounting bracket attached to the C-CC704's camera section into the slots in
the Flush ceiling mounting bracket, then turn the camera unit clockwise until it locks into place.
13. Secure the decorative frame fixing screw hole with the supplied screw.
Safety wire ................................................. 1
Camera fixing screw ................................... 3
Decorative frame fixing screw .................... 1
Camera mounting bracket .......................... 3
Decorative frame section
Decorative frame fixing screw
(accessory)
 Loading...