

Page 1
- 20 -
MEMO
- 1 -
TA series
V106
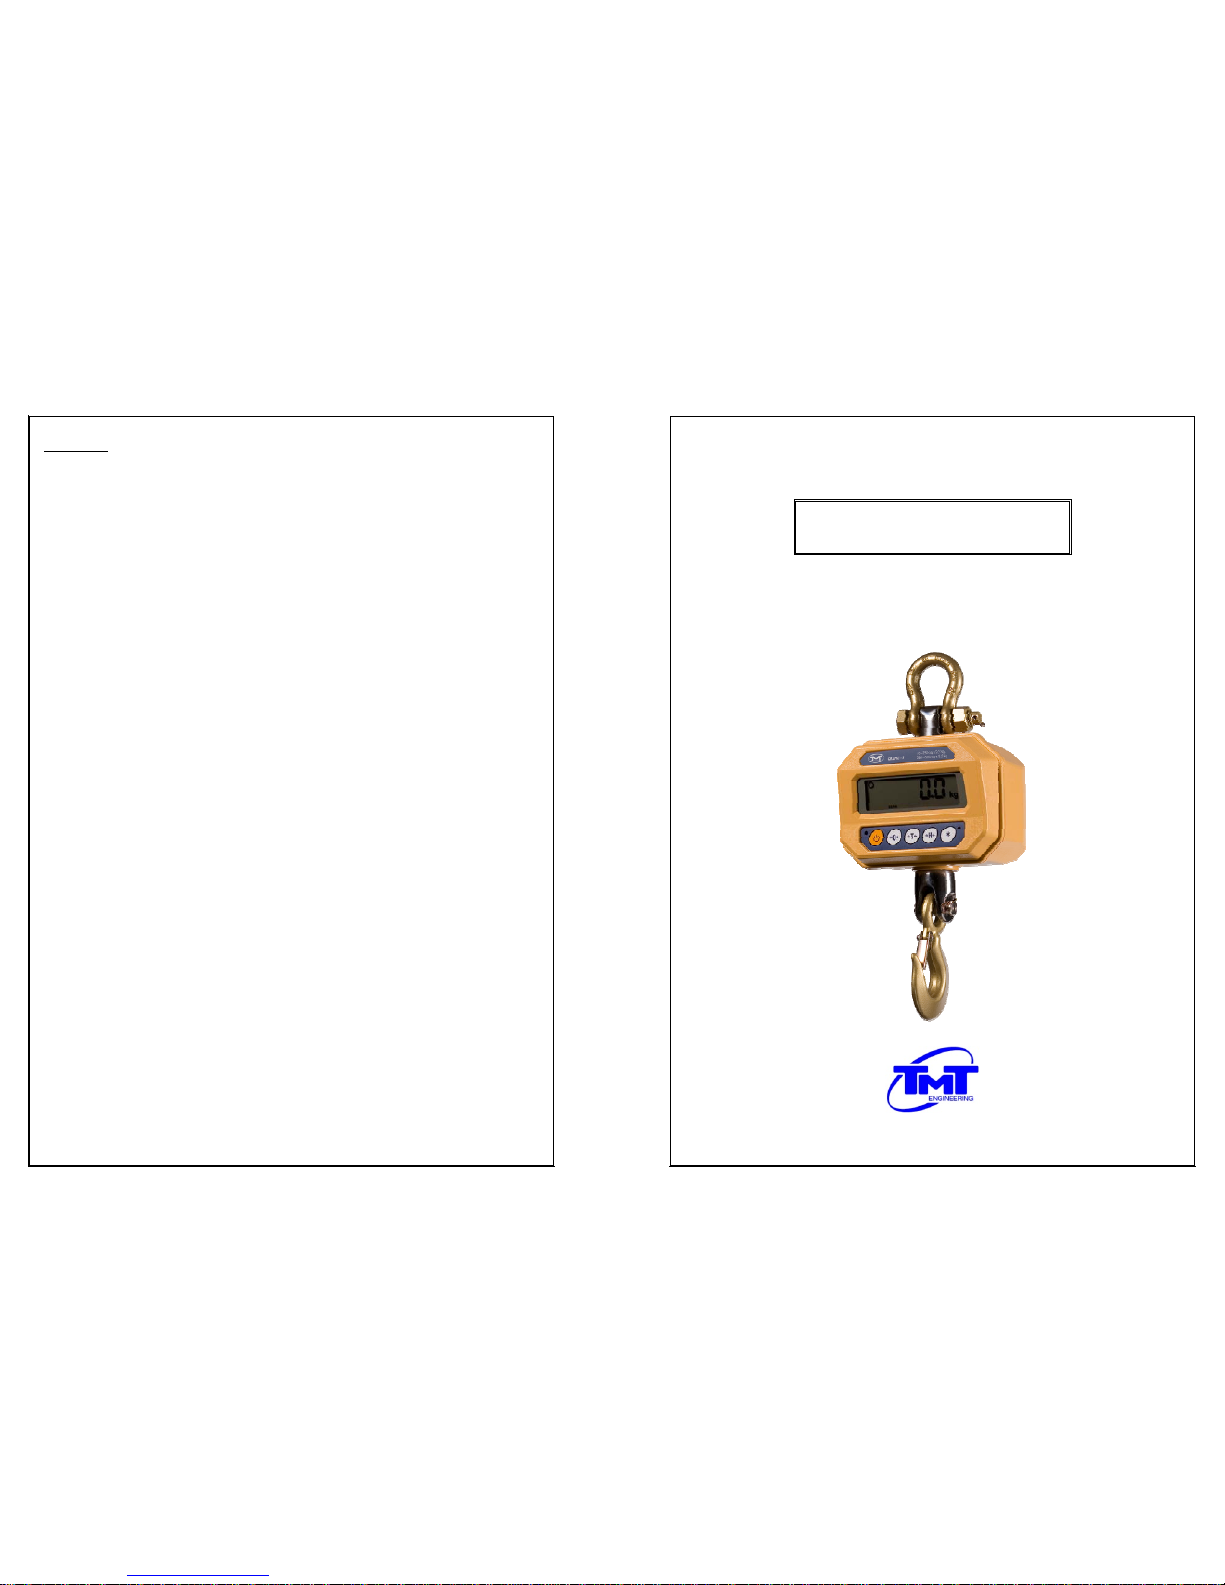
CRANE SCALE
Operating Manual
www.tmteng.com
Page 2

- 18 -
◆ Wireless specification
RF frequency range 2400 ~ 2483.5 MHz
Output power Max. 4dBm
Channel width 2 MHz
Frequency offset < ±30ppm
Transmit data rate 250Kbps,500Kbps
Receiver sensitivity -99dBm (PER <1%)
Maximum input level 0dBm
RF In/out impedance 50 ohm (TXRF, RXRF)
Spurious(2nd harmonics) < -30dBm
Radio link effective range
Approx. 100M (Open space)
- 3 -
1. Instruction
This operating manual is the specifications for our TA series.
The TA series is the product of years of design, development, and complete testing.
This TA series has been designed with reliability, under rigid quality control and with
outstanding performance.
This MANUAL included with basic technical information about composition of hardware
and programmatic functions.
■ Precaution
Please check if the safety hook is connected well before you install our TA series, so
that the SHACKLE is not separated.
◆ Don’t install the TA series in direct sunlight.
◆ Avoid sudden temperature changes, vibration, wind, water, or excessive dirt.
◆ Avoid from the shock of excessive weight.
◆ Place the scale away from water.
◆ Weigh a thing on the scale in vertical direction as follows.
(Refer to following picture.)
Page 3
- 16 -
9. Remote Control
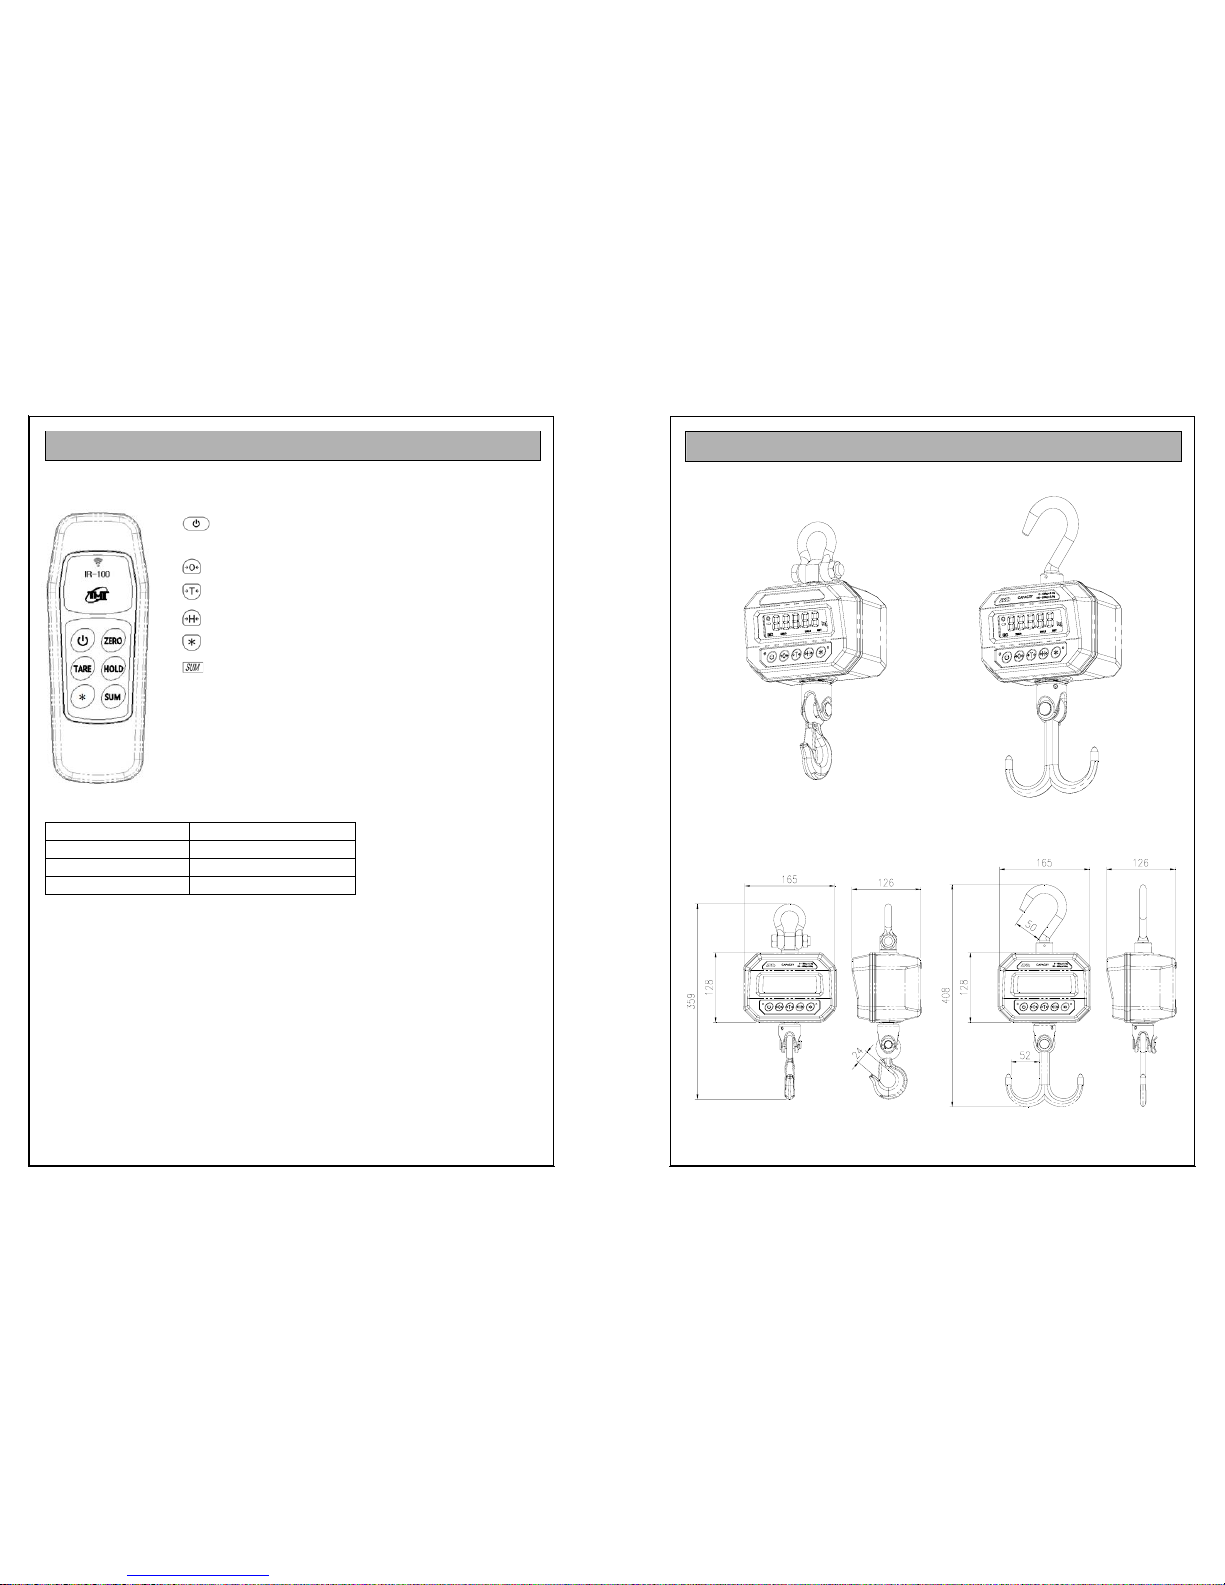
(1) How to use
■
: Used to power off the scale
(Power-ON is available only on scale.)
■
: Same as Keyboard
■
: Same as Keyboard
■
: Same as Keyboard
■
(CLEAR) : Used to clear previously added weights.
■
: SUM KEY : Used to add weights.
If press a SUM KEY, the sum of weights is displayed.
After that, about 2 sec later, a weighing mode is reverted.
Battery for a Remote Control : AA size, 1.5V, 2 pcs
(2) Specification
List Description
Available Distance 6 m ∼ 10 m
Available Angle 60 °
Power 3V (1.5V AA 2pcs)
- 5 -
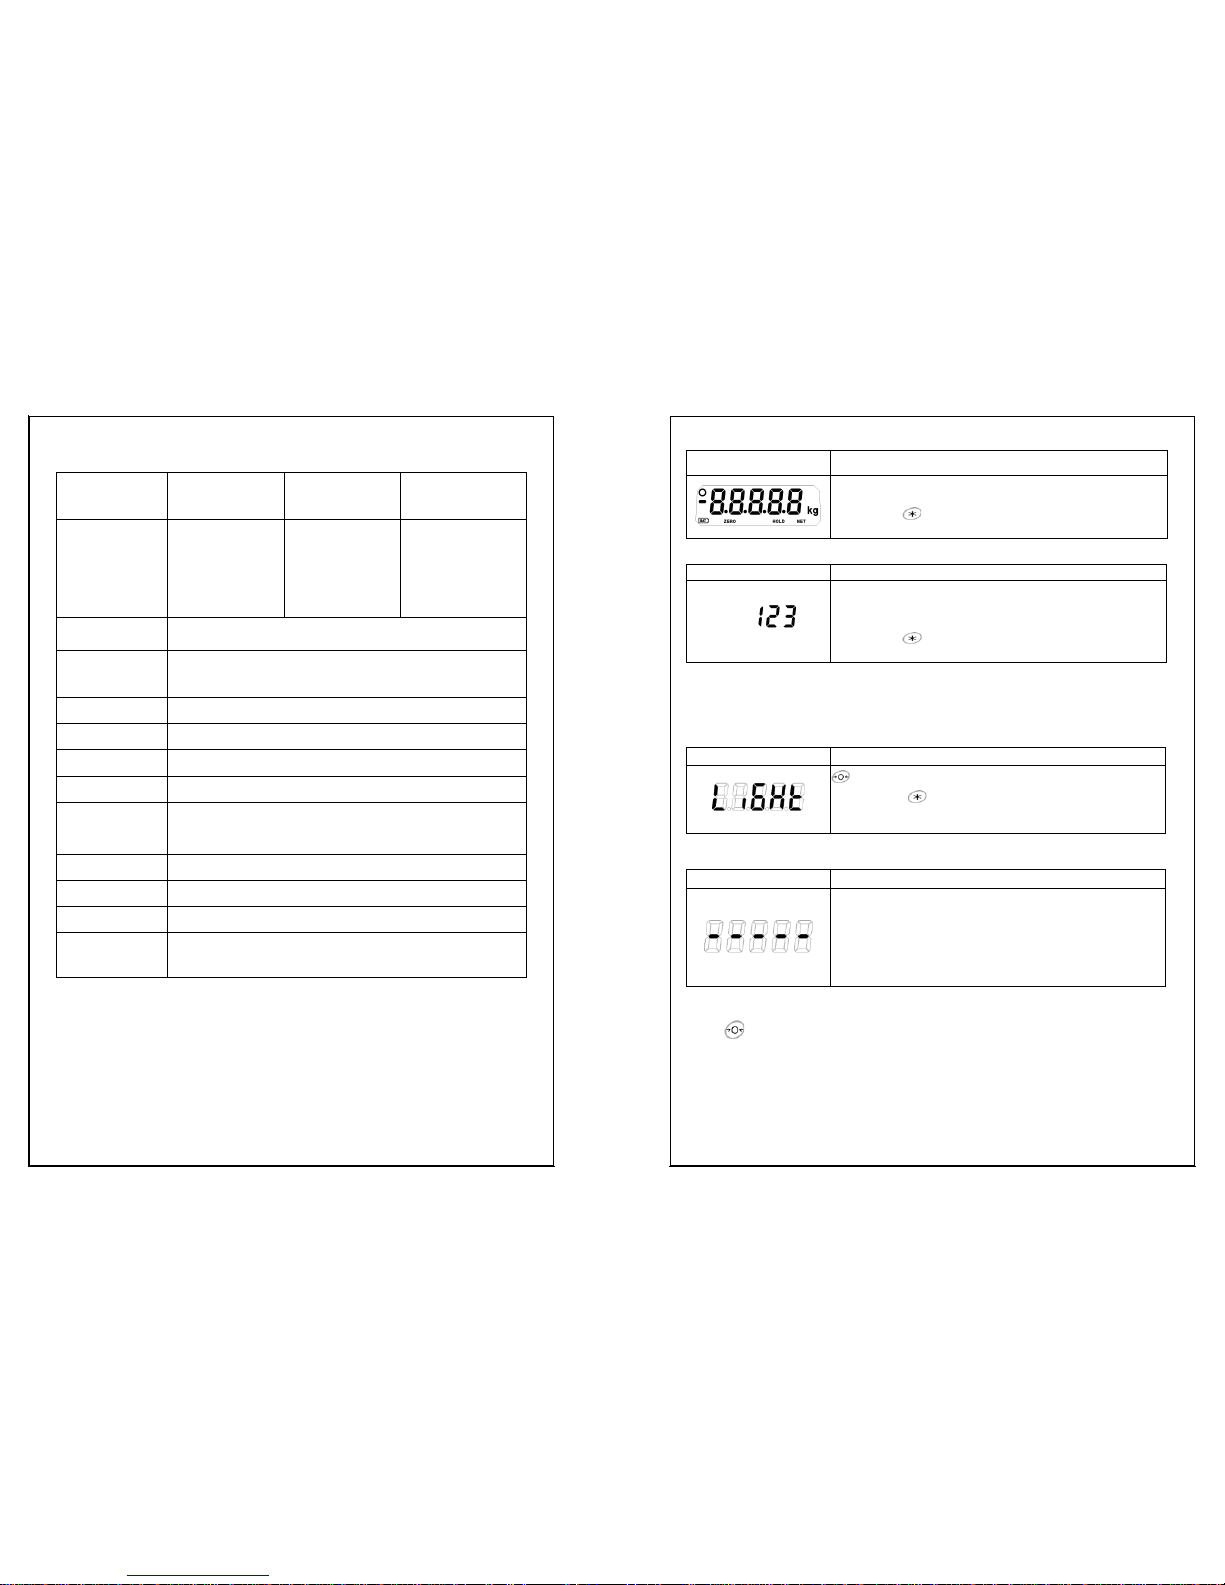
◆ Overall View
TA100/500 TA200
◆ Size
TA100/500 TA200
3. Technical Specifications
Page 4
- 14 -
■ F16 : Initialization of number measured daily (weigh No.) - Wireless option
Setting Menu Description
F16-0 Maintain current number
F16-1 Initialization (starting from No.1)
■ F17 : Auto print - Wireless option
Setting Menu Description
F17-0 Not used
F17-1 Auto print (include print format)
F17-2 Auto print (only weight data)
F17-3 Wireless Auto print (include print format)
F17-4 Wireless Auto print (only weight data)
■ F18 : Hold data auto print - Wireless option
Setting Menu Description
F18-0 Not used
F18-1 used
8. Testing Mode
(1) How to use
■ Press the (TARE Key) with the (ON/OFF Key).
Then, the scale switches into a Testing Mode.
(2) Keyboards
■ SET : Used to move into next menu.
■ ZERO
, TARE , HOLD : Used when the scale is been testing.
(3) Testing Menu (TEST 1 – TEST 6)
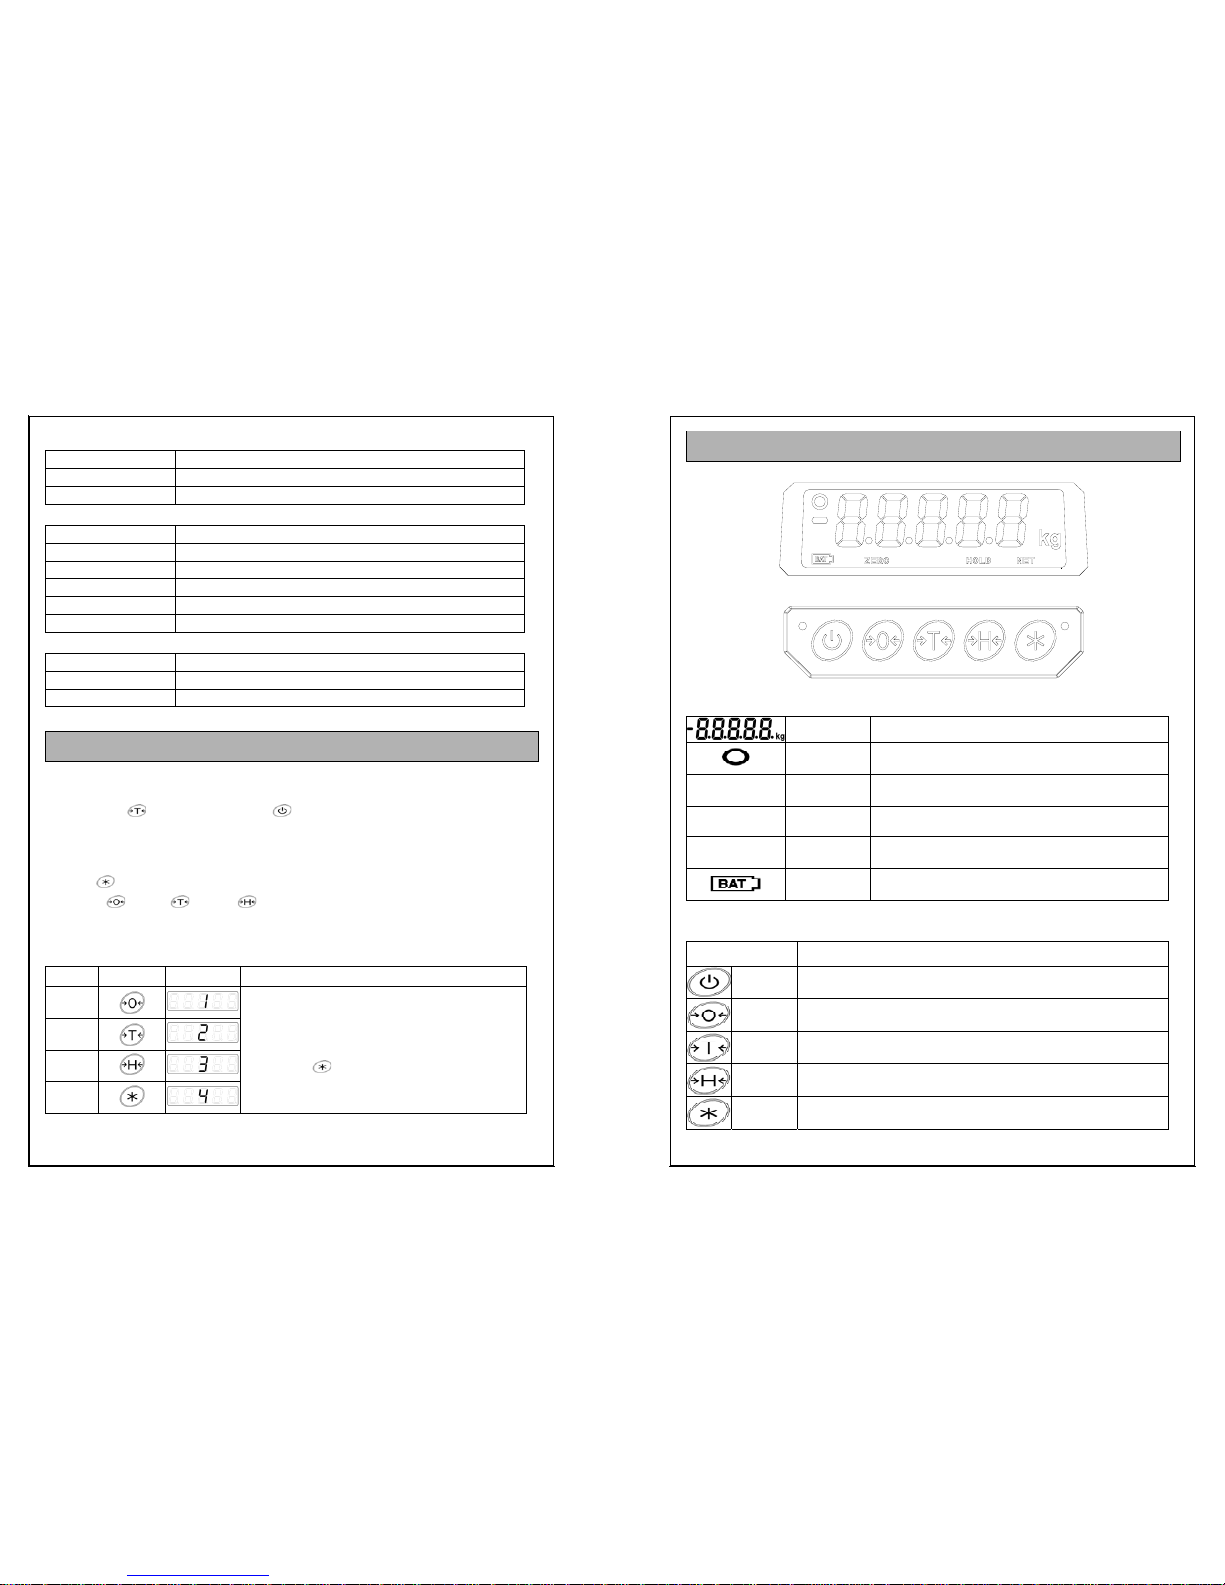
■ TEST 1 : Keyboard Test
KEY
Display Description
ZERO
If you push the button that you want to test,
the key number is appeared on the display.
If press the
(SET Key), it moves into TEST 2.
TARE
HOLD
SET
- 7 -
4. Display and Keys
◆ Display Description
Weight Displays the accurate weight
STABLE Displays that weight is Stable
ZERO
ZERO Displays that current weight is Zero
TARE
TARE Displays the net weight, when the tare is included
HOLD
HOLD Used to weigh an unstable or moving thing
BATTERY Displays when a battery has to be recharged
◆ Key Function
Key Description
ON/OFF Turn on and off the scale
ZERO Reset scale to zero
TARE Input a tare weight
HOLD Weigh an unstable and moving thing (Manual / Auto)
SET Testing Mode or Returning a new Mode
Page 5
- 12 -
■ F05 : Backlight Mode (0~2)
Setting Menu Description
F05-0 Manual ON/OFF
F05-1 Automatic ON/OFF (weighing : ON / zero : OFF)
F05-2 Backlight ON.
■ F06 : Automatic Zero Condition (00~99)
Setting Menu Description
F06-00 No compensation
…
F06-23 Compensation for gradual change below 1 division for 3
…
F06-99 Compensation for gradual change below 4.5 division for 9
■ F07 : Auto Hold Start
Setting Menu Description
F07-0 Manual
F07-1 Automatic
■ F08 : Initialization Hold Weight (1~9)
Setting Menu Description
F08-0 Zero (0)
…
F08-3 Below 3 division
…
F08-9 Below 9 division
■ F09 : Function * key - Wireless option
Setting Menu Description
F09-0 Use to clear previously added weights.
F09-1 Print command key
F09-2 Weighing data send to computer
F09-3 Wireless print command key (include print format)
F09-4 Wireless print command key (only weight data)
F09-5 Used to clear previously added weights.
■ F10 : Device number (Identification number of each scale) - Wireless option
Setting Menu Description
F10-0 Device No.0
…
F10-5 Device No.5
…
F10-9 Device No.9
- 9 -
6. General Functions and Description
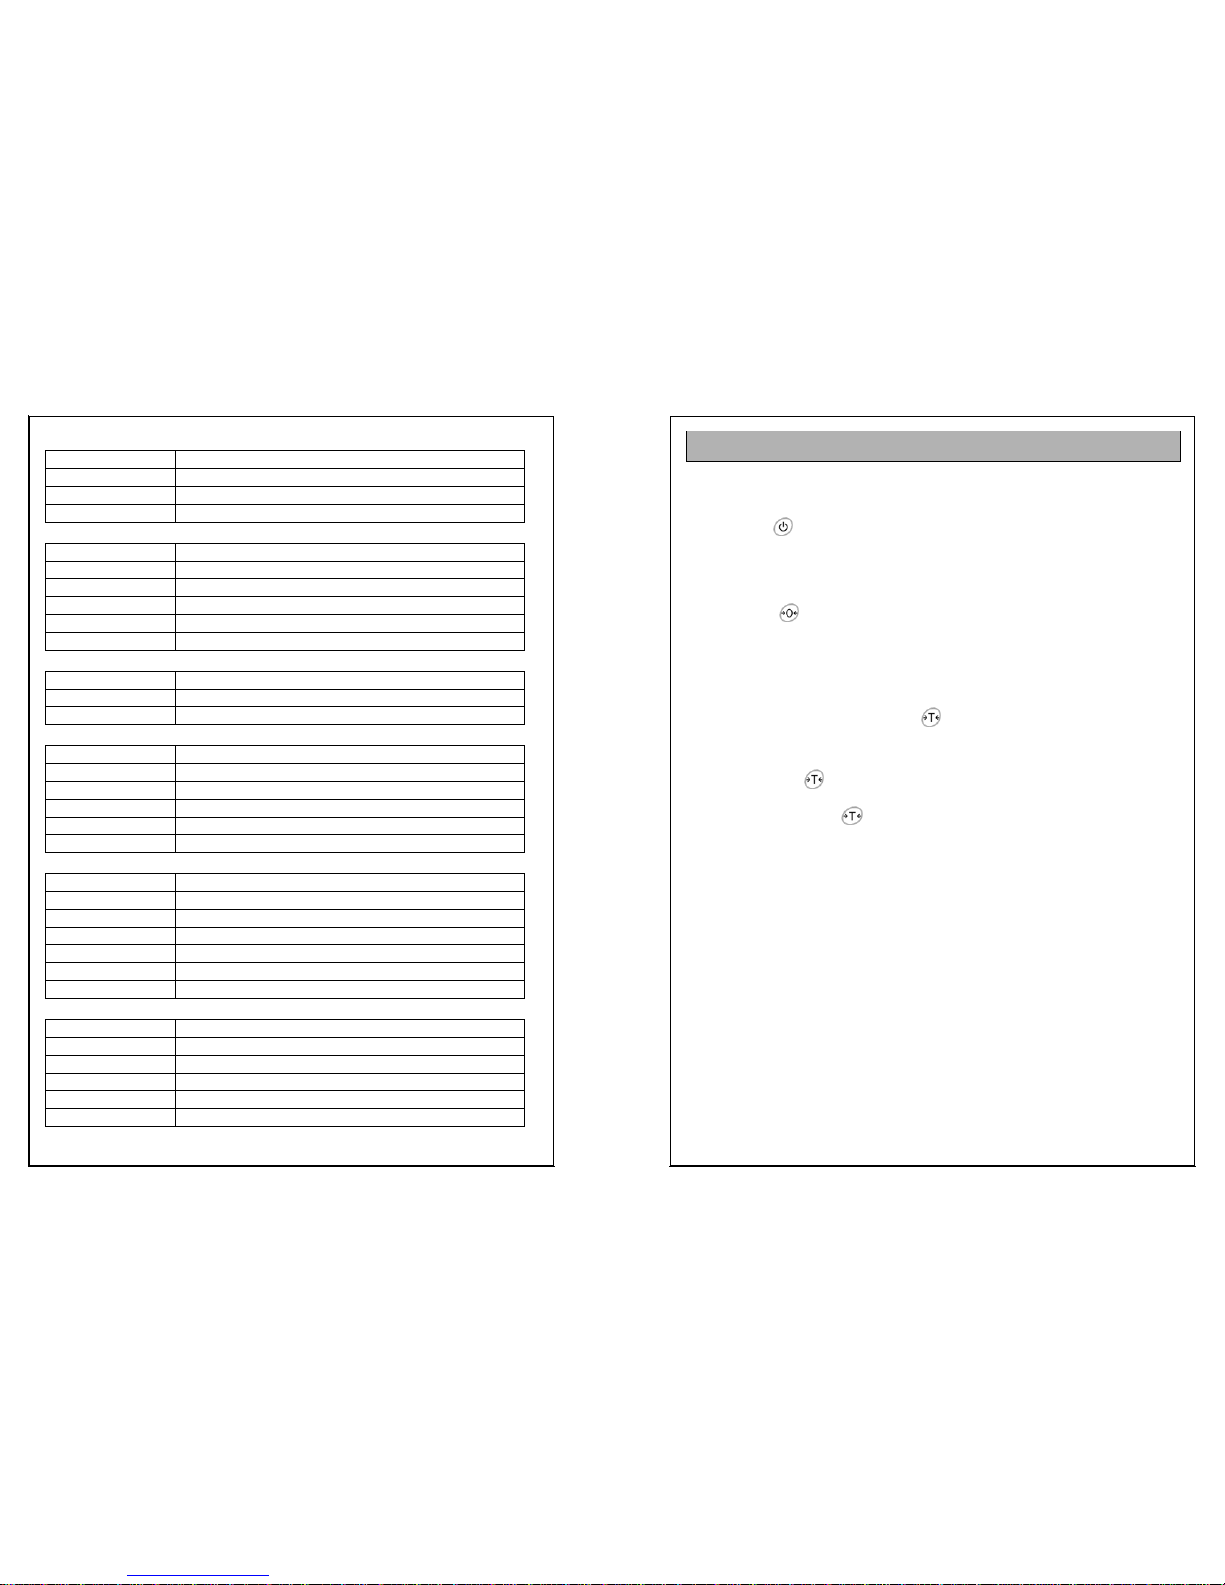
(1) Operating Method
■ Press the (ON/OFF Key) on the front panel of the scale. The scale will be
ready for weighing when ZERO lamp is on.
(2) ZERO Function
■ If press the (ZERO Key), the ZERO is displayed after correcting zero range
by itself. The Zero range is corrected within 2% of maximum weight.
If weigh is unstable, the ZERO Key doesn’t work.
(3) Setting Function of Tare Weight
■ Place the tare on hook and push the (TARE Key). Then, the TARE is displayed
and the display turns ZERO state.
■ In order to delete the tare weight, remove the tare or a thing to be weighted on the
hook and press the (TARE Key).
The TARE is off and the scale returns in normal mode.
If weight is unstable, (TARE Key) doesn’t work.
The s um of b ot h a t ar e we ig ht a nd a we ig hin g w eig ht can no t be exceeded over the
maximum capacity of the scale.
(4) Zero Calibration Function
■ Under th e ZE RO s tat e (Z ERO la mp i s on .), if the wei ght cha ng e is below the half of
the scale graduations, the scale turns automatically Zero.
Page 6
- 10 -
(5) HOLD Function
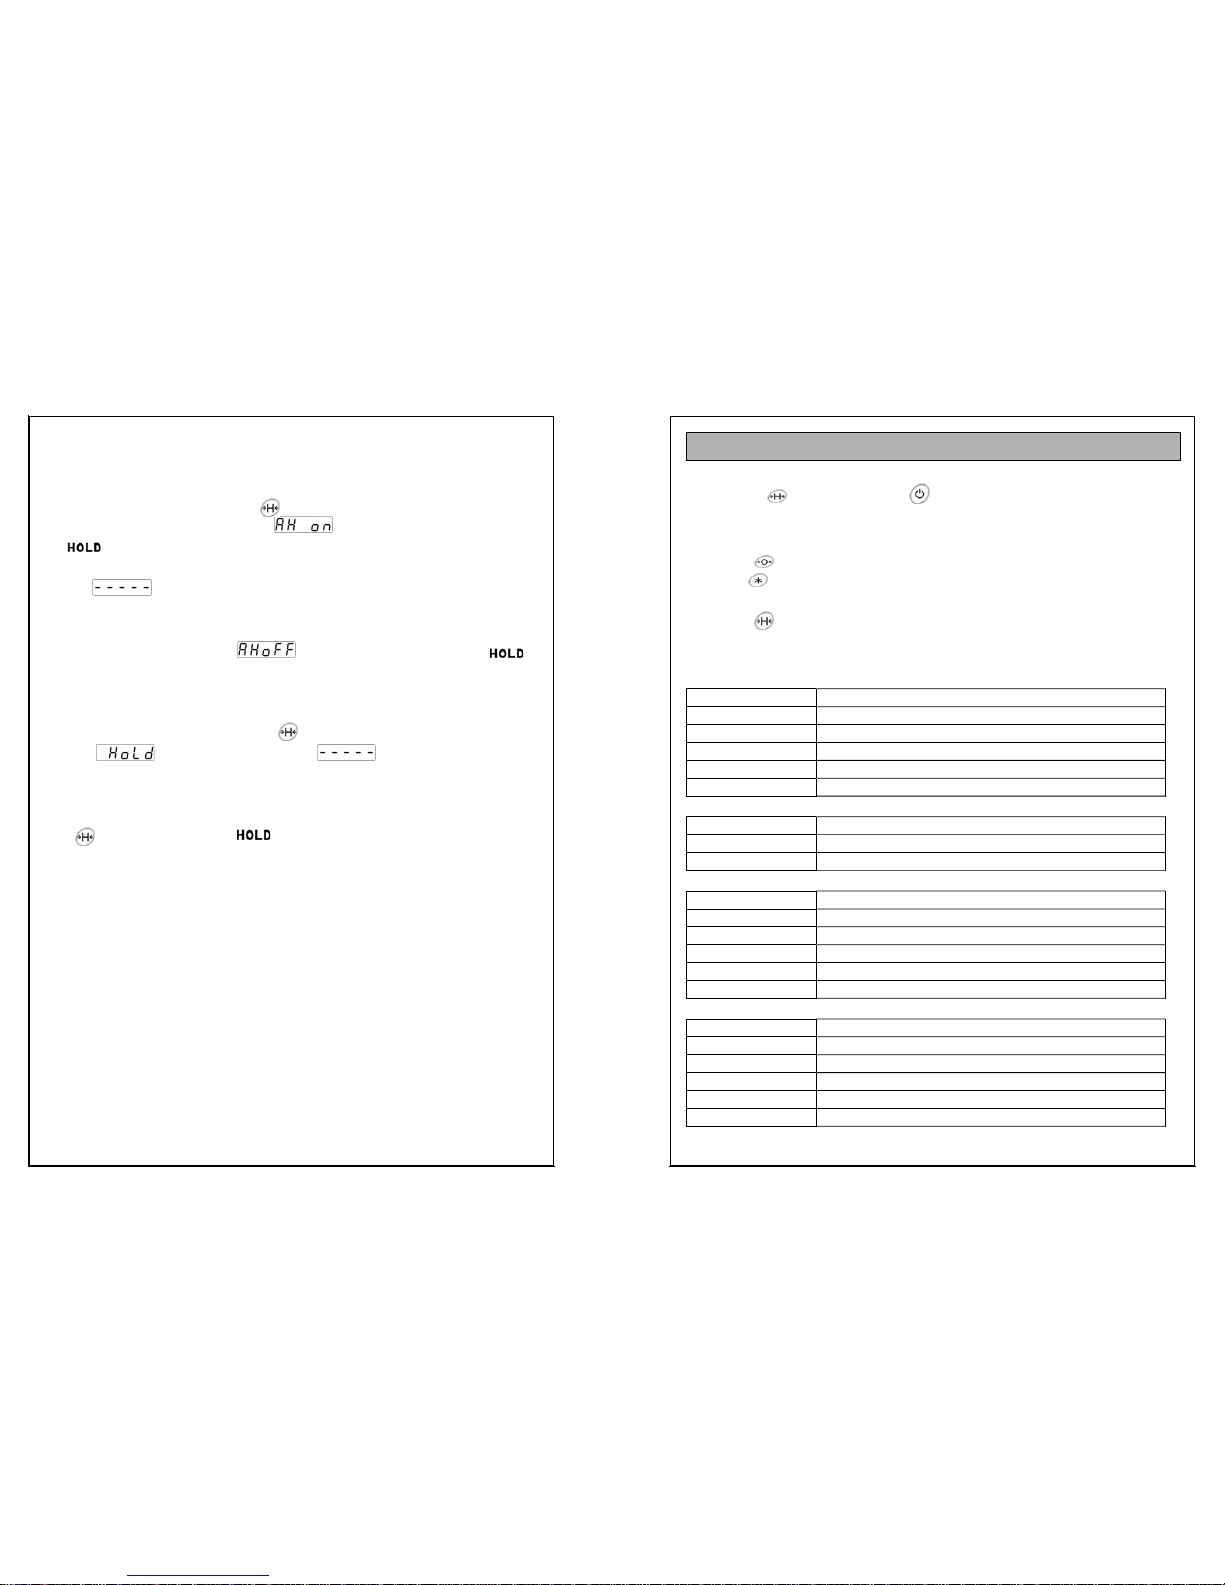
① Auto-Hold Function
(This function works every time the scale weighs all the things.)
■ Under the Zero state, press the (HOLD Key).
■ The weight display will indicate the
message.
■
is displayed.
■ After placing a thing on hook, if the weight change is sta ble, then a display shows
the
message and average weight will appear.
■ The weight of a held thing is displayed.
■ In order to escape from the Auto-Hold function, push the HOLD key under the
ZERO state. Then, after the message will be displayed, the is
off and the scale turns into normal mode.
② Manual-Hold Function
(Only when you press a HOLD key, the HOLD function works.)
■ Place a thing on hook and press the (HOLD Key).
The
message appears and the is displayed. The Average
weight appears.
■ The held weight is displayed.
■ In order to escape from the Manual-Hold function, remove a thing or press the
( HOLD Key). Then, the
is off and the scale returns into the normal
mode.
- 11 -
7. Setting Mode
(1) How to use
■ Press the (HOLD Key) with the (ON/OFF Key).
Then, the scale switches into Setting Mode.
(2) Keyboard
■ ZERO : Used to initialize the scale to ZERO.
■ SET : Used to save the setting constant changed and to move
into next setting menu.
■ HOLD : Used to increase the setting constant one by one.
(3) Setting Menu (F1 – F18)
■ F01 : Adjustment the speed of weight change (1∼9)
Setting Menu Description
F01-1 Very fast
…
F01-5 Normal
…
F01-9 Very slow
■ F02 : Weight Storage Function
Setting Menu Description
F02-0 Not used
F02-1 Use
■ F03 : Adjustment the hold speed (1∼9)
Setting Menu Description
F03-1 Very fast
…
F03-5 Normal
…
F03-9 Very slow
■ F04 : Stable condition set of weight (1~9)
Setting Menu Description
F04-1 Sensitive
…
F04-5 Normal
…
F04-9 Insensitive
Page 7
- 8 -
5. Use of Battery Charging
(1) How to charge a battery
■ Check the power supply (AC : 100V~240V)
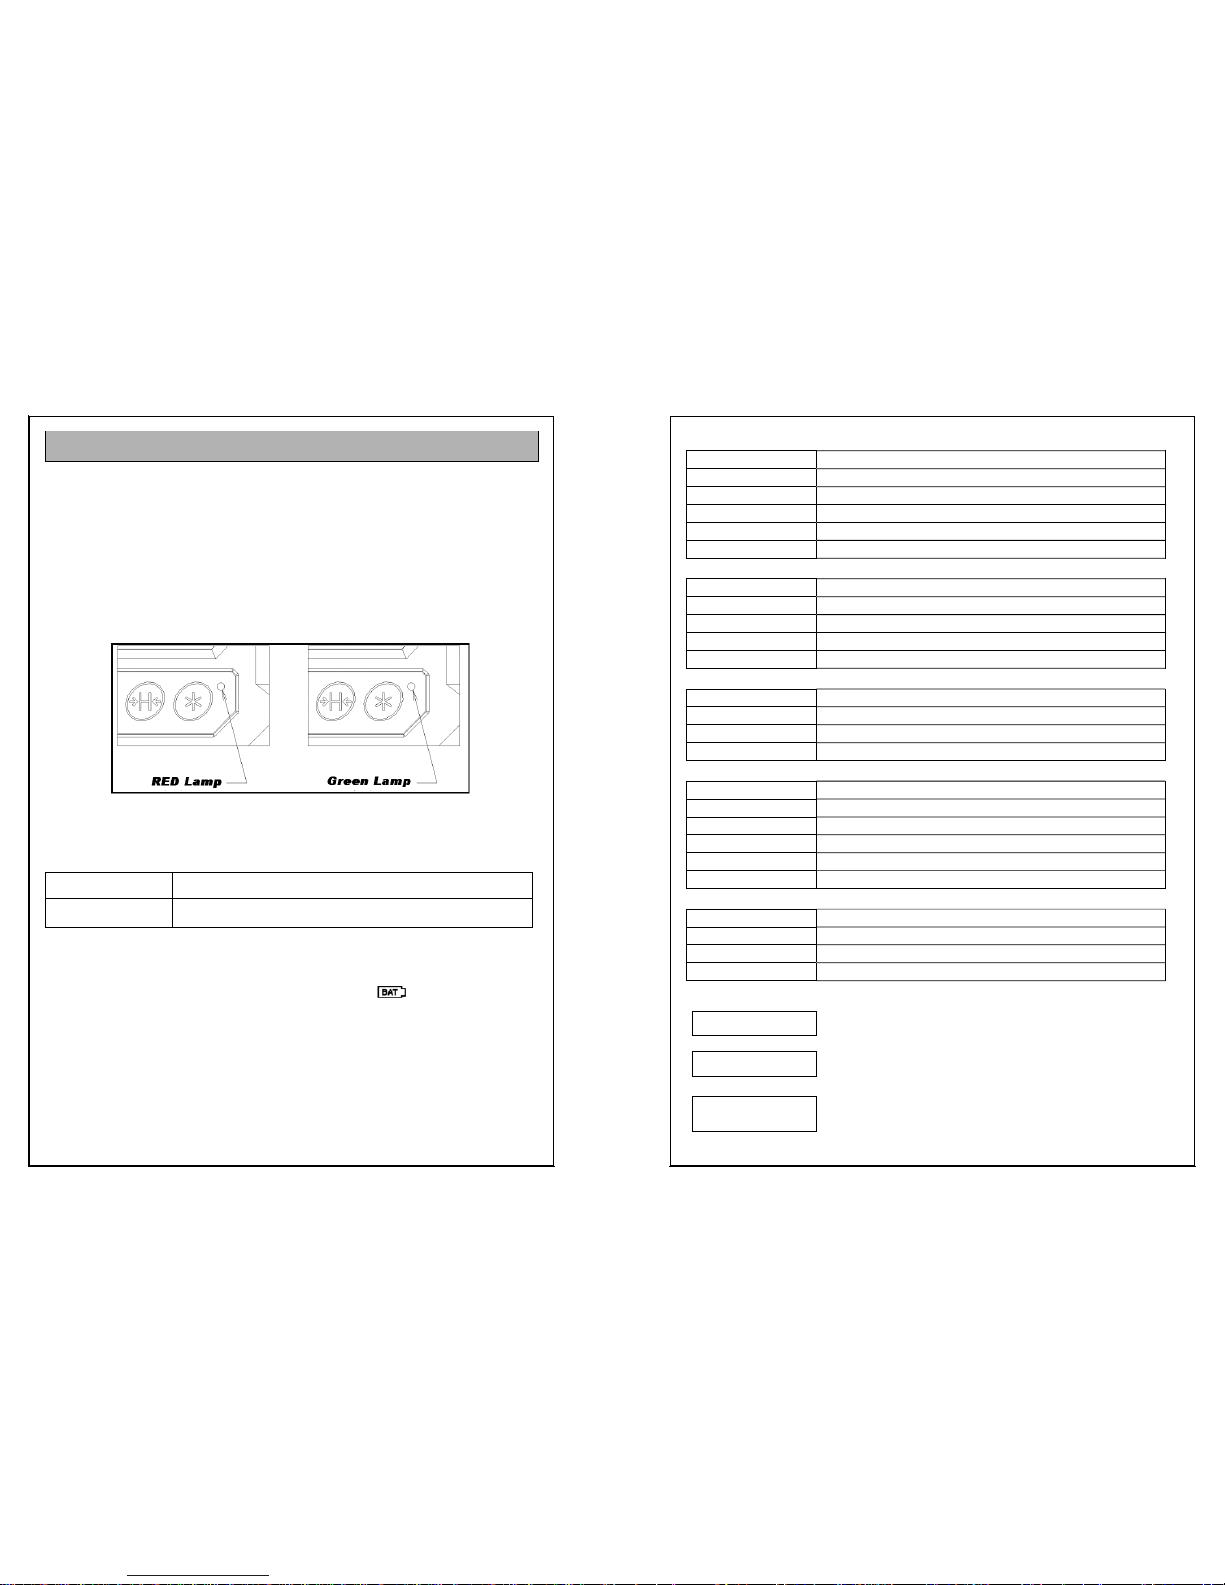
■ If adaptor is still being charged, the RED lamp is on as a below picture.
■ If a charging is completed, the GREEN lamp is on.
The battery charging time takes about 5hr.
(The battery charging ti me is s ubjec t to be chang ed acc ordin g to battery con dition.)
Charging Completed
(2) Charger (Lithium polymer battery)
Capacity 4000mAH
Power 3.7V
(3) “LOW BATTERY” Sign
■ In order to prevent a battery being overcharged, the sign is displayed.
After 6 hours later, power is automatically off. (It’s subject to be changed
according to the using condition.)
- 13 -
■ F11 : Item number (Identification number of each Item) - Wireless option
Setting Menu Description
F11-0 Item No.0
…
F11-5 Item No.5
…
F11-9 Item No.9
■ F12 : Data set sent to computer - Wireless option
Setting Menu Description
F12-0 No data output
F12-1 Command mode
F12-2 Transmission in an state of stable & unstable.
F12-3
Transmission only in stable state
■ F13 : Wireless real time communication - Wireless option
Setting Menu Description
F13-0 Not used
F13-1 Auxiliary display
F13-2 TF200 (Wireless dongle)
■ F14 : Print line feed - Wireless option
Setting Menu Description
F14-0 1 line feed
…
F14-5 6 line feed
…
F14-9 10 line feed
■ F15 : Print form - Wireless option
Setting Menu Description
F15-0
Form 0 (serial No., Item No., weight)
F15-1
Form 1 (weigh No., Item No., weight)
F15-2 Form 2 (weight)
[FORM 0]
001, ID_9, 25 kg
[FORM 1]
SN_012, ID_9, 25 kg
[FORM 2]
25 kg
62 kg
Page 8
- 6 -
◆ Specification
Model #.
TA-100
(General Type)
TA-200
(Meat Shop Type)
TA-500
(General Type)
Capacity
(Graduations)
0 ~ 100kg (0.05kg) 0 ~ 200kg (0.1kg)
0 ~ 250kg (0.1kg)
250 ~ 500kg (0.2kg)
Weight 2.6kg
Maximum Tare
Weight
Full Tare
Operating Time 350 hr
Display 5 Characters, LCD, (Character Size : 20mm)
Temperature -10℃ ~ 40℃
Keys ON/OFF, ZERO, TARE, HOLD, * (Back-light)
Display
LOW BATT, BATTERY State, ZERO, NET, HOLD, STABLE,
“-“ (Minus)
Accessories Rechargeable Battery
Zero Point Within +/- 2% of Maximum Weight
Initial Zero Point Within +/- 10% of Maximum Weight
Adaptor Power
Supply
Input : AC 100V~240V, 50/60Hz
Output : 5V 1000mA
◆ Part List
1) Crane Scale : 1 EA
2) Adaptor : 1 EA
3) Infra Red Remote Controller : 1EA
- 15 -
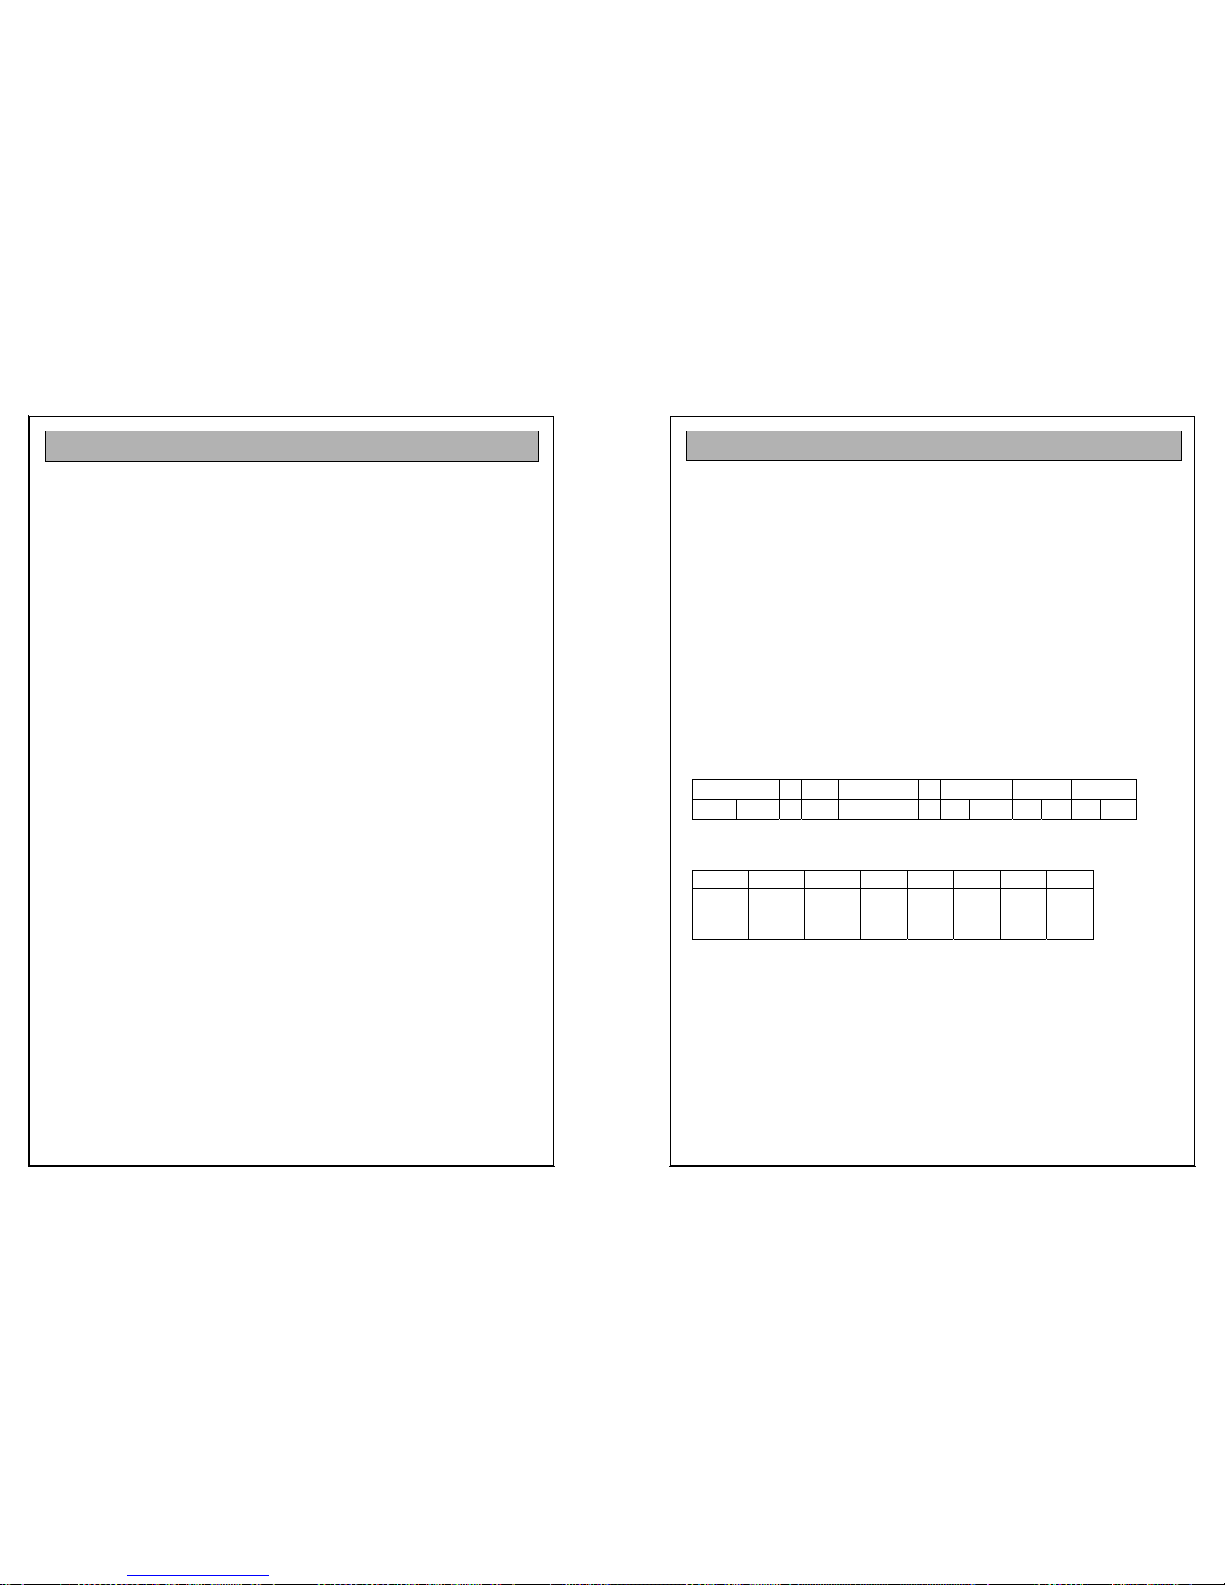
■ TEST 2 : Display Test
Display Description
TE ST 2 op era te s a uto ma tic al ly and th e wh ol e d isp la y is ON .
If press the
(SET Key), it moves into TEST 3.
■ TEST 3 : A/D Conversion Test (Load Cell Test)
Display Description
The value is the conversion constant for A/D.
The value may be different according to scale models.
If press the
(SET Key), it moves into TEST 4.
Please check if the displayed number is changed well with giving some force to the
hook. If the displayed number is not changed and remains “0”, then it needs the
service after sales. Therefore, contact us.
■ TEST 4 : Backlight Test
화면 설명
: Backlight ON/OFF
If press the
(SET Key), it moves into the weighing
mode.
■ TEST 5 : RS232C TEST
Display Description
Ex) 49-13 : Transmit 49 (ZERO KEY)
Receiver 13 (PC ENTER KEY)
(ZERO KEY 49, TARE KEY 50, HOLD KEY 51)
■ TEST 6 : Wireless communication test - Wireless option
Press (ZERO KEY) at the scale. The numeric character increases on the auxiliary
display.
Page 9
- 4 -
2. Main Features
◆ Super mini small size and portable
◆ Lithium polymer battery built-in => Long battery lifetime by one-time charging.
◆ Convenient Charging Method
- Auto Charging after connecting a rechargeable adaptor
(Charging Time : approx. 5 hr)
- Auto Power Cut-Off after the charging is completed.
(Full Charging lamp displays.)
◆ Very easy to exchange the used Shackle in a new one.
◆ As per the using purpose, General Type (TA-100,500), Meat Shop (TA-200)
- 17 -
10. RS232C & Wireless option
■ RS-232C port connection
Connect serial port of the scale to serial port of PC as foll ows.
(RED) TXD ------------------------------ RXD (2)
(WHITE) RXD ------------------------------ TXD ( 3)
(GREEN) GND ------------------------------ GND (5)
[RS232C wire of TA] [Serial port of computer]
■ Data format
Type : EIA-RS-232C
Method : Full-duplex, asynchronous transmission Format
① Baud rate : 9600 bps
② Data bit: 8, Stop bit: 1, Parity bit: None
③ Code : ASCII
④ When data is sent to computer? Set in SET mode(F12).
⑤ Format (18byte)
Start code Blank Lamp status Weighing data Unit Stop code
S(U) T(S) , , +/- 7byte k g CR LF
- Start code : ST (Stable) / US (Unstable)
- Lamp status byte
Bit7 Bit6 Bit5 Bit4 Bit3 Bit2 Bit1 Bit0
One
decimal
point
Two
decimal
point
Three
decimal
point
Stable Zero Tare Hold
- Weighing data (8byte)
a. 13.5 ㎏ : '+', ' ', ' ', ' ', '1', '3', '.', '5'
b. 135 ㎏
: '+', ' ', ' ', ' ', ' ', '1', '3', '5'
c. -135 ㎏ : '-', ' ', ' ', ' ', ' ', '1', '3', '5'
Page 10
- 2 -
INDEX
1. Instruction ················································································ 3
2. Main Features ·············································································· 4
3. Technical Specifications ······························································· 5
4. Display and Keys ···········································································7
5. Use of Battery Charging ···································································8
6. General Function and Descriptions ·····················································9
7. Setting Mode ··············································································11
8. Testing Mode ············································································· 12
9. Remote control············································································ 13
10. RS232C & Wireless option ·····························································14
11. Error Message and Self-Testing methods ···········································14
- 19 -
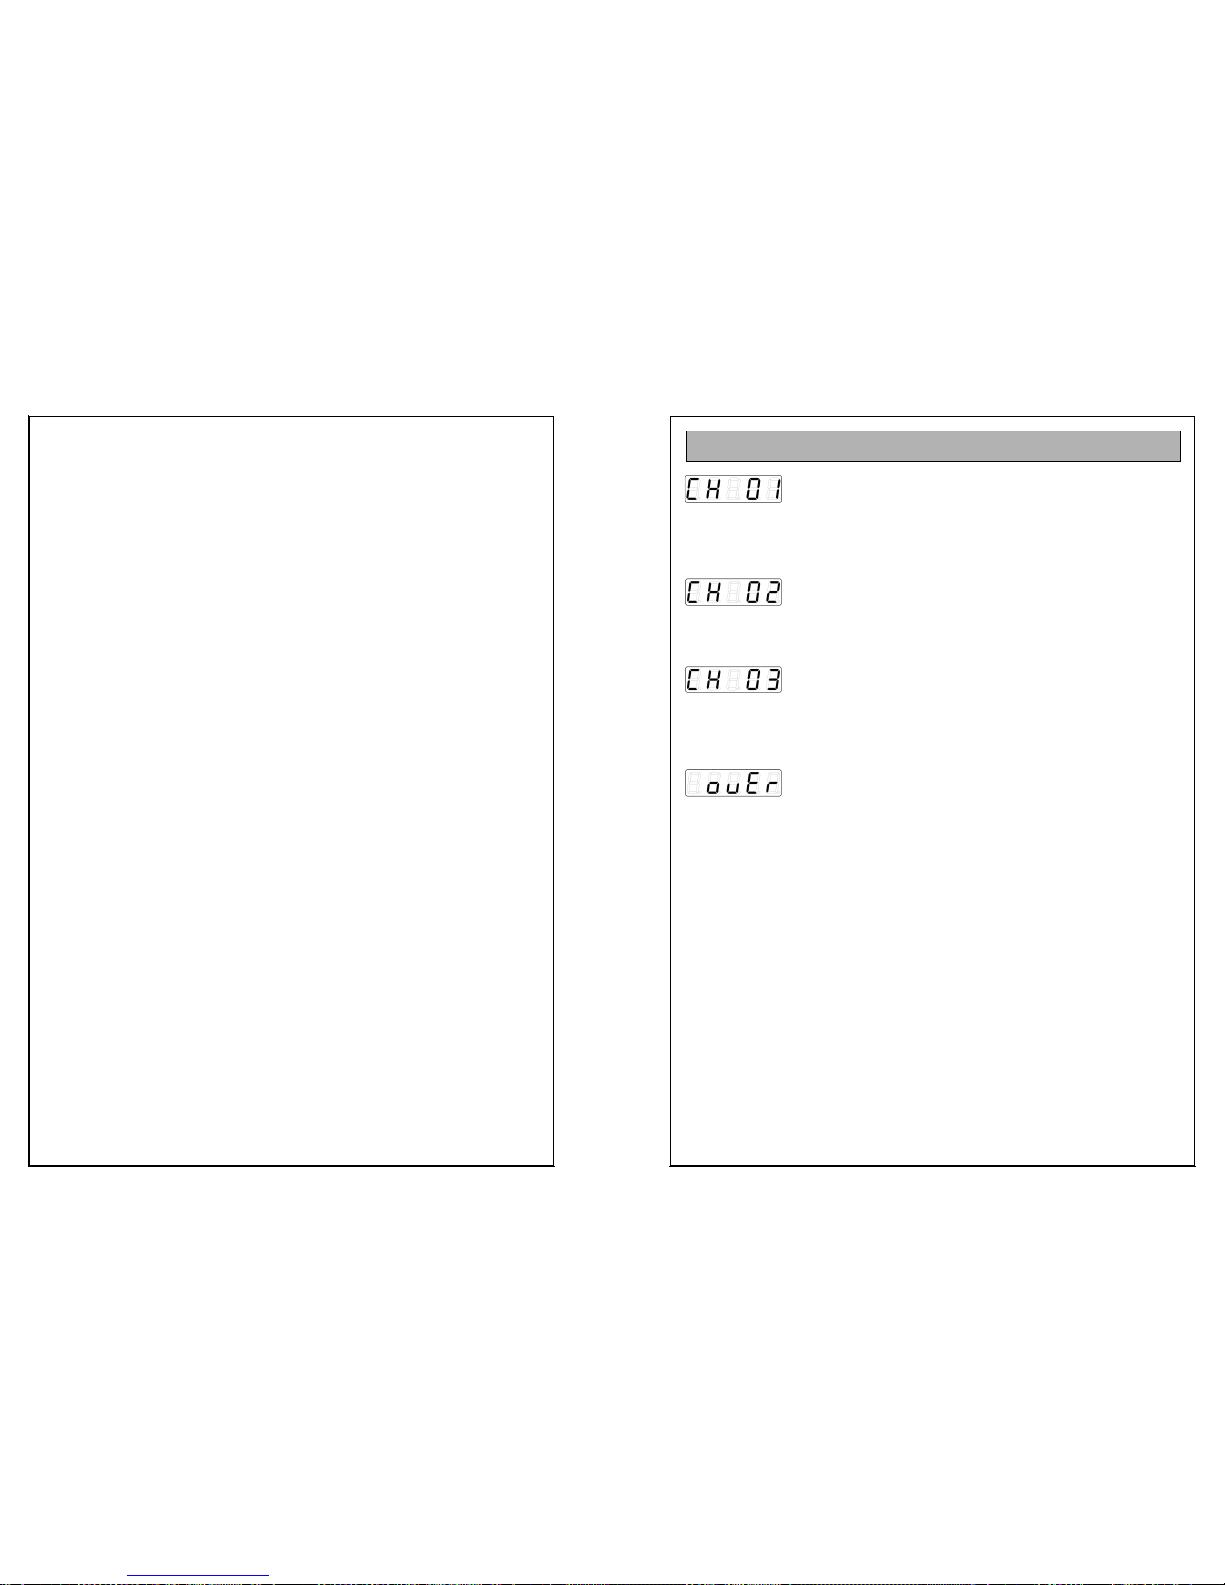
11. Error Message and Self Testing methods
▣ Error 1
z Message : Data in an internal storage allocation are erased owing to any
electrical impact.
z Self-Testing Method : Please contact us to resolve this technical problem.
▣ Error 2
z Me ssa ge : s ome thing wr ong in a Load Cel l connec tion or i n an A/D conversion.
z Self-Testing Method : Please contact us to resolve this technical problem.
▣ Error 3
z M essa ge : The ini tia l z er o r an ge is exceeded within +/- 10% of maximum weight
value.
z Self-Testing Method : Please check if a book is empty.
▣ Error
z Mes sage : When a thing is ove r-wei ghed w ithin the ma ximum weigh t value, the
error message is displayed.
z Self-Testing Method : Do not weigh the thing whose the limit of a maximum
weight value is exceeded.
If a load cell is broken, then the load cell has to be replaced.
 Loading...