

Page 1
Quick Start Guide
Page 2

II
11
Table of Contents
Overview ....................................................................................... 2
Introducing Your T-Mobile webConnectTM Laptop Stick ............... 3
Get Started ................................................................................... 6
Installation & Setup ...................................................................... 8
Connect to T-Mobile Broadband ............................................... 12
Connect to Wi-Fi ....................................................................... 16
Connect to VPN ......................................................................... 20
Additional Information ............................................................... 22
Page 3

2
3
Overview
This guide provides you with everything you need to get started.
If you need additional information on features and services, please
select one of these helpful options:
n
Refer to your User Guide.
n
Visit www.t-mobile.com.
n
Click Help > Help on the T-Mobile Connection Manager
screen.
MAC users please visit http://T-MobileWebConnect.com/Mac.
Introducing Your T-Mobile webConnectTM Laptop Stick
Congratulations on your purchase of the T-Mobile webConnectTM
Laptop Stick with the T-Mobile Connection Manager (also referred to as
Connection Manager).
Together, the Laptop Stick and the Connection Manager allow you to:
n
Connect to T-Mobile’s high-speed 3G and 2G networks
n
Connect to Wi-Fi networks, including
the T-Mobile HotSpot network
n
Browse the Internet
n
Connect to corporate networks through VPN
n
Send and receive text messages
n
View connection types and status
n
Create and modify connections and settings
n
Manage network settings
Page 4
4
5
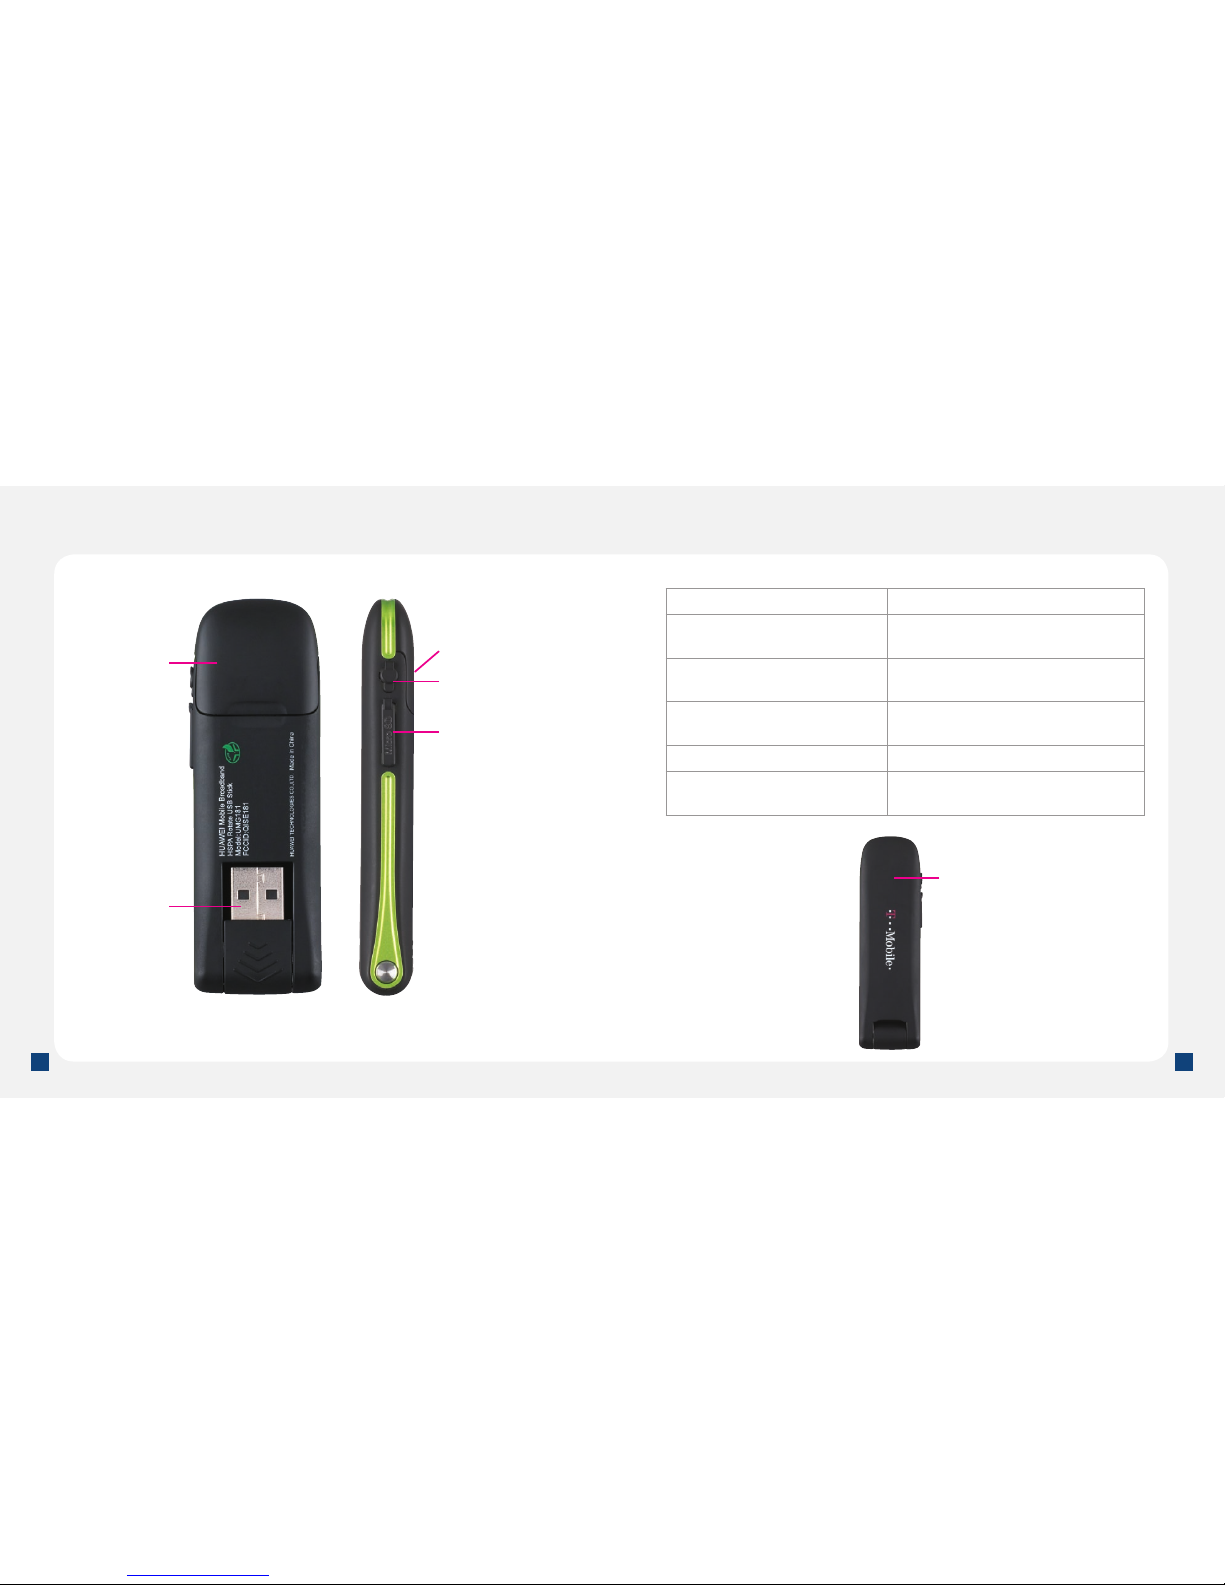
Indicator Light
Green, blinking twice every 3s Your Laptop Stick is powered on
Green, blinking once every 3s Your Laptop Stick is registered to a
GSM/GPRS/EDGE network
Blue, blinking once every 3s Your Laptop Stick is registered to a
3G network
Green, always on The GPRS/EDGE connection is
set up
Blue, always on The 3G connection is set up
Off Your Laptop Stick has been
removed from your computer
Back
Side
Rotatable USB
Connector
RF Output Power
Port
Indicator Light
microSDHCTM
Card Slot
(not shipped with
microSD card)
SIM Card Slot
and Cover
Indicator Light
Page 5
6
7
Activate Service
The exclusive webConnect Data Plan for the laptop stick allows you
to connect to the Internet through T-Mobile’s Broadband and HotSpot
networks.
n
Using webConnect for Broadband 3G/2G Access
T-Mobile’s rapidly expanding 3G network provides faster data transfer
rates than 2G (also known as EDGE). If 3G is not available, the
laptop stick will automatically try to nd T-Mobile’s 2G network. The
plan also provides global roaming access in many countries where
T-Mobile coverage is available and roaming agreements are in place.
n
Using T-Mobile HotSpot for Wi-Fi Access (Included)
The Connection Manager also allows you to control your connections
to home, work, and public Wi-Fi networks. The included T-Mobile
HotSpot account provides access to Wi-Fi in numerous locations
worldwide. You can access T-Mobile HotSpot at select coffeehouses;
Borders Books and Music; FedEx Kinko’s Ofce and Print Centers;
Hyatt Hotels and Resorts; Red Roof Inns; airports; select American
Airlines Admirals Clubs; Delta Air Lines Crown Rooms; United
Airlines Red Carpet Clubs; and US Airways Clubs. For a complete
listing of T-Mobile HotSpot locations, at the main Connection
Manager screen click WiFi, then click the HotSpots button.
NOTE: For data services, you may need to wait up to 24 hours for the service
to be activated. By activating service, you acknowledge that you have read and
agreed to the Terms and Conditions of the Service Agreement.
Get Started
Before You Begin
Before you begin, you will need:
n
A T-Mobile webConnectTM Laptop Stick
n
A Subscriber Identity Module (SIM) card
n
A T-Mobile webConnect Data Plan
n
A computer with the minimum requirements
(see below for Requirements)
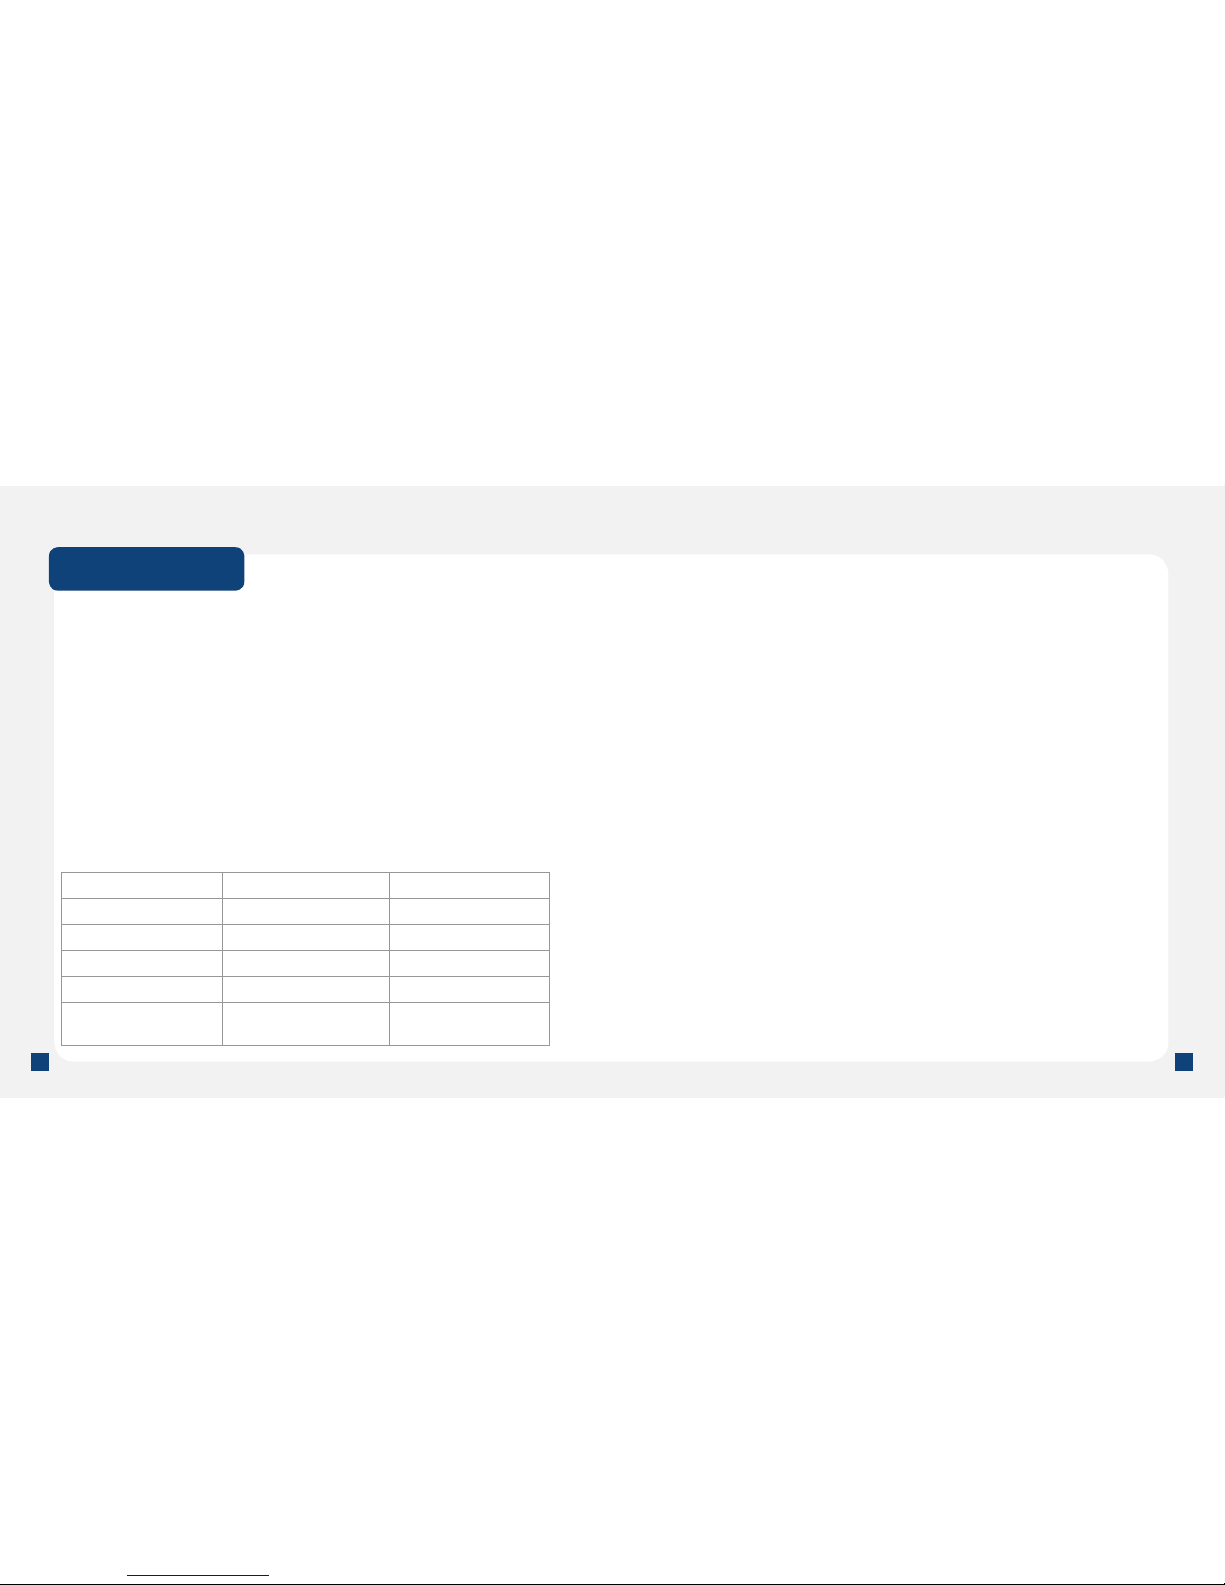
Requirements
You will need your Laptop Stick and a computer with the following
minimum system requirements:
Windows XP
®
Windows Vista
®
Processor 300 MHz 1 GHz
RAM 256 Mb 1 GB
Hard Drive Space 60 Mb 60 Mb
Internet Explorer IE 5.5 IE 7
OS Service Pack Service Pack 1 (or
later)
Service Pack 0, 1
Page 6

8
9
Installation & Setup
The install process involves the following:
n
Insert the SIM into your T-Mobile webConnectTM Laptop Stick
n
Install T-Mobile Connection Manager on your computer
Insert SIM
1. Remove the SIM card slot
cover.
2. Insert SIM card into the SIM
card slot with the golden contacts
facing down and the notched
corner facing out.
3. Replace the SIM card slot cover.
Insert Memory Card
Your T-Mobile webConnectTM Laptop Stick supports a microSDHCTM
memory card, however, a memory card is not included with your
Laptop Stick purchase.
NOTE: Do not remove your memory card while it is in use. Removing the
memory card while in use may corrupt the data stored on your memory card
and damage the memory card or your Laptop Stick.
1. Slide the memory card into the
memory card slot with the golden
contacts facing the back side of
your Laptop Stick.
Page 7

10
11
Install Connection Manager
Connect your T-Mobile webConnectTM Laptop Stick to the USB
port of your computer. The Connection Manager installation begins
automatically. Follow the on-screen instructions to complete the
installation.
Wi-Fi
Click to access the
Wi-Fi screen
Connection Mode Indicator
A indicates automatic scan for
network and M for manual scan
Connection Timer
Network Preferred
Indicator
VPN Indicator Connection Type
Connection Status
Broadband
Click to congure
and connect to a
broadband network
Connect /
Disconnect Button
Click to connect
to a network
VPN
Click to congure
and connect to VPN
HotSpots Locator
Click to nd a T-Mobile
HotSpot
Networks Button
Click to list available
networks
Proles Button
Click to manage
connection proles
Open the Connection Manager:
n
On your computer taskbar, click the Start
button. Point to Programs > T-Mobile and then
click T-Mobile Connection Manager.
OR
n
On your computer desktop, double-click the T-Mobile
Connection Manager icon.
NOTE: When installing Connection Manager, if the installation does not start
automatically, nd AutoRun.exe on your Connection Mgr CD-ROM. Double-
click AutoRun.exe to launch the installation.
Remove your T-Mobile webConnectTM Laptop Stick from Your
Computer
It is important to properly remove your Laptop Stick from your
computer to prevent data loss or corruption.
1. Double-click the Safely Remove Hardware icon in the system
tray on your computer.
2. Select USB Mass Storage Device and click Stop.
3. Select your Laptop Stick and click OK.
4. When you see the prompt, “It is safe to remove the device”,
remove your Laptop Stick from your computer.
NOTE: Two “USB Mass Storage Device” are related to your Laptop Stick. Be
sure to stop both with Safely Remove Hardware before removing your Laptop
Stick. Before removing your Laptop Stick, exit the Connection Manager.
Page 8

12
13
Connect to T-Mobile Broadband
Connect to T-Mobile Broadband
You do not need to set a network prole to connect to T-Mobile
Broadband. The prole (T-Mobile Broadband) is built in, and you do
not need to add a prole or change settings to connect to T-Mobile’s
network.
Connect to T-Mobile Broadband:
1. Insert your SIM card in your T-Mobile webConnectTM Laptop Stick
if you have not done so already.
2. Insert your Laptop Stick in your laptop.
3. Open the Connection Manager and click BROADBAND. Your
Laptop Stick will then scan the area for available networks.
4. Click CONNECT.
SMS
Click to send text
messages to other
Laptop Stick users
Connect Using
Click to list available
networks
Proles
Click to manage
connection proles
Connect to other Networks
To connect to another network, you must rst create a prole for that
network. You must have a network prole for each network to which
you wish to connect.
Create a new network prole:
1. At the main Connection Manager screen, click BROADBAND.
2. Click Proles. The Proles screen opens.
3. At the Proles screen, click Add.
4. Click Broadband and then click Add.
5. Select the network whose prole you would like to add or select
Create Customer Prole if you want to create a prole for a
network that is not listed here. Click Next.
6. Click Next.
7. In the IP Settings screen, congure your settings as needed
and click Next. Consult with your IT administrator if needed for
applicable settings.
8. In the General screen, congure the remainder of the settings for
your prole and click Finish. Consult with your IT administrator if
needed for applicable settings.
Connect to other networks:
NOTE: Connecting to other broadband networks may incur roaming charges.
1. At the main Connection Manager screen, click BROADBAND.
2. Click the Connect Using button to display a list of networks.
3. Click the Connect button for the desired network.
Page 9

14
15
Send Text Message
When you are connected to broadband, you can send and receive
short text messages to another mobile phone or to another Laptop
Stick user using the Connection Manager very much like you can do
on most wireless phones. The Connection Manager makes it easy
by allowing you to send, receive, and manage text messages from a
familiar e-mail like messaging client.
Write and send a text message:
1. At the main Connection Manager screen, click Broadband.
2. Click the SMS button to open the T-Mobile Connection Manager –
Text Messaging Service screen.
3. Click New to open the new message screen.
4. At the To line, type the destination phone number OR click To to
open the address book to select a contact saved in your address
book.
5. Type your message and click Send.
Receive a text message:
When you receive a new text message, the Connection Manager
displays the following icon on the main screen for Broadband:
NOTE: Separate charges apply to send/receive domestic/international text
messages.
Read the message:
1. At the main broadband screen, click SMS.
2. Make sure Inbox is selected.
3. Double-click the message you want to read OR you can click
Preview on the toolbar menu to read the message from the
Preview pane.
Manage text messages:
The Text Messaging Client provides a number of management
functions that let you save and organize your incoming and outgoing
messages. They include:
•
Click or click File > Folders > New Folder to
create a new folder in which to store messages.
•
Click or click File > Folders > Delete Folder to delete
a folder you have created (and all the messages it contains).
•
Click or click Edit > Move to Folder to
move the selected message to another folder.
NOTE: Moving a message from the Inbox to another folder will not delete
the message. The next time you open the Text Messaging Client, the
moved message will re-appear in your Inbox.
•
Click or click Edit > Copy to Folder to place
a copy of the selected message in another folder.
Page 10

16
17
Connect to Wi-Fi
Connect to a T-Mobile HotSpot
The Connection Manager offers you two different networks for
connecting to the Internet from any T-Mobile HotSpot:
n
T-Mobile WiFi Network – This network connection is the
T-Mobile standard network for Wi-Fi connections.
n
T-Mobile’s Enhanced WPA – This network connection allows
secured connection using the WPA encryption (802.1x)
standard.
NOTE: Your Laptop Stick does not have a Wi-Fi radio. Connection Manager uses
the Wi-Fi radio in your computer to make Wi-Fi connections.
Connect to a T-Mobile HotSpot:
1. Make sure that you are at a T-Mobile HotSpot location. For
HotSpot locations, at the main Connection Manager screen click
WiFi, then click the HotSpots button.
2. Open the Connection Manager.
3. Click WiFi. Your Laptop Stick will then scan the area for a
T-Mobile HotSpot connection.
4. Click the CONNECT button. You will be prompted to type your
username and password to your T-Mobile HotSpot account.
5. At the prompt, type the username and password for your T-Mobile
HotSpot account. The Connection Manager will log you in to your
account. When you have successfully logged in, the T-Mobile
HotSpot welcome screen opens.
NOTE: Your T-Mobile HotSpot username is your 10 digit phone number. Your
default password is the last 4 digit of your SSN. The default password for
corporate customers is the last 4 digits of your tax ID. Your phone number is
available through Tools > Network Info > Broadband in Connection Manager.
Page 11

18
19
Hint: Connection Manager can save your username and password
to speed up connections to the T-Mobile HotSpot network. Click WiFi
on the main Connection Manager screen, then click Tools > User
Credentials. Type your username and password and select store this
password for future logins. Call 877-822-SPOT for assistance with
T-Mobile HotSpot or WiFi.
Connect to other Wi-Fi Networks
Your Connection Manager comes pre-loaded with settings for the
T-Mobile HotSpot network, but connecting to other Wi-Fi networks is
as easy as connecting to T-Mobile HotSpot.
Connect to other networks:
1. Make sure that you are at a location with Wi-Fi.
2. Click WiFi. The Wi-Fi radio in your computer will scan the area
for available Wi-Fi networks.
3. Click Networks to display a list of available Wi-Fi networks.
NOTE: The Connection Manager will attempt to automatically
connect to any pre-dened networks set in your network prole
settings or display the last network connection that you made.
NOTE: Before you connect to a Wi-Fi network, you should
conrm with its operator if you will need any additional settings
to connect. For example, if you are trying to connect to your work
Wi-Fi network, you should check with your IT administrator for
the correct settings.
4. Click Connect for the desired network.
Page 12

20
21
Connect to VPN
Virtual Private Networks (VPNs) are extensions of private networks
that you can access over a public network, such as the Internet,
without compromising security. For example, a large company may
implement a VPN so that employees can connect to the corporate
network from remote locations over the Internet. To connect to a VPN,
you may need special software or settings on your laptop. Please
check with your IT administrator for software or settings needed to
connect to VPN.
The Connection Manager currently supports VPN clients from the
following vendors:
•
Microsoft
®
•
Cisco Systems
®
•
Nortel Networks Limited
®
•
Check Point Software Technologies Ltd.
®
•
NetMotion Wireless
You may need to congure VPN settings before connecting to VPN.
Congure a VPN connection:
1. After you have installed the necessary VPN client software and
settings, open the Connection Manager.
2. At the main Connection Manager screen, click Tools > Settings
and then click the VPN tab.
3. Adjust settings as desired.
4. Click OK to exit.
Set a VPN connection for a T-Mobile prole to launch
automatically:
1. At the main Connection Manager screen, click Proles. The
Proles screen opens.
2. Select the network prole from the left pane for which you want to
automate a VPN connection.
3. Click Edit.
4. Click Auto Launch in the VPN area.
5. Click OK to exit.
Page 13

22
23
Additional Information
Data: Data speed is variable and may be impacted by network
conditions and trafc. Your data session, plan or service may be
slowed, suspended, terminated or restricted if you use your service in
a way that interferes with or impacts our network or ability to provide
quality service to other users. We may also temporarily reduce data
speed for a subset of customers who use a disproportionate amount of
bandwidth during a billing cycle. You may not use your plan or device
for the prohibited uses listed in your data plan terms. This device
requires a specic data plan; if you do not have the right plan, you
may not be able to use data services. T-Mobile cannot guarantee the
security of any Internet communications. See your data plan terms at
www.T-Mobile.com for additional details. If you access the T-Mobile
HotSpot network, your use is subject to the T-Mobile HotSpot Terms
and Conditions, available at hotspot.t-mobile.com.
Coverage: Service not available everywhere; 3G coverage available
in limited markets. Roaming may not be possible or may incur
additional charges. For coverage details, see Coverage Maps available
at www.T-Mobile.com. See Pricing, Services and Coverage brochures,
and T-Mobile’s Terms and Conditions (including arbitration
provisions) at www.T-Mobile.com, for additional rate plan information,
charges for features and services, and restrictions and details. T-Mobile
and the magenta color are federally registered trademarks of Deutsche
Telekom AG. webConnect is a trademark of T-Mobile USA, Inc.
©2009 T-Mobile USA, Inc.
12 MONTH LIMITED WARRANTY
Personal Communications Devices, LLC. (the “Company”) warrants
to the original retail purchaser of this wireless device, that should
this product or any part thereof during normal consumer usage and
conditions, be proven defective in material or workmanship that results
in product failure within the rst twelve (12) month period from the date
of purchase, such defect(s) will be repaired or replaced (with new or
rebuilt parts) at the Company’s option, without charge for parts or labor
directly related to the defect(s).
The antenna, keypad, display, rechargeable battery and battery
charger, if included, are similarly warranted for twelve (12) months from
date of purchase.
This Warranty extends only to consumers who purchase the product in
the United States or Canada and it is not transferable or assignable.
This Warranty does not apply to:
(a) Product subjected to abnormal use or conditions, accident,
mishandling, neglect, unauthorized alteration, misuse, improper
installation or repair or improper storage;
(b) Product whose mechanical serial number or electronic serial
number has been removed, altered or defaced.
(c) Damage from exposure to moisture, humidity, excessive
temperatures or extreme environmental conditions;
(d) Damage resulting from connection to, or use of any accessory or
other product not approved or authorized by the Company;
Page 14

24
25
(e) Defects in appearance, cosmetic, decorative or structural items
such as framing and non-operative parts;
(f) Product damaged from external causes such as re, ooding,
dirt, sand, weather conditions, battery leakage, blown fuse, theft
or improper usage of any electrical source.
The Company disclaims liability for removal or reinstallation of the
product, for geographic coverage, for inadequate signal reception by
the antenna or for communications range or operation of the cellular
system as a whole.
When sending your wireless device to Personal Communications
Devices for repair or service, please note that any personal data or
software stored on the device may be inadvertently erased or altered.
Therefore, we strongly recommend you make a back up copy of all
data and software contained on your device before submitting it for
repair or service. This includes all contact lists, downloads (i.e. thirdparty software applications, ringtones, games and graphics) and any
other data added to your device. In addition, if your wireless device
utilizes a SIM or Multimedia card, please remove the card before
submitting the device and store for later use when your device is
returned, Personal Communications Devices is not responsible for and
does not guarantee restoration of any third-party software, personal
information or memory data contained in, stored on, or integrated
with any wireless device, whether under warranty or not, returned to
Personal Communications Devices for repair or service.
To obtain repairs or replacement within the terms of this Warranty, the
product should be delivered with proof of Warranty coverage (e.g.
dated bill of sale), the consumer’s return address, daytime phone
number and/or fax number and complete description of the problem,
transportation prepaid, to the Company at the address shown below
or to the place of purchase for repair or replacement processing. In
addition, for reference to an authorized Warranty station in your area,
you may telephone in the United States (800) 229-1235, and in Canada
(800) 465-9672 (in Ontario call 416-695-3060).
THE EXTENT OF THE COMPANY’S LIABILITY UNDER THIS
WARRANTY IS LIMITED TO THE REPAIR OR REPLACEMENT
PROVIDED ABOVE AND, IN NO EVENT, SHALL THE COMPANY’S
LAIBILITY EXCEED THE PURCHASE PRICE PAID BY PURCHASER FOR
THE PRODUCT.
ANY IMPLIED WARRANTIES, INCLUDING ANY IMPLIED WARRANTY
OF MERCHANTABILITY OR FITNESS FOR A PARTICULAR PURPOSE,
SHALL BE LIMITED TO THE DURATION OF THIS WRITTEN
WARRANTY. ANY ACTION FOR BREACH OF ANY WARRANTY MUST
BE BROUGHT WITHIN A PERIOD OF 18 MONTHS FROM DATE
OF ORIGINAL PURCHASE. IN NO CASE SHALL THE COMPANY
BE LIABLE FOR AN SPECIAL CONSEQUENTIAL OR INCIDENTAL
DAMAGES FOR BREACH OF THIS OR ANY OTHER WARRANTY,
EXPRESS OR IMPLIED, WHATSOEVER. THE COMPANY SHALL NOT
BE LIABLE FOR THE DELAY IN RENDERING SERVICE UNDER THIS
WARRANTY OR LOSS OF USE DURING THE TIME THE PRODUCT IS
BEING REPAIRED OR REPLACED.
Page 15

26
No person or representative is authorized to assume for the Company
any liability other than expressed herein in connection with the sale of
this product.
Some states or provinces do not allow limitations on how long an
implied warranty lasts or the exclusion or limitation of incidental or
consequential damage so the above limitation or exclusions may not
apply to you. This Warranty gives you specic legal rights, and you
may also have other rights, which vary from state to state or province to
province.
IN USA: Personal Communications Devices, LLC.
555 Wireless Blvd.
Hauppauge, NY 11788
(800) 229-1235
IN CANADA: PCD Communications Canada Ltd.
5535 Eglinton Avenue West
Suite# 234
Toronto, ON M9C 5K5
(800) 465-9672
TM1604
 Loading...